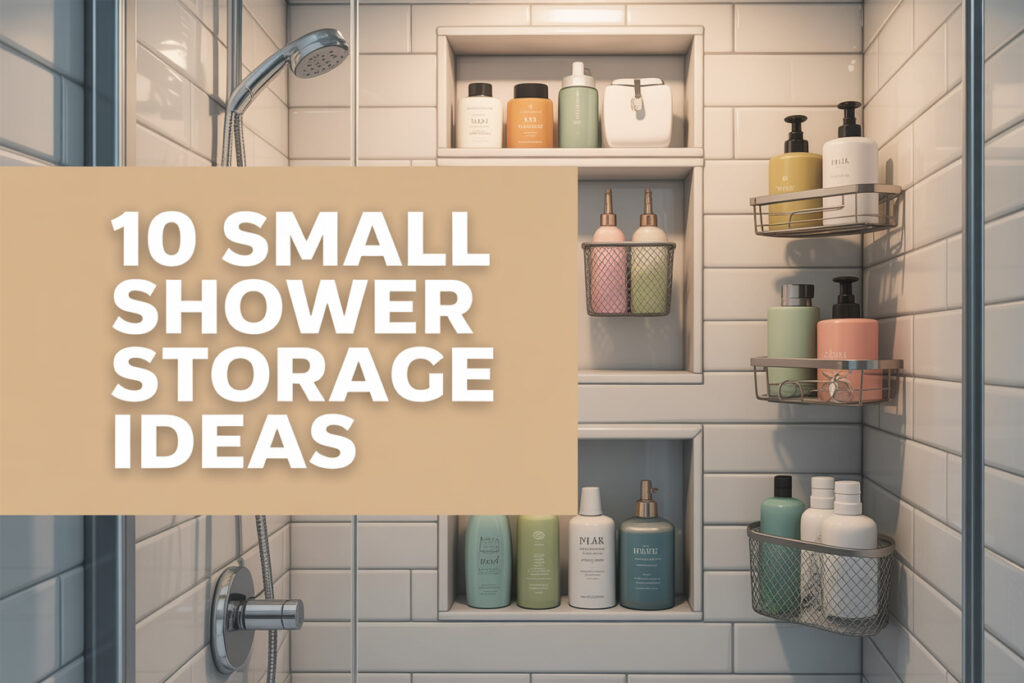
10 Small Shower Storage Ideas to Save Space
Most small showers fail because everyday products pile up faster than the space designed to hold them.
Shampoo bottles multiply, razors appear out of nowhere, and suddenly the tiny corner shelf feels like a crowded grocery store aisle.
Smart storage fixes that problem without changing the size of the shower itself. A few well-placed ideas can create order, improve flow, and honestly make the entire bathroom feel calmer to use.
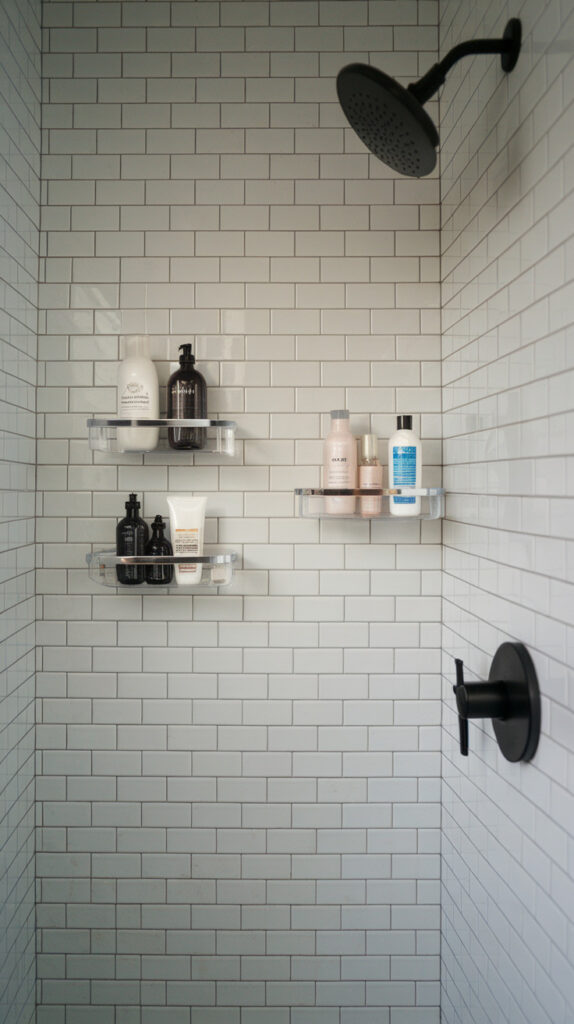
1. Corner Floating Shower Shelves
Small showers almost always waste corner space. Those awkward angles sit empty while bottles pile up along the edges of the tub or shower floor. Corner floating shelves solve that imbalance by turning dead space into functional storage.
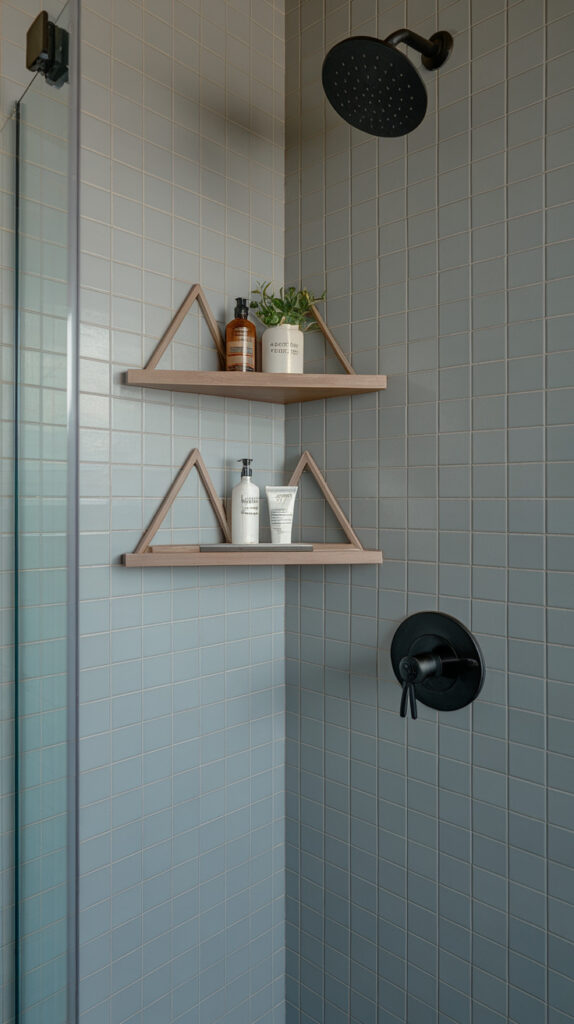
I tried this in a compact bathroom years ago, and the difference surprised me. Two simple corner shelves instantly cleared clutter and made the shower feel bigger, not smaller.
Why This Works
Corners naturally stay out of the main movement path. Installing storage there keeps products accessible without interfering with your elbows, shoulders, or shower routine.
This layout also distributes items vertically instead of horizontally. That change alone makes small showers feel more organized.
How to Do It
• Choose waterproof corner shelves designed for tile or fiberglass walls
• Mount the lowest shelf around chest height for easy access
• Add a second shelf above it for less frequently used items
• Use wall anchors or strong adhesive mounts depending on wall type
Spacing matters more than most people realize. Leaving about 10–12 inches between shelves keeps tall bottles from knocking into the shelf above.
Style & Design Tips
Go for simple triangular shelves in clear acrylic, brushed metal, or matte black. These finishes blend with most bathroom styles and keep the setup looking intentional instead of cluttered.
Avoid bulky plastic shelves with thick edges. Those instantly make a small shower feel tighter.
Pro Tip or Budget Hack
If you want the easiest installation possible, adhesive corner shelves work surprisingly well. Just clean the tile thoroughly first, because soap residue weakens adhesive faster than you’d expect.
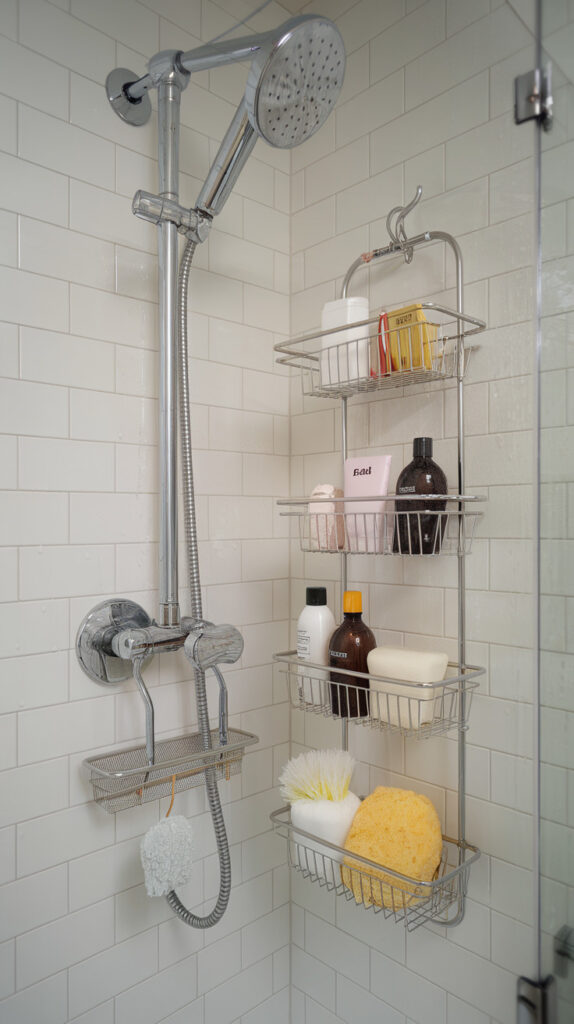
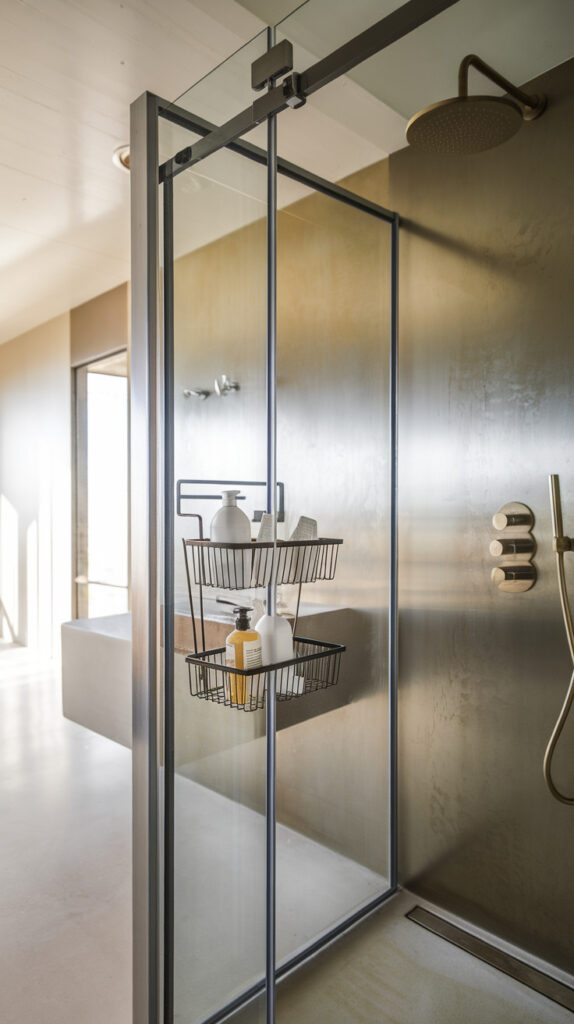
2. Hanging Shower Caddy Over the Showerhead
Some showers simply don’t have usable wall space. When drilling or mounting shelves isn’t an option, a hanging shower caddy solves the problem in about thirty seconds.
These caddies hook directly over the showerhead and provide multiple storage tiers. The design uses vertical space that would otherwise sit empty.
Why This Works
Vertical storage prevents product crowding along shower ledges. When bottles stack upward instead of outward, the entire shower floor clears instantly.
It also keeps items in one central location. That organization saves time during busy mornings when nobody wants to hunt for conditioner.
How to Do It
• Choose a rust-resistant metal caddy rather than plastic
• Hook it securely over the showerhead arm
• Adjust the lower suction cups against the wall for stability
• Place heavier bottles on lower shelves for balance
Balancing weight keeps the caddy from swinging. Once you distribute items properly, the entire setup feels surprisingly solid.
Style & Design Tips
Look for open wire designs instead of solid baskets. Wire frames drain water faster and prevent soap buildup.
Matte black, brushed nickel, and stainless steel options look far more modern than the shiny chrome versions everyone had ten years ago.
Pro Tip or Budget Hack
Add small S-hooks to the bottom of the caddy. They create extra hanging spots for razors, loofahs, or exfoliating brushes without adding another storage unit.
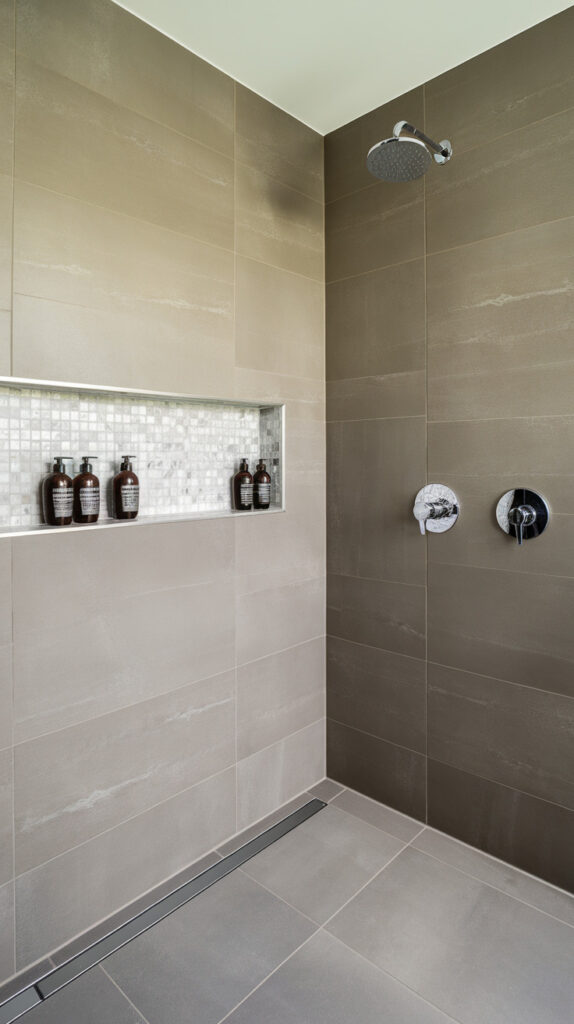
3. Built-In Shower Niche
A built-in niche looks custom because it actually is. Instead of adding shelves that stick out, the wall itself becomes storage space.
You’ll see this feature in newer bathrooms often, but it works just as well during renovations of older showers.
Why This Works
Recessed storage sits inside the wall cavity, so it doesn’t intrude into the shower area. That design keeps the floor open and preserves valuable elbow room.
It also creates a clean, built-in appearance. Nothing feels tacked on or temporary.
How to Do It
• Plan niche placement between wall studs
• Choose a size that fits your most common bottles
• Tile the niche interior to match or contrast the shower wall
• Install a slight slope at the bottom for water drainage
Proper placement makes a huge difference. Positioning the niche around shoulder height keeps items visible and reachable.
Style & Design Tips
A contrasting tile inside the niche adds visual interest without overwhelming the bathroom. Think small mosaic tiles, marble accents, or darker shades.
Avoid placing the niche directly in the center of the wall. Slightly off-center placement often looks more intentional.
Pro Tip or Budget Hack
During renovation, install two stacked niches instead of one tall one. That setup separates products and keeps shorter items from getting lost in the back.
4. Adhesive Shower Shelf Units
Drilling into tile makes many people nervous. Adhesive shower shelves remove that fear entirely.
These shelves attach using industrial waterproof adhesives and can hold a surprising amount of weight when installed correctly.
Why This Works
Adhesive shelves install without tools, holes, or complicated steps. That convenience makes them ideal for renters or anyone who hates DIY projects.
The design also keeps the shower walls clean and uncluttered.
How to Do It
• Clean the wall thoroughly with alcohol or degreaser
• Peel the adhesive backing from the mounting plate
• Press the plate firmly against the wall for 30 seconds
• Wait 24 hours before placing products on the shelf
Skipping the curing time causes most adhesive failures. Patience here saves frustration later.
Style & Design Tips
Choose minimal metal or acrylic designs with drainage holes. Water pooling inside shelves leads to soap buildup and slippery surfaces.
Stick with neutral finishes so the shelf blends naturally with the shower.
Pro Tip or Budget Hack
Buy a two-pack set and stagger them vertically. The extra shelf dramatically increases storage without crowding the wall.
5. Shower Tension Pole Organizer
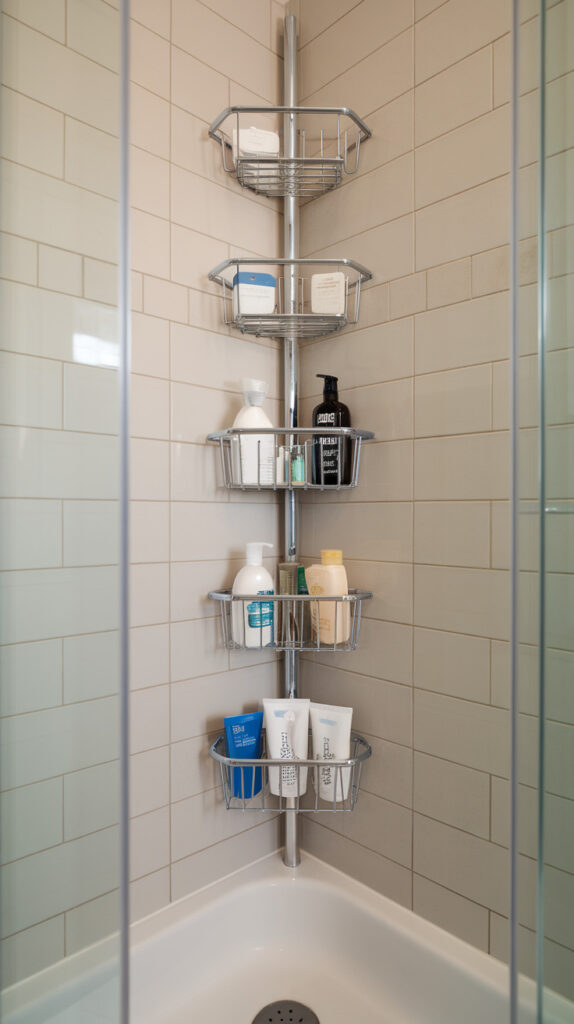
A tension pole organizer works like those adjustable closet rods, except it stretches from the shower floor to the ceiling.
Multiple adjustable baskets attach along the pole, creating customizable storage wherever you need it.
Why This Works
The vertical pole uses unused height instead of wall space. That flexibility helps especially in older showers where tile drilling isn’t practical.
You can also reposition baskets anytime without reinstalling anything.
How to Do It
• Extend the tension pole between the floor and ceiling
• Tighten it until stable and secure
• Slide storage baskets to your preferred heights
• Test stability before loading products
Even weight distribution keeps the pole from shifting. Heavier items should sit lower on the pole.
Style & Design Tips
Look for simple chrome or matte finishes instead of bulky plastic baskets. Cleaner lines prevent the pole from looking like cheap dorm furniture.
Also avoid overloading every basket. Leaving a little breathing room keeps the system looking organized.
Pro Tip or Budget Hack
Use one basket specifically for backup products. That way daily items stay visible while extras remain accessible but out of the way.
6. Shower Hooks for Hanging Storage
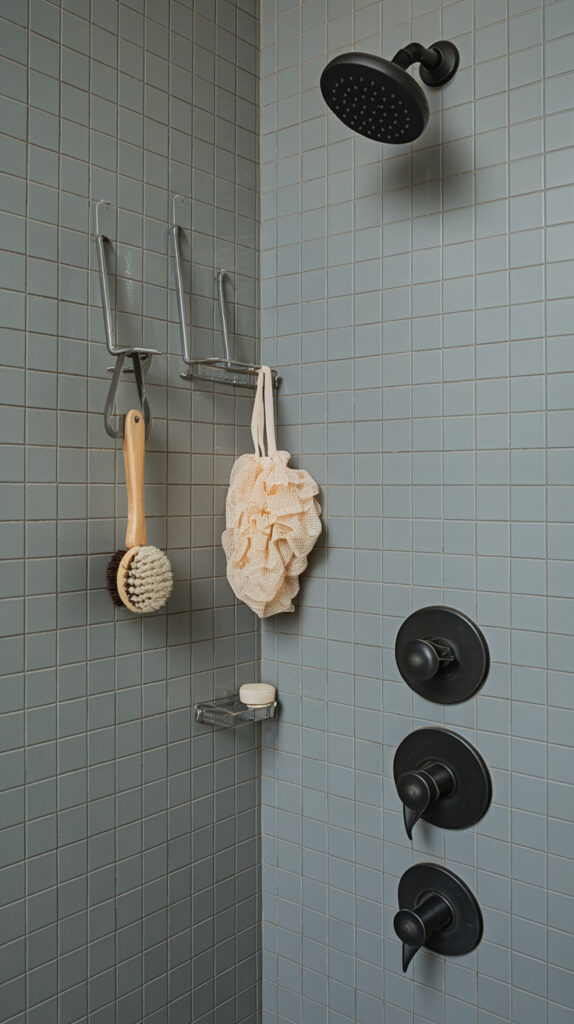
Some shower items don’t belong on shelves at all. Loofahs, brushes, and razors often work better when they hang.
Simple adhesive hooks create storage without adding bulky structures to the shower.
Why This Works
Hanging items dry faster than items resting on flat surfaces. Faster drying reduces mildew and soap buildup.
Hooks also free shelf space for bottles and containers.
How to Do It
• Install waterproof adhesive hooks on shower walls
• Place hooks near corners to avoid arm movement zones
• Hang loofahs, brushes, or washcloths
• Replace hooks if adhesive weakens over time
Spacing hooks a few inches apart keeps items from tangling together.
Style & Design Tips
Choose small stainless steel hooks rather than large plastic ones. Smaller designs look cleaner and feel less intrusive.
Matching hook finishes with existing fixtures also creates a more cohesive look.
Pro Tip or Budget Hack
Install one hook outside the shower for towels or robes. That small addition surprisingly improves bathroom convenience.
7. Magnetic Shower Storage
Magnetic shower shelves sound unusual, but they work brilliantly with metal shower frames or fixtures.
Strong waterproof magnets hold baskets directly against metal surfaces.
Why This Works
Magnetic storage installs instantly and moves easily whenever you want. No drilling, adhesives, or tension rods required.
The flexibility makes it perfect for experimenting with layouts.
How to Do It
• Check if your shower frame or fixture is magnetic
• Attach magnetic baskets to metal surfaces
• Test stability before adding heavier bottles
• Adjust placement for comfortable reach
Not every bathroom supports this idea, but when it works, it’s incredibly convenient.
Style & Design Tips
Stick with simple metal baskets so the magnets stay hidden behind the structure.
Avoid overly decorative designs because magnets already draw attention as a unique feature.
Pro Tip or Budget Hack
Magnetic soap holders work especially well. They keep soap bars elevated and prevent mushy buildup on shelves.
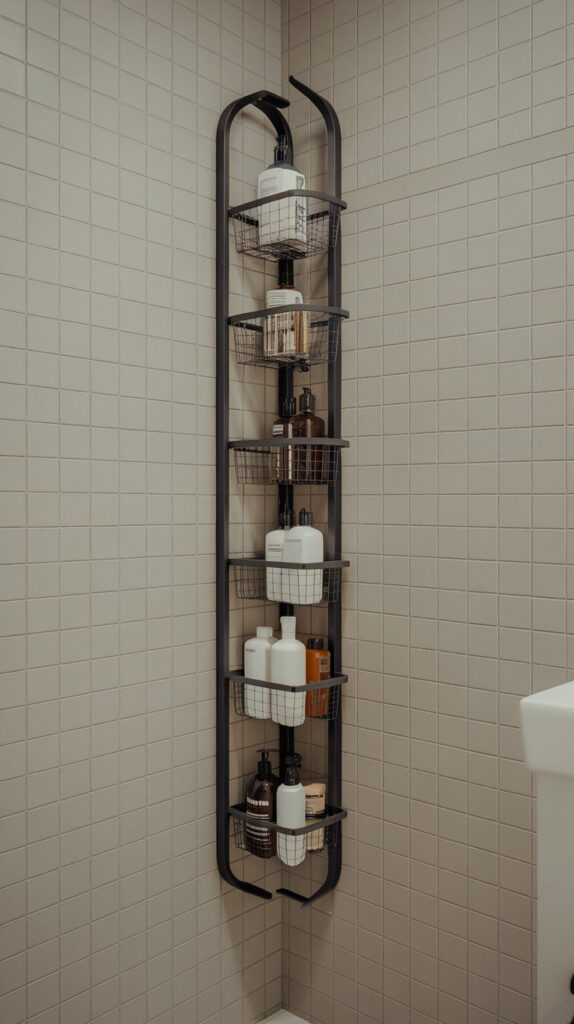
8. Slim Vertical Wall Rack
Wide shelves eat valuable space inside narrow showers. Slim vertical racks solve that issue by storing items in a tall, narrow column.
These racks often hold multiple baskets stacked vertically along one slim frame.
Why This Works
The vertical design fits easily along narrow wall sections. Instead of spreading storage across the shower, it concentrates everything into a compact strip.
That layout leaves more room for movement.
How to Do It
• Choose a rack under 8 inches wide
• Mount it near the back wall of the shower
• Use anchors or strong adhesive brackets
• Place heavier items on lower levels
Keeping heavier bottles lower prevents wobbling.
Style & Design Tips
Look for open wire frames rather than solid plastic panels. Open designs drain water faster and stay cleaner.
Neutral finishes also help the rack blend into the wall instead of dominating the space.
Pro Tip or Budget Hack
Use small labeled containers inside baskets to group similar items. This trick prevents tiny products from disappearing behind larger bottles.
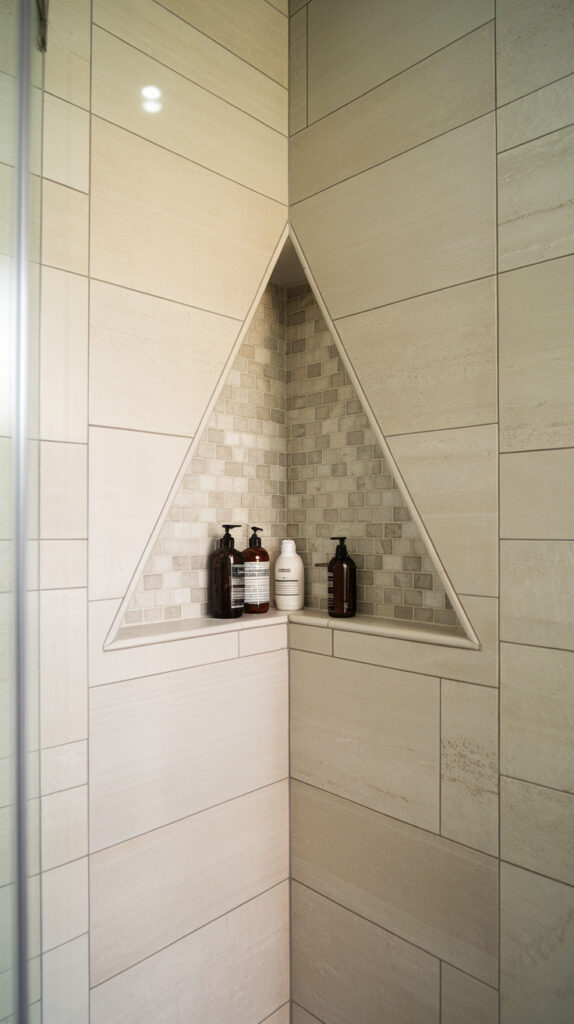
9. Recessed Corner Niches
Standard niches usually sit flat on a wall. Recessed corner niches add a creative twist by using the corner cavity itself.
This design combines corner placement with recessed storage.
Why This Works
Corner niches save wall space while keeping storage completely out of the way. They also create a natural visual feature inside the shower.
The angled placement makes items easier to grab.
How to Do It
• Frame the niche during shower renovation
• Tile the interior carefully for waterproofing
• Angle shelves slightly for drainage
• Seal all edges properly
Precise tiling ensures the niche stays waterproof long-term.
Style & Design Tips
Using contrasting tile or stone inside the niche adds subtle design interest.
Avoid making the niche too deep. Shallow niches prevent bottles from hiding behind one another.
Pro Tip or Budget Hack
Install a small LED strip above the niche if electrical work allows it. Soft lighting highlights the feature and improves visibility.
10. Shower Bottle Dispensers
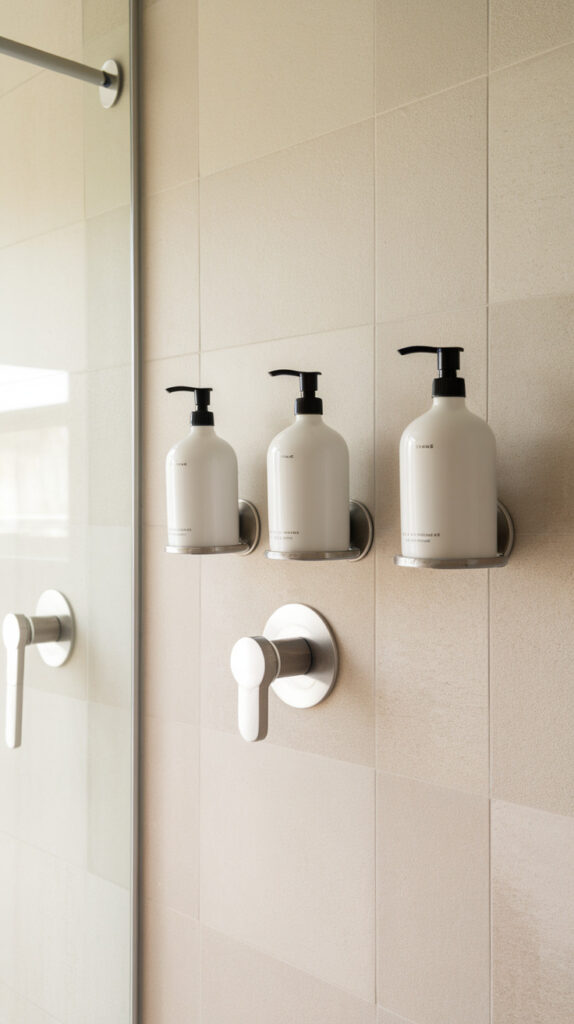
Random bottles clutter small showers faster than anything else. Wall-mounted dispensers eliminate that chaos.
Instead of juggling five bottles, you refill sleek containers mounted directly on the wall.
Why This Works
Dispensers remove bulky packaging and streamline product storage. The shower instantly looks cleaner and more organized.
They also reduce plastic waste over time.
How to Do It
• Choose refillable wall-mounted dispensers
• Install using adhesive mounts or screws
• Label each container clearly
• Refill regularly to prevent air pumping
Spacing dispensers evenly keeps the layout balanced.
Style & Design Tips
Choose matching dispenser sets in matte black, brushed metal, or neutral tones.
Avoid overly decorative labels because simplicity keeps the look modern.
Pro Tip or Budget Hack
Buy bulk shampoo and body wash refills instead of individual bottles. This approach saves money and keeps the system convenient.
How to Plan Smart Shower Storage in a Small Bathroom
Small showers become chaotic when storage gets added randomly instead of intentionally. Many people install shelves or caddies wherever space appears, but that approach often leads to awkward layouts and cluttered walls.
Planning storage before installing anything creates a smoother, more functional setup. The goal isn’t just adding places for bottles, but making the shower easier to use every single day.
Start With What You Actually Use
Look at the products you use daily rather than everything stored in the bathroom. Most people only need space for shampoo, conditioner, body wash, and maybe a razor or scrub.
Everything else should live outside the shower or in backup storage. Limiting items inside the shower immediately frees up valuable space.
Map Out Your Reach Zone
The most convenient storage lives between waist height and shoulder height. Anything lower becomes annoying to reach, and anything higher often requires stretching with wet hands.
Keeping everyday products in this zone makes the shower routine smoother. Less bending and reaching also means fewer bottles falling over.
Separate Daily Products From Extras
Daily-use products deserve the easiest access. Items used once a week, like hair masks or exfoliating scrubs, can sit on higher shelves.
This small change keeps the main storage area clean and uncluttered. It also helps you see everything quickly.
Choose Vertical Storage Whenever Possible
Horizontal storage spreads clutter across the shower walls. Vertical storage stacks items neatly and uses height that would otherwise go unused.
Tall racks, tension poles, and stacked shelves create far more room than wide trays.
Keep the Floor Completely Clear
Shower floors should never store bottles. Aside from looking messy, bottles on the floor create slipping hazards and collect soap residue quickly.
Keeping the floor clear instantly makes the shower feel bigger and easier to clean.
Choosing the Right Storage Material for Wet Environments
Shower storage deals with constant water exposure. Materials that look good in dry areas often fail quickly inside a shower.
Choosing durable materials from the beginning saves frustration later.
Stainless Steel
Stainless steel works well because it resists rust and handles humidity easily. Many modern shower organizers use coated stainless frames to prevent corrosion.
The finish also blends nicely with common bathroom fixtures.
Aluminum
Aluminum shelves and racks stay lightweight and rust-resistant. They’re also easier to mount because the lighter weight puts less stress on adhesives or wall anchors.
Many tension pole organizers use aluminum for this reason.
Acrylic or Tempered Plastic
Clear acrylic shelves remain popular because they visually disappear. In small showers, that transparency helps reduce visual clutter.
Good acrylic also resists mold buildup better than porous plastic.
Powder-Coated Metal
Powder coating adds an extra protective layer to metal organizers. Matte black or brushed finishes not only look modern but also resist scratches and rust.
Just avoid extremely cheap coated products because thin coatings chip quickly.
Solid Tile or Stone (For Built-In Niches)
If you’re renovating a shower, tile niches remain the most durable option. Properly installed tile and waterproof backing can last decades without maintenance.
This built-in approach also creates the cleanest finished appearance.
Common Mistakes to Avoid
Even good storage ideas can fail if they’re installed poorly. Small errors during planning or setup often lead to clutter returning quickly.
Avoiding these common mistakes keeps shower storage functional long-term.
Installing Too Many Shelves
More shelves don’t automatically mean better organization. Overloading the shower walls makes the space feel cramped and visually chaotic.
Two or three well-placed storage spots usually work better than six scattered ones.
Placing Storage Directly Under the Showerhead
Products sitting directly under the water stream collect soap buildup quickly. Constant splashing also makes labels peel and containers slippery.
Placing shelves slightly off to the side keeps items cleaner and easier to grab.
Ignoring Water Drainage
Flat storage trays trap water. Standing water leads to soap scum, mold, and slippery surfaces.
Choosing shelves with drainage holes or wire baskets prevents that problem.
Mounting Storage Too High
Tall shelves may look neat but become frustrating during daily use. Reaching upward while holding slippery bottles rarely ends well.
Keeping most items at chest height improves both safety and convenience.
Mixing Too Many Storage Types
Combining hooks, racks, baskets, shelves, and caddies everywhere can quickly become chaotic. Each storage piece should have a specific purpose.
A simple system always looks better than a crowded one.
Forgetting About Cleaning Access
Storage should never block the ability to clean shower walls. If shelves trap soap residue behind them, the area becomes harder to maintain.
Leave enough spacing around storage units for easy wiping.
How to Keep Shower Storage Organized Long-Term
Adding storage solves the space problem, but maintaining it keeps the shower looking clean.
Small habits make a big difference here.
Do a Monthly Product Reset
Every month or so, remove everything from the shower shelves. Toss empty bottles, wipe surfaces, and only return the products you actually use.
This quick reset prevents clutter from slowly creeping back.
Store Backup Products Outside the Shower
Extra shampoo bottles and large refill containers should live in a cabinet or closet. The shower should only hold what’s currently in use.
Keeping backup items elsewhere keeps shelves from becoming crowded.
Use Matching Containers
Matching bottles or refillable dispensers create visual order. Even if the products vary, the consistent containers make the shower look intentional.
This small upgrade also reduces label clutter.
Limit the Number of Personal Products
In shared bathrooms, products multiply quickly. Giving each person one dedicated shelf or basket keeps things organized.
Without boundaries, shelves fill up faster than expected.
Frequently Asked Questions
What is the best storage option for very small showers?
Corner shelves or hanging shower caddies usually work best in extremely small showers. Both options use vertical space and avoid blocking movement inside the shower area.
Are adhesive shower shelves strong enough?
High-quality adhesive shelves can hold several pounds when installed correctly. Cleaning the surface thoroughly before installation and allowing proper curing time makes a big difference.
How many shelves should a shower have?
Most showers function well with two or three storage areas. One for daily products, one for occasional items, and possibly hooks for hanging accessories.
Where should shower shelves be placed?
Shelves work best slightly off-center from the showerhead and between waist and shoulder height. This placement keeps items easy to reach while avoiding constant water spray.
How do you prevent rust on shower storage?
Choosing rust-resistant materials like stainless steel, aluminum, or powder-coated metal helps. Regular cleaning and avoiding standing water also reduce corrosion.
Are built-in niches better than shelves?
Built-in niches provide the cleanest look and don’t take up space inside the shower. However, they usually require renovation work, while shelves and caddies offer easier installation options.
Final Thoughts
Small showers rarely suffer from lack of space. Most of the time, the real issue is storage that doesn’t match how people actually use the shower every day.
A few thoughtful adjustments can transform even the tightest bathroom corner into something organized and surprisingly comfortable. I’ve tried several of these setups myself, and honestly, the difference between cluttered and streamlined comes down to just a couple smart choices.