13 Shower Remodel Ideas for a Fresh Bathroom Look
Bathrooms tend to age faster than almost any other room in a house. Fixtures wear out, styles change, and suddenly a shower that once looked fine feels dated and cramped.
Shower remodels don’t always require tearing everything apart. A few smart upgrades can completely transform how the space functions and feels.
Most of these ideas come from things I’ve either tried myself or watched friends experiment with during bathroom updates.
Some worked beautifully, while others taught us exactly what not to do.
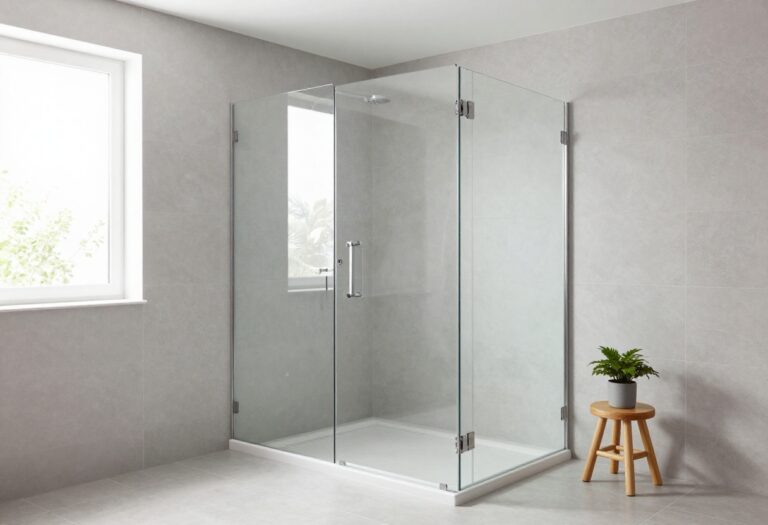
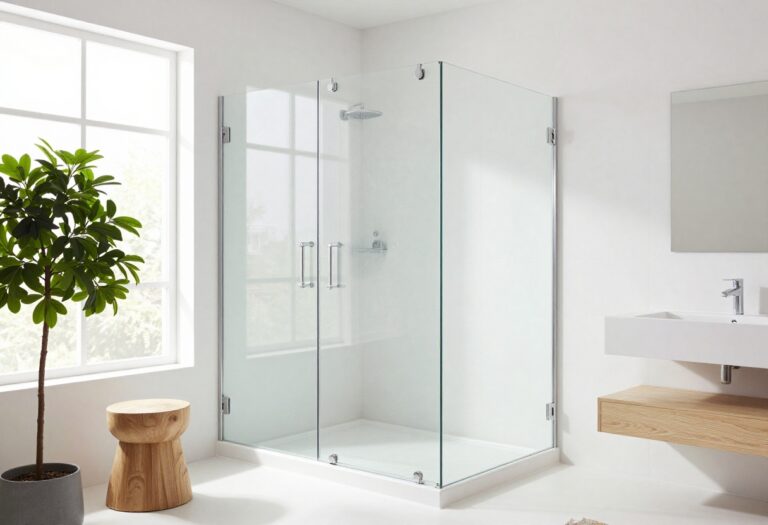
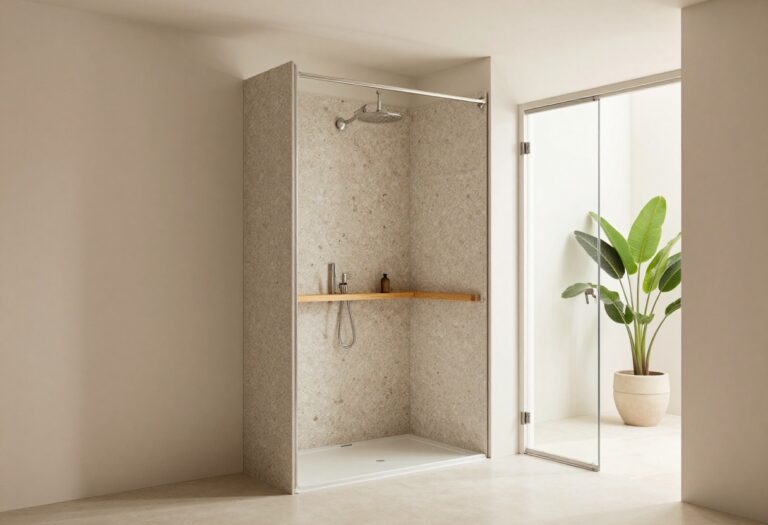
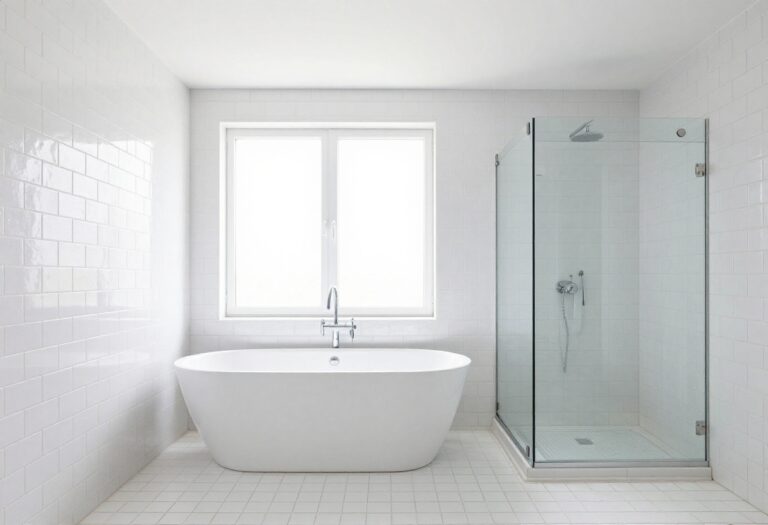
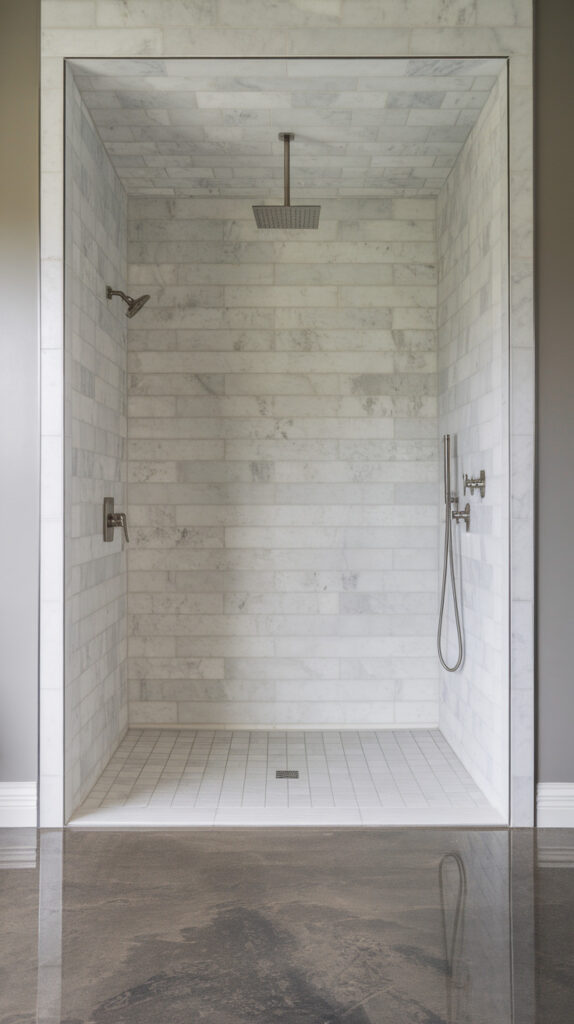
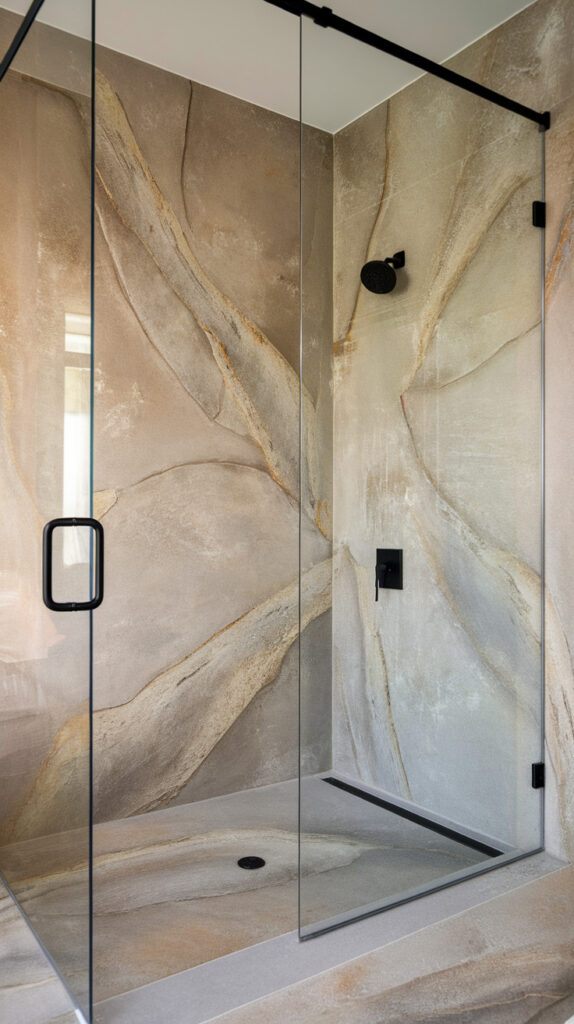
1. Frameless Glass Shower Enclosure
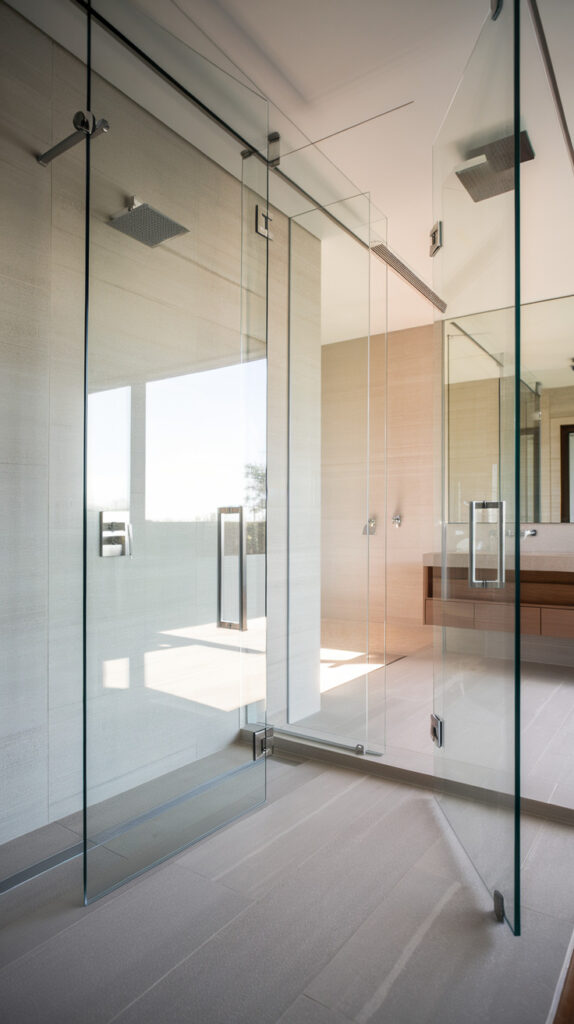
Older shower setups often rely on bulky metal frames or plastic curtains that make the bathroom feel smaller than it actually is. Those frames collect soap scum, the tracks trap grime, and the whole setup ends up looking tired pretty quickly.
Switching to a frameless glass enclosure immediately opens up the space visually. The shower suddenly feels bigger, cleaner, and far more modern without changing the actual footprint.
I remember helping a friend replace a dated sliding door system with frameless glass panels. The bathroom didn’t grow an inch, but it looked twice as spacious afterward.
Why This Works
Frameless glass removes visual barriers, which helps the eye travel through the room uninterrupted. That simple trick makes smaller bathrooms feel noticeably more open.
It also reduces hardware clutter. With fewer metal pieces, the shower looks sleeker and easier to maintain.
How to Do It
- Measure your shower opening carefully before ordering panels.
- Choose tempered safety glass, usually around 3/8 to 1/2 inch thick.
- Install minimal brackets or hinges rather than full frames.
- Use a high-quality silicone seal to prevent leaks.
Every step matters because frameless panels rely on precise installation to stay secure and watertight.
Style & Design Tips
Clear glass works best for smaller bathrooms because it keeps the room visually open. Frosted or textured glass can add privacy but tends to make spaces feel slightly heavier.
Pair the glass with modern hardware finishes like brushed nickel, matte black, or warm brass. Mixing too many finishes nearby can make the shower look disorganized.
Pro Tip or Budget Hack
Custom glass can get expensive quickly. If your shower opening matches common dimensions, check prefab frameless kits before ordering custom panels.
You can save several hundred dollars without sacrificing the sleek look.
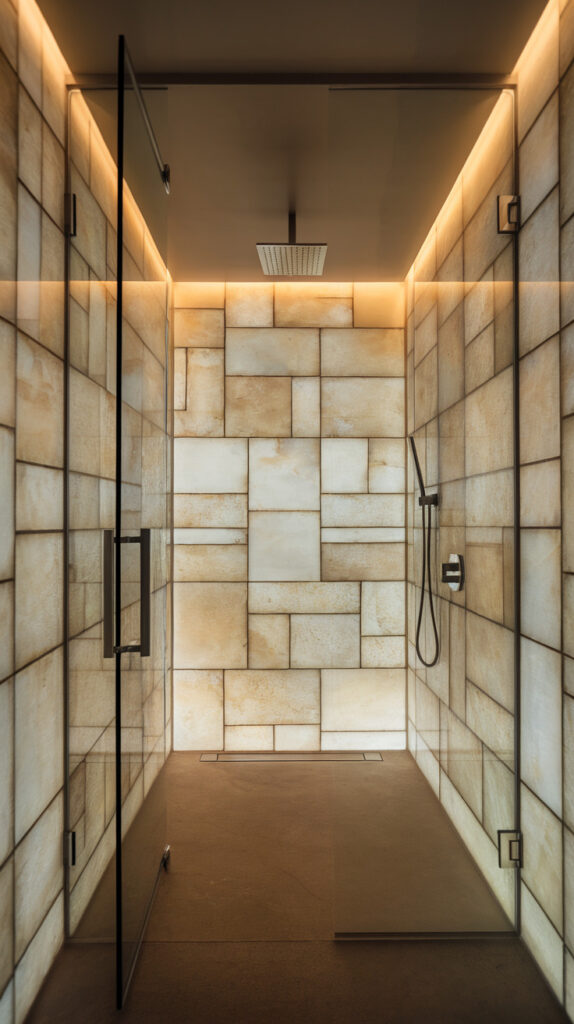
2. Large Format Shower Tiles
Small tiles filled with grout lines can make a shower feel busy and high maintenance. Grout attracts soap buildup and mildew, which means constant scrubbing.
Large format tiles reduce grout lines dramatically. That alone makes cleaning easier and gives the shower a more modern, spa-like feel.
A friend installed oversized porcelain tiles in his shower remodel, and the difference surprised everyone. The walls suddenly looked calm and structured instead of cluttered.
Why This Works
Fewer grout lines mean fewer visual breaks across the wall surface. That smooth appearance makes showers look bigger and more refined.
Large tiles also highlight the material itself. Stone-look porcelain or marble patterns become the star instead of the grout.
How to Do It
- Choose tiles at least 12×24 inches or larger for best effect.
- Use a leveling system during installation to prevent uneven edges.
- Select a grout color that blends closely with the tile.
- Seal grout lines properly to prevent moisture damage.
Skipping proper leveling is the mistake that ruins many tile projects.
Style & Design Tips
Neutral tones usually work best in showers. Shades like soft gray, warm beige, or marble white stay stylish longer than bold colors.
Avoid combining too many tile patterns inside the same shower. One main tile and a small accent area usually look far more balanced.
Pro Tip or Budget Hack
Porcelain tiles that mimic natural stone often cost far less than real marble or travertine.
They also resist stains better, which saves maintenance headaches later.
3. Built-In Shower Niches

Random bottles scattered along the floor or hanging from plastic racks always make showers feel cluttered. Those wire organizers rarely look good and tend to rust eventually.
A built-in shower niche solves the problem neatly. It creates a recessed shelf directly inside the wall where shampoos and soaps stay organized.
I installed one during a small bathroom update a few years ago, and it instantly made the shower feel more intentional.
Why This Works
A recessed niche uses wall space that would otherwise sit empty. It keeps products accessible without sticking shelves into the walking area.
It also creates a subtle architectural feature that can elevate the design.
How to Do It
- Determine stud spacing before cutting the wall opening.
- Frame the niche area securely for support.
- Waterproof the entire niche with membrane or backer board.
- Tile the inside carefully with proper slope for drainage.
Waterproofing matters here more than anywhere else in the shower.
Style & Design Tips
Contrast tiles inside the niche can add visual interest. For example, a darker mosaic inside a white shower creates a nice focal point.
Keep the niche aligned with tile lines to avoid awkward cuts.
Pro Tip or Budget Hack
Pre-made foam shower niches are available and simplify installation dramatically.
They cost more upfront but save time and reduce waterproofing mistakes.
4. Walk-In Curbless Shower
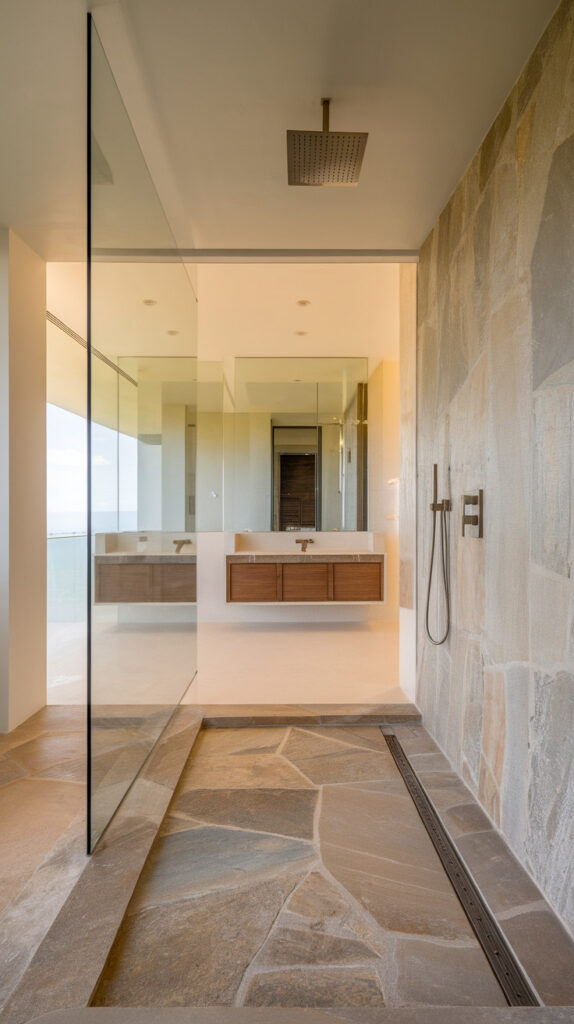
Traditional showers use a raised curb to keep water contained. While functional, those curbs interrupt the floor line and make the bathroom feel segmented.
A curbless shower removes that barrier completely. The bathroom floor flows directly into the shower area for a seamless, modern design.
The first time I stepped into one at a hotel, I immediately noticed how easy and spacious it felt.
Why This Works
A continuous floor surface visually expands the bathroom. The space feels open instead of divided.
It also improves accessibility, which becomes important as homes adapt for aging or mobility needs.
How to Do It
- Lower the shower subfloor slightly during renovation.
- Install a proper linear drain system.
- Create a subtle floor slope toward the drain.
- Use waterproof membranes under the entire area.
Slope accuracy prevents water from escaping the shower zone.
Style & Design Tips
Large tiles work particularly well in curbless showers because they emphasize the uninterrupted floor design.
Stick with simple, calm color palettes to keep the space feeling relaxing.
Pro Tip or Budget Hack
If a fully curbless design isn’t possible due to structure limits, a low-profile curb still creates a similar visual effect.
It’s a practical compromise that many remodelers choose.
5. Rainfall Showerhead Upgrade
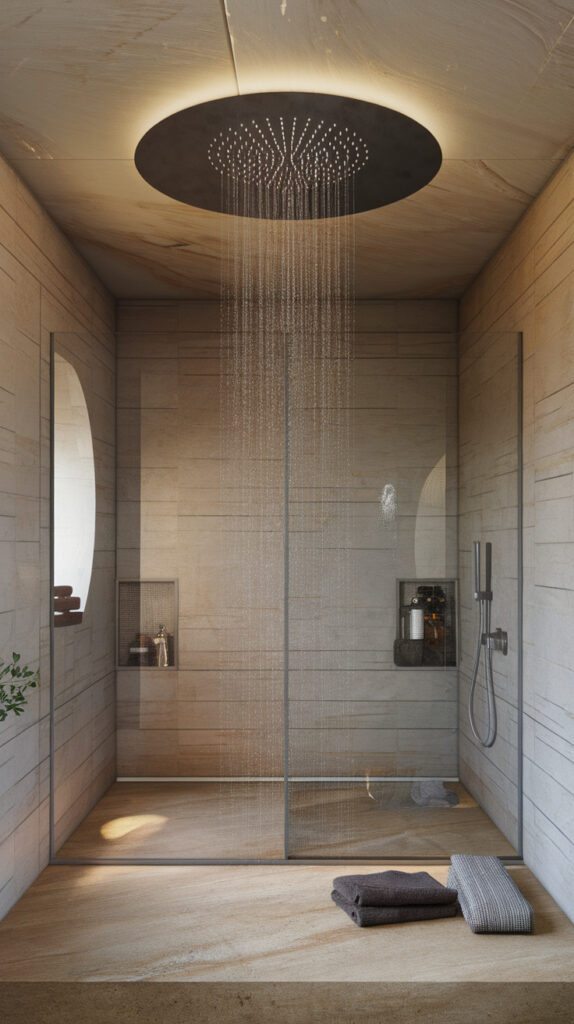
Basic showerheads often spray water aggressively and unevenly. They get the job done, but they rarely feel luxurious.
A rainfall showerhead creates a gentler, wider flow that feels more like standing under a natural cascade of water.
After installing one in my own bathroom, regular showers suddenly felt oddly relaxing.
Why This Works
Rainfall heads distribute water across a larger area. That coverage creates a more immersive experience.
It also reduces harsh pressure points on the skin.
How to Do It
- Choose a ceiling-mounted or extended arm showerhead.
- Ensure the plumbing supports adequate water pressure.
- Install a larger diameter showerhead for wider coverage.
- Seal all connections carefully to prevent leaks.
Water pressure compatibility is the most overlooked step.
Style & Design Tips
Matte black and brushed brass rainfall heads look fantastic in modern bathrooms.
Try pairing the showerhead finish with matching faucet handles for consistency.
Pro Tip or Budget Hack
A wall-mounted rainfall head with a long extension arm gives a similar experience without moving plumbing inside the ceiling.
That simple workaround saves a lot of labor costs.
6. Vertical Accent Tile Strip
Plain tiled showers sometimes feel a little flat visually. Everything blends together with no focal point.
A vertical accent tile strip adds a subtle design feature without overwhelming the space.
I’ve seen this done with everything from glass mosaics to stone textures.
Why This Works
The vertical line draws the eye upward, which helps showers appear taller.
It also breaks up large tile surfaces without cluttering the design.
How to Do It
- Select a narrow strip location, often aligned with the showerhead.
- Use smaller mosaic or textured tiles for contrast.
- Install trim edges for clean borders.
- Keep grout lines aligned with surrounding tiles.
Planning layout before tiling prevents awkward alignment issues.
Style & Design Tips
Choose accent tiles that complement the main wall color rather than competing with it.
Too many contrasting patterns can quickly look chaotic.
Pro Tip or Budget Hack
Accent strips use a small amount of tile. That means you can splurge on premium materials without blowing the budget.
A little marble or glass mosaic goes a long way.
7. Shower Bench Seating
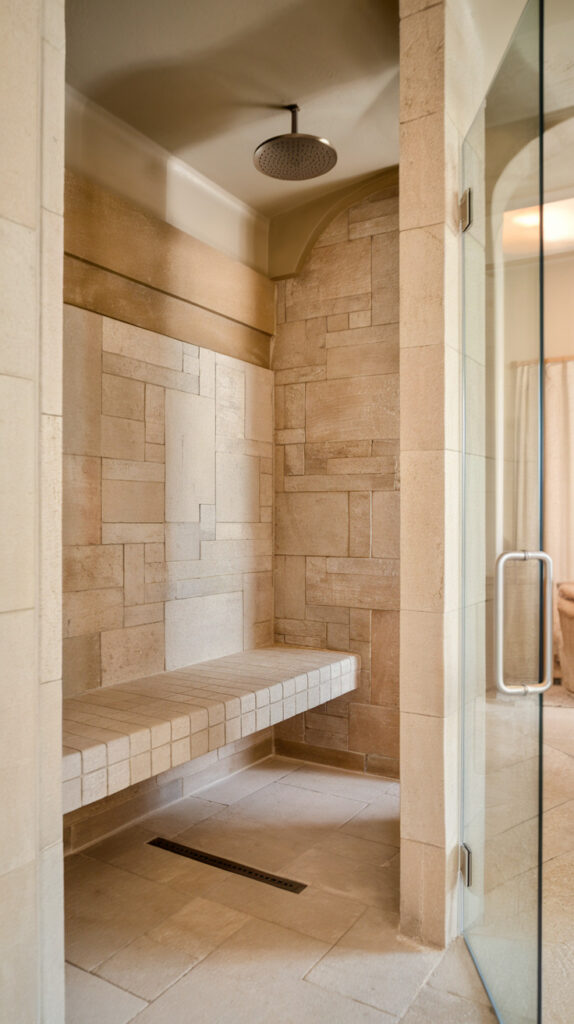
Standing showers work fine for quick routines, but sometimes a small seat changes everything.
A built-in shower bench adds comfort, convenience, and a touch of luxury.
One of my relatives added a corner bench during a remodel, and now everyone in the house uses it constantly.
Why This Works
A bench makes the shower more versatile. It allows sitting, shaving legs, or simply relaxing under warm water.
It also introduces a strong design element within the space.
How to Do It
- Frame the bench structure securely.
- Waterproof the entire surface carefully.
- Tile the bench to match or complement the shower walls.
- Slightly slope the top surface toward the drain.
That slope prevents water from pooling.
Style & Design Tips
Floating benches look sleek and modern. Corner benches save more space in compact showers.
Use durable stone or porcelain tiles on seating surfaces for strength.
Pro Tip or Budget Hack
If building a bench feels complicated, consider installing a teak shower stool instead.
It gives similar functionality with almost no construction.
8. Matte Black Shower Fixtures
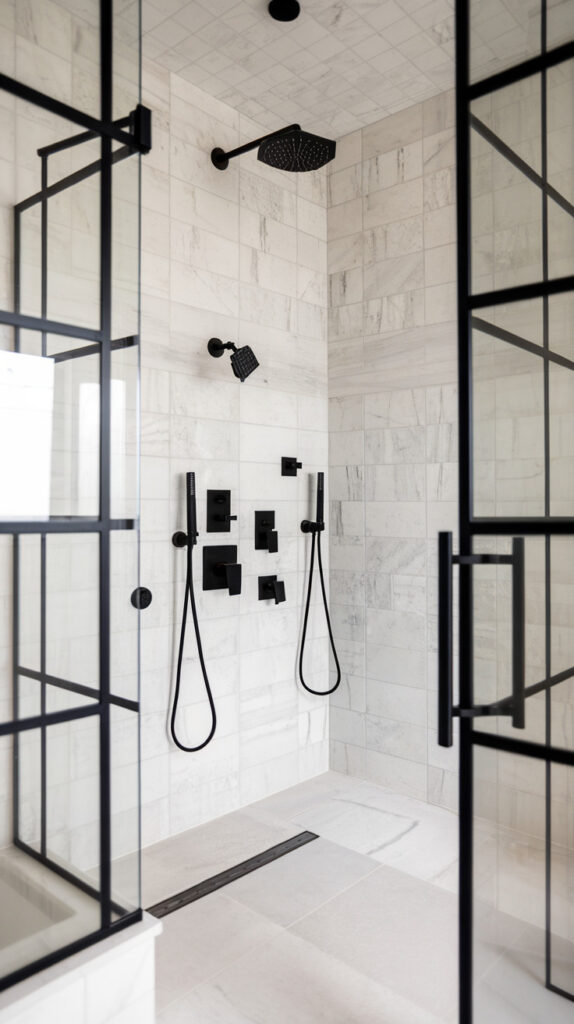
Chrome fixtures dominated bathrooms for decades. They’re still common, but they don’t always feel exciting anymore.
Matte black fixtures introduce bold contrast that instantly modernizes a shower.
The first time I saw this style done well, it completely changed my opinion about bathroom hardware.
Why This Works
Dark fixtures stand out against light tiles. That contrast creates visual interest without adding clutter.
They also hide water spots better than shiny chrome.
How to Do It
- Replace showerhead, handles, and trim with matching matte black pieces.
- Ensure all hardware comes from the same manufacturer line.
- Use plumber’s tape for leak-free connections.
- Test the system thoroughly after installation.
Consistency across finishes makes the design look intentional.
Style & Design Tips
Matte black pairs especially well with white subway tiles or marble-look surfaces.
Avoid mixing it with too many competing finishes nearby.
Pro Tip or Budget Hack
You don’t always need to replace everything at once. Starting with the showerhead and handle trim can deliver a noticeable update.
Gradual upgrades keep renovation costs manageable.
9. Pebble Stone Shower Floor
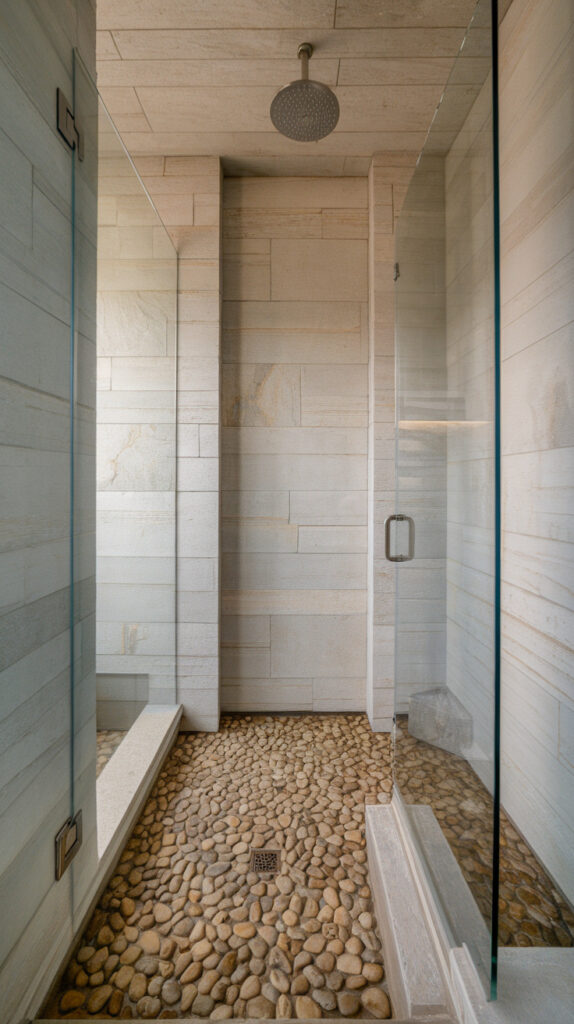
Standard tile floors sometimes feel cold or slippery. They work fine, but they don’t add much character.
Pebble stone shower floors bring natural texture underfoot.
The first time I stepped onto one, it honestly felt like standing in a small spa retreat.
Why This Works
Pebbles create gentle foot massage pressure while improving grip.
They also add organic texture that contrasts nicely with smooth wall tiles.
How to Do It
- Install mesh-backed pebble sheets across the floor.
- Use thin-set mortar for secure adhesion.
- Apply grout carefully between stones.
- Seal the stones to prevent staining.
Sealing is essential to protect natural materials.
Style & Design Tips
Neutral pebble colors blend best with most bathroom designs.
Avoid extremely dark stones unless the shower has strong lighting.
Pro Tip or Budget Hack
Porcelain pebble tiles mimic natural stones while costing less and requiring less maintenance.
They’re a practical alternative for busy households.
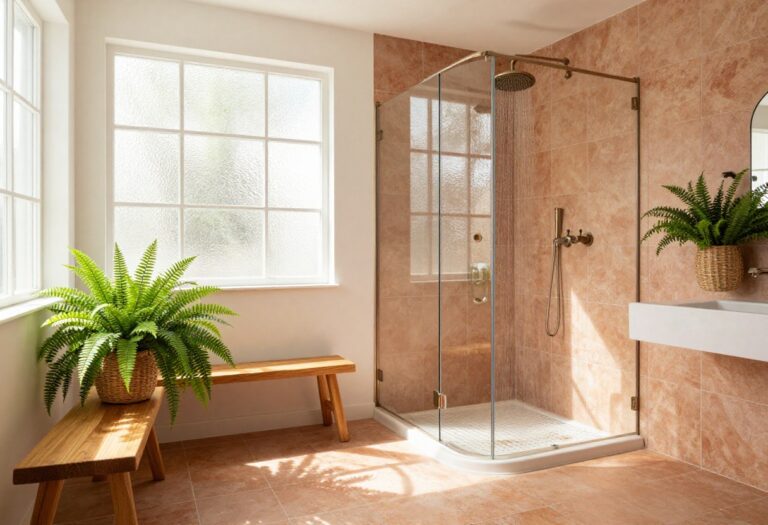
10. Sliding Barn-Style Shower Door
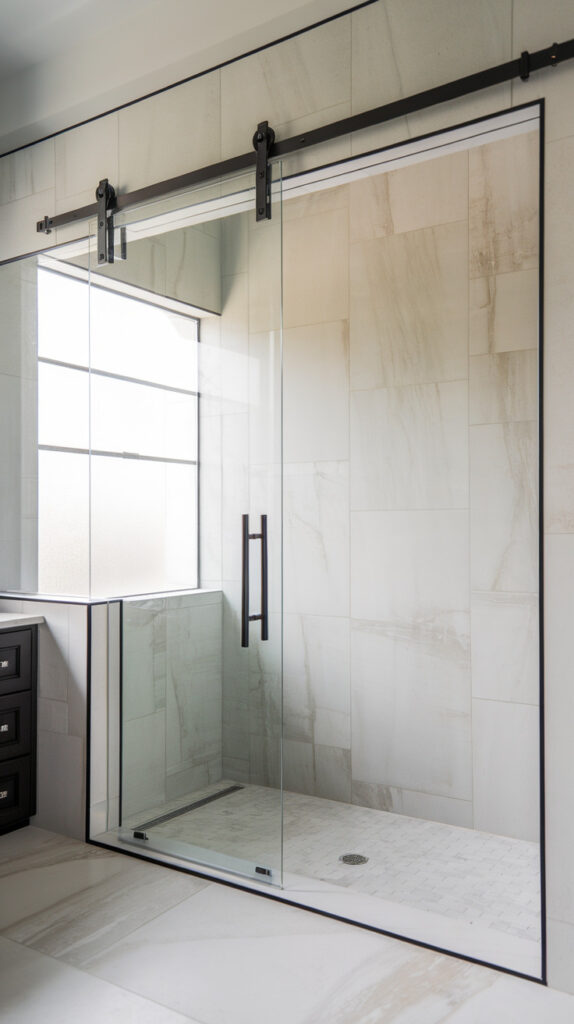
Traditional sliding shower doors often rely on bulky metal tracks.
Barn-style sliding doors use exposed rails and rollers, giving the shower a modern industrial look.
This style has become surprisingly popular in bathroom remodels.
Why This Works
The exposed hardware adds personality to an otherwise simple shower.
It also saves space because the door slides rather than swinging open.
How to Do It
- Install a sturdy top rail above the shower opening.
- Attach roller brackets to the glass door.
- Ensure smooth alignment for sliding motion.
- Add floor guides to keep the door stable.
Precision matters because misaligned rails cause annoying sticking.
Style & Design Tips
Brushed steel rails look clean and modern.
Choose glass panels with minimal tint to maintain openness.
Pro Tip or Budget Hack
Some manufacturers sell complete barn-style door kits, which simplify installation.
Buying a kit prevents compatibility issues between parts.
11. Backlit Shower Wall Panels
Lighting inside showers often gets overlooked. Most bathrooms rely entirely on overhead lights.
Backlit wall panels introduce soft illumination behind translucent materials.
The effect feels subtle but surprisingly luxurious.
Why This Works
Soft lighting highlights textures and materials beautifully.
It also improves visibility without harsh shadows.
How to Do It
- Install waterproof LED light strips behind panels.
- Use translucent stone or acrylic panels.
- Connect lights to a safe low-voltage transformer.
- Seal all electrical components carefully.
Waterproofing electrical work is absolutely critical.
Style & Design Tips
Warm white lighting tends to feel more relaxing than bright cool tones.
Keep lighting subtle rather than overly dramatic.
Pro Tip or Budget Hack
LED strips have become extremely affordable.
Even small lighting upgrades can dramatically change the mood of a shower space.
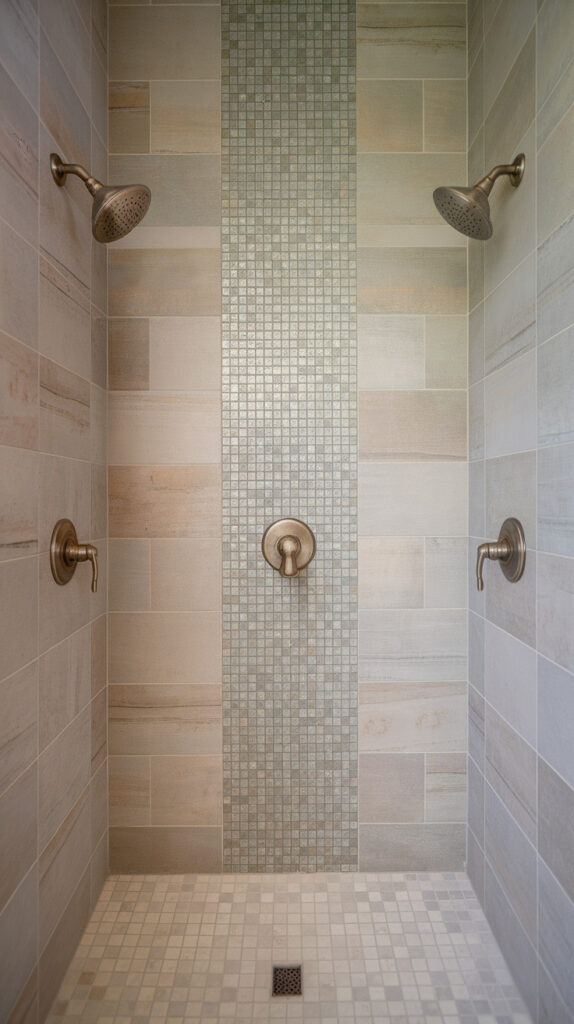
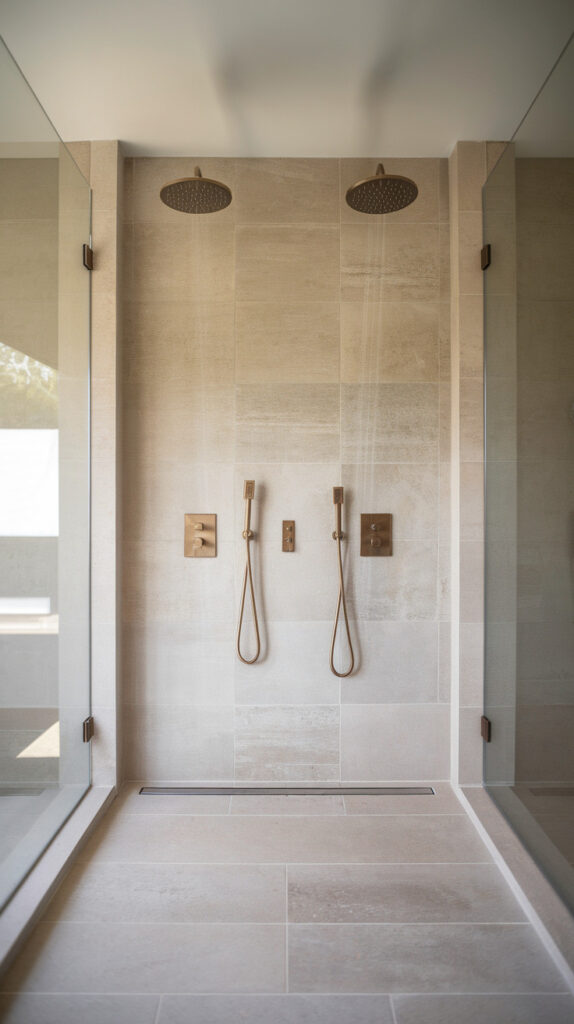
12. Dual Showerhead System
Sharing a bathroom sometimes means waiting for someone else to finish showering.
A dual showerhead setup solves that problem while making showers more flexible.
It also adds a hotel-like feature that many people enjoy.
Why This Works
Two showerheads create customizable water flow. One can provide rainfall while the other offers targeted pressure.
This setup also distributes water more evenly.
How to Do It
- Install a diverter valve to control water flow.
- Mount two showerheads at comfortable heights.
- Ensure plumbing pressure supports both simultaneously.
- Test the system for balanced output.
Plumbing capacity determines whether this system works well.
Style & Design Tips
Matching showerheads keep the design consistent.
Symmetrical placement usually looks cleaner than random positioning.
Pro Tip or Budget Hack
A handheld showerhead paired with a fixed head creates a dual system without extensive plumbing changes.
It’s one of the easiest upgrades available.
13. Textured Shower Wall Panels
Tile looks great but requires time and precision to install.
Textured shower wall panels provide a faster alternative that still looks stylish.
These panels have improved dramatically in quality over the past few years.
Why This Works
Large panels reduce seams and grout lines. That simplifies cleaning and speeds up installation.
They also come in surprisingly realistic stone and tile patterns.
How to Do It
- Measure shower walls carefully before ordering panels.
- Install waterproof backing boards.
- Secure panels using manufacturer adhesives.
- Seal seams with waterproof trim strips.
Accurate measurements prevent frustrating installation problems.
Style & Design Tips
Marble-look panels feel timeless and elegant.
Avoid overly busy patterns that can overwhelm a small shower.
Pro Tip or Budget Hack
Many panels install directly over existing tiles.
That shortcut saves demolition costs and speeds up renovations significantly.
Planning a Shower Remodel the Smart Way
Bathroom upgrades often fail because people jump straight into design choices without thinking through the foundation of the remodel. Tiles, fixtures, and glass panels grab attention, but the real success of a shower renovation usually comes down to planning, layout decisions, and long-term maintenance considerations.
A smart remodel strategy focuses on function first and appearance second. When the practical pieces work properly, the design upgrades feel effortless rather than forced.
Start With the Shower Layout
Before choosing tiles or fixtures, evaluate how the shower fits inside the bathroom. Layout determines comfort, accessibility, and how easy the space feels to use daily.
Measure carefully and look for opportunities to improve movement around the shower area. Even small adjustments to door direction, bench placement, or niche location can dramatically improve usability.
Consider Water Flow and Drainage
Shower design only works when water moves where it should. Poor drainage causes standing water, mold problems, and expensive repairs later.
Floor slope, drain placement, and waterproofing layers all need to work together. These structural decisions matter far more than decorative finishes.
Think About Maintenance From Day One
Some materials look stunning in photos but become exhausting to maintain in real life. Heavy grout lines, natural stone without sealing, or complex glass hardware can increase cleaning time significantly.
Choosing low-maintenance materials keeps the shower looking fresh long after the remodel is complete.
Balance Style With Longevity
Trendy designs come and go quickly. A shower remodel usually lasts 10–20 years, so it’s worth choosing styles that age well.
Neutral tiles, simple fixtures, and timeless layouts tend to hold their appeal much longer than bold experimental trends.
Materials That Work Best for Modern Shower Remodels
Shower materials must handle constant moisture, temperature changes, and daily cleaning. Selecting durable surfaces prevents costly replacements later.
The right material choices also influence how easy the shower feels to maintain.
Porcelain and Ceramic Tiles
Porcelain tiles are one of the most reliable choices for shower walls and floors. They resist moisture, stains, and scratches better than many natural stones.
Modern porcelain tiles can mimic marble, limestone, and concrete so realistically that most people can’t tell the difference.
Natural Stone Options
Marble, travertine, and slate offer beautiful natural textures. However, they require regular sealing and careful cleaning to prevent damage.
If you love the look of stone but prefer easier maintenance, porcelain alternatives provide a practical compromise.
Tempered Glass Panels
Tempered glass is the safest option for shower enclosures. It’s heat-treated for strength and designed to shatter safely if broken.
High-quality glass panels also resist scratching and remain clear for years with basic cleaning.
Waterproof Backer Boards
Behind the tiles, proper backing materials protect the wall structure from moisture damage. Cement boards or foam backer systems are commonly used.
Skipping this layer often leads to hidden mold issues inside the wall.
Budgeting Tips for a Shower Remodel
Bathroom renovations can quickly spiral beyond the planned budget. A little planning helps control costs while still achieving a polished result.
The goal isn’t to spend less on everything but to spend strategically.
Prioritize Structural Improvements
Waterproofing, plumbing upgrades, and drainage systems deserve the largest share of the budget. These elements keep the shower functioning safely.
Cosmetic upgrades should come second once the foundation is secure.
Save on Decorative Materials
Accent tiles, hardware finishes, and lighting upgrades create visual impact without requiring a huge budget.
Focusing on a few standout design features often looks better than trying to upgrade everything.
Consider DIY-Friendly Tasks
Some steps like demolition, painting nearby walls, or installing accessories can be handled by homeowners.
Professional installers should still manage waterproofing, plumbing, and structural changes.
Plan for Unexpected Costs
Bathroom remodels frequently reveal hidden issues behind walls or under flooring. Setting aside a small contingency budget prevents stress if surprises appear.
Most contractors recommend reserving around 10–15 percent of the total budget for unexpected repairs.
Common Mistakes to Avoid
Many shower remodel problems come from small oversights during planning or installation. Avoiding these mistakes can save money and frustration later.
The goal is to build a shower that works well for years, not just something that looks good initially.
Ignoring Waterproofing Layers
Tile itself is not waterproof. Water can pass through grout lines and reach the underlying wall structure.
Proper waterproof membranes and sealed joints are essential for preventing mold and structural damage.
Choosing the Wrong Floor Tile
Smooth tiles may look attractive but can become dangerously slippery when wet.
Textured or slip-resistant tiles provide better traction and improve safety.
Poor Ventilation Planning
Bathrooms generate large amounts of humidity. Without proper ventilation, moisture can damage walls, ceilings, and fixtures.
Installing a high-quality exhaust fan helps remove excess humidity quickly.
Overcrowding the Shower Design
Adding too many features can make the shower feel cramped. Multiple shelves, benches, or accent tiles may compete visually.
A cleaner design usually looks more sophisticated and functions better.
Skipping Professional Help When Needed
DIY projects work well for some parts of a remodel, but plumbing and waterproofing require specialized experience.
Hiring professionals for critical tasks prevents expensive repairs later.
Shower Lighting and Ventilation Upgrades
Lighting and airflow rarely receive attention during shower remodels, yet they dramatically affect comfort and durability.
A well-lit, properly ventilated shower feels cleaner and more relaxing.
Layered Lighting
Overhead bathroom lighting often creates shadows inside the shower. Adding recessed waterproof lights improves visibility.
Better lighting also highlights tile textures and design features.
Moisture-Resistant Fixtures
Standard lighting fixtures may not handle constant humidity well. Shower-rated or damp-rated lights provide better durability.
These fixtures are designed specifically for wet environments.
Proper Ventilation Fans
Ventilation fans remove moisture that accumulates during showers. Without them, humidity lingers and encourages mold growth.
Modern fans operate quietly while maintaining strong airflow.
Smart Ventilation Timers
Some newer exhaust fans include humidity sensors or timers. These automatically remove moisture after showers without needing manual control.
It’s a small upgrade that improves bathroom air quality significantly.
Shower Remodel FAQs
How much does a typical shower remodel cost?
Costs vary widely depending on materials, plumbing changes, and labor. A basic remodel might cost a few thousand dollars, while luxury upgrades with custom glass and premium tiles can reach much higher budgets.
Planning ahead and prioritizing key features helps control costs.
How long does a shower remodel usually take?
Most shower remodels take between one and three weeks depending on complexity. Simple upgrades like replacing fixtures may take only a day or two.
Larger renovations involving tile work and plumbing changes naturally require more time.
Are walk-in showers better than traditional shower tubs?
Walk-in showers often feel more spacious and modern. They also improve accessibility for people with mobility concerns.
However, households with small children sometimes prefer having at least one bathtub available.
What type of tile is easiest to maintain in a shower?
Large porcelain tiles are among the easiest materials to maintain. They resist moisture and require fewer grout lines compared to smaller tiles.
Choosing a grout color similar to the tile also helps hide minor discoloration.
Do frameless shower doors leak water?
When installed correctly, frameless shower doors rarely leak. Proper seals, hinges, and door alignment ensure water stays inside the shower area.
Professional installation usually prevents leakage issues.
Is a rainfall showerhead worth installing?
Many homeowners enjoy the wider water coverage and relaxing feel of rainfall showerheads. They create a spa-like shower experience that standard showerheads rarely provide.
Just make sure the home’s water pressure supports the larger flow area.
Final Thoughts
Shower remodels don’t need to become full-scale construction projects. Small upgrades like new fixtures, glass panels, or creative tile accents can change the entire atmosphere of a bathroom.
The key is choosing ideas that actually improve how the shower functions, not just how it looks.
Some of these upgrades require professional help, while others work perfectly as weekend DIY projects. Either way, the payoff usually shows up immediately every time someone steps into the shower.