15 Kitchen Maintenance Tips for Every Home
Kitchen problems usually start small, stay annoying for a while, and then turn expensive right when you least want to deal with them.
A loose hinge, a slow drain, or a warm fridge shelf can sit there for weeks and quietly push you toward a repair bill.
Most people clean their kitchen all the time, but maintenance plays a different game. Cleaning handles the mess you can see, while maintenance catches the wear, leaks, clogs, and hidden damage that build up in the background.
I treat kitchen maintenance like a habit, not a project, because that mindset saves money and stress.

A five-minute check under the sink or a quick coil cleaning on the fridge can prevent the kind of headache that ruins your whole week.
Why Regular Kitchen Maintenance Saves Money and Prevents Damage
Kitchen maintenance protects the most heavily used room in the house, and that matters more than most people realize. You cook there, wash there, store food there, and run appliances there every single day, so small issues stack up fast.
A clogged drain does not just smell bad and slow you down during dishwashing. It can push water back into pipes, wear out fittings, and create leaks that soak cabinets from the inside where you do not notice damage right away.
Cabinet hinges tell the same story in a quieter way. A hinge loosens, the door starts rubbing, the screw holes widen, and then you end up replacing hardware or patching wood that would have stayed fine with one quick tightening.
Appliances also reward basic maintenance with better performance and a longer life. When fridge coils collect dust, the compressor works harder, your energy bill climbs, and food temperatures fluctuate more than they should.
Moisture control matters just as much as appliance care because kitchens create steam, splashes, and spills all day. If caulk cracks or grout stays dirty and porous, mold and mildew can spread into corners and seams before you even smell the problem.
Regular maintenance also supports hygiene in a practical way, not just a “looks clean” way. A clean disposal, clear drain, fresh fridge seals, and sealed countertops reduce odor, bacteria buildup, and pest attraction, which makes your kitchen safer and easier to manage.
1. Clean and Inspect Kitchen Sink Drains Monthly
Why It Matters
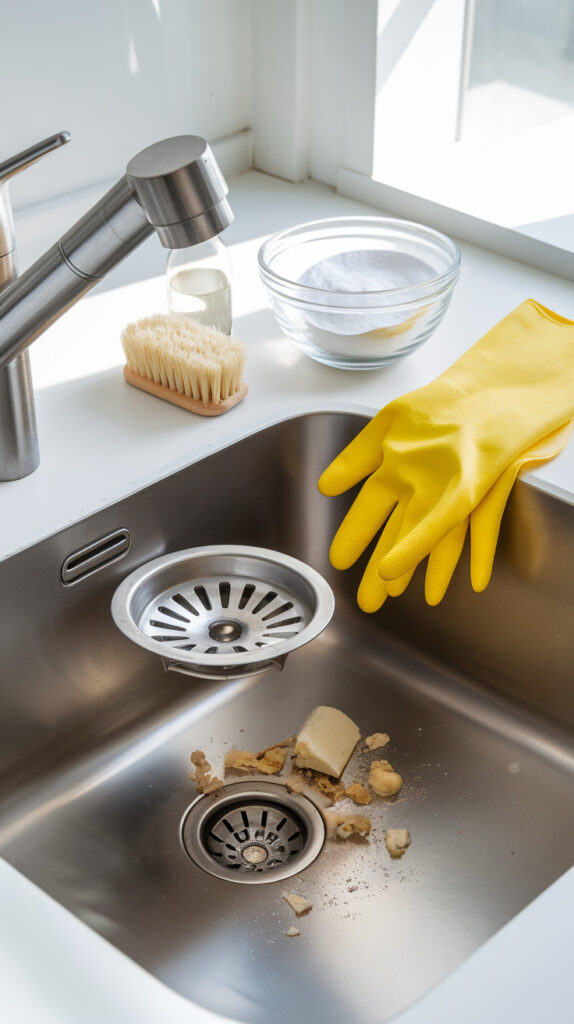
Sink drains collect grease, food bits, soap film, and random gunk faster than people expect, especially in busy kitchens. The drain may look fine from the top, but buildup inside the pipe can create slow drainage, odors, and pressure that strains joints and connections.
I always put this task near the top of any maintenance list because drain problems spread into bigger problems fast. Once water starts draining slowly, people usually ignore it, then they pour harsh cleaner into it, and then they wonder why the smell still hangs around.
How to Do It
- Remove the sink stopper or drain screen and clear visible debris with gloves, because that top layer often causes half the problem.
- Pour hot water down the drain slowly to loosen soap residue and light grease, which helps you see whether the flow improves right away.
- Add baking soda, then vinegar, and let it fizz for several minutes to break up odor-causing buildup without hammering your pipes.
- Flush again with hot water and listen for smooth flow, because gurgling often signals trapped debris deeper in the line.
- Check the P-trap area under the sink for drips while water runs, since clogs and pressure can expose weak fittings.
Common Mistake to Avoid
People rely on harsh chemical drain cleaners too often, and those products can damage pipes, seals, and fittings over time. Use chemicals as a last resort, not your monthly plan.
When to Call a Professional
Call a plumber if slow drainage returns quickly after cleaning or if you see leaks under the sink during your drain check. You should also call if multiple drains back up at once, because that usually points to a bigger line issue.
2. Check for Leaks Under the Sink
Why It Matters
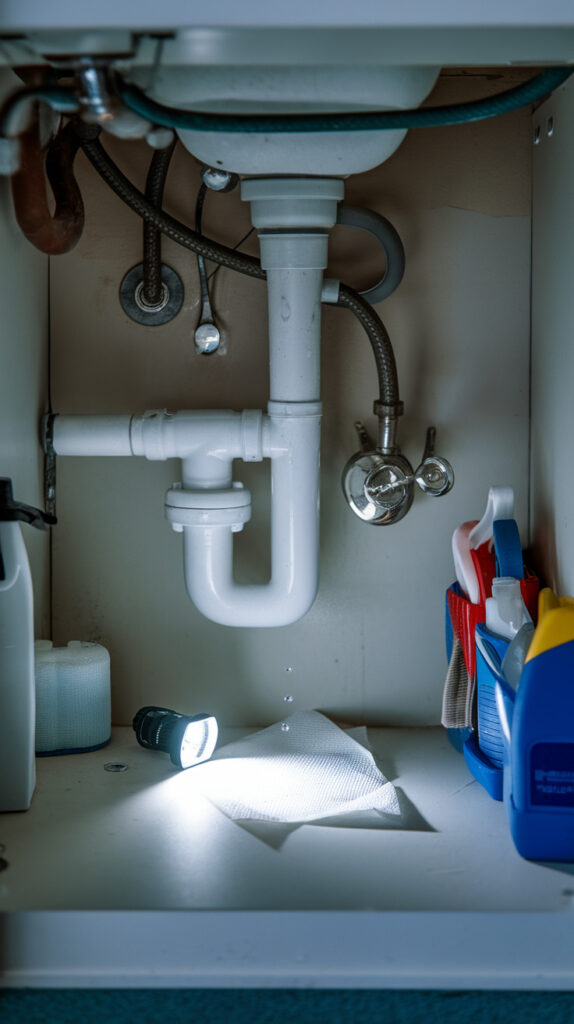
The cabinet under the sink hides one of the most common kitchen maintenance problems in plain sight. Small leaks around supply lines, shutoff valves, or drain connections can soak wood, warp cabinet floors, and feed mold before you notice anything from the outside.
This area also fools people because a leak does not always drip dramatically. A slow seep can leave only a damp ring, a musty smell, or swollen cabinet material, and by then the damage has already started.
How to Do It
- Empty the cabinet completely so you can inspect every surface, because clutter hides moisture stains and slow leaks.
- Run both hot and cold water for a minute while you watch the supply lines, shutoff valves, and drain joints closely.
- Feel around fittings with a dry paper towel, since the towel will catch moisture faster than your eyes will.
- Look for dark stains, peeling cabinet liner, or soft wood on the base panel, because those signs often reveal older leaks.
- Tighten loose slip nuts gently with a wrench if needed, but stop if a connection resists hard force.
Common Mistake to Avoid
People crank fittings too tight and crack plastic parts or distort washers, which creates the leak they tried to fix. Tighten just enough to stop seepage, then recheck after running water.
When to Call a Professional
Bring in a plumber if you find active dripping from supply valves, corrosion on pipes, or water damage that keeps returning. Call faster if you see mold growth or the cabinet base feels soft, because moisture damage spreads quickly.
3. Deep Clean and Inspect the Refrigerator

Why It Matters
A refrigerator can run for years while slowly getting less efficient, less hygienic, and more annoying to use. Spills dry on shelves, seals collect grime, vents get blocked, and food starts spoiling faster because cold air stops circulating properly.
I think this task gets ignored because people “clean the fridge” in quick bursts before groceries, but deep cleaning and inspection do a different job. You need both the cleaning part and the checking part if you want the fridge to stay reliable.
How to Do It
- Remove all food, shelves, and drawers, and toss expired items before you wipe anything down, because clutter slows the whole process.
- Wash shelves and bins with warm soapy water, then dry them fully so you do not trap moisture and odor.
- Wipe interior walls, corners, and door gaskets, because sticky residue on seals can weaken the door closure over time.
- Check the door seals by closing a paper sheet in the door and pulling gently, since weak resistance can signal a poor seal.
- Return food with simple organization zones, which helps airflow and makes future maintenance faster.
Common Mistake to Avoid
People pack the fridge too tightly after cleaning, and that blocks airflow and makes temperature control uneven. Leave some breathing room between containers, especially near vents.
When to Call a Professional
Call for service if the fridge stays warm, runs constantly, leaks water, or makes new loud noises after you clean and organize it. A damaged door gasket also deserves a pro if you cannot get a proper seal.
4. Clean Refrigerator Coils for Efficiency
Why It Matters
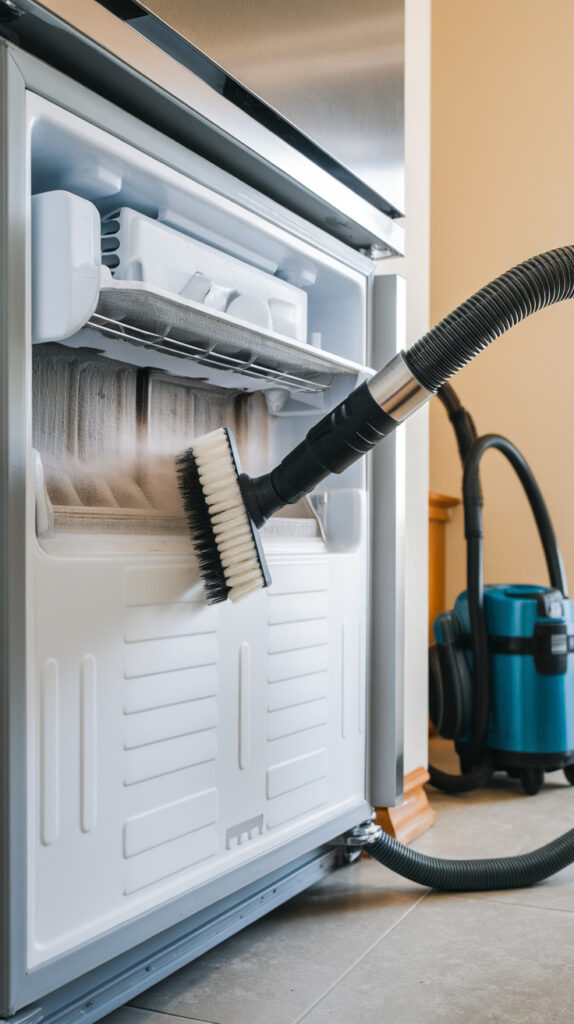
Fridge coils release heat, and dust on those coils makes the system work harder every day. That extra strain increases energy use, shortens compressor life, and can leave your fridge struggling during hot months.
This one feels boring, but it delivers one of the best payoffs in kitchen maintenance. I have seen fridges run quieter and cool better after a simple coil cleaning, and the job takes less time than people think.
How to Do It
- Unplug the refrigerator first, because you need safe access behind or beneath the unit.
- Locate the coils on the back or under a front kick plate, depending on your fridge model.
- Use a coil brush or vacuum attachment to remove dust gently, and work slowly so you do not bend the coils.
- Vacuum the floor and surrounding area too, because loose dust will get sucked back in later.
- Plug the unit back in and check that it runs normally, then add this task to your quarterly routine.
Common Mistake to Avoid
People jam a regular brush into tight spaces and bend the coils or knock wires loose. Use a soft coil brush or vacuum tool designed for narrow gaps.
When to Call a Professional
Call a technician if the fridge still runs hot, cycles constantly, or fails to maintain temperature after coil cleaning. You should also call if you notice damaged wiring, burnt smells, or heavy ice buildup inside.
5. Inspect and Tighten Cabinet Hinges

Why It Matters
Cabinet doors take a beating all day, and hinges loosen little by little from normal use. Once a hinge shifts, the door starts sagging, rubbing, or slamming awkwardly, which can damage the door edge and the cabinet frame.
Loose hinges also create a chain reaction that nobody enjoys. The door sits crooked, you push it harder, the screw holes widen, and now a tiny adjustment turns into a wood repair job.
How to Do It
- Open and close each cabinet door and watch for rubbing, sagging, or uneven gaps, because those signs show hinge movement fast.
- Tighten visible hinge screws with the correct screwdriver, using steady pressure so you do not strip the heads.
- Adjust alignment screws on modern hinges if the door sits crooked, and make small turns instead of big jumps.
- Check screw holes for looseness if screws keep spinning, since worn holes need filler or repair before they hold well again.
- Wipe hinges clean while you work, because grease and dust can hide cracks or rust.
Common Mistake to Avoid
People use the wrong screwdriver size and strip screws, then the fix gets messy for no reason. Match the driver tip carefully before you start tightening anything.
When to Call a Professional
Call a handyman or cabinet pro if doors keep sagging after adjustment or if the wood around the hinges has cracked. You should also call if you want hinge replacements and your cabinet style uses specialty hardware.
6. Clean and Seal Countertops Properly
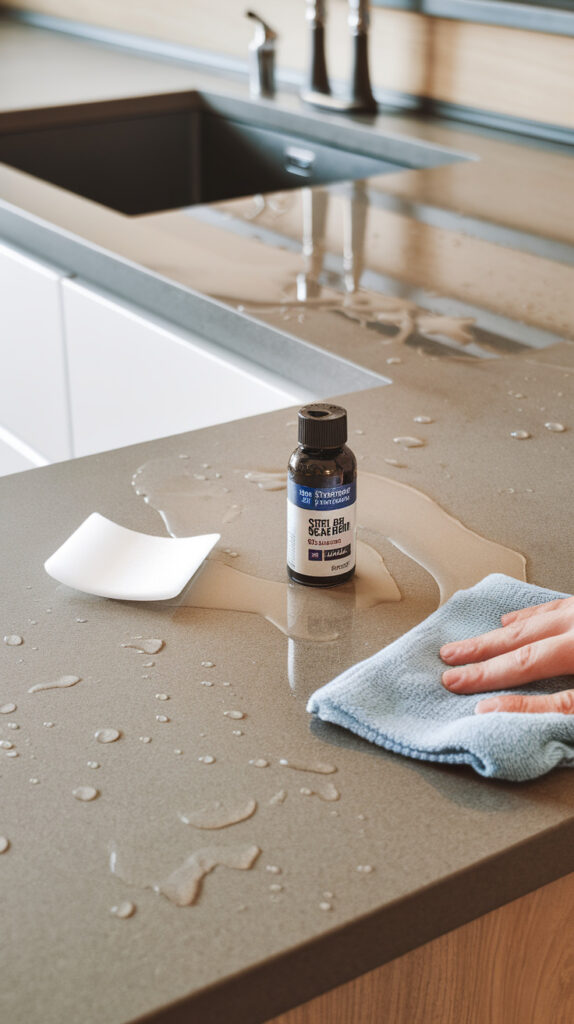
Why It Matters
Countertops handle heat, moisture, knives, spills, and food prep every day, so they need more than a quick wipe. Different materials react differently, and using the wrong cleaner or skipping sealing can stain, etch, or dry out the surface.
People usually notice countertop damage only after it becomes obvious, and by then the surface already carries permanent marks. A simple maintenance routine protects the finish and keeps the countertop easier to clean long term.
How to Do It
- Identify your countertop material first, because granite, quartz, butcher block, and laminate all need different care.
- Use a gentle cleaner that matches the surface type, and avoid abrasive pads that scratch finishes.
- Wipe spills quickly, especially oil, wine, tomato sauce, and citrus, because those can stain or etch some surfaces.
- Apply a food-safe sealer on natural stone or wood when the manufacturer recommends it, which helps block moisture absorption.
- Test water beading on stone surfaces every few months, since weak beading often means the sealer needs a refresh.
Common Mistake to Avoid
People use vinegar or harsh degreasers on stone and then wonder why the shine looks dull. Use surface-safe cleaners only, even if the “strong” product looks tempting.
When to Call a Professional
Call a countertop specialist if you see deep cracks, separated seams, major stains, or water damage near sink cutouts. Professional resealing also helps when the surface absorbs water quickly after repeated sealing attempts.
7. Maintain the Garbage Disposal Safely
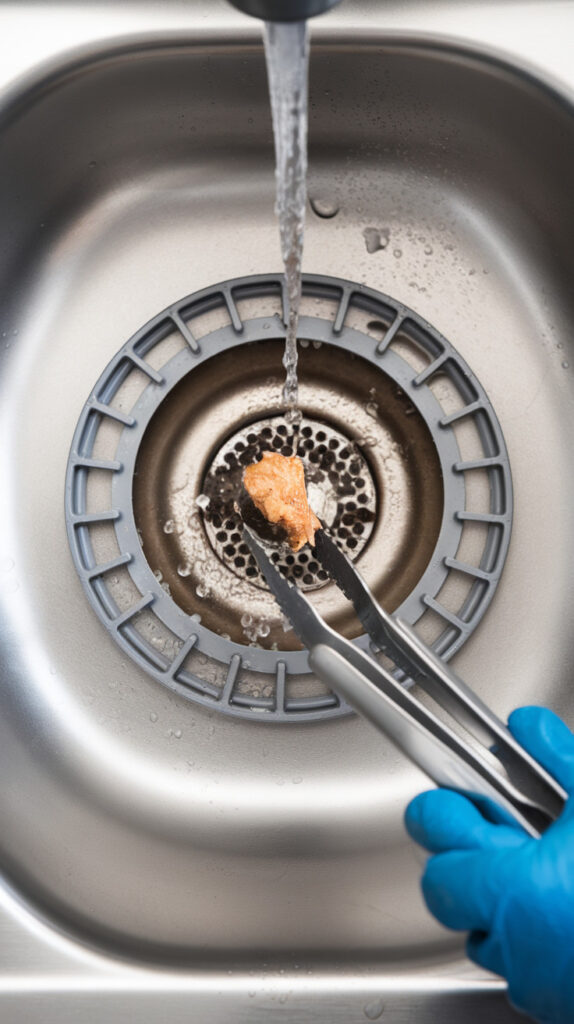
Why It Matters
Garbage disposals make cleanup easier, but they punish bad habits fast. Grease, fibrous scraps, bones, and starchy foods can jam the unit, dull the blades, clog pipes, and create odors that no lemon slice can fix.
I like disposals, but I never treat them like a trash can. A little discipline keeps them running smoothly, and a little maintenance keeps your sink area from smelling weird for no reason.
How to Do It
- Run cold water before, during, and after disposal use, because cold water helps fats stay solid so the system can move them through better.
- Feed small amounts of food waste gradually instead of dumping everything at once, which reduces strain and jamming.
- Clean the rubber splash guard with a brush and dish soap, since gunk hides underneath and causes most disposal odors.
- Grind ice cubes occasionally to help knock residue loose, and follow with cold water for a clean flush.
- Turn off power before any manual inspection, and use tongs instead of your hand if something gets stuck.
Common Mistake to Avoid
People pour grease down the disposal and blame the disposal when the drain clogs later. Keep grease, oil, and fat out of the sink entirely if you want fewer plumbing problems.
When to Call a Professional
Call a plumber or appliance tech if the disposal hums without grinding, leaks from the bottom, or trips power repeatedly. A persistent clog after proper cleaning also deserves professional help.
8. Inspect Stove Burners and Gas Connections
Why It Matters
Your stove works hard every week, and burner performance drops when food debris, grease, or misalignment builds up. Weak flames, uneven heating, and ignition delays make cooking frustrating and can point to maintenance or safety problems.
Gas stoves also need extra respect because fuel connections demand careful checks. You do not need to panic, but you do need a routine, because ignoring gas-related issues never ends well.
How to Do It
- Turn off the stove completely and let it cool before you remove burner grates and caps.
- Clean burner caps and ports gently with a brush or toothpick, because blocked ports cause uneven flames.
- Re-seat burner caps correctly after cleaning, since misaligned caps often cause clicking or poor ignition.
- Inspect visible gas connections and hoses for wear, cracks, or corrosion, but do not loosen fittings unless you know exactly what you are doing.
- Test burner flames after cleaning and look for steady blue flames, because yellow or irregular flames can signal trouble.
Common Mistake to Avoid
People poke burner ports with oversized metal tools and damage the openings, which ruins flame control. Use a soft brush or a small wooden pick and go slow.
When to Call a Professional
Call a licensed technician if you smell gas, see yellow flames that persist, or hear constant clicking after cleaning and reassembly. Call immediately for any suspected gas leak, and do not keep testing it yourself.
9. Clean Range Hood Filters
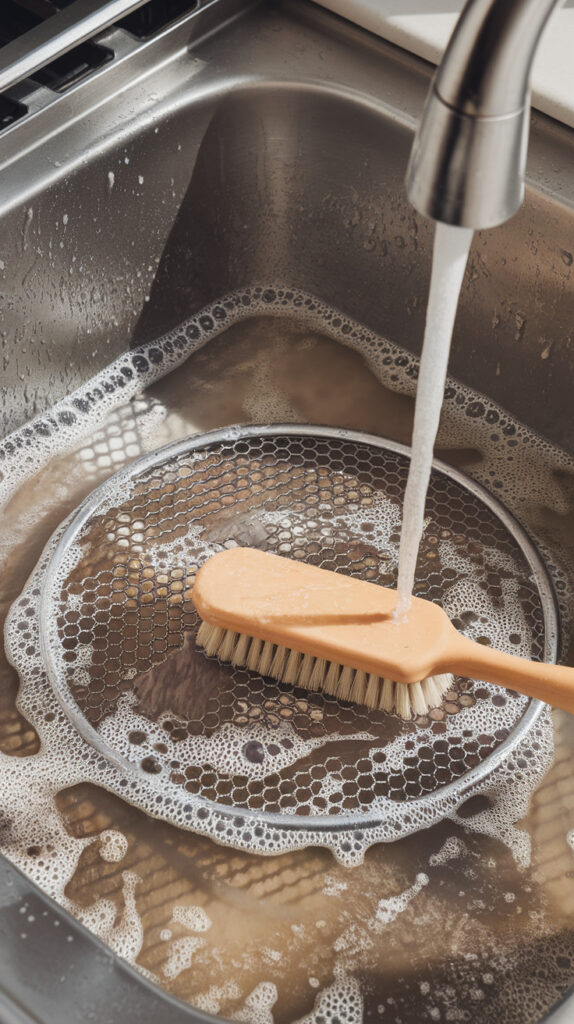
Why It Matters
Range hood filters trap grease and airborne cooking residue, and they get nasty fast if you cook often. Dirty filters reduce ventilation, let grease spread onto cabinets and walls, and make the kitchen feel stuffy during even simple meals.
This task changes how your whole kitchen feels, not just how the hood looks. Clean filters pull smoke and odors better, and they also lower the greasy film that builds up on nearby surfaces.
How to Do It
- Remove the hood filters according to your model instructions, because some slide out while others unclip differently.
- Soak metal filters in hot water with dish soap and a little baking soda to loosen grease.
- Scrub gently with a non-abrasive brush, focusing on corners where grease collects thickest.
- Let filters dry fully before reinstalling them, since trapped moisture can attract grime faster.
- Wipe the hood exterior and underside while filters dry, because grease buildup spreads across the whole unit.
Common Mistake to Avoid
People wait until the hood drips grease or smells bad before cleaning the filters. Clean on a schedule, not on vibes, and the job stays easy.
When to Call a Professional
Call a technician if the fan sounds weak, rattles loudly, or fails to pull smoke after filter cleaning. You should also call if wiring, lights, or fan controls stop working.
10. Check Caulking Around Sink and Backsplash
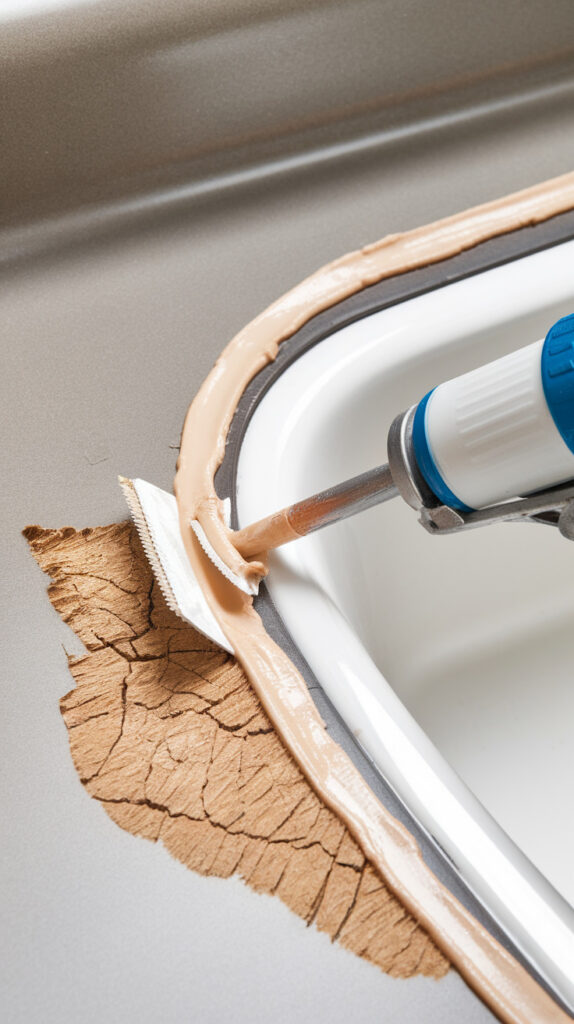
Why It Matters
Caulk seals the gaps where water loves to sneak in, especially around the sink, countertop edges, and backsplash joints. Once caulk cracks or peels, water can slip behind surfaces and cause swelling, mold, and loose materials.
This looks minor, but it protects some of the most vulnerable seams in the kitchen. I always check caulk when I clean the sink deeply because you can spot trouble early and fix it before moisture gets ugly.
How to Do It
- Inspect all caulk lines around the sink and backsplash for cracks, gaps, peeling, or discoloration.
- Press lightly along the seam to check for loose sections, because weak caulk often lifts before it breaks completely.
- Remove damaged caulk cleanly with a scraper tool, and wipe the area dry before applying new caulk.
- Use kitchen-grade, mold-resistant caulk and apply a smooth bead with steady pressure.
- Let the caulk cure fully before exposing it to water, because early splashes weaken the seal.
Common Mistake to Avoid
People apply new caulk over old, moldy caulk and expect a clean seal. Remove the damaged layer first or the new bead will fail quickly.
When to Call a Professional
Call a pro if you find soft drywall, loose backsplash tiles, or recurring mold behind the sink area. Those signs often mean water has already moved past the surface seam.
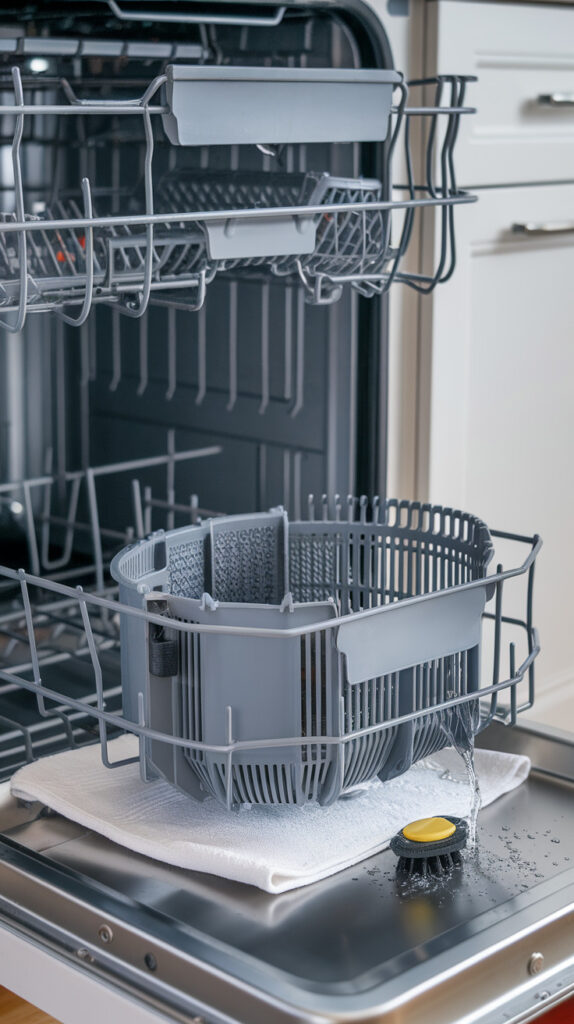
11. Maintain Dishwasher Filters and Spray Arms
Why It Matters
Dishwashers lose performance slowly, so people blame the soap when the machine actually needs maintenance. Food residue in the filter and blocked spray arm holes can leave dishes dirty, cause odors, and force the machine to work harder than necessary.
A dishwasher should not smell funky after a cycle, and it should not leave grit on glasses. When that starts happening, a filter and spray arm check usually fixes the issue faster than buying a new detergent pod.
How to Do It
- Remove the bottom rack and take out the filter according to your dishwasher model instructions.
- Rinse the filter under warm water and scrub gently with a soft brush to remove grease and trapped food.
- Inspect spray arms for clogged holes, and clear debris with a toothpick or soft brush.
- Wipe the door gasket and bottom edge, because slime and residue build up there more than most people expect.
- Run an empty maintenance cycle with a dishwasher-safe cleaner to flush leftover buildup.
Common Mistake to Avoid
People skip the filter because they assume the dishwasher “self-cleans,” which sounds nice but does not match reality. Clean the filter regularly if you want consistent results.
When to Call a Professional
Call an appliance tech if water pools in the bottom, the unit leaks, or dishes stay dirty after filter and spray arm cleaning. Strange grinding noises and drainage failures also need professional repair.
12. Inspect Electrical Outlets and Switches
Why It Matters
Kitchen outlets and switches handle serious daily use, and they sit near heat, moisture, and steam. Loose outlets, damaged covers, or warm switches can signal electrical wear that you should never ignore.
This maintenance task protects safety more than convenience, and that makes it a big deal. A weird smell near an outlet or a plug that slips out easily deserves attention right away, not “maybe next weekend.”
How to Do It
- Check outlet covers and switch plates for cracks, looseness, or discoloration, because heat damage often shows on the surface first.
- Test GFCI outlets using the built-in test and reset buttons, since kitchens rely on them for shock protection.
- Plug in a small appliance and confirm the outlet holds the plug firmly without wobbling.
- Turn off power at the breaker before tightening a loose plate screw or inspecting anything beyond the surface.
- Watch for flickering lights or switches that feel warm, and write down which locations show symptoms.
Common Mistake to Avoid
People keep using a loose or sparking outlet because it “still works.” Stop using that outlet immediately and treat it like a safety issue, not an inconvenience.
When to Call a Professional
Call a licensed electrician if you smell burning, see scorch marks, hear buzzing, or notice repeated breaker trips. You should also call if GFCI outlets fail to test or reset properly.
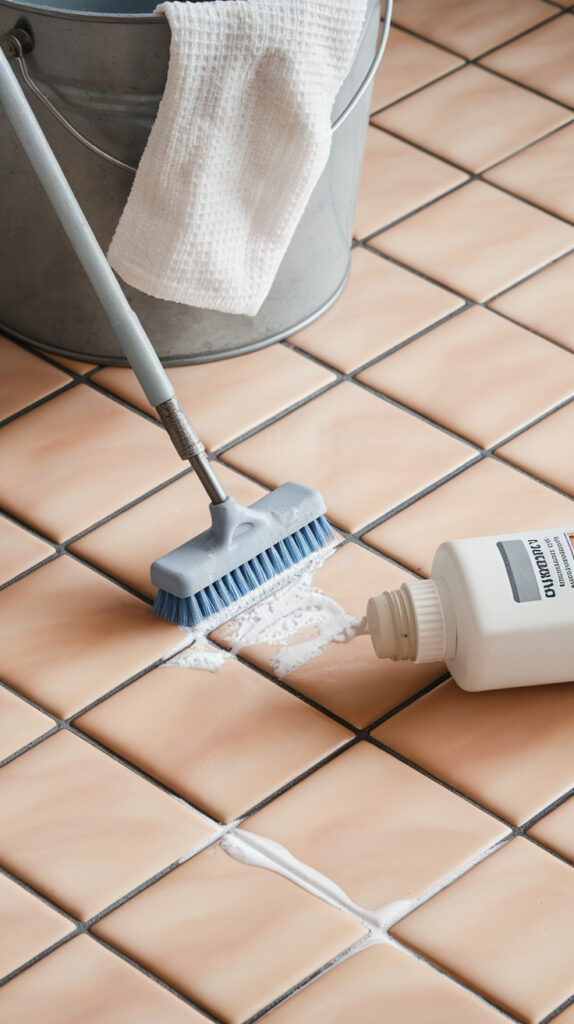
13. Keep Grout Clean and Sealed
Why It Matters
Grout absorbs moisture, grease, and stains, especially around backsplashes and tiled kitchen floors. Dirty or unsealed grout can crack, discolor, and hold onto grime in a way that makes the whole kitchen look older than it is.
Grout maintenance also helps you avoid deeper tile problems. Once water moves through weak grout lines, tiles can loosen and mold can grow behind them, and nobody wants that surprise project.
How to Do It
- Clean grout lines with a grout-safe cleaner and a soft brush, because harsh tools can scrape out the grout.
- Focus on areas near the stove and sink, where grease and moisture build up the fastest.
- Rinse and dry the grout fully before sealing, since trapped moisture weakens the sealer bond.
- Apply grout sealer carefully along the lines and wipe excess from the tile surface.
- Recheck high-use areas every few months, because grout near splash zones wears faster.
Common Mistake to Avoid
People use bleach constantly on grout and end up weakening the grout or discoloring nearby materials. Use grout-safe products first, then reserve stronger options for spot treatment only.
When to Call a Professional
Call a tile pro if grout crumbles, tiles move, or stains return through sealed grout repeatedly. Those issues often point to moisture behind the tile or older installation problems.
14. Test Smoke and Carbon Monoxide Detectors
Why It Matters
Kitchen maintenance should always include safety checks, and detectors sit at the top of that list. Cooking heat, gas appliances, and electrical loads increase risk in the kitchen area, so your alarms need to work every time without guessing.
People forget detector maintenance because the devices stay quiet most days. Silence feels reassuring, but dead batteries and old sensors stay silent too, and that version does not help anyone.
How to Do It
- Press the test button on each smoke and carbon monoxide detector and confirm the alarm sounds clearly.
- Replace batteries on schedule or sooner if the unit chirps, because low-battery warnings always seem to happen at the worst hour possible.
- Clean dust from detector vents gently with a vacuum brush, since dust can affect sensor performance.
- Check the manufacture date and replace units that reach the end of their lifespan.
- Confirm placement still makes sense if you changed appliances or remodeled nearby areas.
Common Mistake to Avoid
People replace batteries but ignore detector age, and old sensors lose reliability even with fresh batteries. Replace the whole unit when it expires, not just the battery.
When to Call a Professional
Call a technician if your carbon monoxide detector alarms and you cannot identify a safe cause immediately. Call emergency services first if you suspect a gas or combustion issue and leave the area.
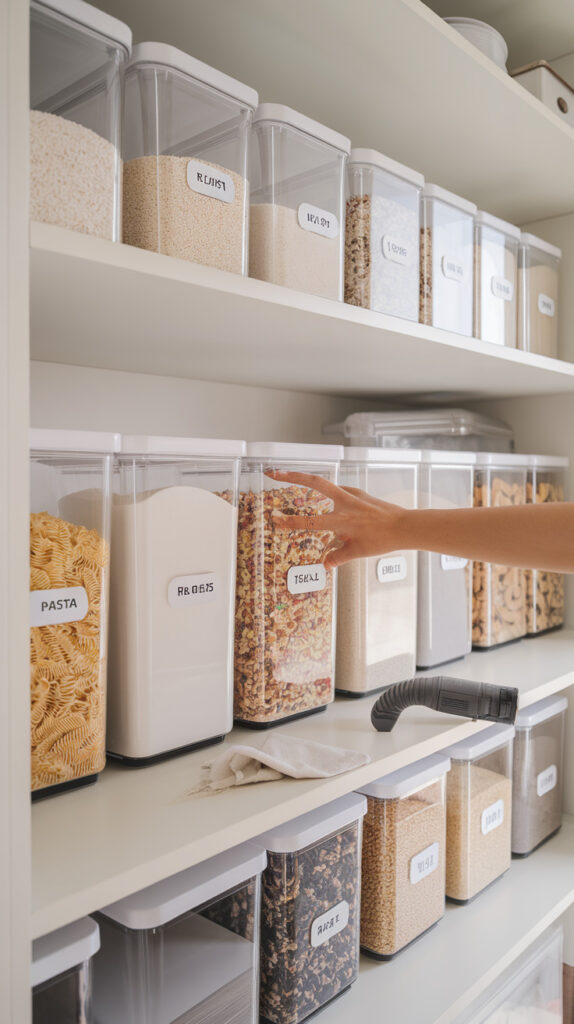
15. Organize and Declutter Pantry to Prevent Pests
Why It Matters
Pantry clutter attracts pests, hides expired food, and makes spills sit unnoticed for weeks. Crumbs, open packages, and crowded shelves create perfect conditions for pantry moths, ants, and that mystery sticky patch nobody claims.
I count pantry organization as maintenance because it protects food, shelves, and your sanity. A tidy pantry also helps you use what you buy, which saves money and cuts waste without much effort.
How to Do It
- Empty shelves section by section and check expiration dates, because old food and forgotten bags attract pests fast.
- Wipe shelves, corners, and container bottoms before restocking, and look for crumbs or droppings while you clean.
- Transfer dry goods into sealed containers, especially flour, rice, cereal, and snacks.
- Group items by category and keep newer products behind older ones, which makes rotation easy.
- Leave a little space around the walls and corners so you can spot leaks, crumbs, or pest activity quickly.
Common Mistake to Avoid
People buy organizers first and skip the cleanout, so they just create prettier clutter. Declutter before you organize, or the system will fail in a month.
When to Call a Professional
Call pest control if you see repeated pest signs after a full pantry cleanout and sealed storage reset. You should also call if pests spread to cabinets or you find signs behind walls.
Kitchen Maintenance Safety Tips
Kitchen maintenance saves money, but safe habits matter more than any savings. A rushed DIY fix around electricity, gas, or harsh chemicals can turn a simple task into a real problem, so take safety seriously every time.
Turn off power before you inspect outlets, switches, disposals, or appliance parts that sit near wiring. I know that extra step feels annoying when you just want to tighten one thing, but it takes seconds and removes a lot of risk.
Wear gloves when you handle cleaning products, drain debris, and greasy filters because kitchen grime can get nasty fast. You should also open a window or run ventilation when you clean with strong products, especially in smaller kitchens.
Never mix cleaning products, especially bleach with anything acidic or ammonia-based, because that combo can create dangerous fumes. Stick to one cleaner at a time, rinse surfaces well, and keep the process simple.
Use the right tools for the job instead of improvising with random knives, metal picks, or oversized brushes. Sharp shortcuts damage fixtures and raise injury risk, and that “quick fix” usually creates extra work.
Know when to stop DIY work and call a professional, particularly with gas smells, electrical burning odors, persistent leaks, or hidden mold. Confidence helps with maintenance, but good judgment helps more.
How Often Should You Perform Kitchen Maintenance?
A maintenance schedule works better than random motivation because it keeps tasks small and predictable. When you assign jobs by week, month, quarter, and year, the kitchen stays under control without eating your whole weekend.
Weekly
Handle quick checks every week so small issues never get a head start. Wipe spills thoroughly, inspect the sink area for moisture, clean visible crumbs in the pantry, and watch for any new odors from drains or the dishwasher.
Monthly
Use your monthly routine for inspection-heavy tasks that prevent hidden damage. Clean sink drains, check under-sink plumbing, inspect caulk and grout, wipe refrigerator seals, and test detector batteries if your units need frequent checks.
Quarterly
Quarterly tasks target performance and efficiency, which makes a big difference over time. Clean refrigerator coils, deep clean the fridge, wash range hood filters, inspect cabinet hinges, and clean dishwasher filters and spray arms.
Annually
Save the bigger reset tasks for once a year so nothing slips through the cracks. Re-seal countertops or grout if needed, replace detector units that expire, inspect electrical outlets more carefully, and schedule a professional inspection if your kitchen shows aging systems.
I keep a simple checklist on my phone because memory gets lazy when life gets busy. You do not need a fancy system, just a repeatable one that helps you notice patterns before they become repairs.
Signs Your Kitchen Needs Professional Repair
Some kitchen problems accept a simple maintenance fix, while others need a trained pro right away. The trick is knowing the difference early so you do not waste time, money, or safety trying to force a DIY solution.
Persistent leaks top the list because water damage spreads quietly and destroys cabinets, walls, and flooring over time. If you dry the area, tighten fittings, and still see moisture return, call a plumber and stop guessing.
Electrical warning signs need fast action, not optimism. A burning smell, buzzing outlet, warm switch, flickering power, or repeated breaker trips all point to problems that can escalate quickly.
Gas odors demand immediate caution and professional help, period. If you smell gas near the stove or any kitchen line, turn off the source if you can do so safely, leave the area, and contact the gas company or a licensed technician.
Mold growth around caulk, under sinks, or behind cabinets often means moisture has moved beyond surface cleaning. You can clean minor surface spots, but repeated mold usually points to a leak, poor sealing, or hidden damage that needs real repair work.
Structural damage also deserves a pro, especially when cabinet bases feel soft, countertops separate at seams, or tiles loosen around the sink. Those signs usually connect to moisture or age-related wear, and a proper fix protects the rest of the kitchen from follow-up damage.
Frequently Asked Questions
How often should kitchen appliances be maintained?
Most kitchen appliances need light maintenance every month and deeper care every few months, depending on how often you use them. I like a simple rhythm: quick wipe-downs and checks monthly, then coil cleaning, filter cleaning, or deeper inspections every quarter.
Heavy-use homes should shorten the timeline, especially for dishwashers, disposals, and range hood filters. If you cook a lot, your maintenance schedule should work harder too, because grease, steam, and food residue build up way faster than people expect.
What is the most common kitchen maintenance issue?
Slow or smelly sink drains usually win that title in most homes, and I am not surprised. People rinse dishes, pour tiny bits of grease, and ignore early drainage changes, so buildup forms gradually and becomes normal until the sink starts acting up.
Under-sink leaks come close behind because they stay hidden and start small. A quick monthly check under the cabinet catches both issues early, and that one habit alone can prevent a bunch of expensive repairs.
Can regular maintenance really extend appliance life?
Yes, and the difference shows up more than people think. Appliances fail faster when dust blocks airflow, filters clog, seals get dirty, and parts work harder than they should, so basic maintenance reduces strain and keeps performance steady.
You still cannot stop every breakdown, of course, because parts wear out over time. Regular care gives your appliances a better shot at a longer life, lower energy use, and fewer surprise service calls.
What maintenance tasks should renters do?
Renters should handle low-risk maintenance tasks that protect cleanliness, efficiency, and early problem detection without touching major systems. Good examples include cleaning drains gently, checking under the sink for leaks, cleaning fridge shelves and seals, maintaining dishwasher filters, and decluttering the pantry.
Renters should also test detectors if the lease allows it and report issues quickly when they spot them. I always tell renters to document leaks, outlet problems, or mold signs early, because waiting makes the problem worse and harder to prove later.
Is professional kitchen maintenance necessary every year?
Not every kitchen needs a full professional maintenance visit every year, but many homes benefit from one, especially older homes. A yearly check helps if you have aging plumbing, gas appliances, recurring leaks, or electrical quirks that keep showing up.
Even without an annual service call, you should call professionals whenever you notice safety risks or repeat problems. Regular DIY maintenance handles a lot, but pros should handle gas, serious electrical issues, hidden leaks, and structural damage.
What is the difference between kitchen cleaning and kitchen maintenance?
Cleaning removes dirt, grease, crumbs, and spills so the kitchen looks and feels fresh. Maintenance goes further and checks function, wear, sealing, drainage, airflow, hardware, and safety systems so the kitchen stays reliable and damage stays away.
Both jobs matter, and they work best together. Cleaning keeps surfaces under control, while maintenance catches the problems you cannot fix with a sponge and a good mood.
Final Thoughts
Kitchen maintenance works best when you treat it like a routine instead of a rescue mission. Small checks done regularly protect your appliances, cabinets, plumbing, and wallet way better than one giant cleanup after something breaks.
You do not need a perfect system, just a consistent one that fits real life. Start with drains, leaks, and fridge care, build from there, and your kitchen will stay easier to use, safer to manage, and a lot less expensive to own.