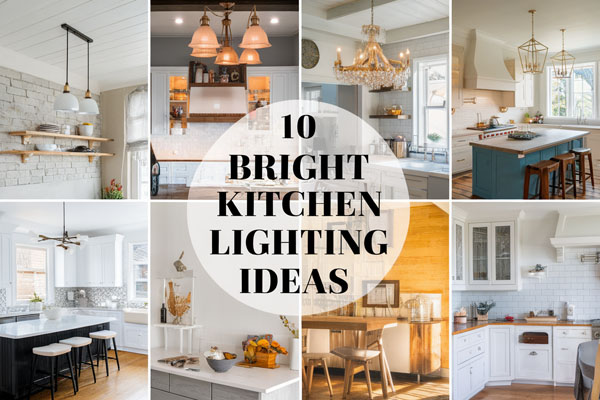
10 Small Counter Space Kitchen Ideas That Work
Function beats square footage every single time in a small kitchen. A cramped counter doesn’t mean you can’t cook comfortably; it just means the setup needs to work harder.
When space gets tight, every inch either helps you or fights you. I’ve learned that the difference usually comes down to smart layout choices, not expensive renovations.
Most small kitchens don’t need more cabinets. They need better decisions about what actually lives on the counter and what doesn’t.
1. Add a Slim Rolling Kitchen Cart
Limited prep space becomes frustrating fast when you’re juggling a cutting board, mixing bowl, and one rogue coffee mug that refuses to move. A slim rolling kitchen cart gives you temporary counter space without permanently crowding the room. I’ve used one in a rental kitchen that barely fit two people, and it honestly changed how I cooked.
You can roll it out when you’re chopping vegetables and tuck it away when dinner’s done. It works especially well in galley kitchens where there’s just enough clearance for something narrow.
Why This Works
A rolling cart adds flexible surface area without blocking traffic flow. Because it’s movable, it adapts to how you cook instead of forcing you to work around it.
It also creates a defined prep zone, which helps keep clutter from spreading everywhere.
How to Do It
- Measure the narrowest walkway in your kitchen and subtract at least 3 inches for clearance.
- Choose a cart under 15 inches deep if your space is tight.
- Look for locking wheels so it doesn’t slide while you chop.
- Store it against a wall or beside the fridge when not in use.
Each step matters because tight kitchens don’t forgive bad measurements.
Style & Design Tips
Go for a cart that contrasts your cabinets slightly for interest but still feels cohesive. A natural wood top warms up white kitchens, while black metal frames add structure to lighter spaces.
Avoid bulky carts with thick legs that visually crowd the room.
Pro Tip or Budget Hack
Check secondhand marketplaces before buying new. A basic utility cart can look custom if you sand and stain the top yourself.
2. Install a Fold-Down Wall Shelf
Permanent counters aren’t always the answer, especially in a tiny apartment kitchen. A fold-down wall shelf gives you extra surface only when you need it. I once installed one near the stove just for plating food, and it kept my main counter clear.
When it folds up, it practically disappears.
Why This Works
It maximizes vertical wall space, which often goes unused. Because it folds flat, it doesn’t eat into your walking path.
That flexibility is gold in tight layouts.
How to Do It
- Find wall studs for secure mounting.
- Install heavy-duty folding brackets rated for at least 50 pounds.
- Use a solid wood board cut to your preferred width.
- Seal the surface for easy cleaning.
Secure mounting matters more than looks here.
Style & Design Tips
Match the shelf finish to either your countertop or open shelving to keep the look intentional. A matte finish feels modern, while a slightly distressed wood board gives casual charm.
Don’t paint it a random accent color unless it connects to something else in the room.
Pro Tip or Budget Hack
If buying brackets feels pricey, repurpose a sturdy tabletop and simple folding supports from a hardware store. It costs less and still looks polished.
3. Use a Large Cutting Board as a Countertop Extender
Stove covers and sink covers aren’t just for aesthetics. A custom-fit cutting board that sits over your sink instantly creates more prep space. I tried this in a small condo kitchen, and it felt like I magically gained a foot of counter.
It’s simple, but it works.
Why This Works
You’re turning an unused surface into a functional one. The sink isn’t needed 100% of the time, so covering it temporarily makes sense.
It also keeps your workflow compact.
How to Do It
- Measure the inner edges of your sink.
- Order or cut a thick hardwood board to fit snugly.
- Add small rubber feet underneath to prevent sliding.
- Oil the board regularly to keep it durable.
Precision matters so it doesn’t wobble.
Style & Design Tips
Choose thick butcher block for a high-end look. Thin boards feel flimsy and visually cheap.
Keep the tone consistent with other wood elements in the kitchen.
Pro Tip or Budget Hack
A local carpenter can cut scrap hardwood to size for less than specialty store prices.
4. Mount Magnetic Strips for Knives
Knife blocks eat counter space fast. A magnetic strip mounted on the wall frees up that footprint instantly. I switched to one years ago and never went back.
It looks cleaner and feels more professional too.
Why This Works
Vertical storage keeps essentials accessible without crowding work surfaces. It also keeps knives dry and visible, which extends their lifespan.
You reduce clutter and increase efficiency in one move.
How to Do It
- Mount the strip at eye level but out of reach of children.
- Anchor securely into studs or use heavy-duty wall anchors.
- Place knives evenly spaced to avoid scratching.
- Keep it a safe distance from the stove.
Proper spacing prevents accidents.
Style & Design Tips
A stainless steel strip suits modern kitchens, while a wood-backed magnet blends into warmer designs.
Avoid overcrowding it with every single blade you own.
Pro Tip or Budget Hack
Only hang your most-used knives and store the rest in a drawer organizer.
5. Replace Bulky Appliances with Slim Versions
Countertop appliances multiply fast. Swapping oversized machines for compact versions frees surprising amounts of space. I downsized my coffee maker and gained enough room for a permanent prep zone.
It felt like I decluttered without actually removing functionality.
Why This Works
Most small households don’t need commercial-sized appliances. Slim models perform just as well for everyday cooking.
Less bulk means more breathing room.
How to Do It
- Audit what you actually use weekly.
- Measure appliance footprints before buying new ones.
- Store seasonal gadgets in cabinets.
- Keep only daily-use items visible.
Intentional editing makes a difference.
Style & Design Tips
Stick to one finish, like all black or all stainless, for cohesion. Mixed appliance finishes make small counters feel chaotic.
Visual consistency calms the space.
Pro Tip or Budget Hack
Sell old appliances online to offset the cost of slimmer replacements.
6. Add Floating Shelves Above Counters
When cabinets crowd your sightline, the kitchen can feel boxed in. Floating shelves open things up while adding storage for everyday items. I prefer them for dishes I use constantly.
They keep counters clear without hiding everything behind doors.
Why This Works
You shift storage upward without expanding outward. Frequently used items become easy to grab, reducing counter pileups.
Open shelves encourage minimalism.
How to Do It
- Mount shelves securely into studs.
- Keep them 12–18 inches above the counter.
- Limit weight to essentials.
- Group items by function.
Balance prevents visual overload.
Style & Design Tips
Use matching dishware for a clean look. Random mismatched plates create clutter.
Keep styling simple and repeat shapes.
Pro Tip or Budget Hack
Paint basic wooden boards the same color as your walls for a subtle built-in effect.
7. Install Under-Cabinet Hooks
Mugs, measuring cups, and utensils often take up unnecessary drawer or counter space. Under-cabinet hooks give them a dedicated home. I installed a row for mugs and freed up half a cabinet.
It’s a small change with big payoff.
Why This Works
It uses the underside of cabinets, which usually goes unused. Items hang neatly without touching prep areas.
That separation keeps surfaces clean.
How to Do It
- Choose screw-in hooks for heavier items.
- Space them evenly for balance.
- Test weight limits before hanging fragile pieces.
- Keep them away from stove heat.
Placement matters for safety.
Style & Design Tips
Stick to one metal finish like brushed nickel or matte black. Mixed metals can look messy in a small space.
Consistency feels intentional.
Pro Tip or Budget Hack
Adhesive hooks work for lightweight measuring spoons if you don’t want to drill.
8. Create a Dedicated Coffee Station Tray
Coffee setups spread quickly across small counters. A large tray keeps everything contained in one defined zone. I tried this after my grinder and sugar jar took over an entire corner.
Now it looks styled instead of chaotic.
Why This Works
Trays create visual boundaries. Even if items stay on the counter, they feel organized.
Containment reduces perceived clutter.
How to Do It
- Choose a tray slightly larger than your coffee maker footprint.
- Group essentials only.
- Remove rarely used syrups or gadgets.
- Wipe down weekly to avoid buildup.
Editing keeps it practical.
Style & Design Tips
Use a wood or metal tray that matches cabinet hardware. Keep color palette tight.
Too many accessories defeat the purpose.
Pro Tip or Budget Hack
Repurpose a serving tray instead of buying a specialty coffee organizer.
9. Use Vertical Dish Drying Racks
Traditional drying racks sprawl across precious counter space. Vertical dish racks stack upward instead of outward. I switched after realizing my old rack blocked half my prep area.
It felt like reclaiming territory.
Why This Works
It reduces horizontal sprawl. Stacking plates upright increases capacity without increasing footprint.
Space efficiency improves instantly.
How to Do It
- Measure available counter depth.
- Choose a narrow two-tier rack.
- Position near the sink for drainage.
- Clean weekly to prevent mildew.
Proper maintenance keeps it hygienic.
Style & Design Tips
A white or stainless rack blends best in small kitchens. Bold colors draw unnecessary attention.
Keep it sleek.
Pro Tip or Budget Hack
Look for collapsible racks if you don’t air-dry daily.
10. Keep Counters Intentionally Sparse
The biggest upgrade doesn’t cost anything. Clearing non-essential decor from the counter creates immediate breathing room. I removed decorative jars once and realized I didn’t miss them at all.
Open space is powerful.
Why This Works
Visual clutter makes small kitchens feel smaller. Empty zones give your eye a place to rest.
Function improves when surfaces stay clear.
How to Do It
- Remove everything from the counter.
- Add back only daily-use items.
- Store decor elsewhere.
- Reassess monthly.
Regular resets prevent buildup.
Style & Design Tips
If you want decor, keep it to one statement piece like a small plant. Avoid multiple tiny items.
Simplicity wins here.
Pro Tip or Budget Hack
Shop your own cabinets before buying organizers. Often the solution is editing, not purchasing.
Small Kitchen Counter Strategy: Build the Right Foundation First
Maximizing counter space starts with clarity, not shopping. Before adding carts, shelves, or organizers, you need to understand how your kitchen actually functions day to day. Most small kitchens feel cramped because everything is treated as equally important, which simply isn’t true.
Start by identifying your primary kitchen habits. Do you cook full meals daily, or mostly reheat and assemble quick dishes? Your answer should determine what earns permanent counter space and what gets stored away.
Next, define clear work zones. Even in the smallest kitchen, you can create a prep zone, a cooking zone, and a cleaning zone. When each area has a purpose, clutter has fewer opportunities to spread.
Finally, commit to surface discipline. Counters are workspaces first and display areas second. If something doesn’t support daily function, it needs a new home.
Counter Space Audit Framework
A practical audit helps you make decisions without emotion. Pull everything off your counters and place it on the table so you can see the full picture.
Then sort items into three categories: daily use, weekly use, and rarely used. Only daily-use tools should return to the counter, and even those should earn their placement based on workflow.
Measure remaining open space afterward. You’ll often discover you already have more usable surface than you thought.
Vertical vs. Horizontal Thinking
Small kitchens demand vertical thinking. Walls, cabinet sides, and undersides offer storage opportunities that don’t compete with prep areas.
Horizontal clutter, on the other hand, steals function instantly. The more items spread outward, the less room you have to cook comfortably.
Train yourself to ask one question before placing anything down: could this go up instead?
Common Mistakes to Avoid
One of the biggest mistakes is over-accessorizing small counters. Decorative jars, layered cutting boards, and oversized utensil crocks may look styled in photos, but they consume valuable prep space in real life.
Another common issue is buying organizers without decluttering first. Adding storage solutions on top of excess items only rearranges the problem instead of solving it.
Ignoring measurements also causes frustration. A cart that’s two inches too wide or a rack that blocks cabinet doors can make a tight kitchen feel even tighter.
Finally, many people underestimate visual clutter. Even functional items can overwhelm the eye if finishes, colors, and shapes compete with each other.
Smart Layout Principles for Small Counter Kitchens
Flow matters more than square footage. The distance between your sink, stove, and main prep area should feel natural and unobstructed.
Keep the primary prep surface closest to your sink whenever possible. This reduces dripping, crossing paths, and unnecessary movement.
Avoid placing tall appliances in corners where they block sightlines. Clear visual lines make the room feel larger, even if nothing physically changes.
Consistency in finishes also supports a cleaner look. When appliances, hardware, and accessories share a cohesive tone, the space feels calmer and more intentional.
Maintenance Habits That Protect Your Counter Space
Even the best layout fails without maintenance. Counters fill up gradually, one mug or mail stack at a time.
Create a nightly reset routine. Wipe surfaces, return stray items to drawers, and leave at least one prep zone completely clear.
Schedule a monthly mini-declutter. Reassess what has crept back onto the counter and remove anything that no longer serves daily function.
Habits protect your progress better than any organizer ever could.
Budget Planning for Small Kitchen Upgrades
Improving counter space doesn’t require a full remodel. Many of the most effective upgrades cost less than a single large appliance.
Prioritize function-first investments. A quality rolling cart or custom cutting board extender often delivers more value than decorative upgrades.
Repurpose before purchasing new. Shelves can be painted, trays can be reused, and hooks can replace bulky storage containers.
Allocate funds strategically instead of impulsively. Small, targeted upgrades add up to meaningful change.
Frequently Asked Questions
How much counter space do I actually need in a small kitchen?
Most small kitchens function well with one clear prep zone that’s at least 24 inches wide. The key isn’t total square footage but having one uninterrupted surface where you can comfortably chop and assemble food.
Is it okay to keep appliances on the counter?
Yes, but only if you use them daily. If an appliance comes out once a month, it should live in a cabinet to protect valuable prep space.
Are open shelves better than upper cabinets?
Open shelves work well when you’re disciplined about what you display. If you tend to accumulate mismatched items, closed cabinets may keep things looking cleaner.
What’s the fastest way to make counters look bigger?
Remove non-essential decor and group necessary items on trays. Reducing visual fragmentation instantly makes surfaces feel more open.
Do small kitchens benefit from light colors?
Lighter tones can help reflect light and create visual openness. However, function and layout matter far more than paint color when it comes to counter usability.
How often should I declutter kitchen counters?
A quick weekly reset works for most households. A deeper monthly review prevents clutter from quietly building back up.
Final Thoughts
Small kitchens don’t fail because they’re small. They struggle when the layout works against you instead of for you. A few smart adjustments can shift the entire flow of the room.
I’ve tested most of these ideas myself in tight spaces, and the difference feels immediate. Start with one change and build from there. You’ll be surprised how much calmer your kitchen feels once the counter finally works with you instead of against you.