11 Walk-In Shower With Bench Ideas for Comfort
Function usually decides whether a shower feels relaxing or frustrating. When basic layouts ignore comfort, people end up balancing bottles on the floor and standing awkwardly during long showers.
A built-in bench quietly fixes several problems at once. It adds comfort, organization, and a subtle spa vibe without making the bathroom feel crowded.
Most people assume benches belong only in luxury bathrooms. In reality, even a modest walk-in shower can benefit from one with the right design choices.
1. Floating Stone Shower Bench
Standing through long showers becomes annoying faster than people expect. Shaving, scrubbing feet, or just relaxing for a moment often turns into an awkward balancing act.
A floating stone bench solves that problem while keeping the shower visually open. Instead of bulky supports, the bench appears to extend from the wall, creating a sleek and modern look.
I’ve seen this style used in surprisingly small bathrooms, and it works beautifully. The floating design keeps the floor clear, which instantly makes the space feel larger.
Why This Works
Floating benches reduce visual weight inside the shower. Because the floor remains visible underneath, the space feels cleaner and less cramped.
They also simplify cleaning. Water flows easily beneath the bench instead of collecting around legs or supports.
How to Do It
- Choose a thick slab of quartz, marble, or granite for durability
- Install hidden steel brackets inside the wall studs
- Slightly tilt the bench surface forward for water drainage
- Seal all seams carefully with waterproof silicone
- Match the bench material with your wall tile or countertop
Each step matters because showers face constant moisture. A properly anchored bench will support weight safely while lasting for years.
Style & Design Tips
Keep the bench thickness substantial. Thin stone looks fragile and sometimes cheap in a wet environment.
A contrasting stone color can turn the bench into a focal point. For example, white tiles paired with a darker stone bench look striking but still clean.
Avoid polished marble if slipping is a concern. A lightly textured finish gives better grip.
Pro Tip or Budget Hack
Quartz remnants from countertop shops often cost very little. Many suppliers sell leftover slabs perfect for a shower bench.
Ask for a cutoff piece from kitchen projects instead of buying full slabs. It saves a surprising amount of money.
2. Full-Length Spa Shower Bench
Some showers technically include a seat, but they feel cramped and awkward. A full-length bench instantly changes the experience.
This design stretches along one wall of the shower, creating enough room to sit comfortably. It feels less like a small seat and more like a mini relaxation area.
I tried a shower like this in a friend’s house once, and it genuinely felt like a spa. You suddenly realize how nice it is to sit down while hot water runs over your shoulders.
Why This Works
A long bench distributes weight and provides more sitting positions. That makes it comfortable for shaving, washing feet, or even stretching tired legs.
It also doubles as storage space. Bottles, loofahs, and towels can rest at one end without cluttering the floor.
How to Do It
- Frame the bench structure using pressure-treated lumber or foam board panels
- Waterproof the frame using cement board or foam tile backer
- Tile the bench with the same material used on the walls or floor
- Slightly slope the top surface toward the drain
- Seal all grout lines with waterproof grout sealer
These steps ensure water doesn’t seep into the structure beneath the tile.
Style & Design Tips
Matching the bench tile to the wall tile keeps the shower looking seamless. The bench blends into the overall design instead of sticking out visually.
Alternatively, choose mosaic tile on the seat surface for better grip and subtle texture.
Avoid overly glossy tiles on seating surfaces. They become slippery when wet.
Pro Tip or Budget Hack
If your shower already has a wide wall, converting part of it into a bench may only require simple framing and tiling.
Foam shower bench kits also exist and are surprisingly affordable. They save a lot of installation time.
3. Corner Triangle Shower Bench
Small showers rarely have room for a traditional seat. A triangular corner bench solves that problem without eating up precious floor space.
This design fits neatly into one corner of the shower. It provides a compact seat while keeping the main walking area clear.
Honestly, corner benches might be the most underrated shower feature. They work in nearly any bathroom size.
Why This Works
Corners naturally waste space in many showers. Installing a triangular bench uses that space efficiently.
The compact shape still offers enough room to sit comfortably or rest a foot while shaving.
How to Do It
- Install two wall brackets anchored into studs
- Cut a triangular stone or tile slab to fit the corner
- Add slight slope for drainage
- Seal edges with waterproof silicone
- Ensure the bench can support body weight
Because the bench sits in a corner, wall support becomes essential.
Style & Design Tips
Choose a stone or tile color that contrasts gently with the walls. A subtle contrast highlights the bench without overwhelming the design.
A rounded front edge softens the shape and prevents sharp corners.
Avoid extremely small benches. Even corner seating should allow comfortable positioning.
Pro Tip or Budget Hack
Pre-made corner bench kits are widely available and inexpensive. They often come ready for tile installation.
Installing one during a bathroom remodel usually takes less than an hour.
4. Marble Slab Shower Bench
Some shower designs lean toward practical simplicity. Others aim for a bit of elegance.
A marble slab bench sits right in the middle of those two ideas. It adds comfort while instantly elevating the entire shower’s appearance.
Even a small piece of marble can make a bathroom feel noticeably more refined.
Why This Works
Marble naturally resists water and handles humid environments well when sealed properly.
The smooth surface also feels cool and comfortable, especially in warm showers.
How to Do It
- Choose a thick marble slab at least 2 inches thick
- Anchor it using steel brackets hidden inside the wall
- Seal the marble surface before installation
- Install matching marble trim along the edges
- Reseal annually for protection
Proper sealing prevents stains and moisture damage.
Style & Design Tips
White marble with subtle gray veining works with almost any tile style.
Pairing marble benches with matte black fixtures creates a balanced modern look.
Avoid extremely busy marble patterns if the rest of the shower already has bold tile.
Pro Tip or Budget Hack
Marble remnants from stone fabricators often cost far less than full slabs.
Check local countertop workshops. They usually have leftover pieces perfect for shower benches.
5. Built-In Tile Bench
Some homeowners prefer a seamless look inside the shower. A built-in tile bench delivers exactly that.
Instead of installing a separate slab or seat, the bench becomes part of the tiled structure. The result looks clean, simple, and integrated.
It also tends to be one of the most durable options.
Why This Works
A fully tiled bench blends into the shower design. There are no visible brackets or supports.
Because the bench uses the same tile as the walls, the shower feels cohesive and balanced.
How to Do It
- Frame the bench structure with waterproof foam boards
- Cover the frame with cement board or foam tile backer
- Waterproof using membrane or liquid waterproofing
- Tile the surface with matching shower tile
- Grout and seal carefully
Waterproofing is the most important step here.
Style & Design Tips
Using smaller mosaic tiles on the seat surface adds traction.
Matching grout color keeps the design subtle and polished.
Avoid overly dark grout lines if the goal is a clean look.
Pro Tip or Budget Hack
Tile benches use leftover tiles from the rest of the shower project. That means fewer material costs.
Planning the bench during the initial tile layout also reduces waste.
6. Wood-Look Shower Bench
Real wood inside a shower rarely ends well. Moisture eventually wins that battle.
Wood-look tile benches offer the same warm aesthetic without the maintenance problems.
This style works especially well in modern spa-inspired bathrooms.
Why This Works
Wood-look porcelain tile resists moisture completely. It won’t warp, swell, or rot like real wood.
At the same time, it introduces warmth that stone or white tile sometimes lacks.
How to Do It
- Build the bench structure using waterproof shower panels
- Install wood-look porcelain tiles on the surface
- Use matching grout for a natural wood effect
- Slightly slope the seat for drainage
- Seal all seams carefully
Porcelain tiles designed for bathrooms hold up extremely well.
Style & Design Tips
Lighter wood tones create a relaxed spa feel.
Darker tones work nicely with black fixtures or darker floor tiles.
Avoid overly glossy wood-look tiles. Matte finishes look far more realistic.
Pro Tip or Budget Hack
Wood-look porcelain tiles often cost less than natural stone.
They also require almost no maintenance, which saves money long-term.
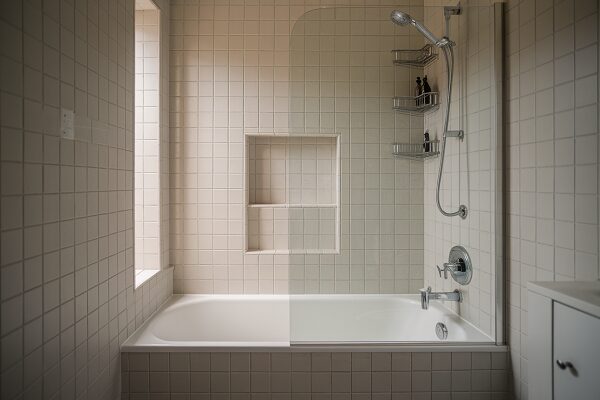
7. Bench With Storage Niche
Shower clutter happens fast. Bottles multiply and suddenly there’s nowhere to put anything.
A bench combined with built-in storage niches solves that problem neatly.
You get seating plus organized storage in the same area.
Why This Works
Vertical niches above the bench keep items within easy reach.
The design also avoids cluttering the floor with bottles or shelves.
How to Do It
- Frame the bench structure first
- Install recessed wall niches above the bench
- Waterproof the entire section carefully
- Tile both the bench and niches together
- Seal edges and grout lines
This setup keeps everything integrated and clean.
Style & Design Tips
Use contrasting tile inside the niche to highlight it.
Keeping the bench tile consistent with the wall tile maintains balance.
Avoid placing niches where water directly hits them.
Pro Tip or Budget Hack
Niche inserts are inexpensive and simplify installation.
They also reduce waterproofing mistakes.
8. Glass-Enclosed Bench Corner
Walk-in showers often feel more luxurious when enclosed with clear glass panels.
Placing the bench inside a glass corner enclosure creates a sleek spa-like setup.
The transparent glass keeps the bathroom visually open.
Why This Works
Glass enclosures reflect light and make bathrooms appear larger.
They also highlight architectural features like benches and tile patterns.
How to Do It
- Install a fixed glass panel enclosure
- Position the bench along the back wall
- Use frameless glass hardware for a modern look
- Seal edges carefully to prevent leaks
- Install anti-slip flooring near the bench
Proper sealing ensures water stays inside the shower.
Style & Design Tips
Frameless glass looks cleaner than framed enclosures.
A darker bench surface contrasts nicely with lighter wall tiles.
Avoid overcrowding the enclosure with shelves or accessories.
Pro Tip or Budget Hack
Half-glass panels often cost much less than full enclosures.
They still maintain the open feel of a walk-in shower.
9. Curved Shower Bench
Straight lines dominate most shower designs. A curved bench introduces a softer shape.
It also feels more comfortable than sharp edges.
Curved benches work especially well in larger walk-in showers.
Why This Works
The curved front allows more legroom while sitting.
It also creates a natural flow within the shower layout.
How to Do It
- Frame a curved bench structure using flexible board
- Cover with waterproof backing material
- Tile the surface using smaller mosaic tiles
- Ensure proper slope toward the drain
- Seal grout lines thoroughly
Small tiles make curved surfaces easier to tile.
Style & Design Tips
Curved benches pair beautifully with rounded shower niches.
Neutral tiles help maintain a calm spa-like appearance.
Avoid large format tiles on curved surfaces.
Pro Tip or Budget Hack
Foam curved bench kits simplify installation.
They also eliminate complicated framing work.
10. Minimalist Wall-Mounted Bench
Some bathrooms benefit from extremely simple solutions.
A slim wall-mounted bench delivers comfort without bulky construction.
It works especially well in modern minimalist bathrooms.
Why This Works
Wall-mounted benches keep the floor clear and maintain visual simplicity.
They can also fold up when not in use.
How to Do It
- Install heavy-duty wall anchors into studs
- Choose a waterproof folding shower bench
- Mount at a comfortable seating height
- Seal mounting points with silicone
- Test weight support carefully
Proper mounting ensures long-term safety.
Style & Design Tips
Choose benches with brushed metal frames for a modern feel.
Neutral seat materials blend best with tile walls.
Avoid plastic designs that look flimsy.
Pro Tip or Budget Hack
Folding shower benches cost far less than custom built-ins.
They also work great in rental properties.
11. Dual-Level Shower Bench
One bench height doesn’t work for everyone. Dual-level benches provide flexibility.
This design includes two seating levels within the same shower area.
It works particularly well in family bathrooms.
Why This Works
Different heights accommodate both adults and children comfortably.
It also creates an interesting layered design within the shower.
How to Do It
- Frame two connected bench platforms at different heights
- Waterproof the entire structure carefully
- Tile both levels with durable materials
- Slope surfaces slightly toward the drain
- Seal grout lines thoroughly
This ensures durability and safe drainage.
Style & Design Tips
Using the same tile for both levels keeps the design unified.
Accent tiles along the bench edges add subtle detail.
Avoid overly tall steps between levels.
Pro Tip or Budget Hack
If building from scratch, extending one bench slightly higher costs almost nothing extra.
Planning it during construction avoids expensive retrofits later.
Choosing the Right Shower Bench Strategy
Shower benches work best when the design supports how the shower will actually be used. Many people focus entirely on appearance and forget that seating height, placement, and materials directly affect comfort.
The smartest approach starts with function first and style second. When the bench location supports movement and water flow, the shower becomes easier to use every day.
Placement Matters More Than People Expect
Bench placement determines whether the shower feels comfortable or cramped. Installing it directly under the main showerhead often leads to excessive splashing and slippery surfaces.
Positioning the bench slightly away from the water stream usually works better. This keeps the seating area usable while still allowing easy access to the shower spray.
Consider Everyday Tasks
Most people use shower benches for specific tasks. Shaving legs, washing feet, sitting during long showers, or storing bath products are the most common reasons.
Designing the bench around these activities ensures it actually improves the shower experience. A poorly placed bench often ends up becoming nothing more than a bottle shelf.
Bench Height and Depth Guidelines
Bench comfort depends heavily on correct dimensions. If the seat is too low or too shallow, it quickly becomes uncomfortable.
A good rule of thumb is keeping the seat height between 17 and 19 inches. Depth usually works best between 12 and 16 inches, which provides support without blocking movement.
Material Choices Affect Longevity
Bathrooms deal with constant moisture, heat, and cleaning products. Choosing the wrong material can lead to staining, cracking, or long-term damage.
Porcelain tile, sealed stone, and quartz remain the most reliable options. These materials resist water and require very little maintenance over time.
Drainage Is Non-Negotiable
Even the best-looking bench can cause problems if water collects on the surface. Flat benches tend to trap water, which leads to stains and mildew.
Adding a slight slope toward the drain solves this problem easily. It keeps water moving instead of pooling on the seat.
Common Mistakes to Avoid When Adding a Shower Bench
Shower benches seem simple, but a few design mistakes can turn them into daily annoyances. Many homeowners realize these problems only after the shower is already finished.
Understanding the most common mistakes helps avoid costly remodeling later.
Installing the Bench Too Close to the Showerhead
A bench placed directly under the shower spray often becomes uncomfortable. Constant water pressure can make sitting unpleasant and slippery.
Moving the bench slightly to the side creates a more relaxing seating area. It also prevents soap bottles from constantly getting knocked over.
Ignoring Waterproofing
Waterproofing is the most critical step in any shower build. Unfortunately, it’s also one of the most overlooked.
Skipping waterproof membranes or sealing layers allows water to seep behind tile. Over time, this leads to mold growth and structural damage.
Choosing Slippery Tile Surfaces
Some tiles look beautiful but become dangerously slick when wet. Glossy marble or polished porcelain can create slipping hazards.
Using textured or matte tile surfaces improves traction and safety. Mosaic tiles also provide better grip due to their grout lines.
Making the Bench Too Small
Tiny benches often look fine in design plans but feel awkward in real use. If someone cannot sit comfortably or rest a foot easily, the bench loses its purpose.
A slightly larger bench almost always works better. Even a few extra inches can dramatically improve comfort.
Forgetting About Cleaning Access
Benches placed too close to walls or glass panels make cleaning difficult. Soap residue and hard water stains build up quickly in tight spaces.
Leaving small gaps around the bench edges makes wiping surfaces much easier. Good airflow also helps prevent mildew.
Materials That Work Best for Shower Benches
Selecting the right material often determines how long a shower bench lasts. Moisture exposure makes durability far more important than appearance alone.
Some materials simply handle bathroom environments better than others.
Quartz and Engineered Stone
Quartz has become extremely popular in modern bathrooms. It resists stains, scratches, and moisture while maintaining a polished appearance.
Because quartz is non-porous, it also requires less sealing than natural stone. This makes it a practical long-term option.
Porcelain Tile
Porcelain tile remains one of the most reliable materials for shower benches. It handles moisture extremely well and comes in countless design styles.
Many homeowners also appreciate how porcelain can imitate wood, stone, or marble while staying budget-friendly.
Natural Stone
Marble and granite benches create a luxurious look that many people love. However, natural stone requires regular sealing to prevent staining.
With proper maintenance, these materials can last for decades.
Teak and Waterproof Wood Alternatives
Real wood struggles in wet environments, but teak performs better than most species. Its natural oils help resist moisture and mold.
Even so, many homeowners prefer wood-look porcelain tile because it offers the same warmth without maintenance concerns.
Safety Considerations for Shower Benches
Comfort is important, but safety should always come first in a shower design. Wet surfaces and smooth tile can quickly become slippery.
A few small adjustments can dramatically improve shower safety.
Slip Resistance
Slip-resistant flooring around the bench area reduces accident risks. Mosaic tile floors or textured stone surfaces provide extra traction.
Rubber shower mats can help as well, though many homeowners prefer built-in tile solutions.
Proper Weight Support
Benches must support body weight safely. Floating benches require strong wall anchors connected directly to studs.
When installed correctly, these benches remain extremely sturdy.
Rounded Edges
Sharp corners inside showers create unnecessary hazards. Rounded edges on benches reduce the chance of bumps or injuries.
They also create a softer and more welcoming design.
Accessibility and Aging-in-Place Design
Shower benches often become more valuable as people get older. Sitting during showers can reduce fatigue and prevent falls.
Many modern bathroom designs now include benches specifically for accessibility and long-term comfort.
Maintenance Tips for Long-Lasting Shower Benches
Even durable materials benefit from regular care. Maintaining a shower bench properly helps prevent stains, mildew, and water damage.
Most maintenance routines are simple and quick.
Regular Cleaning
Soap residue and mineral deposits accumulate quickly in showers. Wiping the bench with mild cleaner once a week keeps surfaces looking fresh.
Avoid harsh chemicals that could damage grout or stone sealants.
Resealing Natural Stone
If the bench uses marble or granite, sealing it annually helps prevent stains. Water should bead on the surface rather than soak in.
If water stops beading, it’s time for a new sealant layer.
Check Grout and Silicone
Grout lines and silicone seams should remain intact. Cracks or gaps allow moisture to seep beneath the tile.
Repairing small issues early prevents larger repairs later.
Frequently Asked Questions
Do walk-in showers really need a bench?
Not every shower requires one, but benches significantly improve comfort. They make tasks like shaving, washing feet, or simply relaxing much easier.
They also add convenience for storing bath products.
What is the ideal height for a shower bench?
Most shower benches work best between 17 and 19 inches high. This height matches typical chair seating and feels comfortable for most adults.
Custom designs can adjust slightly based on user preference.
Can a shower bench work in a small bathroom?
Yes, especially corner or floating benches. These designs save floor space while still providing seating.
Careful placement keeps the shower from feeling crowded.
Are tiled shower benches waterproof?
They can be completely waterproof when installed properly. The key is using waterproof membranes beneath the tile.
Without that layer, moisture can eventually seep into the structure.
Is a floating bench strong enough?
Yes, when installed into wall studs with heavy-duty brackets. Many floating benches can easily support over 250 pounds.
Professional installation helps ensure proper support.
Are shower benches expensive to install?
Costs vary depending on materials and construction. Simple corner benches can be very affordable, while custom stone benches cost more.
Including the bench during a bathroom remodel usually keeps installation costs reasonable.
Final Thoughts
A shower bench seems like a small detail until you actually use one. After that, going back to a plain standing shower feels strangely inconvenient.
Comfort, storage, and better design often come from simple additions like these. Personally, I’d choose a built-in or floating bench every single time because it improves the entire shower experience without complicating the layout.