25 Oven Cleaning Hacks for Burnt Grease and Grime
You open the oven door and see a crust of burnt-on grease that looks like a science experiment gone wrong. Scrubbing it off feels like a workout you didn't sign up for. But you don't need expensive sprays or a professional cleaner to get it back to sparkling.
These 25 hacks rely on stuff you probably already have in your pantry or under the sink. They're designed to save you time, money, and a whole lot of scrubbing.
Some work overnight with zero effort, others give you a quick fix in minutes. Whether you're dealing with a light film or a thick layer of baked-on grime, there's a hack here that fits your situation.
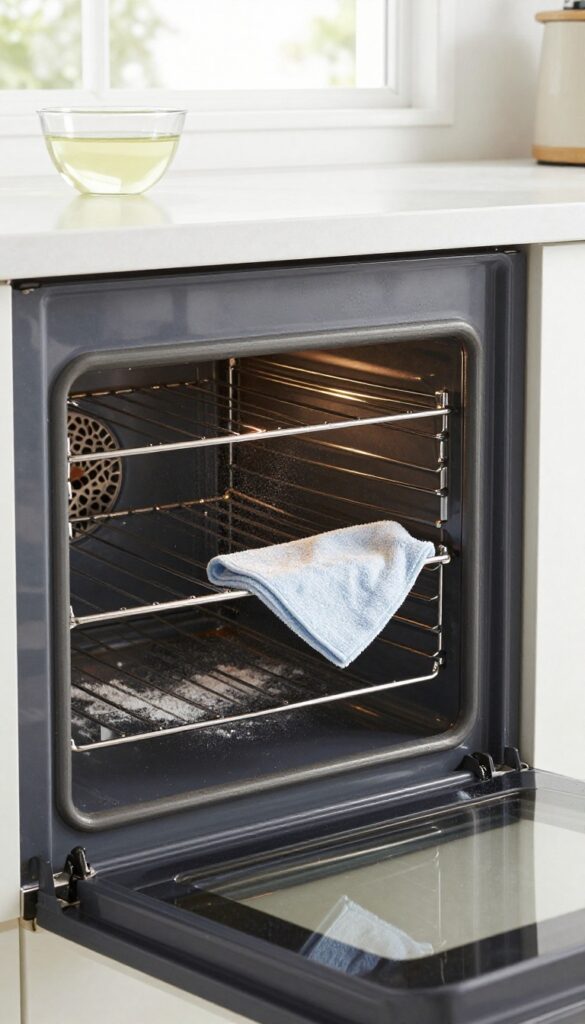
1. Baking Soda and Vinegar Paste
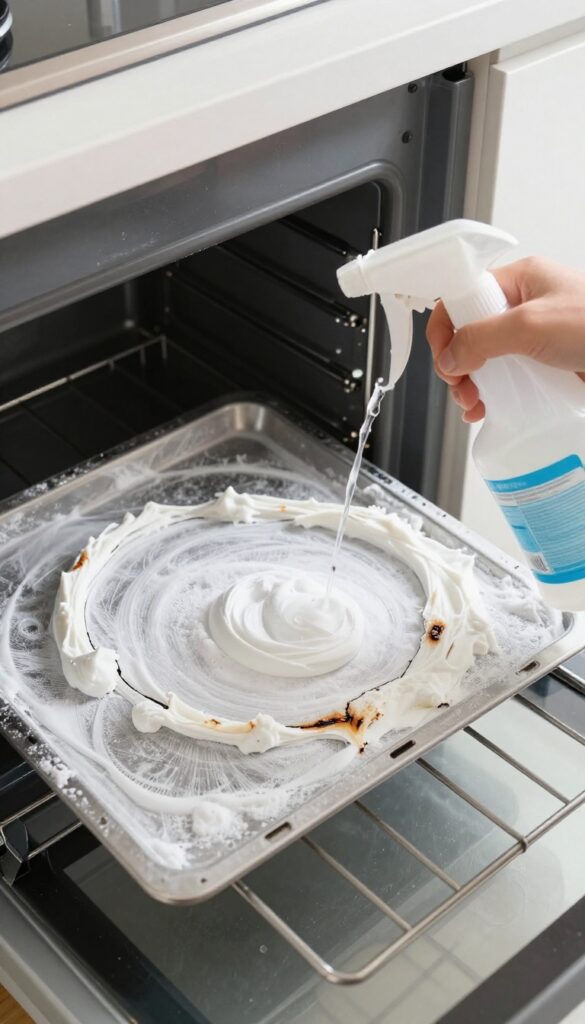
Baking soda and vinegar are the dynamic duo of natural cleaning. Together, they tackle burnt grease without harsh chemicals. This method is gentle on your oven but tough on grime, and it costs pennies compared to store-bought cleaners.
Making The Paste
Start by mixing half a cup of baking soda with a few tablespoons of water. You want a thick, spreadable paste – not too runny. Adjust the water slowly until it feels like frosting.
Applying And Waiting
Spread the paste all over the interior, focusing on greasy spots. Avoid the heating elements. Let it sit overnight or at least 12 hours.
The baking soda will loosen the baked-on grime.
The Vinegar Fizz
Fill a spray bottle with white vinegar and spritz it over the dried paste. It will foam up as the vinegar reacts with the baking soda. Wait a few minutes, then wipe everything down with a damp cloth.
Rinse well to remove any residue.
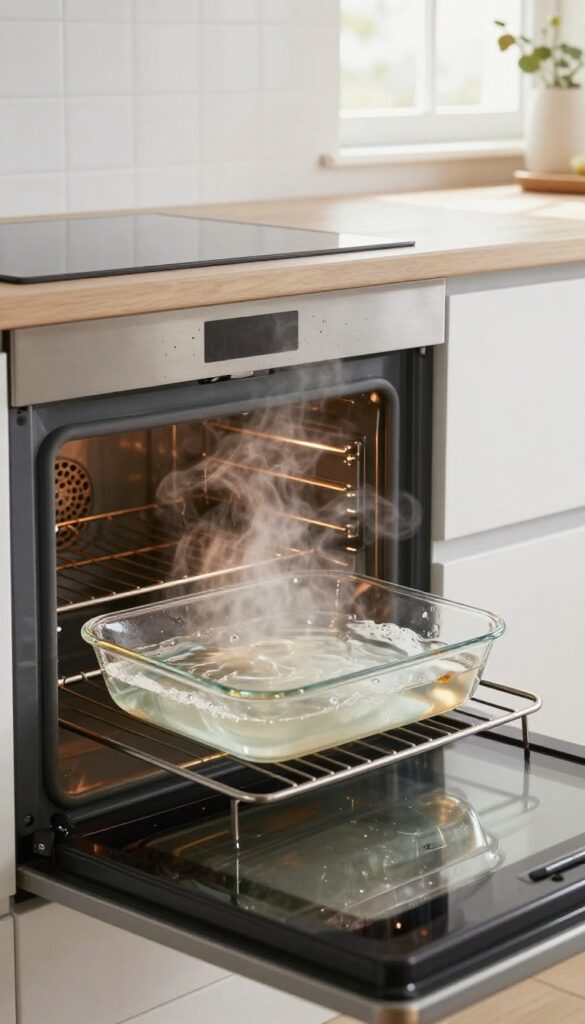
2. Lemon Steam Clean
Lemons aren't just for lemonade. Their natural acidity cuts through grease like a charm, and the steam does the heavy lifting. This hack is almost effortless: you just let the oven do the work while you sit back.
Slice a few lemons in half or into thick rounds. Place them in an oven-safe dish filled with about an inch of water. Set your oven to 250°F and let it run for 30 minutes.
The steam will soften even stubborn burnt-on grime. After it cools slightly, wipe the interior with a damp cloth. The grease wipes away without any scrubbing, leaving a fresh citrus scent behind.
Why It Works
The combination of heat, steam, and citric acid breaks down grease molecules. Steam loosens the bond between grime and the oven surface, while the acid helps dissolve the grease. It's a gentle, non-toxic method that's safe for all ovens.
Pro Tips For Best Results
Use at least three lemons for a standard oven. If you have a self-cleaning oven, avoid using this method during the self-clean cycle. For extra stubborn spots, let the steam sit for 10 more minutes before wiping.
You can also add a few sprigs of rosemary for a pleasant aroma.
3. Dishwasher Tablet Soak
Dishwasher tablets aren't just for dishes. They're packed with powerful degreasers and enzymes that break down baked-on food. One tablet can turn a tough oven cleaning job into a simple wipe-down.
Here's how to put them to work on your oven grime.
How It Works
Drop one dishwasher tablet into a bowl of hot water—about 4 cups will do. Let it dissolve completely, which takes a minute or two. The solution becomes a potent cleaning liquid that attacks grease and burnt-on residue without harsh fumes.
Application Tips
Dip a sponge or cloth into the solution and apply it generously to stubborn spots inside the oven. For vertical surfaces, use a spray bottle to keep the area wet. Let it sit for 20 minutes—don't let it dry out.
If needed, reapply to keep it damp.
Scrubbing And Rinsing
After the soak, scrub with a non-abrasive pad or sponge. The grime should lift off easily. Wipe away all residue with a damp cloth, then dry with a clean towel.
No harsh chemicals, no endless scrubbing.
4. Salt and Baking Soda Scrub
Sometimes you need a little grit to get the job done, but you don't want to scratch your oven's surface. That's where salt and baking soda come in. Together, they make a gentle abrasive scrub that cuts through baked-on grease without damaging enamel or glass.
This combo is perfect for those stubborn spots that won't budge with just a sponge and soap. It's cheap, non-toxic, and uses ingredients you probably already have in your kitchen.
How To Make The Scrub
Mix equal parts salt and baking soda in a small bowl. Add just enough water to form a thick paste. The salt provides the scrubbing power, while the baking soda helps lift grease and neutralize odors.
Application Tips
Dip a damp sponge into the paste and scrub the greasy areas in circular motions. Focus on the toughest spots first. Rinse the sponge frequently and reapply as needed.
For vertical surfaces, let the paste sit for 5-10 minutes before scrubbing to give it time to work.
Rinsing And Finishing
Once you've scrubbed away the grime, wipe down the surface with a clean, damp cloth to remove any residue. Follow up with a dry microfiber towel to prevent streaks. Your oven will look clean and feel smooth to the touch.
5. Cream of Tartar Paste
Cream of tartar is a secret weapon for tackling tough burnt-on messes without harsh chemicals. When mixed with hydrogen peroxide, it creates a gentle but effective paste that breaks down grease and grime. This hack works especially well on baked-on spills that have turned into stubborn crust.
How To Make The Paste
In a small bowl, combine two tablespoons of cream of tartar with just enough hydrogen peroxide to form a thick paste. Stir until it has a spreadable consistency—like toothpaste. Apply it directly to the burnt areas, focusing on the thickest spots.
Application And Wait Time
Spread the paste evenly over the grime, then let it sit for at least 15 minutes. For extra-stubborn layers, leave it on for up to an hour. The cream of tartar lifts the burnt residue while the peroxide helps break down the grease bonds.
Wiping It Clean
After the waiting period, wipe the paste away with a damp cloth. Most of the burnt-on mess should come off with minimal effort. For any remaining spots, use a soft sponge or non-abrasive scrubber.
Rinse the area with water and dry it thoroughly.
6. Ammonia Fumes Method
Ammonia is a heavy-duty degreaser that works without you lifting a finger. The fumes do the hard work of breaking down burnt-on grease while you sleep. Just be sure to ventilate the kitchen well and keep pets and kids away.
This method is perfect for thick, baked-on grime that won't budge with scrubbing. It's a set-it-and-forget-it approach that requires minimal effort for maximum results.
How It Works
Place a small bowl of household ammonia in your cold oven (make sure it's turned off and completely cool). Close the door and let it sit overnight. The ammonia fumes react with the grease, softening it so you can wipe it away easily the next morning.
Safety First
Ammonia fumes are strong, so open windows and turn on a fan. Wear gloves and avoid breathing in the fumes directly. Keep the oven door closed during the process.
Afterward, wipe down the interior with a mix of water and vinegar to neutralize any residue.
Best For
This hack works wonders on oven racks and the interior walls. It's especially effective for grease that has been baked on multiple times. However, avoid using it on self-cleaning oven liners or aluminum surfaces, as ammonia can damage them.
7. Steam with Water and Vinegar
Steam is a powerful, chemical-free way to loosen baked-on grease and grime. When you combine water with vinegar, you get a gentle but effective cleaning duo that softens even stubborn burnt spots. This method requires almost no scrubbing — just heat, steam, and a wipe.
Fill an oven-safe dish with equal parts water and white vinegar, then place it on the bottom rack. Set the oven to 250°F (120°C) and let it run for 15 minutes. The steam will condense on the walls, ceiling, and door, softening the gunk.
After turning off the oven and letting it cool slightly, wipe down all surfaces with a damp cloth or sponge. For tough spots, sprinkle a little baking soda on the cloth for extra abrasion.
Why Vinegar Works
Vinegar is acidic, which helps break down grease and mineral deposits. When heated, it releases steam that penetrates baked-on layers, making them easier to wipe away. It's also safe to use around food and won't leave harsh chemical residues.
Best For Light To Medium Grime
This hack works wonders for ovens with a moderate layer of grease or recent spills. For thick, charred buildup, you may need to repeat the process or follow up with a paste of baking soda and vinegar.
Safety Tips
Never leave the oven unattended while steaming. Use an oven-safe dish (glass or ceramic) to avoid cracking. Let the oven cool before wiping to prevent burns.
Open windows or turn on the vent to reduce vinegar smell.
8. Dryer Sheet Soak
If you've got a box of dryer sheets under the laundry sink, you're about to discover their secret superpower. Those little sheets aren't just for softening clothes—they can soften burnt-on grease too. The fabric softener contains surfactants that break down grime, making this a surprisingly effective oven cleaning hack.
Dryer sheets are infused with fabric softeners that contain cationic surfactants. These compounds are designed to reduce static cling, but they also happen to be excellent at breaking down grease and baked-on food residues. When you soak a dryer sheet in warm water and lay it over a greasy spot, the surfactants go to work loosening the grime.
After an hour, you can wipe or scrub the area with minimal effort. It's a gentle method that won't scratch your oven's interior, making it safe for glass doors and enamel surfaces.
How To Use Dryer Sheets On Oven Grease
First, make sure your oven is cool. Grab a few dryer sheets (new or used both work, but new ones have more softener). Soak them in warm water until they're fully saturated.
Lay the wet sheets directly over the greasy or burnt areas, pressing them into place so they make good contact. Let them sit for at least an hour—overnight for tougher spots. Then remove the sheets and wipe the area with a damp cloth.
For stubborn residue, scrub gently with a non-abrasive sponge.
Why This Hack Works So Well
The fabric softener coating on dryer sheets contains fatty acids and surfactants that are excellent at emulsifying grease. When combined with the warmth of the water, these compounds penetrate the baked-on layer and lift it away from the surface. Unlike harsh chemical cleaners, dryer sheets are mild and won't damage your oven's finish.
Plus, they leave behind a fresh laundry scent that neutralizes kitchen odors.
Tips For Best Results
Use unscented dryer sheets if you prefer no fragrance. For vertical surfaces like the oven door, press the wet sheet against the glass and let it stick—it should cling on its own. If the sheet dries out before the time is up, re-wet it with warm water.
This method works best on light to moderate grease; for thick, charred buildup, you may need to repeat or combine with another hack.
9. Baking Soda and Hydrogen Peroxide
When baking soda alone isn't cutting it, hydrogen peroxide steps in to boost its cleaning power. This combo creates a fizzing paste that lifts burnt grease without harsh scrubbing. It's a gentle but effective method for those stubborn spots that refuse to budge.
Mix baking soda and hydrogen peroxide to form a thick paste—about three parts baking soda to one part peroxide works well. Spread it over the greasy areas and let it sit until dry, usually 30 minutes to an hour. The paste will pull the grime to the surface, so all you need is a damp sponge to wipe it away.
For extra stubborn spots, let it sit overnight.
Why This Combo Works
Baking soda is a mild abrasive that scrubs without scratching, while hydrogen peroxide breaks down organic stains and grease. Together, they create a chemical reaction that loosens burnt-on food. Plus, hydrogen peroxide has mild bleaching properties that can help brighten the oven interior.
How To Apply It Right
Start with a clean, dry surface. Apply the paste generously with a spatula or gloved hand, focusing on the worst spots. Let it dry completely—you'll see it turn white and powdery.
Then dampen a sponge with warm water and scrub gently. Rinse with a clean wet cloth to remove any residue.
Safety Tips To Keep In Mind
Always test on a small hidden area first, especially if your oven has a non-stick coating. Avoid using on aluminum surfaces, as hydrogen peroxide can cause discoloration. Wear gloves to protect your skin, and keep the oven door open while the paste dries to ensure ventilation.
10. Bar Keepers Friend Cleaner
Bar Keepers Friend is a powerhouse cleaner that many people reserve for stainless steel sinks and cookware. But it works wonders on oven grime too. The fine powder contains oxalic acid, which cuts through burnt-on grease and carbonized food without scratching surfaces.
It's especially effective on oven racks and glass doors.
For heavy-duty oven cleaning, Bar Keepers Friend is a game-changer. It tackles the toughest baked-on messes with minimal effort. The key is to use it as a paste and let it sit for a minute to break down the grime before scrubbing.
How To Apply It
Sprinkle a small amount of Bar Keepers Friend powder onto a damp sponge or directly onto the soiled area. Add a few drops of water to form a paste. Let it sit for about one minute—don't let it dry completely.
Then scrub gently in circular motions. Rinse thoroughly with water and wipe dry.
Best Uses In The Oven
This cleaner shines on oven racks, drip pans, and the glass door. For racks, remove them and apply the paste, scrub, then rinse. For the glass, be gentle to avoid scratches.
It also works on ceramic cooktops if you have a spillover.
Safety And Precautions
Always wear gloves to protect your skin. Avoid using on aluminum, chrome, or painted surfaces as it may cause discoloration. Test on a small hidden area first.
Rinse well to remove all residue before using the oven.
11. Magic Eraser for Glass Door
That oven door glass can be a real eyesore when it's coated in a stubborn haze of grease and baked-on splatters. You've tried wiping it with soapy water, but nothing seems to cut through the grime without leaving streaks. A magic eraser is the unsung hero for this specific job.
Melamine foam, the core material in magic erasers, works like a super-fine sandpaper to lift grease and residue without scratching the glass. It's especially effective on the inside of the door where heat has baked spills into a tough film. The best part?
You don't need any additional cleaner—just water.
How To Use It Right
First, make sure the oven is completely cool. Dampen the magic eraser with water and wring out any excess so it's just moist, not dripping. Gently rub the glass in circular motions, focusing on the worst spots.
The eraser will start to break down the grease almost immediately. Rinse the eraser as needed when it gets dirty. After you're done, wipe the glass with a clean, damp cloth to remove any residue.
Where It Works Best
This hack is perfect for the outer glass door and the inner pane if you can access it. It's also great for cleaning the small glass window on the oven door if you have a double-walled design. Avoid using it on the rubber gasket or any painted surfaces, as the abrasive nature can cause damage.
Pro Tip For Stubborn Spots
For really baked-on grime, let the damp magic eraser sit on the spot for a couple of minutes before rubbing. This softens the residue and makes it easier to lift. You can also add a tiny drop of dish soap to the eraser for extra degreasing power.
12. Vinegar and Cornstarch Spray
Vinegar is a classic cleaner, but it can run off vertical surfaces too quickly to tackle tough grime. Adding cornstarch turns it into a thick, clingy spray that stays put and works longer. This simple tweak makes a big difference on baked-on grease.
This spray combines the degreasing power of vinegar with the gentle abrasiveness of cornstarch. The cornstarch helps the mixture adhere to greasy surfaces, giving it time to break down grime without constant reapplication. It's safe for most oven interiors and leaves a streak-free finish.
Why Cornstarch Works
Cornstarch acts as a mild thickener and absorbent. When mixed with vinegar, it creates a paste-like spray that clings to vertical oven walls and racks. The starch also helps lift grease particles so they wipe away easily.
How To Apply It
Mix equal parts white vinegar and water in a spray bottle. Add one tablespoon of cornstarch, screw on the lid, and shake vigorously until the cornstarch dissolves. Spray generously on burnt-on grease and let it sit for 15–20 minutes.
Wipe with a damp cloth or sponge.
Best Uses And Tips
This spray works best on light to moderate grease buildup. For heavy layers, you may need to repeat or let it sit longer. Avoid using on self-cleaning oven liners or aluminum surfaces, as vinegar can cause discoloration.
13. Self-Cleaning Cycle Hack
Your oven's self-cleaning cycle is like a built-in pressure washer—if you use it right. Many people skip it because of the smoke or smell, but with a little prep, it can save you hours of scrubbing. The key is knowing what to do before and after the cycle runs.
Prep Work Matters
Before hitting that clean button, grab a paper towel or a damp cloth and wipe out any loose crumbs or big chunks of food. If you leave those in, they'll burn and create extra smoke. Also, check that your oven door handles are securely attached—some models warn that the high heat can loosen them.
If yours are wobbly, skip this hack or remove them first.
After The Cycle
Once the cycle finishes and the oven cools down, open the door and you'll see a layer of white or gray ash. That's all the burnt-on grease turned to dust. Take a damp microfiber cloth and wipe it away—no scrubbing needed.
Just be gentle around the door seal to avoid damaging the gasket. If there are stubborn spots, a quick spray of vinegar water helps lift them.
When Not To Use It
This hack isn't for every oven. If your oven has loose handles, a damaged door seal, or if you've never cleaned it before and the grime is inches thick, the self-cleaning cycle can create a lot of smoke and even a small fire risk. For those cases, stick with the other hacks in this list.
Also, never use oven cleaner inside a self-cleaning oven—the chemicals can react badly with the high heat.
14. Pumice Stone for Burnt Spills
Burnt-on spills on the oven floor can feel impossible to remove without harsh chemicals. A pumice stone offers a surprisingly simple solution. This volcanic rock acts like fine sandpaper, gently abrading the gunk without scratching the oven's surface.
Pumice stones are a gentle abrasive tool that works wonders on tough, baked-on messes. They are especially effective on oven floors where spills have carbonized into a hard crust. The key is to use the stone wet and apply light pressure.
This method is safe for porcelain and glass surfaces, but avoid using it on non-stick coatings.
How To Use A Pumice Stone
First, wet the pumice stone thoroughly. You can soak it in water for a few minutes. Then, gently rub the stone over the burnt spill using circular motions.
The stone will gradually wear down the residue. Rinse the stone periodically to remove debris. Once the spill is gone, wipe the area with a damp cloth.
Where It Works Best
Pumice stones are ideal for the oven floor, especially on porcelain enamel surfaces. They can also be used on oven racks and glass doors, but test a small area first. Avoid using on aluminum or non-stick surfaces, as it may cause scratches.
Tips For Best Results
Keep the stone wet while scrubbing to prevent scratching. Use a light touch—let the stone do the work. For extra stubborn spots, add a drop of dish soap to the stone.
After cleaning, rinse the oven floor thoroughly to remove any stone dust.
15. Ketchup for Copper and Brass
Ketchup isn't just for fries—it's a surprisingly effective cleaner for copper and brass accents on oven racks. The acidity in tomatoes cuts through tarnish and grime, restoring shine without harsh chemicals. It's a gentle, food-safe option that works wonders on those decorative metal parts.
If your oven racks have copper or brass accents, ketchup can bring back their luster. Squeeze a generous amount onto the metal sections, spread it evenly, and let it sit for about 15 minutes. The acids break down oxidation and burnt-on residue, making scrubbing much easier.
After the wait, scrub gently with a soft brush or sponge, rinse thoroughly with water, and dry with a clean cloth. The result is a bright, polished finish that looks almost new. This hack is especially useful for vintage or decorative racks where you want to avoid abrasive cleaners that could scratch the metal.
Plus, it's cheap and non-toxic, so you can use it without worrying about fumes or residue near food.
Why Ketchup Works
Ketchup contains vinegar, citric acid, and salt—a trio that dissolves tarnish and grease. The acidity reacts with copper oxides, turning them into soluble compounds that rinse away. The salt adds mild abrasion, helping to lift grime without scratching.
How To Apply
Apply a thick layer of ketchup directly to the copper or brass accents. Use a brush or your fingers (with gloves) to coat evenly. Let it sit for 15 minutes—longer for heavy tarnish.
Then scrub with a non-abrasive sponge or soft toothbrush, rinse well, and dry immediately to prevent water spots.
Tips For Best Results
For extra stubborn spots, add a pinch of baking soda to the ketchup to boost abrasion. Avoid leaving ketchup on for more than 30 minutes, as prolonged acid contact can dull the finish. Always test on a small hidden area first, especially on lacquered metals.
16. Oven Rack Bag Method
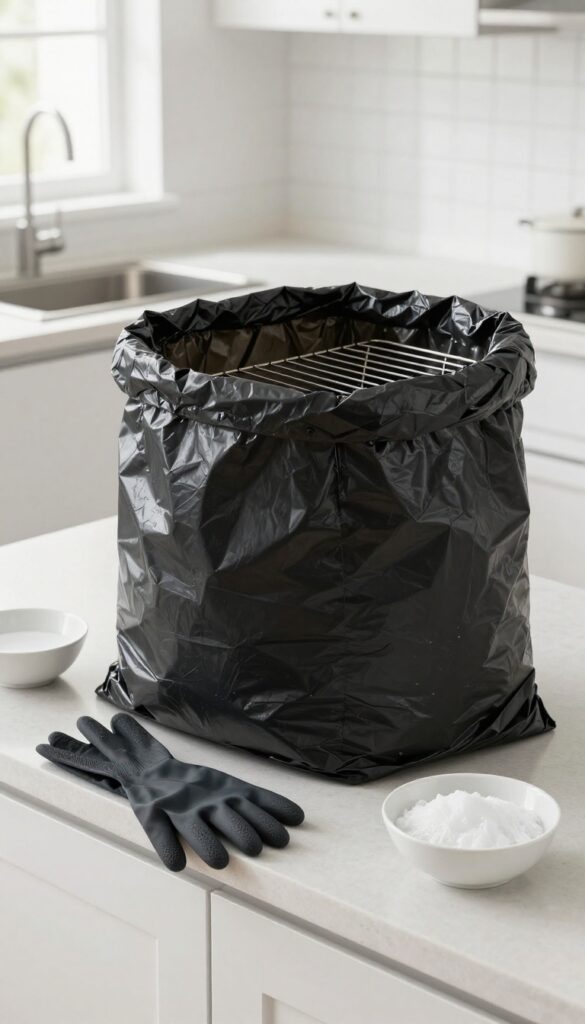
Oven racks are often the toughest part to clean because they don't fit in the sink and scrubbing every bar is tedious. The bag method lets you soak them overnight with minimal effort. All you need is a large trash bag and a cleaning agent that breaks down grease while you sleep.
This hack works wonders for baked-on grease that won't budge with scrubbing. The sealed bag creates a fume chamber that loosens grime without you lifting a finger. Just remember to do this in a well-ventilated area or outdoors, especially if using ammonia.
What You'll Need
Grab a heavy-duty trash bag big enough to hold your oven racks, 1/2 cup of ammonia or 4-5 dishwasher tablets, and a pair of gloves. That's it. No special tools required.
The Setup
Place the racks inside the bag. If using ammonia, pour it into a bowl and set it in the bag with the racks—don't pour directly on the racks. If using dishwasher tablets, place them on a damp cloth inside the bag.
Seal the bag tightly and let it sit overnight or for at least 8 hours.
Rinse And Wipe
The next day, open the bag in a ventilated area. Wearing gloves, remove the racks and rinse them with warm water. Grease and grime should slide off easily.
For stubborn spots, scrub gently with a sponge. Dry thoroughly before putting them back.
17. Baking Soda and Lemon Juice
Baking soda and lemon juice are a dynamic duo for cutting through burnt grease. The acid in the lemon reacts with the baking soda to create a fizzy foam that lifts grime without harsh scrubbing. This paste is gentle enough for enamel surfaces but tough on baked-on gunk.
How To Make The Paste
In a small bowl, mix about half a cup of baking soda with the juice of one lemon. Stir until it forms a thick, spreadable paste. The mixture will bubble up immediately—that's the reaction doing its job.
Let it settle for a minute before applying.
Application And Wait Time
Use a spatula or your fingers (wearing gloves) to coat the greasy areas evenly. Focus on the toughest spots. Let the paste sit for 15 to 30 minutes.
For extra-stubborn grime, leave it on for up to an hour. The longer it sits, the more it breaks down the grease.
Wiping It Clean
After the wait, dampen a microfiber cloth with warm water and wipe away the paste. The grease should come off easily. If any residue remains, a gentle scrub with a non-abrasive sponge will finish the job.
Rinse with a clean damp cloth to remove any leftover lemon stickiness.
18. Steam Clean with Microwave Bowl
Steam is one of the most effective ways to loosen burnt-on grease without scrubbing. This hack uses your microwave to generate steam that softens grime in the oven. It's a clever two-step process that starts in the microwave and ends with a much easier wipe-down.
Fill a microwave-safe bowl with 1 cup of water and 1/2 cup of white vinegar. Microwave on high for 5 minutes until the mixture is boiling and the microwave is filled with steam. Carefully remove the bowl (it's hot! ) and transfer it to the oven.
Close the oven door and let the steam sit for 15–20 minutes. The steam will soften the burnt-on grease, making it easy to wipe away with a sponge or cloth. For extra tough spots, repeat the process or add a bit of baking soda to your cleaning cloth.
Why Vinegar Works
Vinegar is acidic, which helps break down grease and grime. When heated, the steam carries the vinegar particles into the air, allowing them to penetrate baked-on residue. This combination of heat and acidity is a powerful natural cleaner.
Safety Tips
Always use a microwave-safe bowl and handle it with oven mitts to avoid burns. Make sure the oven is turned off and cool before placing the bowl inside. Don't open the oven door while the steam is working—let it sit undisturbed for the best results.
When To Use This Hack
This method works best for light to moderate grease buildup. For thick, crusty layers, you may need to combine it with a baking soda paste or a longer soak. It's also a great maintenance hack to use between deep cleans.
19. Toothbrush for Crevices
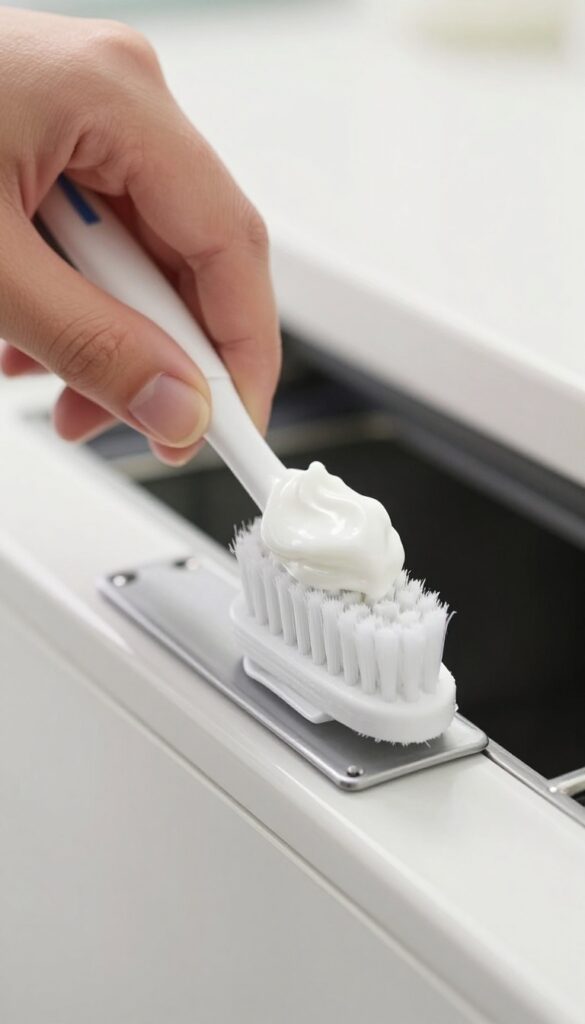
An old toothbrush is one of the best tools for reaching the tight spots in your oven. Door seals, hinges, and the edges of the control panel collect grime that a sponge can't touch. Pair it with a simple baking soda paste, and you'll be amazed at what comes out.
Dip the toothbrush into a thick paste of baking soda and water, then scrub along the rubber gasket around the oven door. Pay extra attention to the folds where grease hides. For hinges and small crevices, work the bristles back and forth to loosen the buildup.
Wipe away the residue with a damp cloth afterward.
Why A Toothbrush Works Best
The stiff bristles of a toothbrush can dig into narrow gaps without scratching the surface. Unlike a cloth or sponge, the bristles reach deep into the folds of the door seal where grease and food particles accumulate. It's also small enough to maneuver around knobs and control buttons.
Making The Perfect Baking Soda Paste
Mix three parts baking soda with one part water until it forms a spreadable paste. Add a few drops of dish soap for extra degreasing power. The paste should be thick enough to stay on the brush without dripping.
If it's too runny, add more baking soda.
Step-by-step Cleaning
Start by removing loose debris with a dry cloth. Dip the toothbrush in the paste and scrub the door seal in small circular motions. Focus on one section at a time.
For stubborn spots, let the paste sit for five minutes before scrubbing. Wipe clean with a damp microfiber cloth. Repeat if necessary.
20. Coffee Filter for Streak-Free Wipe
You've scrubbed and rinsed, but when the oven door dries, there are those annoying streaks and lint bits stuck to the glass. A coffee filter is the secret to a flawless finish. They're designed to trap fine particles, so they won't leave behind fibers or scratches.
Coffee filters are ultra-absorbent and lint-free, making them perfect for the final polish. They pick up any leftover moisture and cleaning residue without leaving streaks. Plus, they're disposable, so you don't have to worry about dirtying a cloth.
Why Coffee Filters Work So Well
Unlike paper towels, which can leave lint, coffee filters are made from dense, fine fibers that trap dust and liquid. They're also gentle on glass and enamel surfaces, so you won't scratch the oven door or interior.
How To Use A Coffee Filter For Streak-free Results
After cleaning your oven with a spray or paste, use a damp coffee filter to wipe away any remaining cleaner. Then, take a dry coffee filter and buff the surface in circular motions. For the glass door, finish with a final dry wipe for a crystal-clear shine.
Bonus Tip: Use A Coffee Filter For Other Appliances
This trick isn't just for ovens. Use a coffee filter to polish stainless steel, mirrors, and even windows. It's a cheap, effective way to get a streak-free shine on any smooth surface.
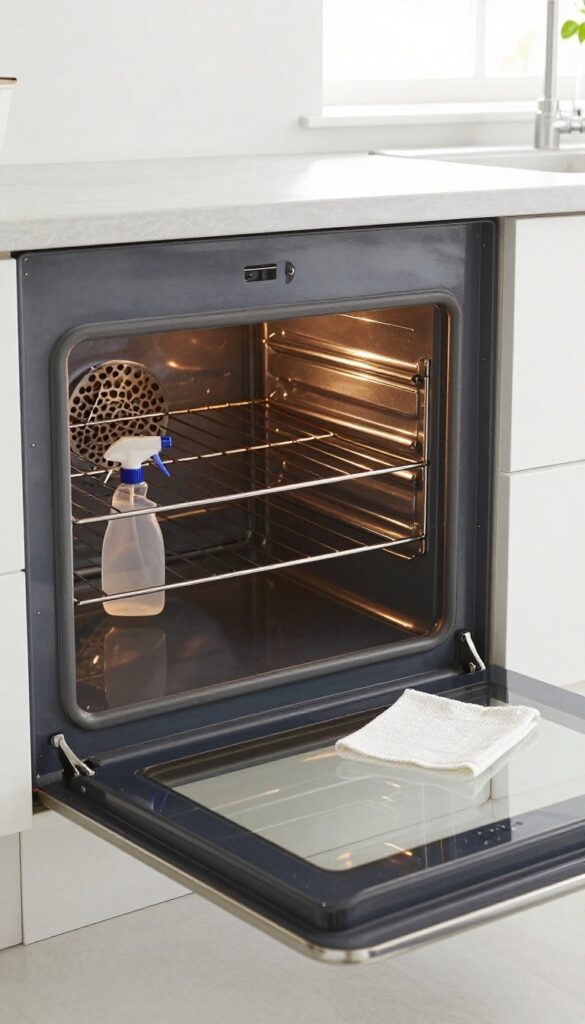
21. White Vinegar and Dish Soap Spray
White vinegar is a powerhouse when it comes to cutting through grease, and dish soap adds that extra lifting power. Together, they make a spray that loosens burnt-on grime without harsh chemicals. You probably already have both in your kitchen, so there's no need to buy anything special.
Mix equal parts white vinegar and water in a spray bottle, then add a few squirts of dish soap. Shake gently to combine, then spray the solution generously over the greasy areas. Let it sit for 10–15 minutes so the vinegar can break down the grease and the soap can lift it away.
After the wait, wipe with a damp sponge or microfiber cloth. For stubborn spots, spray again and let it sit longer, or scrub gently with a non-abrasive pad. Rinse with a clean damp cloth to remove any residue.
Why This Combo Works So Well
Vinegar is acidic, which helps dissolve the alkaline buildup of burnt grease. Dish soap is a surfactant, meaning it reduces surface tension and allows the vinegar to penetrate the grime more effectively. Together, they create a solution that's stronger than either alone, yet still safe for most oven surfaces.
Best Surfaces To Use It On
This spray is perfect for the interior walls, floor, and door of your oven. It's also safe for glass oven doors, though you may want to avoid getting it on the heating elements. For tough baked-on spots, let the spray sit for up to 30 minutes, then scrub with a soft brush or sponge.
A Few Extra Tips
If the grease is really thick, try using warm water instead of cold to help dissolve it faster. You can also add a tablespoon of baking soda to the mix for extra abrasion, but be aware it will fizz. Always test on a small, hidden area first if you're worried about your oven's finish.
22. Oven Cleaner with Fume-Free Formula
Not everyone can handle the harsh chemical fumes that come with traditional oven cleaners. If you're sensitive to strong smells or just prefer a gentler approach, a non-toxic fume-free formula is your best bet. These cleaners are just as effective at breaking down burnt grease and grime, without the eye-watering odor.
Choose a non-toxic oven cleaner spray, apply generously to the interior surfaces, and let it sit for the time recommended on the label—usually 15 to 30 minutes. Then wipe away the loosened grime with a damp cloth or sponge. For stubborn spots, a gentle scrub with a non-abrasive pad can help.
Rinse thoroughly with water to remove any residue.
Why Fume-free Works
These cleaners use natural enzymes, plant-based surfactants, or mild alkalis to dissolve grease without releasing volatile organic compounds (VOCs). They're safe for households with kids, pets, or anyone with respiratory issues. Plus, you won't need to air out the kitchen for hours after cleaning.
Top Picks To Look For
Brands like Method, Mrs. Meyer's, and Seventh Generation offer effective fume-free sprays. You can also find concentrated formulas that you dilute with water.
Check labels for certifications like EPA Safer Choice to ensure they're truly non-toxic.
Application Tips For Best Results
For heavy buildup, apply a thick layer and let it sit longer—up to an hour. If the oven is warm (not hot), the cleaner works faster. Always wear gloves to protect your skin, even with natural formulas.
After wiping, do a final pass with a vinegar-water solution to remove any leftover film.
23. Steam Mop for Oven Floor
The oven floor often takes the worst of spills and splatters, and scrubbing it on your hands and knees is nobody's idea of fun. A handheld steam mop can change that. It uses high-temperature steam to break down burnt-on food without harsh chemicals, and it's surprisingly easy to use.
A steam mop isn't just for floors—it's a secret weapon for oven cleaning. The steam penetrates tough grime, softening it so you can wipe it away with a cloth. This method works best when the oven is cool to avoid burns and to let the steam do its job without evaporating too quickly.
Why Steam Works So Well
Steam is a natural degreaser. It loosens carbonized food and grease without the need for scrubbing pads that can scratch the oven surface. The heat also helps kill bacteria, leaving your oven not just clean but sanitized.
How To Use A Steam Mop Safely
Make sure the oven is completely cool before you start. Fill your handheld steam mop with water according to the manufacturer's instructions. Glide the mop over the oven floor, focusing on the worst spots.
Let the steam sit for a minute, then wipe with a microfiber cloth. Repeat if needed.
Best Practices For Stubborn Spots
For really baked-on messes, hold the steam mop over the area for an extra 10–15 seconds. You can also use a plastic scraper gently after steaming to lift any remaining bits. Avoid using metal scrapers, which can damage the enamel.
24. Cat Litter for Grease Absorption
Fresh grease spills in the oven can be a pain to wipe up, especially when they're still hot and slippery. But before you reach for a paper towel, grab a scoop of unscented cat litter. The clay granules are surprisingly good at soaking up oil and grease, turning a messy puddle into a solid clump you can sweep away.
This hack works best on fresh spills that haven't had time to bake on. Once the oven has cooled enough to touch safely, sprinkle a generous layer of unscented cat litter directly over the grease. Let it sit for 10–15 minutes to absorb the oil, then sweep up the litter with a dustpan and brush.
Follow up with a quick wipe using a degreaser spray to remove any remaining residue.
Why Unscented Matters
Scented cat litter often contains perfumes and chemicals that can leave a lingering smell when heated. Stick with plain, unscented clay litter to avoid any funky odors the next time you preheat the oven. It's also cheaper and easier to find.
When To Use This Hack
This method is ideal for large, fresh spills like a casserole that bubbled over or a roasting pan that leaked fat. It's less effective on dried, baked-on grease, so use it right after the mess happens. For older grime, combine with a soaking method first.
Pro Tip: Combine With Baking Soda
For extra absorbing power, mix a handful of baking soda into the cat litter before sprinkling. Baking soda helps neutralize odors and boosts the grease absorption. Just don't use too much, or the mixture might become pasty.
25. Regular Maintenance with Aluminum Foil
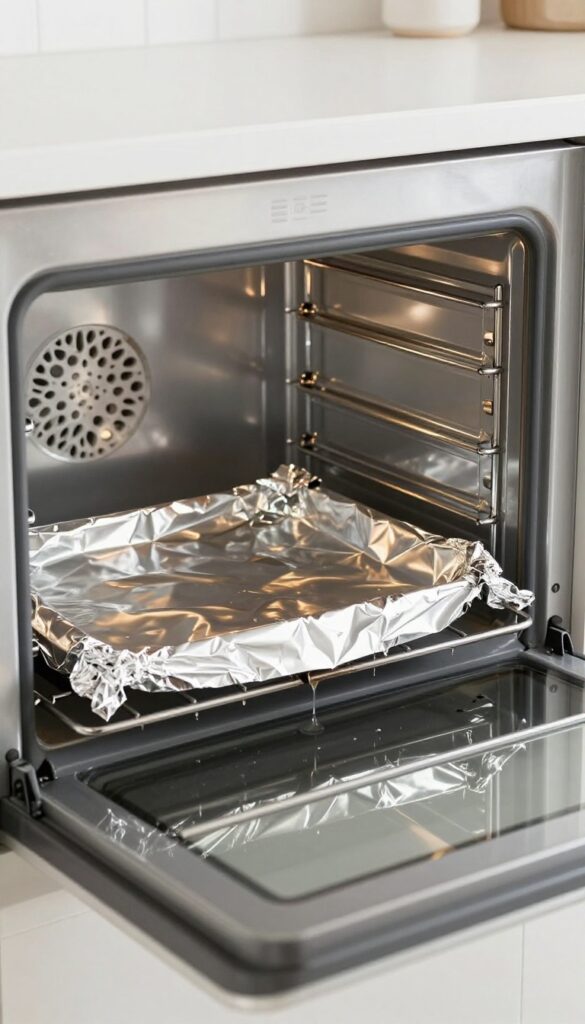
Staying ahead of the mess is easier than you think. A simple sheet of aluminum foil can save you from hours of scrubbing later. By lining the bottom of your oven, you catch drips and spills before they have a chance to bake into stubborn grime.
Aluminum foil is a cheap, effective way to keep your oven cleaner for longer. The key is to place it correctly so it doesn't interfere with heating elements or airflow. This hack works best when you make it a habit after every use.
How To Line Your Oven Safely
Start by measuring the bottom of your oven. Cut a piece of heavy-duty aluminum foil slightly smaller than the floor. Make sure it doesn't touch the heating elements at the top or bottom—this is crucial to avoid fire hazards.
Lay the foil flat, shiny side up, and smooth out any wrinkles. If your oven has a removable bottom panel, you can wrap that instead for even easier cleanup.
When To Replace The Foil
After each messy baking session, check the foil. If it's covered in grease or burnt drips, simply remove it and replace it with a fresh sheet. For lighter use, you can reuse the same foil a few times by wiping it down with a damp cloth.
Just make sure it's not torn or heavily soiled.
What To Avoid
Never line the entire oven rack with foil—it blocks heat circulation and can cause uneven cooking or even damage. Also, avoid using foil on the oven floor if your oven has a hidden heating element beneath the floor. Check your manual to be safe.
Stick to the bottom only, and you'll keep your oven clean without any risk.
FAQ
Can I use bleach to clean my oven?
It's not recommended. Bleach can damage oven surfaces and produce harmful fumes when heated. Stick to baking soda, vinegar, or commercial oven cleaners.
How often should I deep clean my oven?
Every 3 to 6 months, depending on usage. If you notice smoke or strong odors during preheating, it's time for a clean.
Is it safe to use the self-cleaning cycle?
Yes, but it can produce high heat and smoke. Remove oven racks and wipe loose debris first. Ensure good ventilation.
What should I avoid using on oven glass?
Avoid abrasive scrubbers, steel wool, and harsh chemicals that can scratch or etch the glass. Use soft sponges or magic erasers.
Can I clean oven racks in the dishwasher?
Only if they are labeled dishwasher-safe. Many racks have coatings that can be damaged by dishwasher detergent. Check your manual.
Conclusion
You don't need to dread oven cleaning anymore. With these 25 hacks, you can pick the method that fits your schedule and the level of grime you're facing. Most of them use items you already own, so there's no need for a special trip to the store.
Try a couple of these tricks and see which ones work best for your oven. A little regular maintenance goes a long way in preventing burnt-on buildup. Your future self will thank you when the oven looks spotless with minimal effort.