11 Cabin Shower Ideas That Make the Whole Room Look Better
Most cabin bathrooms fail at one thing: they treat the shower like an afterthought instead of the focal point. That’s usually where the whole space starts to feel either cramped or oddly unfinished.
A good shower setup can actually carry the entire look of the bathroom if you get a few key details right. Materials, layout, and even small hardware choices end up doing more heavy lifting than people expect.
I’ve tried a few of these ideas myself (and messed up a couple along the way), so I’ll walk you through what actually works and what just looks good on Pinterest but falls apart in real life.
1. Natural Wood Panel Shower Walls
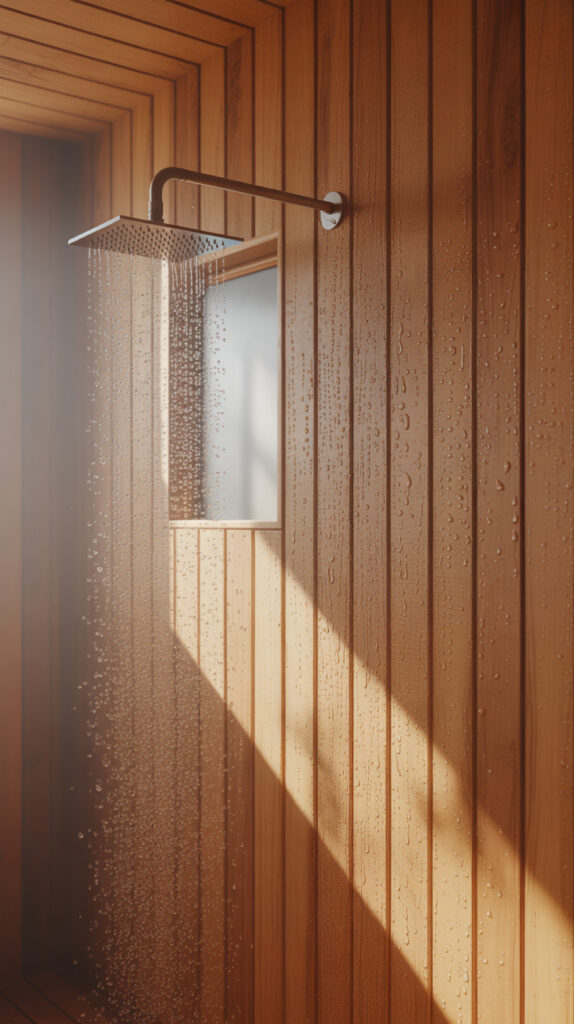
Tiled showers can feel too cold for a cabin space, especially when everything else leans warm and rustic. That contrast often makes the bathroom feel disconnected from the rest of the cabin.
Switching to sealed wood panels brings everything back into harmony. It instantly warms up the space and makes the shower feel like part of the cabin, not a random modern insert.
I tried this in a smaller guest bathroom, and it completely changed the vibe. It felt less like a utility area and more like a mini spa tucked into the woods.
Why This Works
Wood adds visual warmth that tile just can’t compete with. It also softens the overall look, especially if your cabin already has exposed beams or wooden ceilings.
When sealed properly, it holds up surprisingly well in humid environments. The key is choosing the right finish and wood type.
How to Do It
- Choose cedar or teak for natural moisture resistance
- Apply marine-grade sealant to protect against water
- Install panels vertically to make the space feel taller
- Leave slight gaps for expansion and airflow
Style & Design Tips
Stick with natural tones instead of heavy stains to keep that authentic cabin feel. Dark wood can work, but it tends to make smaller showers feel tighter.
Avoid mixing too many wood tones. That’s one mistake I made once, and it looked messy instead of cozy.
Pro Tip or Budget Hack
If real wood is too expensive, use wood-look waterproof panels. They give a similar effect without the maintenance stress.
2. Stone Accent Shower Wall
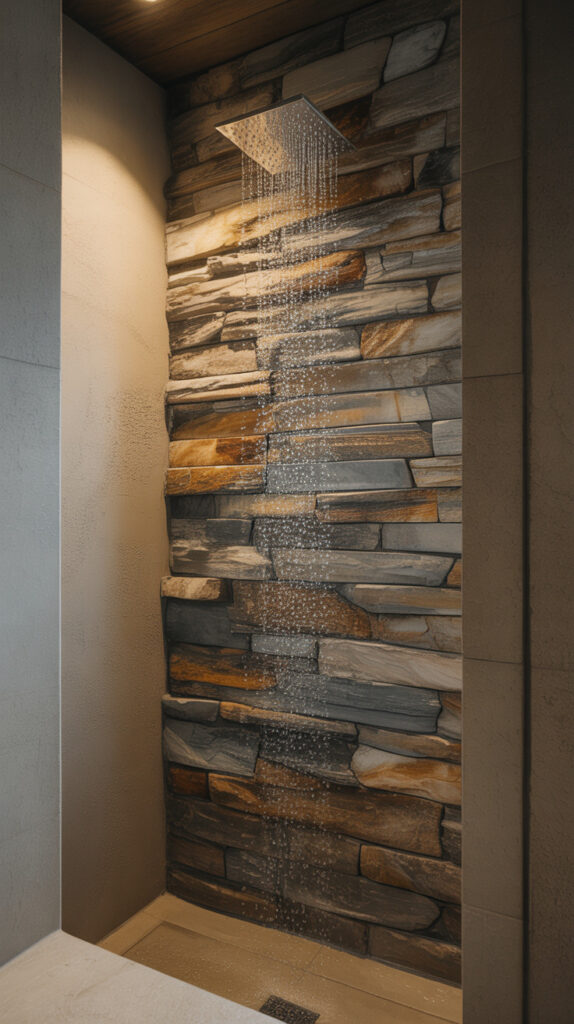
Plain showers can feel flat, especially in cabins where texture usually does most of the design work. A single stone accent wall solves that instantly.
You don’t need to cover every surface with stone. One feature wall adds enough depth without making the space feel heavy.
I’ve seen this done behind the showerhead, and it naturally becomes the focal point. It’s simple, but it works every time.
Why This Works
Stone adds texture and contrast without needing extra decor. It creates a grounded, natural look that fits perfectly with cabin design.
It also ages well, which matters more than people think in rustic spaces.
How to Do It
- Pick stacked stone or river rock panels
- Install on one wall only to avoid overwhelming the space
- Seal properly to prevent moisture damage
- Pair with simple surrounding materials
Style & Design Tips
Use neutral or earthy tones like gray, brown, or beige. Bright colors can look out of place in a cabin setting.
Avoid mixing too many textures nearby. Let the stone be the star.
Pro Tip or Budget Hack
Use faux stone panels if you want the look without the cost and installation hassle.
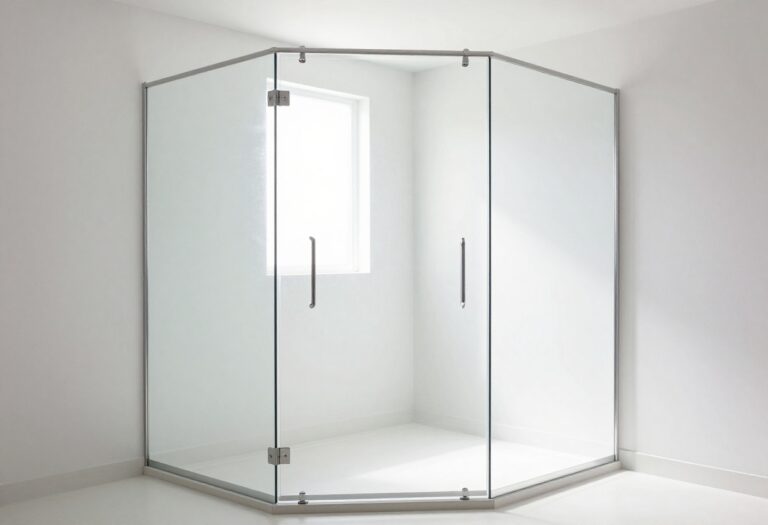
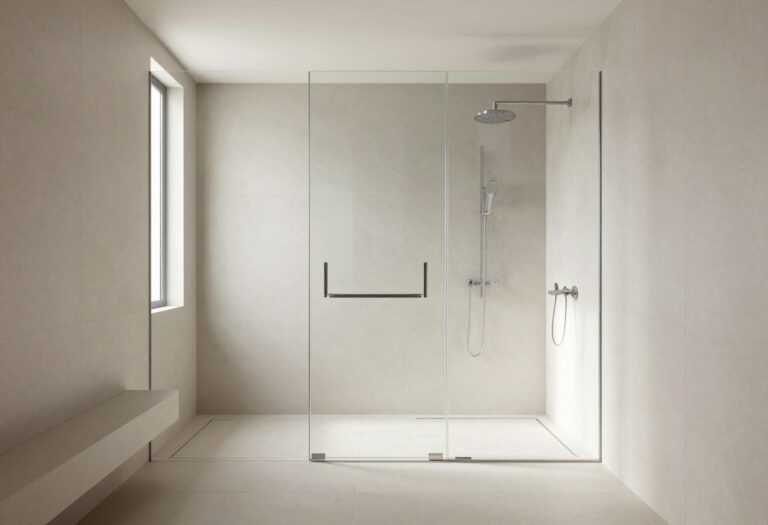
3. Walk-In Open Shower Layout
Traditional enclosed showers can feel bulky, especially in smaller cabins. Doors and frames just eat up visual space.
An open walk-in shower removes that barrier and makes everything feel more spacious. It’s one of those changes that feels bigger than it actually is.
I hesitated trying this at first, but once it’s done right, it’s hard to go back.
Why This Works
Open layouts improve flow and make cleaning easier. There are fewer corners and edges to deal with.
They also let other design elements, like wood or stone, stay visible.
How to Do It
- Use a slight floor slope for drainage
- Install a linear drain for better water control
- Add a partial glass panel if needed
- Keep the layout simple and open
Style & Design Tips
Go with minimal hardware and clean lines to keep it from feeling cluttered. Too many fixtures ruin the simplicity.
Make sure the rest of the bathroom complements the openness.
Pro Tip or Budget Hack
Skip custom glass and use a half wall if you want to save money while keeping the open feel.
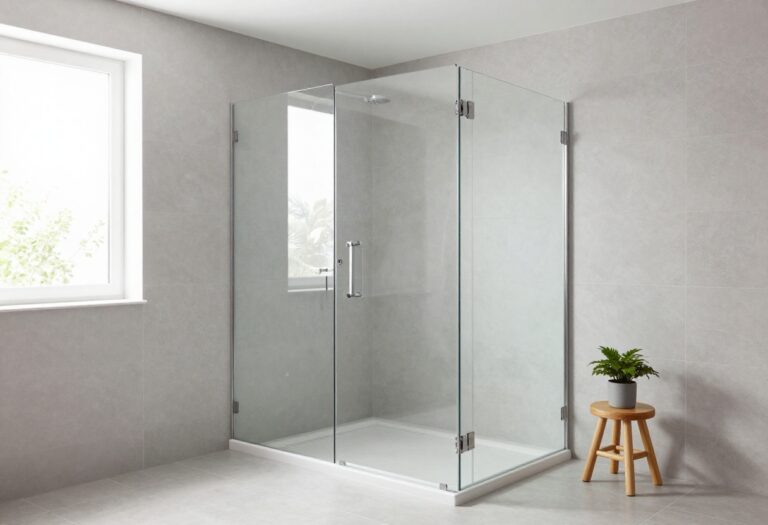
4. Black Metal Frame Shower Enclosure
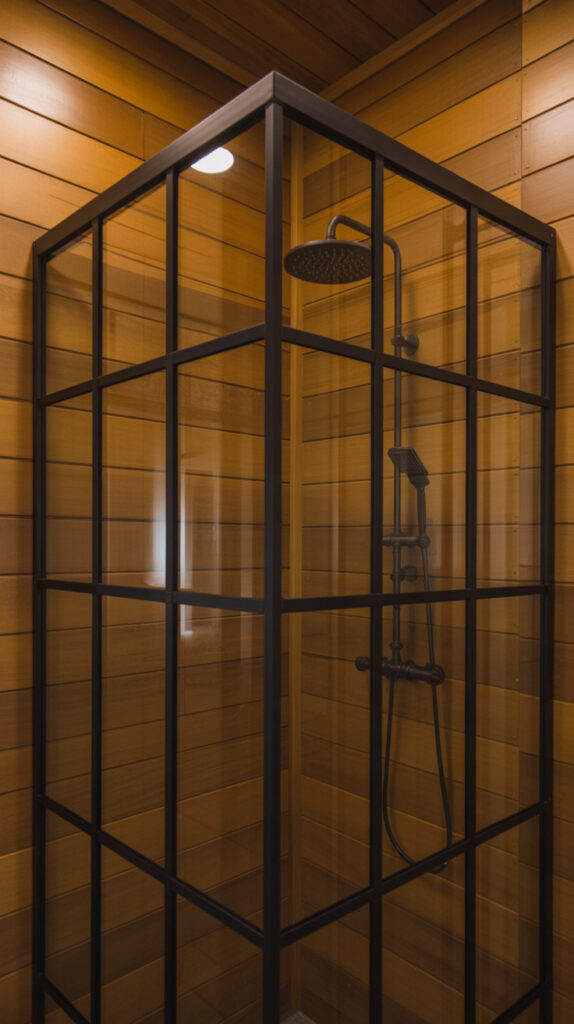
Cabin bathrooms can sometimes lean too soft or overly rustic. Adding black metal introduces contrast and structure.
A metal-framed shower enclosure adds just enough modern edge without clashing with the cabin vibe.
I’ve used this in a wood-heavy bathroom, and it balanced everything out nicely.
Why This Works
The black frame creates strong visual lines that define the space. It also pairs well with wood and stone.
It brings in a subtle industrial feel without going overboard.
How to Do It
- Choose matte black frames for a softer finish
- Keep the grid design simple
- Pair with clear glass panels
- Match fixtures with the same finish
Style & Design Tips
Stick to consistent black accents throughout the bathroom. Mixing metals can quickly look unintentional.
Avoid overly busy grid patterns.
Pro Tip or Budget Hack
Use black-framed shower screens instead of full enclosures to cut costs.
5. River Rock Shower Floor
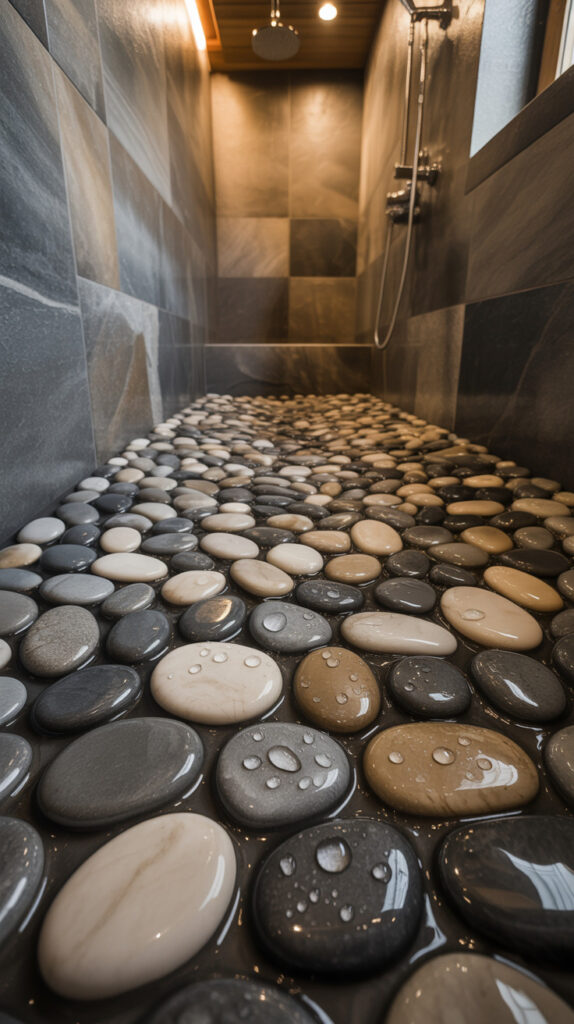
Standard shower floors can feel flat and uninspired. A river rock floor adds texture and makes the shower feel more natural.
It also feels surprisingly good under your feet, which is a bonus you don’t expect at first.
I didn’t think much of it before trying it, but now I wouldn’t go back.
Why This Works
The uneven surface provides grip, making it safer than smooth tiles. It also adds a spa-like experience.
It ties the shower to outdoor elements, which works perfectly in cabins.
How to Do It
- Use pre-mounted pebble tile sheets
- Ensure proper grout sealing
- Keep stones evenly spaced
- Pair with a simple wall design
Style & Design Tips
Choose muted, natural stone colors for the best effect. Bright or polished stones can look artificial.
Keep the rest of the shower minimal.
Pro Tip or Budget Hack
Look for discounted pebble sheets online. They’re often cheaper than traditional tile.
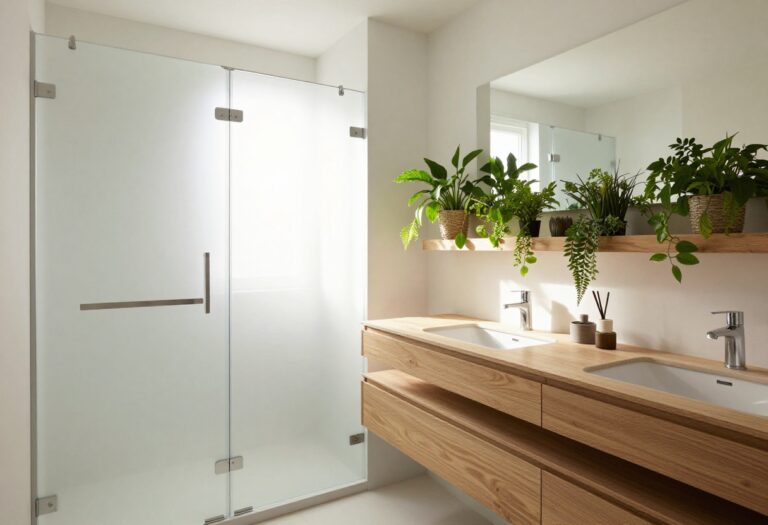
6. Glass + Wood Combo Shower
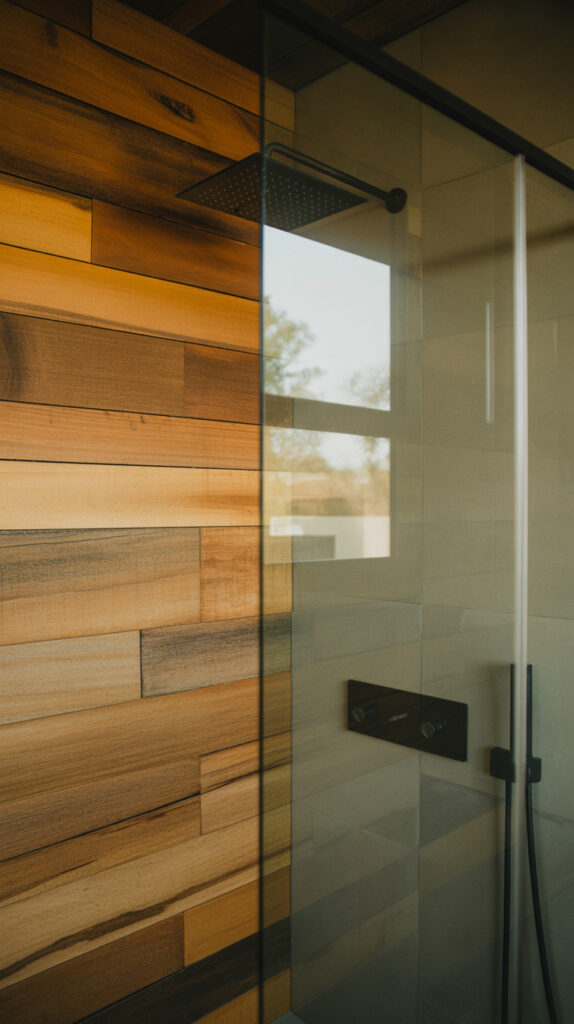
Going fully wood can sometimes feel too heavy, especially in smaller spaces. Mixing glass with wood keeps things balanced.
You get the warmth without sacrificing light and openness.
This combo has become one of my go-to setups.
Why This Works
Glass reflects light and makes the space feel larger. Wood adds warmth and texture.
Together, they create a balanced and inviting look.
How to Do It
- Use wood on one or two walls only
- Install clear glass panels
- Keep framing minimal
- Seal wood properly
Style & Design Tips
Focus on clean transitions between materials. Messy edges ruin the look quickly.
Avoid overcomplicating the design.
Pro Tip or Budget Hack
Use glass panels without frames to save money and keep it sleek.
7. Rustic Copper Shower Fixtures
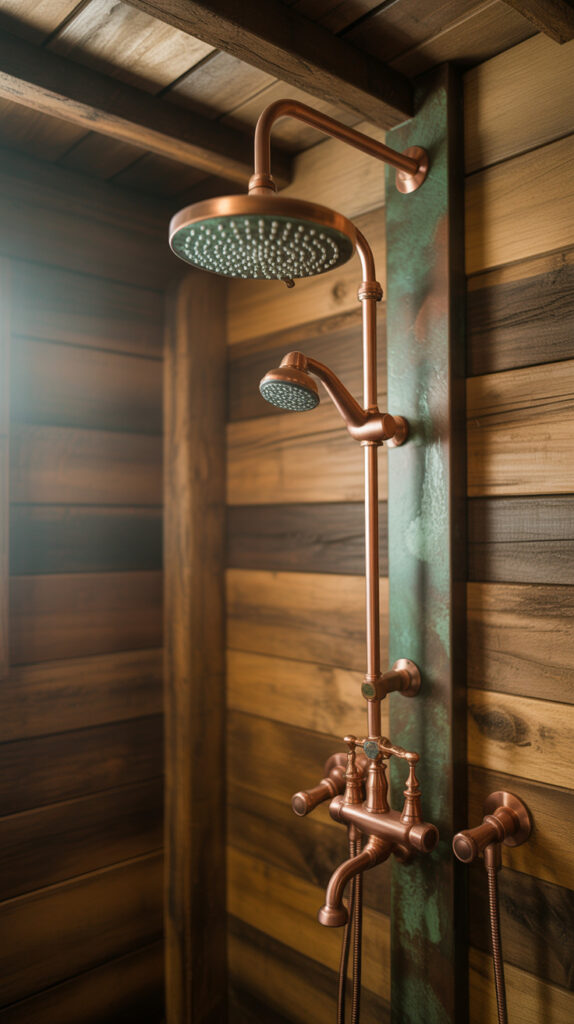
Standard chrome fixtures can feel out of place in a cabin. Copper brings warmth and character.
It’s a small detail, but it makes a noticeable difference.
I swapped fixtures once, and it changed the whole feel instantly.
Why This Works
Copper develops a natural patina over time, adding depth. It also complements wood and stone.
It feels more authentic than modern finishes.
How to Do It
- Choose solid copper or copper-finish fixtures
- Match all hardware for consistency
- Install a rainfall showerhead for added effect
- Maintain occasionally to control patina
Style & Design Tips
Stick with warm tones throughout the space. Mixing cool metals can clash.
Let the copper stand out without overcrowding.
Pro Tip or Budget Hack
Use copper-look finishes instead of solid copper to save money.
8. Skylight Above the Shower
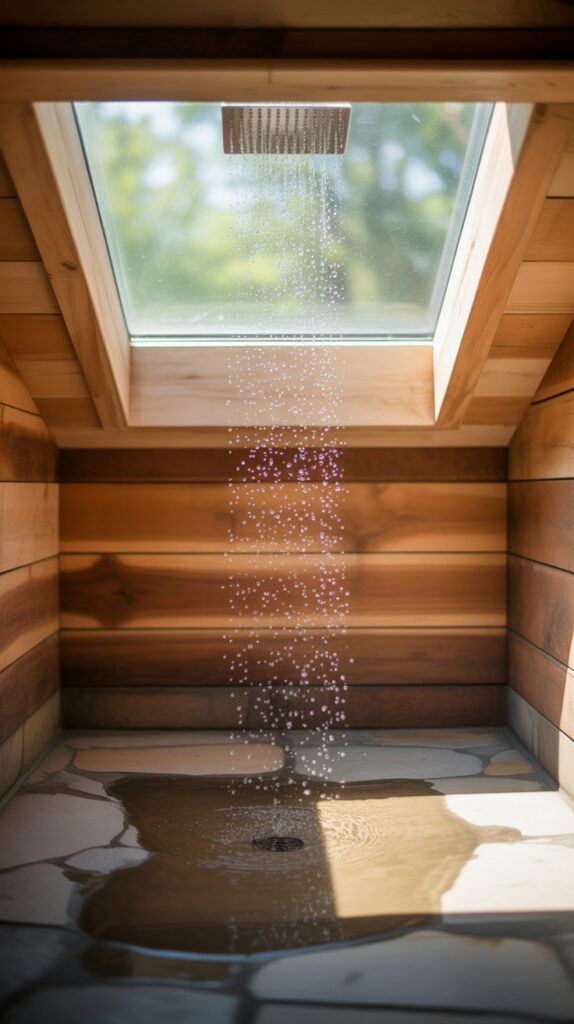
Cabin bathrooms often lack natural light. A skylight above the shower solves that instantly.
It makes the space feel bigger and more open.
This is one of those upgrades that feels luxurious but practical.
Why This Works
Natural light enhances materials like wood and stone. It also reduces the need for artificial lighting.
It creates a connection to the outdoors.
How to Do It
- Install a waterproof skylight
- Position directly above the shower area
- Ensure proper sealing and insulation
- Use frosted glass if privacy is a concern
Style & Design Tips
Keep the surrounding design simple to let the light shine. Too many elements compete with it.
Avoid heavy ceiling fixtures nearby.
Pro Tip or Budget Hack
Use a solar tube if a full skylight isn’t possible.
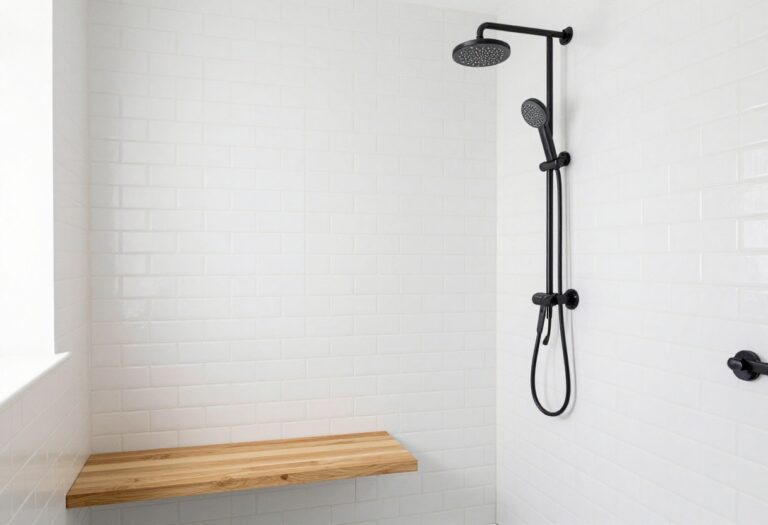
9. Built-In Shower Bench
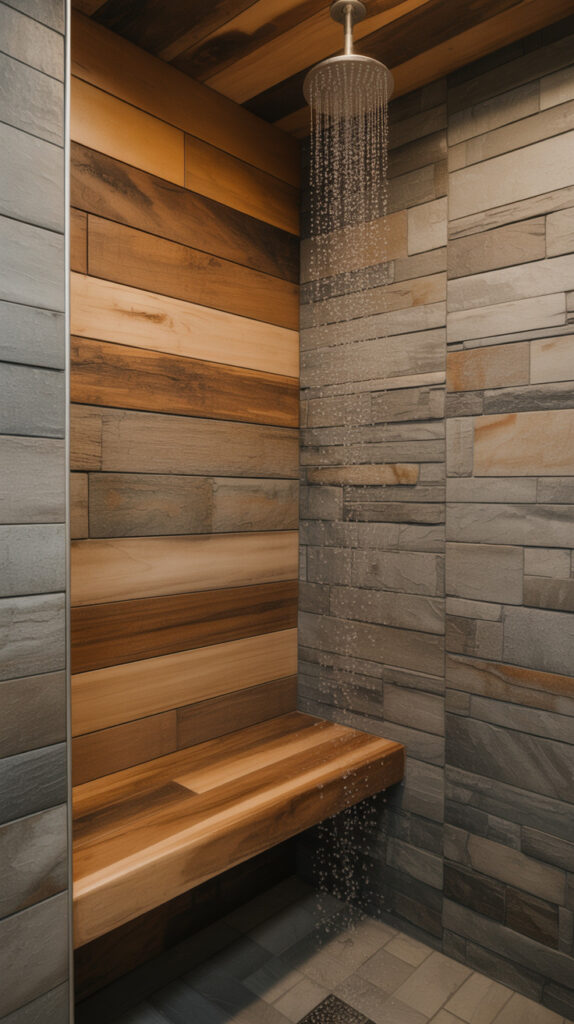
Standing the entire time in the shower isn’t always comfortable. A built-in bench adds both function and style.
It also gives you extra storage or a place to relax.
I didn’t think I needed one until I added it.
Why This Works
It improves usability and adds a spa-like feel. It also breaks up flat surfaces visually.
It’s practical without being bulky.
How to Do It
- Build into the wall structure
- Use waterproof materials
- Match with surrounding finishes
- Keep proportions balanced
Style & Design Tips
Use contrasting materials to highlight the bench. It should feel intentional, not hidden.
Avoid making it too large.
Pro Tip or Budget Hack
Add a floating bench instead of a built-in one for easier installation.
10. Minimalist Cabin Shower Design
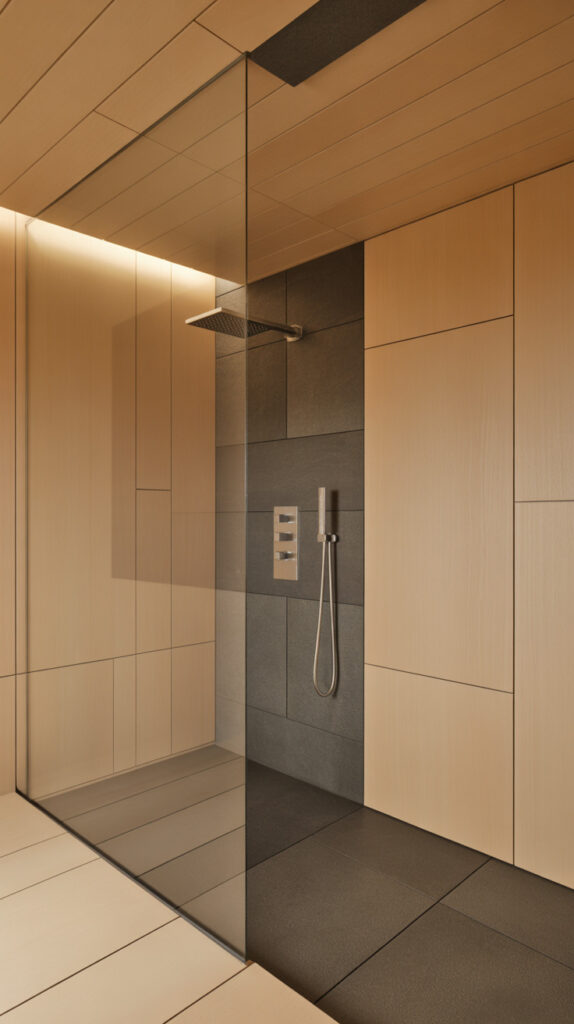
Overdesigning a small space usually backfires. Keeping things simple often looks better.
A minimalist approach focuses on fewer elements done right.
I’ve learned this the hard way after trying to add “just one more thing.”
Why This Works
Less clutter improves visual flow. It also makes maintenance easier.
It highlights the quality of materials.
How to Do It
- Limit materials to 2–3 types
- Use simple fixtures
- Keep colors neutral
- Avoid unnecessary decor
Style & Design Tips
Focus on clean lines and consistency. Random elements break the look.
Stick to a cohesive palette.
Pro Tip or Budget Hack
Invest in fewer but better materials instead of trying to fill the space.
11. Cabin Shower with Vintage Touches
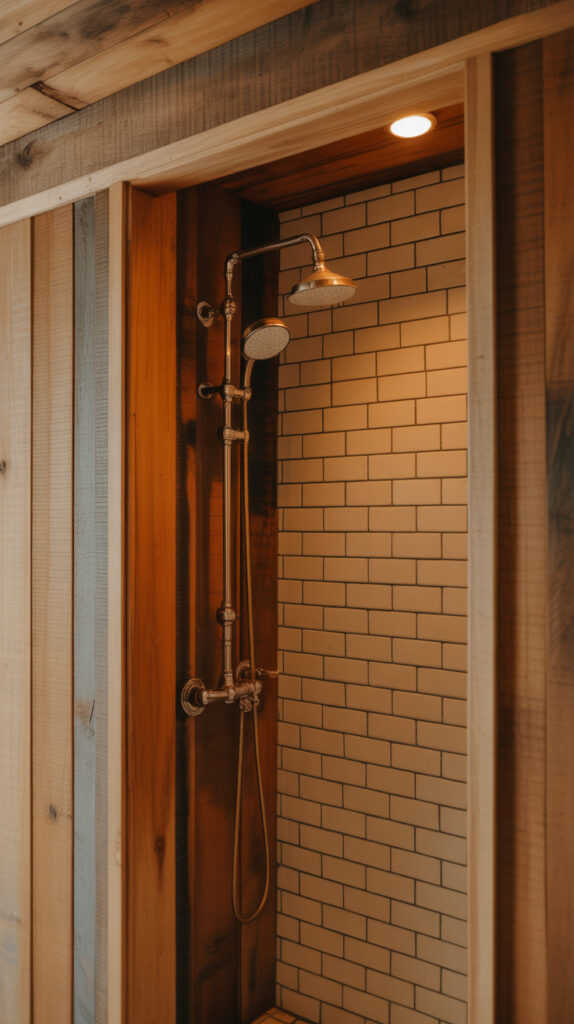
Modern cabins can sometimes feel too polished. Adding vintage elements brings character.
It gives the bathroom a lived-in, authentic feel.
This works especially well in older cabins.
Why This Works
Vintage details add personality and warmth. They make the space feel unique.
They also blend well with rustic materials.
How to Do It
- Use vintage-style fixtures
- Add reclaimed wood elements
- Choose classic tile patterns
- Keep the layout simple
Style & Design Tips
Balance old and new elements carefully. Too much vintage can feel outdated.
Keep it intentional.
Pro Tip or Budget Hack
Check salvage shops for affordable vintage pieces.
Cabin Shower Design Strategy That Actually Works
Most people jump straight into materials and fixtures without thinking about how the shower fits into the overall cabin layout. That’s usually where things start going wrong, because even good design choices feel off when they don’t connect properly.
Start by looking at how your bathroom flows from the rest of the cabin. The shower should feel like a continuation of the same style, not a separate zone with different rules.
Build Around Materials First
Cabin design is heavily material-driven, so your shower should follow that same logic. Pick 2–3 core materials and let everything revolve around them.
If your cabin leans wood-heavy, keep that consistent inside the shower but balance it with stone or glass. Too much of one material can make the space feel flat or overwhelming.
Think About Moisture From Day One
Humidity is not something you “figure out later.” It affects everything from wall finishes to fixture longevity.
Proper sealing, ventilation, and material choice should be part of your initial plan, not a last-minute fix. This alone prevents most long-term issues.
Focus on Layout Before Style
A beautiful shower that feels cramped or awkward quickly becomes frustrating to use. Layout always comes before aesthetics.
Make sure there’s enough space to move comfortably, reach storage areas, and avoid bumping into fixtures. Even small adjustments can improve usability.
Keep It Visually Connected
Your shower should feel like it belongs to the bathroom, and the bathroom should feel like it belongs to the cabin. That visual flow matters more than people expect.
Use similar tones, textures, and finishes throughout. When everything connects, the space automatically looks more polished.
Common Mistakes to Avoid
Some mistakes don’t show up immediately but become obvious after a few weeks of use. These are the ones I see people regret the most.
Ignoring Proper Sealing
Wood, stone, and even grout need proper sealing. Skipping this step leads to stains, mold, and long-term damage.
It’s not the exciting part of the project, but it’s one of the most important.
Mixing Too Many Styles
Combining rustic, modern, vintage, and industrial elements all at once rarely works. It usually ends up looking confused instead of intentional.
Stick to one main style and add subtle variations if needed.
Choosing Looks Over Comfort
Some designs look amazing but feel uncomfortable in daily use. That includes awkward showerhead placement, slippery floors, or poor drainage.
Always test your layout decisions from a practical perspective.
Poor Lighting Decisions
Lighting gets overlooked more than it should. Too dim, and the space feels gloomy; too harsh, and it kills the cozy cabin vibe.
Balanced lighting makes everything look better and improves usability.
Overcrowding a Small Space
Trying to include every idea in a limited space usually backfires. The result feels cluttered instead of stylish.
Less really does work better here, especially in compact cabin bathrooms.
Material Pairing Ideas That Always Look Good
Choosing materials randomly can make even expensive setups look off. Certain combinations just work better together, especially in cabin-style bathrooms.
Wood and stone is the most reliable pairing. It feels natural, balanced, and visually grounded without trying too hard.
Glass works best as a supporting material rather than the main feature. It helps open up the space without taking attention away from the textures.
Black metal pairs nicely with both wood and stone when used sparingly. It adds contrast and structure without overpowering the design.
Lighting Setup for Cabin Showers
Lighting is one of those things you only notice when it’s done wrong. A well-lit shower feels inviting and functional at the same time.
Natural light should always come first if possible. Skylights or small windows make a big difference without adding visual clutter.
Layered lighting works best when natural light isn’t enough. Combine overhead lighting with softer accent lights to avoid harsh shadows.
Warm light tones usually suit cabin interiors better than cool white. They enhance wood tones and create a more cohesive look.
Storage Solutions That Don’t Ruin the Look
Shower storage often ends up looking like an afterthought. Random shelves and hanging racks can quickly mess up the aesthetic.
Built-in niches are the cleanest option. They keep everything accessible without adding extra bulk.
Corner shelves work well in smaller showers. They use space efficiently without interfering with movement.
Avoid oversized storage solutions. They tend to dominate the space and make everything feel tighter.
FAQ
What is the best material for a cabin shower?
Cedar, teak, and natural stone are some of the best options. They handle moisture well and match the rustic cabin aesthetic naturally.
Can you really use wood inside a shower?
Yes, but it must be properly sealed with a waterproof finish. Without sealing, moisture damage becomes a serious issue.
Are walk-in showers good for small cabins?
They actually work really well. Removing doors and frames makes the space feel more open and less crowded.
How do you keep a cabin shower from getting moldy?
Good ventilation is key. Use exhaust fans, proper sealing, and materials that resist moisture buildup.
Is a skylight worth adding to a shower?
If possible, yes. It adds natural light and makes the space feel larger without needing extra fixtures.
What’s the easiest upgrade for a better-looking shower?
Swapping fixtures and adding texture (like stone or wood accents) gives the biggest visual impact without a full renovation.
Final Thoughts
Small changes inside a shower setup often end up reshaping the entire bathroom. It’s one of those areas where details matter more than square footage.
Pick one or two ideas and do them properly instead of trying everything at once. That approach usually looks better and saves you from fixing mistakes later.