11 Walk-In Tile Shower Ideas for a Bathroom That Looks Better Fast
A walk-in tile shower changes the whole bathroom faster than most people expect. The floor plan feels cleaner, the room looks more custom, and even a basic bathroom starts acting a little more expensive.
That shift usually comes down to a few smart choices, not some giant luxury remodel with a dramatic budget meltdown. Tile layout, wall shape, color balance, and drain placement do a lot of the heavy lifting when the design actually makes sense.
I’ve seen bathrooms look ten times better just from fixing the shower zone instead of trying to reinvent every corner at once. When the shower looks polished, the rest of the room usually falls in line without begging for attention.
1. Go Floor-to-Ceiling With Large-Format Tile
Some showers look busy before anything even goes wrong because the wall is chopped up by too many grout lines. Large-format tile fixes that fast by making the whole shower feel calmer, taller, and way more pulled together.
This idea works especially well in bathrooms that already feel cramped or visually messy. I’m a big fan of it because it gives that clean designer look without relying on trendy tricks that start feeling dated six months later.
A floor-to-ceiling installation also makes the shower feel intentional instead of looking like a separate box dropped into the room. When the tile runs all the way up, the eye keeps moving, and that little visual stretch makes the ceiling feel higher than it actually is.
Why This Works
Large tiles reduce visual clutter, and that matters more in a bathroom than people realize. Fewer grout lines mean the walls look smoother, the cleaning gets easier, and the shower feels more modern without trying too hard.
How to Do It
- Pick large-format tile in a size like 12×24, 24×24, or even bigger if the bathroom layout can handle it.
- Run the tile vertically if the room needs height, or horizontally if the shower feels narrow and needs to look wider.
- Use a grout color close to the tile color so the surface reads as one clean plane instead of a grid.
- Finish the tile all the way to the ceiling, because stopping short usually makes the shower look cheaper.
Style & Design Tips
Matte porcelain works beautifully here because it feels modern and hides water spots better than super glossy finishes. Soft white, warm greige, pale stone, and concrete-look tile all work really well if the goal is timeless instead of flashy.
The biggest mistake is choosing a bold tile pattern in a giant format and then pairing it with loud floors too. Let one surface lead, otherwise the bathroom starts arguing with itself.
Pro Tip or Budget Hack
Use large-format tile on the main shower walls and save the splurge tile for one smaller accent area if the budget gets tight. That move keeps the high-end look without forcing the wallet to do gymnastics.
2. Add a Single Vertical Accent Strip That Actually Has Purpose
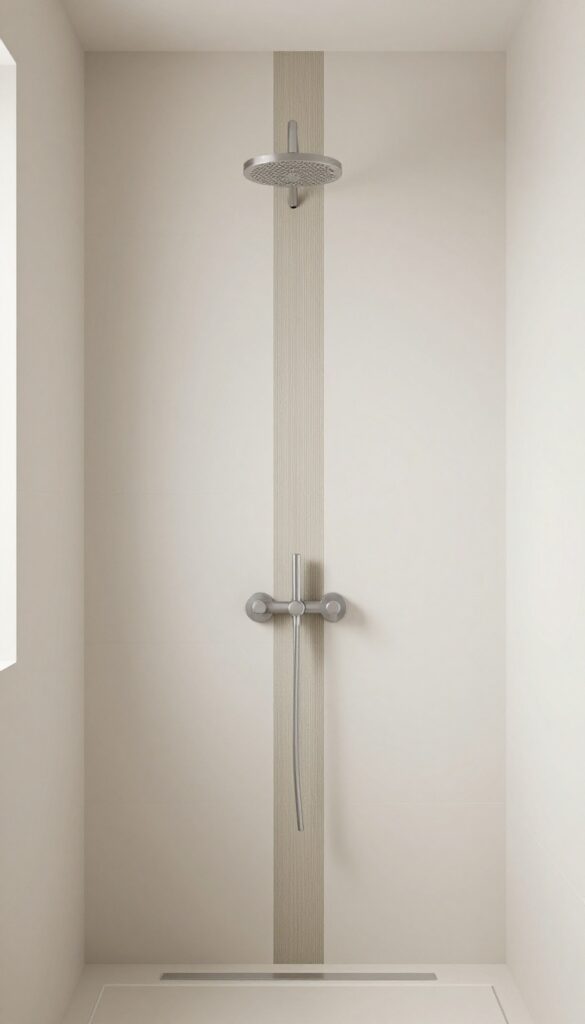
A lot of accent strips feel like they were added because someone panicked halfway through the design. A vertical feature strip looks much better when it lines up with the shower head, valve, or a niche and feels tied to the layout instead of randomly decorative.
This is one of the easiest ways to break up plain tile without making the shower look fussy. I like it most in simple bathrooms that need one detail to wake things up a bit.
A narrow strip in a different tile can create a custom feel while still keeping the room easy on the eyes. It also gives the shower a stronger focal point, which helps the whole setup look more finished even if the rest of the bathroom stays pretty minimal.
Why This Works
A vertical accent adds rhythm and structure, especially in a walk-in shower where flat walls can look a little blank. When it lines up with plumbing or storage features, it feels architectural instead of decorative for decoration’s sake.
How to Do It
- Choose one accent tile that contrasts in texture or tone but still belongs with the main wall tile.
- Keep the strip narrow, usually one tile wide or just wide enough to frame a niche cleanly.
- Run it from floor to ceiling so it looks intentional and not like a patch job.
- Place it behind the shower hardware or continue it through the niche for a more custom result.
Style & Design Tips
Mosaic tile, zellige-look tile, ribbed ceramic, or a darker stone-look tile can all work here. The key is restraint, because once that accent gets too wide or too colorful, the shower starts looking like an older hotel renovation that meant well.
Avoid putting multiple accent strips on different walls unless the shower is very large. One strong line usually looks sharper than three okay ones.
Pro Tip or Budget Hack
Buy accent tile by the square foot only for that one section and keep the rest of the shower in a budget-friendly field tile. That gives the shower a premium detail without dragging the whole project into expensive territory.
3. Build a Low Pony Wall for Shape and Privacy
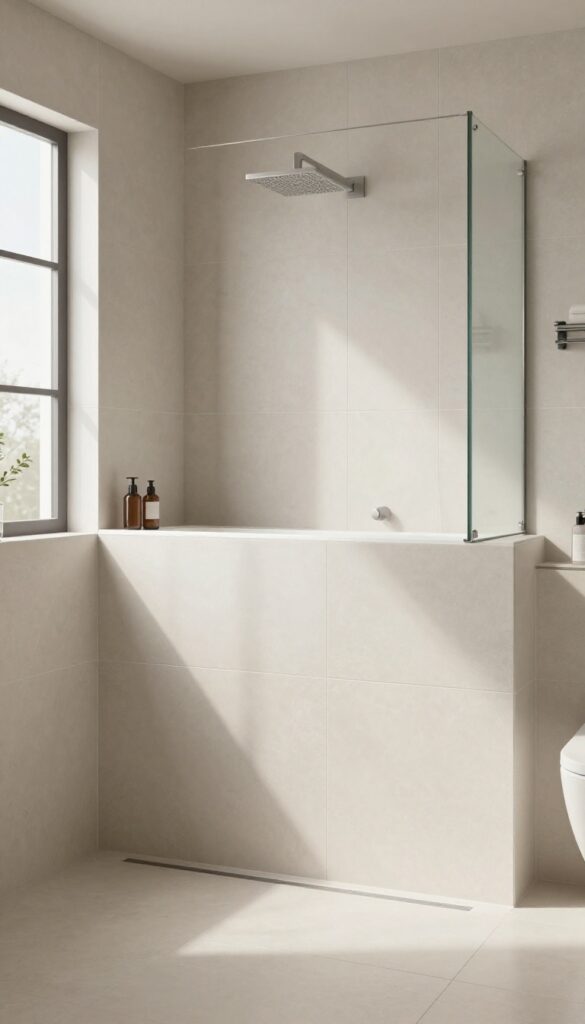
A fully open walk-in shower can look sleek, but sometimes it also looks a little too exposed for real life. A low pony wall gives the shower shape, blocks a direct view, and still keeps the room feeling open.
This idea works especially well in shared bathrooms or primary baths where a bit of separation helps. I’ve always liked pony walls because they solve practical problems without making the shower feel boxed in.
They also create a natural place for plumbing, a glass panel, or a small ledge for products. That extra structure makes the shower feel designed instead of just carved out from leftover space.
Why This Works
A pony wall creates definition without sacrificing openness, which is exactly what most walk-in shower designs need. It helps with splash control, adds privacy, and can make the overall layout feel more balanced.
How to Do It
- Decide whether the pony wall will sit at the shower entry or along one side of the wet zone.
- Keep the height low enough to stay open, usually around chest height or a bit lower depending on the layout.
- Tile the wall in the same material as the shower for a seamless look, or use a complementary finish for subtle contrast.
- Add a fixed glass panel above it if the shower needs more splash protection without needing a full door.
Style & Design Tips
A chunky pony wall can look heavy, so keep the proportions clean and avoid making it wider than necessary. Slim profiles, crisp tile edges, and matching surfaces help it feel modern instead of bulky.
This is also a good spot to repeat a material from somewhere else in the bathroom, like the vanity backsplash or floor tile. That repetition makes the whole room feel connected, which honestly does more for style than buying another fancy faucet ever will.
Pro Tip or Budget Hack
If custom glass pushes the budget too far, use the pony wall alone in a deeper shower layout that naturally limits splashing. That still gives the space shape and privacy while skipping one of the pricier parts of the install.
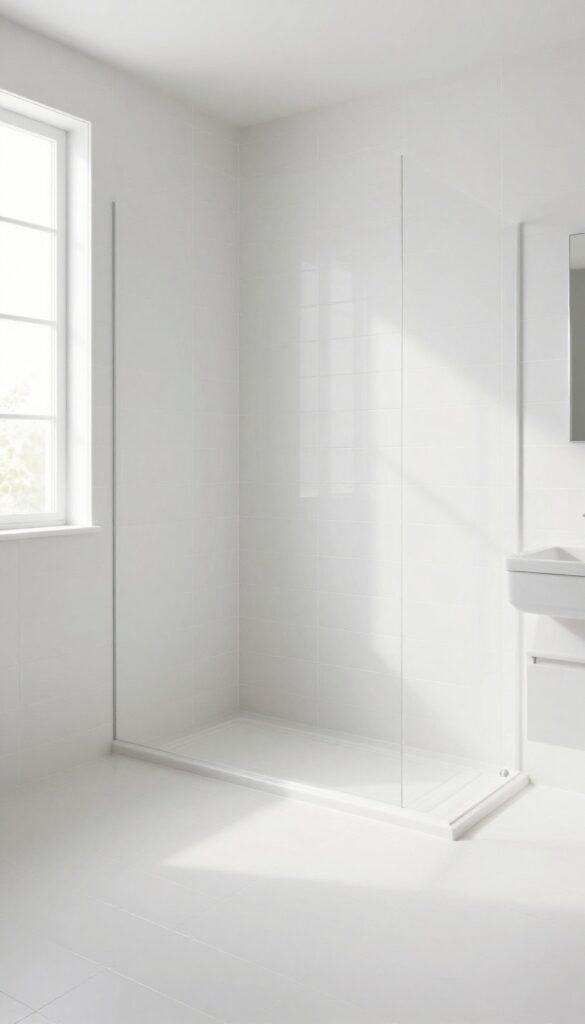
4. Use a Curbless Entry for a Cleaner, Bigger Look
Nothing makes a walk-in tile shower look more updated, fast, than removing the curb. A curbless entry gives the floor one continuous line, and that instantly makes the bathroom feel larger and more high-end.
It also makes the space easier to move through, which is great now and even better later. I like this approach because it looks sleek, but it also solves real-life function instead of being design fluff dressed up as genius.
When the shower floor flows into the bathroom floor with almost no interruption, the whole room feels calmer. That uninterrupted surface is one of those details people notice even if they can’t explain why the bathroom suddenly looks so good.
Why This Works
Curbless showers improve visual flow because there’s no raised edge chopping the room apart. They also support better accessibility and make a small bathroom feel more open, which is a win no matter how trendy the style cycle gets.
How to Do It
- Plan the slope carefully so water drains properly inside the shower zone without escaping into the room.
- Use a linear drain or a centered drain depending on the tile size and floor layout.
- Keep the bathroom floor tile and shower floor tile coordinated so the transition looks intentional.
- Work with an installer who understands waterproofing, because this is not the place for “close enough.”
Style & Design Tips
Curbless showers look best when the lines stay simple and the materials feel connected. Matching or closely related floor tones make the entry feel seamless, while wildly different tile choices can break the effect.
The biggest mistake here is ignoring water control and assuming open equals effortless. It still needs smart planning, especially around slope, splash zone, and drain placement.
Pro Tip or Budget Hack
If a fully curbless build gets complicated, use a very low-profile threshold that visually disappears. It won’t be a true zero-entry shower, but it still delivers most of the same clean look without all the structural drama.
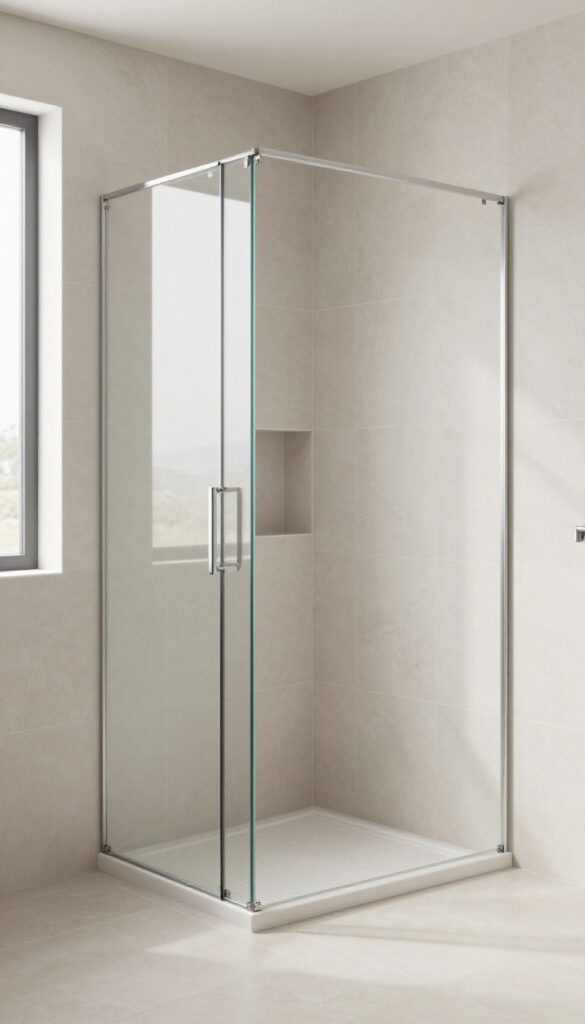
5. Create a Recessed Niche Instead of Using Hanging Caddies
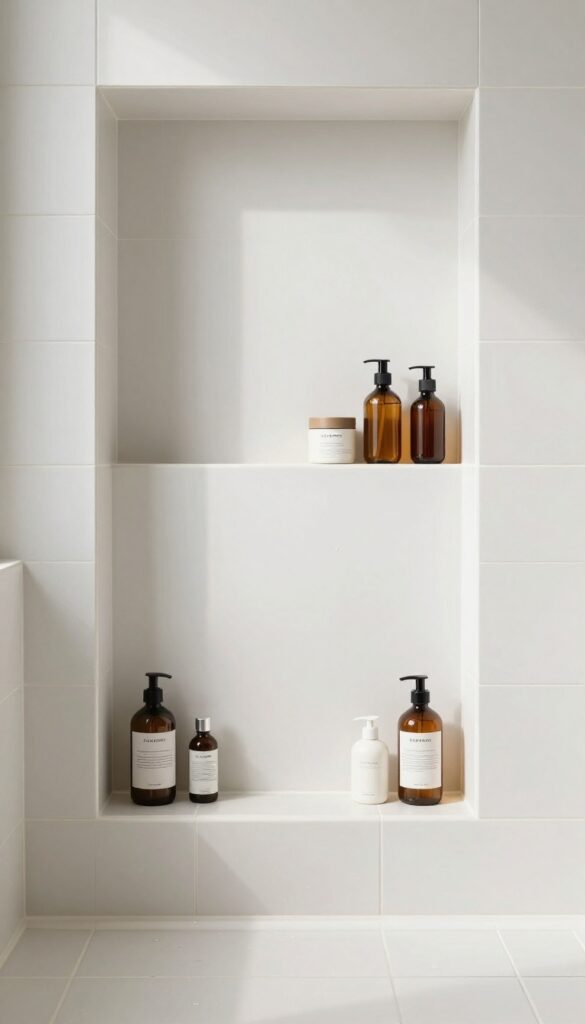
Nothing ruins a nice tile shower faster than plastic storage swinging from the shower head like it gave up on life. A recessed niche keeps products organized, clears visual clutter, and makes the shower feel built-in and intentional.
This is one of those details that looks small on paper but changes the whole vibe in person. I always think showers look more expensive when the storage feels planned from the start instead of patched in afterward.
A niche also helps keep the layout cleaner because bottles stay off the floor and off the ledges. That matters a lot in a walk-in shower where every visible surface contributes to the overall look.
Why This Works
Built-in storage improves both function and appearance without taking up extra room. It keeps the shower streamlined, makes daily use easier, and gives the tile wall a custom detail that feels polished.
How to Do It
- Place the niche where it’s easy to reach but not the first thing seen from the bathroom doorway.
- Size it based on actual products instead of guessing, because tiny niches are just decorative frustration.
- Line the niche up with tile grout lines when possible so it looks integrated into the wall.
- Waterproof it properly and slope the bottom slightly so water does not sit there forever.
Style & Design Tips
A niche can blend in with the wall tile or stand out with a contrasting tile inside. Both can work, but the cleaner look usually comes from keeping the niche simple and not turning it into a tiny stage set.
Avoid placing several small niches at random heights unless the layout truly needs it. One well-sized horizontal niche often looks neater than a bunch of little boxes pretending to be a design moment.
Pro Tip or Budget Hack
Use the same main tile inside the niche and just switch the layout pattern, like stacked outside and herringbone inside. That creates subtle interest without forcing an extra tile purchase.
6. Try a Bench Wrapped in Tile for Comfort and Style
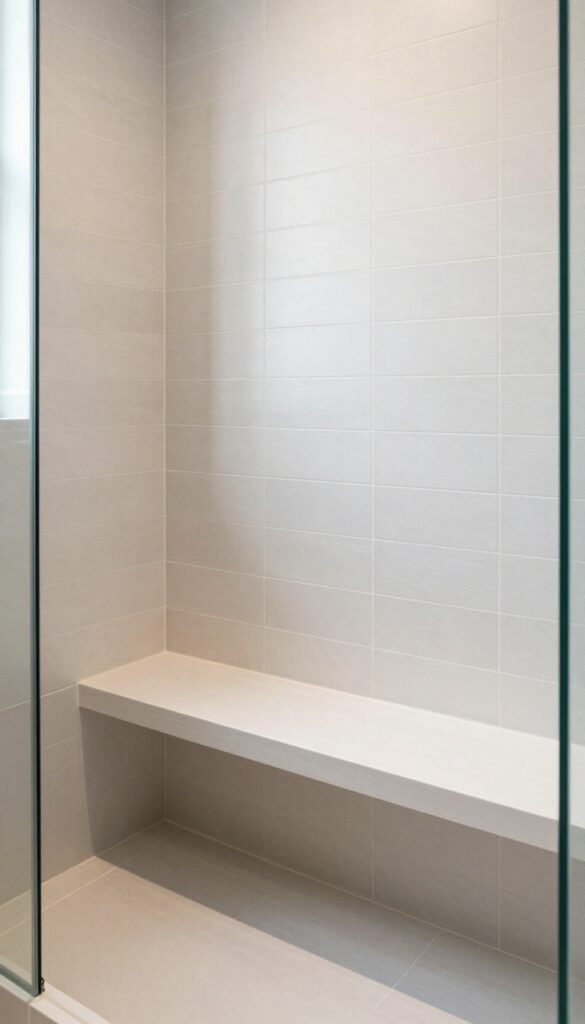
A tiled bench makes a walk-in shower feel more substantial right away. Even a compact bench can add comfort, storage space, and a more custom-built look that basic shower stalls never really pull off.
This idea is especially helpful in larger walk-in showers where one open corner can feel awkward or underused. I’ve always liked shower benches because they make the space feel thoughtful, and they’re surprisingly useful even for people who swear they’ll never sit down in the shower.
A bench also gives the eye a horizontal element, which can balance out tall wall tile and big glass panels. That mix of vertical and horizontal lines usually makes the space look more grounded.
Why This Works
A bench adds function without feeling utilitarian when it’s built into the tile design. It creates comfort, supports accessibility, and helps the shower look like part of a tailored bathroom plan instead of a standard insert.
How to Do It
- Decide whether the bench will span one wall, sit in a corner, or float at the far end of the shower.
- Build it with the right slope so water drains off instead of pooling on top.
- Wrap it in the same tile as the walls for a seamless look, or use a contrasting slab top for extra definition.
- Keep the proportions practical so it supports actual sitting and does not become a decorative shelf in disguise.
Style & Design Tips
A bench should feel integrated, not bulky. Clean lines, simple tile choices, and a comfortable depth usually look better than oversized benches that eat half the shower and make everything feel cramped.
This is also a nice place to bring in a different texture, like a stone-look seat on smoother wall tile. Just do not pile on too many materials in one small shower or the whole thing starts getting loud.
Pro Tip or Budget Hack
If building a full bench is too expensive or the shower is too tight, add a small corner seat instead. It still gives that built-in look and practical function without demanding as much material or labor.
7. Mix Wall Tile and Shower Floor Tile the Smart Way
Using the same tile everywhere can look clean, but sometimes it makes the shower feel flat. Mixing wall tile and floor tile adds depth, traction, and visual variety, as long as the choices actually work together.
This is where a lot of bathrooms either look custom or go completely sideways. I like a mixed-tile shower when the contrast feels controlled, because it gives the space more personality without losing that polished, easy feel.
The shower floor is also one area where function really matters, so a different tile there often makes sense anyway. Smaller floor tile or textured tile helps with grip, while the wall tile can stay smoother and simpler.
Why This Works
Different tiles on the wall and floor create contrast while allowing each surface to do its job better. The floor can focus on grip and drainage, while the walls carry the bigger visual statement.
How to Do It
- Pick the wall tile first, because it covers the most visible area and sets the tone.
- Choose a shower floor tile that relates in color or undertone but adds texture or pattern.
- Keep the palette tight so the contrast feels intentional instead of random.
- Use samples side by side before committing, because some pairings look great online and weird in real life.
Style & Design Tips
Hex tile, penny tile, pebble-look porcelain, or small mosaics can all work beautifully on the shower floor. The trick is balance, so if the floor has movement or pattern, the walls should usually calm down a bit.
One common mistake is choosing a floor tile that is technically pretty but visually fights the wall tile. Bathrooms are small, so every finish has to get along or the tension shows immediately.
Pro Tip or Budget Hack
Use a more affordable basic wall tile and spend a little more on the shower floor where the detail gets noticed up close. That swap often makes the whole shower look richer without increasing the total budget much.
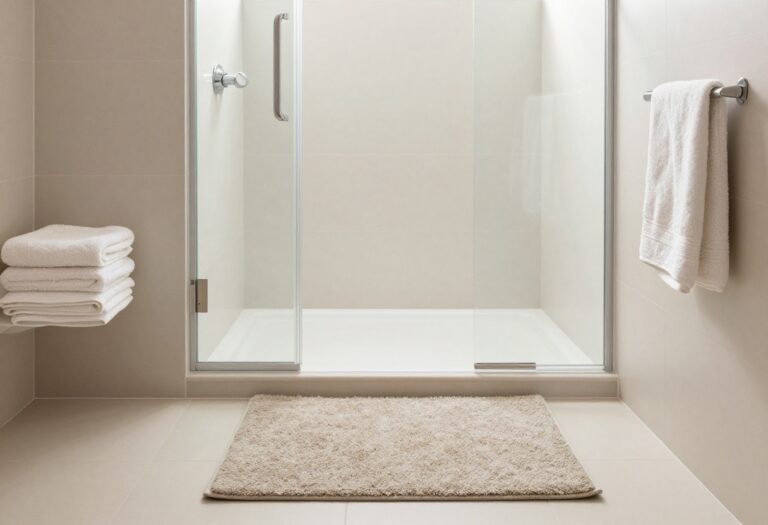
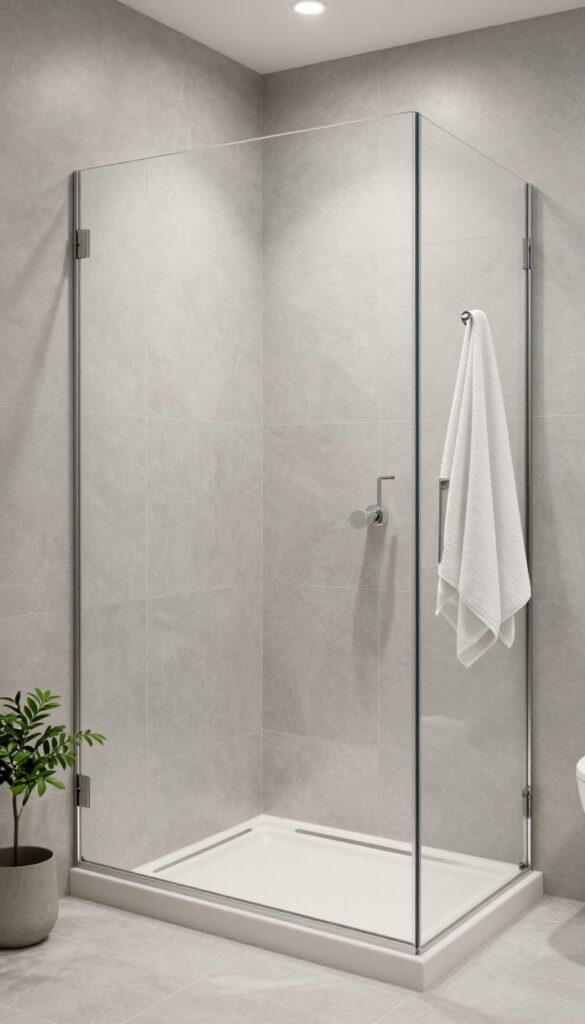
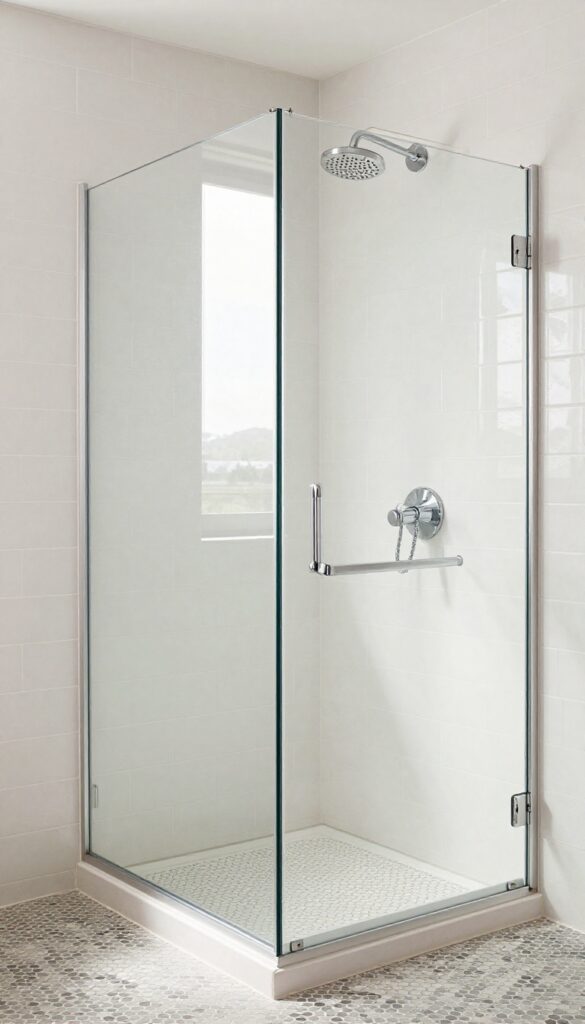
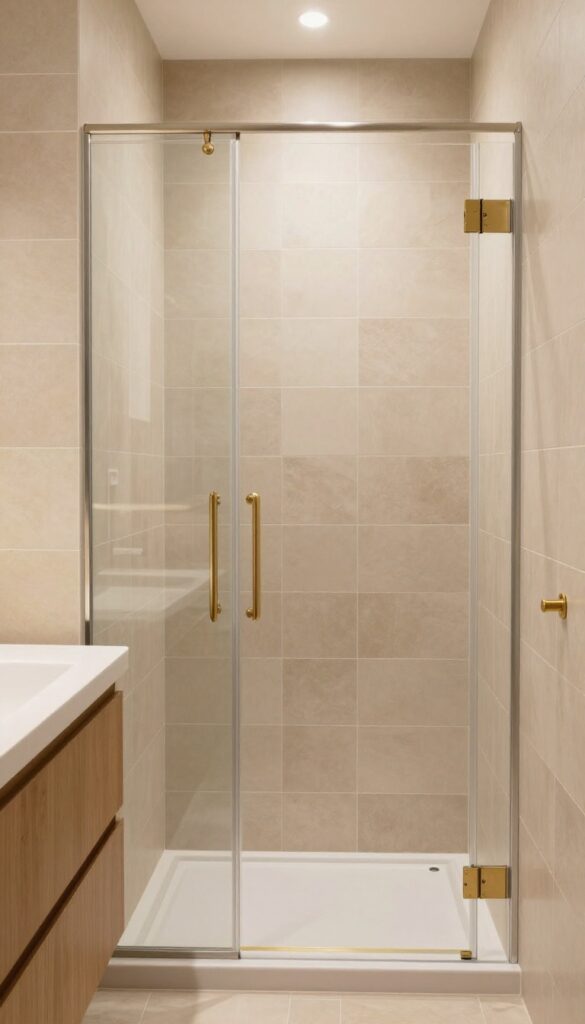
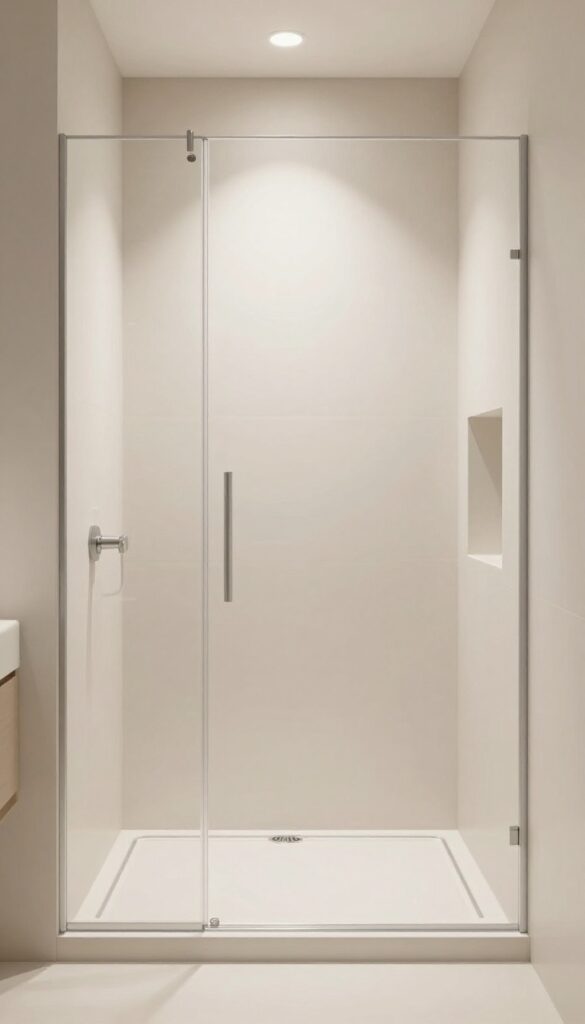
8. Frame the Shower With a Fixed Glass Panel, Not a Full Door
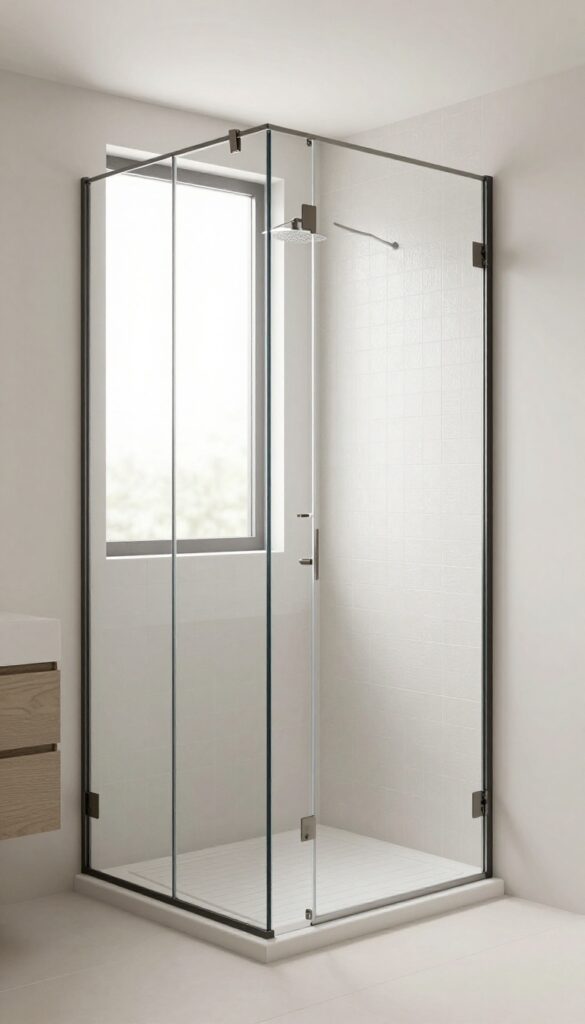
A full shower door can feel heavy, busy, and honestly a little annoying to clean. A fixed glass panel keeps the walk-in look open while still helping control splash, which makes it a great middle ground.
This option works especially well in modern or transitional bathrooms where the goal is clean lines without losing practicality. I’m a fan because it looks streamlined and avoids that extra hardware clutter that can make a bathroom feel overdesigned.
A single panel also lets the tile stay more visible, and that matters if the shower design is one of the room’s best features. When less hardware interrupts the view, the bathroom usually looks more spacious and more expensive.
Why This Works
A fixed glass panel keeps the shower visually open while giving enough containment for everyday use. It improves sight lines, highlights the tile work, and removes the bulky feel that swinging doors sometimes create.
How to Do It
- Measure the splash zone based on the shower head location and the width of the entry.
- Install the fixed panel where it blocks the most water without closing off the whole shower.
- Choose minimal hardware in a finish that matches the rest of the bathroom fixtures.
- Keep the glass clear unless privacy is absolutely necessary, because frosted glass can visually shrink the space.
Style & Design Tips
This works best when the panel looks crisp and understated. Thin black framing, brushed nickel clips, or nearly invisible hardware can all look sharp, depending on the style of the room.
Do not oversize the panel just because bigger sounds better. If it starts feeling like a half-enclosed box, the breezy walk-in effect gets lost.
Pro Tip or Budget Hack
A standard fixed glass panel often costs less than a custom door setup with hinges and handles. That means more room in the budget for better tile, which is usually the smarter place to spend anyway.
9. Use a Horizontal Linear Drain for a More Custom Finish
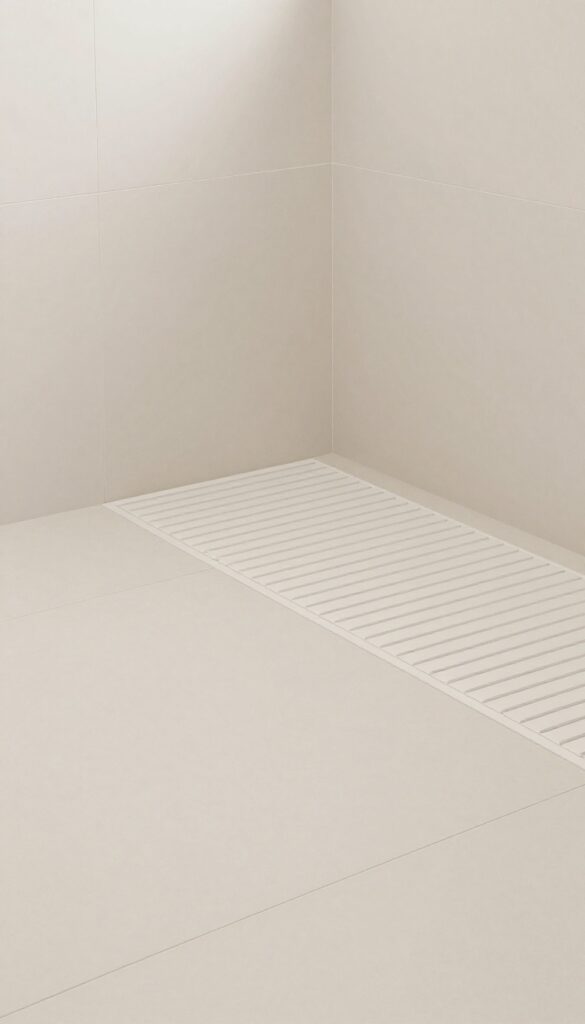
A traditional round drain gets the job done, but it does not exactly add style points. A horizontal linear drain gives the shower floor a cleaner, more modern look and makes the tile layout easier to simplify.
This detail feels subtle until it’s installed, and then suddenly the whole shower looks more tailored. I like linear drains because they quietly elevate the design without screaming for attention, which is pretty much the sweet spot in bathroom design.
They also pair really well with larger floor tiles in curbless showers. That combination creates long, calm lines that make the shower feel streamlined and intentional.
Why This Works
A linear drain improves the visual flow because the floor slopes in one direction instead of several. It also supports larger tile layouts and helps the shower look more architectural and less builder-basic.
How to Do It
- Decide whether the drain will sit at the back wall, near the entry, or along one side based on the plumbing and layout.
- Coordinate the drain finish with the shower hardware for a more polished look.
- Plan the floor slope carefully so water moves efficiently toward the drain.
- Confirm the drain works with the tile size and waterproofing system before installation begins.
Style & Design Tips
Linear drains look especially strong in minimalist showers with large-format tile and simple wall finishes. Clean geometry matters here, so crooked installation or awkward placement will stick out fast.
A tile-in drain cover can make the drain nearly disappear, while a metal grate gives it a more obvious modern edge. Both can work, so it really comes down to whether the bathroom needs subtlety or contrast.
Pro Tip or Budget Hack
If the budget cannot stretch to a premium tile-in version, choose a simple linear grate in a finish that matches the fixtures. That still gives the shower an upgraded feel without turning the drain into a luxury line item.
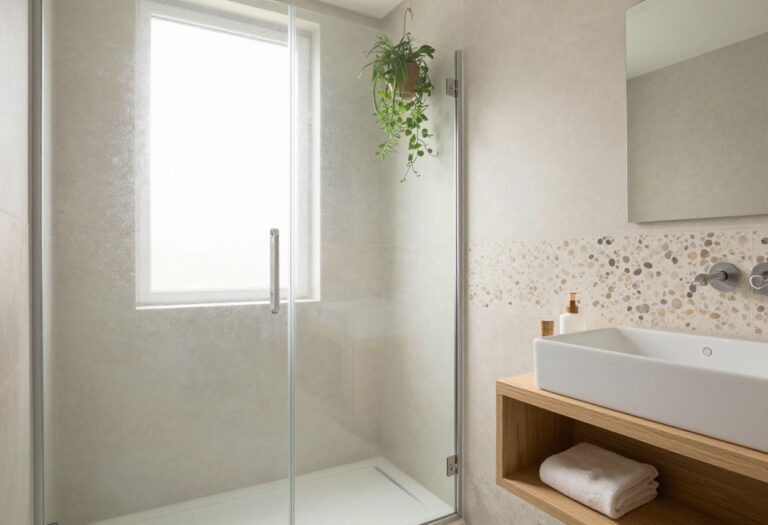
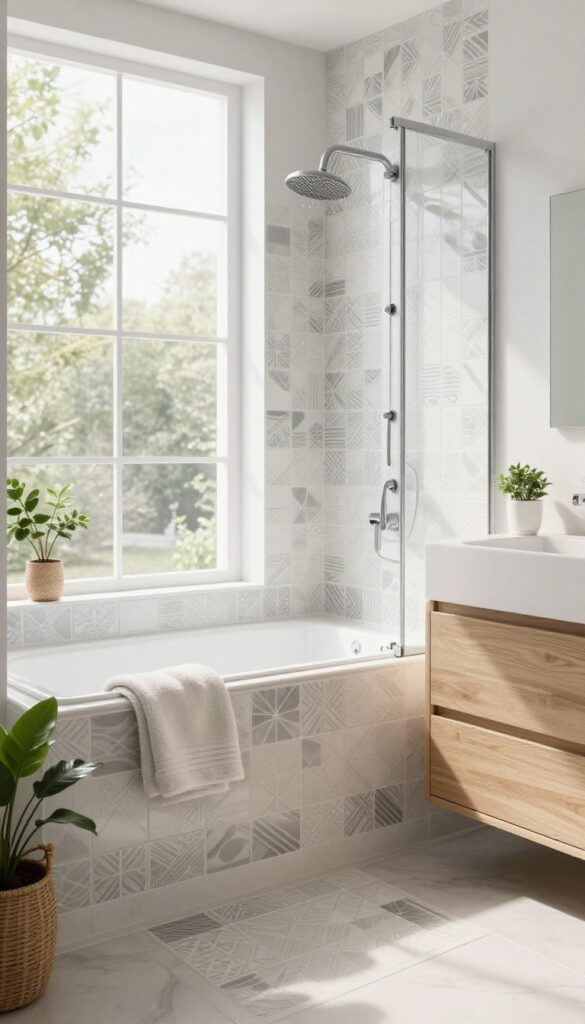
10. Bring in Warm Tile Tones So the Bathroom Does Not Feel Cold
A lot of tile showers look technically nice but emotionally flat because every surface leans icy gray or bright white. Warm tile tones make the bathroom feel more welcoming and lived-in without losing that clean, fresh look.
This matters even more in walk-in showers, where there is usually more visible tile than in a standard setup. I’ve learned the hard way that a bathroom can be spotless and still feel weirdly sterile if the color temperature is off.
Warm whites, sandy beige, soft taupe, clay, and gentle stone shades add softness fast. They also pair more easily with wood vanities, brass fixtures, and other finishes that keep the bathroom from feeling like a medical supply closet.
Why This Works
Warm tones soften hard surfaces and create a better balance between clean and comfortable. Since tile covers so much of the visual field in a shower, that color shift has a huge impact on the entire room.
How to Do It
- Test tile samples in the actual bathroom, because store lighting lies with a straight face.
- Look at undertones carefully and choose shades with warmth rather than stark blue-gray or harsh white.
- Pair warm tile with neutral grout that supports the tone instead of fighting it.
- Repeat that warmth elsewhere in the room through wood, metal, or textiles for a more cohesive finish.
Style & Design Tips
Warm does not mean orange, muddy, or dated. Soft, muted warmth usually looks best, especially in bathrooms that need to feel timeless and not like a Tuscan throwback from 2007.
Avoid mixing too many different warm undertones unless the palette is really controlled. Beige, pink-beige, yellow-beige, and gray-beige are not all the same thing, and bathrooms notice everything.
Pro Tip or Budget Hack
If replacing all the tile is not realistic, use warmer grout, paint, and hardware finishes around the shower area to shift the overall feel. Small tone changes can rescue a cold bathroom faster than people expect.
11. Repeat the Same Tile Detail Somewhere Else in the Bathroom
A walk-in shower looks better when it feels tied to the rest of the bathroom instead of acting like its own little kingdom. Repeating one shower tile detail elsewhere in the room makes the whole space feel planned, polished, and more expensive.
That repeated detail could show up on the vanity backsplash, a niche surround, the tub skirt, or even a small wall section. I love this move because it creates cohesion without needing a bunch of extra materials or a complicated design scheme.
This is also one of the easiest ways to make a bathroom feel custom. When a pattern, color, or texture appears in more than one place, the room starts telling one clear story instead of several competing ones.
Why This Works
Repetition creates visual connection, and that makes the bathroom feel more balanced and intentional. It helps the shower belong to the room, which is important when the shower takes up a major chunk of the design.
How to Do It
- Choose one tile detail from the shower, like the accent tile, floor tile, or niche tile.
- Repeat it in one small secondary location somewhere else in the bathroom.
- Keep the repetition limited so it feels smart and cohesive rather than overdone.
- Use the same finish and grout approach so the repeated detail reads as deliberate.
Style & Design Tips
This works best when the repeated detail is noticeable but not overpowering. Think echo, not copy-and-paste, because too much repetition can make the room feel forced.
The safest move is to repeat a smaller feature tile instead of the main shower wall tile everywhere. That gives continuity without making the whole bathroom feel monotonous.
Pro Tip or Budget Hack
Save leftover accent tile from the shower and use it behind the vanity mirror or on a small backsplash section. That cuts waste, saves money, and makes the design look more custom with almost no extra effort.
What Actually Matters Before Choosing a Walk-In Tile Shower Design
The best shower design usually starts with layout, not tile shopping. Size, drain position, wall depth, splash control, and storage needs should be figured out first, because pretty tile cannot rescue a bad plan.
It also helps to be honest about maintenance habits. If cleaning grout already sounds like a personal attack, choosing tiny mosaic on every wall is probably not the brilliant move it seemed during the first scroll through inspiration photos.
Think about who uses the bathroom every day and how they move through it. A shower that looks amazing but feels awkward, slippery, cramped, or annoying will lose its charm fast.
Material balance matters more than chasing trends. One or two strong design moves usually look better than stuffing the shower with every cool idea at once.
Common Mistakes That Make a Tile Shower Look Worse, Not Better
Too many tile styles in one shower can make the whole space feel chaotic. A cleaner mix almost always looks more expensive than a complicated one.
Poor niche placement is another easy mistake. If it lands at an awkward height or cuts through the tile pattern in a weird way, the whole wall can look off even when the materials are nice.
Skipping samples is risky, especially with warm and cool undertones. Tile, grout, lighting, and metal finishes all react differently in a real bathroom than they do in a showroom or photo.
Finally, do not treat the shower floor like an afterthought. Good traction, proper slope, and a finish that works with the wall tile matter just as much as the pretty part.
FAQ
What tile size works best in a walk-in shower?
Large-format tile works great on walls because it cuts down on grout lines and makes the shower feel more open. Smaller tile usually works better on the floor because it handles slope and grip more effectively.
Is a walk-in tile shower good for a small bathroom?
Yes, especially if the design stays simple and visually open. A curbless entry, lighter tile, and minimal glass can make a small bathroom feel noticeably bigger.
Do walk-in showers need a door?
Not always. Many walk-in showers work really well with a fixed glass panel or even no door at all if the layout controls splash properly.
What is the easiest shower tile to keep clean?
Large porcelain tile with a matte or satin finish is one of the easiest options. It has fewer grout lines than small tile and usually hides water marks better than glossy surfaces.
Are shower niches better than shelves or caddies?
In most cases, yes. A built-in niche looks cleaner, keeps products organized, and makes the shower feel more custom than hanging storage ever will.
How do I make my tile shower look more expensive without a full remodel?
Focus on the details that change the overall impression fast. Better grout color, a cleaner niche design, a fixed glass panel, warm tile tones, and a more cohesive layout can do a lot without requiring a full gut job.
Final Thoughts
A walk-in tile shower can change the entire bathroom without needing a hundred dramatic upgrades. The smartest designs usually look simple, function well, and avoid that overdone showroom energy.
I’d start with the layout, pick one strong style direction, and keep the materials working together instead of competing. That approach almost always looks better fast, and honestly, it saves a lot of regret later.