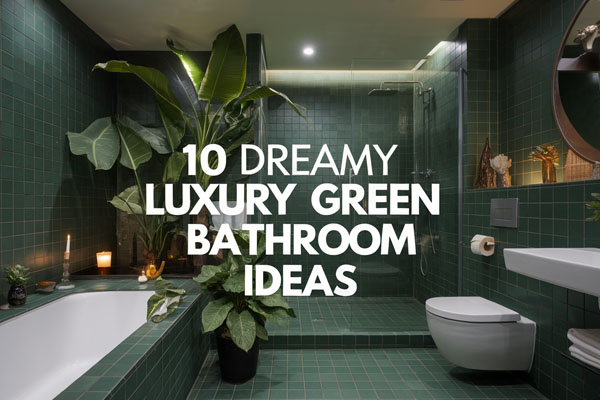
15 Small Bathroom Ideas With Tub That Save Space
Steam clings to the mirror, towels crowd the hooks, and your elbows keep bumping into things that should not exist. Small bathrooms with tubs feel cozy in theory, but they test your patience fast.
I learned the hard way that square footage matters less than smart choices, and once I stopped fighting the tub, everything else started working.
I used to think a tub automatically meant clutter and compromise, but that idea never helped me enjoy my own space. I changed how the room flowed instead of changing the room itself.
You can do the same without knocking down walls or losing your sanity.
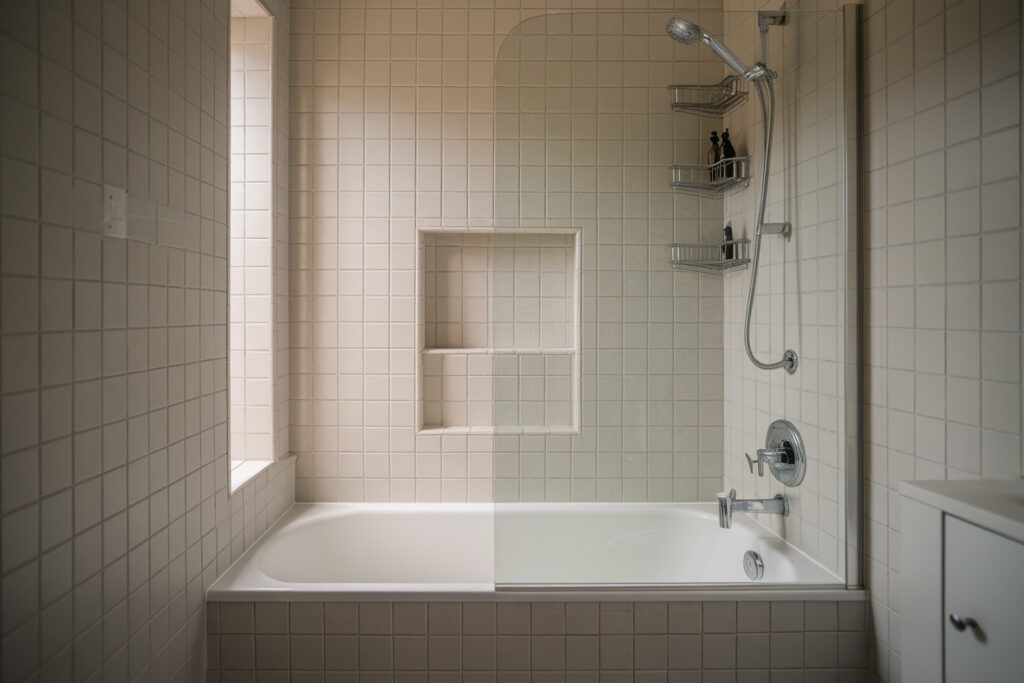
1. Compact Alcove Tub With Built-In Storage Shelves
Small bathrooms usually fail because they waste the space around the tub, not because the tub feels too big. A compact alcove tub with built-in shelving turns that dead zone into a workhorse.
I love this option because it feels intentional instead of crammed, and it keeps everyday items right where you need them.
The tub sits between three walls, which already saves space by design. The magic happens when you add recessed shelves into the surrounding walls, especially near the plumbing side. You gain storage without adding bulk, and the bathroom suddenly feels calmer and more organized.
Why This Works
This setup uses space that already exists, which always beats adding furniture later. Built-in shelves keep the eye moving instead of stopping at bulky racks or carts. The tub stays the star, but the storage quietly supports it.
How to Do It
- Choose a shorter alcove tub designed for small bathrooms
- Add recessed niches between wall studs near the tub
- Keep shelf depth shallow to avoid visual clutter
- Use waterproof materials that handle steam easily
Style & Design Tips
Stick with light tile colors on the shelves to reflect more light. Avoid mixing too many finishes because small bathrooms punish visual chaos. Clean lines always win here.
Pro Tip or Budget Hack
If cutting into walls feels intimidating, use slim surface-mounted shelves that mimic built-ins. Paint them the same color as the wall, and they blend in surprisingly well.
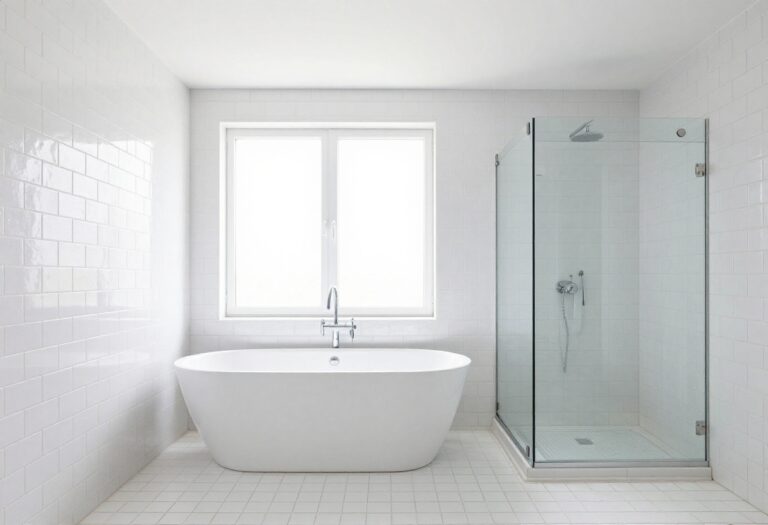
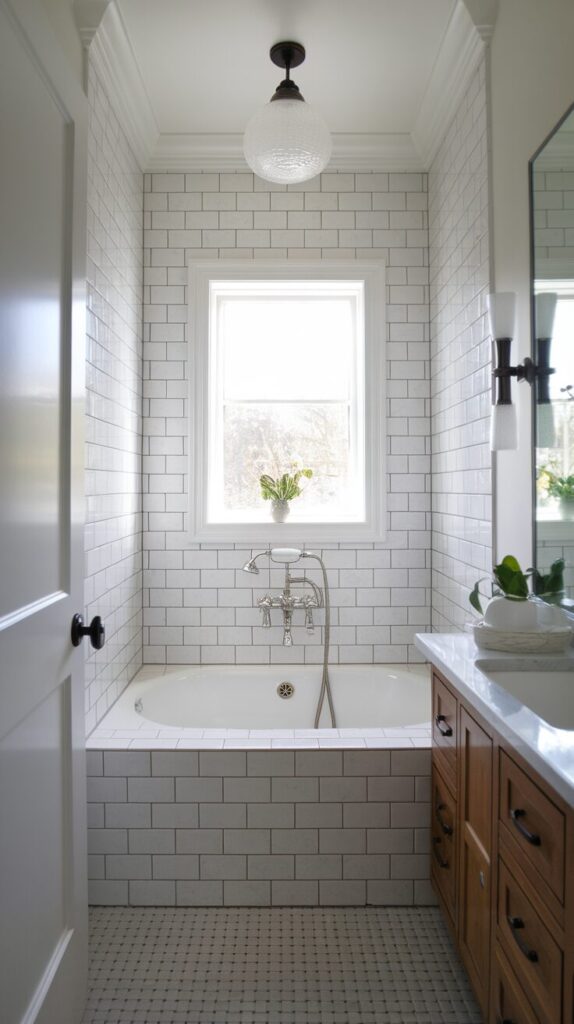
2. Shower-Tub Combo With Clear Glass Panels
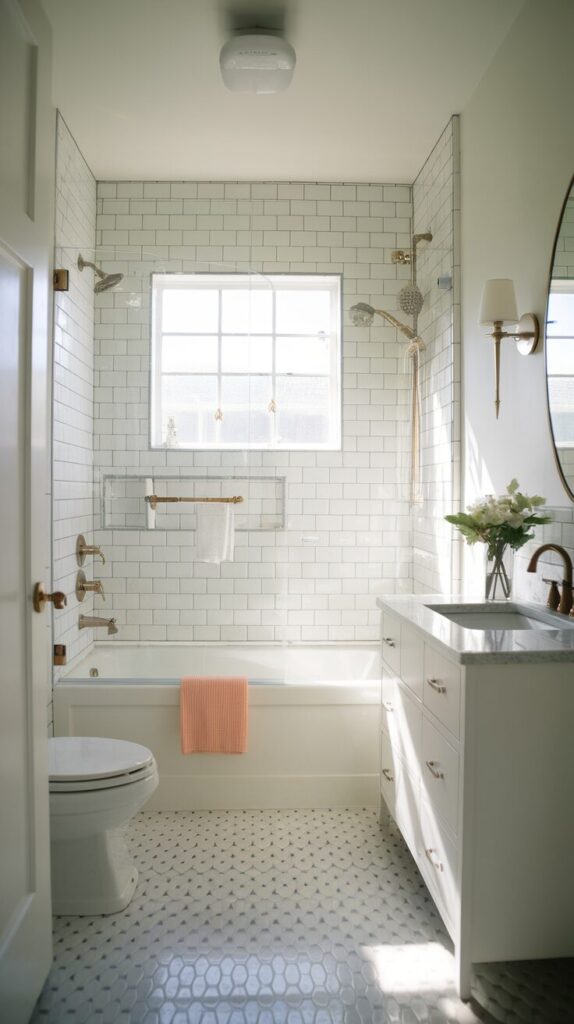
Shower curtains lie to you. They promise flexibility, but they make small bathrooms feel chopped up and dark. Clear glass panels change everything by letting light move freely through the space.
I swapped a curtain for a fixed glass panel in a tight bathroom, and the room instantly felt wider. The tub stayed exactly where it was, but the visual barrier disappeared. That single change made the whole bathroom breathe.
Why This Works
Glass creates continuity, which tricks your brain into seeing more space. A fixed panel also eliminates the daily battle with soggy curtains. The tub-shower combo stays functional without feeling boxed in.
How to Do It
- Measure carefully to choose the right glass panel size
- Install a fixed or hinged panel instead of a full enclosure
- Use minimal hardware to keep the look clean
- Seal edges properly to avoid water issues
Style & Design Tips
Choose frameless or thin-frame glass for the cleanest look. Skip frosted glass unless privacy demands it. Clear always wins in small rooms.
Pro Tip or Budget Hack
Partial panels cost less than full enclosures and still block splashes. You get the open look without paying premium prices.
3. Tub With Integrated Storage Apron
That blank tub apron feels harmless, but it wastes serious potential. An integrated storage apron turns the tub base into hidden storage. I love this idea for bathrooms that lack closets or cabinets.
Drawers or lift panels built into the tub surround store towels, cleaning supplies, or backup toiletries. Everything stays accessible without adding a single extra piece of furniture. The bathroom stays sleek, not stuffed.
Why This Works
You use the tub footprint more efficiently without shrinking anything else. Hidden storage keeps clutter out of sight, which matters in tight spaces. The room feels simpler even though it works harder.
How to Do It
- Choose a tub designed for storage integration
- Work with a carpenter for custom panels if needed
- Use moisture-resistant drawer hardware
- Keep contents organized with bins
Style & Design Tips
Match the apron finish to the wall color for a seamless look. Avoid chunky handles that draw attention downward. Flat fronts keep things modern.
Pro Tip or Budget Hack
Use removable magnetic panels instead of drawers for cheaper access storage. They cost less and still hide clutter effectively.
4. Corner Tub Designed for Small Bathrooms

Corner tubs get a bad reputation, but modern versions fix old mistakes. A compact corner tub frees up wall space while still offering a comfortable soak. I used to hate corner tubs until I saw how well the newer ones fit.
This option works especially well in square bathrooms where wall space feels limited. The tub tucks neatly into a corner, opening the center of the room. Movement feels easier and less cramped.
Why This Works
Corners often go underused, and this design flips that problem. You gain floor space where you actually walk. The tub stays functional without dominating the layout.
How to Do It
- Choose a small-footprint corner tub
- Confirm plumbing alignment early
- Pair with wall-mounted fixtures
- Keep surrounding finishes light
Style & Design Tips
Use large-format tiles to reduce grout lines around the tub. Skip bulky corner shelves that crowd the area. Simplicity keeps the corner clean.
Pro Tip or Budget Hack
Look for acrylic corner tubs instead of stone. They cost less and install more easily in small homes.
5. Wall-Mounted Faucet With Standard Tub

Floor and deck-mounted faucets steal precious inches. Wall-mounted faucets give those inches back. I underestimated how much cleaner this setup feels until I tried it myself.
Mounting the faucet on the wall opens the tub deck or removes it entirely. Cleaning gets easier, and the tub area feels less cluttered. The change looks subtle but works hard.
Why This Works
You eliminate unnecessary hardware surfaces. The wall handles water delivery without intruding into your space. Every inch matters in small bathrooms.
How to Do It
- Confirm wall depth supports plumbing
- Choose a faucet with a compact spout
- Install during renovation for easier access
- Test water flow direction carefully
Style & Design Tips
Stick with simple silhouettes that age well. Avoid oversized handles that overwhelm the tub area. Clean lines feel lighter.
Pro Tip or Budget Hack
Some brands offer retrofit kits for wall faucets. They save money if your wall already hides plumbing access.
6. Japanese-Style Soaking Tub

Deep tubs beat long tubs in small spaces. Japanese soaking tubs focus on depth, not length. I fell in love with these once I realized how little floor space they need.
These tubs feel luxurious without stretching across the room. You sit upright, soak deeply, and still keep space for storage or movement. Comfort improves while clutter disappears.
Why This Works
Vertical design uses space more efficiently. The tub footprint stays small, but the experience feels rich. That balance matters in tight bathrooms.
How to Do It
- Measure ceiling height for comfortable entry
- Choose a compact soaking tub model
- Pair with wall-mounted fixtures
- Add a small step if needed
Style & Design Tips
Keep the area calm with neutral tones and natural textures. Avoid busy tile patterns that compete with the tub. Let the form shine.
Pro Tip or Budget Hack
Acrylic soaking tubs cost far less than stone versions. They still deliver the same soaking depth and warmth.
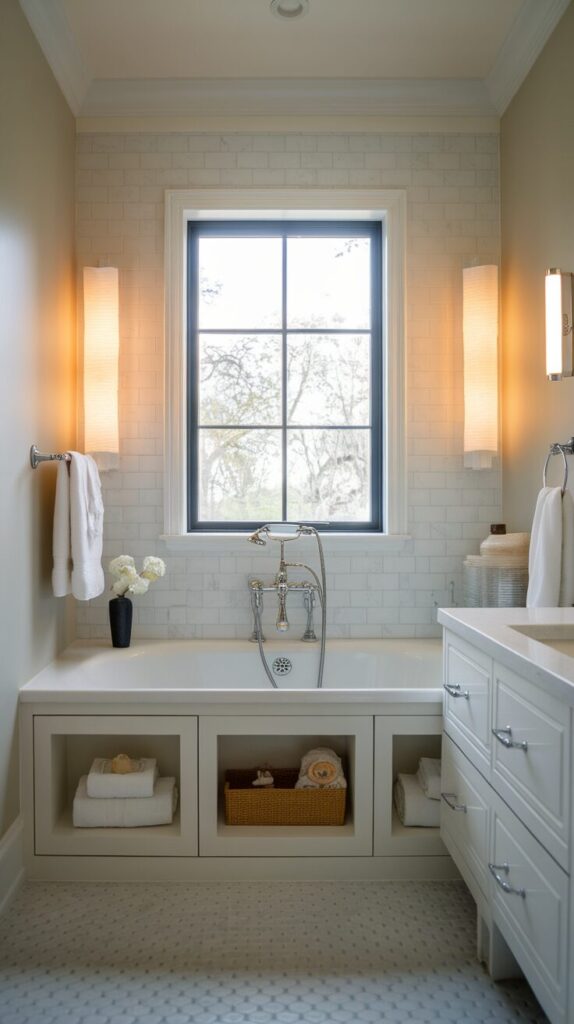
7. Tub Positioned Under a Window
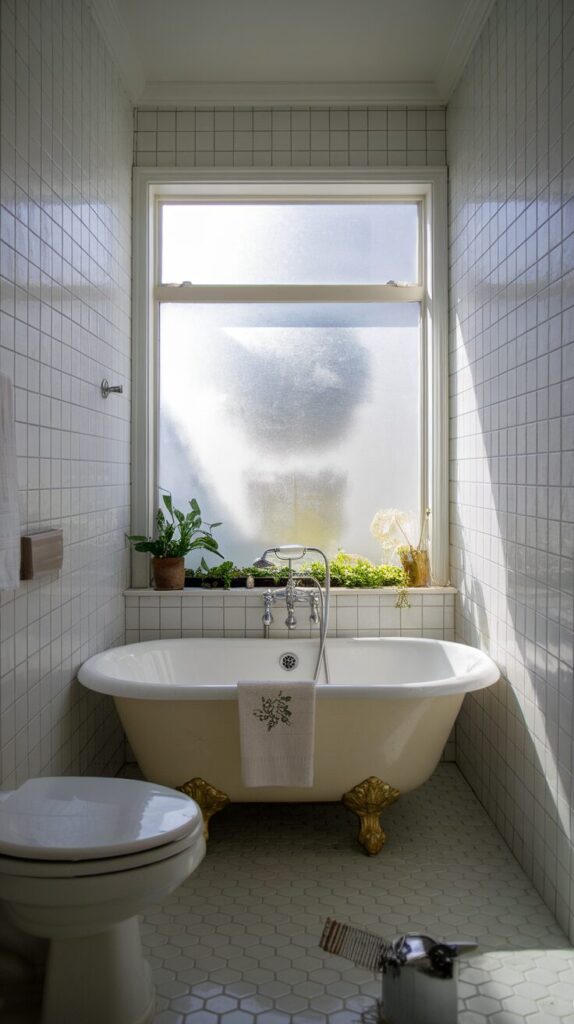
People fear tubs under windows, but they work beautifully in small bathrooms. Natural light instantly expands the space. I love how morning light makes the tub feel like a feature instead of an obstacle.
This layout frees up solid wall space for storage elsewhere. The tub gets a view, and the bathroom gains balance. Privacy stays manageable with the right window treatment.
Why This Works
Windows draw the eye outward. That visual extension makes the room feel bigger. The tub benefits from light instead of blocking it.
How to Do It
- Use frosted or textured glass
- Install waterproof window trim
- Choose moisture-resistant blinds
- Position fixtures thoughtfully
Style & Design Tips
Keep window treatments minimal and light. Avoid heavy curtains that trap moisture. Simple shades work best.
Pro Tip or Budget Hack
Static cling privacy film costs little and installs in minutes. It lets in light without permanent changes.
8. Built-In Tub With Floating Vanity Nearby
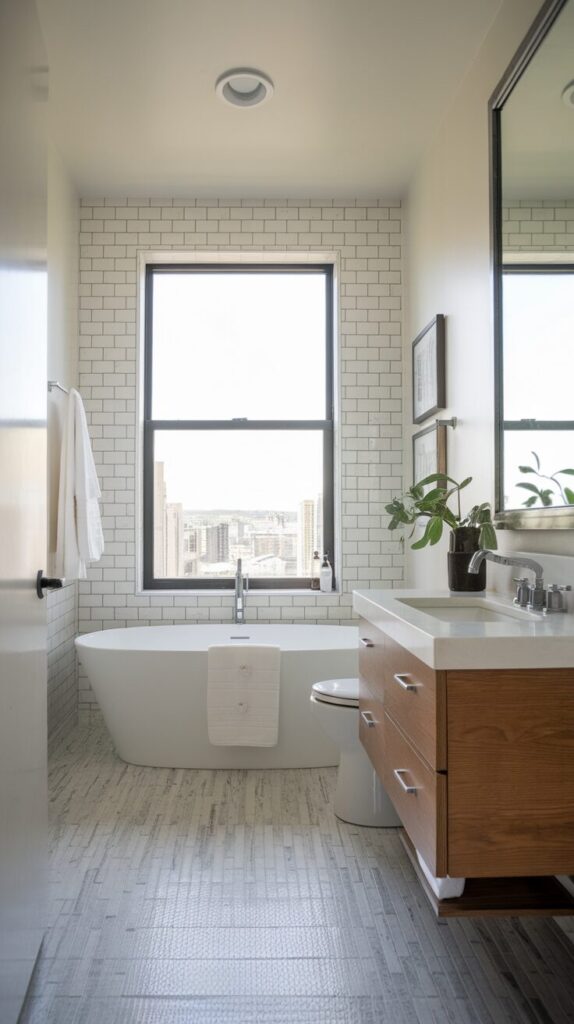
Floating vanities change how bathrooms feel. Pairing one with a built-in tub opens the floor visually. I noticed immediate improvement once the floor showed more surface.
The tub anchors the room while the vanity floats nearby. Storage stays available without crowding the floor. Cleaning also becomes faster, which always feels like a win.
Why This Works
Visible floor space makes rooms feel larger. Floating elements reduce visual weight. The tub remains grounded while other features lighten up.
How to Do It
- Choose a wall-mounted vanity with storage
- Align vanity height with tub edge visually
- Keep plumbing hidden cleanly
- Use under-vanity lighting if possible
Style & Design Tips
Choose handle-free vanity fronts for a sleek look. Avoid dark finishes that pull attention downward. Light wood or matte white works well.
Pro Tip or Budget Hack
IKEA-style floating vanities offer solid quality at lower prices. They install easily and save money.
9. Narrow Tub With Vertical Tile Emphasis
Horizontal lines widen rooms, but vertical lines add height. In small bathrooms, height matters. A narrow tub paired with vertical tile tricks the eye beautifully.
I tried vertical subway tile once and never went back. The tub felt less dominant, and the ceiling felt higher. That illusion helps tight spaces breathe.
Why This Works
Vertical lines pull the eye upward. The room feels taller without physical changes. The tub blends instead of blocking.
How to Do It
- Choose a slim-profile tub
- Install tiles vertically around the tub
- Use matching grout for cohesion
- Extend tile to the ceiling
Style & Design Tips
Stick with simple tile shapes to avoid visual noise. Skip bold patterns in small areas. Calm designs age better.
Pro Tip or Budget Hack
Standard subway tiles cost less than specialty tiles. Rotate them vertically for a fresh look without extra cost.
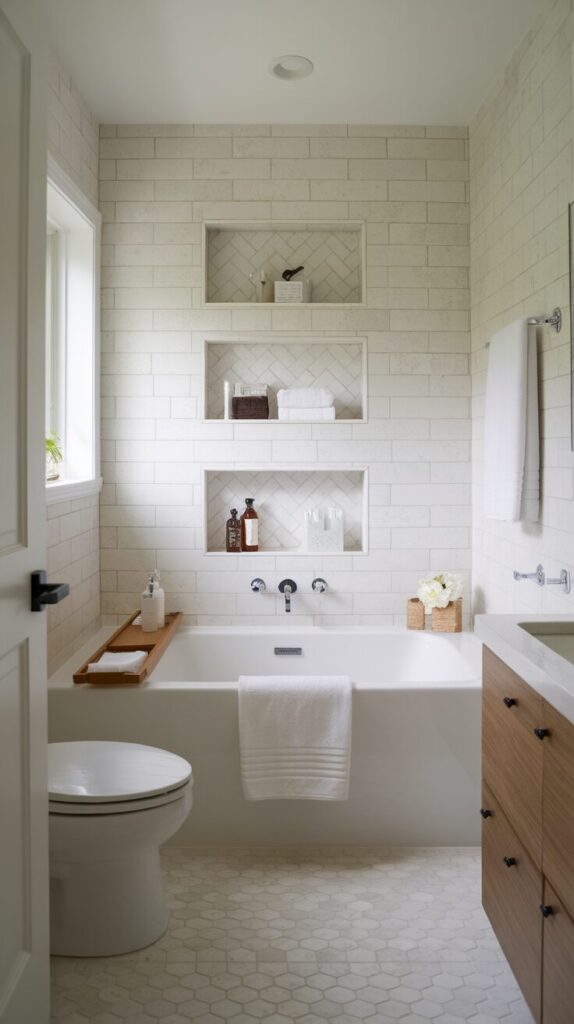
10. Tub With Overhead Storage Cabinets

Overhead storage scares people, but smart placement works wonders. Cabinets above the tub store rarely used items without stealing floor space. I use this trick for extra towels and backup supplies.
The key lies in keeping cabinets shallow and well-aligned. They should support the room, not dominate it. Done right, they disappear into the background.
Why This Works
Vertical storage uses unused air space. You keep the tub area functional while gaining storage. Floor space stays clear.
How to Do It
- Install shallow cabinets above tub height
- Anchor securely into studs
- Use moisture-resistant materials
- Limit contents to lighter items
Style & Design Tips
Paint cabinets the same color as the walls. Avoid dark tones that loom overhead. Seamless finishes feel lighter.
Pro Tip or Budget Hack
Open shelving costs less than cabinets and still stores essentials. Use baskets to keep things tidy.
11. Tub With Integrated Bench Seating

Benches feel luxurious but also practical. A built-in bench inside or beside the tub adds seating and storage. I love how it simplifies shaving, bathing kids, or just sitting.
The bench can hide storage underneath or support toiletries above. It adds structure without crowding the room. Comfort improves instantly.
Why This Works
Multi-use features save space. One element serves several needs. Small bathrooms thrive on versatility.
How to Do It
- Design bench during tub installation
- Use waterproof materials
- Keep bench depth moderate
- Add non-slip surfaces
Style & Design Tips
Match bench tile with tub surround for cohesion. Avoid contrasting colors that break flow. Unified finishes calm the space.
Pro Tip or Budget Hack
A simple tiled ledge costs less than custom benches. It still provides seating and storage.
12. Tub Paired With Sliding Door Entry

Swing doors eat space without mercy. Sliding doors free up valuable clearance. Pairing one with a tub changes movement patterns dramatically.
I swapped a hinged door for a slider and gained immediate breathing room. The tub no longer competed with the door. Traffic flowed better.
Why This Works
Sliding doors eliminate swing radius issues. You gain usable space instantly. The bathroom feels less cramped.
How to Do It
- Choose pocket or barn-style doors
- Confirm wall cavity space
- Use quality hardware
- Seal for bathroom moisture
Style & Design Tips
Keep door design simple and flat. Avoid heavy textures that steal focus. Clean lines work best.
Pro Tip or Budget Hack
Surface-mounted barn sliders cost less than pocket doors. They install faster and still save space.
13. Tub With Minimalist Open Shelving

Closed storage feels bulky in small rooms. Open shelves keep things light. I prefer them near tubs for daily essentials.
Shelves keep items visible and accessible. The room feels airy instead of boxed in. Discipline matters, but the payoff feels worth it.
Why This Works
Open storage reduces visual mass. The eye moves freely across the space. Small rooms benefit from openness.
How to Do It
- Install slim floating shelves
- Limit shelf count
- Use uniform containers
- Clean regularly
Style & Design Tips
Use matching bottles and jars. Avoid mismatched clutter. Consistency keeps shelves calm.
Pro Tip or Budget Hack
Wood planks and simple brackets cost little. Paint them wall color for a built-in feel.
14. Tub With Neutral Color Palette

Color controls perception more than size. Neutral palettes make small bathrooms feel open. I learned this after fighting bold colors for years.
Soft whites, warm beiges, and gentle grays keep the tub from dominating. The room feels balanced and relaxed. Everything flows better visually.
Why This Works
Neutrals reflect light evenly. They reduce contrast that chops up space. Calm colors support relaxation.
How to Do It
- Choose one primary neutral
- Layer textures instead of colors
- Keep finishes consistent
- Add subtle accents only
Style & Design Tips
Avoid stark white everywhere. Mix warm neutrals for depth. Texture adds interest without clutter.
Pro Tip or Budget Hack
Paint changes cost little and deliver huge impact. Start with walls before replacing fixtures.
15. Tub With Smart Lighting Placement

Lighting fixes more problems than people admit. Good lighting reshapes how small bathrooms feel. I noticed instant improvement once I adjusted lighting near the tub.
Layered lighting highlights the tub without overwhelming the room. Shadows disappear, and surfaces feel softer. The space feels intentional.
Why This Works
Proper lighting enhances depth. It prevents dark corners that shrink rooms. Light guides attention naturally.
How to Do It
- Install recessed ceiling lights
- Add wall sconces near the tub
- Use warm color temperature
- Include dimmers
Style & Design Tips
Avoid harsh overhead-only lighting. Mix ambient and task lighting. Balance matters.
Pro Tip or Budget Hack
LED strips under shelves cost little and add glow. They elevate the tub area instantly.
Smart Layout Strategy for Small Bathrooms With a Tub
Before you move a single fixture or buy one storage basket, step back and look at how your bathroom actually functions. I always tell friends to study movement first, because layout mistakes cause more frustration than lack of space. When you understand how you enter, turn, dry off, and store things, you design smarter instead of decorating blindly.
Start by identifying your bathroom’s traffic flow and daily habits. Notice where you bump into the vanity, where towels pile up, and where the tub blocks movement. When you fix those friction points first, the rest of your design decisions become easier and more intentional.
Think in zones instead of items. The tub zone handles bathing and moisture, the vanity zone handles grooming, and the storage zone supports both without crowding either. When you respect those zones, even the smallest bathroom starts to feel organized and purposeful.
Measure everything before committing to changes. Small bathrooms punish guesswork, and one oversized cabinet can undo all your effort. I always recommend mapping the room on paper with exact dimensions so you can visualize clearance and spacing before installation.
Prioritize vertical solutions over floor solutions. Walls offer more usable space than you think, especially above the tub and toilet. When you build upward instead of outward, you preserve walking room and reduce clutter instantly.
Finally, simplify materials and finishes. Limit your palette, reduce visual breaks, and keep fixtures streamlined. A cohesive space always feels larger than a busy one, even when the square footage stays the same.
Common Mistakes to Avoid in Small Bathrooms With a Tub
Many homeowners overload small bathrooms with bulky storage that visually shrinks the room. Heavy cabinets, thick frames, and dark finishes create unnecessary weight. Choose slim, light, and functional elements instead.
People often ignore lighting until the end, and that decision hurts the final result. One harsh overhead light flattens the space and creates shadows. Layered lighting makes even a tight tub area feel warm and open.
Another mistake involves overcrowding the tub surround with products. Shampoo bottles, bath toys, and decorative items quickly take over. Keep only daily essentials visible and store backups elsewhere.
Some homeowners choose oversized tubs in tiny bathrooms because they want luxury. That decision usually sacrifices movement and storage. A compact or deep soaking tub delivers comfort without overwhelming the layout.
Lastly, avoid mixing too many tile patterns and finishes. Visual chaos shrinks perception faster than actual walls. Stick to one or two cohesive finishes for a calm, spacious feel.
Budget Planning & Renovation Considerations
Budget clarity protects your design decisions from impulse upgrades. I always suggest separating cosmetic updates from structural changes so you know where your money goes. Paint and lighting cost less than plumbing relocation, and both impact the space differently.
If you plan a renovation, confirm plumbing placement early. Moving a tub drain or water line increases costs quickly. When you work with existing plumbing, you stretch your budget further without compromising style.
Choose durable materials that handle humidity well. Bathrooms experience constant moisture, and cheap finishes fail fast. Spending slightly more on waterproof materials saves money long term.
Consider phased upgrades if your budget feels tight. Start with lighting and paint, then tackle storage, then fixtures. Layering improvements over time keeps the space functional while you upgrade gradually.
Maintenance & Longevity Tips
Small bathrooms need consistent maintenance to stay functional. Clutter builds quickly in tight areas, so regular decluttering prevents overwhelm. I schedule quick resets weekly to keep surfaces clear.
Ventilation protects your investment. Install a quality exhaust fan and actually use it after showers. Proper airflow prevents mold and keeps finishes looking fresh.
Seal grout lines and caulk joints regularly. Moisture damage spreads quietly behind walls and under tubs. Simple upkeep extends the life of your bathroom dramatically.
Clean glass panels and light fixtures often. Bright surfaces reflect more light and maintain the spacious feel you worked hard to create. Maintenance keeps your design performing at its best.
Frequently Asked Questions
Can I fit a bathtub in a very small bathroom?
Yes, you can fit a bathtub in a small bathroom if you choose a compact or deep soaking model. Smart layout planning and vertical storage make it work comfortably.
What is the best tub style for saving space?
Alcove tubs and Japanese-style soaking tubs save the most space. They use walls efficiently and keep the footprint minimal.
Should I remove my tub to make the bathroom feel bigger?
Removing a tub creates more floor space, but it reduces versatility and resale appeal. A well-designed compact tub often balances function and value better.
How do I make a small bathroom with a tub look bigger?
Use light colors, clear glass panels, floating vanities, and layered lighting. These elements visually expand the room without changing its size.
Are corner tubs good for small bathrooms?
Modern compact corner tubs work well in square layouts. They free up central floor space and improve movement.
What color works best in a small bathroom with a tub?
Neutral tones like soft white, warm beige, and light gray reflect light and reduce visual clutter. Consistent color palettes always feel more spacious.
Final Thoughts
Small bathrooms with tubs demand smarter thinking, not bigger budgets. You do not need to try every idea at once to see improvement. Pick one change that fixes your biggest annoyance, and build from there.
I always start with layout and light before buying accessories. Once the space works, decorating feels fun instead of frustrating. Try one idea this week and enjoy the difference.