13 Tub to Shower Conversion Ideas for a More Polished Bathroom
Swapping out an old tub for a shower can instantly refresh your bathroom's vibe, making it feel more open and tailored to your daily routine. It's a change that blends practicality with style, offering a chance to rethink how the space flows and functions.
Start by considering the mood you want—whether it's a serene retreat or a bright, energizing spot—and let that guide your decor choices. From there, small details like lighting and texture can elevate the whole look, turning a basic update into a standout feature.
This listicle walks through ideas that balance comfort with visual appeal, ensuring your new shower area feels both cozy and polished.
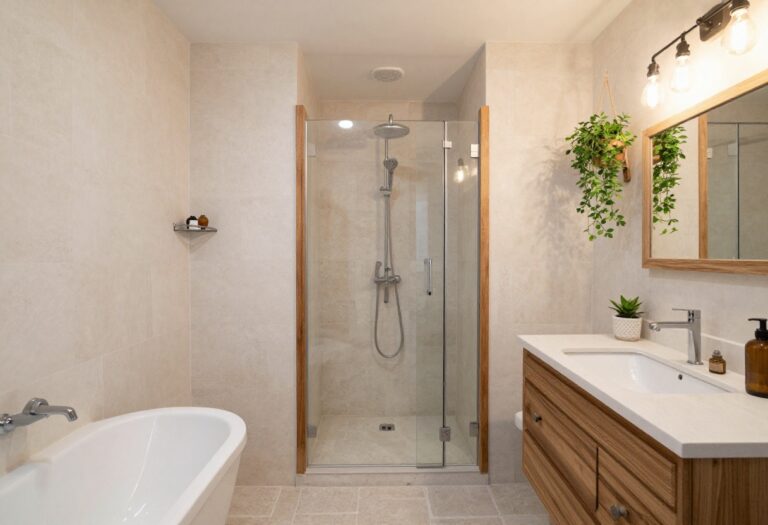
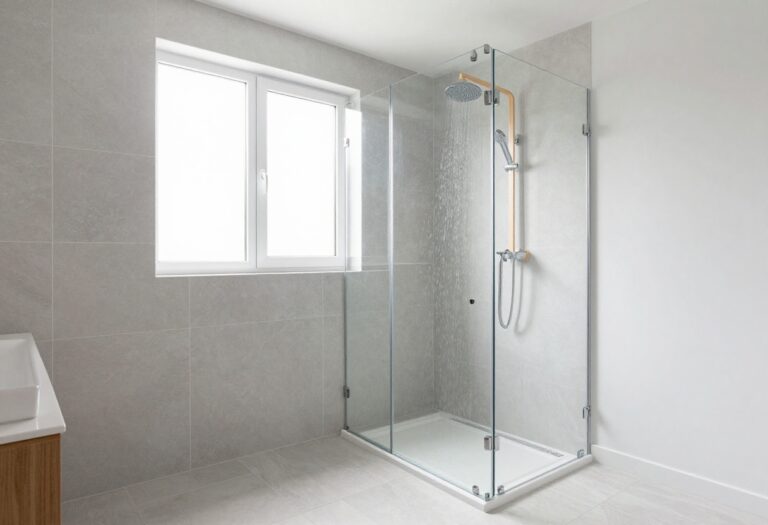
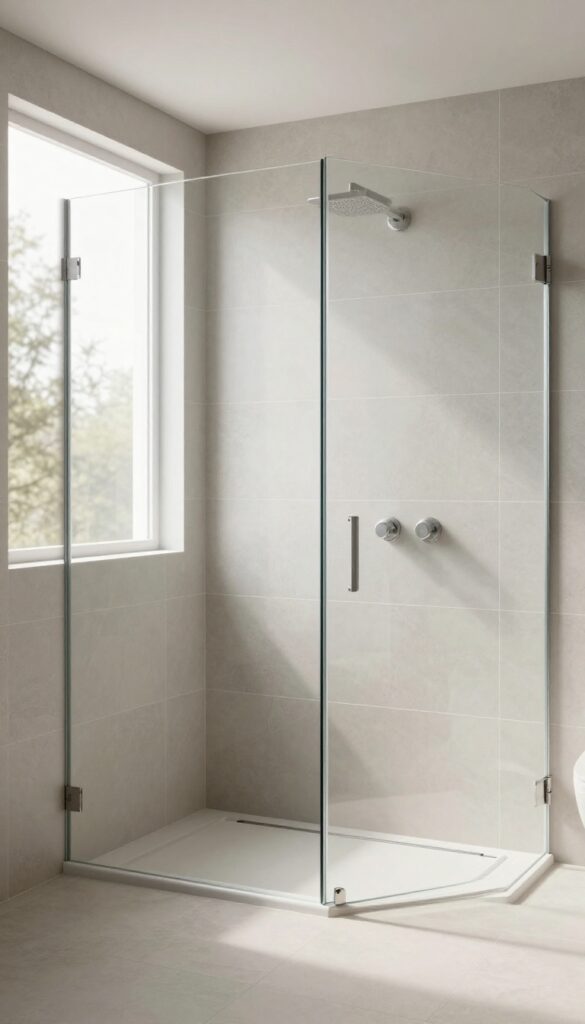
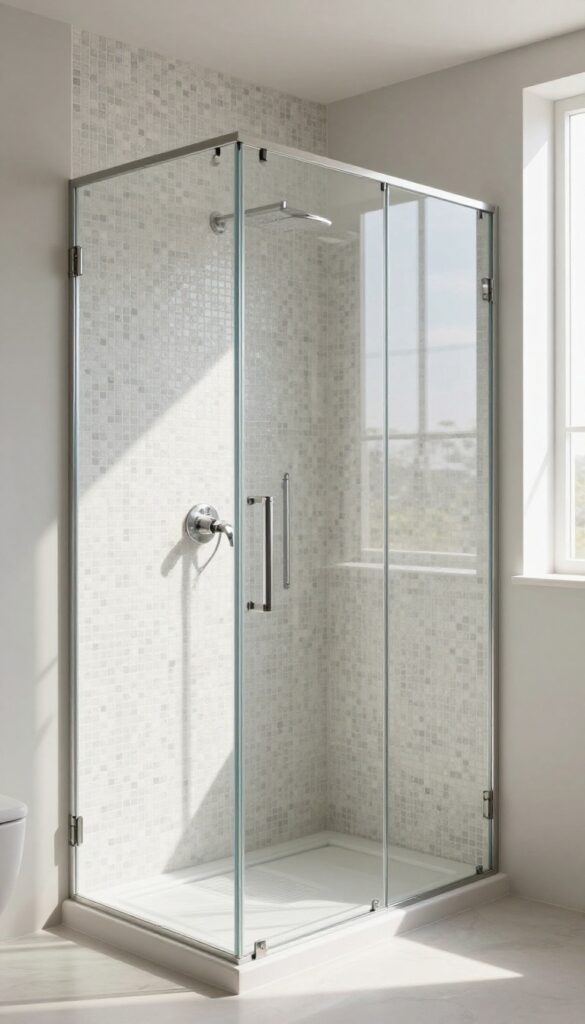
1. Go Frameless for a Sleek, Open Feel
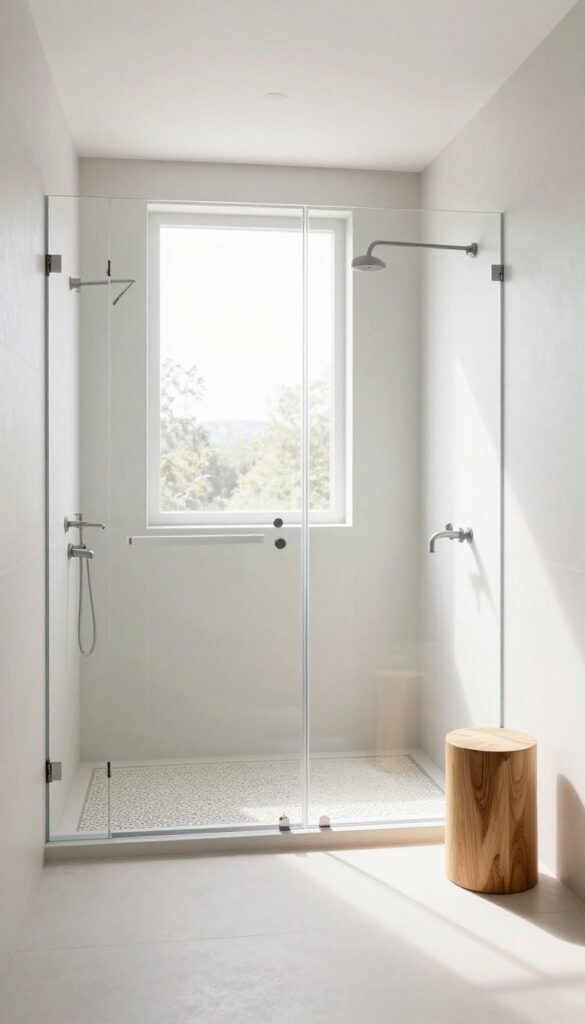
A frameless glass shower enclosure instantly transforms your bathroom by removing bulky frames and hinges. It creates a clean, uninterrupted look that feels airy and modern, perfect for making small spaces appear larger. People love how it simplifies cleaning and adds a touch of luxury without overwhelming the room.
Why It Works
Frameless glass eliminates visual barriers, allowing light to flow freely and making the bathroom feel more spacious. The seamless design reduces clutter, so your shower area looks polished and easy to maintain, enhancing both style and practicality.
Best For
This idea fits best in bathrooms aiming for a contemporary or minimalist vibe, especially smaller ones where maximizing openness is key. It works well in master suites or guest baths where you want a sleek, uncluttered finish.
Styling Tip
Pair the frameless glass with neutral tiles and matte fixtures to keep the focus on the clean lines. Add a subtle texture with a pebble floor or a wooden stool inside for warmth, ensuring the space feels inviting yet streamlined.
Budget-Friendly Swap
If custom frameless glass is too pricey, opt for semi-frameless options with minimal metal accents. You can also use clear shower curtains on a tension rod for a similar open effect at a fraction of the cost.
2. Add a Built-In Bench for Comfort and Storage
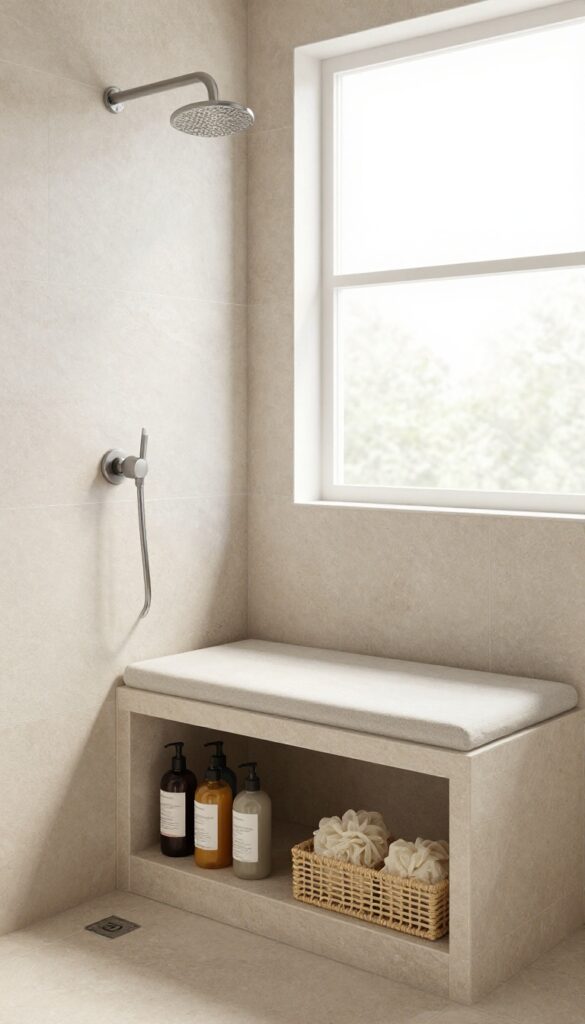
Imagine having a cozy spot to sit right in your shower, perfect for those moments when you want to relax or need a break. A built-in bench isn't just about comfort—it also adds hidden storage underneath, keeping toiletries organized and within easy reach. This feature turns your shower into a more functional and inviting space, blending practicality with a touch of luxury that makes daily routines feel special.
Why It Works
A built-in bench works because it maximizes unused space in the shower area, providing both seating and storage without taking up extra room. It enhances safety by offering a stable place to sit, which is especially helpful for anyone with mobility concerns. Plus, the hidden compartments help reduce clutter, making your bathroom look cleaner and more polished.
Best For
This idea fits best in medium to large bathrooms where there's enough room to incorporate a bench without crowding the shower. It's ideal for families or individuals who value comfort and organization, or for creating a spa-like retreat in master bathrooms. Small spaces can still benefit by opting for a compact bench design that doesn't overwhelm the layout.
Styling Tip
Choose materials like tile or stone for the bench to match your shower walls, creating a seamless look that feels cohesive. Add a waterproof cushion or mat on top for extra comfort, and use baskets or bins under the bench to corral items like shampoo bottles and loofahs. Consider accent lighting above or beside the bench to highlight it as a focal point and enhance the ambiance.
Budget-Friendly Swap
If a custom-built bench is too pricey, try using a sturdy waterproof stool or teak bench that can be placed inside the shower. Look for storage solutions like wall-mounted shelves or corner caddies to mimic the organization benefits without construction costs.
3. Choose Large-Format Tiles for a Clean Look
Oversized tiles can make your shower feel more spacious and modern, with fewer grout lines creating a sleek, uninterrupted surface. This approach not only looks polished but also simplifies cleaning, cutting down on maintenance time and mold buildup. Many homeowners love how it adds a touch of luxury without feeling over-the-top, blending seamlessly with various bathroom styles.
Why It Works
Large-format tiles reduce visual clutter by minimizing grout lines, which helps the space appear larger and more cohesive. They're also more durable and easier to wipe down, making them a practical choice for wet areas like showers where hygiene matters.
Best For
This idea works well in bathrooms aiming for a contemporary or minimalist aesthetic, especially in smaller spaces where you want to avoid a busy look. It's also great for those prioritizing low-maintenance solutions in high-traffic family bathrooms.
Styling Tip
Pair large tiles with subtle grout in a matching or neutral shade to enhance the seamless effect. Consider extending the same tile from floor to wall for a continuous flow, and add texture with matte finishes or light veining to keep it from feeling too sterile.
Budget-Friendly Swap
If oversized tiles are too costly, opt for standard-sized tiles laid in a stacked bond pattern to mimic fewer grout lines. Use larger-format options on just one focal wall or the floor to save money while still achieving a cleaner look.
4. Incorporate a Niche for Shampoo and Soap
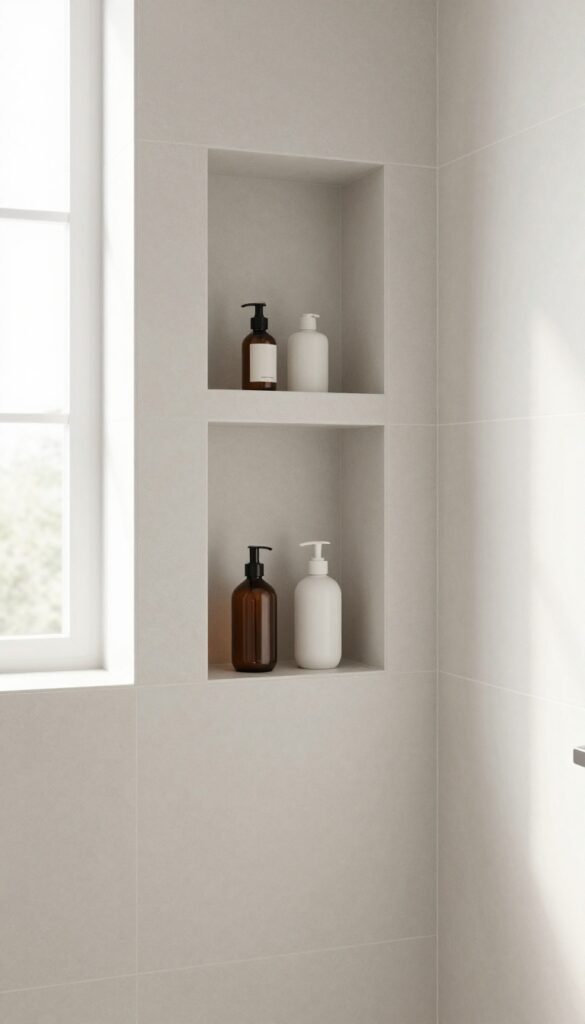
A recessed shelf built right into your shower wall keeps shampoo, soap, and other essentials tidy without taking up extra space. It's a smart way to ditch cluttered corners and add a custom look that blends seamlessly with your tile. People love how it makes everything feel organized and intentional, turning a basic shower into a more polished spot.
Why It Works
This idea works because it uses the wall itself for storage, so you don't need extra shelves or caddies that can look messy. It keeps items within easy reach while maintaining a clean, streamlined appearance that enhances the overall design of your bathroom.
Best For
It fits best in showers where you want to maximize space without sacrificing style, especially in smaller bathrooms or when aiming for a minimalist, spa-like vibe. It's also great for anyone tired of dealing with slippery bottles on the floor or crowded ledges.
Styling Tip
Match the niche tile to your shower wall for a cohesive look, or use a contrasting color or pattern to make it a subtle focal point. Consider adding a small LED light inside for extra ambiance and practicality, ensuring everything is visible and inviting.
Budget-Friendly Swap
If building a niche isn't feasible, opt for a sleek corner shelf made of waterproof materials like teak or stainless steel. Install it at a comfortable height to keep essentials off the floor while still achieving that organized feel without major renovation.
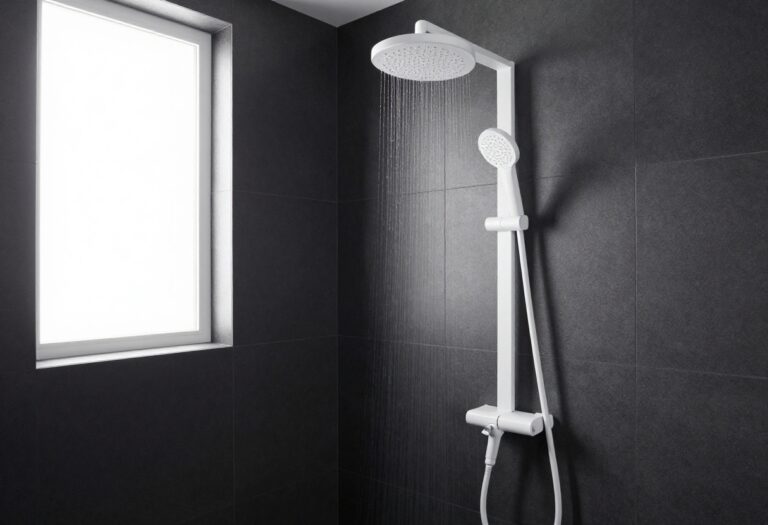
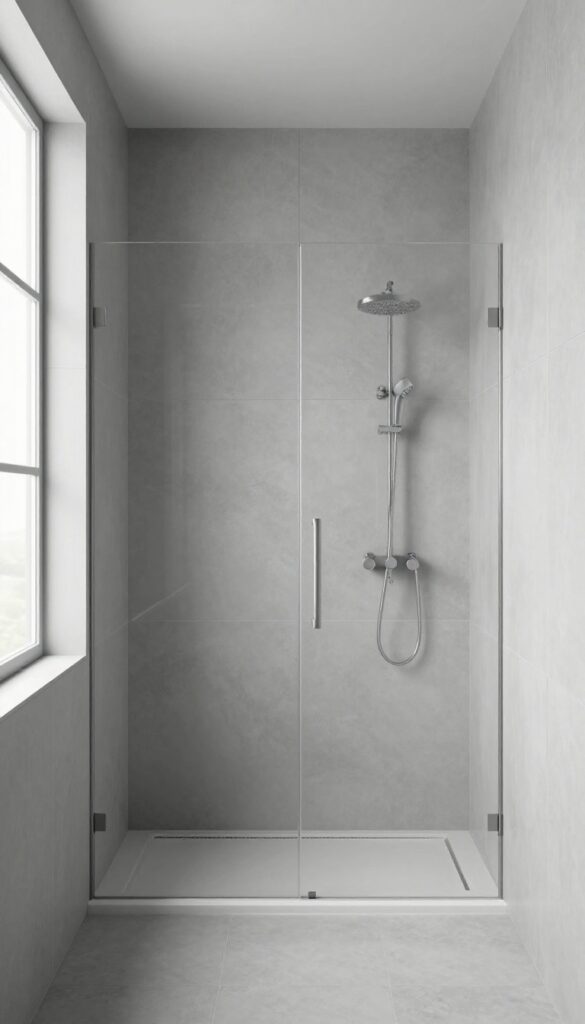
5. Opt for a Rainfall Showerhead for Luxury
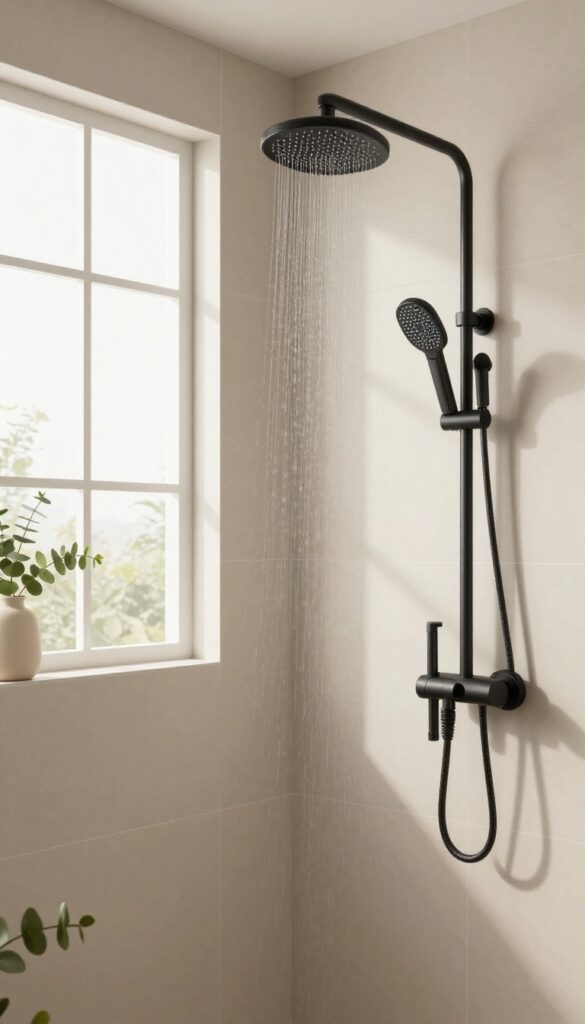
Picture stepping into your shower and feeling like you're under a gentle, warm rain—that's the magic of a rainfall showerhead. It's not just about getting clean; it's about turning your daily routine into a mini escape. People love it because it adds that spa-like touch without needing a full renovation, making your bathroom feel instantly more indulgent.
Why It Works
A rainfall showerhead works by spreading water evenly over a wider area, which reduces pressure points and creates a soothing, immersive experience. This gentle flow helps you relax muscles and unwind, mimicking the calming effect of natural rain. Plus, its ceiling-mounted design often means less splashing and a cleaner look that elevates your shower's overall aesthetic.
Best For
This idea fits best in bathrooms where you want to prioritize relaxation and luxury, especially in master suites or guest baths aiming for a high-end feel. It's great for those who enjoy longer showers or want to create a serene retreat at home. If your space has higher ceilings or an open layout, the rainfall effect can feel even more dramatic and enveloping.
Styling Tip
To style it well, pair the showerhead with neutral tiles and warm lighting to enhance the spa vibe—think matte black or brushed nickel finishes for a modern touch. Add plants like eucalyptus or bamboo nearby to bring in natural texture and scent. Keep the surrounding area clutter-free with built-in niches or simple shelves, so the focus stays on that luxurious water flow.
Budget-Friendly Swap
If a ceiling-mounted option is too pricey, look for wall-mounted rainfall showerheads that offer similar wide coverage at a lower cost. You can also upgrade just the showerhead without changing plumbing by choosing models with adjustable settings for rain-like spray. Another swap is to add a handheld attachment with a rainfall setting for flexibility without the full installation hassle.
6. Use Contrasting Grout to Define Tiles
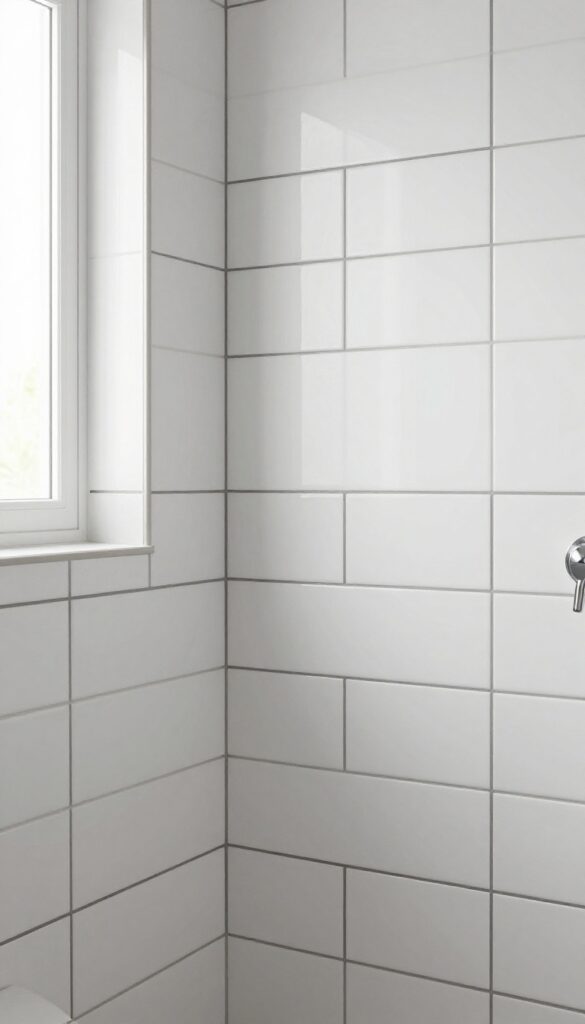
Sometimes the smallest tweak can make the biggest impact in your shower design. Choosing grout that contrasts with your tile color isn't just about cleaning—it's a clever way to draw attention to patterns and shapes you might otherwise overlook. This simple switch adds depth and personality, turning plain walls into a focal point without cluttering the space with extra accessories.
Why It Works
Contrasting grout works because it creates clear lines that emphasize tile layouts, making geometric or subway patterns pop visually. It adds texture and definition, helping the shower area stand out while keeping the overall look clean and intentional. This technique is especially effective in small bathrooms where every detail counts toward a polished finish.
Best For
This idea fits best in modern or minimalist bathrooms where you want to highlight sleek tile work without overwhelming the space. It's also great for vintage-inspired designs with intricate patterns, as the grout can enhance those details beautifully. Consider it for showers with neutral tiles to inject a subtle burst of contrast.
Styling Tip
Pair dark grout with light tiles for a bold, graphic effect, or try a soft gray with white tiles for a more subdued look. Keep the rest of your decor simple—think clean lines in fixtures and minimal accessories—to let the grout shine. For added cohesion, echo the grout color in small touches like towel bars or bath mats.
Budget-Friendly Swap
If new tiles aren't in your budget, refresh existing ones by regrouting with a contrasting color instead. It's a DIY-friendly project that costs much less than a full renovation but still delivers that custom, high-end feel. Just ensure your tiles are in good condition to make the new grout stand out effectively.
7. Install a Linear Drain for a Modern Edge
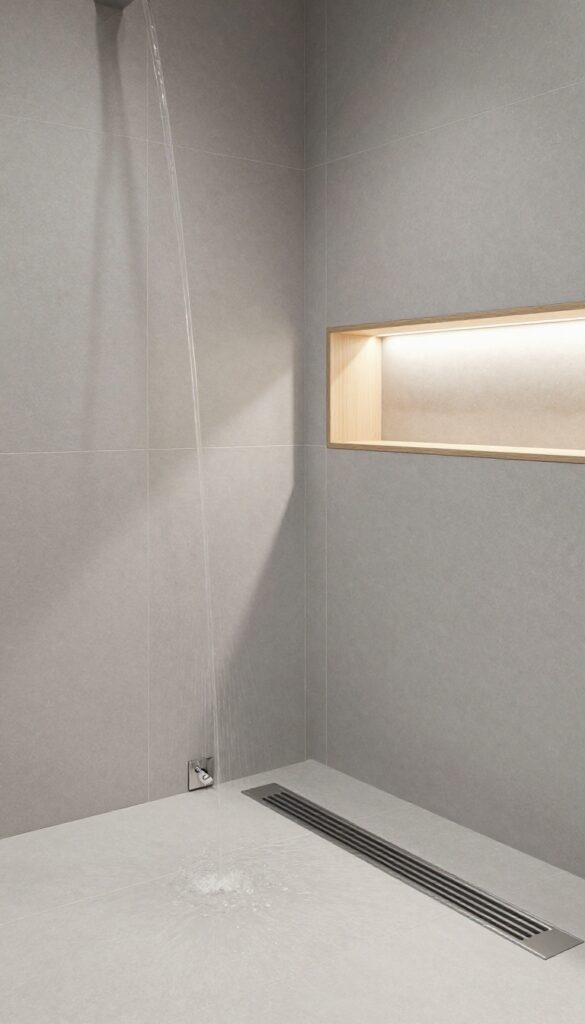
Switching to a linear drain gives your shower a sleek, updated look that feels straight out of a high-end spa. It's not just about aesthetics—this type of drain can actually help water flow away more efficiently, reducing puddles and making cleanup easier. Many homeowners love how it complements large tiles and creates a seamless, minimalist vibe in the bathroom.
Why It Works
Linear drains are designed to sit flush along one wall, which allows for better water drainage compared to traditional center drains. This setup minimizes standing water and helps prevent slips, while also giving you more flexibility in tile layout. It's a smart choice for improving both safety and style in your shower space.
Best For
This idea works best in bathrooms aiming for a contemporary or industrial look, especially if you're using large-format tiles or natural stone. It's also great for smaller showers where every inch counts, as the slim profile doesn't eat up visual space. Consider it if you want a polished finish that feels custom and intentional.
Styling Tip
Pair your linear drain with oversized tiles in neutral tones like gray or beige to enhance the clean lines. Add subtle texture with matte finishes or light wood accents nearby to keep things warm and inviting. For lighting, opt for recessed fixtures or a simple pendant to highlight the drain's sleek design without overwhelming the space.
8. Add Warmth with Heated Floors
Imagine stepping out of the shower on a chilly morning and feeling warm tiles under your feet instead of a cold shock. Radiant floor heating tucked beneath your shower tiles turns a basic bathroom update into a cozy, everyday luxury. It's one of those upgrades that feels indulgent but makes perfect sense for comfort.
Why It Works
Heated floors work by warming the surface evenly, so you get consistent comfort without hot or cold spots. They're energy-efficient and can help dry the floor faster, reducing moisture buildup. Plus, they add a touch of spa-like pampering that elevates your whole bathroom experience.
Best For
This idea fits best in bathrooms where you want to boost coziness, especially in colder climates or homes with tile floors that tend to feel icy. It's great for master suites or guest baths where you aim to create a welcoming, polished retreat.
Styling Tip
Pair heated floors with neutral tile colors like soft grays or creamy whites to keep the focus on warmth and texture. Add a plush bath mat nearby for extra comfort when you step out, and consider dimmable lighting to enhance the relaxed vibe.
Budget-Friendly Swap
If radiant heating is out of budget, try a heated towel rack or a small area rug with a non-slip pad for instant warmth. These options add coziness without the installation cost.
9. Incorporate Natural Stone for Texture
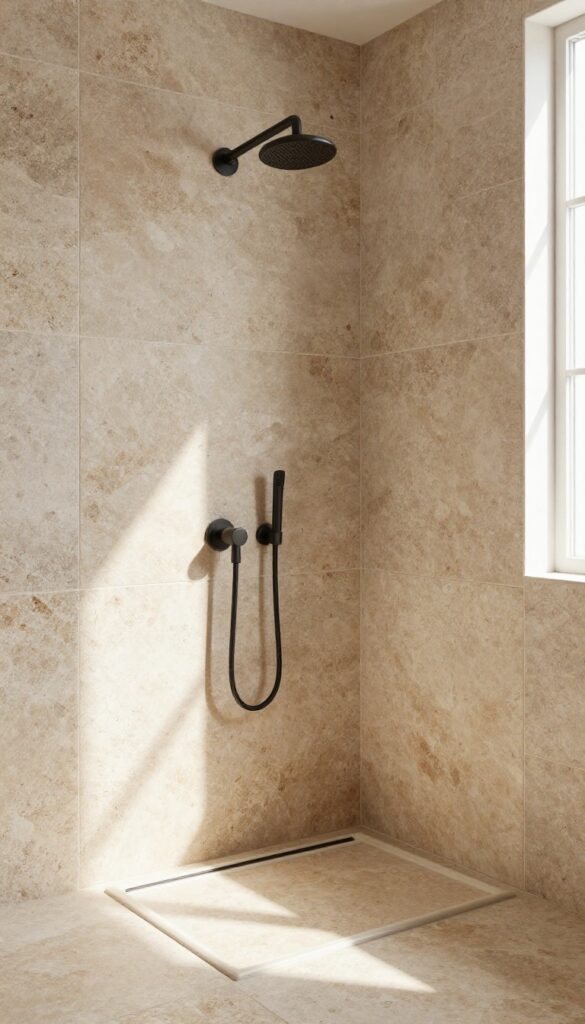
Bringing natural stone into your shower design adds a layer of depth that instantly elevates the space. Materials like slate or travertine introduce rich, earthy tones and a tactile feel, making the area more inviting and grounded. This approach blends rustic charm with a polished finish, creating a bathroom that feels both timeless and personal.
Why It Works
Natural stone works because it's durable and naturally water-resistant, perfect for wet areas like showers. Its varied textures and colors add visual interest without overwhelming the space, helping to create a cohesive look that feels organic and serene.
Best For
This idea fits best in bathrooms aiming for a spa-like or rustic-modern vibe, especially in shower walls or floors where the stone can be a focal point. It's great for homeowners who want to add character without sacrificing practicality.
Styling Tip
Pair slate or travertine with simple fixtures in matte black or brushed nickel to let the stone shine. Use larger tiles on walls to minimize grout lines and keep the look clean, and consider adding warm lighting to highlight the natural variations in color.
Budget-Friendly Swap
If natural stone is too pricey, try porcelain tiles that mimic its look—they're more affordable and easier to maintain while still offering similar texture and style.
10. Choose a Bold Accent Wall for Focus

A bold accent wall behind your shower can instantly become the star of your bathroom, drawing attention without needing a full room makeover. It's a simple way to inject personality and visual interest, making the space feel more curated and intentional.
People love this idea because it adds a pop of color or pattern that breaks up monotony, creating a focal point that feels both stylish and personal. It works especially well in bathrooms where you want to keep other elements neutral, letting the wall do all the talking.
Why It Works
This approach works by using contrast to guide the eye, making the shower area feel more defined and polished. A patterned or colored tile wall adds depth and texture, which can make a small bathroom appear larger or more dynamic without overwhelming the rest of the decor.
Best For
It fits best in bathrooms with neutral palettes or minimalist designs, where you want to add a touch of drama without clutter. This idea is also great for renters or those on a budget, as you can focus on one wall instead of retiling the entire room.
Styling Tip
Keep the rest of the bathroom simple with clean lines and muted tones to let the accent wall shine. Add matching accessories like towels or a bath mat in complementary colors to tie everything together seamlessly.
Budget-Friendly Swap
If new tiles are too pricey, consider peel-and-stick wallpaper designed for moisture resistance or paint with a high-gloss finish for a similar effect. These options are easy to install and can be swapped out later if you change your mind.
11. Install Multiple Showerheads for Versatility
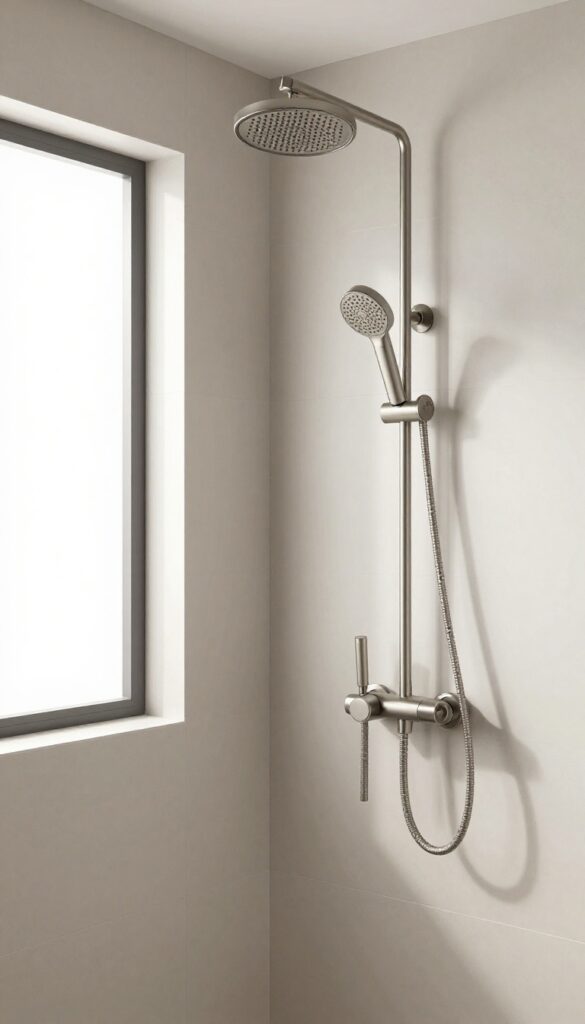
Adding both a handheld and a fixed showerhead gives you the best of both worlds in your shower setup. It’s a simple upgrade that makes cleaning easier and bathing more adaptable, whether you’re rinsing off quickly or helping kids wash up. People love how it adds a touch of luxury without needing a major renovation, making everyday routines feel a bit more special.
Why It Works
This setup works because it combines convenience with flexibility. The fixed showerhead provides steady coverage for regular showers, while the handheld one lets you target hard-to-reach spots or adjust the flow for different tasks. It’s especially handy for cleaning the shower itself or accommodating users with varying heights and needs.
Best For
This idea fits best in family bathrooms or shared spaces where versatility matters. It’s also great for smaller bathrooms that need to maximize functionality without feeling cramped, as it doesn’t take up extra room but adds significant utility.
Styling Tip
Choose showerheads in matching finishes like brushed nickel or matte black to keep the look cohesive. Position the fixed head at a standard height and mount the handheld on a slide bar so it can be adjusted easily—this adds a custom feel without complicating installation.
Budget-Friendly Swap
If you’re on a tight budget, look for dual-showerhead kits that include both types in one affordable package. You can often find good options at home improvement stores that offer basic functionality without sacrificing style.
12. Use Glass Mosaic Tiles for a Sparkle
Glass mosaic tiles bring a bit of magic to your shower, catching light in ways that make the whole space feel brighter and more inviting. They're perfect for adding a touch of glamour without going overboard, creating subtle shimmer that elevates your bathroom's look. People love how these tiles can transform a simple shower into something special, offering both style and a practical way to enhance lighting.
Why It Works
These tiles work because their reflective surfaces bounce light around, making small showers appear larger and more open. The glass material is also durable and easy to clean, so you get beauty that lasts without extra hassle. Plus, the variety of colors and finishes lets you customize the sparkle to match any decor theme.
Best For
This idea fits best in bathrooms where you want to add visual interest without major renovations, especially in showers with good natural or artificial lighting. It's great for accent walls or borders in modern, minimalist, or even traditional styles, helping tie together other elements like fixtures and vanities.
Styling Tip
For a cohesive look, pair glass mosaics with neutral larger tiles to let the sparkle stand out without overwhelming the space. Use them as a border along the shower niche or behind the showerhead to create focal points that draw the eye. Keep grout lines thin and match the grout color to the tiles for a seamless finish.
Budget-Friendly Swap
If glass mosaics are too pricey, try using smaller ceramic or porcelain tiles with a glossy finish to mimic the reflective effect. You can also focus on just one accent area instead of covering a whole wall to save on materials while still getting that shimmer.
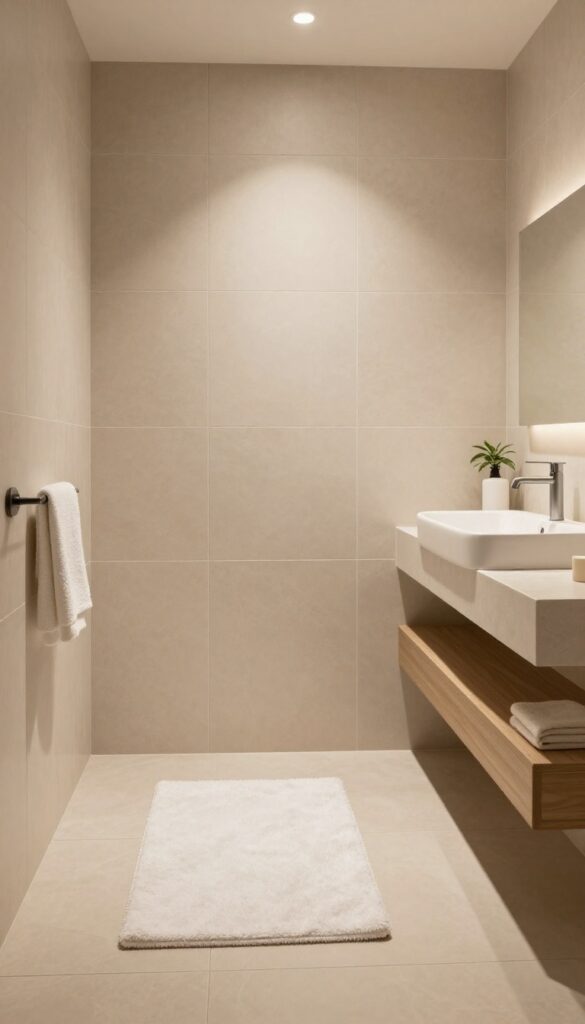
13. Keep It Simple with a Monochromatic Palette
A monochromatic palette in your shower conversion means sticking to shades within one color family for everything from tiles to fixtures. This approach creates a seamless, unified look that feels both calming and intentionally designed. People love it because it simplifies decision-making and results in a space that feels effortlessly put-together.
Why It Works
Using one color family reduces visual clutter, making the bathroom appear larger and more serene. It also allows textures and finishes to stand out, adding depth without overwhelming the eye.
Best For
This idea fits best in small bathrooms or those aiming for a minimalist, spa-like retreat. It's great for anyone who wants a low-maintenance design that still looks polished and cohesive.
Styling Tip
Mix matte and glossy tiles in similar hues to add subtle contrast. Pair with brushed nickel or chrome fixtures for a clean finish, and use towels or accessories in slightly lighter or darker tones to keep the look dynamic.
Budget-Friendly Swap
Opt for affordable ceramic tiles instead of pricier stone, and choose standard white fixtures that can be painted or accessorized with your chosen color palette.
FAQ
How much does a tub-to-shower conversion typically cost?
Costs vary widely based on materials and labor, but a basic conversion starts around $2,000-$5,000, while high-end options with custom features can reach $10,000 or more.
How long does a tub-to-shower conversion take to complete?
Most conversions take 3-7 days, depending on the complexity, with factors like tile drying time and fixture installation affecting the timeline.
Can I convert a tub to a shower in a small bathroom?
Yes, showers often save space compared to tubs, and options like corner units or frameless glass can make a small bathroom feel more open and functional.
What are the best materials for a shower conversion?
Popular choices include porcelain or ceramic tiles for durability, natural stone for texture, and acrylic or fiberglass for budget-friendly, easy-to-clean surfaces.
Do I need a permit for a tub-to-shower conversion?
Permit requirements vary by location, but many conversions require one, especially if plumbing is altered; check with local building codes to ensure compliance.
Conclusion
Transforming your tub into a shower opens up so many possibilities to craft a bathroom that's both beautiful and practical. Each idea here focuses on blending comfort with style, so you can pick what fits your space and needs best.
Remember, small touches like lighting or texture can make a big difference in how the room feels. Start with one change that excites you, and build from there—your polished, inviting bathroom is closer than you think.