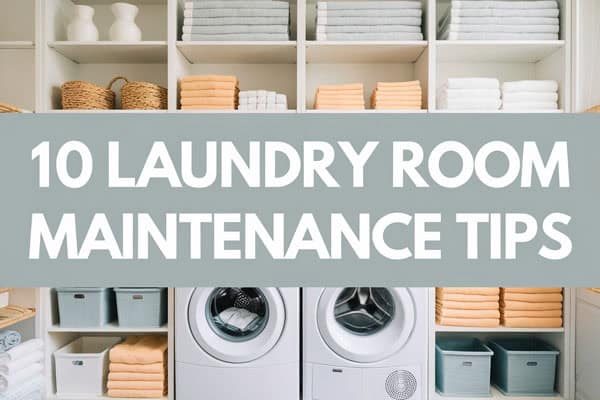
15 Essential Home Maintenance Tips You Must Know
Home maintenance usually gets ignored for one simple reason: nothing feels urgent until something breaks. People handle the noisy faucet, the weak airflow, or the tiny stain later, and later turns into a repair bill that hurts.
Neglect costs more than money, too. It creates safety risks, shortens appliance life, and adds that constant low-level stress of knowing the house has a few things hanging by a thread.
“Smart” maintenance means you do small, boring jobs before they become expensive, messy jobs. That approach saves time, cuts waste, and gives you control instead of forcing you into panic mode.
Reactive maintenance starts after damage shows up, while proactive maintenance starts when everything still looks fine.

I always prefer proactive work because it feels less dramatic and way cheaper, and honestly, drama belongs in TV shows, not in your kitchen ceiling.
This guide works for homeowners and renters because most of these habits focus on inspection, cleaning, and basic prevention. You do not need fancy tools or contractor-level skills to make a real difference.
Why Preventive Home Maintenance Saves Money and Stress
Small issues almost never stay small when you ignore them. A minor leak under a sink can turn into swollen cabinets, mold, and a floor repair that costs way more than a five-minute fix.
Preventive maintenance also helps appliances last longer because dirt, moisture, and friction quietly wear everything down. When you clean filters, check vents, and keep parts moving smoothly, your systems work with less strain.
Energy bills drop when your home runs efficiently. Sealed drafts, clean HVAC filters, and maintained appliances reduce waste, and that means you pay for comfort instead of paying for inefficiency.
Safety improves fast when you stay consistent with basic checks. Smoke detectors, cords, outlets, and moisture spots all give warning signs early, and regular maintenance helps you catch problems before they become dangerous.
A well-maintained home also holds value better, even if you do not plan to sell soon. Buyers notice signs of care, and you feel that same benefit every day because the house works the way it should.
1. Create a Monthly Home Inspection Routine

What This Means
Most people do maintenance only when something annoys them enough to deal with it. A monthly inspection routine fixes that by turning random repairs into a simple habit you can repeat without thinking too hard.
You walk through the home and check the same areas every month, even when everything seems fine. I like this tip because it stops the “I didn’t notice it” problem before it starts.
Why It Works
A routine catches early signs like stains, drips, cracks, rust, or odd smells before they become expensive projects. It also helps you compare changes month to month, which makes it easier to spot issues that grow slowly.
Consistency matters more than perfection here. Ten focused minutes every month beats one giant weekend cleanup after six months of ignoring everything.
How to Do It
- Start in the kitchen and check under sinks, around appliances, and along the backsplash for leaks or moisture.
- Move to bathrooms and look at caulk lines, toilet bases, and exhaust fans.
- Check windows, doors, vents, and visible walls for cracks, drafts, or stains.
- Test lights, listen for unusual sounds, and note anything that needs a follow-up.
- Keep a short checklist on your phone so you do not skip the same problem areas.
How Often
- Do a quick inspection once every month.
- Add a deeper seasonal check every three months for exterior areas and larger systems.
Common Mistake to Avoid
People usually rely on memory and then skip half the house. Use a repeatable checklist so your routine stays consistent, even on busy weeks.
2. Clean and Inspect HVAC Filters
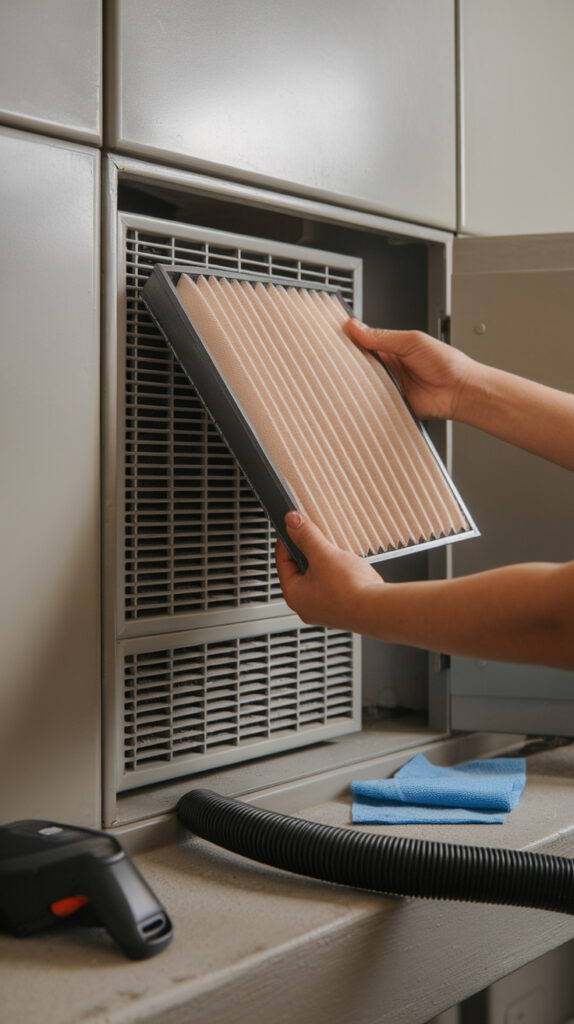
What This Means
HVAC filters trap dust, pet hair, and airborne junk before it circulates through your home. When filters clog up, airflow drops, your system works harder, and your energy bill starts climbing for no good reason.
A lot of people forget this task because the unit still runs, so it feels fine. I see this one as the easiest win on the whole list because it takes minutes and pays off fast.
Why It Works
Clean filters help your HVAC system move air efficiently, which reduces strain on the motor and other internal parts. That extra efficiency improves indoor air quality too, especially if you have pets, allergies, or a house that seems to collect dust overnight.
Dirty filters can also cause uneven cooling or heating in different rooms. You fix a comfort issue and a maintenance issue at the same time, which feels like cheating in the best way.
How to Do It
- Turn off the HVAC system before removing the filter.
- Check the filter size printed on the frame so you buy the correct replacement.
- Slide out the old filter and inspect it for heavy dust buildup or discoloration.
- Install the new filter in the correct airflow direction using the arrow on the frame.
- Write the replacement date on the filter or add a phone reminder immediately.
How Often
- Check filters monthly.
- Replace every 1–3 months depending on pets, dust, and usage.
Common Mistake to Avoid
Many people buy a filter and forget to install it properly. Match the airflow arrow direction or the system will struggle and the filter will not do its job well.
3. Check for Water Leaks Under Sinks
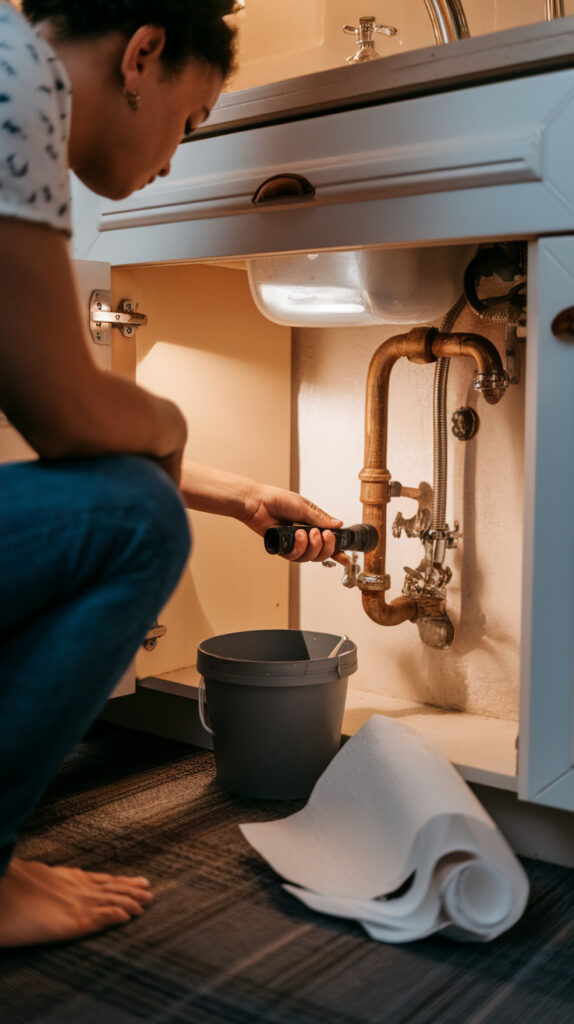
What This Means
Small plumbing leaks hide in plain sight because cabinets stay closed and nobody looks under them often. A slow drip under a sink can sit there for months and quietly damage wood, paint, and flooring.
This tip focuses on early leak detection, not complicated plumbing work. I always check under sinks after I notice a musty smell because that smell usually tells the truth before your eyes do.
Why It Works
Water damage spreads fast and gets expensive because it affects multiple surfaces at once. If you catch a loose connection or a worn washer early, you usually spend a few dollars instead of paying for cabinet replacement.
Leak checks also help prevent mold growth. Moist, dark cabinets create the perfect setup for mold, and nobody wants to deal with that mess or the smell that comes with it.
How to Do It
- Empty the area under each sink so you can see pipes and supply lines clearly.
- Run water for a minute, then check joints, valves, and the drain trap for drips.
- Feel the cabinet floor with your hand for damp spots or warping.
- Look for rust, mineral buildup, or peeling around connections.
- Tighten loose fittings gently and replace worn seals if needed.
How Often
- Inspect under sinks once a month.
- Recheck immediately if you notice odor, staining, or a spike in your water bill.
Common Mistake to Avoid
People often look quickly and miss slow leaks. Run the water while you inspect because many drips only show up when pressure moves through the line.
4. Test Smoke and Carbon Monoxide Detectors

What This Means
Smoke and carbon monoxide detectors protect your home only if they work when you need them. Batteries die, sensors age, and plenty of people assume everything works because the alarm has not beeped lately.
That assumption gets risky fast. I test mine on a schedule because safety gear should never depend on luck.
Why It Works
Regular testing confirms the alarm can detect danger and make enough noise to wake people up. It also helps you replace weak batteries before the low-battery chirp starts at 2:17 a.m., which feels like a personal attack.
Carbon monoxide protection matters even more because you cannot see or smell the gas. A working detector gives you a warning your senses cannot give you.
How to Do It
- Press the test button on each smoke and carbon monoxide detector until it sounds.
- Replace batteries if the sound seems weak or the unit chirps.
- Vacuum around detector vents to remove dust buildup.
- Check the manufacture date printed on the unit housing.
- Replace units that exceed the recommended lifespan, usually 7–10 years.
How Often
- Test every month.
- Replace batteries at least once a year unless the unit uses sealed long-life batteries.
Common Mistake to Avoid
People replace batteries but ignore old units. Check the detector age, because expired sensors can fail even with fresh batteries.
5. Seal Drafts Around Windows and Doors
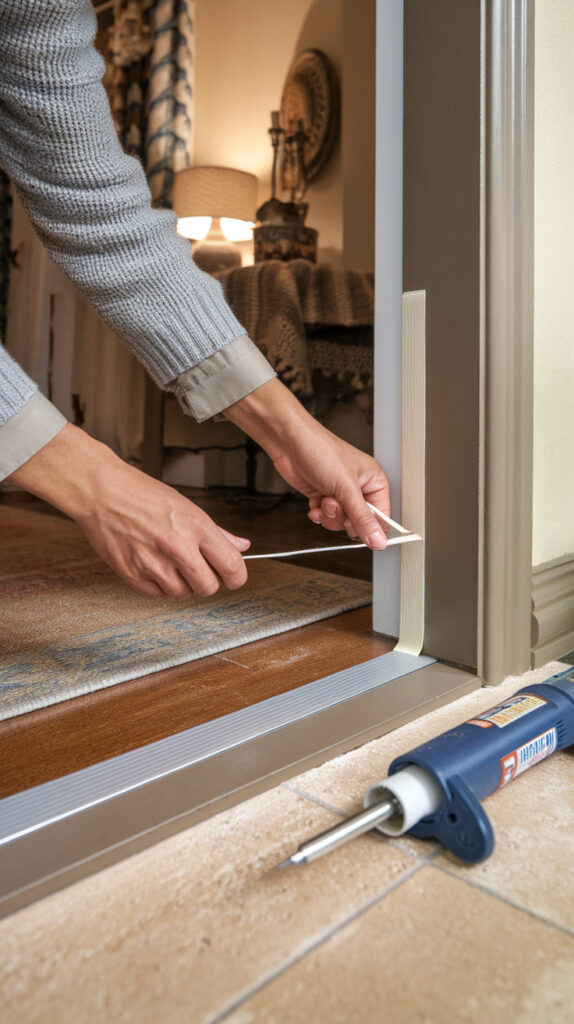
What This Means
Drafts waste money because your heating and cooling system keeps fighting outside air that sneaks in through gaps. The house still works, but it works harder, and your energy bill reflects that.
This tip focuses on sealing small openings around windows and doors with simple materials. I love this one because it makes a home feel more comfortable almost immediately.
Why It Works
Air leaks create temperature swings, cold spots, and extra system strain. Sealing those gaps improves comfort and efficiency at the same time, which makes this one of the smartest low-cost fixes you can do.
Draft sealing also helps with noise and dust. When you close up gaps, less outdoor dust and sound slip inside, and the whole space feels tighter and cleaner.
How to Do It
- Check window and door edges with your hand to feel for moving air.
- Inspect weatherstripping for cracks, flattening, or missing sections.
- Replace worn weatherstripping and apply caulk to fixed gaps or trim cracks.
- Add a door sweep if light shows under exterior doors.
- Recheck after installation to confirm the seal feels solid.
How Often
- Inspect seasonally, especially before summer and winter.
- Replace materials as soon as they crack, peel, or compress.
Common Mistake to Avoid
People often caulk moving parts like door edges or window sashes. Use weatherstripping for moving gaps and caulk only fixed joints, or you will create a bigger headache.
6. Flush Your Water Heater Annually
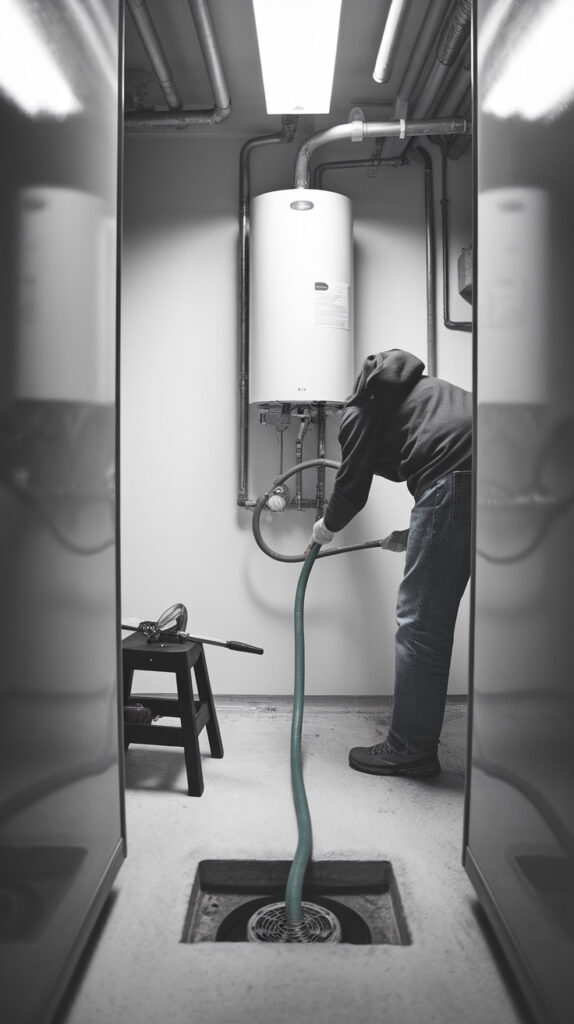
What This Means
Water heaters collect sediment over time, especially in areas with hard water. That buildup sits at the bottom of the tank, reduces efficiency, and forces the heater to work harder than it should.
A yearly flush removes that sediment and helps the tank heat water more evenly. It sounds technical, but the basic process stays simple if you follow steps carefully.
Why It Works
Sediment acts like a barrier between the burner or heating element and the water. Your unit burns more energy, makes weird rumbling sounds, and wears out faster when that layer gets thick.
Flushing also helps you spot signs of rust or corrosion early. Catching those signs gives you time to plan a repair or replacement instead of waking up to a leaking tank one day.
How to Do It
- Turn off power or gas to the water heater and let the water cool.
- Connect a garden hose to the drain valve and run the hose to a safe drain area.
- Open the drain valve and let water flow out until it runs clearer.
- Briefly open the cold-water inlet to stir and flush remaining sediment.
- Close the valve, remove the hose, refill the tank, and restore power or gas.
How Often
- Flush once a year.
- Flush every 6 months if you have very hard water or heavy sediment buildup.
Common Mistake to Avoid
People rush and skip the shut-off step. Turn off power or gas first, because heating an empty tank can damage the unit.
7. Inspect Roof and Gutters

What This Means
Roof and gutter issues create expensive damage because they affect water flow across the whole house. A loose shingle or clogged gutter can push water where it should never go, and the damage often stays hidden at first.
You do not need to climb onto the roof for every inspection. A ground-level check with binoculars plus a safe gutter look can catch a lot.
Why It Works
Roofs and gutters protect your walls, attic, foundation, and landscaping by directing water away from the home. When they fail, water finds weak points fast, and repairs pile up across multiple areas.
Gutter clogs also cause overflow that stains siding and rots fascia boards. You fix a drainage issue now or pay for carpentry later, and that choice stays pretty obvious.
How to Do It
- Walk around the house and look for missing shingles, sagging sections, or debris piles.
- Check gutters for leaves, standing water, and loose fasteners.
- Inspect downspouts to confirm they direct water away from the foundation.
- Clean out debris with gloves or a scoop and flush with a hose.
- Watch for granules near downspouts, which can signal roof shingle wear.
How Often
- Inspect roof and gutters every season.
- Clean gutters at least twice a year, more often if trees hang over your home.
Common Mistake to Avoid
People clean the gutter channel but ignore the downspouts. Flush the downspouts too, because a hidden clog still causes overflow.
8. Deep Clean Major Appliances

What This Means
Major appliances look clean on the outside while grease, dust, and residue build up inside or behind them. That hidden grime hurts performance and shortens lifespan, especially for refrigerators, ovens, dishwashers, and washers.
Deep cleaning goes beyond wiping surfaces. You target coils, filters, seals, and drain areas that affect how the appliance works.
Why It Works
Clean appliances use less energy and run more reliably because airflow and moving parts stay unobstructed. A dusty refrigerator coil, for example, forces the compressor to work harder and can raise your electric bill without any warning.
Deep cleaning also helps you spot wear early, like cracked seals or loose hoses. I like this task because it doubles as maintenance and inspection, which saves time.
How to Do It
- Unplug the appliance or switch off power before cleaning internal or rear areas.
- Pull out the fridge and vacuum condenser coils if accessible.
- Clean dishwasher filters, spray arms, and door seals to prevent buildup.
- Wipe washer detergent trays and check drain areas for mold or residue.
- Inspect oven door seals and clean grease buildup around vents and burners.
How Often
- Deep clean major appliances every 3–6 months.
- Spot-clean spills and filters monthly to reduce heavy buildup.
Common Mistake to Avoid
People scrub visible parts and skip the components that matter. Clean filters, coils, and seals first, because those parts affect performance the most.
9. Maintain Caulking in Bathrooms and Kitchens
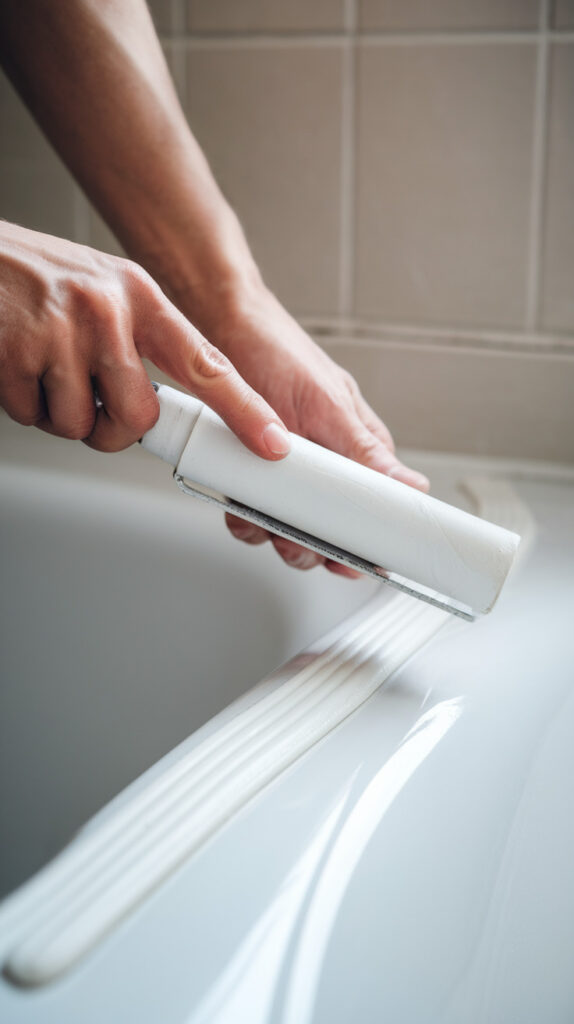
What This Means
Caulk seals gaps around sinks, tubs, showers, and backsplashes where water loves to sneak in. Once caulk cracks or pulls away, moisture reaches drywall, wood, and subflooring, and problems start growing behind the surface.
This tip sounds minor, but damaged caulk causes some of the most annoying repairs in a home. I never ignore split caulk because it usually means water has already started testing the gap.
Why It Works
Fresh caulk blocks water entry and keeps moisture on the surface where you can wipe it away. That protection helps prevent mold, rot, peeling paint, and loose tiles.
Caulk maintenance also keeps bathrooms and kitchens looking cleaner. A neat seal line makes the whole area look cared for, even if you did not do a full remodel.
How to Do It
- Inspect caulk lines for cracks, gaps, discoloration, or peeling.
- Remove damaged caulk fully with a scraper or caulk removal tool.
- Clean and dry the area completely before applying new caulk.
- Apply a smooth bead of mildew-resistant caulk and tool it evenly.
- Let it cure fully before exposing it to water.
How Often
- Inspect monthly in wet areas.
- Recaulk as needed, usually every 1–3 years depending on wear.
Common Mistake to Avoid
People apply new caulk over old damaged caulk. Remove the old layer first, or the new seal will fail sooner and look messy.
10. Lubricate Door Hinges and Tracks
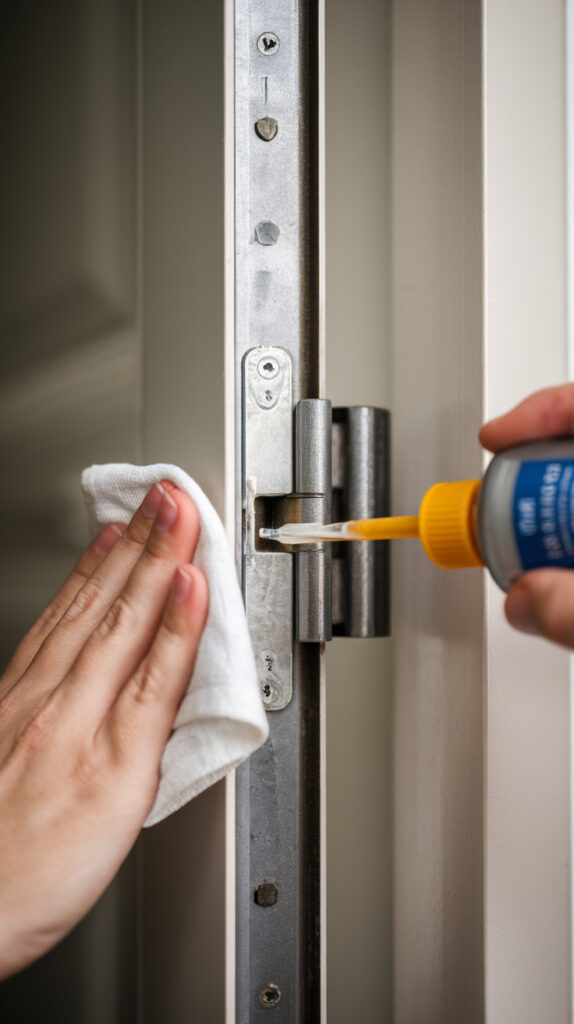
What This Means
Doors, garage tracks, and sliding tracks create friction every day, and friction creates wear and noise. Squeaks sound harmless, but they often signal dryness, dirt buildup, or alignment stress.
A little lubrication keeps movement smooth and protects hardware from premature wear. This tip takes almost no time and makes the house feel better maintained right away.
Why It Works
Lubrication reduces metal-on-metal friction, which prevents grinding, sticking, and strain on hinges and rollers. It also helps you spot loose screws or bent hardware while you work.
Smooth movement lowers the chance of bigger problems like warped doors or damaged tracks. I always notice this one instantly because the difference feels immediate, and that quick win keeps the maintenance habit going.
How to Do It
- Wipe dust and debris from hinges, tracks, and rollers first.
- Tighten loose screws on hinges or track brackets before lubricating.
- Apply a small amount of appropriate lubricant to hinges and moving joints.
- Open and close the door several times to distribute the lubricant.
- Wipe away excess so it does not attract dirt.
How Often
- Lubricate indoor hinges every 6 months.
- Check garage doors and sliding tracks quarterly if you use them often.
Common Mistake to Avoid
People spray too much and leave sticky residue everywhere. Use a small amount, because excess lubricant attracts dust and creates a grimy mess.
11. Check Electrical Outlets and Extension Cords
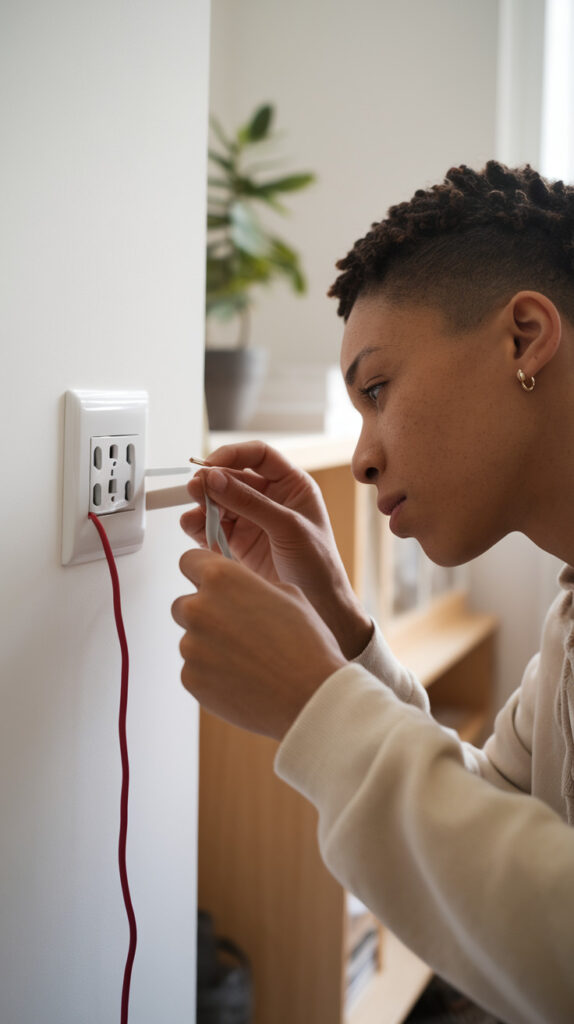
What This Means
Electrical problems often show warning signs before they become serious, but people miss them because outlets and cords look ordinary. Warm plugs, loose connections, and damaged insulation signal risk, not normal wear.
This tip focuses on visible checks only, not DIY wiring repairs. If anything looks or feels wrong, you stop using it and call a pro.
Why It Works
Outlet and cord inspections help prevent electrical fires, damaged electronics, and shock hazards. A five-minute check can catch overloaded strips, cracked cords, or scorch marks before they turn dangerous.
This habit also improves everyday safety because many homes rely on temporary extension setups for way too long. I say this with love, but a six-plug tower balanced behind the couch does not count as a smart plan.
How to Do It
- Check outlets for loose plugs, discoloration, or burn marks.
- Feel wall plates lightly after use to see if they feel unusually warm.
- Inspect extension cords for cracks, kinks, frayed areas, or exposed wire.
- Replace damaged cords immediately instead of taping them.
- Avoid daisy-chaining power strips or overloading one outlet.
How Often
- Inspect visible outlets and cords monthly.
- Recheck right away if breakers trip or lights flicker often.
Common Mistake to Avoid
People keep using damaged cords because they “still work.” Replace worn cords immediately, because electrical damage gets worse with use.
12. Clean Dryer Vents Regularly
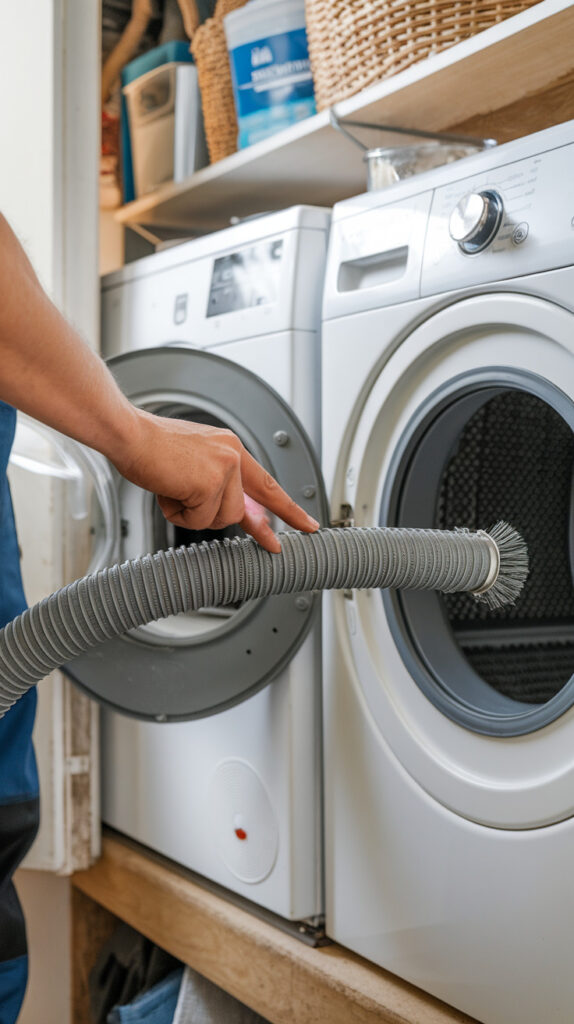
What This Means
Lint builds up in dryer vents over time, and that buildup blocks airflow and increases fire risk. Cleaning the lint screen helps, but lint still escapes into the vent line and collects where you cannot see it.
This maintenance task protects safety and improves drying performance. I always notice clothes dry faster after a vent cleaning, which feels great because nobody enjoys running the same load twice.
Why It Works
A clean dryer vent allows hot air and moisture to exit properly, so the dryer runs more efficiently and safely. Blocked vents force longer cycles, raise energy costs, and put extra strain on the heating element.
Vent cleaning also reduces overheating around the appliance. That matters a lot in tight laundry spaces where heat and dust already build up faster.
How to Do It
- Unplug the dryer or switch off the power.
- Pull the dryer away from the wall and disconnect the vent hose carefully.
- Vacuum lint from the hose, rear vent connection, and wall opening.
- Use a dryer vent brush kit to clean deeper into the duct if needed.
- Reconnect everything securely and test airflow outside.
How Often
- Clean the lint screen every load.
- Clean the full vent system every 6–12 months.
Common Mistake to Avoid
People stop at the lint trap and call it done. Clean the vent duct too, because hidden lint causes the bigger risk.
13. Inspect Exterior Walls and Foundation

What This Means
Exterior walls and foundation areas take constant abuse from weather, moisture, and soil movement. Small cracks or peeling spots may look cosmetic, but they often point to drainage or moisture problems underneath.
A regular exterior check helps you catch issues while repairs stay manageable. This tip matters even for renters because you can report problems early before they get worse.
Why It Works
Exterior inspections help you identify water intrusion paths, pest entry points, and structural warning signs before damage spreads. Cracks, gaps, and staining often appear outside first, which gives you an early heads-up.
Foundation awareness also protects interior spaces because moisture near the base of the home eventually affects floors and walls. I like this check because it connects the whole house system, not just one room.
How to Do It
- Walk the perimeter and look for cracks, peeling paint, or damaged siding.
- Check the foundation for new cracks, shifting soil, or pooling water nearby.
- Inspect where pipes or cables enter the wall for open gaps.
- Confirm downspouts move water away from the house.
- Note any changes and photograph them so you can compare later.
How Often
- Inspect every season.
- Recheck after heavy rain, storms, or long dry spells that shift soil.
Common Mistake to Avoid
People ignore small cracks because they seem harmless. Track changes over time, because growth matters more than the crack alone.
14. Maintain Proper Indoor Humidity Levels
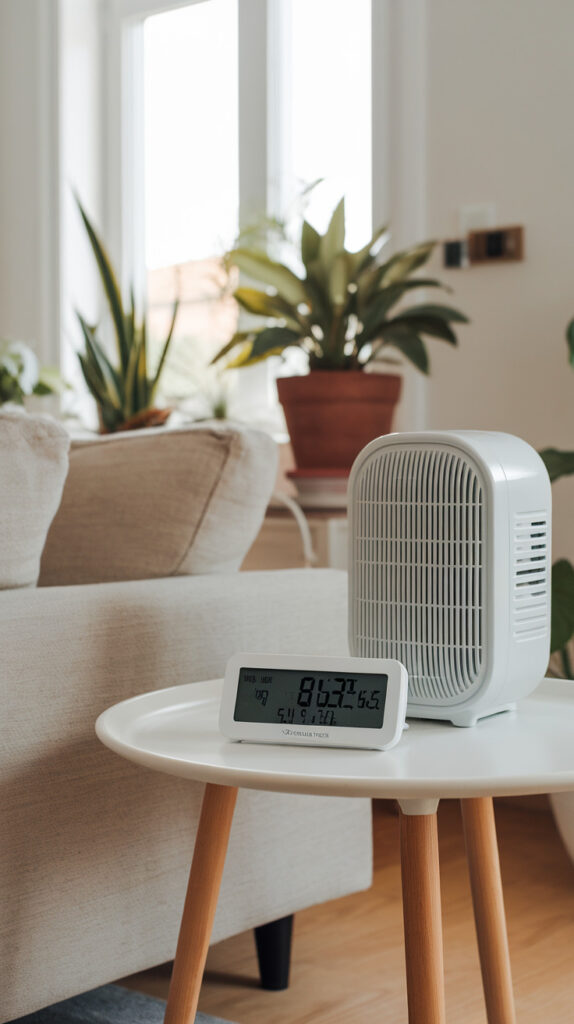
What This Means
Indoor humidity affects comfort, air quality, furniture condition, and mold risk more than most people realize. Air that feels too damp or too dry creates problems that show up in walls, wood, and even how your home smells.
Smart humidity control means keeping levels balanced instead of guessing. I use a basic humidity meter because your skin can tell you something feels off, but the meter tells you what to fix.
Why It Works
Balanced humidity helps prevent mold growth, condensation, wood warping, and paint issues. It also improves comfort, so you rely less on constant thermostat changes.
Low humidity can dry out wood and irritate skin, while high humidity creates sticky air and moisture buildup. A target range gives you a clear goal and reduces trial-and-error.
How to Do It
- Use a hygrometer to measure indoor humidity in key rooms.
- Aim for roughly 30–50% humidity for most homes.
- Run exhaust fans in bathrooms and kitchens during and after use.
- Use a dehumidifier in damp spaces or a humidifier in dry seasons.
- Fix moisture sources like leaks before relying on machines alone.
How Often
- Check humidity weekly during seasonal changes.
- Monitor daily in basements, laundry rooms, or humid climates.
Common Mistake to Avoid
People buy a dehumidifier and ignore the root issue. Fix leaks and poor ventilation first, or humidity keeps coming back.
15. Keep a Home Maintenance Log
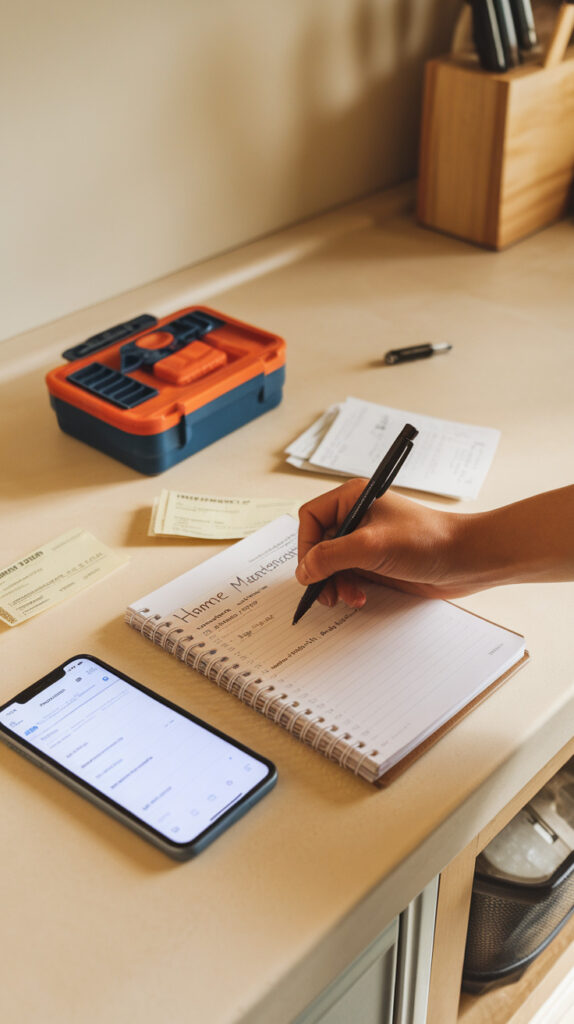
What This Means
A maintenance log tracks what you checked, cleaned, repaired, or replaced and when you did it. Most people trust memory until they cannot remember the last filter change or whether the water heater got flushed last year.
This habit turns maintenance into a system instead of a guessing game. I started doing this in a simple notes app, and it made everything easier almost immediately.
Why It Works
Logs help you stay consistent because you can see patterns and due dates clearly. They also save money by preventing duplicate work and helping you plan future repairs before they become urgent.
A good log adds real value during repairs or moves because you can show maintenance history. Contractors and buyers both appreciate records, and you avoid the classic “I think I replaced that recently” confusion.
How to Do It
- Create a simple log in a notebook, spreadsheet, or notes app.
- Record the date, task, room or system, and any issue you noticed.
- Add reminders for recurring tasks like filters, alarms, and vent cleaning.
- Save photos of problem areas to track changes over time.
- Keep receipts for parts, service visits, and appliance maintenance.
How Often
- Update the log every time you complete a task.
- Review it once a month during your home inspection routine.
Common Mistake to Avoid
People start a log and stop using it after a week. Keep it simple and fast, because a basic log you actually use beats a fancy system you abandon.
Simple Home Maintenance Schedule (Monthly, Quarterly, Yearly)
A schedule keeps maintenance from piling up into one exhausting weekend. You do not need a perfect plan, but you do need a repeatable one that fits real life.
Monthly tasks should focus on quick checks and safety basics. That includes HVAC filters, leak checks, detector testing, visible cord inspections, and a short walk-through of bathrooms, kitchen, and windows.
Quarterly or seasonal tasks should cover heavier cleaning and exterior checks. I usually group these by season because it feels easier than remembering random dates, and it lines up well with weather changes.
Monthly Tasks
- Walk through the home with your inspection checklist.
- Check HVAC filters and replace if needed.
- Inspect under sinks for leaks or moisture.
- Test smoke and carbon monoxide detectors.
- Check visible outlets, cords, and power strips.
- Update your maintenance log.
Seasonal Tasks
- Inspect rooflines, gutters, and downspouts.
- Seal drafts around windows and doors.
- Deep clean major appliances.
- Check exterior walls and foundation.
- Monitor humidity changes and adjust as needed.
Yearly Tasks
- Flush the water heater.
- Deep clean the dryer vent duct system.
- Reevaluate detector ages and replacement dates.
- Review your maintenance log and plan bigger repairs.
Safety Tips for Home Maintenance
Home maintenance saves money, but safety always comes first. A cheap fix stops being cheap the second someone gets hurt trying to do it too fast.
Call a professional when a job involves panel wiring, gas lines, major roof work, structural cracks, or anything that feels outside your skill level. Confidence helps with DIY work, but fake confidence creates expensive problems and dangerous ones too.
Electrical safety stays simple if you respect a few rules. Turn off power before working near outlets or appliances, never use damaged cords, and stop immediately if you notice heat, sparks, or a burning smell.
Ladder safety matters because falls happen during “quick” jobs all the time. Use a stable ladder on level ground, keep three points of contact, and never lean too far sideways just to save a few seconds.
Moisture and mold need careful handling, especially in bathrooms, basements, and under sinks. Wear gloves, improve ventilation, and call a pro for widespread mold or recurring dampness because surface cleaning alone will not solve the root issue.
Appliance shut-off basics also matter more than people think. Learn how to shut off water valves, gas supply, and power breakers for major systems now, not during a leak or emergency.
Low-Cost Maintenance Habits That Prevent Expensive Repairs
A lot of smart maintenance habits cost less than a takeout meal. That makes them easy to delay, which feels ironic when those same tasks prevent repairs that cost hundreds or thousands.
A $10 tube of caulk can prevent water damage behind a sink or tub. A cheap HVAC filter change can reduce system strain and help you avoid a service call that starts expensive and somehow gets worse by the minute.
DIY works best for cleaning, inspecting, sealing, and simple part swaps like batteries or weatherstripping. Professional work makes more sense for electrical repairs, gas systems, major plumbing, roofing height risks, and anything you cannot diagnose clearly.
The smartest budget move involves prioritizing urgent issues over cosmetic ones. Water leaks, electrical warning signs, and ventilation problems deserve attention first, while scuffed paint and minor trim flaws can wait.
I also recommend building a tiny maintenance fund, even if you start small. Setting aside a little money each month makes repairs feel manageable, and it keeps you from putting off the stuff that actually protects the home.
Frequently Asked Questions
How often should I inspect my home?
A monthly inspection works best for most homes because it keeps problems visible without turning maintenance into a full-time job. You can walk through key areas in 10–20 minutes and catch leaks, drafts, stains, or wear before they grow.
Seasonal checks add another layer because weather changes affect roofs, gutters, humidity, and exterior surfaces. If you have an older home, pets, or frequent weather swings, increase your checks a bit and keep notes in a maintenance log.
What maintenance tasks matter most?
Start with safety and water control because those issues create the biggest risks and the fastest damage. Smoke and carbon monoxide detectors, leak checks, electrical outlet checks, and dryer vent cleaning should sit near the top of your list.
After that, focus on HVAC filters, gutters, caulking, and humidity control because they affect comfort, efficiency, and long-term wear. These tasks look small, but they protect systems that cost serious money to repair or replace.
Can renters follow these tips too?
Yes, renters can follow most of these tips because many tasks involve cleaning, inspection, and reporting issues early. You can test detectors, check for leaks, monitor humidity, clean accessible appliance areas, and keep a maintenance log for your own records.
Just avoid repairs that your lease or local rules assign to the landlord, especially electrical, plumbing, and structural work. Report problems quickly with photos and dates, because early reporting protects you and helps the landlord fix the issue before it spreads.
What happens if I ignore home maintenance?
Ignored maintenance usually creates a chain reaction, not one isolated problem. A clogged gutter becomes water overflow, then siding damage, then wood rot, and suddenly one skipped cleaning turns into a repair project nobody wanted.
Neglect also raises energy bills and shortens the life of appliances and systems. The house keeps functioning for a while, so it feels fine, but hidden wear builds up until something breaks at the worst possible time.
How do I stay consistent with home maintenance?
Keep your system simple enough that you will actually use it every month. A short checklist, calendar reminder, and maintenance log work better than a complicated planner that looks impressive but never gets opened.
I also recommend pairing maintenance with a routine you already have, like the first weekend of the month. Once it becomes a habit, the work feels lighter, and you stop wasting energy trying to remember what needs attention.
Should I do everything myself or hire help?
Do the tasks that involve inspection, cleaning, basic replacement parts, and low-risk prevention work. Those jobs save money and help you understand your home better, which makes future decisions easier.
Hire professionals for electrical repairs, gas-related work, major roof issues, structural concerns, and persistent leaks you cannot trace. Smart maintenance includes knowing your limits, and that choice usually saves money in the long run.
Final Thoughts
Smart home maintenance works because small habits stop big problems before they get expensive. You do not need a huge budget or expert skills, and you just need a repeatable system and a little consistency.
Start with one monthly checklist and a simple maintenance log, then build from there. That approach keeps the house safer, lowers stress, and saves money without turning your life into a nonstop DIY project.