11 Eye-Catching Kitchen Photoshoot Ideas to Refresh Your Cooking Space
Your kitchen is more than just a place to cook—it's the heart of your home and a prime spot for beautiful photos. Whether you're snapping for social media, a blog, or just personal memories, a well-styled kitchen can make all the difference.
The trick is keeping it modern and clean without losing that lived-in warmth. These 11 ideas are designed to help you capture your kitchen in a fresh, eye-catching way.
They're practical, easy to execute, and perfect for anyone who wants their cooking space to look its best. No need for a professional photographer—just a few smart tweaks and a good eye.
1. Let Natural Light Steal the Show
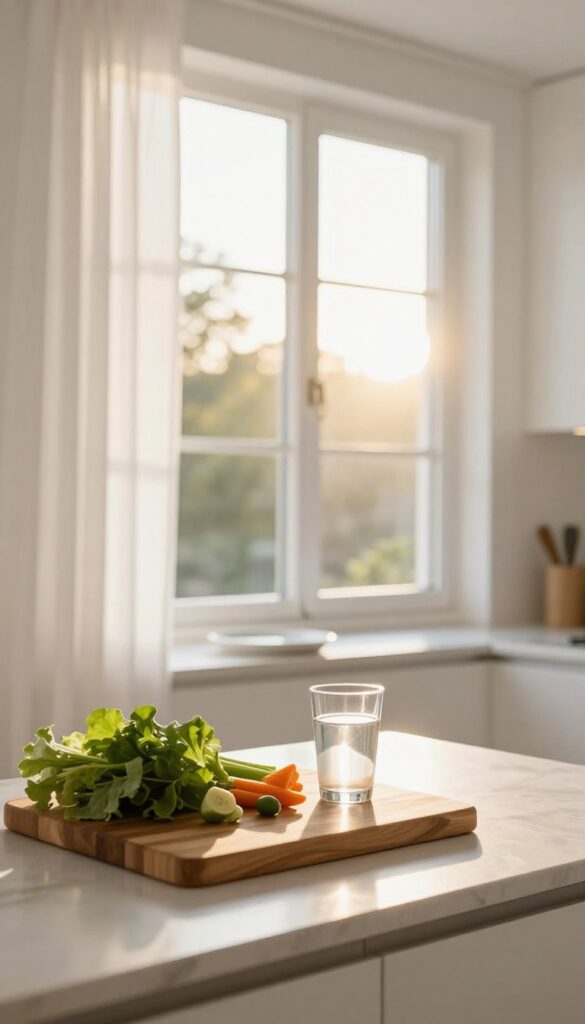
There’s no filter quite like the real thing. Positioning your kitchen setup near a window during golden hour bathes everything in a soft, warm glow that makes ingredients sparkle and surfaces look effortlessly polished. Pull back the curtains, give the glass a quick wipe, and let the sun do the heavy lifting.
Harsh overhead lights? Skip them. Natural light makes colors pop and textures feel almost touchable.
Why It Works
Natural light is flattering on everything—food, props, and even the background. It reduces harsh shadows and gives your photos a clean, airy look that feels both modern and inviting. Plus, it’s free and always available.
Best For
Bright kitchens with south- or west-facing windows, especially during late afternoon. Works wonders for flat lays, ingredient shots, and any scene where you want a warm, welcoming vibe.
Styling Tip
Use a white or light-colored backdrop near the window to bounce light back onto your subject. A simple linen towel or a matte ceramic plate can help soften any remaining shadows.
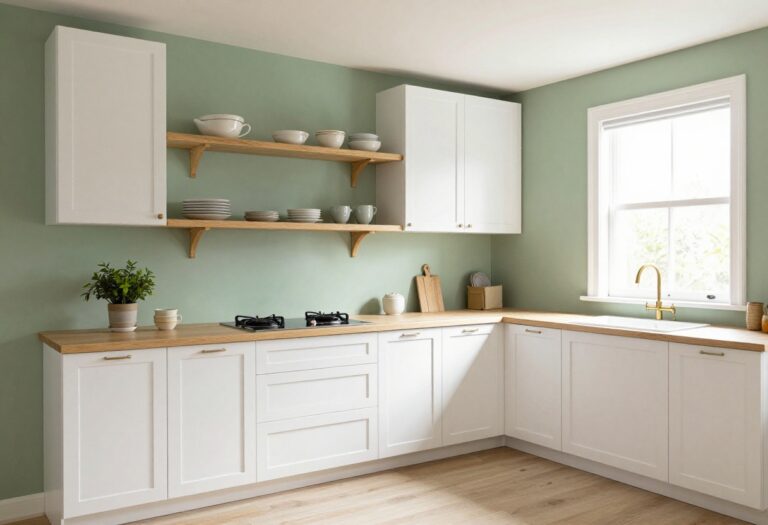
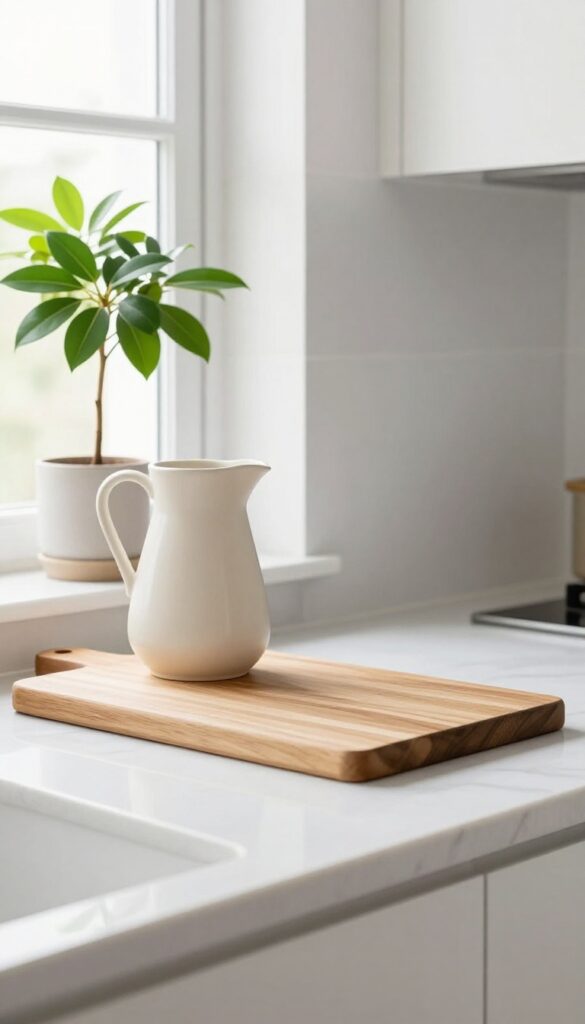
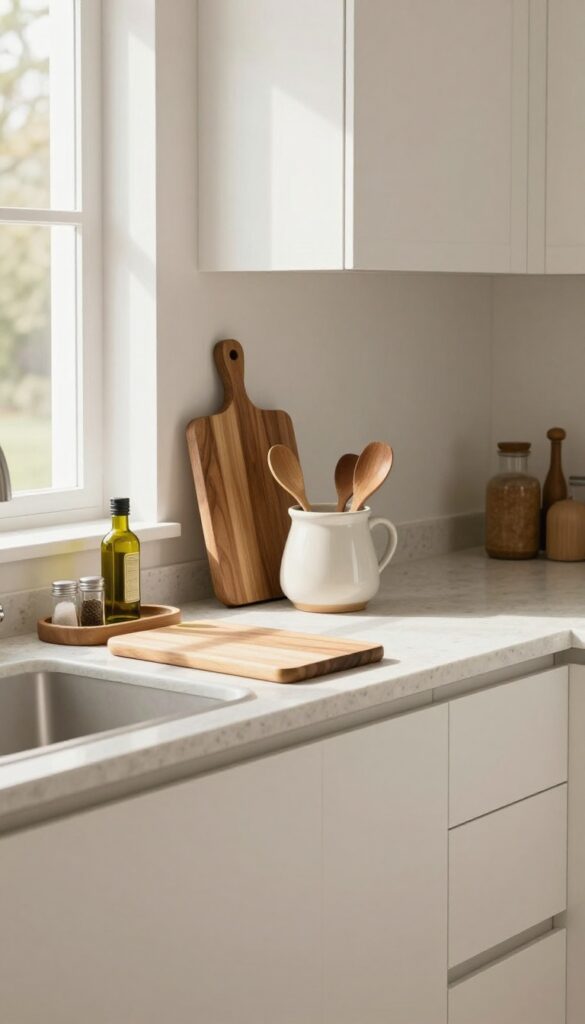
2. Create a Minimalist Counter Staging
Imagine walking into a kitchen where the counters are almost bare—just a few thoughtfully chosen objects resting on the surface. That’s the magic of minimalist counter staging. It’s not about having nothing; it’s about having only what matters.
A wooden cutting board, a simple ceramic pitcher, and a small potted plant can transform your kitchen into a calm, breathable space. This look leans into clean lines and negative space, letting your cabinetry and natural light take center stage.
Why It Works
Minimalist staging forces you to edit, which instantly reduces visual clutter. With fewer items competing for attention, the eye rests on the texture of the wood, the sheen of the ceramic, and the green of the plant. It makes your kitchen feel larger, more intentional, and easier to keep clean.
Best For
This idea is perfect for kitchens with strong architectural features—like a marble backsplash, sleek cabinetry, or a statement range hood. It also works well in small kitchens where counter space is precious, as it keeps surfaces open for actual cooking.
Styling Tip
Choose a neutral color palette for your staged items—warm wood, cream ceramic, and deep green foliage. Place the cutting board at an angle, the pitcher slightly off-center, and the plant near a window for natural light. Swap out items seasonally to keep the look fresh.
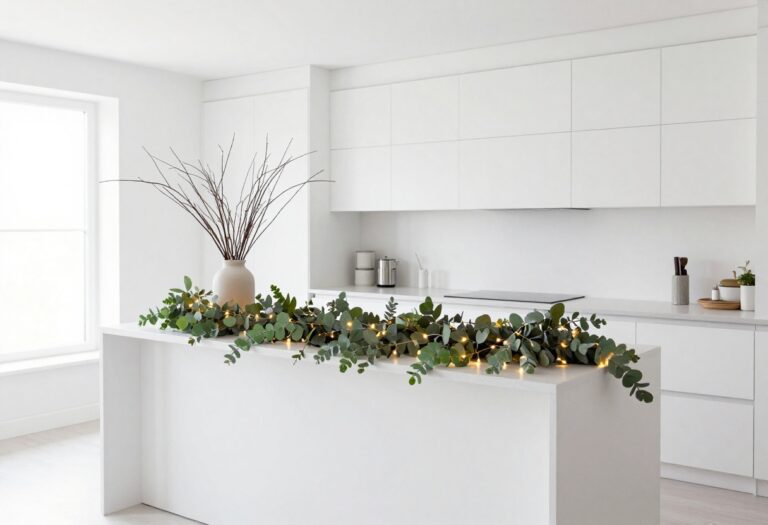
3. Play with Monochrome Tones
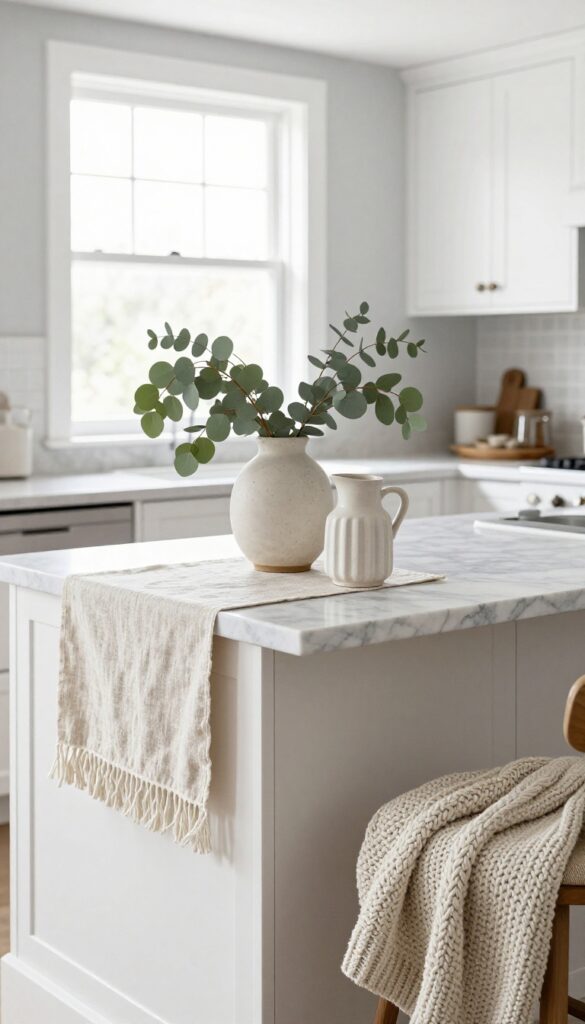
A single color family can transform your kitchen into a serene, gallery-like space. By sticking with whites, creams, and light grays, you create a calm backdrop that lets textures and subtle contrasts shine. It’s a look that feels both intentional and effortless—perfect for modern homes that crave simplicity without sacrificing style.
Why It Works
Monochrome eliminates visual clutter, making your kitchen appear larger and more cohesive. The lack of competing colors draws the eye to shapes and materials, like the weave of a linen napkin or the matte finish of a ceramic vase. This restraint actually adds sophistication, giving your photos a clean, editorial feel.
Best For
This idea works beautifully in kitchens with neutral cabinetry or open shelving, where the monochrome palette can extend naturally. It’s also ideal for small spaces or kitchens with lots of natural light, as the light tones reflect brightness and make the room feel airy.
Styling Tip
Layer in texture to keep the look from falling flat. Try a chunky knit throw draped over a stool, a ridged stoneware pitcher, or a linen table runner with subtle fringe. Even a single branch of eucalyptus in a matte white vase adds organic interest without breaking the color scheme.
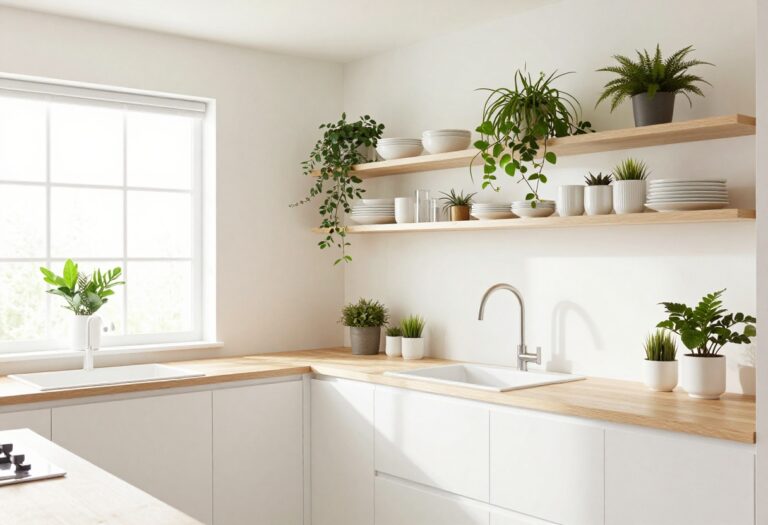
4. Incorporate Fresh Greenery
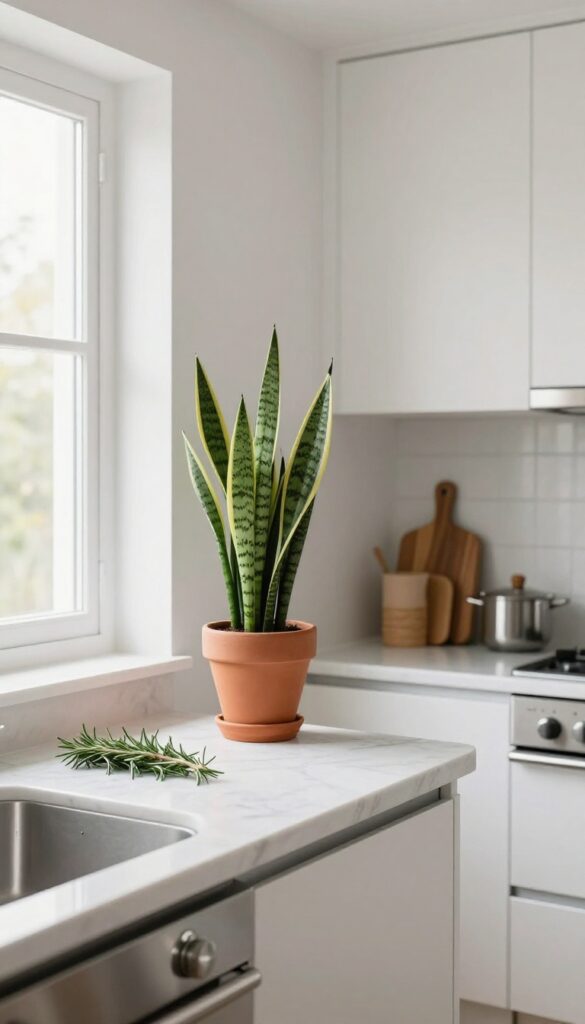
A sprig of rosemary on the counter or a tiny succulent by the sink can completely shift the energy of your kitchen. Greenery introduces an effortless, organic contrast to sleek appliances and hard surfaces, making the space feel more alive and inviting. The best part?
You don’t need a jungle—just one or two well-placed plants can do the trick.
Why It Works
Plants soften the cold, hard lines of cabinets, tile, and stainless steel, adding warmth and texture. They also improve air quality and create a visual break that makes the kitchen feel less like a workspace and more like a lived-in room.
Best For
This idea is perfect for kitchens that lean modern or minimalist, where a single green element can become a focal point. It’s also great for renters because potted plants are easy to move and don’t require permanent changes.
Styling Tip
Stick to low-maintenance options like herbs, snake plants, or eucalyptus. Place them near a window for natural light, and use simple ceramic or terra-cotta pots that complement your countertop material. Avoid overcrowding—one or two plants spaced apart look far more intentional than a cluster.
5. Use Open Shelving as a Backdrop
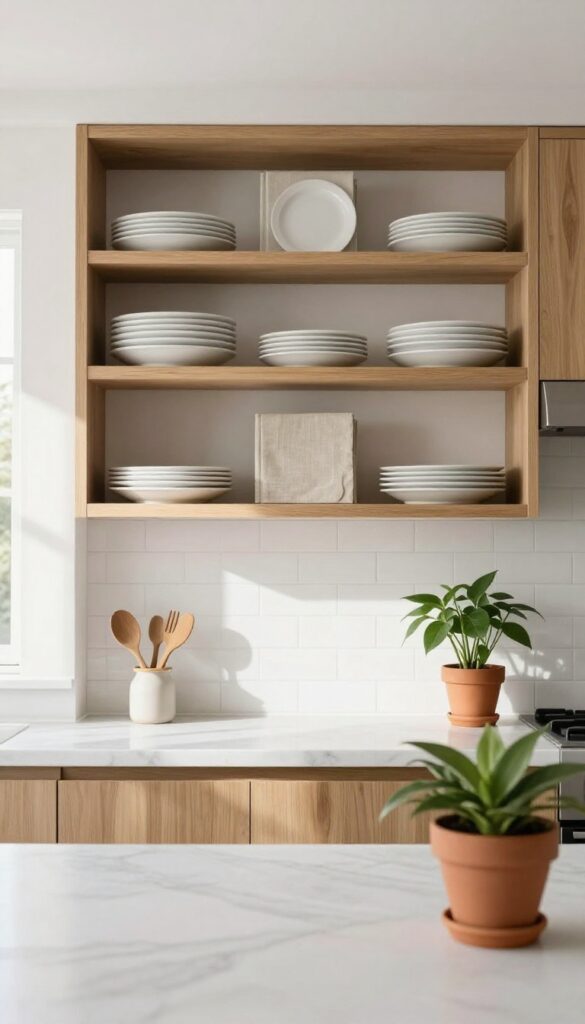
Open shelving isn't just for storage—it can be the star of your kitchen photoshoot. By styling your shelves with a few carefully chosen items, you create a backdrop that feels both lived-in and curated. The key is balance: a stack of plates, a favorite cookbook, and a small jar of utensils arranged in a way that looks effortless but intentional.
This setup adds depth and tells a visual story about how you use the space every day.
Why It Works
Open shelving draws the eye and adds texture to your photos. It breaks up large expanses of tile or backsplash, giving the kitchen a more personal, approachable feel. The mix of materials—ceramic, paper, metal—creates visual interest without clutter.
Best For
This idea works well for kitchens with a modern or transitional style, especially if you have a clean backsplash or neutral wall color. It's also great for renters who can't change permanent fixtures but want to add personality.
Styling Tip
Stick to a simple color palette—white plates, a neutral cookbook cover, and wooden or black utensils. Keep the arrangement asymmetrical but balanced: group three items on one side and two on the other. Leave some empty space to avoid a crowded look.
6. Highlight a Single Statement Piece
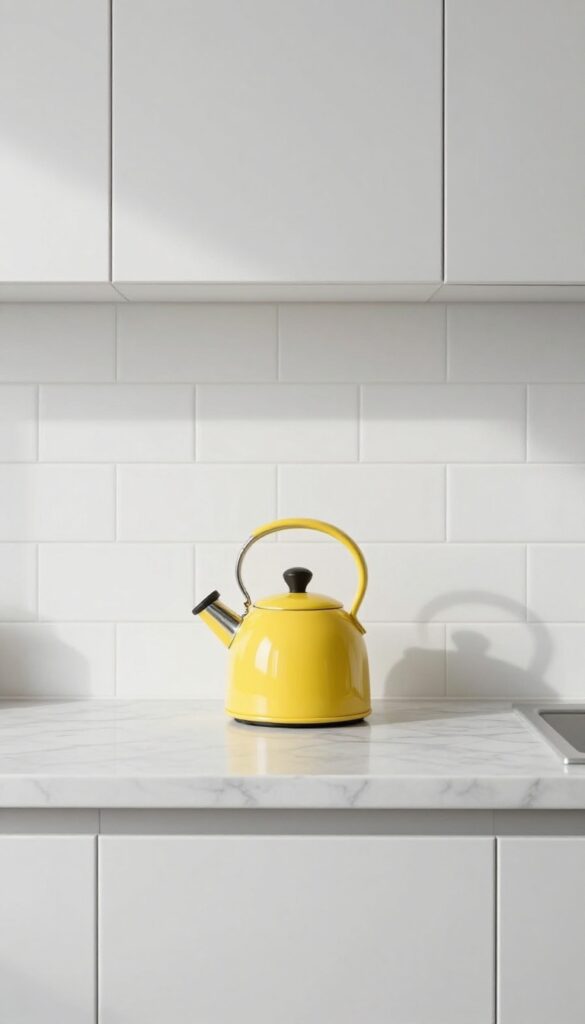
Sometimes the most powerful styling move is also the simplest. Instead of cluttering your counters with dozens of accessories, choose one bold item and let it steal the show. Think a vibrant yellow kettle against white subway tile, a hand-painted ceramic pitcher on a marble island, or a sculptural wooden fruit bowl filled with green apples.
The key is restraint: clear the surrounding surfaces, keep the backdrop neutral, and let that one piece breathe. The result feels intentional, modern, and effortlessly curated—like you just walked out of a design magazine.
Why It Works
A single statement piece creates an instant focal point without visual noise. It draws the eye exactly where you want it, making even a small kitchen feel thoughtfully designed. Plus, it’s an easy way to inject color, texture, or personality without committing to a full renovation.
Best For
This idea is perfect for kitchens with clean lines, neutral cabinetry, or open shelving where a pop of color can stand out. It also works well in rental kitchens where you can’t change permanent fixtures but want to make a stylish impact.
Styling Tip
Place your statement piece on a clean countertop, island, or open shelf with plenty of negative space around it. For extra impact, position it near a window or under a pendant light so natural or directed light highlights the object. Keep the background clutter-free and stick to one hero piece per zone.
7. Capture Candid Cooking Moments
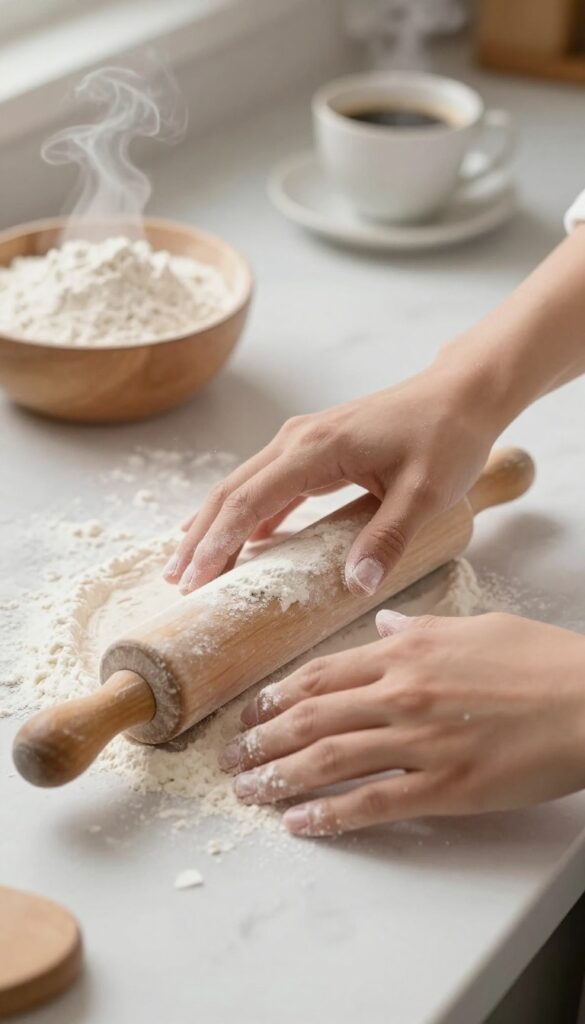
Some of the most magnetic kitchen photos aren't perfectly staged — they're real. A hand dusted with flour reaching for a rolling pin, steam rising from a freshly poured cup of coffee. These candid slices of daily life feel warm and inviting, like a peek into someone's actual morning routine.
The key is to keep the scene natural and the composition clean, letting the action tell the story.
Why It Works
Action shots break the formality of a styled kitchen and make the space feel lived-in and approachable. They also create a sense of movement that draws the eye, making the photo more engaging than a static wide shot.
Best For
Kitchens with simple, uncluttered backgrounds where the focus stays on the hands and the task. Works especially well for breakfast nooks, coffee stations, and baking prep areas.
Styling Tip
Use a fast shutter speed (1/500 or higher) to freeze motion crisply. Frame tight — crop out faces and extra clutter so the viewer focuses on the gesture and the texture of the food or drink.
8. Style a Coffee or Tea Corner
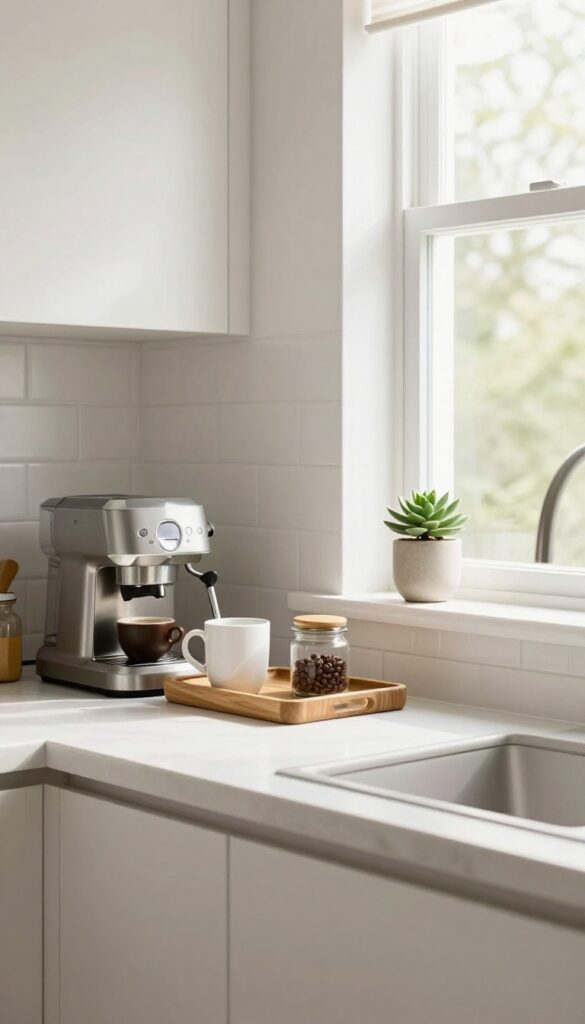
Even in a modern kitchen, a dedicated coffee or tea corner adds a layer of warmth and ritual. Pick a spot on your countertop or a small cart, and keep it simple: a sleek machine, a ceramic mug, and a jar of beans on a tray. The clean lines and intentional arrangement make the space feel both functional and inviting, like a little café moment at home.
Why It Works
This setup creates a visual anchor that draws the eye and suggests a daily routine. The tray keeps everything contained and easy to wipe down, while the mug and beans add personality without clutter. It’s a low-effort way to make your kitchen feel curated and lived-in.
Best For
Kitchens with a spare countertop section, a narrow console table, or even a rolling cart. Works especially well in open-plan layouts where the coffee corner can double as a visual break between cooking and living zones.
Styling Tip
Choose a tray in a natural material like bamboo or matte metal to ground the setup. Keep the color palette neutral—white, wood, and black—then add one small plant or a ceramic spoon rest for texture. Avoid overcrowding; three or four items are plenty.
9. Experiment with Reflections
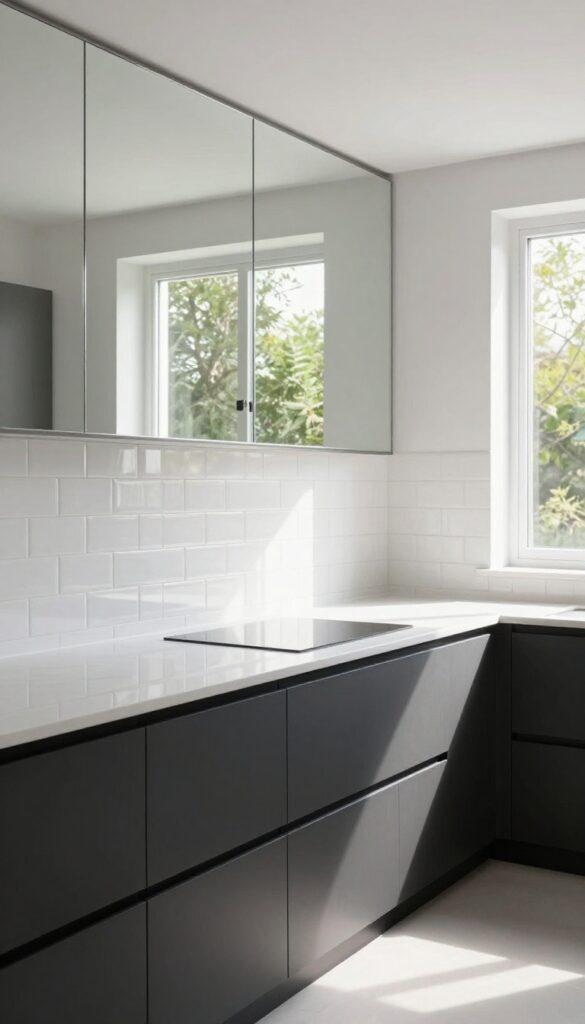
Mirrors and glossy surfaces aren't just for bathrooms. In a kitchen, they can bounce light around, making the space feel airier and more open. A well-placed reflection adds a subtle artistic layer without overwhelming the room.
Think of it as a gentle visual trick that plays with depth and brightness.
Why It Works
Reflections create an illusion of more space and light, which is especially valuable in compact or windowless kitchens. They also introduce an unexpected design element that feels modern and clean. When done right, a mirrored backsplash or a strategically angled mirror can become a conversation starter.
Best For
This idea shines in small kitchens, galley layouts, or spaces with limited natural light. It also works well in minimalist or contemporary kitchens where clean lines and openness are key. Avoid in overly busy or maximalist spaces where reflections might add visual clutter.
Styling Tip
Place a large mirror opposite a window to double the natural light. For a subtler effect, use a glossy tile backsplash that catches reflections without being too obvious. Keep surrounding surfaces matte to prevent competing reflections.
10. Add Warmth with Wood Textures
Even in the cleanest, most modern kitchen, a few natural touches can keep the space from feeling cold or sterile. Wood textures are an easy way to bring in warmth without sacrificing your sleek aesthetic. Think of a butcher block resting on the counter, a set of wooden spoons in a ceramic crock, or a rustic breadboard leaned against the backsplash.
These small additions soften the hard lines of modern cabinetry and stainless steel appliances, making the kitchen feel more inviting and lived-in. Pair them with neutral linens or simple white dishes, and you have a balanced scene that feels both polished and cozy.
Why It Works
Wood tones add visual warmth and texture that contrast beautifully with the cool surfaces common in modern kitchens. This mix of materials creates depth and interest, preventing the space from feeling flat or overly minimalist. The natural grain and variation in wood also bring a sense of authenticity and comfort that resonates in a home setting.
Best For
This idea works well in kitchens with white or gray cabinetry, quartz or marble countertops, and stainless steel appliances. It's especially effective in open-concept spaces where the kitchen flows into a living area, as the wood helps bridge the two zones and adds a cohesive, welcoming feel.
Styling Tip
Choose one or two wood accents rather than cluttering every surface. A large wooden cutting board propped against the backsplash, a wooden utensil holder, and a small wooden tray for oils and salts can be enough. Keep the wood tones consistent—warm oak or walnut pairs nicely with neutral palettes—and avoid mixing too many different wood finishes.
11. Frame the Shot with a Window or Doorway
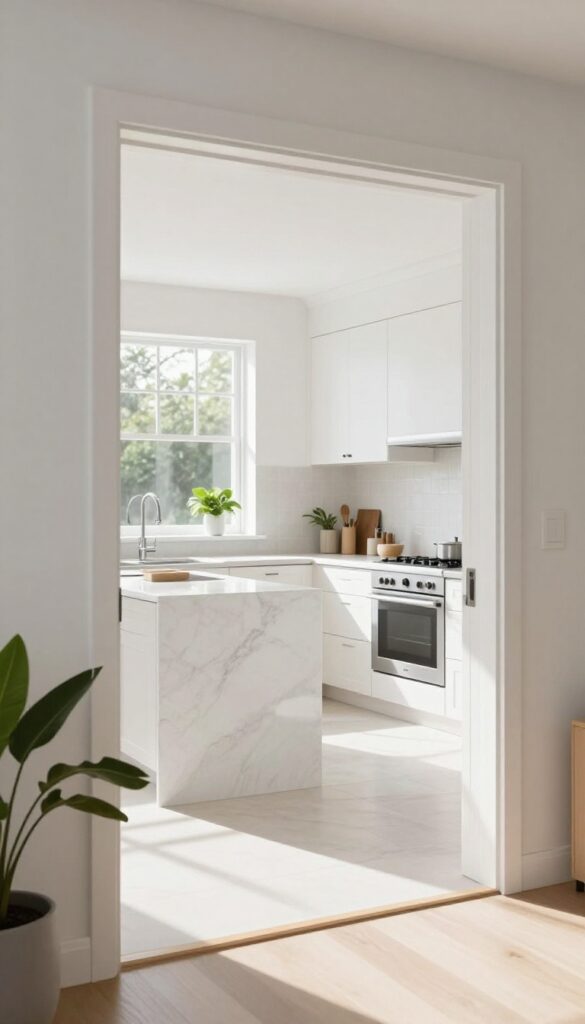
Sometimes the best kitchen photos aren't taken from inside the room at all. Stepping back and shooting through an open doorway or a window frame gives your space a whole new depth. It turns a straightforward kitchen shot into something that feels layered and inviting, like a glimpse into a real home in action.
This trick works especially well in modern kitchens where clean lines and open sightlines are already part of the design.
Why It Works
Framing your kitchen through an architectural element naturally draws the eye in and creates a sense of discovery. It also adds context, showing how the kitchen connects to the rest of your home, which makes the space feel larger and more cohesive.
Best For
Open-concept kitchens that flow into a dining or living area, or kitchens with a nice hallway or pantry door that can serve as a natural frame. It's also great for smaller kitchens where you want to hint at more space beyond.
Styling Tip
Keep the foreground simple and uncluttered so the frame doesn't compete with the kitchen itself. A clean doorway or a window with minimal trim works best. If you're shooting through a window, make sure the glass is spotless and consider adding a small plant or vase on the sill for a soft focal point.
FAQ
What's the best time of day to photograph a kitchen?
Early morning or late afternoon—often called golden hour—gives you soft, warm natural light. Midday sun can be too harsh and create strong shadows.
Do I need a fancy camera for good kitchen photos?
Not at all. A modern smartphone with a good camera can work beautifully. Focus on lighting, composition, and styling instead.
How do I make a small kitchen look bigger in photos?
Use wide-angle shots sparingly—they can distort. Instead, shoot from a corner to show depth, keep counters clear, and let natural light flood in.
What props should I avoid in kitchen photos?
Stay away from cluttered items, bright plastic, or anything with logos. Stick to natural materials like wood, ceramic, and linen for a clean look.
How can I add color without making it look busy?
Choose one or two accent colors—like a soft blue vase or a yellow bowl—and keep everything else neutral. This adds interest without overwhelming the frame.
Conclusion
These 11 kitchen photoshoot ideas are all about making your cooking space look fresh, modern, and inviting without overcomplicating things. Whether you're a seasoned home decor enthusiast or just starting out, each tip is easy to try and can instantly elevate your photos. Remember, the best shots come from a place of authenticity—so have fun with it.
Experiment with different angles, play with light, and let your kitchen's personality shine through. Happy shooting!