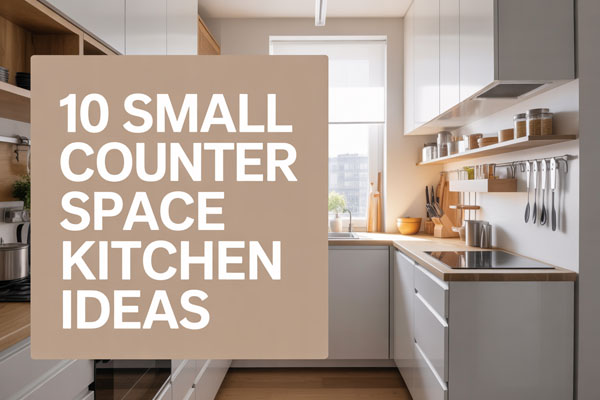
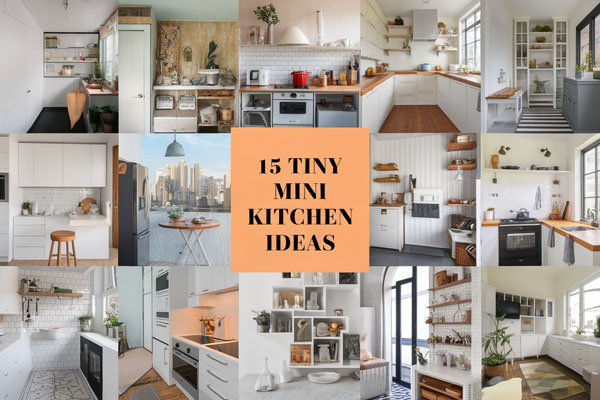
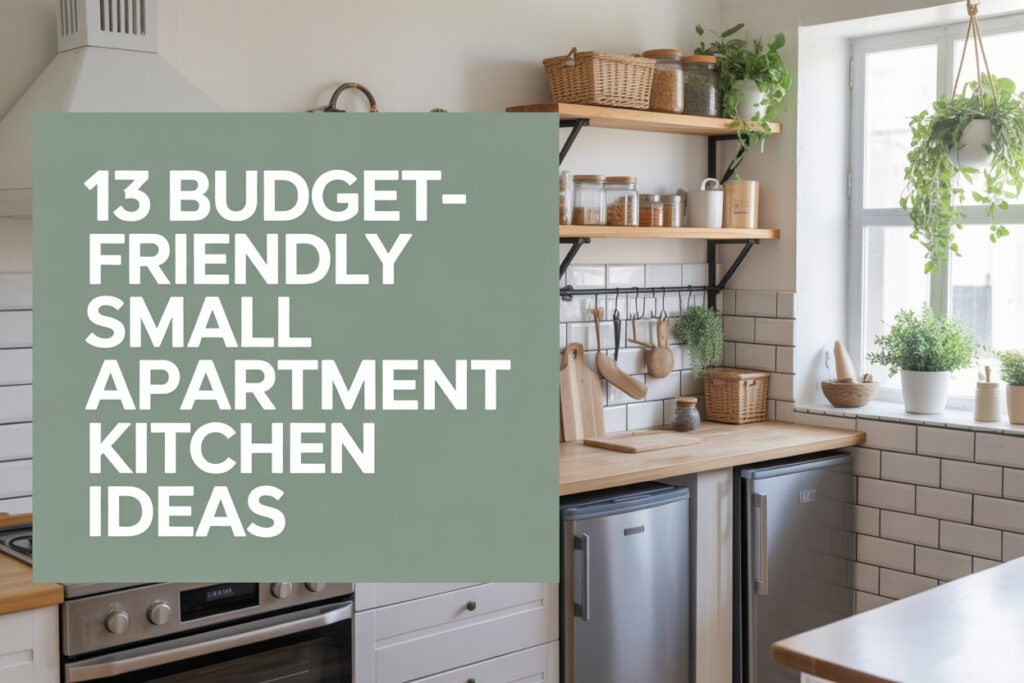
13 Budget-Friendly Kitchen Ideas for Small Apartment Spaces
Small apartment kitchens usually lose space to bad storage choices, awkward layouts, and random clutter more than actual size.
Fixing those problems costs a lot less than most people think, which is great because nobody wants to throw serious money at a rental kitchen that still has weird cabinets from 2009.
I’ve dealt with kitchens where the fridge door blocked the walkway and the only prep zone felt about the size of a paperback.
A few smart changes made those spaces feel way more usable without turning the whole thing into a renovation project.
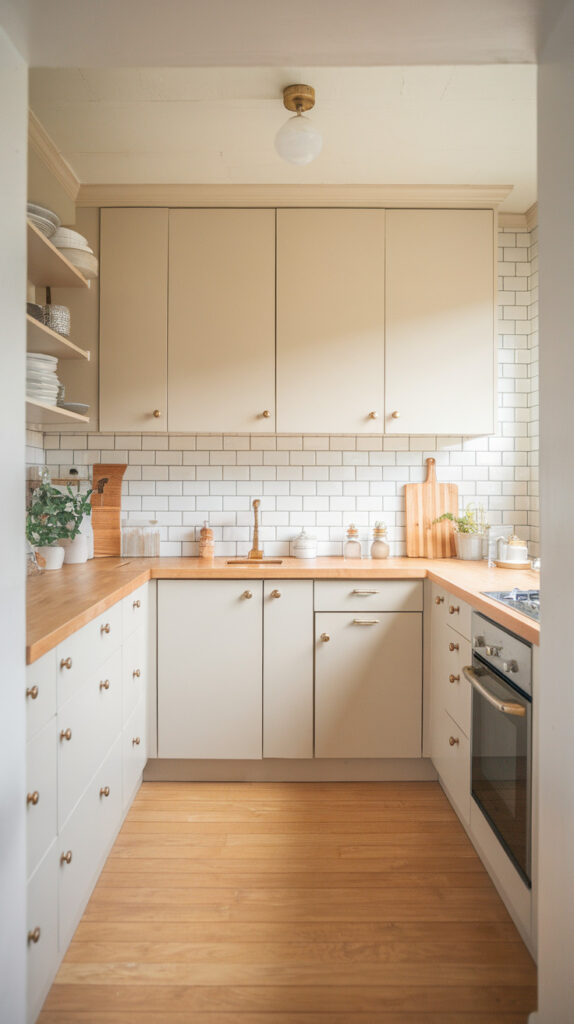
1. Install Floating Shelves Instead of Upper Cabinets
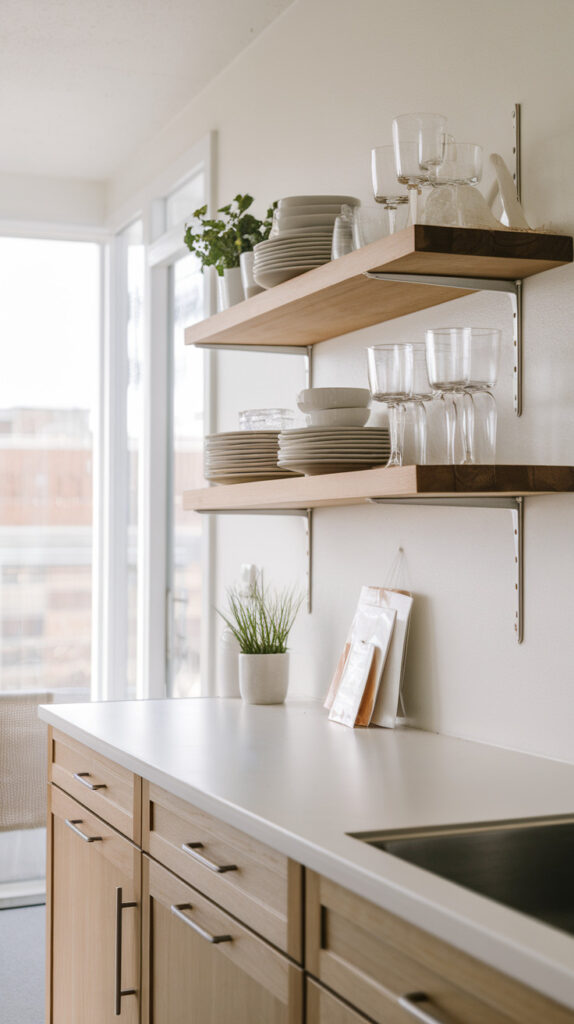
Upper cabinets can make a tiny kitchen feel boxed in fast, especially when they sit low and create that heavy wall of storage right at eye level. Floating shelves solve that problem without forcing a full remodel, and they usually cost a lot less than adding or replacing cabinets.
I like this move because it changes the room immediately, even if the kitchen footprint stays exactly the same. I tried it in a small rental years ago, and the whole space stopped feeling like it was leaning over me in a rude way.
Why This Works
Floating shelves remove visual weight while still giving everyday dishes and glasses a place to live. They also force a little restraint, which small kitchens desperately need because too much hidden storage often turns into a junk drawer with doors.
How to Do It
- Remove one or two upper cabinets instead of all of them so you keep some closed storage.
- Anchor shelf brackets into studs because decorative regret is one thing and collapsed shelving is another.
- Use thick shelves that can handle real dishes, not flimsy boards that belong in a craft closet.
- Limit shelf items to things you actually use every week so the whole setup stays functional.
Style & Design Tips
Stick with a tight color palette on the shelves so the display looks calm instead of chaotic. White dishes, clear glasses, and a few matching containers always look cleaner than a random parade of mugs collected over five different phases of life.
Skip stuffing every inch with decor because that kills the airy effect almost immediately. A small kitchen needs breathing room more than it needs another tiny fake plant pretending to help.
Pro Tip or Budget Hack
If solid wood shelves feel too pricey, use plywood with edge banding and stain it for a cleaner finish. It gives you the custom look without the custom bill, which is honestly the kind of math I enjoy.
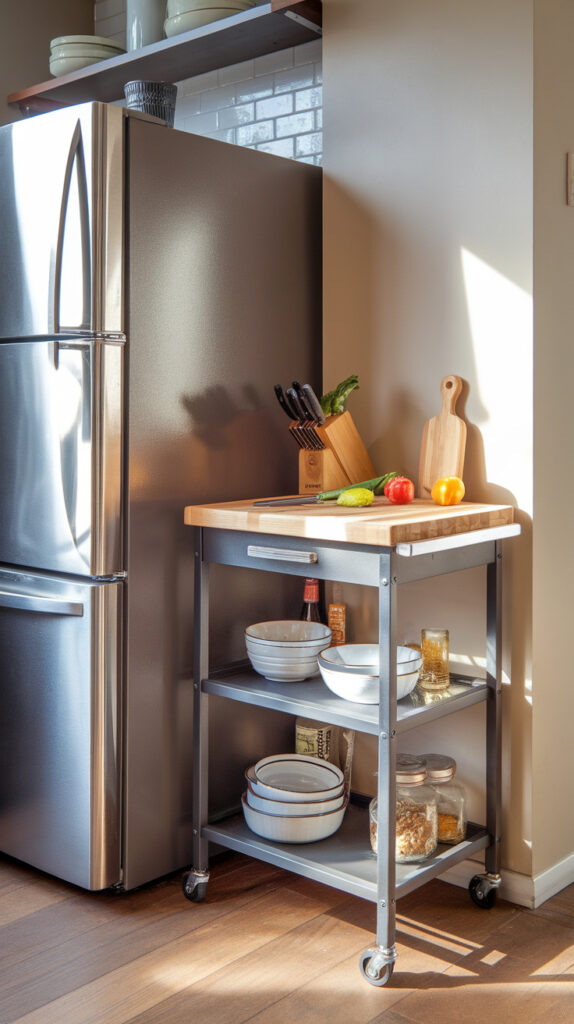
2. Add a Slim Rolling Kitchen Cart
Counter space disappears in small kitchens for almost no reason at all. One cutting board, one mixing bowl, and suddenly the whole room acts like it’s doing its best under difficult circumstances.
A slim rolling cart adds prep space, storage, and flexibility without locking you into a bulky island situation. I used one that slid between the fridge and the wall, and it earned its keep every single day.
Why This Works
A narrow cart gives you extra workspace only when you need it, which matters in a kitchen where permanent furniture can ruin the flow. It also creates a natural work zone for coffee supplies, baking tools, or whatever category currently owns your counter.
How to Do It
- Measure every narrow gap before buying anything because online dimensions love to lie by half an inch.
- Pick a cart with locking wheels so it stays put while you chop or mix.
- Use the top for prep and keep heavier items on the bottom shelf for balance.
- Slide it out only when needed so the walkway stays open.
Style & Design Tips
Choose a finish that relates to something already in the kitchen, like hardware, shelves, or the countertop tone. Stainless steel works in modern spaces, while wood feels softer and warmer, and both look better than a cart that seems borrowed from a random office break room.
Avoid oversized carts, even if they look beautiful in photos. In a small apartment kitchen, slim always beats impressive.
Pro Tip or Budget Hack
Check secondhand listings for bar carts, utility carts, or old microwave stands that can be repurposed. Add a removable wood top if needed, and suddenly the “budget piece” looks surprisingly intentional.
3. Use Vertical Wall Storage for Utensils and Tools
Drawers fill up ridiculously fast in small kitchens, especially once spatulas, whisks, tongs, and scissors start fighting for room. Hanging tools on the wall frees up drawer space and makes cooking feel less annoying in the process.
I started doing this after one drawer jammed so badly I had to yank it open with both hands, which felt dramatic for a Tuesday. A simple rail with hooks fixed that mess faster than any drawer organizer ever did.
Why This Works
Wall storage uses space that normally sits empty, and empty wall space is basically missed opportunity in a tiny kitchen. It also keeps everyday tools visible, so you stop buying duplicates because you forgot the first one existed.
How to Do It
- Install a metal rail, pegboard, or hook strip near the prep zone or backsplash.
- Hang only the utensils you use often so the display stays neat.
- Group similar items together because visual order matters more than people admit.
- Leave some empty space between tools so the wall still feels clean.
Style & Design Tips
Use one finish for the whole setup, whether that means matte black, brass, or brushed steel. Matching hardware makes the wall look designed instead of improvised, and that small difference really changes how polished the kitchen feels.
Do not hang every tool you own like you’re opening a cooking museum. Too much stuff on display can make the room feel cluttered before breakfast.
Pro Tip or Budget Hack
A painted pegboard costs very little and works harder than a lot of expensive storage gadgets. Paint it the same color as the wall if you want it to blend in, or go one shade darker if you want it to look deliberate.
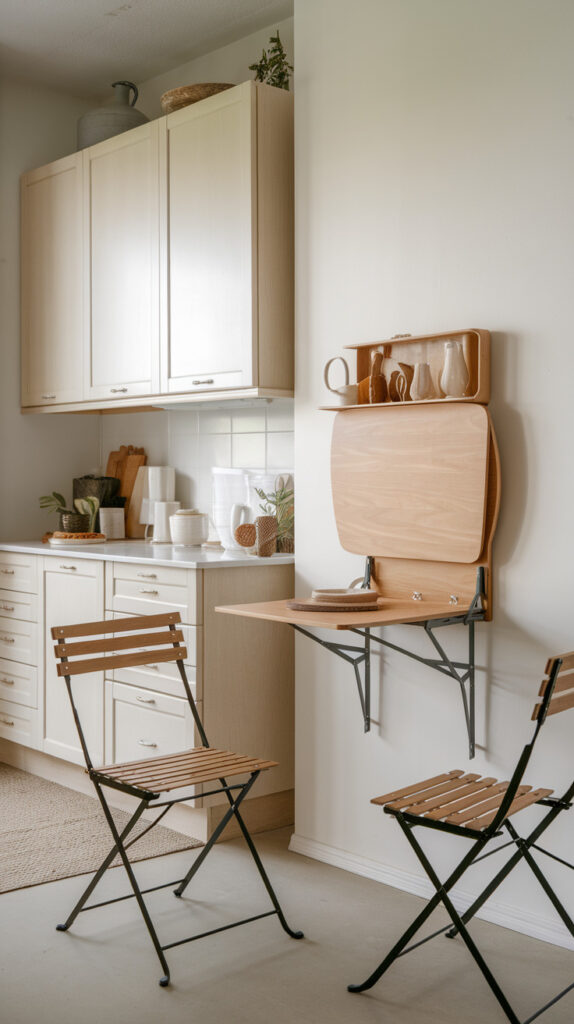
4. Swap Bulky Dining Tables for a Wall-Mounted Drop-Leaf Table
Traditional dining tables take up floor space even when nobody’s using them, which feels wasteful in a small apartment kitchen. A wall-mounted drop-leaf table solves that problem by giving you a surface only when you actually need one.
I love this idea because it works as a dining table, prep station, and laptop perch without permanently crowding the room. In one studio setup I tried, folding it down instantly made the kitchen feel twice as open.
Why This Works
Fold-down furniture gives you flexibility, and flexibility matters more than almost anything in a small kitchen. Keeping the floor clearer improves movement, which makes the entire room feel less cramped and more functional.
How to Do It
- Choose a sturdy wall and mount the table with heavy-duty brackets or supports.
- Keep the table size modest so it fits the room instead of overpowering it.
- Pair it with folding stools or chairs that tuck away easily.
- Clear the surface after each use so it keeps its space-saving advantage.
Style & Design Tips
Match the tabletop finish to your cabinets, shelves, or floor tone so it doesn’t look like a random afterthought. Clean lines and light finishes usually work best here because they help the table blend into the room instead of shouting for attention.
Avoid bulky dining chairs, because they undo half the benefit of the whole setup. The smartest table in the world still loses if the seating eats up the walkway.
Pro Tip or Budget Hack
You can DIY this with a wood panel and folding shelf brackets from a hardware store for way less than designer versions cost. Paint the underside the same color as the wall if you want it to practically disappear when folded.
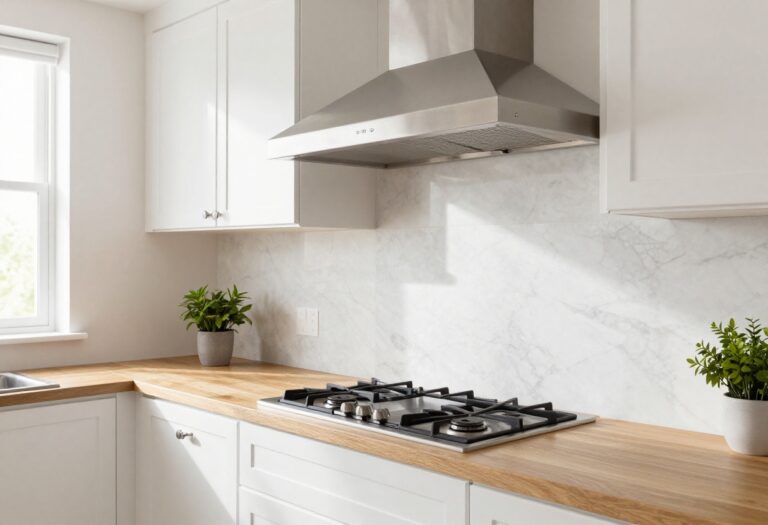
5. Choose Light, Reflective Backsplash Materials

A dark or dated backsplash can make a small kitchen look tighter, older, and somehow slightly grumpy. A light peel-and-stick backsplash gives you a brighter look without the cost, mess, or landlord side-eye that comes with real tile work.
This is one of my favorite cheap upgrades because the visual payoff feels immediate. I swapped out a dull brown backsplash once, and the kitchen suddenly looked cleaner, bigger, and less tired without touching anything else.
Why This Works
Light, slightly reflective surfaces bounce light around the room and create a stronger sense of openness. They also help the kitchen feel more finished, which matters a lot when the cabinets and counters aren’t exactly designer material.
How to Do It
- Pick a peel-and-stick tile in white, cream, or another soft neutral tone.
- Clean the wall really well before applying because grease ruins adhesion fast.
- Keep the pattern simple so the small space doesn’t get visually crowded.
- Line everything up carefully from the start because crooked tile gets annoying very quickly.
Style & Design Tips
Glossy subway-style designs usually work well because they feel classic and easy to style. Light grout lines or seamless patterns tend to look best in small kitchens since they keep the wall from feeling too chopped up.
Avoid bold busy prints unless the rest of the kitchen is extremely simple. Small kitchens don’t handle visual chaos very gracefully.
Pro Tip or Budget Hack
Buy one sample sheet first and test it near the stove area before committing to the full wall. That tiny step can save money, effort, and the deeply irritating experience of peeling off a bad decision three days later.
6. Install Under-Cabinet Lighting
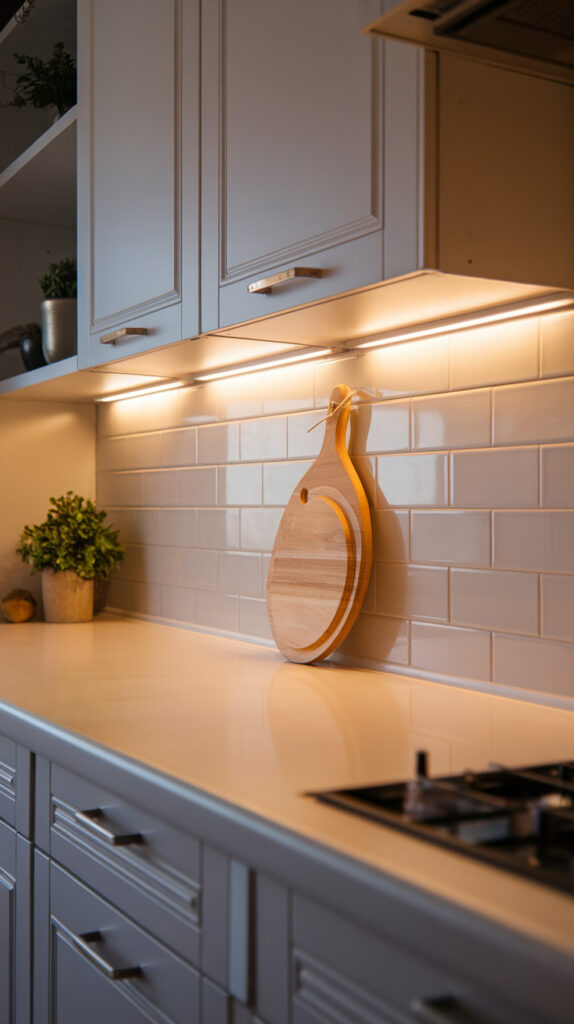
Shadows make a small kitchen feel tighter than it already is, and bad lighting makes even decent countertops look kind of sad. Under-cabinet lighting fixes both problems without needing a major electrical project or fancy contractor involvement.
I added simple LED strips in one apartment kitchen and honestly wondered why I waited so long. The counters looked better, the room felt brighter, and cooking stopped feeling like a low-budget mystery challenge.
Why This Works
Good lighting expands perceived space because it removes dark corners and visually opens the work area. It also makes meal prep easier and safer, which is a very practical bonus for something that also makes the room look better.
How to Do It
- Choose LED strips or puck lights that are easy to mount under cabinets.
- Use warm white light so the kitchen feels comfortable instead of harsh.
- Hide cords with clips or adhesive channels for a cleaner result.
- Run lighting along the full underside for an even glow instead of random bright spots.
Style & Design Tips
Keep the lighting subtle so it feels polished rather than dramatic. A soft warm glow works better than icy blue light, which can make the kitchen feel less inviting and a little too close to a dentist office.
Skip uneven placement or visible wires because they cheapen the whole effect. This upgrade works best when it feels quiet and intentional.
Pro Tip or Budget Hack
Battery-operated LED strips are great for renters and cost far less than hardwired lighting. Some even come with motion sensors, which feels a little extra in the best possible way when your hands are full.
7. Use Clear Storage Containers in Cabinets
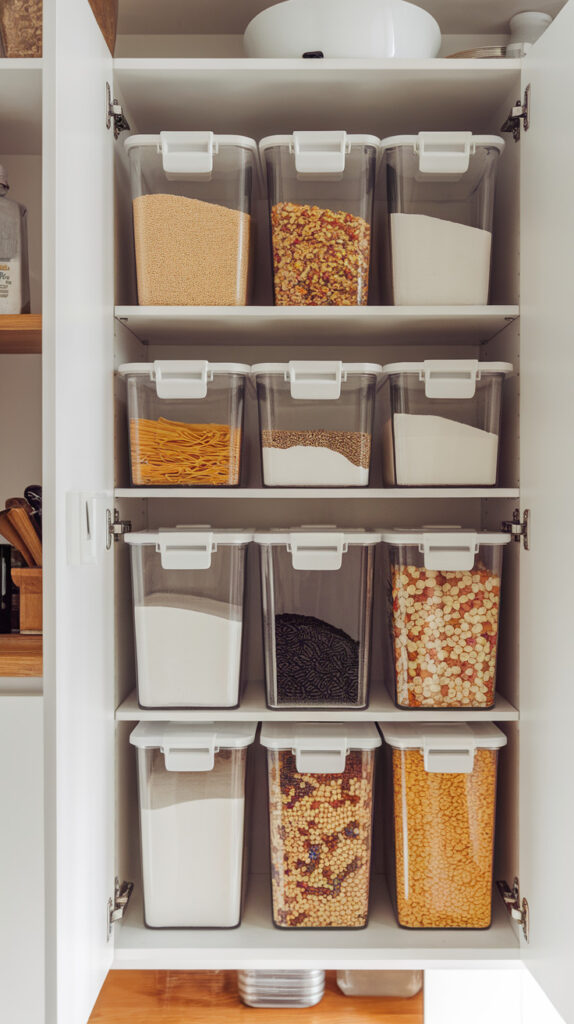
Cabinets get messy fast when pasta, rice, flour, and snacks stay in half-open bags and crumpled boxes. Clear containers fix that chaos and make the inside of the kitchen feel more organized without requiring extra square footage.
I switched to uniform containers in one tiny apartment pantry, and it was weirdly satisfying how much calmer everything looked. I also stopped buying the same dry goods twice, which paid for the containers sooner than expected.
Why This Works
Clear containers improve visibility, stacking, and storage efficiency all at once. When you can actually see what you have, the kitchen runs better and the cabinets stop acting like a cluttered scavenger hunt.
How to Do It
- Move dry goods into airtight containers in a few consistent sizes.
- Label each one clearly so nobody has to guess between flour and powdered sugar.
- Stack by size and place everyday items at easy reach.
- Keep heavier containers on lower shelves so the setup stays safer and more practical.
Style & Design Tips
Use simple labels in black, white, or another neutral tone so everything feels tidy and cohesive. Matching container shapes help cabinets look cleaner, while random sizes and colors usually bring back the same clutter you were trying to escape.
Do not overstuff every shelf just because the containers make things look neat. A little empty space actually helps the whole system stay manageable.
Pro Tip or Budget Hack
Start with the ingredients you use most instead of buying a huge set all at once. A few budget-friendly containers from discount stores can go a long way if you focus on the categories that create the most mess first.
8. Paint Cabinets a Light Neutral Shade
Dark, dated cabinets can make a small apartment kitchen feel heavy even when everything else is working pretty well. Painting them a light neutral shade gives the room a brighter, softer look without the cost of replacing doors or boxes.
I’ve done this on old cabinets that looked beyond saving, and the difference was honestly ridiculous. New paint won’t turn bargain cabinets into custom millwork, but it can absolutely make them look cleaner and way more current.
Why This Works
Light cabinet colors reflect more light and reduce visual heaviness, which helps the kitchen feel larger. They also create smoother lines across the room, and smoother lines matter in small spaces where every interruption feels bigger.
How to Do It
- Clean every cabinet thoroughly because grease will ruin paint adhesion.
- Sand lightly and use the right primer so the finish lasts longer.
- Choose a cabinet-specific paint in soft white, warm beige, or light gray.
- Apply thin coats and let them dry properly instead of rushing the job.
Style & Design Tips
Warm neutrals usually look better than stark bright white, especially in kitchens with limited natural light. Soft white, greige, and light taupe all help a kitchen feel airy without making it look cold or flat.
Avoid piling on trendy colors just because they look fun online. In a small kitchen, a calm cabinet color gives you more flexibility with everything else.
Pro Tip or Budget Hack
If painting every cabinet feels like too much work, start with the uppers or just the fronts that show most. That partial update still changes the room, and it saves a chunk of time, paint, and patience.
9. Add Mirrors Strategically
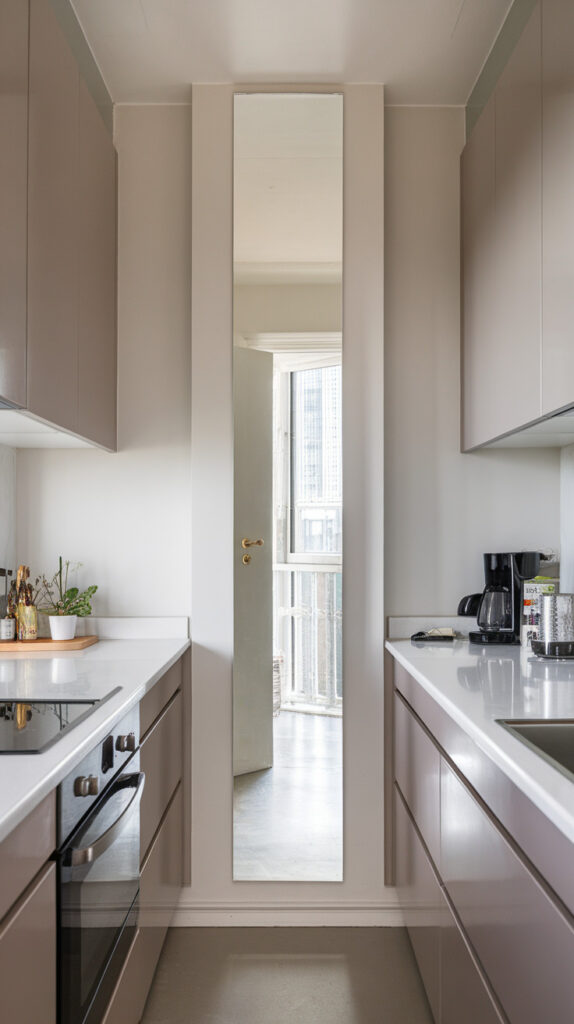
Mirrors aren’t just for hallways and bedrooms, and small kitchens can benefit from them more than people expect. A well-placed mirror bounces light around and gives the room a little visual depth without taking up any actual space.
I tried this on a narrow wall in one cramped apartment kitchen, and the room stopped feeling so boxed in. It wasn’t magic, obviously, but it was one of those tiny changes that made the kitchen feel less stubborn.
Why This Works
Mirrors reflect light and create the illusion of more room, which helps small kitchens look more open. They also break up solid walls in a way that feels lighter, especially if the kitchen has limited windows or darker finishes.
How to Do It
- Choose a slim mirror that won’t dominate the wall.
- Place it opposite or near a light source for the biggest effect.
- Keep the surrounding area simple so the reflection looks clean.
- Anchor it securely because kitchen accidents do not need extra drama.
Style & Design Tips
Thin black, wood, or brass frames usually work well without feeling fussy. Simple shapes and clean lines help the mirror blend into the kitchen instead of making it feel oddly decorative.
Avoid ornate frames or oversized mirrors unless the rest of the kitchen is very minimal. In a small space, too much detail can tip from stylish to busy fast.
Pro Tip or Budget Hack
Secondhand mirrors are often cheap and easy to repaint if the frame looks rough. A little spray paint can make a thrifted piece look far more expensive than it has any right to.
10. Maximize Corner Storage with Lazy Susans
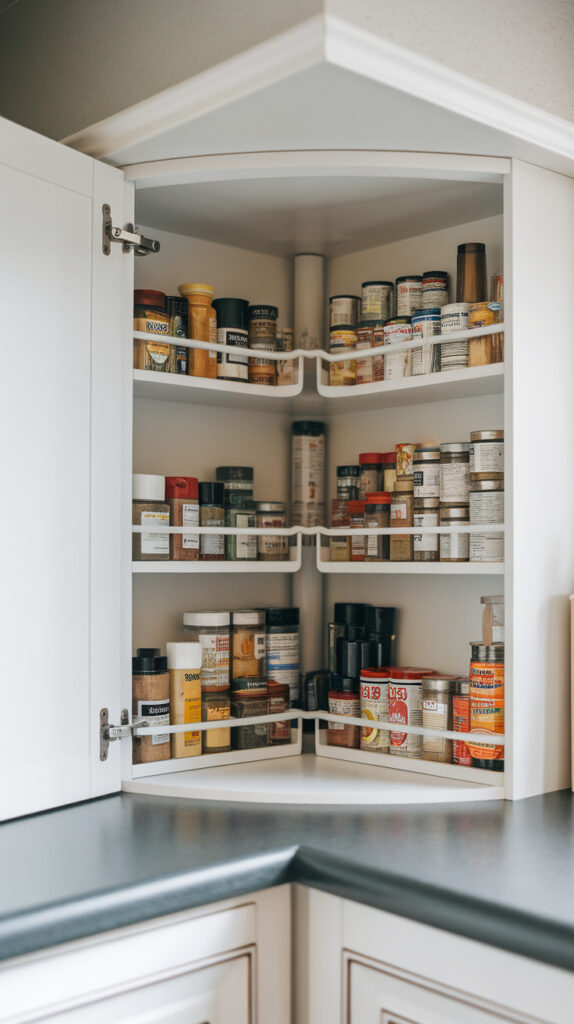
Corner cabinets waste an absurd amount of space when things get shoved to the back and forgotten for months. A lazy Susan turns that dead zone into usable storage without requiring custom cabinetry or a giant budget.
I’m a big fan of this fix because it solves one of the most annoying small-kitchen problems with almost no effort. Anything that stops me from crouching on the floor to search for one spice jar gets my respect immediately.
Why This Works
Rotating storage brings items forward instead of burying them in the back of a cabinet. That makes corners more efficient, easier to maintain, and far less likely to turn into a storage black hole.
How to Do It
- Measure the cabinet carefully so the insert actually fits and turns properly.
- Use one lazy Susan per category, like spices, oils, or canned goods.
- Keep weight balanced so the tray rotates smoothly.
- Edit items regularly so the cabinet doesn’t become overcrowded again.
Style & Design Tips
Stick to categories that are easy to group and easy to reach. Spices, condiments, and shorter pantry items usually work better than tall awkward containers that fight the whole system.
Avoid mixing random objects on the same tray because that makes the setup feel messy fast. A little order keeps the convenience from turning back into cabinet chaos.
Pro Tip or Budget Hack
Plastic lazy Susans from discount stores work just fine for most kitchens, so there’s no need to overspend. If the cabinet is extra deep, use two smaller trays instead of one big one for better access.
11. Keep Countertops Intentionally Minimal
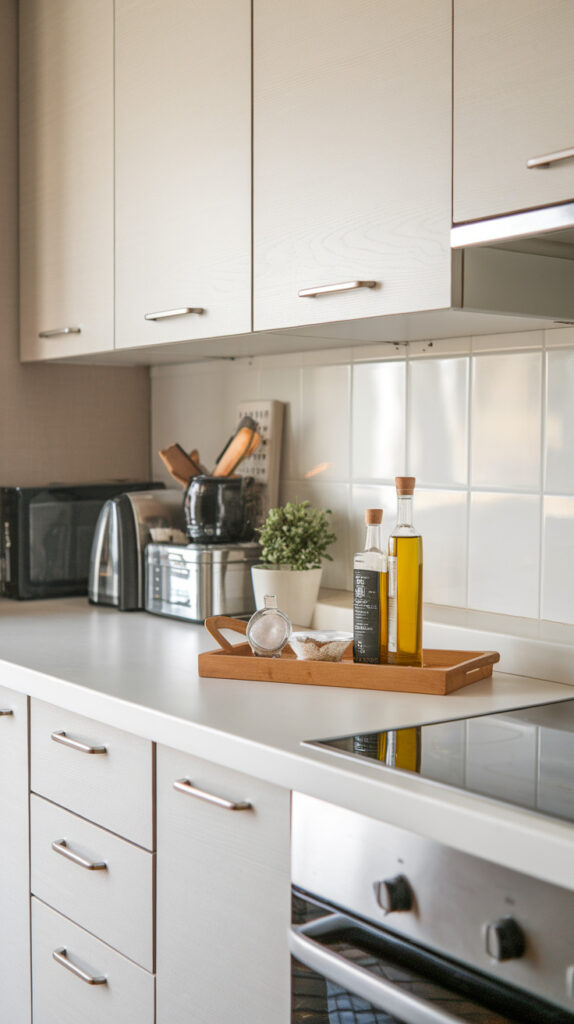
Cluttered countertops shrink a kitchen almost instantly, even when the actual layout is decent. Too many small appliances, containers, and random extras make the room feel tighter, messier, and harder to use.
I learned this the hard way after treating one tiny kitchen counter like it had unlimited emotional resilience. It did not, and the room looked better the second I cleared off half the stuff I swore I needed.
Why This Works
Open counter space gives the eye a break and makes the room feel more functional. It also improves actual cooking flow, which matters way more than displaying every appliance you own like a showroom nobody asked for.
How to Do It
- Remove appliances you don’t use at least several times a week.
- Group must-have items on one tray so they look organized instead of scattered.
- Store extras inside cabinets, carts, or drawers whenever possible.
- Do a quick reset every evening so clutter doesn’t creep back in.
Style & Design Tips
A minimal counter does not need to look bare or cold. One tray, one utensil crock, or one pretty functional item usually looks much better than six cute things competing for the same six inches.
Avoid impulse decor that serves no purpose in a small kitchen. When space is tight, decorative clutter becomes regular clutter with better marketing.
Pro Tip or Budget Hack
Before buying any new organizer, try removing five items from the counter first. That costs nothing, takes about three minutes, and often solves the problem faster than shopping for another container to hold the clutter.
12. Add an Over-the-Sink Drying Rack

A dish rack can eat up a shocking amount of counter space in a small apartment kitchen. An over-the-sink drying rack fixes that by moving the mess upward and using an area that usually sits empty once the dishes are done.
I love this setup because it gives the sink zone an actual job instead of letting it become a dead spot between washing and wiping. In one tiny kitchen, this single change freed enough counter space to make meal prep feel normal again.
Why This Works
The sink already interrupts the countertop, so using that zone for vertical drying makes sense. It keeps water contained, clears work surfaces, and adds storage without forcing another bulky item into the room.
How to Do It
- Measure the sink width carefully before buying a rack.
- Choose a model with sections for plates, utensils, and maybe a small cutting board.
- Keep the rack height balanced so it doesn’t block cabinets or feel too heavy.
- Clean it regularly because even smart storage gets gross if ignored.
Style & Design Tips
Go for a slim black, white, or stainless finish that blends with the kitchen instead of dominating it. Open-frame designs usually look lighter than chunky plastic ones, and that visual difference matters in a small room.
Avoid oversized models loaded with too many attachments unless you truly need them. Some racks try to do everything, and the result looks one bad decision away from chaos.
Pro Tip or Budget Hack
A simple roll-up drying rack can give a similar effect for even less money if the budget feels tight. It stores easily, works over many sinks, and doesn’t demand permanent commitment, which is honestly ideal for rental life.
13. Use Cabinet Door Storage for Hidden Extras

Cabinet doors hide useful storage space that most people ignore completely. Adding small racks or hooks inside those doors helps hold spices, foil, trash bags, or cleaning supplies without stealing shelf space from everything else.
This idea feels small, but it adds up fast in a kitchen where every inch has to work. I started using door storage for wraps and cutting boards in one apartment, and suddenly the main shelves stopped feeling packed for no reason.
Why This Works
Door storage uses vertical space inside existing cabinets, which makes it a smart low-cost upgrade. It also keeps frequently used items easy to grab while leaving the main cabinet area less cluttered and easier to organize.
How to Do It
- Check the cabinet depth first so added storage won’t hit the shelves inside.
- Use slim racks, adhesive bins, or small hooks depending on the item type.
- Keep heavier objects off the doors so hinges don’t get stressed.
- Group items by function so the storage feels intentional and easy to maintain.
Style & Design Tips
Choose simple storage pieces that match each other, even if they stay hidden most of the time. Thin white, black, or metal organizers tend to look cleaner and fit better than bulky plastic bins with huge edges.
Avoid stuffing the doors with too many categories at once. The goal is smarter access, not secretly recreating the same clutter problem behind a cabinet front.
Pro Tip or Budget Hack
Adhesive-mounted organizers work well for renters and cost less than many custom inserts. Start with one cabinet door first, and once you see how much shelf space it frees up, it gets very hard to stop.
Small Apartment Kitchen Design Strategy & Foundation
A small apartment kitchen needs a plan before it needs more stuff. Random upgrades can look helpful on their own, but if they don’t improve flow, storage, or light, the room still ends up feeling cramped in the same old way.
I always think it makes more sense to fix the biggest daily annoyance first. If the real problem is cluttered counters, then a cute shelf won’t save you, and if the kitchen feels dark and boxed in, better storage alone won’t magically make it feel open.
Start by figuring out what slows you down most. It might be lack of prep space, bad cabinet storage, poor lighting, or too many things living in the wrong places, and once you fix that one main issue, the kitchen usually starts cooperating a lot more.
It also helps to create clear zones, even in a tiny layout. A prep area, a cooking area, and a storage area make the room feel bigger because you stop crossing over yourself every time you make something more complicated than toast.
Color consistency matters more than people expect in a small kitchen. Two or three main tones across cabinets, shelves, storage pieces, and accessories create visual calm, and visual calm makes a tight room feel more open.
Flexibility should stay part of the plan too. Rolling carts, fold-down tables, removable lighting, and modular storage work especially well in apartment kitchens because life changes, leases end, and nobody wants to sink a fortune into something they may have to leave behind.
Layout Planning Principles for Tiny Kitchens
Layout matters more than decor in a small apartment kitchen, and I will gladly die on that hill. If the workflow feels awkward, no amount of styling will save the room from being annoying to use.
The working triangle between the sink, stove, and fridge should stay compact without feeling blocked. You don’t need a perfect showroom layout, but you do want to move between those three spots without squeezing past a cart or bumping into a chair every five seconds.
Clear pathways make a huge difference, even when the kitchen is tiny. If you can keep around 30 to 36 inches of open walkway where possible, the room feels a lot easier to move through and a lot less like a punishment.
Vertical clearance matters too, especially when you start adding tall shelves or upper storage. Height is useful, but if everything stacks upward in dark heavy finishes, the kitchen can start feeling closed in instead of better organized.
That’s why balance matters. Tall storage works best when it’s paired with lighter tones, cleaner lines, and enough open space to keep the room from looking visually packed.
Storage Hierarchy: What Stays and What Goes
Small kitchens do not reward over-collecting, and they definitely do not reward keeping every weird gadget from a hopeful cooking phase three years ago. If you haven’t used something in six months, it probably doesn’t deserve prime shelf space.
Everyday items should live at waist to eye level where they’re easiest to grab. The things you use once in a while, like holiday platters, specialty baking pans, or that blender attachment you keep forgetting about, can go higher up or deeper in storage.
A simple storage hierarchy keeps the kitchen functioning better because it reduces visual and physical clutter. When your best-used tools sit front and center, you stop wasting time digging past things you barely touch.
This is also where duplicates start causing trouble. Two spatulas make sense, but five spatulas, three half-broken peelers, and a drawer full of mystery lids do not create abundance, they create nonsense.
I like doing a quick kitchen audit every few months just to reset things. It doesn’t need to be dramatic, but regular editing keeps the room from slowly turning back into a crowded little mess.
Common Mistakes to Avoid in Small Apartment Kitchens
Overdecorating is one of the fastest ways to make a small kitchen feel tighter. A few styled pieces can look great, but once every shelf, wall, and countertop starts carrying decor, the room loses breathing room fast.
Oversized furniture causes trouble too. A big island might look beautiful online, but if it blocks movement or makes the kitchen harder to use, then it’s basically expensive sabotage.
Lighting mistakes also shrink a room more than people realize. If the only light comes from one overhead fixture, the counters and corners can feel dim and boxed in, which is why under-cabinet lighting and better task lighting usually make such a strong difference.
Too many finishes can make a tiny kitchen feel visually chaotic. Mixing several metals, wood tones, bold colors, and patterns might sound creative, but in a small apartment kitchen, restraint usually looks better and feels calmer.
Ignoring vertical space is another common miss. Walls, cabinet doors, and the area above cabinets can all work harder, and leaving them unused often means the counters and drawers end up carrying more clutter than they should.
Budget Planning & Smart Investment Priorities
A small apartment kitchen does not need a huge renovation budget to improve. In a lot of cases, the smartest low-cost upgrades do more for the space than the flashy expensive ones.
Lighting usually gives a strong return for the money. Under-cabinet LEDs, brighter bulbs, and better placement can completely change how the kitchen feels without requiring some dramatic budget meeting with yourself.
Paint is another upgrade that punches above its weight. Cabinets, walls, shelving, or even an old cart can look much better with the right color, and that kind of change tends to be far more affordable than replacing things outright.
I’d be careful with custom cabinetry unless you know you’re staying put long term. For renters or anyone working with a short-term setup, modular storage, removable solutions, and flexible furniture make way more financial sense.
Breaking the budget into phases helps too. Tackle one high-impact fix at a time, and the whole project feels more manageable, less impulsive, and a lot less likely to end with three half-finished ideas sitting in your cart.
Maintenance & Long-Term Organization Habits
Even the smartest small kitchen setup falls apart if nobody maintains it. Organization is not a one-and-done thing, which is mildly annoying, but it’s true.
A nightly reset goes a long way here. Clearing the counters, wiping surfaces, and putting things back where they belong takes a few minutes, but it stops the slow buildup that makes a kitchen feel messy again before you even notice it happening.
A deeper cabinet reset every few months helps too. Expired food, duplicate tools, random storage overflow, and forgotten pantry items have a way of creeping back in unless you check in on them now and then.
Systems should change as your habits change. If you start cooking more, baking more, or relying on different appliances, the storage should adjust with that instead of forcing you to keep using a setup that no longer makes sense.
Consistency is what keeps a tiny kitchen feeling calm. When everything has a place and mostly stays there, even a small apartment kitchen can feel surprisingly under control.
Frequently Asked Questions
How can I make a small apartment kitchen look bigger without remodeling?
Focus on light colors, reflective finishes, good lighting, and less clutter on the counters. Mirrors, peel-and-stick backsplashes, and open visual space usually make the biggest difference without requiring a full renovation.
Are floating shelves practical in small kitchens?
Yes, but only if you use them with some restraint. They work best for everyday dishes and a few useful items, not for turning the kitchen into a storage display competition.
What’s the best color for small kitchen cabinets?
Soft whites, light grays, warm beige tones, and greige usually work best. They reflect more light, reduce visual heaviness, and help the room feel more open.
How do I add more storage in a rental kitchen?
Use removable or low-commitment options like rolling carts, adhesive hooks, cabinet-door organizers, magnetic strips, and freestanding shelving. Those upgrades improve function without creating a fight with the lease.
Should I add an island in a tiny apartment kitchen?
Only if the layout can handle it without choking the walkway. In most small apartment kitchens, a slim rolling cart or fold-down table works better than a bulky fixed island.
How often should I reorganize a small kitchen?
A quick reset every week helps, and a deeper reorganization every three to four months keeps things from getting out of hand. Small kitchens stay functional when you edit them regularly instead of waiting for chaos to fully move in.
Final Thoughts
Small apartment kitchens don’t need luxury upgrades nearly as much as they need smarter decisions. A few practical changes can open up the room, improve the workflow, and make the whole space feel less cramped without draining the budget.
I’ve tried enough small-kitchen fixes to know the best ones usually aren’t the flashy ones. Start with the idea that solves your biggest daily annoyance, and the rest of the kitchen tends to fall into place from there.