11 Rustic Christmas Wreath Ideas to Welcome the Season
A good wreath does more than decorate a door. It sets the mood before anyone steps inside, and a rustic one adds warmth that a store-bought plastic ring just can't match. You don't need a craft room full of supplies to pull one off, either.
Most of these ideas lean on natural textures, simple materials, and a little imperfection. That's the whole point of rustic style, and it works in your favor when you're building something by hand.
Below you'll find eleven wreaths worth trying this season, each with a clear materials list and honest notes on what takes time. Pick one that fits your door, your budget, and how much patience you have on a cold afternoon.
1. Foraged Evergreen Wreath With Cedar and Pine
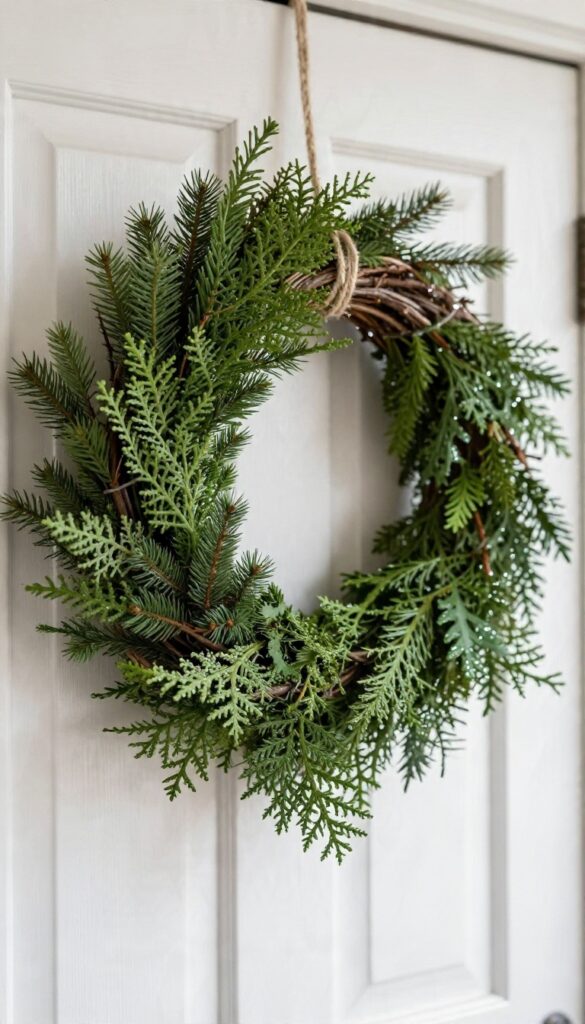
Cedar and pine give you that deep, woodsy green that reads as Christmas without trying too hard. The trick is layering a few different evergreens so the wreath looks gathered rather than bought. A grapevine form does most of the work for you, and a bit of twine ties it all together.
Start with a plain grapevine wreath, the kind with loose, twiggy loops. You can buy one cheap at most craft stores, or use a vine you already have. The gaps in the form are a feature here, not a flaw, since they let you tuck stems in without any glue.
Gather your greens in short bundles of three to five sprigs. Mix cedar for its flat, feathery look with pine for longer needles and a little juniper for texture and a faint holiday scent. Wire each bundle onto the form and overlap them as you go so the wreath fills out evenly.
What To Forage And When
Cedar, pine, and juniper all hold up well after cutting, which makes them forgiving for beginners. Clip from lower branches where the tree can spare growth, and skip anything that looks dry or brown. Early morning is a good time to gather, while stems still hold some moisture from the night air.
If you don't have evergreens nearby, a florist or tree lot will often sell you trimmings for a few dollars. Ask nicely and bring a bag.
Keeping The Greens Fresh
Fresh greens dry out faster indoors than most people expect. Soak the cut ends in water for a few hours before you build, then mist the finished wreath every couple of days. Keep it out of direct sun and away from heater vents, which sap moisture fast.
A light spritz of water also perks up needles that start to droop. If you hang it outside on a covered door, it will usually last several weeks.
Finishing With A Twine Bow
Skip the shiny ribbon and reach for plain jute twine instead. Wrap it around your hand a few times, pinch the middle, and tie it off to form a simple bow. Attach it near the top or off to one side, wherever it looks balanced to you.
A small pinecone or a sprig of juniper tucked behind the bow adds a nice finishing touch. Keep it loose and a little uneven, since that's what makes it feel handmade.
2. Grapevine Wreath With Dried Orange Slices
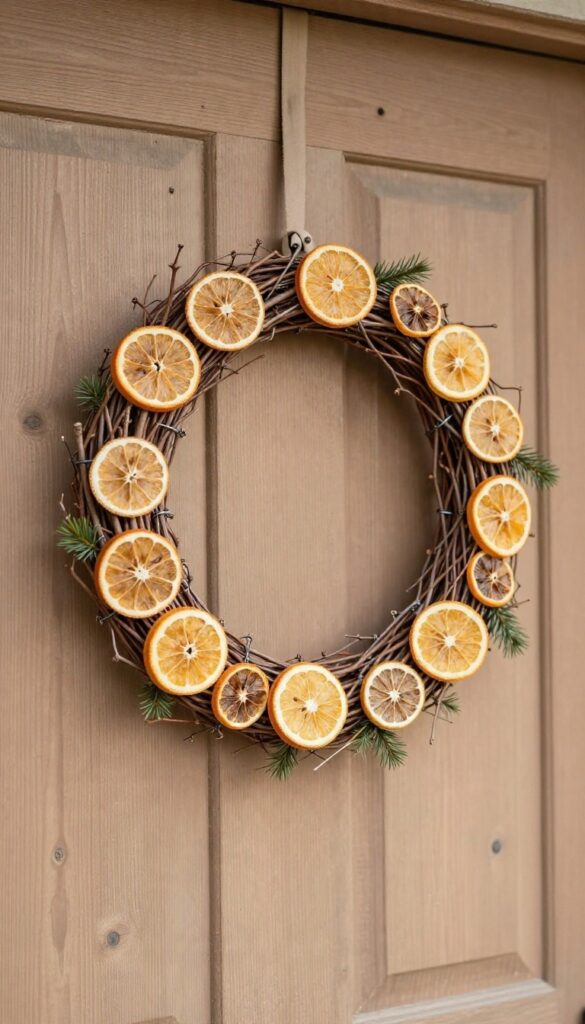
A bare grapevine ring costs very little and already looks like something. Dried orange slices do the rest, adding warm color and a faint citrus smell that lingers near the door. The trick is drying them properly and spacing them so the wreath looks balanced instead of clumped.
Start with a plain grapevine wreath, the kind you can find at most craft stores for a few dollars. The tangled vines give you plenty of little gaps to tuck stems into, which means you barely need any glue. You'll want about six to eight oranges, a sharp knife, and a couple of hours of oven time.
That's really the whole supply list.
Drying The Oranges
Slice the oranges thin, somewhere around a quarter inch, and try to keep the thickness even so they dry at the same rate. Blot them with a paper towel, then lay them on a baking sheet lined with parchment. Bake at 200°F for two to three hours, flipping once halfway through.
They're done when they feel leathery and dry, not brittle. Let them cool completely before you touch them, since warm slices bend and crack. If you want them to last through the season, a light coat of clear craft sealant helps, though it does mute the scent a bit.
Attaching Slices Securely
Hot glue works, but florist wire holds up better on a door that gets bumped. Poke a small hole near the edge of each slice with a needle, thread a short piece of wire through, and twist it around a vine. That way nothing drops off in a cold wind.
Work in a circle and step back often. Grapevine is uneven, so what looks fine up close can look lopsided from the sidewalk. A quick glance from a few feet away catches most problems.
Balancing The Layout
Don't crowd the slices into one spot. Spread them around the ring with small gaps between each one, and let a few overlap slightly for depth. Odd numbers tend to look more natural than even ones.
If the wreath still feels plain, tuck in a sprig of greenery or a cinnamon stick between the oranges. Keep it sparse, though. The bare vine is part of the charm, and too much filler hides the texture you're going for.
3. Burlap and Bells Farmhouse Wreath
Burlap has a way of making a wreath feel like it belongs on a farmhouse door, even if your house is a suburban ranch. The loose weave and earthy color add texture without competing with the rest of your Christmas decor. Pair it with a few rusty jingle bells, and you get that relaxed, collected-over-time look that's hard to fake with plastic greenery.
The trick to this wreath is layering the burlap so it looks effortless, not like you spent an hour fighting with a glue gun. You'll need a grapevine or wire wreath base, a roll of burlap ribbon (about 2 to 3 inches wide), some floral wire, and a handful of rusty bells. A hot glue gun helps, but you can get by with wire if you prefer.
Looping The Ribbon Without The Fuss
Start by cutting a few lengths of burlap ribbon, each about 12 to 18 inches long. Fold each piece into a loose loop and pinch the center, then secure it to the wreath base with floral wire. Don't worry about making them uniform—slight variations in size and shape actually make the wreath look more natural.
Work your way around the base, overlapping the loops slightly so the wreath looks full.
Making The Bow Look Relaxed
A stiff bow can make the whole wreath feel too formal. To keep it relaxed, use a longer piece of burlap and tie it in a simple knot rather than a tight bow. Leave the tails long and let them hang loosely.
If you want a more traditional bow shape, make two loops and secure them with wire, then fluff the loops out with your fingers so they're not perfectly round. The goal is a bow that looks like you tied it without overthinking it.
Adding The Bells
Cluster three or four rusty bells together and wire them to the wreath just below the bow. You can also scatter a few smaller bells around the wreath for a subtle jingle. If your bells are new and shiny, you can age them by soaking them in a mixture of vinegar and salt for a few hours, then letting them dry.
That little bit of rust adds to the farmhouse feel.
4. Pinecone Wreath With a Plaid Bow
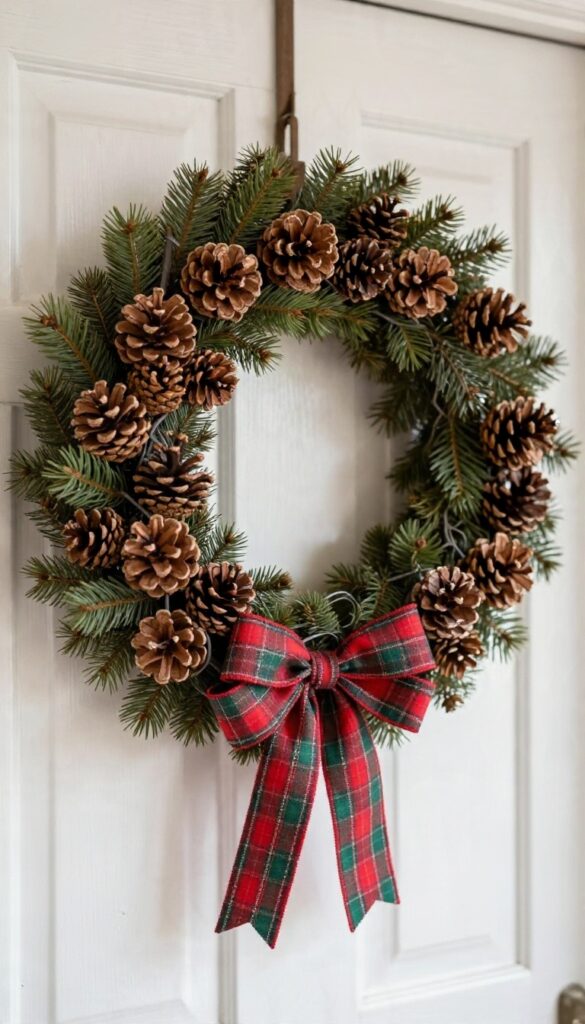
Pinecones cost nothing if you know where to look, and they bring a chunky, organic texture that pairs perfectly with a simple plaid ribbon. This wreath works best when you embrace the natural variation in size and shape rather than fighting it. Gather a basketful on your next walk, and you're already halfway there.
The key to a full pinecone wreath is sorting your cones by size before you start gluing. You'll want a mix of small, medium, and large cones to fill gaps and create depth. A wire wreath form gives you a sturdy base, and a hot glue gun holds everything in place.
Expect this one to take an evening or two, depending on how many cones you've collected.
Sorting And Prepping Your Pinecones
Spread your pinecones on a newspaper-covered table and separate them into three piles: large, medium, and small. Check for sap and debris, and give them a quick rinse if needed, then let them dry completely. If you want to keep them pest-free, a few minutes in a low oven (around 200°F) can help, but watch them closely.
Gluing In A Spiral Pattern
Start at the outer edge of your wire form and glue the largest pinecones in a circle, packing them tightly. Work your way inward in a spiral, using medium cones for the middle and small ones to fill any gaps. Don't worry about perfection—the overlapping layers are what give it that full, textured look.
Finishing With A Flannel Bow
A flannel bow in a classic red or green plaid adds a soft contrast to the prickly texture. Cut a length of ribbon and tie a simple bow, then secure it to the wreath with floral wire or a dab of hot glue. Fluff the loops and trim the tails at an angle for a clean finish.
5. Twig and Berry Minimalist Wreath
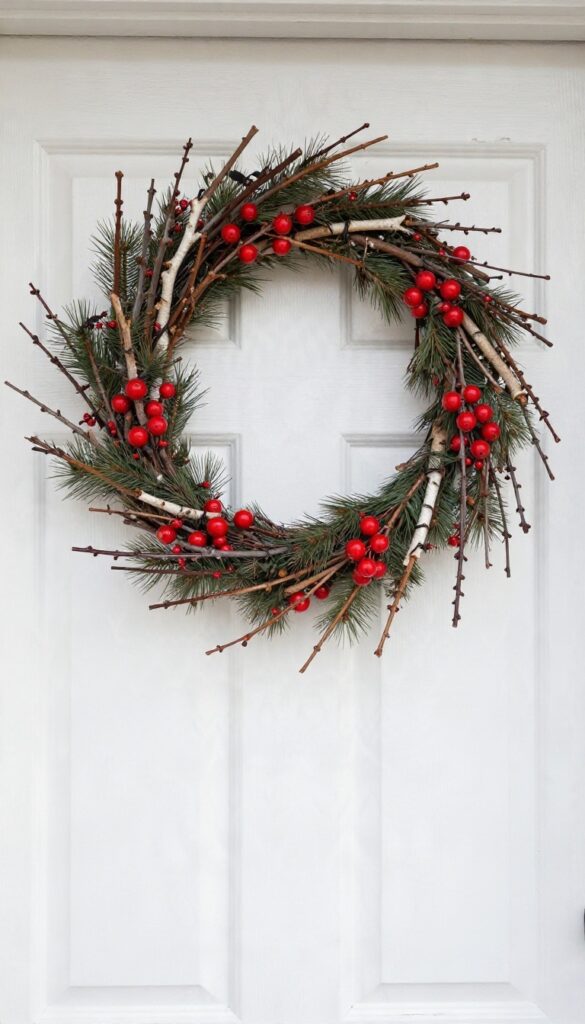
Not every wreath needs to be full. A twig and berry minimalist wreath strips things back to a few bare branches and a scatter of red, and somehow it makes a bigger statement than a dense ring of greenery. It reads as sculptural, a little Scandinavian, and completely deliberate.
The best part is how fast it comes together. You're not wiring hundreds of sprigs or wrestling with a hot glue gun for an hour. A handful of twigs, some faux berries, and a simple base get you there in under thirty minutes.
Minimalist wreaths work because the eye has somewhere to rest. When you leave open space, the few elements you do include get to shine. That's the whole trick here, and it's easier to pull off than it sounds.
You want a shape that feels balanced without being crowded. Think of it like arranging a few flowers in a vase versus stuffing it full. A little air is what makes it look intentional rather than unfinished.
What You'll Need
Start with a thin wire or grapevine base, around ten to twelve inches across. Grab a bundle of bare birch or willow twigs, some faux red berry sprays, and floral wire or twine. Keep the twigs varied in length.
A few longer ones that arc past the base add movement, and shorter ones fill in the gaps. Faux berries work better than real here because they hold their color and won't drop on your porch.
Building The Sparse Shape
Wire the twigs onto the base in small clusters, leaving clear gaps between them. Aim for three or four groupings spaced around the ring rather than an even spread. Let some twigs cross over each other and poke out at angles.
Straight, tidy branches look stiff. A little wildness is what sells the natural feel. Step back as you go.
Sparse wreaths are all about balance, and you'll spot awkward spots better from a few feet away than up close.
Placing The Berries
Tuck berry sprays into the twig clusters so they peek through rather than sit on top. Two or three small sprays total is usually enough for a twelve-inch wreath. Group them unevenly on purpose.
One cluster with a few berries, another with just one or two, keeps it from looking manufactured. If red feels too bold, swap in muted burgundy or even tiny white berries for a softer, frostier look.
Why Less Greenery Works
A sparse wreath leans on negative space, and that space is doing real work. It frames your door instead of covering it, and it lets the shape of the branches show. This style also plays well with modern or neutral homes where a full evergreen wreath might feel like too much.
It's quiet, but it still says Christmas. Hang it against a dark door for contrast, and let the twigs cast a little shadow. That's where the sculptural effect really lands.
6. Vintage Sled and Greenery Door Hanging
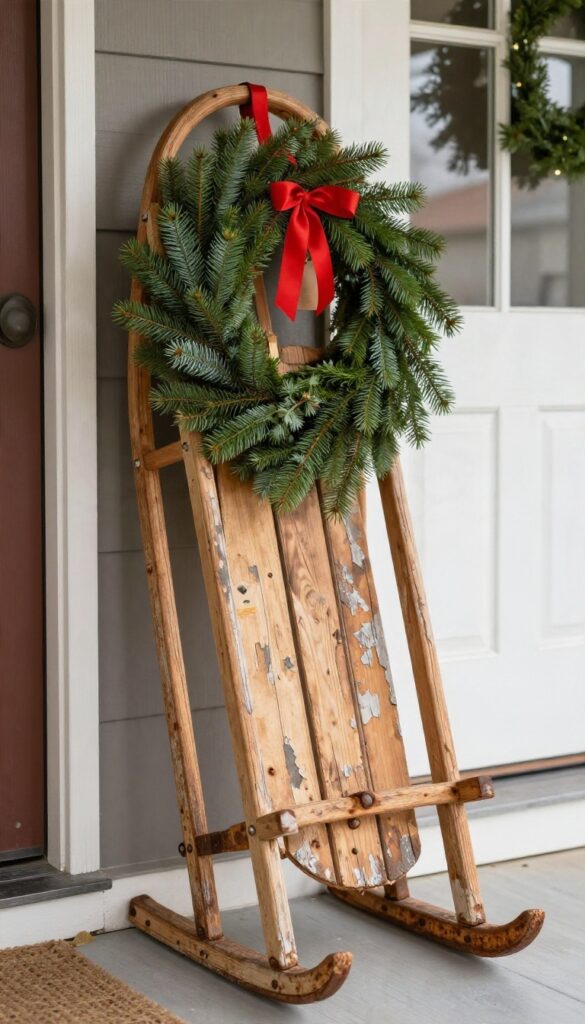
An old wooden sled leans against a door the way a wreath hangs on one, and that slight difference is what makes it stand out. Instead of a circle, you get a tall, narrow shape that fills the space nicely and looks like it's been part of the house for years. The sled does most of the visual work, so you don't need much greenery to finish it off.
A few sprigs, a ribbon, and maybe a small sign are enough. The trick is finding a sled that's sturdy and treating it so it survives the weather.
The whole project comes together in an afternoon once you have the sled. Most of the effort goes into prep and hanging, not decorating.
Finding A Sled Worth Using
Thrift stores, estate sales, and barn sales are where these turn up, usually for less than a new wreath would cost. Look for solid wood and intact runners. Peeling paint and rusted metal are fine, even desirable, as long as the frame isn't cracked or soft.
Skip anything with rot or loose joints. A sled that falls apart mid-season isn't charming, it's a mess on your porch. Give it a quick scrub with a stiff brush and let it dry fully before you decorate.
Weatherproofing The Wood
Bare wood and old paint soak up moisture, so seal the sled before it goes outside. A coat or two of matte exterior polyurethane keeps the vintage look while protecting the surface. Brush it on thin and let each coat dry completely.
If you want to keep the worn finish exactly as-is, test the finish on the back first. Most sealers darken raw wood slightly, and that's usually fine, but it's better to know before you commit.
Dressing It With Greens And Ribbon
Attach a small cluster of faux or fresh greens near the top of the sled, where the curve gives you something to work against. Zip ties or florist wire hold everything in place without damaging the wood. Add a plaid or burlap bow at the same spot and let the tails hang down.
A small wooden sign with a simple word or two can hang from the crossbar. Keep it short so it reads from the sidewalk. Fresh greens will dry out, so plan to swap them for faux stems after a couple of weeks.
Hanging It On A Heavy Door
A decorated sled has some weight, so treat it like a real hanging piece. Use a wreath hanger rated for the load, or mount a sturdy hook into the door frame rather than the door itself. Avoid adhesive hooks for anything this heavy.
Lean the sled slightly against the door and secure the top with wire or twine so wind can't tip it. On a storm door, check that the sled clears the glass when the door swings. A quick test open and close saves you a cracked pane.
7. Eucalyptus and Cotton Stem Wreath
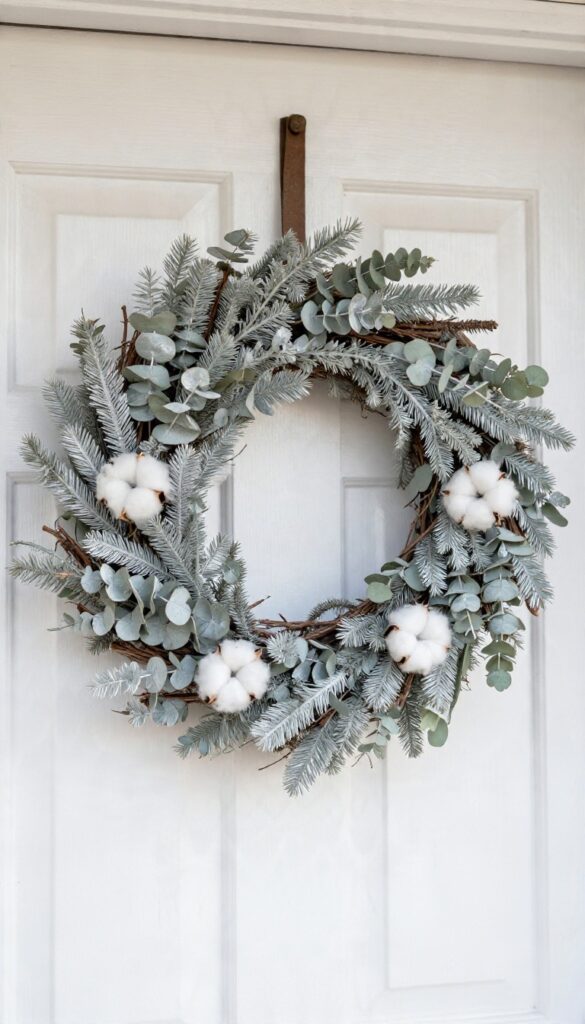
Eucalyptus and cotton make an unlikely pair on paper, but together they hit a muted, modern-rustic note that's hard to beat. The silver-green leaves bring a soft, dusty color, and the cotton bolls add the kind of fluffy texture that reads cozy without shouting. It's also one of the more forgiving wreaths on this list, since both materials dry beautifully and keep their shape for weeks.
If you want something that looks intentional but still a little wild, this is a solid pick.
Start with a grapevine or wire base, whichever you already have on hand. A grapevine ring gives the finished wreath a rougher, more organic edge, while a wire form keeps things lighter and easier to hang. Either works, so don't overthink it.
You'll want a bundle of fresh or dried eucalyptus stems and about eight to twelve cotton stems, depending on how full you like your wreath. Grab some floral wire and a pair of clippers, and you're basically set. A hot glue gun helps in a few spots, but it isn't strictly required.
Placing The Stems
Work in small clusters rather than one stem at a time. Group two or three eucalyptus stems with a cotton stem, then wire the bunch to the base. Overlap each cluster slightly over the last one so the wreath fills in as you go around.
Keep the cotton bolls facing outward and slightly up. If you bury them under leaves, you lose the whole point of the texture. Leave a little breathing room between clusters, too.
A slightly uneven, airy look suits this wreath better than a tight, packed ring.
How It Dries
Eucalyptus holds up remarkably well as it dries. The leaves may fade a touch and curl slightly at the edges, but the color stays in that silvery range for a long time. Cotton stems dry in place and keep their shape, so you don't need to do anything special.
Expect a little shrinkage as moisture leaves the stems. That's normal, and it usually just makes the wreath look a bit more relaxed. Keep it out of direct sun and away from damp spots, and it'll hold up through the season and often well beyond.
Keeping Cotton From Shedding
Cotton bolls can shed a few wisps, especially if someone brushes against them or a draft catches the wreath. A light spritz of unscented hairspray helps lock the fibers in place. Do it outside or over a sink, and let it dry fully before hanging.
Handle the wreath by the base, not the cotton, when you move it. If a boll starts looking loose, a tiny dab of hot glue at the base of the fluff will hold it together. That small step saves you from sweeping up white fluff all December.
8. Cinnamon Stick and Cranberry Wreath
Cinnamon sticks and cranberries turn a wreath into something you can smell before you see it. The combination reads warm and kitchen-ish, like a pot of mulled cider simmering on the stove. It's also one of the cheapest builds on this list, since a bag of cinnamon sticks and a couple of cartons of fresh cranberries cost less than a single premade wreath at a craft store.
The structure is simple: a ring base, a hot glue gun, and a little patience. Cinnamon sticks give you the frame and the fragrance, while cranberries fill in the gaps with deep red color. The one catch is freshness, which we'll get to below.
Start with a sturdy base. A wire wreath form or a foam ring both work, but a flat wooden or grapevine ring gives the glue more to grab onto. If you're using foam, wrap it in twine first so the sticks have something textured to stick to.
Break your cinnamon sticks into similar lengths, roughly three to four inches, and lay them out before you glue anything. Working in a pattern now saves you from a lopsided wreath later. Once you're happy with the arrangement, glue each stick down with a generous dab of hot glue and hold it for a few seconds until it sets.
Leave small gaps between the sticks on purpose. Those gaps are where the cranberries go, and they also let a little light through so the wreath doesn't look like a solid brown ring.
Building The Cinnamon Base
Glue the cinnamon sticks in a fan pattern, alternating the direction every few sticks so the texture stays interesting. Keep the ends roughly even around the outer edge. A second, shorter layer of sticks on top adds depth without much extra work.
If you want the wreath to last for years, seal the sticks with a light coat of clear spray sealer after the glue dries. It locks in the color and keeps the cinnamon from flaking.
Adding The Cranberries
Fresh cranberries are the star here, but they don't last forever. Glue them on in small clusters of three or four, tucking them into the gaps between sticks. A dot of glue on each berry is enough, and you don't need to cover every gap.
For an indoor wreath, swap fresh berries for faux ones or small red wooden beads. They hold their color all season and won't shrivel or drip onto your door. Fresh berries work best outdoors, where cool air keeps them firm for a few weeks.
Finishing Touches
A simple twine loop at the top is all the hanger you need. If you want a little contrast, thread a narrow burlap or plaid ribbon behind the top of the wreath and tie it in a loose bow. Keep the wreath out of direct sun and away from heat sources.
Fresh cranberries soften fast in a warm entryway, so a shaded porch or a cool front door is the friendliest spot.
9. Moss-Covered Wreath With Woodland Accents
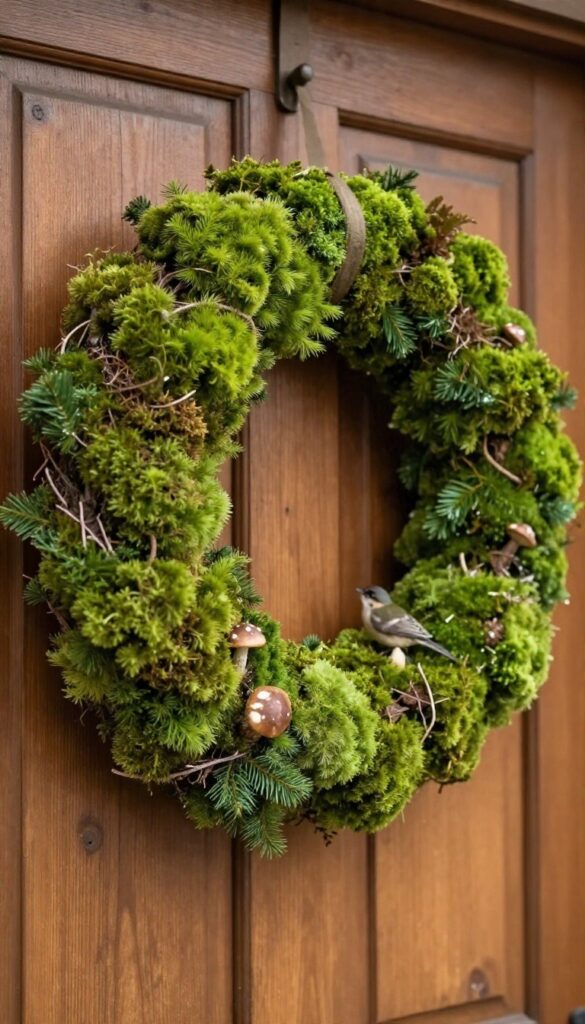
Moss brings a deep, velvety green that stays rich even when the weather turns gray and wet. It's one of the few natural materials that actually looks better with a little moisture, which makes it a smart pick for a front door that takes a beating all winter. The base does most of the work here, so you don't need a ton of extras to finish it.
A few small woodland touches tucked into the green give it that quiet, forest-floor feel without turning it into a cluttered craft project. This one rewards a slow afternoon and a little patience with the glue gun. Set aside an hour or two, and you'll end up with something that looks like it was gathered on a walk rather than bought in a store.
## Start With the Right Base A grapevine or wire wreath form gives the moss something to grip. Grapevine is the friendlier option because the twiggy surface holds moisture and texture well, and you can tuck stems right into the gaps. Sheet moss is the easiest material to work with for a full, even coverage.
You can also use preserved reindeer moss for a fluffier, more textured look, though it costs a bit more and sheds slightly. Work in small sections rather than trying to cover the whole ring at once. Press a clump onto the form, wrap a bit of floral wire or fishing line around it, and move to the next spot.
Overlap each piece so no bare vine shows through. ## Tuck in the Woodland Details Once the green is in place, the fun part starts. Tiny faux mushrooms, small birds, and even a little nest add character without overwhelming the moss. Keep the accents clustered rather than spread evenly.
A small group of mushrooms near one side and a bird perched on the opposite edge feels intentional, while perfectly spaced decorations can look a bit stiff. Use hot glue for anything lightweight, but wire heavier pieces through the form for security. A dab of glue alone won't hold a ceramic bird through wind and rain. ## Seal It for the Weather Preserved moss is already treated, but a light seal helps it survive damp air and the occasional snow flurry.
A matte spray sealer works well and won't leave a shiny film. Hold the can back about ten inches and mist in thin coats, letting each one dry before adding the next. One or two passes are plenty.
If your door is fully exposed to rain, consider hanging the wreath under a small overhang or on an interior door instead. Moss handles moisture better than most materials, but constant soaking will eventually dull the color.
Start With The Right Base
A grapevine or wire wreath form gives the moss something to grip. Grapevine is the friendlier option because the twiggy surface holds moisture and texture well, and you can tuck stems right into the gaps. Sheet moss is the easiest material to work with for a full, even coverage.
You can also use preserved reindeer moss for a fluffier, more textured look, though it costs a bit more and sheds slightly. Work in small sections rather than trying to cover the whole ring at once. Press a clump onto the form, wrap a bit of floral wire or fishing line around it, and move to the next spot.
Overlap each piece so no bare vine shows through.
Tuck In The Woodland Details
Once the green is in place, the fun part starts. Tiny faux mushrooms, small birds, and even a little nest add character without overwhelming the moss. Keep the accents clustered rather than spread evenly.
A small group of mushrooms near one side and a bird perched on the opposite edge feels intentional, while perfectly spaced decorations can look a bit stiff. Use hot glue for anything lightweight, but wire heavier pieces through the form for security. A dab of glue alone won't hold a ceramic bird through wind and rain.
Seal It For The Weather
Preserved moss is already treated, but a light seal helps it survive damp air and the occasional snow flurry. A matte spray sealer works well and won't leave a shiny film. Hold the can back about ten inches and mist in thin coats, letting each one dry before adding the next.
One or two passes are plenty. If your door is fully exposed to rain, consider hanging the wreath under a small overhang or on an interior door instead. Moss handles moisture better than most materials, but constant soaking will eventually dull the color.
10. Burlap Rag Wreath With Felt Poinsettias
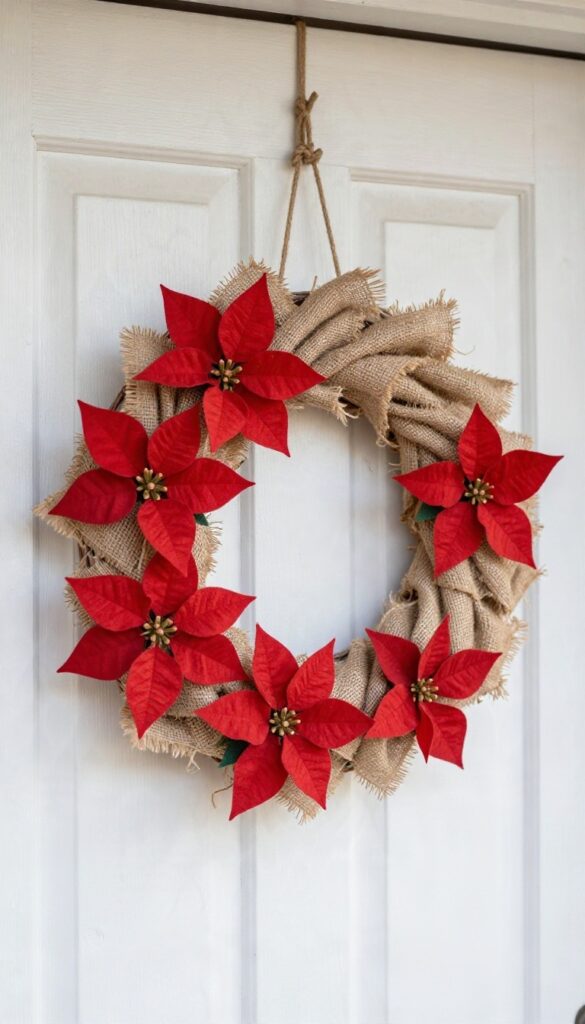
Burlap has a way of looking expensive while costing almost nothing, and this wreath leans into that fully. You tear the fabric into strips, tie them in knots around a wire form, and end up with a ruffled, full-bodied ring that reads like something from a boutique. Then a few felt poinsettias add the red that keeps it from looking like a potato sack.
The whole thing is forgiving. Torn edges are the point, spacing doesn't have to be perfect, and you can adjust the fullness as you go. Set aside an evening and a good show, because the tying takes longer than the cutting.
Burlap is the star here, but the felt flowers are what make people look twice. Plan for roughly two yards of burlap for a twelve-inch wreath, though wider strips eat fabric faster.
Cutting And Tearing The Strips
Cut a small snip at the edge of your burlap and rip the rest by hand. The tear gives you that frayed, rustic edge that scissors can't fake, and it goes faster than measuring every piece. Aim for strips about one and a half inches wide and eight to ten inches long.
Shorter strips give you a tighter, denser look, while longer ones hang looser and more casual. Either works, so pick based on how full you want the final wreath to feel.
Tying Around The Wire Form
Work around a wire wreath form in sections rather than all the way around at once. Tie each strip in a simple knot, push it snug against the last one, and keep the tails pointing outward. Alternate which direction the tails face so the texture fills out evenly.
If you spot a bald patch later, just slide in another strip. Burlap hides gaps well, which is why this project is hard to mess up.
Adding The Felt Poinsettias
Cut petal shapes from red felt in two sizes, then layer the smaller ones over the larger ones and stitch or hot glue them at the center. A tiny cluster of gold beads in the middle finishes each flower. Place three or four poinsettias off to one side rather than spacing them evenly.
An asymmetrical cluster looks intentional and keeps the wreath from feeling too symmetrical and stiff. Glue them onto the burlap knots so they sit slightly raised.
11. Rustic Herb and Olive Branch Wreath
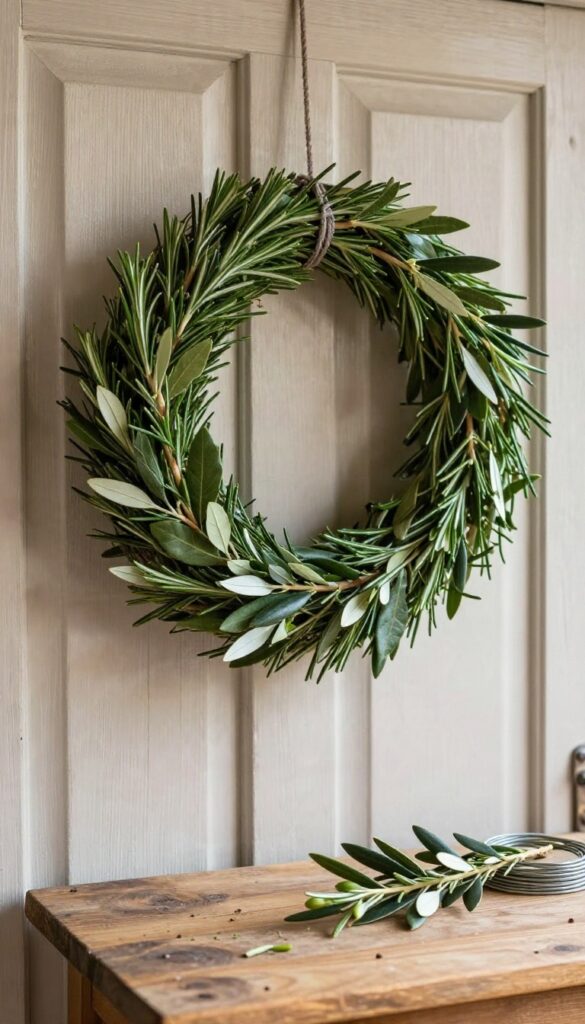
Herbs belong on a wreath as much as they belong in a roasting pan. Rosemary, bay, and olive branches give you a wreath that looks like it wandered in from a Mediterranean kitchen and smells like it too. Hang it near the door you actually use and every guest gets a whiff of something green and warm before they even knock.
The best part is that this wreath keeps working after Christmas. It fades from fresh green to a soft, dusty olive, and the scent shifts from bright to mellow. That slow change is a feature, not a flaw, so don't panic when it starts to look a little different in February.
You don't need a florist's stash for this one. A handful of each herb, a wire base, and some floral wire will get you there, and the whole thing comes together in under an hour once you get the rhythm of it.
Choosing Your Herbs
Rosemary is the backbone here. It's sturdy, holds its shape, and keeps its scent longer than almost anything else you can wire onto a wreath. Grab a few bunches from the grocery store or snip from the garden if you have a bush that needs a trim anyway.
Bay leaves add a glossy, structured look and a subtle scent that comes through when you brush past them. Olive branches bring the silvery-green color that ties the whole thing together, and their small leaves fill gaps nicely. If you can't find fresh olive branches, look for them at a florist or a garden center in late fall.
Skip anything that's already dry and brittle. You want stems that bend without snapping, since you'll be wrapping them around a wire base. A little flexibility goes a long way.
Wiring It Together
Start with a wire wreath base, the kind with a few concentric rings. Cut your herbs into small bundles of three or four stems, then lay the first bundle on the base and wrap floral wire around it a few times to lock it down. Work your way around the ring, overlapping each new bundle over the stems of the last one.
That overlap is what hides the wire and gives the wreath its full, layered look. Keep your wire tight but not so tight that you crush the stems. When you get back to where you started, tuck the final bundle under the first one and wire it in place.
Give the whole wreath a gentle shake to check for loose spots, then trim any stray stems poking out.
How It Changes As It Dries
Fresh herbs will dry over the next few weeks, and the wreath will shrink a little as they do. Expect some gaps to open up, which is normal. You can fill them later with a few extra sprigs if you want, or just let it go a little wild.
The color shift is the good part. Rosemary deepens to a forest green, bay holds its shape but dulls slightly, and olive branches turn a pale, silvery gray-green. The scent fades to something soft and herbal rather than disappearing completely.
Keep it out of direct sun and away from radiators to slow the drying. A dry wreath on a covered porch or a kitchen door will last through the season and often well into the new year.
FAQ
How do I keep a fresh evergreen wreath from drying out?
Mist the greens every couple of days and keep the wreath out of direct sun and heat. A cool, shaded door lasts longer than one facing full afternoon light, and you can soak the base in water before hanging it.
Can I make a rustic wreath without a glue gun?
Yes. Floral wire and twine handle most of the work, especially for evergreen, twig, and herb wreaths. Save the glue gun for pinecones, dried fruit, and felt accents where wire won't hold.
What's the best wreath base for a beginner?
A grapevine form is the most forgiving. It already looks rustic, hides mistakes well, and lets you tuck in stems without much fuss. Wire forms work too but need fuller coverage.
Will a fresh wreath survive freezing temperatures?
Evergreens handle cold well, and freezing actually slows drying. The bigger risk is wind and sun, so hang the wreath where it's sheltered and check it after storms.
How much material do I need for a standard 18-inch wreath?
Plan on roughly one to two bunches of greenery, or about 40 to 60 pinecones for a full pinecone wreath. Buy a little extra so you can fill gaps without a second trip.
Conclusion
You don't need a perfect wreath to make your entryway feel like Christmas. Pick two or three ideas that suit your door, your climate, and the time you actually have, then let the rest wait for another year.
Start with what's already in your yard or storage bin, add one small thing that makes you smile, and hang it with confidence. A wreath that looks a little handmade usually welcomes people better than a flawless one, so enjoy the process and let the season come to you.