17 Cleaning Pans Tips for Stains Grease and Burnt Marks
You scrub and scrub, but that blackened crust on your favorite frying pan just won't budge. Grease slicks and rainbow stains can make even good cookware look tired. The good news is you don't need a chemistry degree or a cabinet full of specialty sprays to get them gleaming again.
Most of the solutions are already in your kitchen: baking soda, vinegar, lemons, and a bit of patience. These 17 tips are realistic—some take minutes, others need a little soak time, but all are budget-friendly and effort-aware.
Whether you're dealing with stainless steel, nonstick, or cast iron, there's a fix here that works without damaging your pan. Let's get those pans looking like new.
1. Baking Soda and Water Paste for Burnt-On Food
Burnt-on food is probably the most frustrating mess a pan can have. You scrape, you soak, and still that dark crust clings. Baking soda is your best friend here because it's mildly abrasive but gentle enough not to scratch most surfaces.
A simple paste does the job without harsh chemicals.
Mix three parts baking soda with one part water to create a thick, spreadable paste. Apply it generously over the burnt areas and let it sit for 15 minutes. The paste loosens the carbonized food, so when you scrub with a non-abrasive sponge, it comes off easily.
Rinse and repeat if needed. This works brilliantly on stainless steel and enamel pans, but avoid it on nonstick coatings as it can wear them down over time.
Why Baking Soda Works So Well
Baking soda is alkaline, which helps break down the chemical bonds in burnt food. Its fine grit provides gentle scrubbing power without scratching most surfaces. It's also odorless and safe for food contact, so you don't have to worry about residues.
How To Apply The Paste Effectively
Make sure the pan is cool before applying. Spread the paste in a thick layer—don't rub it in. Let it sit for at least 15 minutes; for stubborn spots, leave it up to 30 minutes.
Then scrub in circular motions with a soft sponge or brush. For extra tough bits, add a splash of vinegar to create fizzing action, but rinse immediately afterward.
Pans That Love This Method
Stainless steel and enameled cast iron are perfect candidates. The paste won't damage their surfaces. Avoid using it on nonstick pans, as the abrasive can scratch the coating.
For aluminum pans, test on a small spot first, as baking soda can darken aluminum if left too long.
2. Vinegar and Baking Soda Combo for Stubborn Stains
When burnt-on grime laughs at your regular scrubbing, it's time to bring out the heavy hitters: vinegar and baking soda. This classic duo creates a fizzy reaction that helps lift stubborn residue without harsh chemicals. It's especially effective on stainless steel pans that have seen better days.
To use this method, start by pouring enough white vinegar into the pan to cover the stained or burnt areas. Place the pan on the stove and bring the vinegar to a gentle simmer. Let it bubble for a minute or two, then remove from heat.
Carefully add a generous tablespoon of baking soda—the mixture will foam up vigorously. Allow it to sit until the fizzing subsides and the pan cools. Finally, scrub with a non-abrasive sponge or brush.
Rinse and dry. For extra stubborn spots, you can repeat the process or let the baking soda paste sit on the stains for a few minutes before scrubbing.
Why It Works So Well
The acidity of vinegar helps break down mineral deposits and grease, while baking soda acts as a mild abrasive. When combined, the carbon dioxide bubbles physically lift burnt food particles from the pan's surface. This chemical reaction is gentle enough for stainless steel but powerful enough to tackle tough stains.
Best Practices For Stainless Steel
Avoid using this method on nonstick or aluminum pans, as the acid can damage the coating or react with the metal. For stainless steel, make sure the pan is cool before adding baking soda to prevent excessive foaming. Also, use a soft sponge to avoid scratching the surface.
If stains persist, let the baking soda paste sit for 15–20 minutes before scrubbing.
Pro Tip: Add A Little Salt
For extra scrubbing power, mix a teaspoon of salt with the baking soda before applying. The salt crystals provide additional abrasion without damaging the pan. This works wonders on burnt-on cheese or caramelized sugar.
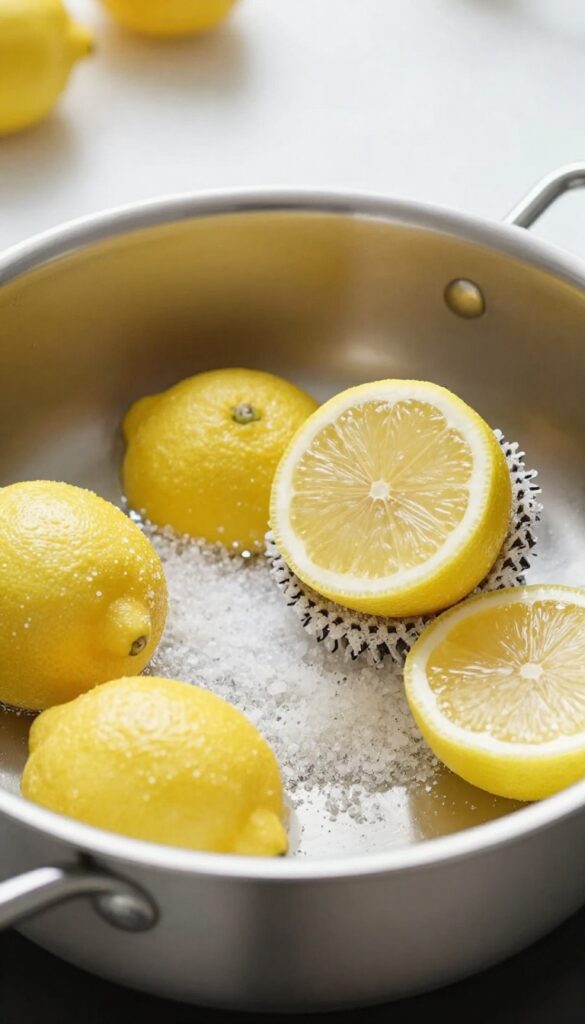
3. Boiling Lemon Slices for Discoloration
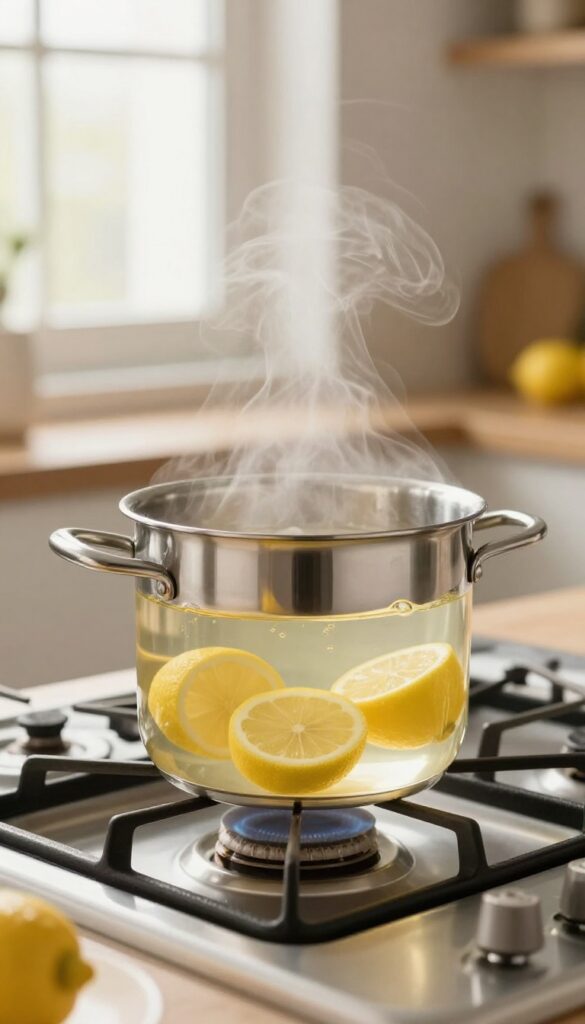
Stainless steel pans can develop a dull, yellowish tint or dark splotches over time, especially after high-heat cooking. Lemon juice is a natural acid that gently lifts those stains without harsh scrubbing. This method works best for light to moderate discoloration and leaves your pan smelling fresh.
Fill the pan with enough water to cover the stained area, then add several slices of fresh lemon. Bring the water to a boil and let it bubble for about 10 minutes. The acid in the lemons reacts with the minerals and residues causing the stains, breaking them down.
After boiling, discard the water and let the pan cool slightly. Rinse with warm water and dry with a soft cloth. For stubborn spots, you can also rub a cut lemon half directly on the stain before boiling.
Why Lemon Works
Lemon juice contains citric acid, which is a mild chelating agent. It binds to metal ions and food residues, making them soluble in water. This lifts discoloration without scratching the surface.
Unlike abrasive cleaners, it's safe for stainless steel and won't damage the finish.
Best Pans For This Method
This technique is ideal for stainless steel pans. It's also safe for enameled cast iron, but avoid using it on raw cast iron or nonstick coatings, as the acid can damage the seasoning or nonstick layer. For copper pans, lemon can brighten the interior but may dull the exterior if left too long.
Pro Tips For Best Results
Use fresh lemons rather than bottled juice for a more consistent acid concentration. If the pan is heavily stained, let the lemon water simmer for up to 15 minutes. After boiling, scrub gently with a soft sponge—no steel wool.
For extra shine, wipe the pan with a drop of olive oil after drying.
4. Dishwasher Tablet Hack for Burnt Pans
If you have a dishwasher, you already have a secret weapon for burnt pans. Those little tablets are packed with enzymes and degreasers that work wonders on stubborn, baked-on messes. No scrubbing required—just a little patience.
Drop one dishwasher tablet into your burnt pan and fill it with hot water. Let it soak for about an hour—the enzymes will break down grease and carbonized food. After that, dump the water, rinse well, and wipe clean.
For extra-stubborn spots, give it a gentle scrub with a soft sponge. This works best on stainless steel and enameled cookware; avoid it on aluminum or nonstick as the chemicals can damage the coating.
Why It Works
Dishwasher tablets contain surfactants, enzymes, and bleaching agents designed to dissolve tough food residues. When dissolved in hot water, they create a powerful soaking solution that attacks burnt-on layers without elbow grease.
Best Pans For This Hack
Stainless steel, ceramic, and enameled cast iron handle this method well. Avoid using it on nonstick pans—the harsh chemicals can strip the coating. Also skip aluminum, as it may discolor or pit.
Pro Tips For Best Results
Use the hottest tap water you can. Let the pan cool slightly before soaking to avoid cracking. If one soak doesn't do it, repeat or add a second tablet.
Rinse thoroughly—you don't want any residue left behind.
5. Salt and Oil Scrub for Cast Iron
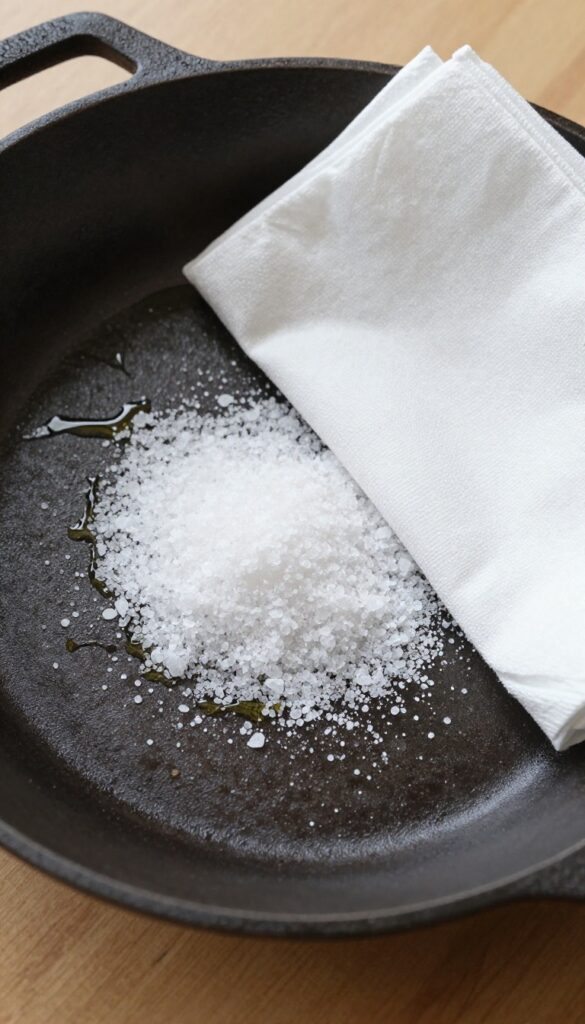
Cast iron pans are workhorses, but they come with their own set of rules. You can't just soap and scrub them like stainless steel—that would ruin the seasoning. Instead, when food sticks or leaves burnt bits, reach for coarse salt and a bit of oil.
This gentle abrasive combo lifts grime without stripping the pan's nonstick surface.
To use this method, make sure your cast iron pan is warm (not hot). Sprinkle a generous layer of coarse kosher or sea salt onto the surface. Add a splash of vegetable oil or any neutral oil.
Using a folded paper towel or a soft cloth, scrub the pan in circular motions, focusing on stuck-on spots. The salt acts as a gentle scrubber while the oil lubricates and protects the seasoning. Rinse with warm water (no soap) and dry immediately.
For extra protection, rub a thin layer of oil over the surface before storing.
Why Salt Works
Coarse salt is abrasive enough to dislodge burnt food but soft enough not to scratch the seasoning. It dissolves as you scrub, so you're not left with gritty residue. Plus, it's cheap and always in the pantry.
Avoiding Common Mistakes
Don't use this method on a cold pan—the salt won't grip as well. And never soak cast iron in water; that invites rust. Always dry your pan thoroughly on the stove over low heat after rinsing.
When To Re-season
After a salt scrub, your pan's seasoning might look a bit dull. That's normal. If you see bare metal patches, apply a thin coat of oil and heat the pan until it smokes.
This restores the protective layer and keeps your pan nonstick for years.
6. Cream of Tartar Paste for Copper and Stainless
Copper bottoms on stainless steel pans can develop a dull, tarnished look that regular soap won't touch. Cream of tartar is a mild acid that cuts through that oxidation without harsh scrubbing. Mixed with a little hydrogen peroxide or water, it becomes a gentle polishing paste that brings back the warm glow.
Cream of tartar is a pantry staple that doubles as a metal polish. It's non-toxic and safe for food surfaces, making it ideal for cookware. The paste works by chemically lifting tarnish rather than abrading the metal, so it won't scratch your pans.
How To Make The Paste
Mix two tablespoons of cream of tartar with just enough hydrogen peroxide (or water) to form a thick paste. Hydrogen peroxide boosts the cleaning action, but water works fine too. Stir until it's spreadable, like toothpaste.
Application And Buffing
Apply the paste to the tarnished areas with a soft cloth or sponge. Let it sit for about 10 minutes—don't let it dry completely. Then buff in circular motions.
Rinse thoroughly with warm water and dry immediately to prevent water spots.
When To Use This Method
This technique is best for copper bottoms on stainless steel pans and for stainless steel interiors with heat stains. It's not suitable for nonstick or cast iron. Use it every few months or whenever the copper looks dull.
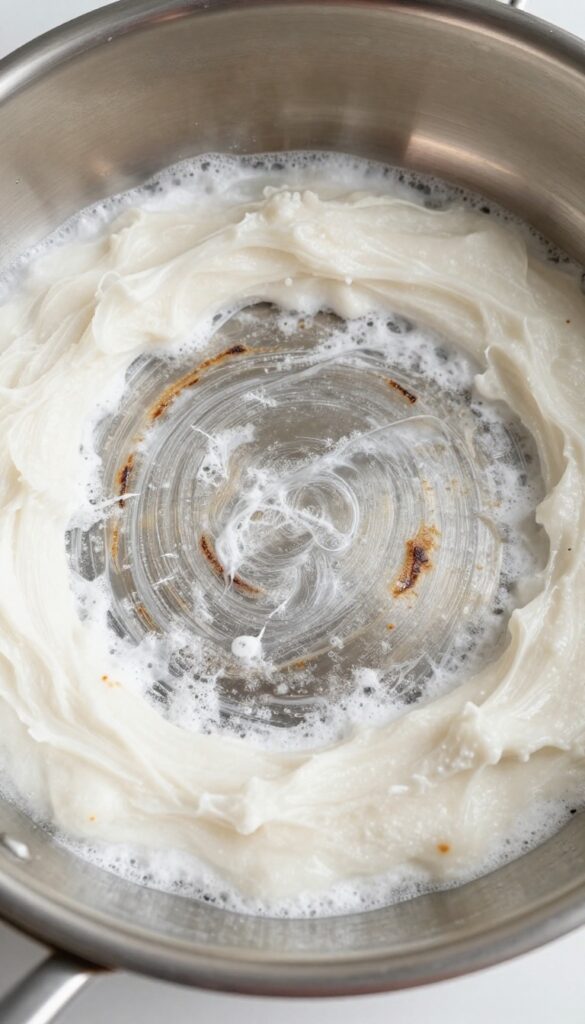
7. Boiling Water with Baking Soda for Grease Layers
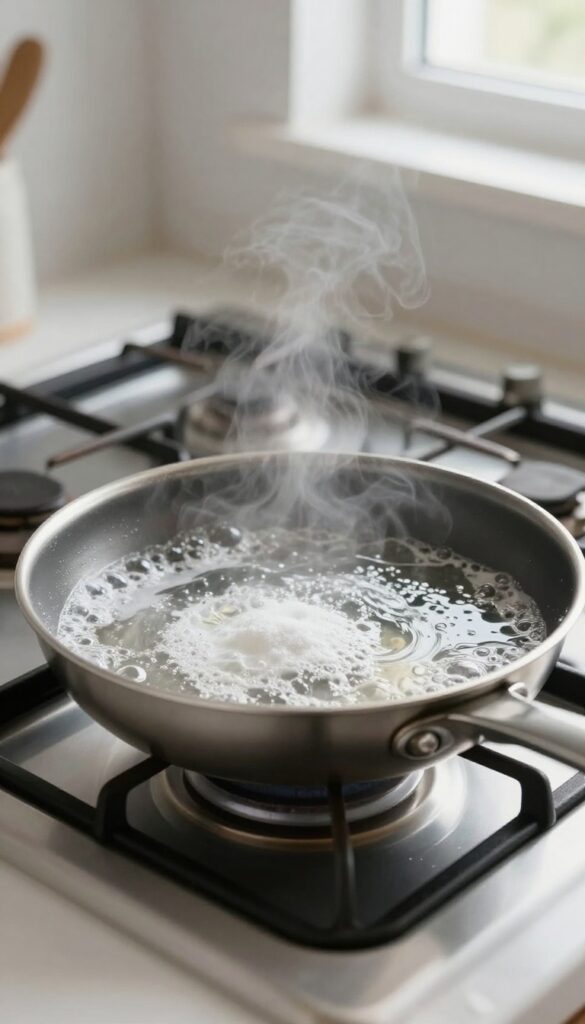
Grease that has baked on over multiple uses can feel impossible to remove. But a simple boil with baking soda cuts through those stubborn layers without harsh scrubbing. The heat and alkalinity work together to break down the oil, making cleanup almost effortless.
Fill your pan with water and add 2 tablespoons of baking soda. Bring it to a boil and let it bubble for about 10 minutes. Turn off the heat and let the water cool down.
Once it's safe to touch, pour out the water and wipe the pan with a soft sponge. The grease should slide right off. If any residue remains, a quick scrub with a paste of baking soda and water will finish the job.
This method works great on stainless steel and enameled cast iron, but avoid it on nonstick pans as the boiling can damage the coating.
Why It Works
Baking soda is a mild alkali that reacts with grease molecules, breaking them apart. The boiling water adds heat energy, speeding up the reaction and loosening the bond between the grease and the pan surface. It's like giving your pan a gentle chemical bath.
Tips For Best Results
Use enough water to cover the greasy areas. If the pan is heavily layered, let it boil a few extra minutes. After boiling, let the pan cool naturally—don't dump cold water into a hot pan or you risk warping.
For extra stubborn spots, add a splash of vinegar after boiling to boost the cleaning power.
8. Ketchup or Tomato Paste for Copper Tarnish
Copper-bottomed pans look beautiful when they're shiny, but they tarnish fast. That dull, brownish layer is copper oxide, and you don't need a special cleaner to fix it. A simple kitchen staple—ketchup—works wonders because of its acidity.
Spread a thin layer of ketchup or tomato paste over the tarnished copper areas. Let it sit for about 15 minutes. The acid in the tomatoes reacts with the oxidation, breaking it down.
Rinse with warm water and buff dry with a soft cloth. For stubborn spots, add a little salt to the ketchup for gentle abrasion.
Why Ketchup Works
Tomatoes contain natural acids like citric and malic acid, which dissolve copper oxide without scratching the metal. Ketchup also has a thick consistency that clings to vertical surfaces, so it's easy to apply evenly.
How To Apply For Best Results
Use a paper towel or your fingers to spread a generous layer. Make sure the tarnish is fully covered. Let it sit for 10–15 minutes—longer if the tarnish is heavy.
Rinse thoroughly and dry immediately to prevent water spots.
Alternative: Tomato Paste Paste
If you don't have ketchup, mix tomato paste with a splash of vinegar or lemon juice to thin it. Add a pinch of salt for extra scrubbing power. Apply the same way and let it sit.
This works just as well and uses ingredients you likely have on hand.
9. Dryer Sheet Soak for Burnt Residue
You've probably used dryer sheets to soften laundry and reduce static, but they have a surprising second life in the kitchen. That same fabric-softening magic can help loosen stubborn burnt-on food from your pans. It's one of those tricks that sounds too good to be true, but it really works.
This method is incredibly simple and requires almost no effort. Just grab a used or new dryer sheet, place it in the dirty pan, and fill the pan with warm water. Let it soak overnight—the fabric softener compounds break down the carbonized residue, making it much easier to scrub away the next morning.
After soaking, dump the water, remove the sheet, and wash the pan normally with soap and a sponge. You'll be amazed at how much comes off with minimal scrubbing.
Why It Works
Dryer sheets contain cationic surfactants and softening agents that are designed to reduce friction and loosen fibers in laundry. When applied to burnt food particles, these same chemicals help break the bond between the residue and the pan surface. The warm water activates the compounds, and the extended soak gives them time to penetrate the crust.
Best Pan Types
This trick works best on stainless steel and enameled cookware. Avoid using it on nonstick pans, as the chemicals could damage the coating over time. For cast iron, stick to traditional methods like salt scrubs or vinegar soaks, since dryer sheets can strip the seasoning.
Pro Tips
Use a fresh dryer sheet for maximum effect, but a used one can still work in a pinch. If the burnt layer is very thick, add a drop of dish soap to the soak water. After rinsing, if any residue remains, a quick scrub with a paste of baking soda and water will finish the job.
10. Bar Keepers Friend for Tough Stains
Some stains just laugh at regular dish soap. Burnt-on food, discolored patches, and that weird rainbow sheen on stainless steel need something stronger. Bar Keepers Friend is a classic powder cleanser that tackles these without scratching.
Sprinkle Bar Keepers Friend powder on a damp sponge and scrub the pan. This mild abrasive works wonders on stainless steel and ceramic. Rinse well.
For extra stubborn spots, make a paste with a little water and let it sit for a minute before scrubbing.
How It Works
The active ingredient is oxalic acid, which breaks down mineral deposits, rust, and burnt food. The fine feldspar powder provides gentle abrasion. Together they lift stains without gouging the surface.
Best Pans To Use It On
Stainless steel and ceramic are ideal. Avoid using it on nonstick pans or cast iron—the abrasion can damage the coating or seasoning. Always test a small spot first.
Pro Tips For Best Results
Wet the pan first, then sprinkle the powder directly onto the stain. Scrub in circular motions with a non-scratch sponge. Rinse thoroughly and dry immediately to avoid water spots.
For burnt-on gunk, let the paste sit for 5 minutes.
11. Hydrogen Peroxide and Baking Soda for Yellowed Nonstick
Nonstick pans are great for low-fat cooking, but over time they can develop a yellow, greasy film that makes them look old and tired. Regular dish soap often fails to cut through that baked-on residue. A simple paste of hydrogen peroxide and baking soda can restore the original bright surface without damaging the nonstick coating.
Hydrogen peroxide acts as a mild bleaching agent and disinfectant, while baking soda provides gentle abrasion. Together, they lift the grease film that causes yellowing. This method is safe for all nonstick surfaces, including Teflon and ceramic coatings.
Always test on a small hidden area first if you're unsure about your pan's durability.
Making The Paste
Mix 2 tablespoons of baking soda with enough hydrogen peroxide (3% solution) to form a thick, spreadable paste. The consistency should be like toothpaste—not too runny. If it's too thin, add more baking soda; if too thick, add a few more drops of peroxide.
Application And Soak Time
Apply the paste to the yellowed areas of the cool pan using a soft sponge or your fingers. Spread it evenly, then let it sit for 15 minutes. Don't let it dry completely; if it starts to dry, spritz a little water or hydrogen peroxide on top.
For stubborn stains, you can leave it for up to 30 minutes.
Gentle Scrubbing And Rinsing
After soaking, use a non-abrasive sponge or soft cloth to gently scrub in circular motions. You should see the yellow film lift away. Rinse thoroughly with warm water and mild dish soap to remove any residue.
Dry with a soft towel. The pan should look noticeably brighter and cleaner.
12. Potato Peel Soak for Rust Spots
Rust can sneak up on carbon steel and cast iron pans, especially if they're not dried properly after washing. Instead of reaching for harsh chemicals, try this old-school trick using potato peels. The starch and oxalic acid in the peels work together to gently lift rust without damaging the seasoning.
Boil potato peels in the rusty pan for 10 minutes. The starch and oxalic acid help lift rust. Rinse and dry immediately.
Works on carbon steel and cast iron.
Why Potato Peels Work
Potato peels contain oxalic acid, a natural compound that breaks down rust. The starch also acts as a mild abrasive when you scrub. Together, they create a gentle yet effective rust remover that won't strip the pan's seasoning.
Step-by-step Method
Fill the pan with water and add a handful of clean potato peels. Bring to a boil and let it simmer for about 10 minutes. The rust should start to loosen.
Remove from heat, discard the peels, and scrub the pan with a soft sponge. Rinse thoroughly and dry immediately with a towel.
Aftercare Tips
Once the rust is gone, dry the pan completely to prevent new rust from forming. For cast iron or carbon steel, apply a thin layer of oil after drying to protect the surface. Store in a dry place.
13. Oven Cleaner Spray for Carbonized Grease
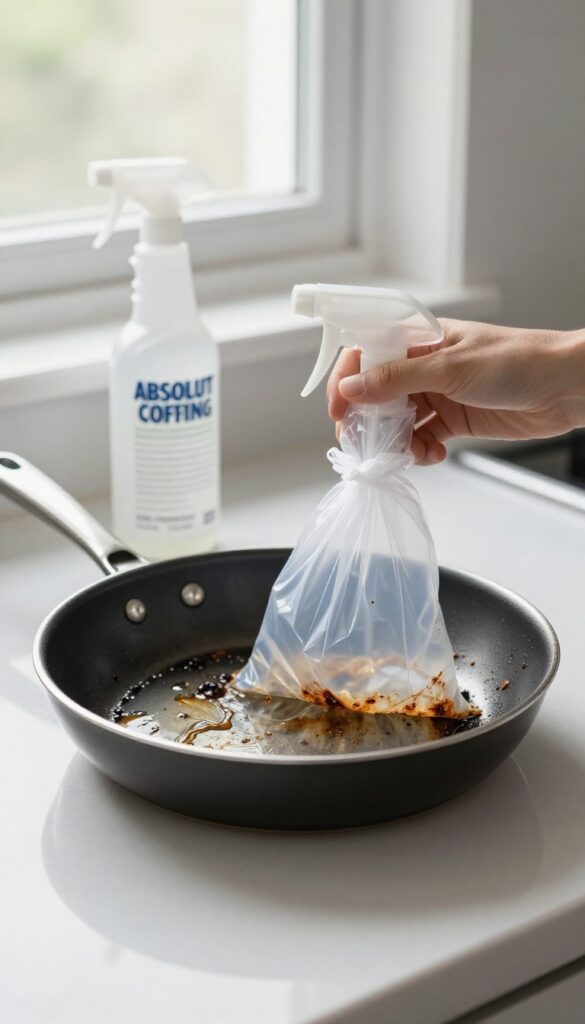
When burnt-on grime has turned into a hard, black crust that resists every scrubbing trick you know, it's time to bring out the heavy artillery. Oven cleaner is formulated to break down the toughest baked-on grease, and it works just as well on your most neglected pans. This method is aggressive, so it's not for everyday use, but for those pans that look beyond saving, it can be a game-changer.
The key is to let the chemicals do the work. Spray the oven cleaner generously over the burnt areas, then place the pan inside a plastic trash bag and tie it shut. Leave it overnight—at least 8 to 12 hours.
The fumes and active ingredients will soften the carbonized layer so you can wipe it away with a sponge the next morning. Always wear rubber gloves and work in a well-ventilated area. This method is best for oven-safe pans like stainless steel or enameled cast iron.
Avoid using it on aluminum, copper, or nonstick surfaces, as the chemicals can cause damage.
Which Pans Can Handle It?
Stainless steel and enameled cast iron are the safest bets. Bare cast iron can be treated if you plan to re-season it afterward. Never use oven cleaner on nonstick, aluminum, or copper pans—it will strip coatings and cause pitting.
Check the manufacturer's guidelines if you're unsure.
Safety First
Oven cleaner contains caustic chemicals like sodium hydroxide. Protect your skin with long rubber gloves and your eyes with safety glasses. Keep the sealed bag away from kids and pets.
Open the bag outdoors if possible to avoid inhaling fumes. Rinse the pan thoroughly after cleaning.
The Aftercare
Once you've wiped off the softened grime, wash the pan with hot soapy water and dry it immediately. For bare cast iron, you'll need to re-season it with oil to restore its nonstick surface. Stainless steel may need a quick polish with vinegar to remove any residue.
14. Boiling Cola for Burnt Sauce
Cola isn't just for drinking—it's a surprisingly effective cleaner for burnt-on sauce. The phosphoric acid in cola helps break down carbonized food, making it easier to scrub away. This trick works best on stainless steel pans and is a great last resort for stubborn, sticky messes.
Pour a can of cola into the pan and bring it to a boil. Let it simmer for 5–10 minutes, then turn off the heat and allow the pan to cool. The acid will have loosened the burnt residue, so you can scrub it off with a non-abrasive sponge.
Rinse thoroughly with soap and water to remove any sticky residue. This method is especially effective for burnt tomato-based sauces or sugary glazes.
Why It Works
Cola contains phosphoric acid, which reacts with burnt food particles to break them down. The carbonation also helps lift debris. It's a gentle chemical reaction that doesn't damage stainless steel, unlike harsh abrasives.
Best Practices
Use full-sugar cola for best results—diet versions lack the same acidity. Avoid this method on nonstick or aluminum pans, as the acid can damage the coating or cause discoloration. Always rinse thoroughly after cleaning to prevent any sticky film.
When To Use This Trick
This is ideal for pans with a thick, burnt layer that won't come off with regular scrubbing. It's a quick fix for sauce disasters, but don't rely on it daily—stick to regular cleaning for lighter messes.
15. Lemon and Salt Rub for Cutting Board Stains (Bonus for Pans)
Lemons are a powerhouse in the kitchen, not just for flavor but for cleaning. When paired with coarse salt, they create a gentle abrasive that tackles stains and odors without scratching your pans. This trick is especially handy for stainless steel and enamel surfaces, where you want to avoid harsh chemicals.
This method is incredibly simple and effective. The citric acid in the lemon breaks down grease and lifts discoloration, while the salt provides the scrubbing power. It's also a natural deodorizer, leaving your pans smelling fresh.
How To Do It
Cut a lemon in half. Sprinkle a generous amount of coarse salt (like kosher or sea salt) onto the cut side. Scrub the pan surface firmly with the lemon half, focusing on stained or burnt areas.
Rinse thoroughly with warm water and dry.
Best For Which Pans
This technique works wonders on stainless steel and enamel-coated pans. Avoid using it on nonstick or delicate surfaces, as the salt can be too abrasive and damage the coating.
Why It Works
The combination of acid and abrasion cuts through grime without the need for harsh chemicals. Lemon also neutralizes odors, so it's great for pans that have absorbed fish or onion smells.
16. Soaking in Hot Dish Soap Water for Everyday Grease
Sometimes the simplest method is the one you overlook. For everyday grease that hasn't had time to bake into a stubborn crust, hot water and dish soap are all you need. This gentle soak lifts away oil without any harsh scrubbing or chemicals.
Fill the pan with hot water—as hot as your tap can deliver—and add a generous squirt of dish soap. Let it sit for 30 minutes. The heat and detergent work together to break down grease molecules, making them easy to rinse away.
After soaking, pour out the water and wash the pan normally with a soft sponge. This method is especially effective for stainless steel and nonstick pans, where abrasive scrubbing can cause damage.
Why Hot Water Matters
Hot water is the key. It melts grease and activates the soap, allowing the mixture to penetrate and dissolve oily residues. Cold water won't cut through grease nearly as effectively, so always use the hottest water your tap can produce.
Choosing The Right Soap
Any standard dish soap works, but a grease-fighting formula can speed things up. Avoid using too much—a single squirt is enough. Excess soap can leave a residue that's hard to rinse off.
When To Use This Method
This technique is best for pans with light to moderate grease buildup after cooking. If you have burnt-on food or thick carbonized layers, you'll need a stronger approach. But for daily maintenance, a hot soapy soak keeps pans clean without extra effort.
17. Regular Seasoning Maintenance for Cast Iron
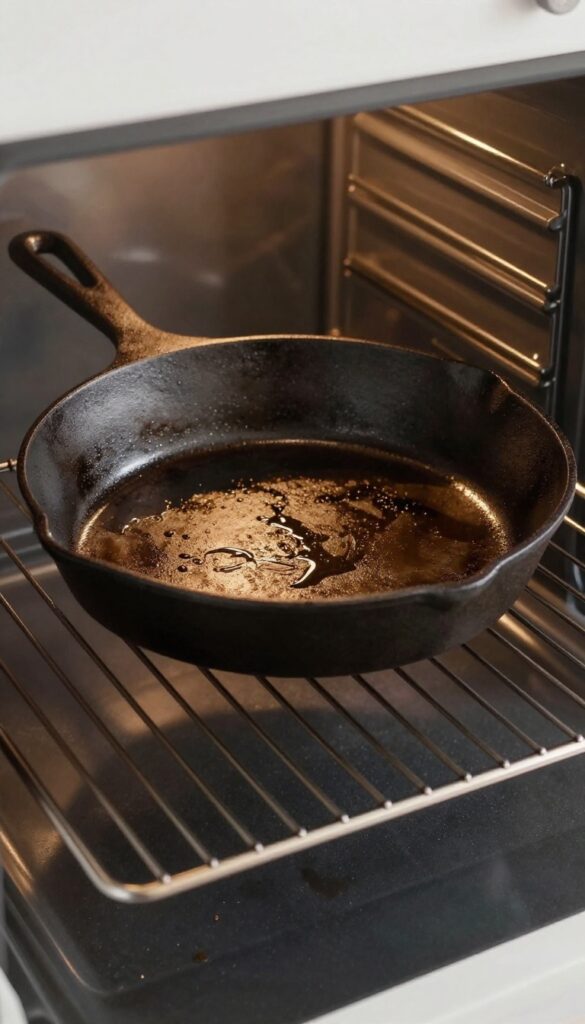
Cast iron pans are workhorses, but they need a little love to stay nonstick and rust-free. Seasoning isn't a one-time thing—it's an ongoing habit that keeps the surface smooth and protected. The best part?
It only takes about an hour and a few simple steps.
After each cleaning, dry your cast iron pan completely over low heat on the stove. Then rub a thin layer of vegetable oil or flaxseed oil all over the interior and exterior. Place the pan upside down in a 375°F oven with a baking sheet on the rack below to catch drips.
Bake for one hour, then let it cool in the oven. This polymerizes the oil into a hard, nonstick coating that prevents rust and makes cooking easier over time.
Why Seasoning Matters
Seasoning isn't just about nonstick performance—it's the armor that protects cast iron from moisture and oxidation. A well-seasoned pan resists sticking, releases food easily, and develops a natural patina that improves with use. Skipping regular seasoning can lead to rust spots and a rough cooking surface.
How Often To Season
You don't need to season after every use. A good rule of thumb is to season after cooking acidic foods (like tomatoes or vinegar-based dishes), after scrubbing with soap, or whenever the surface looks dull or patchy. For most home cooks, a quick stovetop seasoning after each wash is enough, with a full oven seasoning every few months.
Common Mistakes To Avoid
Using too much oil is the biggest mistake—it leaves a sticky, gummy residue. Always wipe off as much oil as you think you applied; a thin, barely visible layer is ideal. Also, avoid seasoning at too high a temperature, which can burn the oil and create a brittle coating.
Stick to 375°F to 400°F for most oils.
FAQ
Can I use baking soda on nonstick pans?
Yes, but use a soft sponge and avoid harsh scrubbing. Baking soda is mildly abrasive, so gentle pressure is key to preserving the nonstick coating.
How do I remove burnt food from stainless steel without scratching?
Soak with baking soda and water or use a paste. Avoid steel wool. A nylon scrubber or soft sponge works best.
Is it safe to use oven cleaner on pans?
Only on oven-safe pans like stainless steel or cast iron. Avoid nonstick and aluminum. Wear gloves and rinse thoroughly.
How do I prevent burnt marks on pans?
Use medium heat instead of high, preheat the pan before adding oil, and don't overcrowd the pan. Stir frequently to avoid sticking.
Can I restore a rusty cast iron pan?
Yes. Scrub off rust with steel wool, wash, dry completely, then re-season with oil. Regular seasoning prevents future rust.
Conclusion
Cleaning pans doesn't have to be a dreaded chore. With these 17 tips, you can tackle everything from light grease to blackened burnt marks using items you already own. Most methods take little active time—just a soak or a boil—and save you money on harsh chemicals.
Pick the tip that matches your pan type and the mess level. A little patience goes a long way, and your cookware will reward you with better performance and longer life. Happy cleaning!