17 Bathroom Cleaning Ideas for a Fresh, Easy Space
Bathroom cleaning often feels like a never-ending battle against soap scum, mold, and grime. But with the right strategies, you can cut your cleaning time in half and keep your bathroom looking fresh with minimal effort.
These 17 practical ideas target the toughest spots, from showerheads to grout lines, using everyday items you probably already have. Each tip is designed to solve a specific problem, like preventing mold buildup or removing stubborn stains without harsh chemicals.
You'll learn quick tricks like using a squeegee after every shower and deep-cleaning your shower curtain in the washing machine. Say goodbye to scrubbing for hours and hello to a bathroom that stays clean longer.
1. Use a Squeegee After Every Shower

Keeping a squeegee in your shower is one of the simplest ways to cut down on cleaning time. A quick swipe across glass doors and tiles after each shower removes water droplets before they dry into hard water spots and soap scum. This habit alone can keep your shower looking spotless for weeks.
Make it a routine to squeegee right after you turn off the water. Store the squeegee on a hook inside the shower so it's always handy. For best results, use a squeegee with a rubber blade that fits your glass door width.
If you have textured tiles, a microfiber cloth works better than a squeegee to avoid pushing grime into crevices.
Why It Works
Water contains minerals like calcium and magnesium that leave white deposits when they dry. Soap scum forms when soap residue mixes with these minerals. By removing water immediately, you prevent both issues at the source.
Less buildup means less scrubbing and fewer harsh cleaners needed.
Best Squeegee Options
Look for a squeegee with a stainless steel handle and a replaceable rubber blade. A 12-inch blade is ideal for standard shower doors. For larger doors, a 14-inch blade covers more area quickly.
Some models come with a built-in hook or suction cup for easy storage.
Quick Tips For Tiles
If your shower has tiles instead of glass, a squeegee still helps on smooth tiles. For textured or natural stone tiles, use a microfiber cloth instead to avoid scratching. Focus on the walls and floor area near the drain where water pools.
This simple step reduces mold and mildew growth in grout lines.
2. Make a DIY All-Purpose Cleaner with Vinegar and Dish Soap
Why spend money on store-bought cleaners when you can whip up a powerful, non-toxic solution in minutes? This simple mix of vinegar, water, and dish soap tackles soap scum, hard water spots, and everyday grime without harsh chemicals. Plus, it's gentle enough for most surfaces and costs pennies per batch.
Combine equal parts white vinegar and water in a spray bottle, then add a few drops of dish soap. Shake gently to mix (avoid vigorous shaking to prevent excess suds). Spray on counters, sinks, faucets, and tiles, let sit for a minute, then wipe with a damp cloth.
For tough buildup, let the solution dwell longer or scrub with a soft brush. Always test on a small area first, especially on natural stone or unsealed surfaces, as vinegar can etch some materials.
Why This Combo Works
Vinegar's acidity breaks down mineral deposits and soap scum, while dish soap cuts through grease and grime. Together, they create a cleaner that's more effective than either alone. The soap also helps the solution cling to vertical surfaces, making it ideal for shower walls and tiles.
Best Uses And Surfaces
This cleaner shines on ceramic tiles, porcelain sinks, chrome fixtures, and glass shower doors. Avoid using it on marble, granite, or other natural stone, as the acid can damage the finish. For mirrors, use a separate glass cleaner to avoid streaks.
Storage And Shelf Life
Store the mixture in a labeled spray bottle away from direct sunlight. It will stay effective for several weeks. If you notice a change in smell or appearance, make a fresh batch.
For a scent boost, add a few drops of essential oil like lemon or tea tree.
3. Clean Grout with a Baking Soda Paste

Grout lines can quickly turn from bright white to dingy gray, making even a clean bathroom look dirty. The good news is you don't need harsh chemicals or expensive cleaners to bring them back to life. A simple paste made from baking soda and water does the job beautifully.
Mix three parts baking soda with one part water to form a thick, spreadable paste. Apply it directly to the grout lines using an old toothbrush or your finger. Let it sit for about 10 minutes to break down the grime.
Then scrub vigorously with the toothbrush, focusing on the darkest spots. Rinse with warm water and wipe dry. For stubborn stains, add a splash of white vinegar to the paste—just be ready for some fizzing action.
Why Baking Soda Works So Well
Baking soda is mildly abrasive, so it scrubs away dirt without scratching tiles. It also neutralizes odors and reacts with acids (like vinegar) to create a bubbling action that lifts deep-seated grime. It's safe, cheap, and already in your pantry.
Pro Tips For The Best Results
For extra tough grout, cover the paste with plastic wrap after applying to keep it moist and active longer. Use a grout brush or a stiff-bristled toothbrush for better scrubbing power. Always rinse thoroughly to avoid any white residue.
How Often To Clean Grout This Way
A deep clean with baking soda paste every month or two keeps grout looking fresh. For maintenance, simply wipe grout lines with a damp cloth after each shower to prevent buildup.
4. Use a Magic Eraser on Stubborn Stains
Melamine foam sponges, often sold as Magic Erasers, are a game-changer for bathroom cleaning. They tackle tough stains like scuff marks, soap scum, and hard water deposits on tubs, sinks, and walls with just water and a little elbow grease. No extra chemicals needed, and the results are almost instant.
Where It Works Best
Magic Erasers shine on glossy surfaces like fiberglass tubs, acrylic sinks, and ceramic tile. They lift scuff marks from shoes or cleaning tools, erase soap scum buildup around faucets, and fade hard water rings. Avoid using them on brushed or matte finishes, as they can dull the surface.
How To Use It Right
Just wet the sponge until it's damp but not dripping, then gently rub the stain in a circular motion. The foam breaks down as you go, so use a fresh side for larger areas. Rinse the surface afterward to remove any residue.
For extra tough spots, let the sponge sit on the stain for a minute before scrubbing.
Pro Tips For Best Results
Cut the sponge into smaller pieces to make it last longer and reach tight corners. Test on an inconspicuous area first, especially on painted walls or natural stone. And remember, these sponges are abrasive, so use them sparingly on delicate surfaces like glass shower doors.
5. Descale Your Showerhead with Vinegar
Over time, mineral deposits from hard water can clog your showerhead, reducing water pressure and creating uneven spray patterns. A simple vinegar soak restores full flow without scrubbing or replacing the fixture. This method works for most metal and plastic showerheads and costs just pennies.
Fill a small plastic bag with enough white vinegar to fully submerge the showerhead. Carefully place the bag over the showerhead, making sure the head is completely covered, and secure the bag with a rubber band or twist tie. Let it soak overnight—at least 6 to 8 hours—so the vinegar can dissolve calcium and lime deposits.
In the morning, remove the bag and run the shower for a few minutes to flush out loosened debris. For stubborn buildup, you can gently scrub the nozzles with an old toothbrush before rinsing.
Why Vinegar Works So Well
White vinegar is mildly acidic—about 5% acetic acid—which effectively breaks down alkaline mineral scale. Unlike harsh chemical descalers, vinegar is non-toxic, safe for most finishes, and leaves no strong fumes. It's also cheap and readily available, making it a go‑to for regular maintenance.
When To Soak Vs. When To Replace
If your showerhead is heavily crusted or hasn't been cleaned in years, an overnight vinegar soak can often revive it. However, if the flow remains weak after two soaks, the internal parts may be permanently damaged, and replacement is the better option. For plastic showerheads, avoid boiling vinegar—use room‑temperature vinegar to prevent warping.
Preventing Future Buildup
To keep your showerhead clog‑free longer, wipe it dry after each use with a microfiber cloth. You can also install a water softener or a showerhead filter to reduce mineral content. Doing a quick vinegar soak every three months will maintain strong pressure and extend the life of your fixture.
6. Freshen the Toilet with Baking Soda and Vinegar
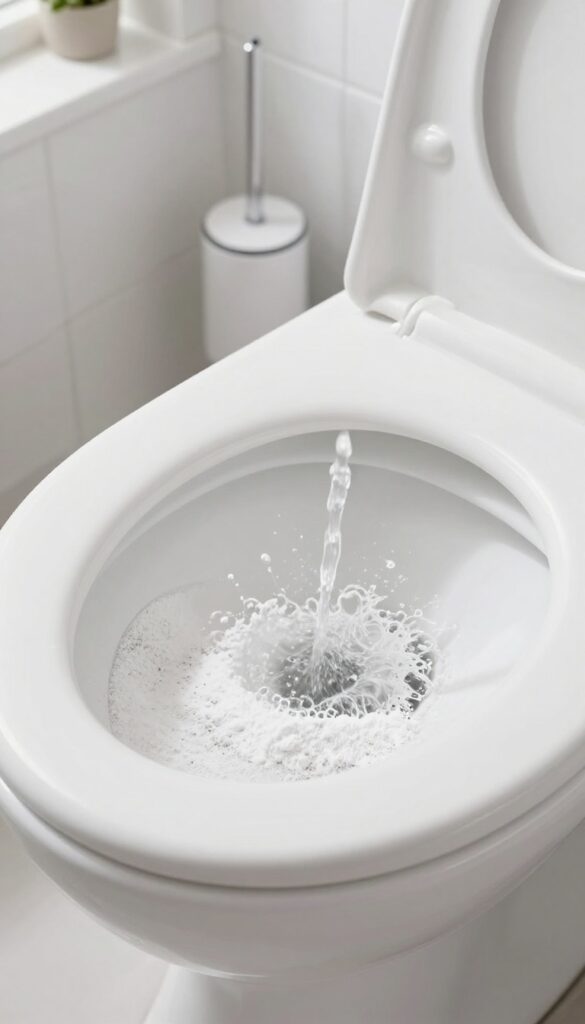
Forget harsh chemical cleaners that leave your bathroom smelling like a science lab. Baking soda and vinegar are a dynamic duo that can tackle toilet stains and odors naturally. This simple method uses ingredients you already have in your pantry to leave the bowl sparkling and fresh.
Start by sprinkling about a cup of baking soda directly into the toilet bowl, focusing on the waterline and any stains. Then pour in one cup of white vinegar. The mixture will fizz and bubble, working to lift grime and deodorize.
Let it sit for 10 minutes while the reaction does its job. After that, scrub the bowl with a toilet brush, paying extra attention to stubborn rings. Flush to rinse, and you'll see a noticeably cleaner and fresher toilet.
Why This Combo Works So Well
Baking soda is a mild abrasive that helps scrub away stains without scratching porcelain. Vinegar is acidic, which dissolves mineral deposits and kills bacteria. Together, they create a fizzy reaction that loosens dirt and deodorizes naturally.
No harsh fumes, no toxic residue—just clean.
Tips For Best Results
For tough stains, let the mixture sit longer, up to 30 minutes. You can also add a few drops of essential oil like tea tree or lemon for extra freshness. Avoid using this method if you have recently used a bleach-based cleaner, as mixing bleach with vinegar can create harmful chlorine gas.
7. Organize with a Caddy for Cleaning Supplies
A cleaning caddy is one of those simple tools that makes a big difference. Instead of running back and forth to grab a spray bottle or sponge, you keep everything together in one portable carrier. That saves time and keeps you focused on the task at hand.
A well-stocked caddy means you never have to search for a cleaner mid-scrub. It also helps you stay organized, so you always know when you're running low on something. Plus, you can easily move it from room to room or store it out of sight when you're done.
Choose The Right Caddy
Look for a caddy with a sturdy handle and compartments that fit your bottles upright. Plastic is lightweight and easy to clean, while metal or wire options offer a more stylish look. Make sure it has enough space for your essentials but isn't so large that it's awkward to carry.
Stock It Smartly
Keep only the products you use regularly: an all-purpose cleaner, glass cleaner, toilet bowl cleaner, a scrub brush, microfiber cloths, and gloves. Avoid overfilling, or the caddy becomes cluttered. Refill it after each cleaning session so it's ready for next time.
Keep It Accessible
Store your caddy under the sink or in a nearby cabinet so you can grab it quickly. If you have multiple bathrooms, consider a caddy for each floor. That way, you're not lugging supplies up and down stairs.
8. Use a Microfiber Cloth for Streak-Free Mirrors
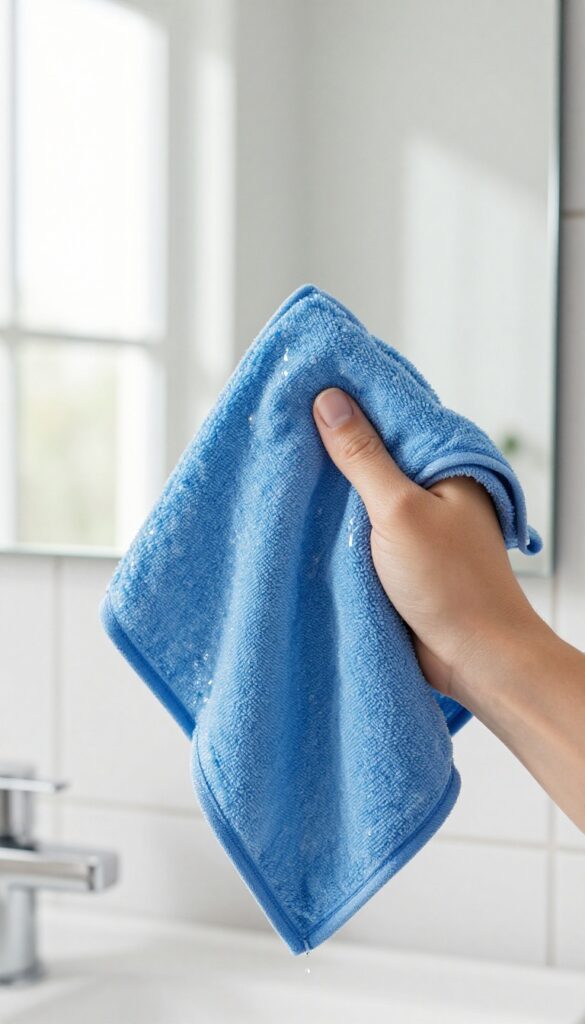
Mirrors can be the trickiest part of bathroom cleaning—one wrong wipe and you're left with streaks and lint. But the secret to a crystal-clear reflection is simpler than you think: microfiber cloths. These tiny fibers trap dust and grime without leaving behind residue, making them perfect for glass surfaces.
For the best results, use two microfiber cloths. Dampen one with water (add a drop of dish soap for extra shine) and wipe the mirror in a circular motion. Then immediately buff it dry with the second, dry cloth using long, vertical strokes.
This two-step method eliminates streaks and gives you a mirror that looks like new.
Why Microfiber Works Best
Microfiber cloths have split fibers that create a static charge, attracting dust and dirt rather than pushing it around. They also absorb up to seven times their weight in water, so you don't end up with drips or puddles. Unlike paper towels or cotton rags, microfiber won't leave lint or fuzz behind.
The Dish Soap Trick
A tiny drop of dish soap in your water helps break down any oily residue from hair products or skin oils. Just be careful not to use too much—a little goes a long way. This simple addition gives your mirror that extra sparkle without any harsh chemicals.
How To Keep Your Microfiber Cloths Effective
To maintain their performance, wash microfiber cloths separately from other laundry using a mild detergent. Avoid fabric softener or dryer sheets, as they coat the fibers and reduce their cleaning power. Air-dry or tumble dry on low heat to keep them fluffy and ready for the next use.
9. Prevent Mold with a Fan or Dehumidifier
Mold and mildew thrive in damp bathrooms, especially on ceilings and in corners. The simplest fix is to run your exhaust fan during and for at least 20 minutes after every shower. If your bathroom lacks a fan, a portable dehumidifier works just as well to pull moisture from the air.
This habit cuts down on scrubbing and keeps your bathroom healthier. Here’s how to make it work in your space.
Run The Fan The Right Way
Most people turn the fan off as soon as they step out of the shower. That’s a mistake. Moisture lingers in the air for a while.
Leave the fan running for at least 20 minutes after your shower, or until the mirror clears up. If your fan is on a timer, set it for 30 minutes. If it’s on a switch, get into the habit of flipping it off last when you leave.
No Fan? Use A Dehumidifier
Not every bathroom has a vent fan. In that case, a small dehumidifier placed on the counter or floor can make a huge difference. Look for one designed for bathrooms—they’re compact and often have a built-in humidity sensor.
Set it to 50% humidity, and it will automatically kick on when the air gets too damp.
Keep Surfaces Dry Too
Even with good ventilation, water on walls and shower doors can lead to mold. Use a squeegee on glass doors and tiles after each shower. Wipe down the walls with a microfiber cloth if you notice drips.
This extra step takes 30 seconds but prevents mold from taking hold.
10. Deep Clean the Shower Curtain in the Washing Machine
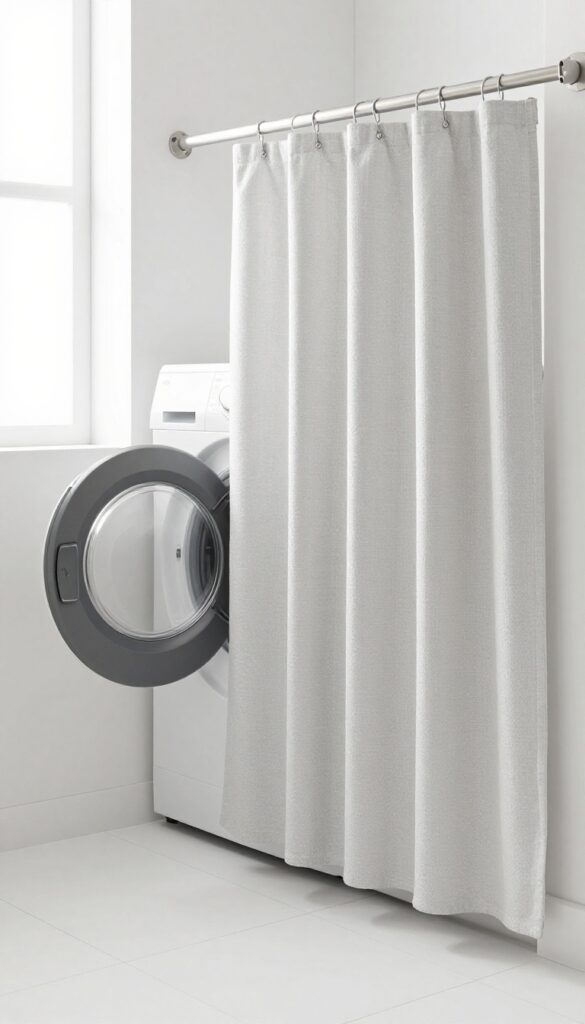
That fabric shower curtain might look clean, but it's probably harboring soap scum, mildew, and mystery stains. The good news? You don't need to scrub it by hand.
Just toss it in the washing machine with a few simple ingredients, and it'll come out looking like new. This method works for both the outer curtain and the plastic liner, saving you time and elbow grease.
Remove your fabric shower curtain and liner, toss them in the washing machine with a couple of towels and a cup of vinegar, then hang to dry. No scrubbing needed.
What You'll Need
Grab your fabric shower curtain and liner (if it's machine-washable), two old towels, 1 cup of white vinegar, and a mild detergent. Avoid bleach, as it can damage the fabric or liner over time.
The Washing Process
Place the curtain and liner in the machine with the towels—the towels help scrub the curtain gently during the cycle. Add detergent and vinegar to the dispenser, then run a warm or hot water cycle. Skip the spin cycle if your curtain is delicate; just let it drain.
Drying Tips
Hang the curtain and liner back up immediately after washing. The towels can go in the dryer. Don't leave the curtain bunched up, or wrinkles and mildew can set in.
For plastic liners, a quick shake before hanging prevents water spots.
11. Use a Toothbrush for Tight Spots
An old toothbrush is a surprisingly effective tool for tackling the nooks and crannies that sponges and cloths just can't reach. Those tight spaces around faucet bases, drain covers, and tile edges are prime spots for grime buildup, but a toothbrush's small bristle head fits right in. Pair it with a baking soda paste for extra scrubbing power, and you'll be amazed at the difference.
Don't toss that worn-out toothbrush—repurpose it for bathroom cleaning. Its compact size and firm bristles make it ideal for precision scrubbing. Dip it in a paste of baking soda and water (or a mild cleaner) and work it into crevices.
Rinse with water and wipe away residue. For stubborn buildup, let the paste sit for a few minutes before scrubbing.
Faucet Bases And Handles
The base of your faucet and the area around handles collect soap scum and hard water deposits. A toothbrush can get into the small gap where the fixture meets the countertop. Apply a little vinegar or baking soda paste, scrub gently, and rinse.
This prevents grime from building up and keeps your fixtures looking new.
Drain Covers And Overflow Plates
Drain covers often have slotted designs that trap hair and gunk. Use a toothbrush to scrub both the cover and the area around the drain opening. For overflow plates on sinks and tubs, remove the plate (if possible) and scrub the inside edge.
This reduces odors and prevents clogs.
Tile Grout And Corners
Grout lines and corners of showers are magnets for mold and mildew. A toothbrush lets you scrub these narrow lines without damaging the grout. Dip it in a bleach solution or hydrogen peroxide, scrub along the grout, then rinse.
For tough spots, let the solution sit for 10 minutes before scrubbing.
12. Try a Steam Cleaner for Deep Sanitization
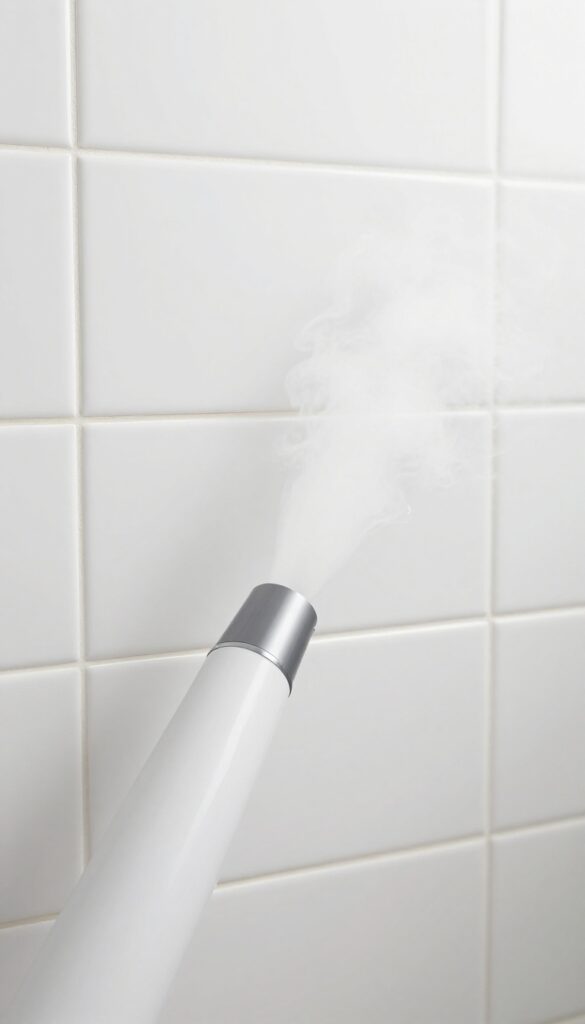
If you're tired of scrubbing grout lines and worrying about chemical residues, a steam cleaner might be your new best friend. These handheld devices blast high-temperature steam that kills bacteria, mold, and mildew on contact. They loosen grime without any harsh cleaners, making them perfect for a deep, chemical-free clean.
Why Steam Works So Well
Steam cleaners heat water to over 200°F, which is hot enough to kill most germs and dissolve soap scum and dirt. The steam penetrates porous surfaces like grout and tile, lifting grime from deep within. You don't need to scrub as hard—just let the steam do the work.
Best Spots To Use A Steam Cleaner
Focus on areas that are hard to clean with a cloth or brush: grout lines, shower door tracks, faucet bases, and around the toilet. You can also use it on bathroom mirrors and glass shower doors for a streak-free shine. Just be careful on unsealed natural stone, as the heat and moisture could damage it.
Tips For Getting The Most Out Of It
Always let the steamer heat up fully before use. Work in small sections, and wipe away loosened grime with a microfiber cloth before it dries. For tough mold spots, hold the steam nozzle on the area for a few seconds before scrubbing with a brush.
Afterward, open a window or run the fan to dry the surfaces quickly.
13. Keep a Trash Can with a Lid
A small trash can without a lid might be convenient, but it lets odors escape and makes your bathroom look cluttered. Switching to a lidded bin is a simple upgrade that keeps smells contained and the space feeling cleaner. Plus, it hides used cotton balls, floss, and other waste from sight, so the room stays visually tidy between deep cleans.
Choose a bin that fits your bathroom size—a slim, pedal-operated model works well in tight spots. Line it with a small bag or even a grocery sack for easy removal. Empty it at least once a week, or more often if you have a family, to prevent buildup and odors.
Wipe down the inside and lid with a disinfectant wipe during your regular cleaning routine.
Why A Lid Matters
An open trash can lets bathroom odors—especially from damp waste like used tissues or cotton pads—waft into the room. A lid traps those smells, making the air feel fresher. It also keeps curious pets or toddlers from rummaging through the trash, which is a bonus for safety and mess prevention.
Choosing The Right Bin
Look for a bin with a foot pedal so you don't have to touch the lid with dirty hands. Stainless steel resists rust and is easy to clean, while plastic is lightweight and budget-friendly. Make sure the lid seals tightly but opens smoothly.
A 2- to 4-gallon size is usually plenty for a bathroom.
Maintenance Tips
Empty the bin before it overflows to avoid straining the lid mechanism. Wash the bin with soap and water monthly, and give the lid a quick spray with a disinfectant. Replace the liner each time you empty it—this prevents sticky residues and makes the next change easier.
14. Use a Pumice Stone on Hard Water Rings
Hard water stains can leave stubborn rings in your toilet bowl and around sink drains that regular scrubbing won't touch. A pumice stone offers a simple, chemical-free solution that saves you from harsh cleaners and elbow grease. The trick is to wet the stone first and use gentle pressure to avoid scratching the porcelain.
Pumice stones are naturally abrasive but softer than porcelain, so they wear down mineral deposits without damaging the surface. This makes them perfect for removing those white or brown rings that form from hard water. You can find pumice stones at hardware stores or online for just a few dollars, and one stone will last through many cleanings.
How To Use A Pumice Stone Safely
Start by wetting the stone thoroughly with water. Never use it dry, as that can cause scratches. Gently rub the stone over the hard water ring using light, circular motions.
You'll see the deposit start to powder away. Rinse the area frequently to check your progress and remove debris. Stop as soon as the ring is gone to avoid over-scrubbing.
Where Else Can You Use A Pumice Stone?
Besides toilet bowls and sink basins, pumice stones work great on porcelain tubs, ceramic tile, and even glass shower doors. They can also remove rust stains and calcium buildup from faucets. Just test on a small hidden area first, especially on colored or glossy surfaces, to ensure it doesn't dull the finish.
Pro Tips For Best Results
Keep the stone wet throughout the process by dipping it in water every few seconds. If the stone starts to feel smooth, rub it against concrete or another rough surface to expose fresh grit. After use, rinse the stone clean and let it air dry.
Store it away from moisture to prevent it from getting slimy.
15. Wipe Down Surfaces with Rubbing Alcohol
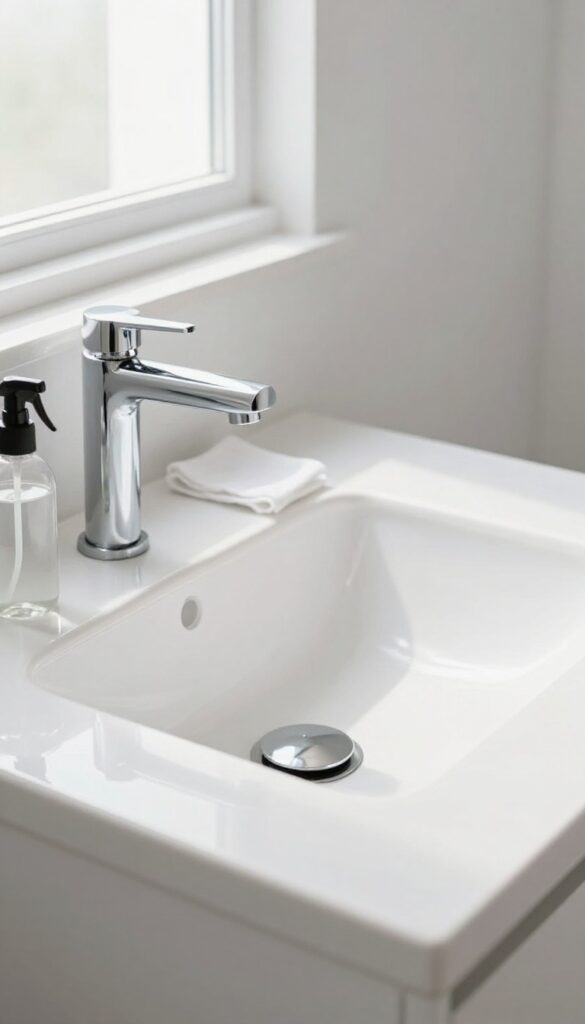
Rubbing alcohol isn't just for first aid kits—it's a bathroom cleaning powerhouse. It evaporates quickly, disinfects on contact, and leaves no streaks behind. That makes it perfect for a quick daily wipe-down of high-touch surfaces like countertops, handles, and light switches.
Plus, it cuts through sticky residue from labels or hair products without damaging most finishes.
Why Rubbing Alcohol Works So Well
Alcohol is a solvent that dissolves oils, soap scum, and sticky adhesives. It also kills bacteria and viruses in seconds, making it a great disinfectant for frequently touched areas. Unlike water-based cleaners, it dries instantly, so you won't have to wait around or worry about water spots.
Where To Use It (and Where Not To)
Use it on chrome fixtures, glass, mirrors, tile, and sealed granite or quartz countertops. Avoid it on unsealed natural stone, acrylic, or painted surfaces—it can damage the finish. Always test in a hidden spot first if you're unsure.
How To Make A Daily Wipe-down Habit
Keep a small spray bottle of 70% isopropyl alcohol under the sink. After your morning routine, give the sink, faucet handles, and light switch a quick spritz and wipe with a microfiber cloth. It takes less than 30 seconds and keeps grime from building up.
16. Store a Small Broom and Dustpan Nearby
Hair and dust seem to accumulate in bathrooms faster than anywhere else. Instead of letting them pile up until your weekly deep clean, keep a compact broom and dustpan set tucked in a corner or under the sink.
A quick daily sweep takes just seconds but prevents dust bunnies from forming and keeps your floors looking tidy. This simple habit reduces the need for mopping as often and makes your bathroom feel fresher with minimal effort.
Choose The Right Size
Look for a broom with a narrow head and soft bristles that can reach under cabinets and around the toilet base. A dustpan with a rubber lip hugs the floor better, so you pick up everything in one swipe.
Make It Accessible
Hang the broom and dustpan on the inside of a cabinet door or mount a small hook on the wall near the vanity. If you have a narrow gap between the toilet and wall, a slim dustpan set can slide right in.
Daily Sweep Routine
After brushing your teeth or before hopping in the shower, take thirty seconds to sweep the floor. This catches hair before it clogs drains and keeps dust from settling into corners.
17. Schedule a Weekly 15-Minute Tidy

A little consistency goes a long way in bathroom cleaning. Instead of letting mess pile up until you need a deep scrub, set aside just 15 minutes each week for a quick reset. This small habit keeps surfaces fresh, reduces grime buildup, and makes your bathroom feel inviting with hardly any effort.
What To Do In 15 Minutes
Start by spraying all surfaces—counter, sink, toilet, and mirror—with an all-purpose cleaner. While it sits, sweep or vacuum the floor. Then wipe down each surface with a microfiber cloth, working from top to bottom.
Finish by restocking toilet paper, tissues, and hand soap, and take out the trash if needed. That's it.
Why It Works
Frequent light cleaning prevents soap scum, hard water spots, and mold from taking hold. You'll never need to spend hours scrubbing because you're staying ahead of the mess. Plus, a quick tidy each week keeps the bathroom pleasant for guests and yourself.
Tips To Stay Consistent
Pick the same day and time each week—like Sunday evening or Tuesday morning—so it becomes a habit. Set a timer and put on a fast song to make it feel like a game. Keep your cleaning supplies in a caddy or under the sink so you can grab them instantly.
FAQ
How often should I deep clean my bathroom?
Aim for a deep clean every one to two weeks, focusing on areas like the toilet, shower, and sink. Daily quick wipes can help maintain freshness between deep cleans.
What's the best natural cleaner for bathroom mold?
White vinegar is effective against mold. Spray it directly on affected areas, let it sit for an hour, then scrub. For stubborn mold, use a baking soda paste first.
Can I use bleach on colored grout?
Bleach can discolor colored grout. Instead, use a mixture of baking soda and hydrogen peroxide or a commercial grout cleaner designed for colored grout.
How do I prevent soap scum on glass shower doors?
Use a squeegee after each shower to remove water. Apply a glass protectant or a mixture of vinegar and water weekly to reduce buildup.
Is it safe to mix vinegar and baking soda in the toilet?
Yes, it's safe and effective. The fizzing action helps loosen stains and deodorizes. However, don't mix with bleach or other cleaners as it can create harmful fumes.
Conclusion
A clean bathroom doesn't have to be a chore. By weaving a few of these ideas into your routine, you can keep things fresh without spending your whole weekend scrubbing. Pick the ones that fit your space and schedule, and you'll be amazed at the difference.
Consistency is the real secret here. A quick daily wipe-down and a weekly deep focus on one or two areas will keep mold, grime, and clutter from building up. Your bathroom will feel like a place you actually want to relax in.