25 Cleaning Stove Top Burners Tips for Sticky Grease
Sticky grease on stove burners can turn a quick cleanup into a frustrating battle. But with the right approach, you can banish that gunk without spending hours scrubbing or resorting to harsh chemicals.
These 25 tips break down the process into simple, actionable steps that target even the toughest residue, from soaking caps to clearing clogged ports. Whether you're maintaining a glass cooktop or gas burners, each method is designed to save you time and effort while delivering a spotless result.
Ready to make your stovetop look brand new? Let's dive into the strategies that actually work.
1. Let the Burners Cool Completely Before You Start
Jumping into cleaning while the burners are still hot is a recipe for trouble. Not only can you burn yourself, but heat can bake grease onto the surface, making it even harder to remove. Patience here saves time and effort later.
Why Heat Makes Grease Harder To Remove
When grease is hot, it's more fluid and can spread into tiny crevices. As it cools, it solidifies and bonds more tightly to the metal. Cleaning while hot can also cause cleaning solutions to evaporate too quickly, reducing their effectiveness.
How Long To Wait
Typically, 15 to 30 minutes after turning off the burner is enough for it to become cool to the touch. For gas burners with heavy grates, give them extra time. A quick test with the back of your hand—without touching—will tell you if it's safe.
A Safety Reminder
Always unplug electric coils or remove gas knobs before cleaning. This prevents accidental ignition and protects you from electric shock. Safety first means you can focus on getting those burners sparkling.
2. Remove All Removable Parts First
Before you start scrubbing, take a minute to disassemble the burner area. Pull off the burner caps, grates, and drip pans—whatever can come off, should come off. Cleaning them separately lets you reach every nook and cranny that grease loves to hide in.
Once you've removed the parts, you'll be amazed at how much gunk was trapped underneath. This simple step prevents you from just pushing grease around and ensures a deep clean. Plus, it protects your cooktop from scratches during scrubbing.
What To Remove
For gas stoves, lift off the grates and burner caps. On electric coil stoves, pull up the drip pans. Glass cooktops may have removable burner rings or trim rings.
Check your manual if you're unsure—most parts lift right off without tools.
Why It Matters
Grease and food particles collect in the gaps between parts. If you clean everything assembled, you'll miss those hidden spots. Separating them also lets you soak stubborn grime without damaging the stove's surface.
Pro Tip For Stubborn Parts
If a part feels stuck, don't force it. A little warm soapy water around the edges can loosen the grip. For drip pans that are welded on with baked-on grease, a plastic scraper can help pry them up gently.
3. Soak Burner Caps in Hot, Soapy Water
Sometimes the easiest solution is the most effective. A simple soak in hot, soapy water can work wonders on greasy burner caps, loosening baked-on residue without any elbow grease. This method is gentle enough for regular maintenance yet powerful enough to tackle tough buildup.
Fill your sink or a large bowl with hot water and add a generous squirt of dish soap. Submerge the burner caps completely and let them soak for at least 15 minutes. For extra stubborn spots, add a splash of white vinegar to the mix—the acidity helps break down grease.
After soaking, scrub with a soft sponge or brush, rinse thoroughly, and dry completely before reassembling.
Why This Works
Hot water softens grease while dish soap breaks down oils, making it easy to wipe away grime. Vinegar adds an extra boost for caked-on residue without damaging the metal.
How To Do It Right
Use water as hot as your tap can handle, but not boiling, to avoid warping thin caps. Let caps dry fully before placing them back on the stove to prevent rust or moisture issues.
When To Skip This Method
Avoid soaking caps with painted or decorative finishes, as hot water may cause peeling. For those, stick to a gentle wipe-down with a damp cloth.
4. Use a Paste of Baking Soda and Water for Stubborn Grease
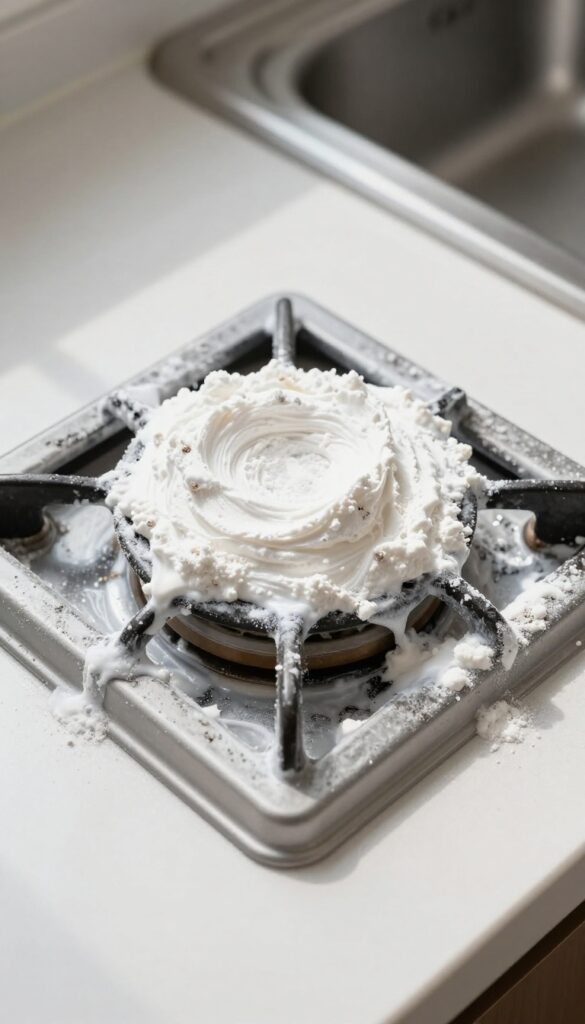
When grease has baked on hard, a simple spray might not cut it. A thick baking soda paste clings to vertical surfaces and breaks down sticky residue without scratching. This gentle abrasive is a kitchen workhorse that handles tough grime with minimal effort.
Mix three parts baking soda with one part water until it forms a spreadable paste. Apply a thick layer over the greasy burner parts, focusing on crusty edges and crevices. Let it sit for 10 to 15 minutes so the soda can lift the grease.
Then scrub with a soft sponge or old toothbrush, rinsing with warm water. For extra stubborn spots, add a splash of white vinegar to the paste for fizzing action.
Why Baking Soda Works
Baking soda is mildly alkaline, which helps dissolve fatty acids in grease. Its fine crystals provide gentle abrasion that won't scratch porcelain or metal finishes. Unlike harsh chemical cleaners, it's safe to use around food and won't release fumes.
How To Apply The Paste Effectively
Use a silicone brush or your fingers (with gloves) to spread an even layer. Don't skimp—a thick coating stays wet longer and works better. Cover tricky spots like burner ring grooves and cap undersides.
Let it sit undisturbed; the longer it stays, the easier the wipe-off.
After The Soak: Scrubbing And Rinsing
Scrub in a circular motion with a non-abrasive pad. For baked-on carbon, a plastic scraper can help lift residue without scratching. Rinse thoroughly with warm water and dry immediately with a microfiber cloth to prevent water spots.
5. Scrub with a Soft-Bristled Brush or Old Toothbrush
A soft brush is your best friend when it comes to cleaning burner nooks and crannies. It reaches into tight spots without scratching the surface, making it ideal for both gas and electric stoves. An old toothbrush, in particular, is perfect for dislodging grease around gas ports and burner rings.
Why Soft Bristles Matter
Hard brushes or steel wool can leave scratches on enamel or glass surfaces. Soft bristles are gentle yet effective at loosening sticky grease. They also prevent damage to protective coatings on burner caps.
Targeting Gas Ports And Crevices
Gas burner ports are prone to clogging with grease. Use an old toothbrush dipped in warm soapy water to gently scrub around each opening. This clears residue without bending or damaging the ports.
Best Brushes For The Job
A dedicated cleaning brush with angled bristles works well for burner grates. For tight spaces, a toothbrush or a small detail brush offers precision. Keep one set aside just for stove cleaning to avoid cross-contamination.
6. Try a Vinegar and Water Spray for Daily Maintenance
A simple vinegar and water spray can be your go-to for keeping grease at bay between deep cleans. It's gentle enough for daily use yet effective at cutting through light residue before it hardens. This method works best as a preventive step, not a cure for baked-on grime.
How To Make And Use The Spray
Fill a spray bottle with equal parts white vinegar and water. After cooking and once burners are cool, give them a light mist. Let it sit for a minute, then wipe with a soft cloth.
The vinegar breaks down fresh grease and helps prevent sticky buildup.
Why Daily Misting Works
Grease hardens over time, making it harder to remove. A daily vinegar spray keeps surfaces slightly acidic, which discourages grease from bonding tightly. It's a low-effort habit that reduces the need for heavy scrubbing later.
When To Skip This Method
If your burners have heavy, baked-on grease, vinegar alone won't cut it. Use this spray for light, daily maintenance only. For tough residue, follow up with a paste of baking soda and vinegar or a dedicated degreaser.
7. Use a Magic Eraser for Stubborn Stains on Glass Cooktops
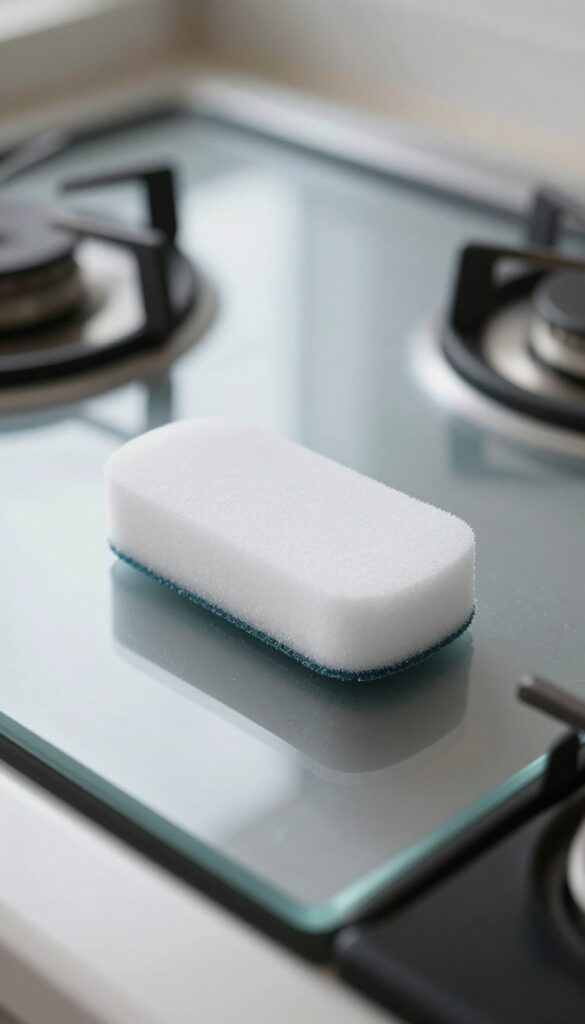
Glass cooktops look sleek, but they also show every bit of baked-on grease and residue. When your usual cleaner isn't cutting it, a magic eraser can be a game-changer. These melamine foam sponges work like a super-fine sandpaper to lift stains without scratching the surface, as long as you use them correctly.
Just dampen the sponge with water and gently rub the stained area in small circles. You'll see the grime start to lift almost immediately. The key is to avoid pressing too hard—let the sponge do the work.
And never use it on textured or matte surfaces, as it can damage the finish.
How It Works
Melamine foam is made of an incredibly hard, porous material. When wet, it acts like a micro-abrasive that gets into tiny crevices and lifts dirt. It's gentle enough for glass but tough on grease.
The foam actually breaks down as you scrub, so you're always working with a fresh surface.
Best Practices
Always wet the sponge first—never use it dry. Test on a small, hidden area if you're unsure. Rinse the cooktop afterward to remove any residue.
For extra-stubborn spots, let the sponge sit on the stain for a minute before scrubbing. And remember: this is a one-time-use tool for tough jobs, not for daily cleaning.
What To Avoid
Skip the magic eraser on ceramic, enamel, or any textured surface. It can dull or scratch those finishes. Also avoid using it on hot surfaces—wait until the cooktop is completely cool.
And don't combine it with bleach or other harsh chemicals; water alone is best.
8. Degrease with Dish Soap and Hydrogen Peroxide
Hydrogen peroxide isn't just for first aid—it's a surprisingly effective cleaner, especially when paired with dish soap. This combo creates a fizzing, bubbling reaction that helps lift sticky, baked-on grease from burner surfaces. It's gentle enough for regular use but strong enough to cut through tough buildup.
To use this method, mix a few drops of dish soap with hydrogen peroxide in a small bowl. Apply the mixture directly to the greasy areas of your burner caps or grates. Let it sit for about 5 minutes—you'll see it start to bubble and break down the grease.
Then simply wipe clean with a damp cloth or sponge. For extra stubborn spots, scrub gently with a soft brush before rinsing.
Why This Combo Works
Dish soap is designed to break down grease, while hydrogen peroxide adds an oxidizing boost that helps dissolve sticky residue. The bubbles help lift grime away from the surface, making it easier to wipe off without harsh scrubbing.
Best Practices
Always test on a small, hidden area first if you're unsure about your burner's finish. Avoid using this mixture on aluminum or uncoated surfaces for extended periods, as hydrogen peroxide can cause slight discoloration. Rinse thoroughly with water after cleaning to remove any residue.
When To Use This Method
This is ideal for weekly or bi-weekly maintenance to prevent heavy grease buildup. It's also great for a quick touch-up after cooking greasy foods like bacon or fried chicken. For deeply caked-on grease, you may need to combine it with a longer soak or a baking soda paste.
9. Clean Gas Burner Ports with a Toothpick or Pipe Cleaner
If your gas burner flames look uneven or weak, clogged ports are likely the culprit. Those tiny holes where gas escapes can get packed with grease and food debris over time. The fix is simple: a toothpick or pipe cleaner can clear them out in minutes.
Uneven flames not only affect cooking performance but also waste gas and leave food undercooked. Cleaning the ports restores a steady, blue flame and prevents dangerous gas buildup. This quick maintenance step should be part of your regular cleaning routine, especially after spills.
Why Clogged Ports Happen
Grease splatters, food bits, and even dust can settle into the burner ports. When you cook sticky or sugary foods, residue hardens and blocks the gas flow. Over time, this leads to yellow or flickering flames instead of a clean blue one.
Step-by-step Cleaning
First, make sure the burner is completely cool and the gas is turned off. Remove the burner cap and grate. Use a toothpick or a thin pipe cleaner to gently poke each port, pushing debris out.
Avoid using metal objects that could scratch or widen the holes. Wipe away loosened gunk with a damp cloth.
When To Call For Help
If cleaning doesn't fix the flame issue, the burner might need professional servicing. Persistent yellow flames or a strong gas smell could indicate a deeper problem. Always prioritize safety and consult your stove's manual or a technician if you're unsure.
10. Wipe Down Electric Coils with a Damp Cloth
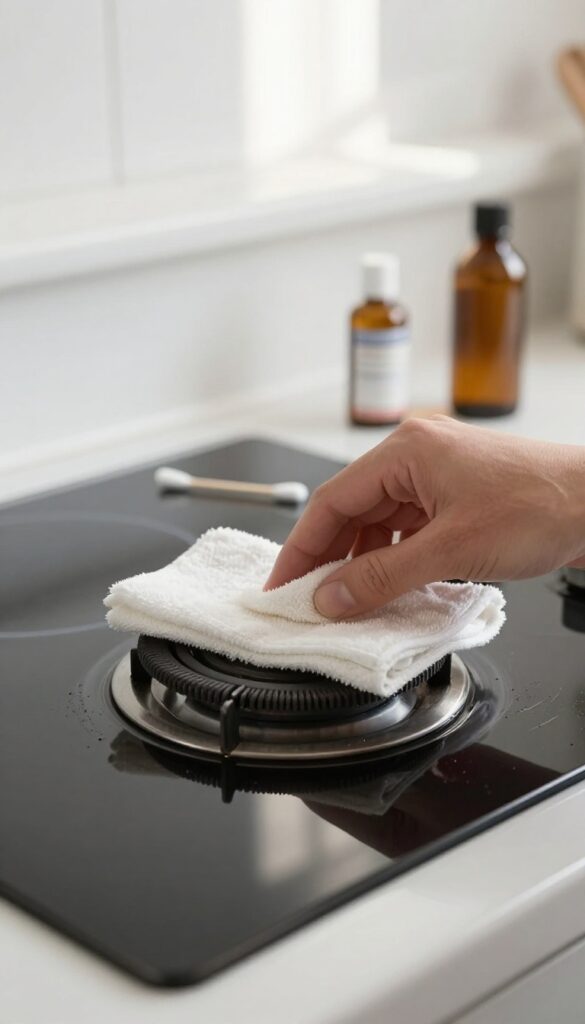
Electric coils are durable, but they demand a gentle touch when cleaning. Submerging them in water can ruin the heating element or cause electrical hazards. Instead, a simple wipe-down after cooking keeps them in top shape without the risk.
Start by ensuring the coils are completely cool to avoid burns or thermal shock. Unplug the cooktop or turn off the breaker for safety. Dampen a soft cloth with warm water—avoid soaking it—and wipe the coil surface to remove loose grease.
For stubborn drips, dip a cotton swab in rubbing alcohol and carefully dab the affected area. The alcohol evaporates quickly and cuts through grease without leaving residue. Let the coils air-dry fully before plugging them back in or turning on the power.
This method preserves the coils and keeps your stovetop looking clean.
Why Submerging Is A No-go
Electric coils have internal wiring that can short out if water seeps inside. Even a quick dunk can cause corrosion or permanent damage. Stick to surface cleaning only.
The Alcohol Trick For Stubborn Spots
Rubbing alcohol is a degreasing powerhouse that dries fast. Use a cotton swab to target baked-on drips without oversaturating the coil. It's safe for most coil types.
Drying Matters More Than You Think
Moisture trapped in the coil base can lead to rust or electrical issues. After wiping, let the coils sit for at least 30 minutes before reconnecting power. Patience pays off.
11. Use a Commercial Degreaser for Heavy Buildup
Sometimes the grease on your stove burners has hardened into a thick, stubborn crust that home remedies can't touch. That's when it's time to bring out the big guns: commercial degreasers. Products like Simple Green or Krud Kutter are formulated to dissolve heavy buildup quickly, saving you elbow grease and frustration.
When everyday cleaners fail, a dedicated degreaser can make short work of baked-on grease. These products contain powerful solvents that break down the molecular structure of grease, allowing you to wipe it away with minimal scrubbing. They're especially effective on burner caps, grates, and drip pans that have seen months of neglect.
Choosing The Right Degreaser
Look for a degreaser labeled as safe for the material you're cleaning. Simple Green is a popular all-purpose option that works on metal and ceramic surfaces without harsh fumes. Krud Kutter is stronger, great for stainless steel and cast iron, but always spot-test first.
Avoid degreasers with bleach or ammonia if you have aluminum parts, as they can cause discoloration.
Application And Safety Tips
Spray the degreaser generously over the greasy areas and let it sit for the time recommended on the label—usually 5 to 10 minutes. For extra thick buildup, apply a second coat. Use a soft brush or sponge to agitate the surface, then rinse thoroughly with warm water.
Wear gloves and ensure good ventilation, as degreasers can be strong.
Rinsing Is Critical
After cleaning, rinse every part with clean water to remove all chemical residue. Leftover degreaser can leave a sticky film that attracts more dirt or affect burner performance. Dry completely before reassembling to prevent rust or moisture issues.
12. Try a Steam Clean for a Chemical-Free Deep Clean
If you're looking for a way to cut through stubborn grease without harsh chemicals, a handheld steamer might become your new favorite tool. The combination of heat and moisture loosens baked-on grime in seconds, making it easy to wipe away without scrubbing. It's especially effective on burner grates and caps where grease has hardened into a thick layer.
Steam cleaning is a gentle yet powerful method that works on most stove burner types, including gas, electric coil, and glass cooktops. The high temperature softens grease while the moisture helps lift it from surfaces. Best of all, you avoid the fumes and residue left by chemical cleaners.
Why Steam Works So Well
Steam penetrates porous surfaces and crevices that sponges can't reach. The heat melts grease at its melting point (around 200°F), while the steam's moisture rehydrates dried-on food particles, making them slide off easily. This combination means less elbow grease and no need for abrasive scrubbing that could scratch your burners.
How To Steam Clean Your Burners
Start by removing burner caps, grates, and any removable parts. Hold the steamer nozzle a few inches away from the surface and direct steam at the greasy areas for about 10–15 seconds. You'll see the grease soften and start to bead up.
Wipe immediately with a microfiber cloth or sponge. For heavy buildup, repeat the process. Let everything dry completely before reassembling.
Safety Tips For Steaming
Always unplug electric coils and let them cool before steaming. Never direct steam into electrical openings or control knobs. Use distilled water to prevent mineral buildup in your steamer.
Wear gloves to protect your hands from the hot steam, and keep children and pets away during use.
13. Line Drip Pans with Aluminum Foil for Easy Cleanup
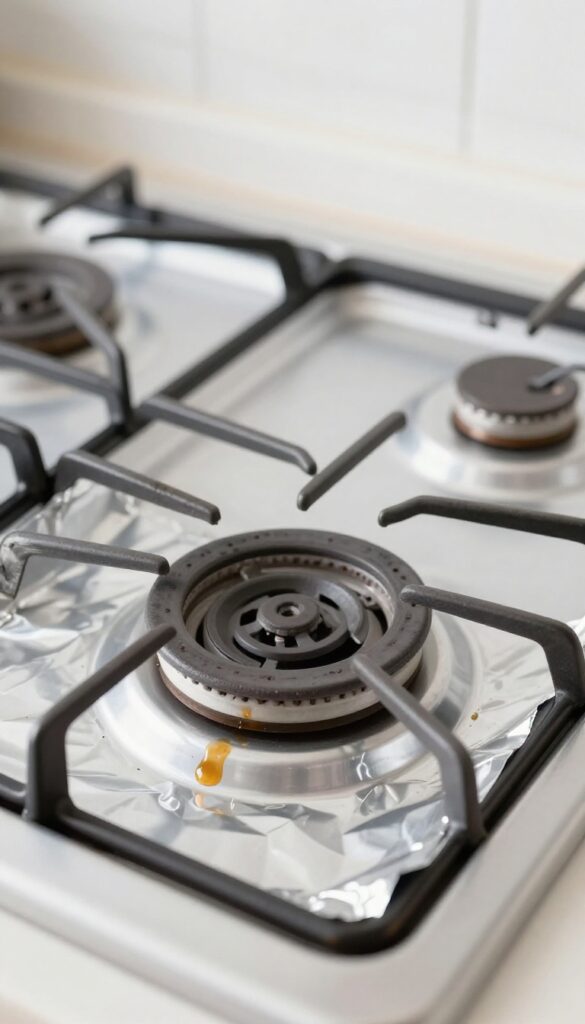
If scrubbing drip pans feels like a never-ending chore, there's a clever shortcut that saves you time and elbow grease. Lining them with aluminum foil creates a disposable barrier that catches spills and grease before they bake on. When it gets dirty, just swap it out—no soaking, no scrubbing.
Aluminum foil is a simple yet effective tool for keeping your stove top burners clean with minimal effort. By placing a sheet under burner caps or over drip pans, you create a protective layer that catches drips, splatters, and grease. When the foil looks dirty, simply remove and replace it.
This trick works best for electric coil burners and gas stove drip pans, but avoid using it on glass cooktops where foil can cause scratches or damage. For best results, cut the foil to fit snugly around the burner, and replace it weekly or after heavy cooking. It's a low-cost, low-effort solution that keeps your stove looking tidy between deep cleans.
How To Line Drip Pans Properly
Start by removing the burner grates and caps. Take a sheet of heavy-duty aluminum foil and mold it over the drip pan, pressing gently around the edges to create a custom fit. Use scissors to trim any excess, leaving about an inch overhang to tuck under the pan.
For gas burners, place the foil under the burner cap, not over the flame openings. Replace the foil once it shows visible grease or food residue.
When To Avoid Foil Lining
Avoid using foil on glass or ceramic cooktops, as it can scratch the surface and interfere with heat distribution. Also, never cover burner ports on gas stoves—this can cause uneven flames or gas buildup. Stick to using foil only on removable drip pans or under burner caps where airflow isn't restricted.
Pro Tips For Best Results
Use heavy-duty foil for durability—it resists tearing and holds its shape better. For extra protection, double-layer the foil. Replace the lining after every major cooking session or at least once a week.
If you prefer a reusable option, consider silicone drip pan liners that can be washed and reused, though foil is cheaper and more convenient.
14. Use a Razor Blade Scraper for Baked-On Grease on Glass
Glass cooktops look sleek, but baked-on grease can turn them into a patchy mess. A razor blade scraper is your secret weapon for lifting that crusty residue without damaging the surface—when used correctly. The key is technique and a little lubrication.
Hold the blade at a consistent 45-degree angle against the glass. Spray a generous layer of glass cleaner or a dedicated cooktop cleaner onto the area first; this acts as a lubricant and prevents scratches. Gently push the blade forward in short, smooth strokes, scraping off the burnt-on layer.
Wipe away debris with a soft cloth, then repeat if needed. Never use a dry blade or scrape at a steeper angle, as that can gouge the glass. Finish by wiping the entire cooktop with a damp microfiber cloth to remove any residue.
Why Lubrication Matters
Skipping the lubricant is the fastest way to scratch your glass cooktop. The liquid creates a thin barrier that lets the blade glide over the surface, lifting grease without digging into the glass. Glass cleaner works well, but you can also use a mixture of dish soap and water.
Just make sure the surface is wet before you start scraping.
Choosing The Right Blade
Standard single-edge razor blades are perfect for this job. Avoid using box cutter blades or utility knife blades—they're often thicker and less precise. Look for blades labeled "scraper blades" at hardware stores.
Always use a fresh blade; a dull one requires more pressure and increases the risk of scratching.
Safety First
Razor blades are sharp, so handle them with care. Use a scraper tool with a handle that holds the blade securely. Never scrape over loose debris or crumbs that could drag across the glass and cause scratches.
Work in a well-lit area so you can see the residue clearly, and always scrape away from your body.
15. Soak Grates in a Trash Bag with Ammonia Overnight
Sometimes the grease on your stove grates has baked on so hard that scrubbing feels pointless. That's where a simple overnight soak with ammonia can do the heavy lifting for you. The fumes work like a charm to dissolve sticky residue without you lifting a finger.
This method is almost effortless: place your grates in a heavy-duty trash bag, pour in about a cup of ammonia, seal the bag tightly, and let it sit overnight. The ammonia vapors will loosen the grease, making it easy to rinse off the next morning. Just be sure to do this in a well-ventilated area or outdoors, and wear gloves when handling the grates after soaking.
Why Ammonia Works So Well
Ammonia is a strong alkaline compound that breaks down fats and oils through a process called saponification. The fumes penetrate the grease, softening it so it slides off with a simple rinse. It's especially effective on cast iron and stainless steel grates that have layers of baked-on residue.
Safety First: Handling Ammonia
Always use ammonia in a well-ventilated area—preferably outdoors. Wear rubber gloves to protect your skin, and avoid inhaling the fumes. Never mix ammonia with bleach or other cleaners, as that can create toxic gases.
After soaking, rinse the grates thoroughly with hot water and dish soap to remove any ammonia residue.
When To Use This Method
This technique is best for grates that are heavily soiled with sticky, baked-on grease. If your grates are only lightly dirty, a quick scrub with soapy water might suffice. But for those tough, crusty layers, the ammonia bag method is a game-changer that saves time and effort.
16. Polish Stainless Steel Burner Caps with Olive Oil
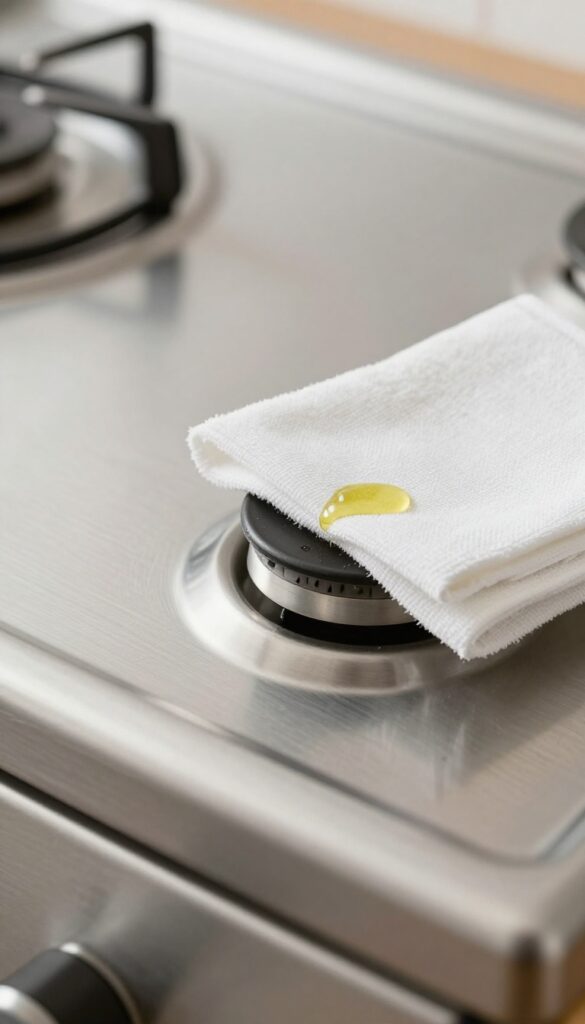
Stainless steel burner caps look great when they're clean, but they tend to attract fingerprints and grease almost immediately. A simple kitchen staple—olive oil—can give them a protective shine that keeps grime from sticking as easily. It's a quick finishing touch that makes your stovetop look polished without any special products.
Why Olive Oil Works
Olive oil is a natural, food-safe polish that fills microscopic pores in stainless steel. This creates a smooth surface that grease and water have a harder time latching onto. Plus, it adds a warm, streak-free shine that's more subtle than commercial sprays.
How To Apply It Right
Start with completely clean and dry burner caps. Put a single drop of olive oil on a soft, lint-free cloth—less is more. Rub it gently over the entire surface in the direction of the grain, then buff with a clean part of the cloth until no visible residue remains.
When To Skip This Trick
Avoid using olive oil on painted, coated, or non-stainless steel caps, as it can leave a sticky film that attracts dust. Also, don't apply it near burner openings where it could drip onto the flame and cause smoke or odor. Stick to the top surfaces only.
17. Use a Dishwasher for Oven-Safe Burner Parts
Your dishwasher can do more than just clean plates—it can tackle greasy burner parts too. This method is almost effortless: just load, run, and dry. But you need to check a few things first to avoid damage.
Check The Manual First
Not all burner parts are dishwasher-safe. Look up your stove's manual or check the manufacturer's website. If the parts are labeled "dishwasher-safe, " you're good to go.
If not, stick to hand washing to prevent warping or discoloration.
Top Rack Only For Small Items
Place burner caps, small grates, and rings on the top rack. This keeps them away from the heating element and reduces the risk of melting or bending. For larger grates, use the bottom rack but make sure they are securely positioned.
Use A Gentle Cycle
Run a normal or light cycle with a standard detergent. Avoid high-temperature or sanitize cycles, which can damage the finish. If your dishwasher has a heated dry, turn it off or use the air-dry setting to prevent overheating.
Dry Thoroughly Before Reassembling
After the cycle, let the parts air dry completely. Any trapped moisture can cause rust or clog burner ports. Wipe them down with a dry cloth if needed.
Then reassemble and enjoy a grease-free stovetop.
18. Create a DIY Degreaser with Lemon Juice and Baking Soda
When store-bought cleaners feel too harsh or expensive, a simple kitchen combo does the trick. Lemon juice and baking soda work together to cut through sticky grease without toxic fumes. This paste is gentle enough for most burner parts but tough on baked-on grime.
Mix equal parts lemon juice and baking soda to form a thick paste. Apply it to cool burner caps, grates, or drip pans and let it sit for 10–15 minutes. The acid in the lemon juice breaks down grease, while the baking soda provides gentle scrubbing power.
Scrub with a soft sponge or brush, then rinse thoroughly with warm water. Dry completely before reassembling to prevent rust.
Why It Works
Lemon juice contains citric acid, a natural degreaser that dissolves sticky residue. Baking soda adds mild abrasion without scratching surfaces like enamel or stainless steel. Together, they create a chemical reaction that lifts grease without harsh scrubbing.
Application Tips
Always test on a small hidden area first to ensure compatibility. For extra stubborn spots, let the paste sit longer—up to 30 minutes. Use an old toothbrush to work the paste into crevices and burner ports.
Avoid using this on aluminum parts, as the acid can cause discoloration.
Rinsing And Drying
Rinse every part with warm water until no residue remains. Leftover baking soda can leave a white film or clog gas burner ports. Dry with a soft cloth or let air dry completely before putting burners back in place.
Moisture trapped under caps can lead to rust.
19. Clean Around Knobs with a Cotton Swab and Rubbing Alcohol
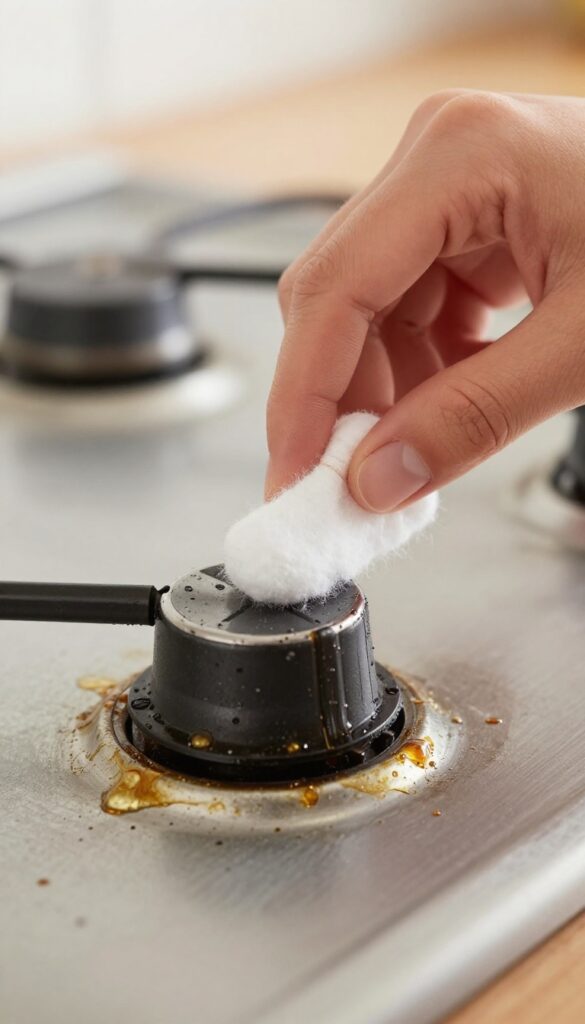
Knobs are notorious for trapping sticky grease in those tight crevices. A cotton swab dipped in rubbing alcohol reaches exactly where a sponge can't, dissolving residue without damaging the surface. Just be careful not to let liquid seep into the knob mechanism.
Why Rubbing Alcohol Works
Rubbing alcohol is a powerful degreaser that evaporates quickly, so it won't leave moisture behind. It breaks down sticky buildup without harsh scrubbing, making it ideal for delicate areas around knobs.
Step-by-step Cleaning
Dip a cotton swab in rubbing alcohol and gently run it along the base of each knob. Use a fresh swab for each knob to avoid spreading grease. For stubborn spots, let the alcohol sit for a few seconds before wiping.
Avoiding Damage
Never saturate the swab—damp is enough. Excess liquid can drip inside the knob and damage electrical components. If your knobs pull off, remove them first for easier access.
20. Use a Pumice Stone on Ceramic Cooktops
Ceramic cooktops look sleek, but burnt-on grease can leave stubborn stains that resist regular cleaning. A pumice stone offers a gentle abrasive solution that lifts residue without scratching the surface, provided you use it correctly. This method is especially effective for those dark, baked-on spots that won't budge with sprays or sponges.
Why A Pumice Stone Works
Pumice is a volcanic rock with a porous texture that acts as a fine abrasive. When wet, it becomes soft enough to scrub away grease without damaging ceramic or glass. The key is to keep the stone and surface wet at all times—dry scrubbing can cause scratches.
This technique is ideal for removing carbonized spills that have bonded to the cooktop.
How To Use It Safely
Start by soaking the pumice stone in water for a few minutes. Wet the cooktop surface as well. Gently rub the stone over the burnt-on grease using light pressure and circular motions.
Rinse the area frequently to check your progress and remove residue. Once the stain is gone, wipe the surface clean with a damp cloth and dry it. Never use a pumice stone on a hot cooktop or on surfaces with decorative coatings.
When To Avoid This Method
Pumice stones are not suitable for all cooktop types. Avoid using them on gas burner grates, stainless steel, or painted surfaces, as they can cause scratches. Stick to ceramic or glass cooktops only.
If your cooktop has a glossy finish, test the pumice on a small, hidden area first to ensure it doesn't dull the shine.
21. Try a Baking Soda and Vinegar Fizz for Tough Spots
When grease has baked on hard, sometimes you need a little chemical reaction to break it loose. The classic baking soda and vinegar combo creates a fizzy action that lifts stubborn residue without harsh scrubbing. This method is gentle enough for most burner surfaces but powerful enough to handle those crusty edges that won't budge with soap alone.
To use this method, start by sprinkling a generous layer of baking soda over the greasy areas. Then fill a spray bottle with white vinegar and mist it over the baking soda until it forms a thick paste. Let the mixture fizz and sit for 5–10 minutes—the bubbles help loosen the grease.
After the fizzing stops, scrub with a soft sponge or brush, then rinse thoroughly with water. For extra stubborn spots, let the paste sit longer or repeat the process.
Why The Fizz Works
The reaction between baking soda (a base) and vinegar (an acid) produces carbon dioxide gas, creating those bubbles you see. This effervescence helps lift grease and grime away from the surface, making it easier to wipe off. Plus, baking soda is a mild abrasive that adds gentle scrubbing power without scratching.
Best Burner Types For This Method
This technique works well on sealed gas burner caps, electric coil drip pans, and ceramic cooktops. Avoid using it on unsealed gas burners where moisture could seep into the gas ports—stick to a dry brush for those. Always check your stove's manual if you're unsure.
Tips For Maximum Effectiveness
For the best results, remove burner parts and clean them separately. Apply the paste while the parts are still warm (but not hot) to help activate the reaction. If the paste dries out, just spritz with more vinegar.
Rinse thoroughly afterward to prevent any residue from affecting burner performance.
22. Wipe Down Burners After Every Use to Prevent Buildup
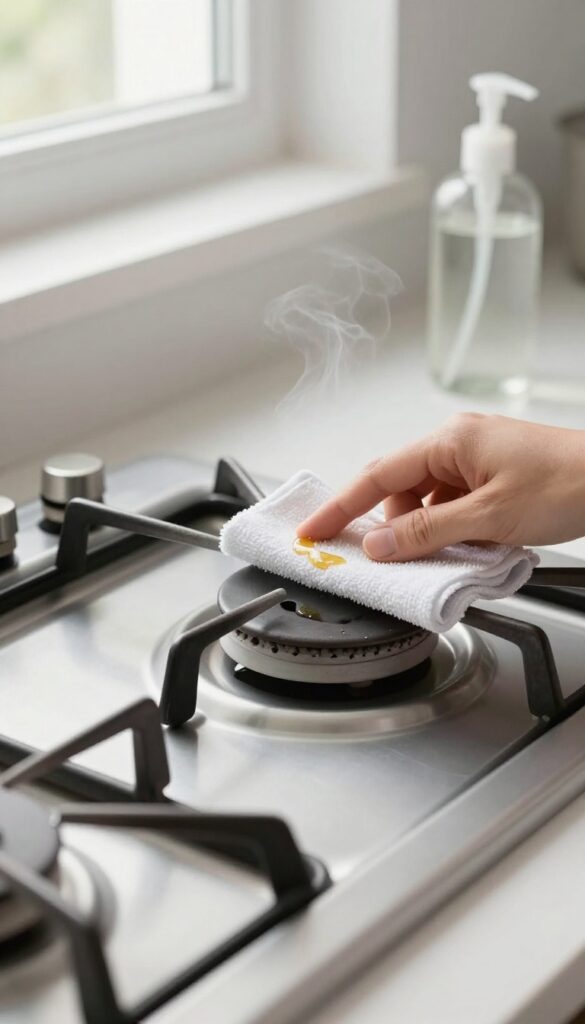
A quick wipe with a damp cloth after cooking prevents grease from hardening. Make it a habit to save time later. This simple step takes just seconds but can dramatically reduce the need for deep scrubbing.
When you wipe while the burner is still warm (but not hot), the grease wipes away effortlessly. Think of it as a daily insurance policy against sticky buildup. Over time, this habit keeps your burners looking clean and functioning well without extra effort.
Prevention is always easier than cure, and this tip is the ultimate preventive measure. By wiping down your burners after every use, you stop grease from ever having a chance to bake on. This is especially important for gas burner caps and electric coil burners, where residue can quickly become stubborn.
Keep a dedicated microfiber cloth or a sponge near your stove. After you finish cooking and the burner has cooled slightly, give it a quick once-over. If there's any stuck-on food, a gentle wipe with a little dish soap will do the trick.
The key is consistency—make it part of your post-cooking routine, just like turning off the stove.
Why It Works
Grease starts to harden as it cools. By wiping while the burner is still warm, you remove it before it bonds to the surface. This prevents the need for harsh scrubbing later.
Plus, it keeps your stovetop looking clean and ready for the next meal.
What To Use
A soft microfiber cloth works best because it picks up grease without scratching. For gas burners, you can also use a damp paper towel. Avoid abrasive sponges that can damage the finish.
A little warm water is usually enough, but for oily residue, add a drop of dish soap.
Making It A Habit
Tie this wipe-down to an existing habit, like waiting for your coffee to brew or while your food rests. Keep a cloth within arm's reach so you don't have to search for it. After a week, it'll feel automatic.
You'll be amazed at how much cleaner your burners stay with minimal effort.
23. Use a Silicone Brush to Apply Cleaning Paste Evenly
A silicone brush isn't just for basting—it's a secret weapon for applying cleaning paste to stove burners. Unlike sponges or cloths, a silicone brush glides over grates and burner caps without leaving lint or scratching surfaces. It helps you work baking soda paste or degreaser deep into crevices where grease loves to hide.
Silicone brushes are heat-resistant, non-porous, and easy to rinse clean. They give you precise control so you can target sticky spots without wasting product. Plus, they won't absorb grease or odors, making them a hygienic choice for repeated use.
Why Silicone Beats Sponges
Sponges can trap bacteria and leave fibers behind, especially on rough burner surfaces. Silicone brushes are non-absorbent and dry quickly, preventing bacterial growth. Their flexible bristles bend into tight spaces like burner cap edges and gas ports, dislodging grease without scratching.
How To Apply Paste With A Brush
Dip the silicone brush into your baking soda paste or degreaser and spread it generously over the burner parts. Use circular motions to work the paste into stubborn areas. Let it sit for 10–15 minutes before scrubbing with the same brush—the bristles loosen grime without extra effort.
Cleaning The Brush After Use
Rinse the brush under hot water and scrub with a drop of dish soap to remove residue. Silicone dries quickly, so you can store it immediately. Avoid abrasive pads that could damage the bristles.
24. Rinse and Dry Thoroughly to Avoid Water Spots
You've scrubbed away the grease, but the job isn't done until every part is bone dry. Water spots aren't just unsightly—they create a fresh surface for dust and grease to cling to. A thorough rinse and dry step ensures your burners look pristine and stay cleaner longer.
Once you've cleaned all burner components—caps, heads, and bases—rinse each piece under warm running water to remove any soap or cleaning residue. Shake off excess water, then grab a lint-free microfiber cloth. Dry each part completely, paying extra attention to crevices and burner ports where moisture hides.
For gas burners, let the parts air-dry for an hour before reassembling to ensure no water remains inside the gas tube.
Why Water Spots Matter
Hard water contains minerals that leave white spots when they dry. These spots aren't just cosmetic—they can attract airborne grease and dust, making your burners look dirty again quickly. On stainless steel or enamel surfaces, water spots can etch into the finish over time.
The Microfiber Advantage
Paper towels leave lint and can scratch delicate surfaces. Microfiber cloths absorb more water and trap mineral deposits without leaving streaks. Use a clean, dry microfiber cloth for the final wipe to achieve a mirror-like shine.
Speed Up Drying
If you're in a hurry, place rinsed burner parts in a warm oven (set to 170°F or the lowest setting) for 10 minutes with the door ajar. Or use a hairdryer on low heat to blast moisture out of burner ports. Never reassemble wet parts—trapped moisture can cause corrosion or clog gas flow.
25. Reassemble and Test Burners for Proper Function
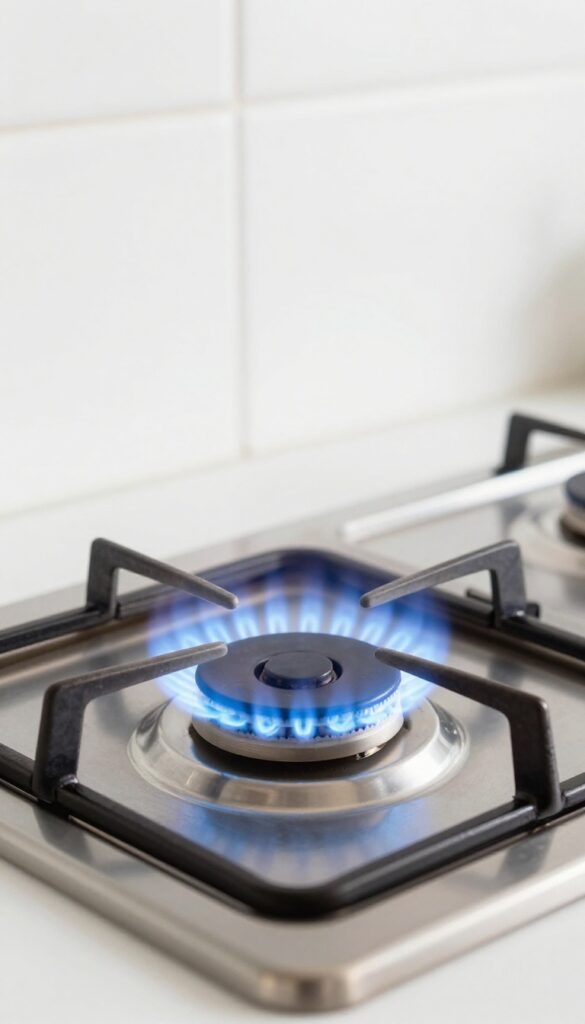
After all that scrubbing, soaking, and drying, it’s time to put everything back together. But don’t just slap the parts on and call it done—testing each burner ensures your hard work didn’t accidentally block a gas port or leave a cap misaligned. A quick check now can prevent uneven flames or weak heat later.
Reassembling stove burners correctly is just as important as cleaning them. A tiny misalignment can cause inefficient burning or even safety hazards. Take your time to fit each piece snugly, then run a simple test to confirm everything works as it should.
Match Parts To Their Original Positions
If you removed multiple burner caps and heads, it helps to keep them organized. Some caps are slightly different sizes or shapes, and swapping them can lead to a poor fit. Place each cap on its matching burner base, ensuring it sits flat and level.
For gas stoves, the burner head should align perfectly with the gas port opening.
Check For Obstructions Before Lighting
Before turning on the gas, visually inspect each burner port. Use a flashlight to spot any leftover debris or moisture that could block the flame. If you see anything, use a pin or compressed air to clear it.
This step is especially important if you soaked the parts—sometimes a drop of water lingers in a tiny hole.
Light Each Burner And Observe The Flame
Turn on one burner at a time. For gas stoves, look for a steady blue flame with a consistent height across all ports. Yellow or flickering flames often indicate a clog or improper air mixture.
For electric stoves, turn the heat to medium and check that the coil or glass top heats evenly without hot spots. If a burner doesn’t light or heats unevenly, shut it off and recheck the connections.
Make Small Adjustments As Needed
If a gas burner flame is uneven, try adjusting the air shutter (usually a small metal clip near the burner base) to get a cleaner burn. For electric burners, ensure the coil is fully seated in its socket. A quick tweak now can save you from frustration later.
Once all burners perform well, you’re done—enjoy your clean, efficient stovetop.
FAQ
Can I use bleach to clean stove burners?
Bleach is not recommended for stove burners as it can be too harsh and may damage the finish. Stick to mild dish soap, baking soda, or vinegar-based cleaners.
How often should I clean my stove burners?
For light maintenance, wipe burners after each use. A deep clean every 1-2 months is usually enough to prevent heavy grease buildup.
Is it safe to put gas burner grates in the dishwasher?
Check your stove's manual. Many gas grates are dishwasher-safe, but some may discolor or warp. When in doubt, hand wash with warm soapy water.
What's the best way to clean electric coil burners?
Never submerge electric coils. Wipe them with a damp cloth after cooling. For stubborn drips, use a cotton swab dipped in rubbing alcohol.
How do I remove burnt-on grease from a glass cooktop?
Use a razor blade scraper at a 45-degree angle with a lubricant like glass cleaner. Alternatively, apply a baking soda paste and gently scrub.
Conclusion
Sticky grease doesn't stand a chance when you have the right approach and a few simple tools. Start with the tip that matches your burner type and grime level, then build from there. A little routine care keeps your stove looking great and cooking efficiently.
You've now got a full set of strategies to tackle even the toughest buildup. Pick your favorites, make them a habit, and enjoy a cleaner kitchen with less effort. Your burners will thank you.