11 Grinch Craft Ideas for a Fun and Festive December
A few paper plates, some green paint, and an hour at the kitchen table can turn a gray December afternoon into something the kids actually remember. Grinch crafts work because the supplies are cheap, the mess stays manageable, and the finished projects look genuinely festive on a shelf or tree.
Most of these ideas use stuff you probably already own, like cotton balls, cardboard, and washable paint. A handful take ten minutes, while others stretch into a cozy weekend project with older kids.
You can spread them across the month or knock out a batch before a party. Below are eleven Grinch craft ideas, each with enough detail to actually pull off.
1. Paper Plate Grinch Faces
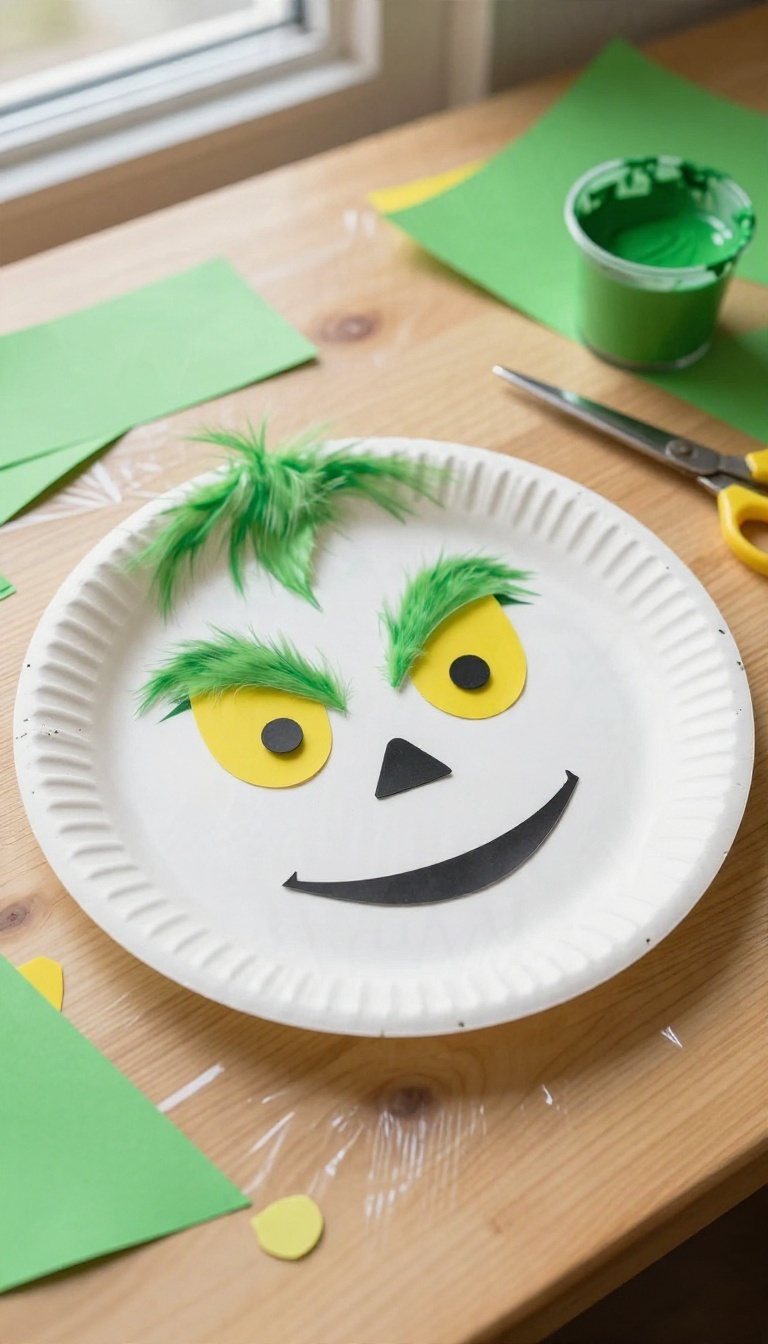
Paper plates make a surprisingly good canvas for a Grinch face, mostly because the ridged edge already looks a little like fur when you paint over it. This one costs almost nothing, dries fast, and keeps little hands busy long enough to finish a cup of coffee while it's still warm. It's also forgiving.
Toddlers can slap paint around and it still reads as the Grinch, and preschoolers can get fussy with the eyebrows and the little smirk. No two come out the same, which is half the fun.
Grab the cheap white plates rather than the coated ones, since paint sticks better to the plain paper surface. You'll want green paint, a brush or sponge, glue, and a pile of paper scraps for the face. Set everything out before the kids sit down so nobody's waiting on you to hunt for scissors.
A plastic tablecloth or a few sheets of newspaper underneath saves you ten minutes of scrubbing later. Keep a damp cloth nearby for quick hand wipes between steps.
Paint The Base First
Have kids cover the whole plate in green, ridges and all. A sponge brush works well here because it pushes paint into the grooves and covers faster than a skinny brush. Let it dry completely before adding anything else.
This is the hard part for eager kids, so plan a snack break or move on to cutting out paper pieces while the paint sets. A hair dryer on low speed can speed things up if you're short on patience.
Build The Face From Scraps
Cut yellow paper into two almond shapes for the eyes, then add small black circles for pupils. A triangle of black paper makes the nose, and a curved strip becomes that signature crooked grin. Older kids can add eyebrows angled down for the grumpy look, or a tiny red paper heart pinned near the chin if you want the softer ending of the story.
Glue everything down and press gently for a few seconds so the pieces stay put.
Add The Fuzzy Details
Cotton balls stretched thin and glued along the top edge give the plate a fuzzy hairline. A few strands of green yarn work too if you have some in a craft bin. Skip this step for the youngest toddlers, since cotton balls tend to end up in mouths.
Once everything is dry, poke a small hole at the top and thread a ribbon through if you want to hang the finished faces on a wall or door.
2. Grinch Handprint Ornaments
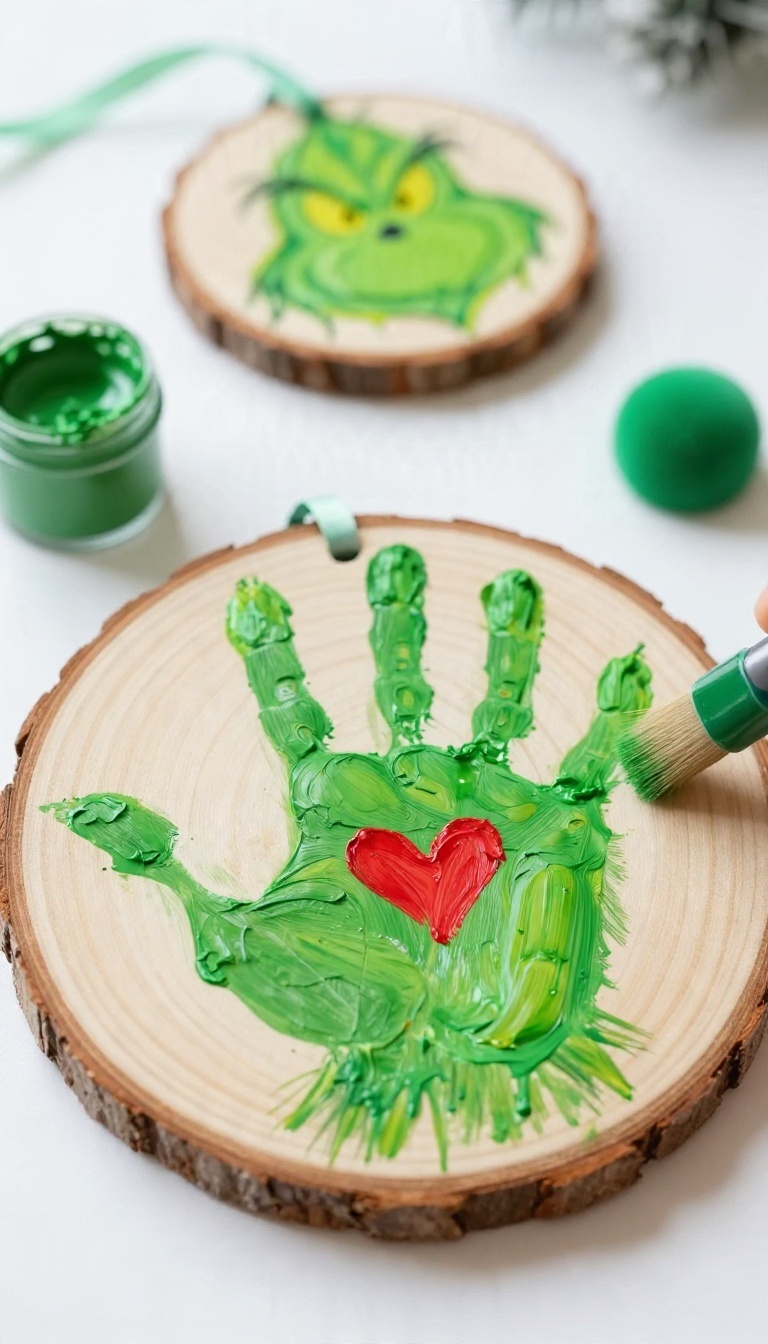
Little hands grow fast, and December is the perfect excuse to freeze one in time. A green handprint pressed onto a flat ornament becomes a Grinch face with almost no effort, and the tiny red heart at the center sells the whole thing. It works on wooden ornaments, cardboard circles, or plain cardstock if you want to turn it into a card.
Grandparents tend to lose their minds over these, so plan to make a few extras.
The process is simple enough for toddlers but still looks polished when it dries. You paint, you press, you add a heart, and you let it set. The trick is working fast and keeping a wet wipe within arm's reach.
Set everything up before any paint comes out. Once a small hand is covered in green, you have about thirty seconds to get a clean print.
What You'll Need
Grab washable green craft paint, a foam brush, and something flat to print on. Wooden slice ornaments, blank cardboard rounds, or heavy cardstock all hold a handprint well. For the heart, a small red paint dab, a foam heart sticker, or a red marker all work.
Add a ribbon or ornament hook if you're hanging it. Keep a bowl of warm soapy water and paper towels nearby for the inevitable cleanup.
Making The Print
Brush a thin, even coat of green paint across your child's palm and fingers. Too much paint smears the lines; too little leaves gaps. Press the hand down firmly and lift straight up so the fingers don't drag.
Let it dry completely before adding the heart. A thumbprint of red paint or a small sticker in the middle of the palm makes the Grinch's shrunken heart. Write the child's name and the year on the back with a fine marker.
Turning It Into A Gift
These make easy grandparent gifts, especially paired with a handwritten tag. Slide a finished ornament into a small paper bag with tissue paper, or tie it to a wrapped present as the tag itself. If you're making cardstock versions, glue the print onto folded card and add a short note inside.
They mail flat and survive the trip better than a wooden ornament.
3. Cindy Lou Who Hair Accessories
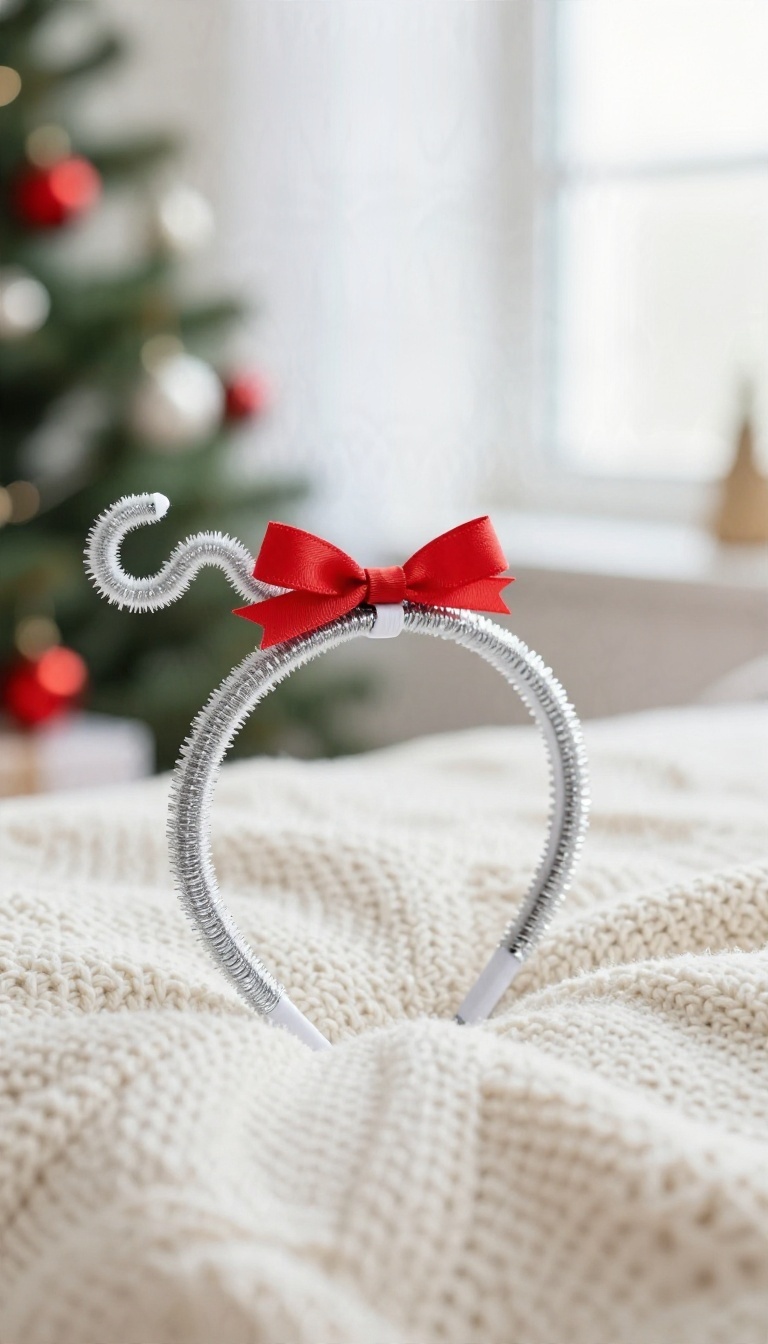
Cindy Lou Who's sky-high hairdo is basically the cutest part of the whole Grinch story, and you can recreate it without touching a curling iron. A headband or clip built around a soda-bottle top, some tinsel, and a red bow gives you that signature swoop in about twenty minutes. It's a playful dress-up piece that works for parties, holiday photos, or a cozy Grinch movie night on the couch.
The trick is keeping it lightweight so it actually stays put on a kid's head. You're building a little tower of shine, not a heavy sculpture. Grab a clean bottle cap, a pipe cleaner or two, some silver or green tinsel, and a small red bow, then let the assembly do the rest.
What You'll Need
Start with a plain plastic headband or an alligator hair clip, depending on whether you want a full updo look or a smaller accent. Add a clean soda-bottle cap, a bendy pipe cleaner, silver or green tinsel garland, a small red ribbon bow, and hot glue. A little floral wire helps if you want the tinsel to hold a curl.
Keep the tinsel short so it doesn't droop into faces. A six- to eight-inch strand is plenty for the signature swoop.
Building The Swoop
Glue the bottle cap to the top of the headband or clip as your anchor point. Twist the pipe cleaner into a gentle curve and secure one end inside the cap, then wrap tinsel around the pipe cleaner so it reads as a wavy lock of hair. Bend the tinsel forward at the tip for that classic Cindy Lou flip.
Hot glue the red bow right at the base where the tinsel meets the cap, and let everything set for a few minutes before anyone tries it on.
Making It Fit And Last
Test the headband on the wearer before the glue fully hardens so you can adjust the angle. If the tinsel feels floppy, a thin piece of floral wire threaded through the center stiffens it right up. For clips, add a small felt square on the underside so it grips hair without slipping.
Store the piece in a small box or bag so the tinsel doesn't get crushed between wears.
4. Grinch Slime in a Jar

Slime has been a kid favorite for years, and a batch of bright Grinch-green slime fits December perfectly. You mix it up in one bowl, add a little red heart to the jar, and suddenly you have a craft that doubles as a toy. It also makes a great party favor or classroom gift because the whole thing costs very little per kid.
The sensory part is the real win here. Kids squish, stretch, and poke at it long after the crafting is done, which buys you a quiet stretch on a rainy afternoon. Package it right and it looks cute enough to hand out at a holiday party.
Clear a spot on the counter and grab a mixing bowl, because this one gets a little sticky. The payoff is a stretchy, glossy slime that looks exactly like something the Grinch would keep in his cave. You do not need specialty ingredients.
A few basics from the grocery store or craft aisle cover it, and most batches take about fifteen minutes from start to finish.
What You'll Need
For the slime itself, grab a bottle of clear or white school glue, contact lens solution, and baking soda. You will also want green food coloring, and a tiny drop of yellow helps push it toward that lime Grinch green. For packaging, small glass or plastic jars work well, along with red paper, a heart-shaped punch or scissors, and a bit of twine.
A funnel saves a lot of mess when it is time to fill the jars.
Mixing The Slime
Pour the whole bottle of glue into a bowl and stir in about half a teaspoon of baking soda. Add several drops of green food coloring and a single drop of yellow, then mix until the color is even. Add contact lens solution a tablespoon at a time, stirring between each addition.
Once the slime pulls away from the bowl and stops sticking to your fingers, it is ready. Knead it for a minute or two to firm it up.
Packaging And Labels
Spoon the slime into small jars, leaving a little headroom at the top. Cut a red paper heart and press it onto the front of the jar, or tie it on with twine around the lid. A small label with the words "You're a mean one" or a simple heart sticker finishes it off.
Keep the jars sealed when not in use so the slime stays fresh.
5. Grinch Heart Ornaments

The heart that grows three sizes is the moment everyone remembers, and it makes a smart little ornament. You can sew it, glue it, or felt it, then hang it somewhere everyone will see. The trick is making the heart feel like it's growing or popping out of a tiny box.
These work for a tree, a gift topper, or a card for a teacher. Pick the version that matches your patience and supplies. All three take an afternoon at most.
A heart ornament gives you room to play with the story's best moment. The size change is the whole point, so decide up front whether your heart grows or bursts out of a box. Either way, keep the colors simple: bright green, a touch of red, and maybe a gold outline.
The Growing Heart Version
Cut two felt hearts, one small and one about twice the size. Stack the small heart on the big one and stitch around the edges with a visible running stitch. Add a loop of ribbon at the top and a tiny tag that reads "three sizes bigger.
" Kids can do the stitching with a plastic needle and yarn.
The Pop-out Box Heart
Find a small jewelry or matchbox and paint it Grinch green. Glue a felt heart to a short strip of stiff card, then attach the strip inside the box so the heart springs up when the lid opens. Decorate the outside with a simple face or a bow.
This one needs a little drying time, so plan for it.
No-sew Shortcut
Skip the needle entirely and use fabric glue on stiff felt. Cut a heart, glue a smaller heart on top, and let it set under a book for an hour. Thread a ribbon through a hole punched at the top.
It holds up fine on a tree and takes about fifteen minutes.
6. Grinch-Themed Hot Cocoa Bombs

Hot cocoa bombs already feel like a small magic trick, and a Grinch-green version doubles the fun. You make a hollow chocolate sphere, tuck marshmallows inside, and seal it up with a little red heart on top. Drop one in a mug of hot milk and it cracks open into a warm, cozy drink.
The best part is that one batch makes plenty to hand out, so you get a kitchen craft and a stack of neighbor and teacher gifts from the same afternoon.
These are a step up from paper crafts, so plan for a little more counter space and a bit of patience. The payoff is a treat people actually use, which makes them a smart pick when you want something homemade but not another trinket. You do not need fancy equipment.
A silicone mold, good melting chocolate, and a microwave get you most of the way there. Set aside an hour or two, keep the kitchen cool, and let the chocolate set fully before you handle it. Kids can help with the marshmallow filling and the heart decorations, while an adult handles the hot melted chocolate.
That split keeps little hands safe and still lets everyone feel involved.
What You'll Need
Grab a half-sphere silicone mold, about 12 ounces of white or green candy melts, and a bag of mini marshmallows. Green food coloring gel works better than liquid drops because it won't seize up the chocolate. For the heart, a small tube of red icing or a few red candy melts piped onto parchment paper does the job.
You'll also want a warm plate or skillet for smoothing the rims, plus mugs of hot milk for the big reveal.
Making The Shells
Melt the candy melts in short bursts, stirring between each one so nothing scorches. Spoon a little into each mold cavity and use the back of the spoon to push it up the sides, keeping the coating thick enough to hold together. Chill the mold for about ten minutes until the shells pop out clean.
If a rim looks jagged, press it against a warm plate for a second to smooth it. That tiny step makes the two halves seal much better.
Filling And Sealing
Fill half the shells with a small scoop of mini marshmallows, leaving a little room at the top. Warm a dry skillet over low heat and briefly press an empty shell rim into it to melt the edge, then gently press it onto a filled half. Hold it for a few seconds so the seam sets.
Pipe a small red heart on top of each finished bomb and let it firm up on parchment. Store them in a cool spot, not the fridge, so they don't sweat.
Gifting And Serving
Pack each bomb in a clear bag or a small box with a note that says to drop it in hot milk and stir. Teachers and neighbors tend to love these because they're useful and look like you spent way more time than you did. When you're ready to drink one, heat a mug of milk until steaming and slide the bomb in.
Give it a stir and watch the green shell melt into a marshmallow-topped cup of cocoa.
7. Grinch Garland and Paper Chains
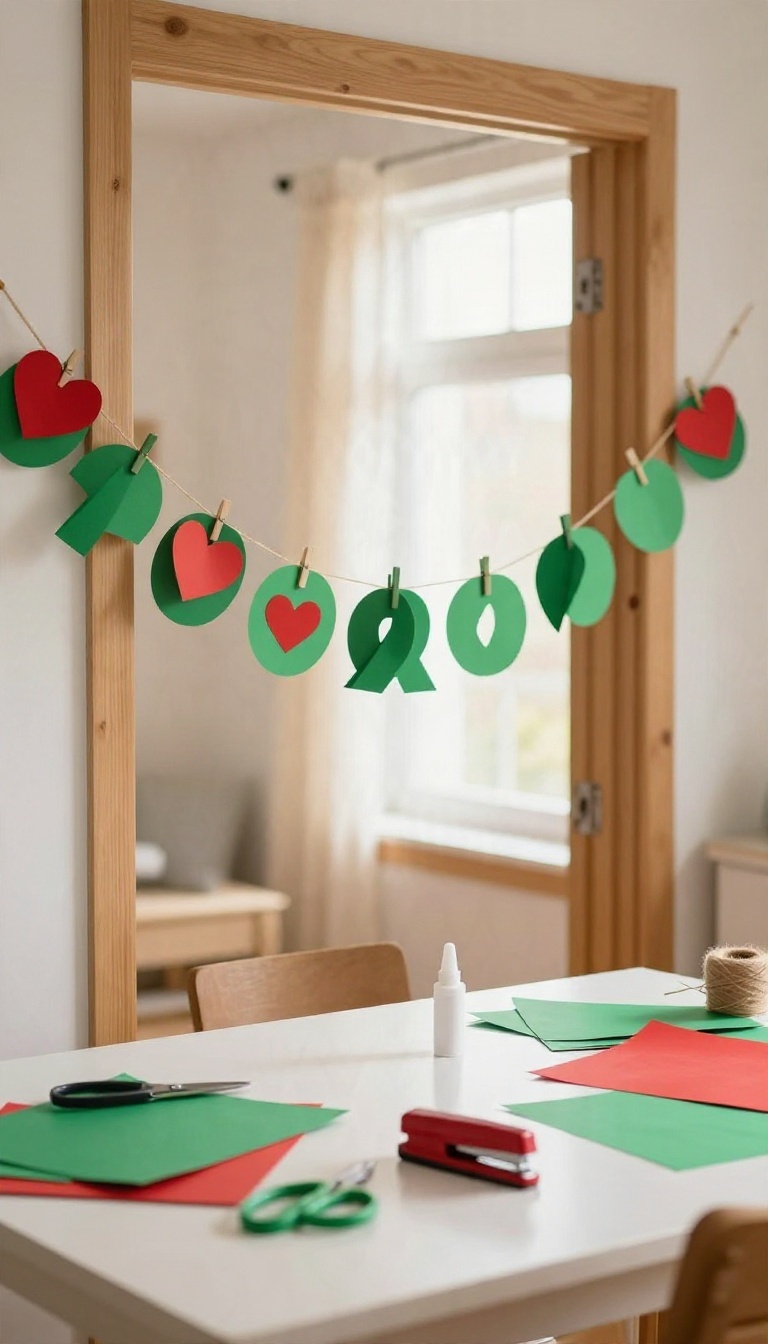
Garland might be the most forgiving craft on this list. You cut strips, staple or glue them into loops, and suddenly a doorway looks like it belongs in Whoville. The Grinch angle comes from the colors: bright green paper with a small red heart tucked into each link, a nod to that heart growing three sizes.
It also happens to be one of the cheapest projects you can set up. A pack of green construction paper and a glue stick cover a whole mantel. Kids can help with the cutting and looping, and you can assemble in batches while dinner cooks.
The nice thing about garland is that it scales. One short chain dresses up a bookshelf, and a long one can stretch across a whole doorway. You can also mix paper chains with a heart garland and hang them together for more texture.
Set up a cutting station and a looping station so nobody's fighting over the scissors. Older kids cut, younger kids glue, and you handle the stapler if you want the links to hold up. A little assembly line keeps it moving and cuts down on glue everywhere.
What You'll Need
Grab green construction paper in a couple of shades if you can find them, plus red paper for the hearts. A paper cutter or scissors, a glue stick, and a stapler cover the basics. A hole punch and some twine help if you want to hang the finished chain.
Cardstock holds up better than thin paper, especially if the garland will hang near a door that gets used a lot. Skip anything glittery unless you enjoy vacuuming it for a week.
Making The Links
Cut strips about an inch wide and six to eight inches long. Smaller strips make a tighter chain, longer ones make a looser, chunkier look. Fold each strip into a loop, thread it through the previous link, and glue or staple the ends together.
For the heart detail, cut small red hearts and glue one to the outside of each link. You can also slip a heart inside the loop before closing it so it peeks through. Either way, the red pops against the green.
Hanging And Displaying
Drape the chain across a mantel, loop it around a doorway, or wind it through the tree. A few small pieces of tape or removable hooks keep it in place without marking paint. For a doorway, hang it slightly off-center so it doesn't block the walkway.
If you want a longer garland, make several short chains and connect them at the end. That way kids can finish a section in one sitting and you can add to it over a few days.
8. Grinch Painted Rocks
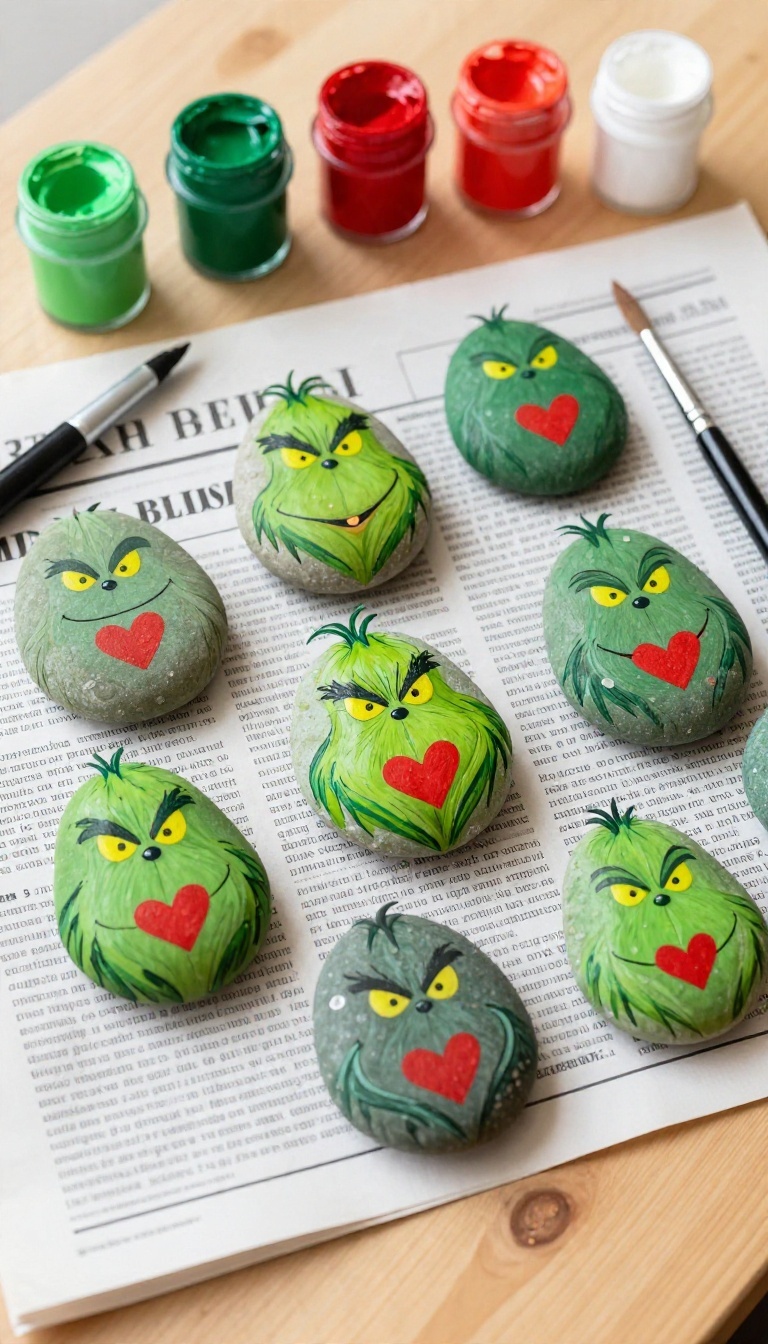
Painted rocks have quietly become one of the easiest crafts to pull off with kids, and they fit the Grinch theme perfectly. A smooth stone becomes a little green face, a red heart, or a short quote in about fifteen minutes. Then you get to hide them around town or slip them into a stocking for a surprise.
It's the kind of project that costs almost nothing and cleans up in one rinse.
Grab a bag of smooth river rocks from a craft store or scavenge a few on a walk. Wash and dry them fully so the paint sticks, then set out green acrylic paint, a fine brush, and a black marker for the details. The whole craft lives on one sheet of newspaper, which is the real selling point here.
Kids can go simple with a solid green rock and two yellow eyes, or get ambitious with the full Grinch face. Either way, the results look charming on a windowsill or tucked into a neighbor's mailbox.
What You'll Need
Smooth rocks, green acrylic paint, a small brush, and a black fine-tip marker cover the basics. Add red paint for hearts, white for eyes, and a sealer spray if you plan to hide them outside. Washable paint works fine for indoor rocks, but acrylic holds up better in the weather.
Simple Faces And Quotes
The easiest version is a green base with two yellow eyes and a crooked smirk drawn in marker. Older kids can add the classic furrowed brow or a tiny Santa hat. For a quicker option, paint the rock green and write a short quote like "You're a mean one" or "Merry Grinchmas" in white paint pen.
Hide Them Or Gift Them
Once the paint dries, hide the rocks around the neighborhood for strangers to find, or leave one on a friend's porch. They also fit neatly into a stocking or a small gift bag. A quick coat of sealer keeps them looking fresh if they end up outside in the rain.
9. Grinch Treat Bags for Classmates
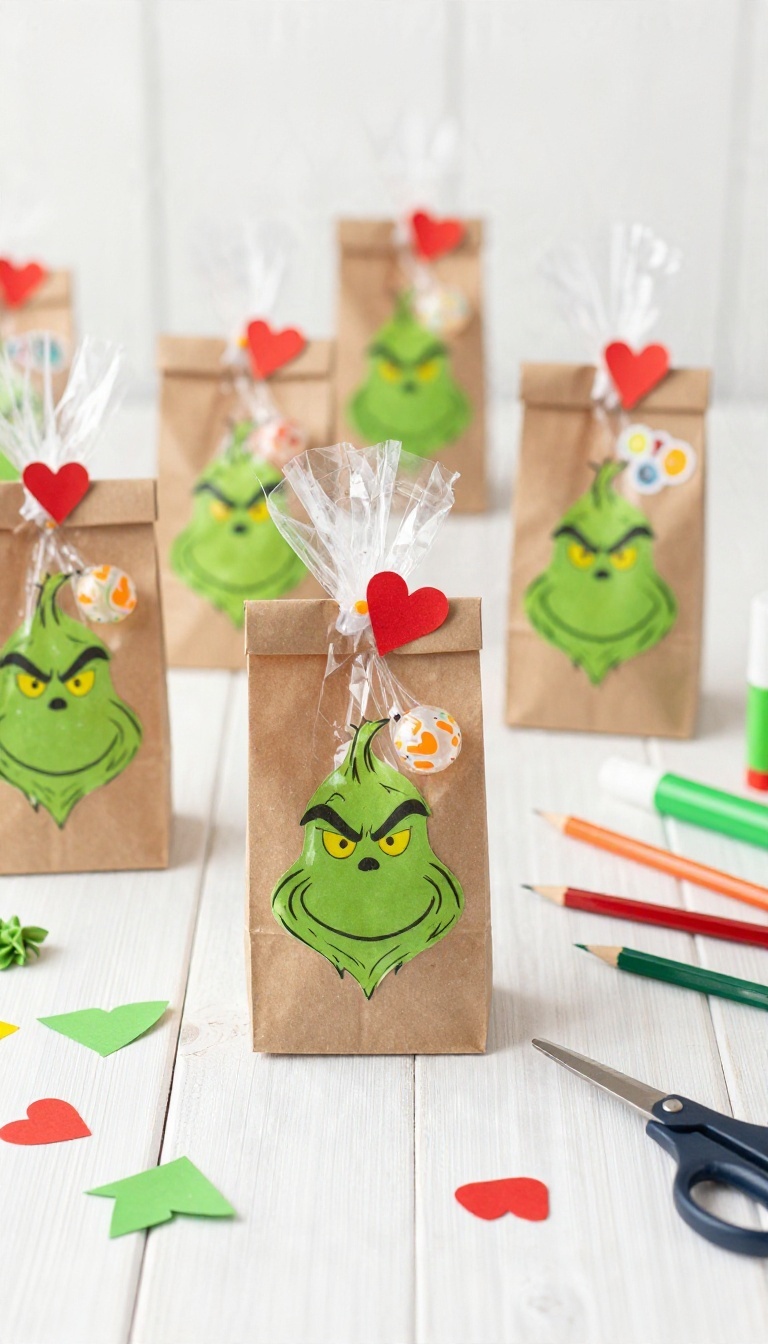
Class parties sneak up fast, and suddenly you need something for twenty-five kids by Friday morning. Grinch treat bags solve that problem without a trip to a specialty shop. Paper bags or clear cellophane get a green face and a red heart, then you fill them with candy or tiny toys.
The whole thing works as a party favor, a classroom handout, or a small gift for neighbors. Best of all, you can make them assembly-line style while watching a movie. Set up a station, hand everyone a job, and the pile grows fast.
Treat bags do double duty here. They look festive on a table and they hold something kids actually want to take home. The Grinch angle gives a plain paper bag a personality in about two minutes.
You do not need fancy supplies. Most of what you need is already in a drawer or a dollar store run away.
Pick Your Bag And Fill It
Brown paper lunch bags are the cheapest and sturdiest option. They stand up on their own and hold a decent amount of candy without tearing. Clear cellophane bags show off the contents, which kids love, but they wrinkle easily and need a little more care.
For fillings, stick to things that survive a backpack ride home. Wrapped candy, pencils, stickers, and small bouncy balls all work. Skip chocolate if the bags will sit in a warm classroom all day.
Make The Grinch Face
Cut a simple face shape from green construction paper, or paint the top half of a brown bag with green washable paint and let it dry flat. Add two small eyes and a crooked smirk with a black marker. For the heart, cut a small red heart from paper or use a heart sticker.
Glue it near the top or let it peek out from the bag opening. A tiny heart on the outside ties the whole theme together without extra work.
Speed Up The Assembly Line
Cut all the faces and hearts first, then set up stations. One person glues faces, another adds hearts, and a third handles filling. This keeps the process moving and stops anyone from getting bored halfway through.
Fold the top of each bag over once and add a sticker or a piece of tape to seal it. Write names on the front if you are handing them out to specific classmates. Stack finished bags in a box so they stay flat on the ride to school.
10. Grinch Wreath for the Front Door
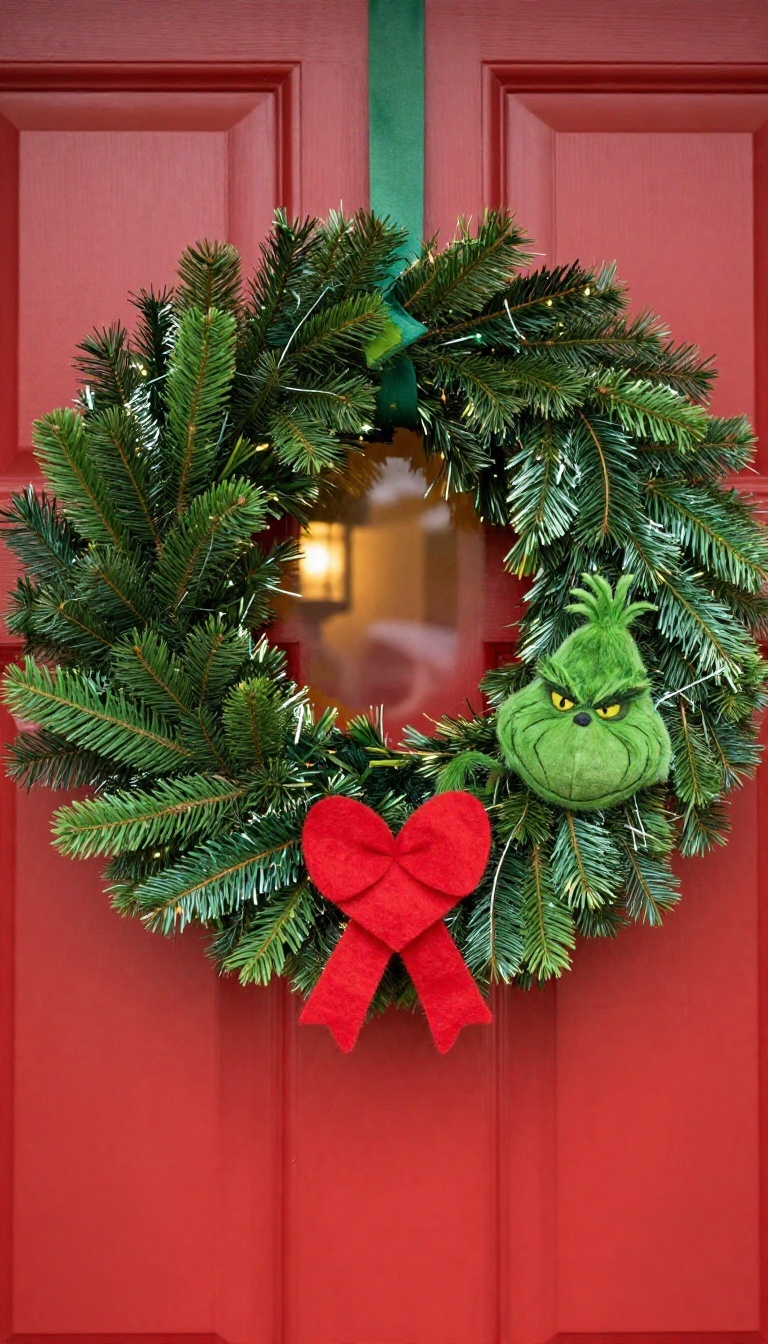
A wreath on the front door sets the tone before anyone steps inside, and a Grinch version does it with a little attitude. Green tinsel or yarn wrapped around a simple wreath form gets you most of the way there, and the finishing touches are where the personality shows up. The best part is the price.
Store-bought character wreaths can run forty dollars or more, while this one comes together for a fraction of that using supplies from the craft store or your own stash. It also gives you a project that works solo on a quiet evening or as a group craft with older kids who can handle the wrapping.
Start with a foam or wire wreath form, whichever you can find cheaply. Foam gives you a fuller, rounder look, while wire keeps things light and lets you pack on more tinsel without the whole thing sagging. Either works fine, so pick based on what's on sale.
Green tinsel is the fastest route. Yarn takes longer but looks softer and more handmade, which some people prefer. You can also mix the two if you want texture in different spots.
Wrapping The Form
For tinsel, tie one end to the form and start winding, pushing each pass close to the last so no bare spots show through. Work your way around in a steady rhythm and tuck the tail into the back when you finish. Yarn takes more patience.
Wrap tightly in one direction, then go back over it in the opposite direction if you want full coverage. A little hot glue at the start and end keeps everything locked in place.
Adding The Face
Cut a heart from red felt or craft foam and glue it near the bottom center. That's the Grinch's softened heart, and it anchors the whole design. For the grin, cut a crooked smile from yellow or green felt and attach it just above the heart.
A couple of small white circles for eyes and a green pom-pom nose finish the look. Keep the features slightly off-center and lopsided, since a perfectly symmetrical Grinch misses the point.
Hanging It Up
Attach a loop of ribbon or twine to the back before you hang it. A wide red or green ribbon bow at the top adds a nice finishing touch and hides where the wrapping started. If the wreath will sit outside, give the felt pieces a light coat of outdoor sealant so rain doesn't ruin them.
A covered porch is the safest spot, but a sealed wreath handles a normal December fine.
11. Grinch Movie Night Craft Station
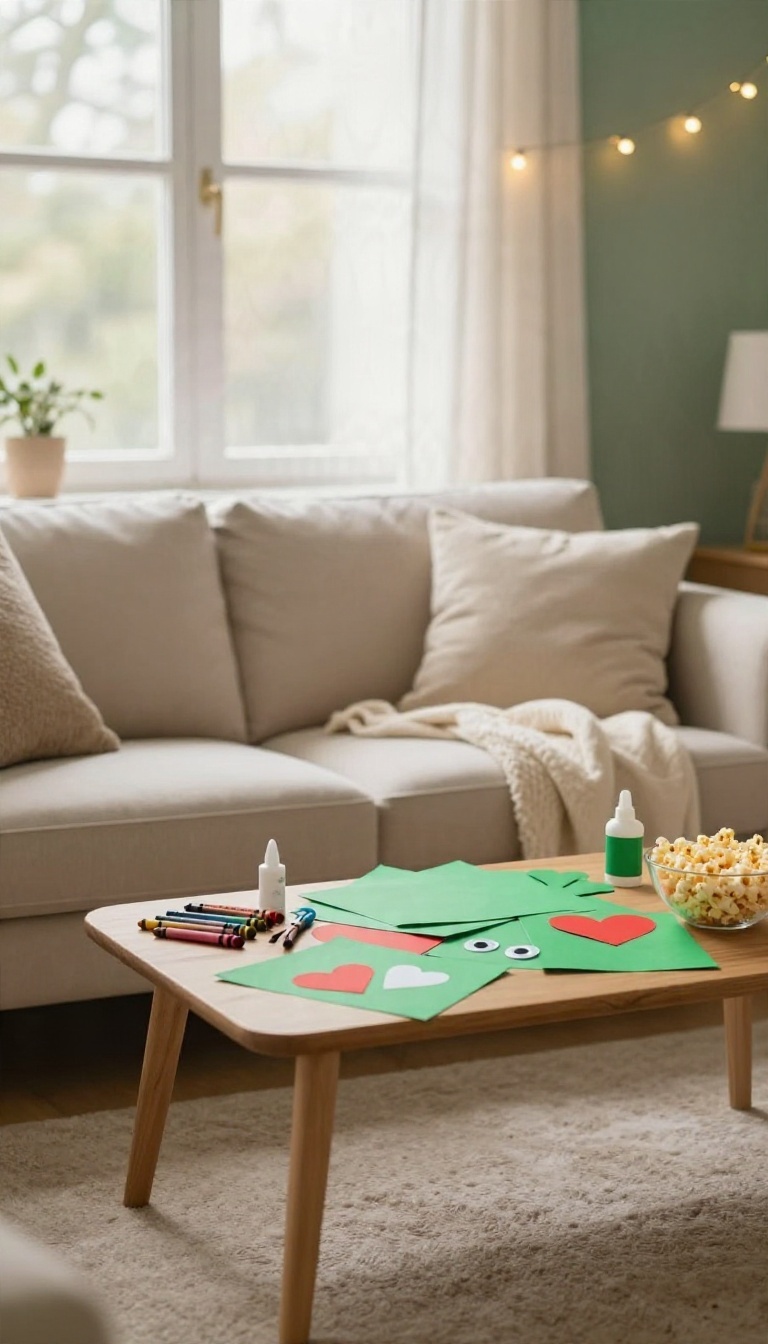
Movie night gets a lot more fun when there's something to do with your hands besides reaching for popcorn. A small craft station next to the couch keeps everyone busy while the Grinch schemes on screen, and nobody has to pause the film to hunt down supplies. Set it up once, and it becomes the easiest tradition you'll keep all season.
The beauty here is flexibility. Kids can drift over during slow scenes, make a heart or a little green ornament, then wander back to the blanket. You're not running a formal craft class, just leaving out the goods and letting the evening unfold.
Pick a low table or a sturdy tray that fits near the TV but out of the main walking path. You want it close enough that people can reach it without getting up constantly, but not so close that someone knocks over the glue during a jump scare. Keep the supply list short and forgiving.
Green paper, markers, a bag of paper hearts, glue sticks, and maybe some googly eyes cover almost everything. Add scissors for older kids and skip anything that needs drying time or careful assembly. ### What to Put on the Table Stick to materials that don't need supervision or a long cleanup. Construction paper, cardstock, crayons, and glue sticks are the workhorses here.
A few sheets of green and red paper let people cut out their own shapes without asking for help. Paper hearts do a lot of the heavy lifting. They're pre-cut, cheap, and instantly read as Grinch-themed when paired with green.
Toss in a handful of cotton balls for fuzzy trim and a small cup of markers for faces and messages. Skip glitter and paint for this one. They look great in photos but turn a relaxed movie night into a cleanup project.
Save the messy stuff for a daytime craft session. ### Keeping Hands Busy Without Missing the Movie The goal is low-stakes crafting, so don't hand out instructions. Let people make whatever they want, whether that's a green paper heart ornament, a little Grinch face, or a card for a neighbor. Print a few simple shape templates ahead of time if you have younger kids who get frustrated cutting freehand.
A basic heart outline and a Grinch head silhouette are enough to get them started. Keep a small basket nearby for finished projects so they don't get crushed on the table. A hole punch and some yarn let people turn their creations into ornaments on the spot. ### Making It a Tradition Once you've done this a couple of times, the setup gets faster every year.
Store the supplies together in one bin labeled for movie night, and you'll be ready in five minutes flat. Snap a photo of the finished crafts each December. Watching the collection grow becomes its own little ritual, and the kids start asking when movie night is happening.
You can also let each person add one piece to a shared poster or paper tree on the wall. By the end of the movie, you've got a group project and a reason to do it again next year.
What To Put On The Table
Stick to materials that don't need supervision or a long cleanup. Construction paper, cardstock, crayons, and glue sticks are the workhorses here. A few sheets of green and red paper let people cut out their own shapes without asking for help.
Paper hearts do a lot of the heavy lifting. They're pre-cut, cheap, and instantly read as Grinch-themed when paired with green. Toss in a handful of cotton balls for fuzzy trim and a small cup of markers for faces and messages.
Skip glitter and paint for this one. They look great in photos but turn a relaxed movie night into a cleanup project. Save the messy stuff for a daytime craft session.
Keeping Hands Busy Without Missing The Movie
The goal is low-stakes crafting, so don't hand out instructions. Let people make whatever they want, whether that's a green paper heart ornament, a little Grinch face, or a card for a neighbor. Print a few simple shape templates ahead of time if you have younger kids who get frustrated cutting freehand.
A basic heart outline and a Grinch head silhouette are enough to get them started. Keep a small basket nearby for finished projects so they don't get crushed on the table. A hole punch and some yarn let people turn their creations into ornaments on the spot.
Making It A Tradition
Once you've done this a couple of times, the setup gets faster every year. Store the supplies together in one bin labeled for movie night, and you'll be ready in five minutes flat. Snap a photo of the finished crafts each December.
Watching the collection grow becomes its own little ritual, and the kids start asking when movie night is happening. You can also let each person add one piece to a shared poster or paper tree on the wall. By the end of the movie, you've got a group project and a reason to do it again next year.
FAQ
What age group are these Grinch crafts best for?
Most of them work for kids around ages 3 and up with some adult help, and several are simple enough for older kids and adults to do on their own. Adjust supplies like scissors and hot glue based on who's crafting.
Do I need special supplies for Grinch crafts?
Not really. Green paint, paper, glue, red hearts, and a few basic craft items cover most of the list. A couple of projects use slime ingredients or melting chocolate, but everything is easy to find at a grocery or craft store.
Can I make these Grinch crafts as gifts?
Yes. Ornaments, treat bags, cocoa bombs, and painted rocks all make good small gifts for teachers, neighbors, or classmates. Just make sure anything with food is wrapped and labeled clearly.
How do I keep Grinch crafts from getting too messy with kids?
Cover the table, keep paint and glue on a tray, and set out a damp cloth before you start. Paper-based projects like garlands and handprint ornaments are the lowest-mess options if you want a quick cleanup.
When should I start making Grinch crafts in December?
Early December works well for decorations and ornaments so you can enjoy them all month. Food-based crafts like cocoa bombs are better closer to when you'll gift or use them, so they stay fresh.
Conclusion
Eleven Grinch crafts give you plenty of ways to fill December with green fur, crooked smiles, and a little mischief. Pick two or three that match your supplies and the ages at your table, then let the kids take the lead on the silly parts. Nothing here needs to look perfect.
A lopsided ornament or a smudged card still earns a spot on the fridge or the tree. Grab the glue, turn on the movie, and enjoy the mess while it lasts.