10 Patio Ideas on a Budget That Still Feel Pulled Together
A stylish patio doesn't have to come with a designer price tag. With a little creativity and some weekend effort, you can transform your outdoor space into a cozy retreat that looks intentional and put-together.
The secret is focusing on smart, low-cost upgrades that make a big visual impact. From clever paint tricks to repurposed materials, these ten budget-friendly ideas will help you create a patio that feels polished without breaking the bank.
Get ready to roll up your sleeves and give your outdoor area a fresh new look.
1. Use Painted Concrete as a Faux Rug
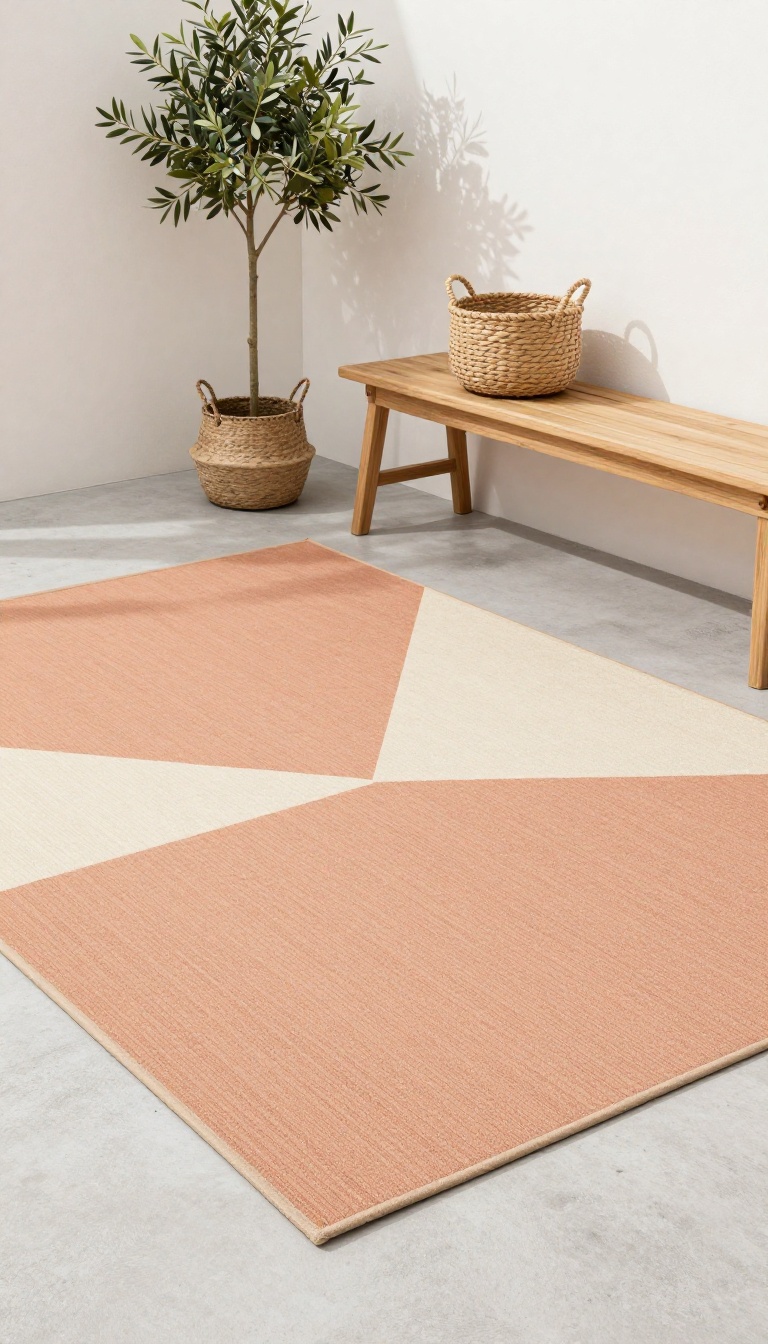
Outdoor rugs can cost a pretty penny, and they often end up faded or mildewed after a single season. Instead, turn your concrete patio floor into a permanent, custom rug with paint. It's a budget-friendly project that adds color and pattern, and it's as durable as the concrete itself.
Painting a faux rug on concrete is easier than it sounds. With a few supplies and a steady hand, you can create a look that's both stylish and practical. The best part?
You can change the design whenever you want, though this paint job is built to last.
Why Paint Instead Of Buy?
Real outdoor rugs are pricey, especially in larger sizes. They also trap moisture and dirt, requiring constant cleaning. Painted concrete eliminates those problems.
It's a one-time cost that never fades, never blows away in the wind, and cleans up with a simple hose-down.
Choosing The Right Paint And Tools
For this project, you'll need concrete paint or a high-quality exterior acrylic paint. Make sure it's meant for floors. You'll also need a stencil (or make your own with cardboard), painter's tape, a roller, and a small brush for touch-ups.
If you want a more intricate pattern, use multiple stencils.
Step-by-step Painting Process
Start by cleaning the concrete thoroughly and letting it dry. Apply a concrete primer if needed. Tape off the area where you want the rug.
Position your stencil and use a roller to apply the paint, going over it lightly to avoid drips. Move the stencil, repeating the pattern. Once dry, seal it with a concrete sealer to protect it from weather and foot traffic.
2. Build a Pallet Sofa with Cushions
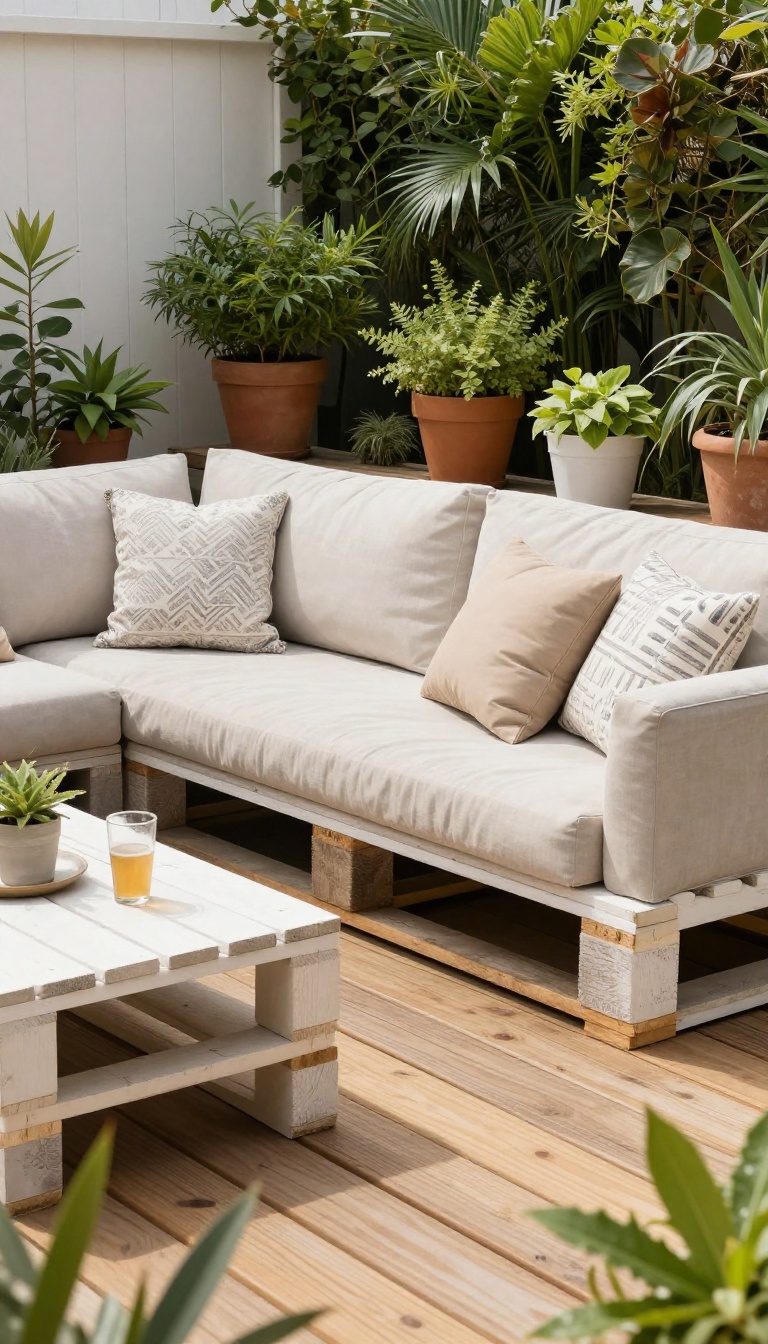
If you're handy with a drill and don't mind a little elbow grease, a pallet sofa is one of the most rewarding DIY projects you can tackle. Pallets are often free or very cheap, and with a bit of sanding and staining, they can look surprisingly chic. Add some plush outdoor cushions, and you've got a custom seating area that costs a fraction of what you'd pay at a furniture store.
Start by sourcing sturdy, heat-treated pallets (look for the HT stamp) to avoid harmful chemicals. Sand them down to prevent splinters, then apply a weatherproof sealant or paint to match your patio's vibe. Stack two pallets for the base and one for the backrest, securing them together with screws.
For extra comfort, add a wooden top or a piece of plywood to create a smooth surface for cushions. Finish with weather-resistant cushions and throw pillows—you'll have a cozy spot that looks like it cost a fortune.
Finding And Prepping Pallets
Check local hardware stores, warehouses, or online marketplaces for free pallets. Inspect each one for damage and choose those in good shape. Sand thoroughly, especially the top edges, and wipe away dust.
Apply a coat of exterior primer and paint or a wood stain with UV protection to keep it looking fresh.
Assembling The Sofa Frame
Lay two pallets side by side for the seat, and attach a third pallet vertically for the backrest. Use long screws or brackets to secure them firmly. If you want armrests, cut a pallet in half and attach one on each side.
For a more finished look, add a wooden top or a piece of plywood to create a smooth surface for cushions.
Cushion And Styling Tips
Measure your pallet dimensions and order outdoor cushions that fit snugly. Look for high-density foam with water-resistant covers. Add a few throw pillows in complementary colors to tie the look together.
Place a low coffee table in front made from another pallet or a repurposed crate to complete the setup.
3. Add String Lights for Instant Ambiance
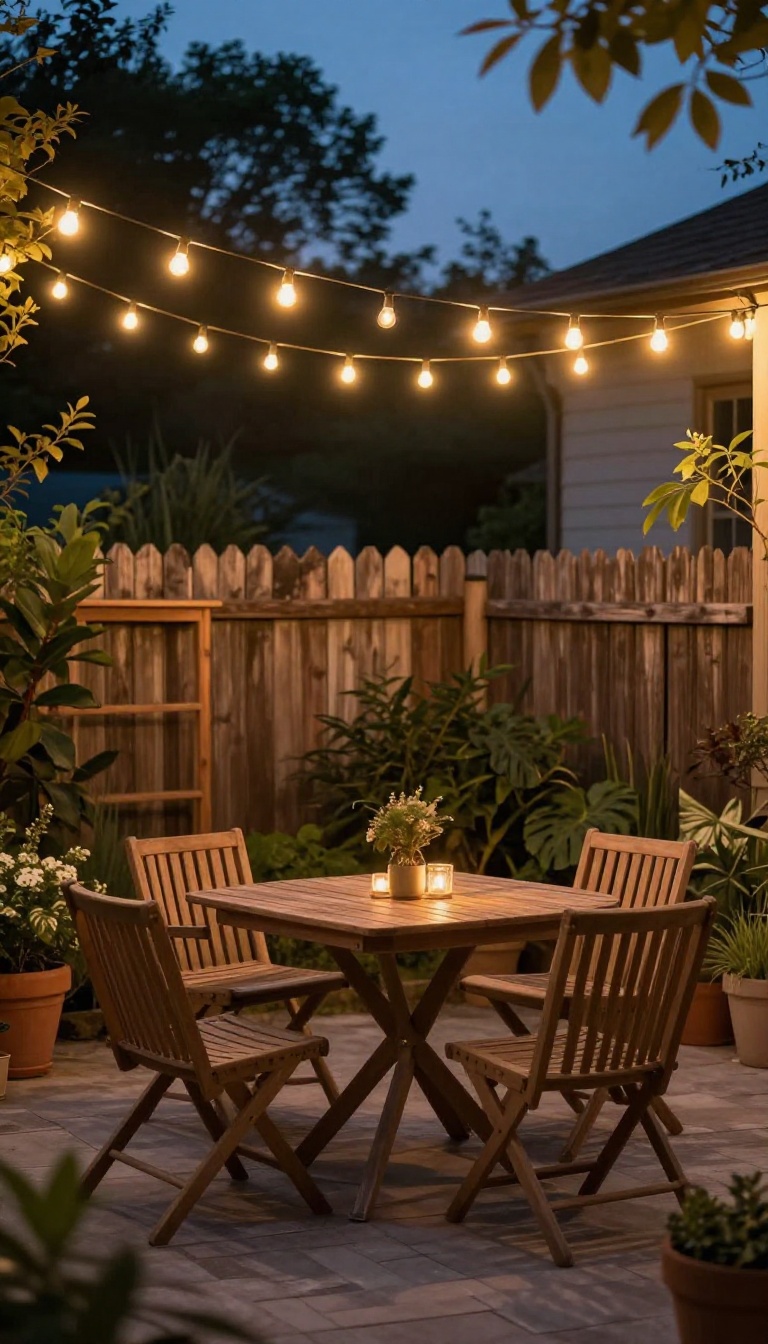
Few things transform a patio as quickly as warm, glowing string lights. They soften the space, create a cozy vibe, and make even a basic setup feel inviting after sunset. The best part?
You don't need an electrician or a big budget to pull it off. Solar-powered options have gotten surprisingly good, so you can skip the extension cords and just stick them in the ground or along a fence. Whether you drape them overhead or wrap them around a railing, the effect is immediate and magical.
String lights do more than just illuminate—they set the mood. They turn a plain patio into a place where people want to linger, and they cost far less than permanent lighting fixtures. Plus, they're easy to install and remove, so you can change the look whenever you want.
Choose The Right Bulb Style
Not all string lights look the same. Bigger, Edison-style bulbs give off a warm, vintage glow, while small fairy lights feel delicate and whimsical. For a classic outdoor look, go with S14 or C9 bulbs—they're larger and cast a soft, even light.
If you want something subtler, try mini LED lights that wrap around railings or plants. Color temperature matters too. Look for 'warm white' or 'soft white' bulbs instead of cool white, which can feel harsh and clinical.
Warm tones make the space feel cozy and inviting.
Hang Them Without Drilling
You don't need to mount permanent hooks to enjoy string lights. Use removable adhesive hooks, zip ties, or even heavy-duty magnets if you have metal posts. For a freestanding option, place two tall planters or shepherd's hooks at opposite ends and string the lights between them.
If you're renting, these no-drill methods are perfect—they come down without leaving marks. Just make sure whatever you use is rated for outdoor use and can handle the weight of the lights.
Layer With Solar Or Plug-in
Solar string lights are the most budget-friendly because they cost nothing to run. They charge during the day and turn on automatically at dusk. Just make sure the solar panel gets enough direct sunlight—otherwise, they'll be dim or won't last through the evening.
Plug-in lights are brighter and more reliable, but they need an outdoor outlet. If you have one, use a timer to control when they turn on. That way, you don't have to remember to switch them off, and you save energy.
4. Repurpose Old Furniture with Spray Paint
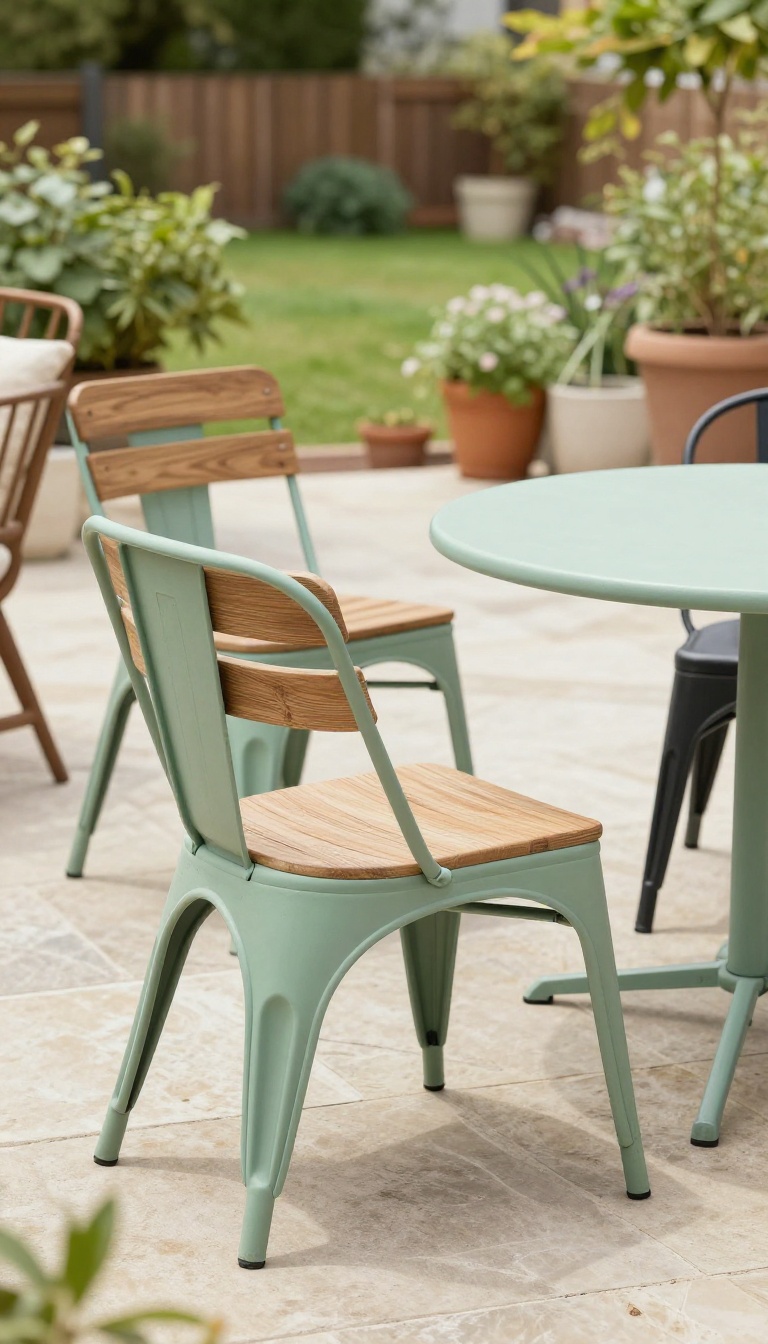
Before you drag that wobbly chair to the curb, consider a makeover. A few cans of spray paint can turn mismatched patio furniture into a coordinated set that looks custom and chic. It’s one of the quickest, cheapest ways to refresh your outdoor space, and the results can be surprisingly polished.
Spray paint is a budget-friendly miracle worker. It adheres well to metal, plastic, and wood, and it dries fast, so you can finish a whole chair in an afternoon. The key is to choose a cohesive color palette—think matte black, sage green, or warm terracotta—and stick with it across all your pieces.
This instantly ties everything together, making your patio feel intentional rather than haphazard.
Pick A Palette That Pops
Start by deciding on a color scheme that complements your home’s exterior or the natural surroundings. For a calm, coastal vibe, go with soft blues and whites. Craving a bolder look?
Try a deep navy or a cheerful mustard. Once you have your colors, gather all the furniture you want to repaint—even if the styles differ, the unified color will make them look like a set.
Prep Like A Pro
Spray paint only looks good if the surface is ready. Clean each piece thoroughly with soap and water to remove dirt and grime. Lightly sand any glossy or flaking areas, then wipe down with a tack cloth.
Apply a primer made for the material (metal, plastic, or wood) to ensure the paint sticks and lasts. Work in a well-ventilated area, and lay down a drop cloth to protect your patio.
Spray, Dry, And Repeat
Hold the can about 8–12 inches from the surface and use sweeping, even strokes to avoid drips. Apply several thin coats, waiting about 15 minutes between each. For best results, do this on a dry day with low humidity.
Once you’ve achieved full coverage, let the piece cure for at least 24 hours before using it. Then, add some new cushions or pillows to complete the transformation.
5. Create a Vertical Garden with Pallets or Gutters
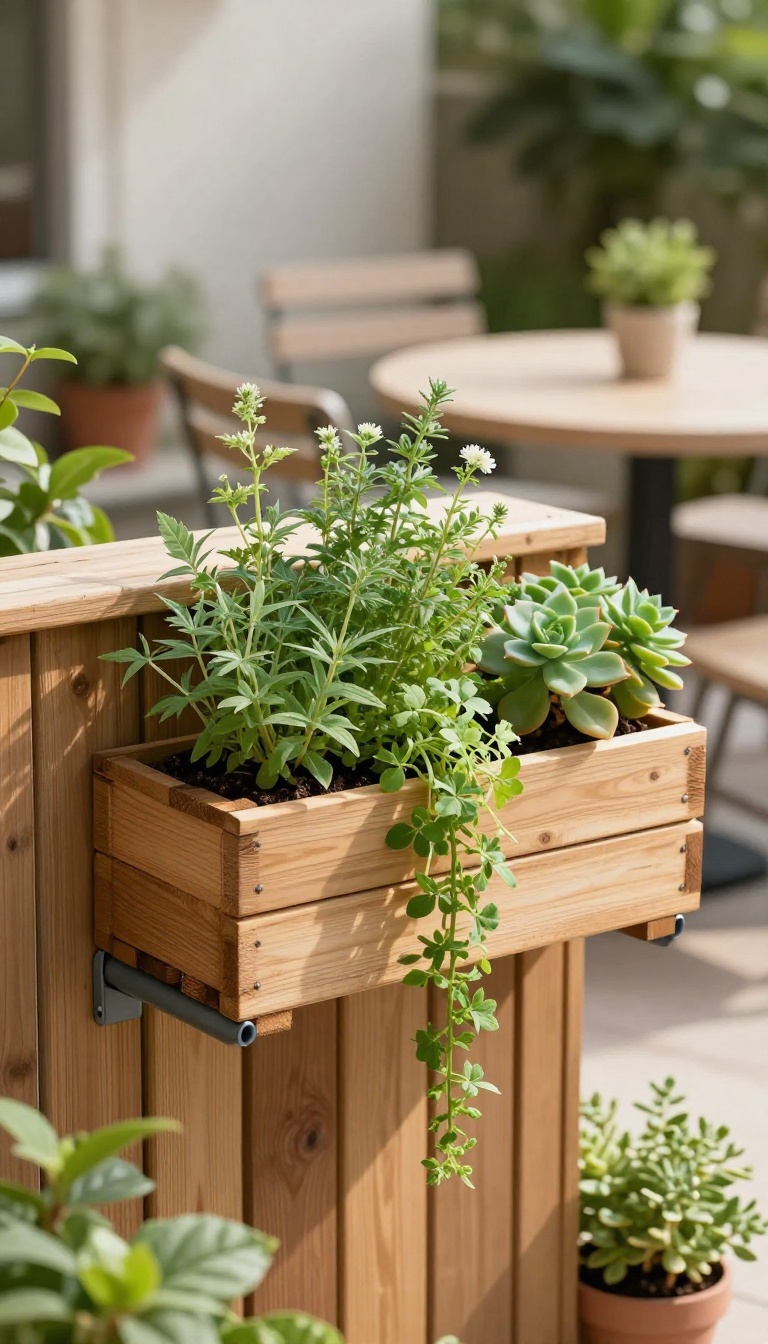
If your patio is short on square footage, look up. Vertical gardens let you grow a surprising amount of greenery without sacrificing floor space. Using reclaimed pallets or inexpensive gutters, you can build a living wall that adds privacy, color, and fresh herbs or flowers right outside your door.
Vertical gardens are a clever way to bring life to a small patio. They draw the eye upward, making the space feel larger and more lush. Plus, they're a budget-friendly DIY project that reuses materials you might already have or can find cheaply.
Why Go Vertical?
When floor space is limited, walls and fences become valuable real estate. A vertical garden not only maximizes your growing area but also softens hard surfaces and creates a natural backdrop. It's an easy way to add greenery without crowding your seating or walkways.
Pallet Planter How-to
Start with a sturdy wooden pallet. Sand it down to avoid splinters, then staple landscape fabric to the back and bottom to hold soil. Fill each slat opening with potting mix and plant herbs like basil, mint, or trailing flowers.
Lean the pallet against a wall or secure it to a fence, and water regularly.
Gutter Garden Alternative
Vinyl gutters make excellent narrow planters. Cut them to desired lengths, cap the ends, and drill drainage holes along the bottom. Mount them horizontally on a wall or fence at different heights for a modern look.
They're perfect for shallow-rooted plants like lettuce, strawberries, or succulents.
Choosing The Right Plants
Pick plants that thrive in containers and suit your light conditions. For sunny spots, go with cherry tomatoes, peppers, or petunias. In shade, try ferns, hostas, or impatiens.
Mixing herbs and flowers adds both fragrance and visual interest.
6. Use Outdoor Curtains for Privacy and Shade
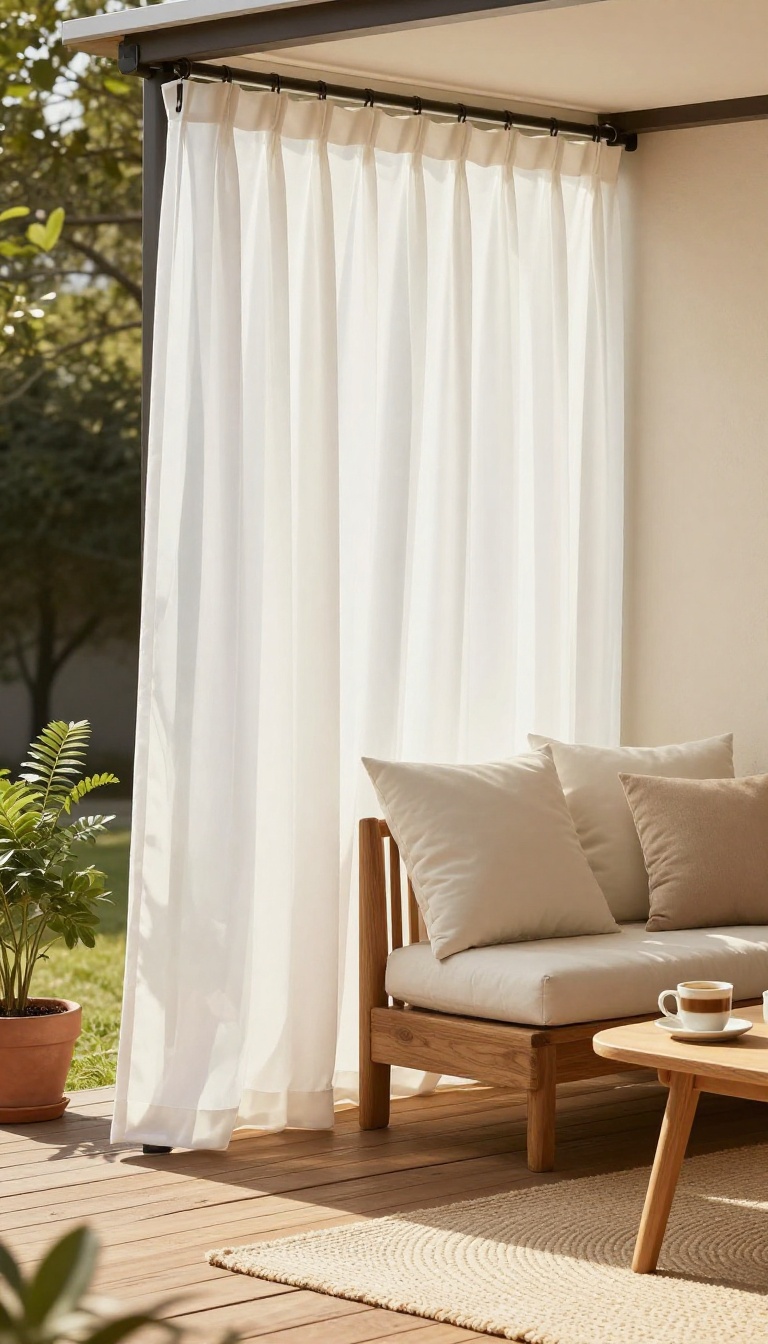
When you want to carve out a cozy nook without building walls, outdoor curtains are a game-changer. They soften the space, filter harsh sunlight, and give you a little breathing room from nosy neighbors. Best of all, they're one of the most affordable updates you can make—especially if you're willing to DIY.
Choose The Right Fabric
Look for fabrics labeled as outdoor or weather-resistant, like polyester or acrylic blends. They won't fade or mildew as quickly as indoor curtains. If you're on a tight budget, canvas drop cloths from the hardware store work surprisingly well—just hem the edges or use fabric glue to prevent fraying.
Hang Them Right
You can mount a tension rod between two walls or posts, or string a sturdy wire across the space. For a more permanent feel, install a simple curtain rod with outdoor-rated brackets. Make sure the rod is high enough to create a sense of height, and let the curtains pool slightly on the ground for a relaxed, elegant look.
Style And Maintenance
Keep the look light and breezy with white or soft neutral tones. They reflect heat and make the area feel larger. When not in use, tie them back with decorative rope or fabric ties.
At the end of the season, take them down and wash them gently—most outdoor fabrics can handle a machine wash on a delicate cycle.
7. Make a Fire Pit from a Washing Machine Drum
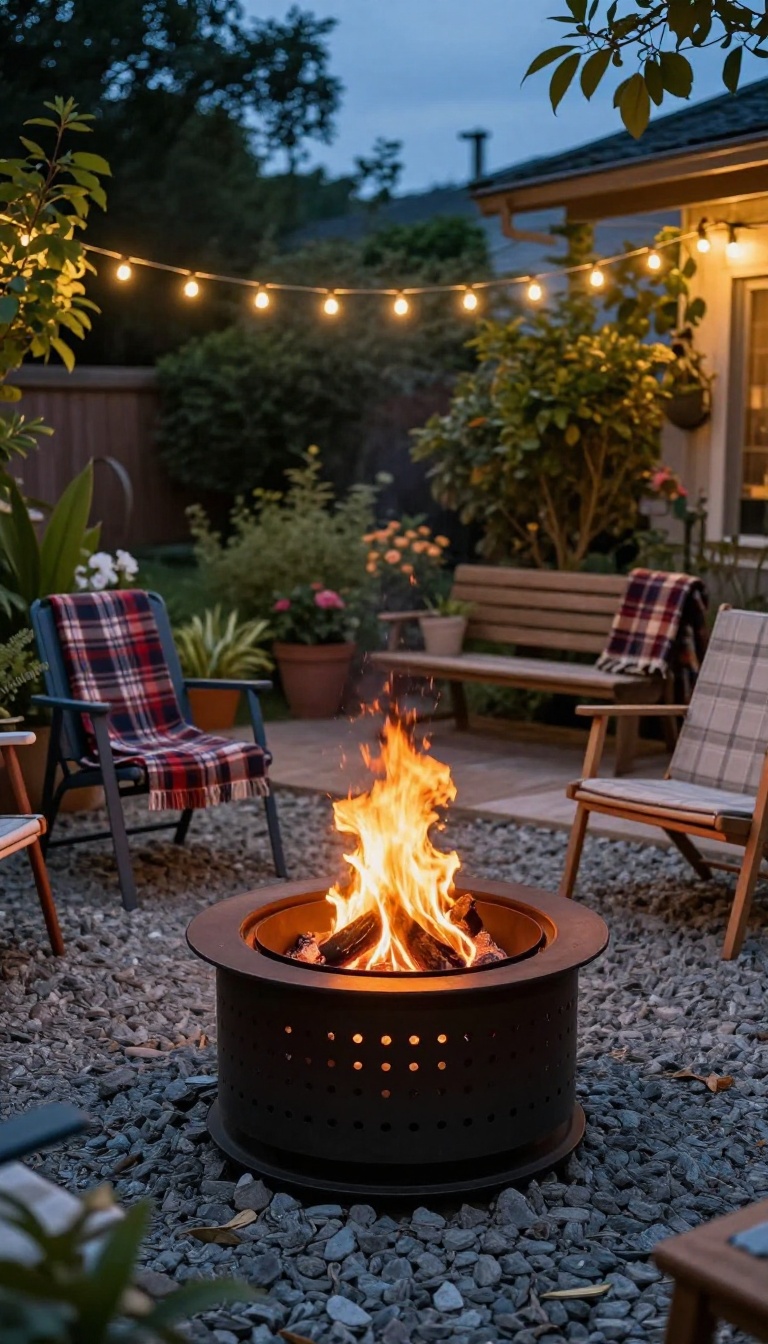
That old washing machine sitting in your garage might just be the centerpiece your patio needs. With a little creativity, you can turn its drum into a portable fire pit that adds warmth and a cool industrial vibe to your outdoor space. It's a weekend project that's more about repurposing than perfection.
Plus, it gives you a reason to gather around a crackling fire without spending a fortune on a store-bought pit.
Why A Washing Machine Drum Works
The stainless steel drum is built to handle heat and rust, making it perfect for holding a fire. Its perforated sides allow airflow, which helps the fire burn efficiently. And because it's lightweight and has handles (if you keep them), you can move it around your patio with ease.
Best of all, you're giving new life to something that would otherwise end up in a landfill. It's a win for your wallet and the planet.
How To Build It
First, check with your local appliance repair shop or scrap yard – they often have old drums for free or just a few bucks. Once you have one, clean it thoroughly to remove any soap residue. Then, decide on a base: a simple metal stand or a few bricks will keep it stable and protect your patio surface.
You'll want to drill a few drainage holes in the bottom so rainwater doesn't pool. And if you're feeling fancy, you can add a metal mesh screen on top to keep sparks contained.
Safety And Placement Tips
Always place your fire pit on a non-flammable surface like concrete, pavers, or gravel. Keep it at least 10 feet away from your house, fences, and overhanging branches. And never leave the fire unattended – have a bucket of water or a hose nearby just in case.
Before you light it, check your local fire codes. Some areas have restrictions on open flames, so it's better to know the rules first.
8. Lay a Gravel or Pebble Floor
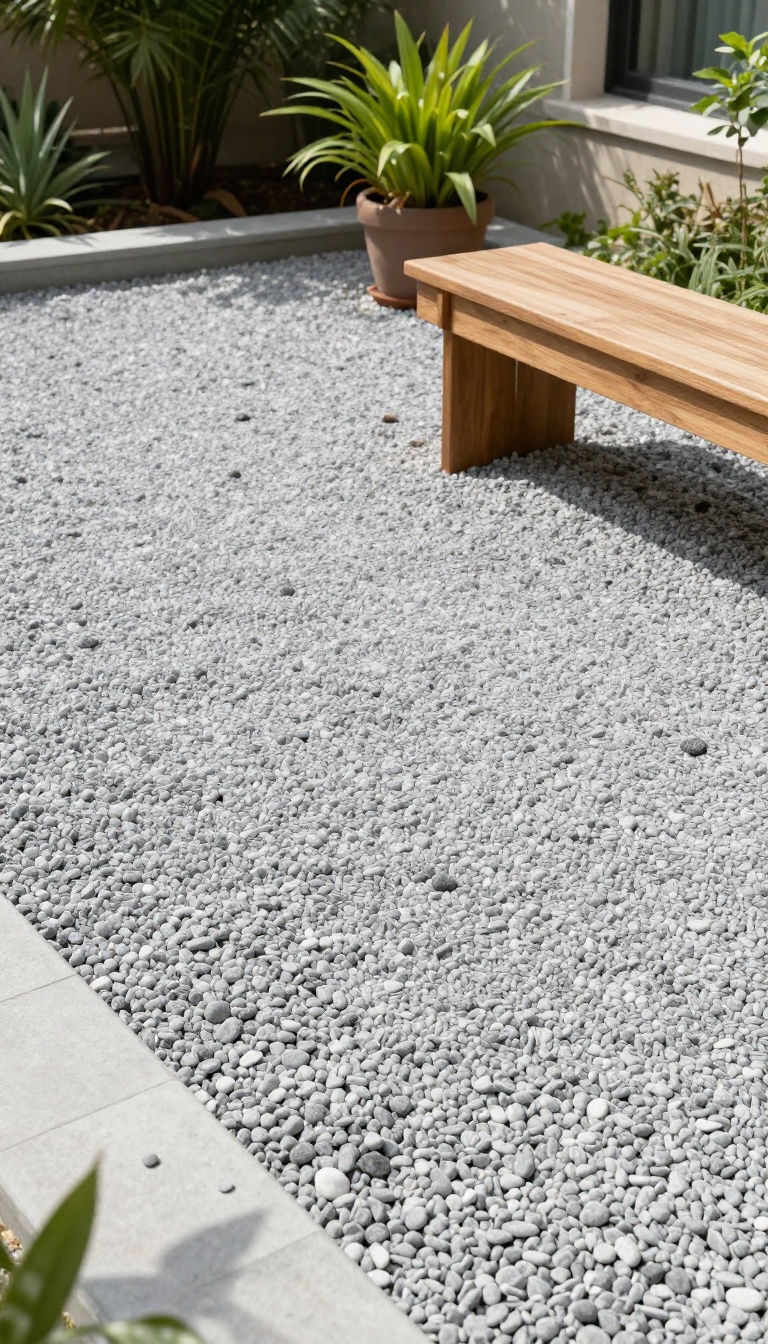
A cracked or stained concrete slab can drag down the whole vibe of your patio. Before you price out pavers or decking, consider a simpler fix: a layer of gravel or pebbles. It’s one of the most budget-friendly flooring options out there, and it can completely change the look and feel of your outdoor space in an afternoon.
The texture adds natural charm, and the best part? You don’t need any special skills to pull it off.
Gravel and pebble floors are a classic choice for budget patios because they’re affordable, easy to install, and forgiving. You can lay them directly over an existing hard surface to hide flaws, or use them to create a soft, permeable base for a new seating area. They also drain well, so you won’t have to worry about puddles after a rainstorm.
Plus, the variety of colors and sizes means you can match the look to your home’s style—from smooth river pebbles to crushed granite. Whether you’re refreshing an old slab or starting from scratch, this is a project you can tackle in a weekend with just a few tools and a trip to the landscape supply store.
Why Gravel Works For Patios
Gravel and pebbles are practical for outdoor floors because they’re porous, which means water seeps through instead of pooling on the surface. That helps prevent slippery spots and keeps your patio usable right after a storm. They also add a pleasant crunch underfoot that signals you’re in a relaxed, outdoor setting.
And because they come in so many shades—from warm golds to cool grays—you can easily find a tone that complements your furniture and landscaping. The natural, textured look feels intentional and inviting, without the high cost of stone or tile.
How To Install A Gravel Floor Over Concrete
If you have an existing concrete patio that’s seen better days, you can cover it with gravel without ripping anything out. Start by cleaning the surface thoroughly to remove dirt and debris. Then, lay down a weed barrier fabric to keep unwanted growth from poking through.
Next, edge the perimeter with metal or plastic edging to hold the gravel in place. Finally, spread a 2- to 3-inch layer of pea gravel or crushed stone evenly across the area. Rake it smooth, and you’re done.
This method hides cracks and stains instantly, and it’s reversible if you ever decide to change the look.
Creating A Gravel Patio From Scratch
For a brand-new patio area, gravel is a quick and affordable option. Mark out your desired shape with string and stakes, then remove the top layer of grass or soil to a depth of about 4 to 6 inches. Fill the base with a few inches of crushed stone for stability, then add a layer of weed barrier.
Top it off with pea gravel or pebbles, and rake it level. This approach works great for creating a seating area under a tree or a path that leads to a garden. Just be sure to choose gravel that’s comfortable to walk on—smaller, rounded pebbles are easier on bare feet than sharp-edged crushed rock.
9. Add a Thrifty Outdoor Bar Cart
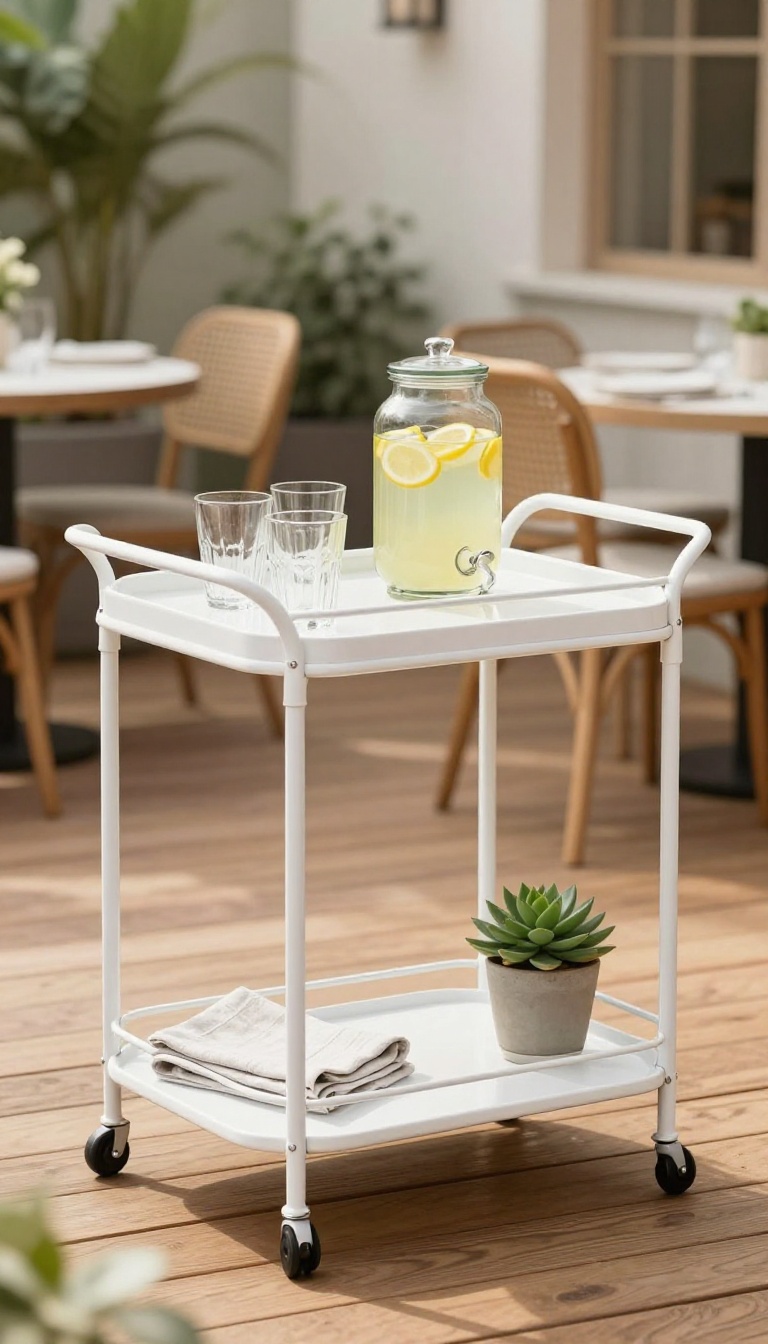
A bar cart isn't just for indoor entertaining. Roll one outside and you've got an instant drink station that keeps everything within arm's reach. The best part?
You don't need to spend a fortune to get that stylish look.
When you're hosting a backyard barbecue or just enjoying a quiet evening on the patio, a dedicated spot for drinks and snacks makes everything feel more organized and special. A vintage cart or trolley found at a thrift store or garage sale can be transformed with a little paint and some creativity. Not only does it add charm, but it also provides practical storage and serving space.
Where To Find Your Cart
Start by checking local thrift stores, flea markets, and online marketplaces like Facebook Marketplace or Craigslist. Look for sturdy carts with wheels that roll smoothly. Even if the finish is worn or dated, you can easily update it with a fresh coat of spray paint or chalk paint.
Don't overlook metal carts, wooden trolleys, or even old tea carts—they all have potential.
Give It A Fresh Look
Once you've found your cart, clean it thoroughly and sand any rough spots. Choose a color that complements your patio decor—think crisp white, cheerful yellow, or a bold navy. Spray paint works well for metal, while chalk paint is great for wood.
Add new hardware or drawer pulls for an extra touch. Let it dry completely before moving it outside.
Style And Stock It
Place your bar cart in a convenient spot, perhaps near your seating area or grill. Stock it with glasses, a drink dispenser, or a cooler for beverages. Add a tray for snacks, some napkins, and maybe a small potted herb or a string of fairy lights for ambiance.
You can also hang a small chalkboard on the side for drink specials or welcome messages.
Make It Work Year-round
During cooler months, bring the cart under a covered patio or into a sunroom. You can repurpose it as a coffee station or a place to display seasonal decor. With wheels, it's easy to move around as needed.
This versatile piece adds function and style without taking up permanent space.
10. Incorporate Potted Plants for Greenery
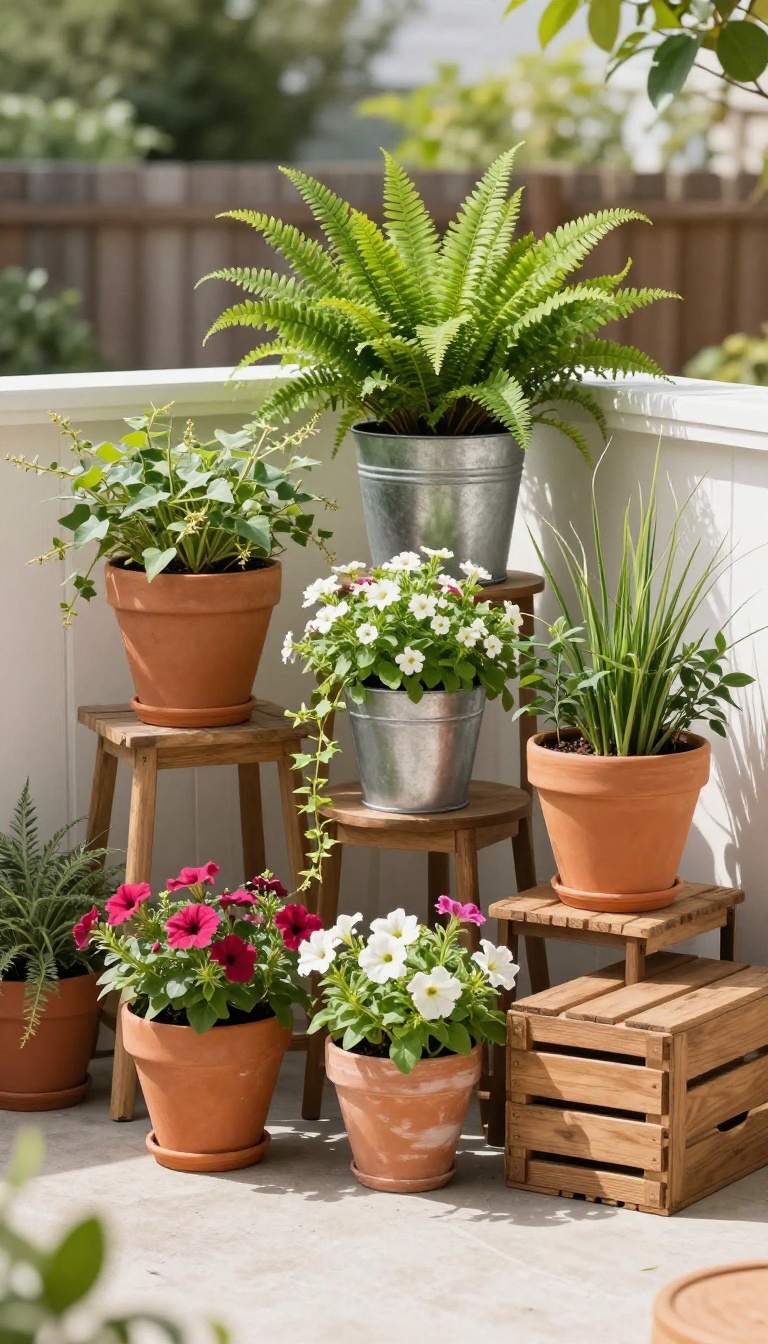
Plants are the quickest way to breathe life into any patio, and they don't have to cost a fortune. By grouping pots of varying heights and textures, you can create a lush, layered look that feels curated and calm. Choose low-maintenance varieties like succulents, ferns, or trailing vines that thrive with minimal fuss.
Potted plants are a budget-friendly way to add color, texture, and privacy to your patio. The trick is to arrange them in clusters rather than scattering single pots. Mix tall plants like ornamental grasses with trailing types like ivy, and fill in with bushy ferns or colorful annuals.
Use pots in complementary colors or materials—terra cotta, ceramic, or even repurposed buckets—to tie the look together. Grouping pots on steps, shelves, or plant stands creates visual interest and makes the space feel intentional.
Choose The Right Plants
Stick to low-maintenance options that thrive in your climate. Succulents and cacti are perfect for sunny spots and need little water. Ferns and hostas love shade and add a soft, airy feel.
Herbs like basil, mint, and rosemary are both pretty and practical—you can snip fresh leaves for cooking. Consider mixing a few flowering plants like petunias or marigolds for a pop of color that lasts all season.
Arrange For Maximum Impact
Instead of lining pots in a row, group them in odd numbers (three or five) at different heights. Use plant stands, overturned pots, or wooden crates to elevate some plants. Place taller plants at the back or corners, with shorter ones in front.
This creates depth and makes the arrangement look fuller. Also, think about traffic flow—leave clear paths so the space feels open and inviting.
Thrifty Pot Ideas
You don't need expensive planters. Thrift stores, garage sales, and dollar stores often have cheap pots that you can paint or distress for a custom look. Repurpose tin cans, old buckets, or even wooden wine boxes with drainage holes added.
Get creative with containers—anything that holds soil and drains well can become a planter. Painting pots in a unified color scheme instantly makes mismatched containers look cohesive.
Maintenance Made Simple
Keep your potted plants healthy with minimal effort. Use a good potting mix that drains well, and add a layer of mulch or pebbles on top to retain moisture and prevent weeds. Water thoroughly but less frequently—most plants prefer to dry out between waterings.
Fertilize once a month with a balanced liquid fertilizer to keep them lush. Deadhead spent flowers regularly to encourage new blooms.
FAQ
What is the cheapest way to upgrade a patio?
The cheapest way is to focus on cleaning, painting, and adding affordable decor like string lights and potted plants. These small changes can make a big impact without a big budget.
How can I make my patio look expensive on a budget?
Use a cohesive color scheme, invest in a few high-impact items like outdoor curtains or a painted floor, and mix textures with cushions and plants. Avoid clutter and keep the space tidy.
Are pallet furniture projects worth it?
Yes, pallet furniture is budget-friendly and customizable. Just make sure to sand and seal the wood properly to withstand weather and ensure safety.
What are some low-maintenance plants for a patio?
Succulents, ferns, and ornamental grasses are great low-maintenance options. They require minimal watering and thrive in containers.
How do I protect my patio furniture from the weather?
Use weather-resistant materials or apply a protective sealant. Store cushions indoors when not in use, and consider using covers during harsh weather.
Conclusion
You don't need a huge budget to make your patio feel intentional and welcoming. Start with one or two ideas that fit your space and lifestyle, then build from there as time and money allow.
Even small touches like string lights or a fresh coat of paint can change the whole vibe. Pick a project that excites you, gather a few supplies, and enjoy the process of making your outdoor spot truly yours.