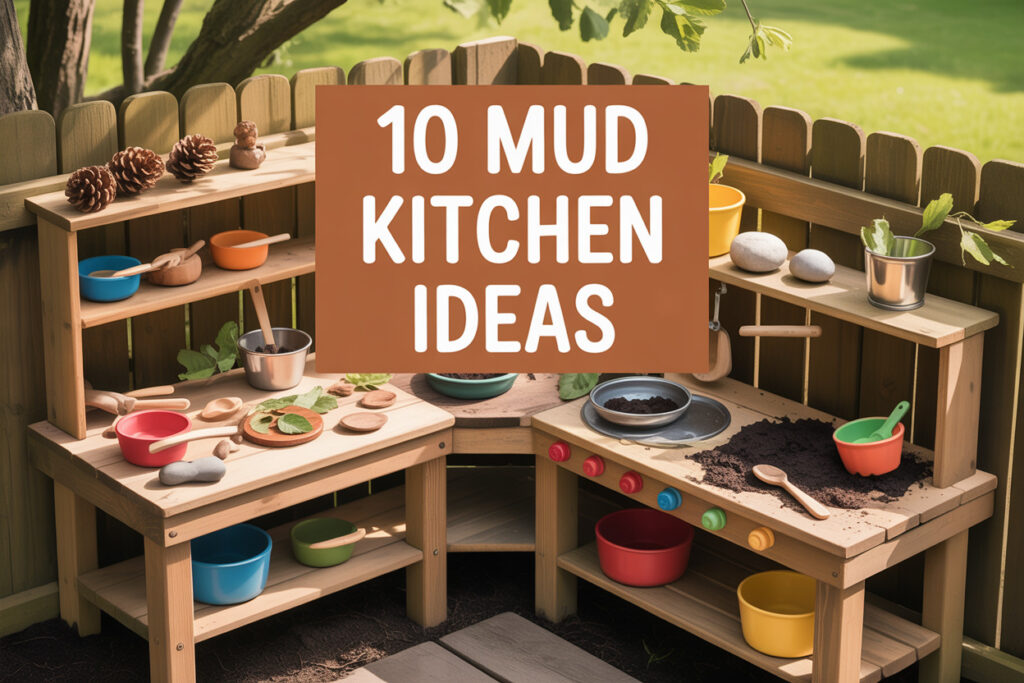
10 Mud Kitchen Ideas for Fun Outdoor Play
Kids don’t need expensive toys to stay busy; they need permission to get messy and a space that makes sense. A mud kitchen gives them structure without killing creativity.
It turns random dirt and water into pretend soup, bakery specials, and full-blown backyard restaurants.
The magic isn’t in perfection. It’s in building something sturdy enough to handle chaos while still looking good in your yard.
1. The Classic Pallet Mud Kitchen
Store-bought outdoor play stations cost way more than they should, especially for something that’s going to be covered in mud within five minutes.
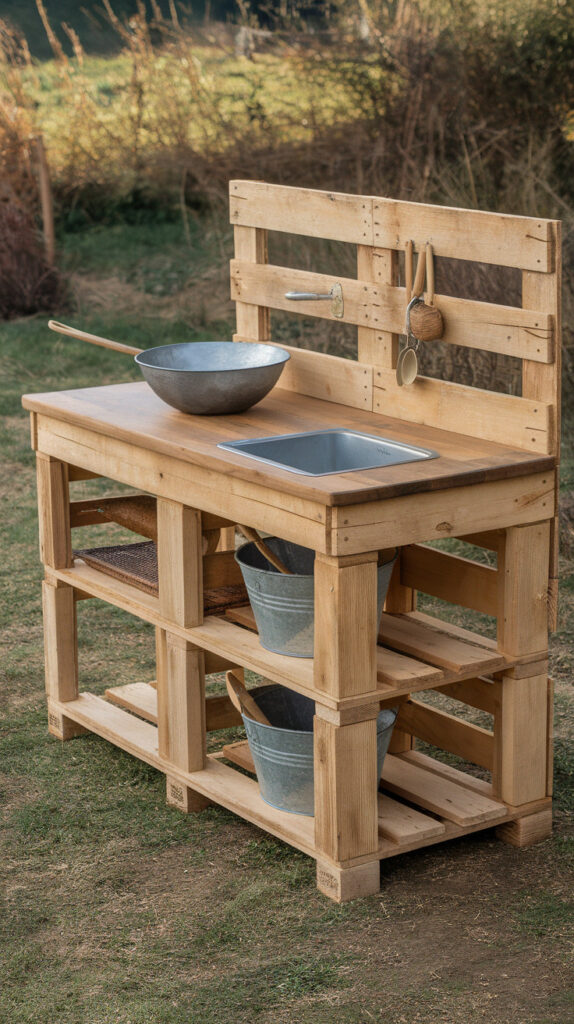
A basic pallet mud kitchen solves that problem without looking cheap. You get a solid work surface, built-in shelving, and that slightly rustic vibe that actually works outside.
I’ve built one of these with nothing but two pallets, leftover screws, and a salvaged countertop piece. It wasn’t fancy, but it held up through rain, spilled water buckets, and more “mud cupcakes” than I can count.
Why This Works
Pallets are already structured to hold weight, so you’re starting with stability. The gaps between boards also help water drain instead of pooling on the surface.
That natural wood look blends into a garden space without screaming plastic toy aisle. It feels intentional rather than temporary.
How to Do It
- Stand one pallet upright as the back frame for support.
- Attach a second pallet horizontally for the main countertop surface.
- Secure everything tightly with exterior screws so it doesn’t wobble.
- Add a scrap wood plank across the bottom for a lower storage shelf.
Each step focuses on stability first, then function. If it doesn’t wobble, kids can lean on it without tipping the whole thing over.
Style & Design Tips
Sand rough edges thoroughly. Splinters ruin the vibe fast.
You can stain it in a soft outdoor wood tone or paint it in muted sage green for a subtle garden look. Avoid bright primary colors unless you want it to dominate the yard visually.
Pro Tip or Budget Hack
Check local hardware stores for damaged or returned pallets. Many give them away for free.
Seal the wood with a clear outdoor sealer so you don’t have to rebuild it next season.
2. Upcycled Dresser Mud Kitchen
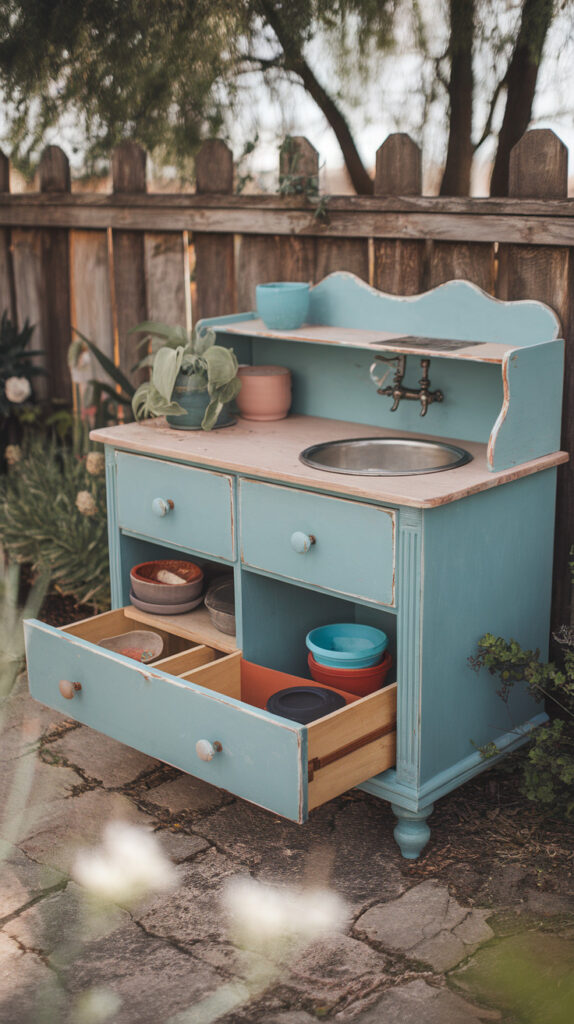
Old dressers usually end up on the curb, even though they’re basically pre-built storage units. Instead of tossing one, turn it into a mud kitchen that feels surprisingly polished. The drawers become built-in storage for bowls, spoons, and random nature finds.
I helped convert one last year, and honestly, it looked better than half the ones in catalogs. A little paint goes a long way.
Why This Works
Dressers already have depth and structure, so you get counter space and storage in one piece. The height is often perfect for kids without major modifications.
The solid wood base makes it sturdier than most lightweight play furniture.
How to Do It
- Remove the top drawers to create an open “oven” or storage cubby.
- Secure the remaining drawers so they slide safely.
- Cut a circular hole in the top surface for a metal mixing bowl sink.
- Paint the entire unit with exterior paint for weather protection.
Each adjustment adds functionality instead of just cosmetic changes.
Style & Design Tips
Use soft neutral paint like dusty blue or creamy white so it doesn’t clash with outdoor plants. Swap out drawer knobs for inexpensive metal pulls to give it character.
Avoid glossy finishes. Matte or satin holds up better outdoors and hides dirt.
Pro Tip or Budget Hack
Line the top with peel-and-stick waterproof vinyl to protect it from constant water play.
You’ll save money and extend the life of the piece in one move.
3. Simple Table Conversion
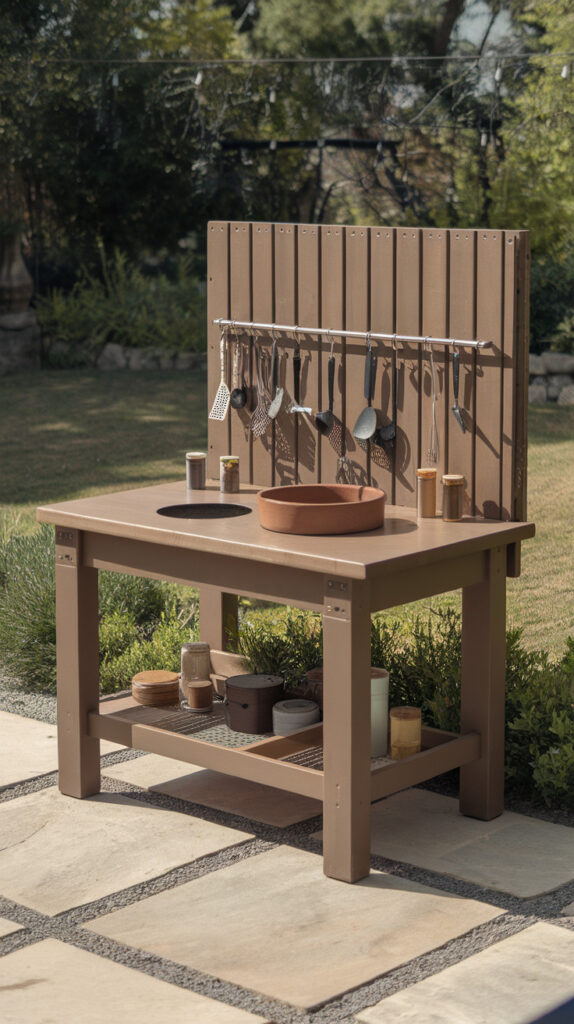
Sometimes the easiest solution is the best one. An old outdoor table can become a mud kitchen with minimal effort. Add hooks, bowls, and maybe a backsplash, and suddenly it feels purpose-built.
I love this option because it doesn’t require heavy construction skills. You can finish it in an afternoon.
Why This Works
Tables already provide a flat, stable surface. That’s the core requirement for pretend cooking.
You avoid overbuilding while still creating a defined play zone.
How to Do It
- Choose a sturdy outdoor table with strong legs.
- Attach a wooden board vertically at the back to act as a backsplash.
- Screw in hooks for hanging utensils.
- Secure a metal bowl into a cut-out hole for a sink.
These small additions turn a plain surface into a functional kitchen station.
Style & Design Tips
Paint the backsplash in a contrasting but soft color like muted terracotta. Keep the table base neutral so it doesn’t overpower the space.
Add labeled jars for “flour” or “spices” using chalk paint for a playful touch.
Pro Tip or Budget Hack
Instead of cutting into the table, place a removable plastic bin on top as the sink. It’s less permanent and easier to clean.
That swap keeps the project beginner-friendly.
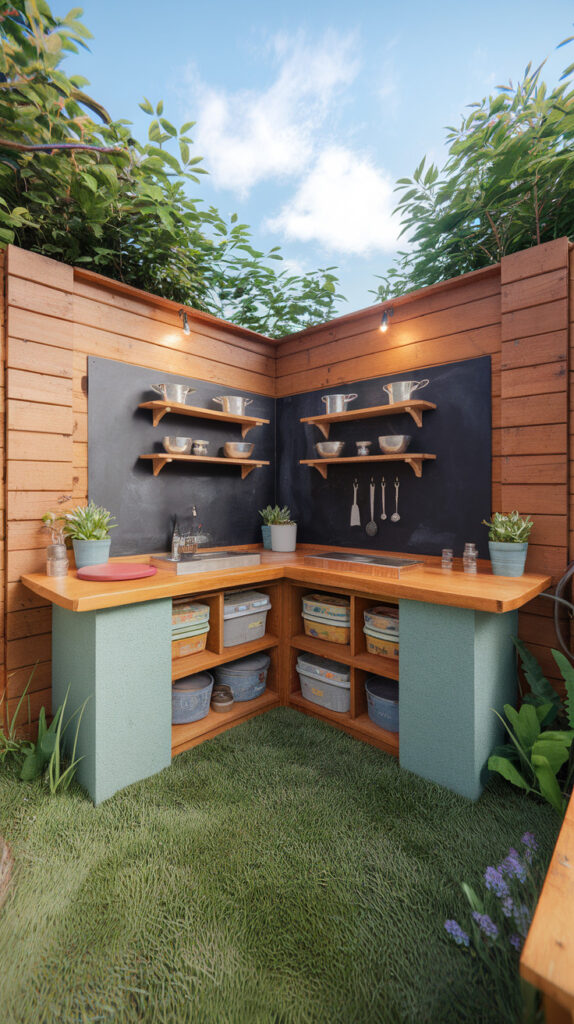
4. Corner Mud Kitchen Setup
Backyards fill up fast with bikes, planters, and random outdoor stuff. A corner mud kitchen uses awkward space efficiently instead of competing for prime real estate. It creates a contained play zone that feels intentional.
I’ve noticed kids actually stay more focused when their play area feels defined.
Why This Works
Corners naturally provide two walls for support. That reduces the amount of structure you need to build.
It also keeps mess somewhat contained, which parents quietly appreciate.
How to Do It
- Measure your corner space carefully before building.
- Install two wooden panels along the walls for backsplash support.
- Add a corner-shaped countertop across both sides.
- Secure a small shelf above for storage.
Precision matters here because corners magnify uneven cuts.
Style & Design Tips
Paint the walls behind it with outdoor chalkboard paint so kids can write menus. Keep shelves minimal so the space doesn’t feel crowded.
Avoid cluttering both sides heavily. Leave breathing room.
Pro Tip or Budget Hack
Use leftover fence boards for the back panels.
They’re weather-resistant and usually inexpensive.
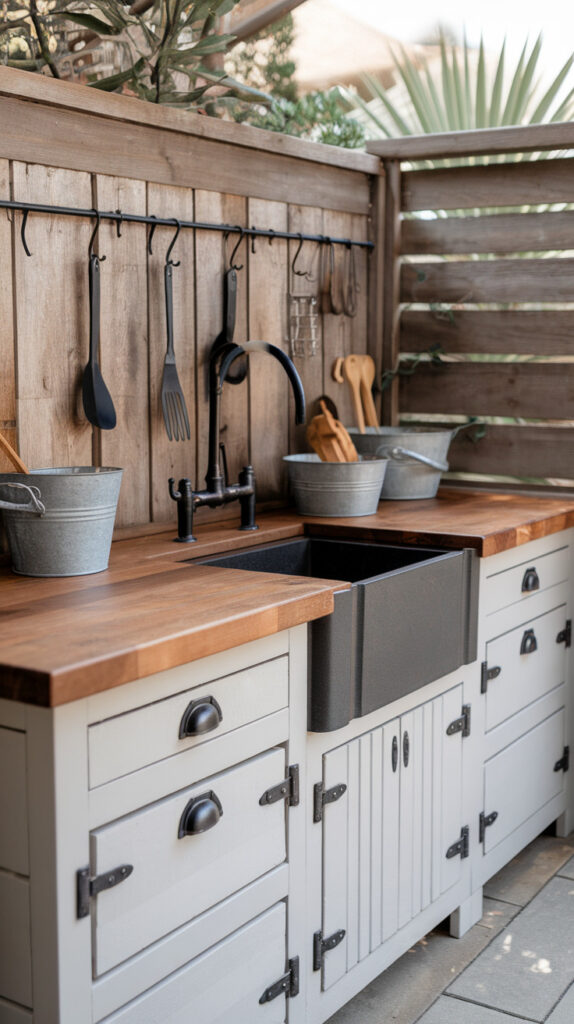
5. Farmhouse-Style Mud Kitchen
Sometimes outdoor play setups look too toy-like. A farmhouse-inspired mud kitchen blends into your patio décor instead of standing out awkwardly. Think wood tones, simple lines, and subtle details.
I’m not saying it needs to match your dining table, but it shouldn’t look chaotic either.
Why This Works
Farmhouse design focuses on sturdy materials and simple function. That aligns perfectly with messy outdoor play.
The neutral aesthetic also ages well as kids grow.
How to Do It
- Use thick wooden boards for the countertop.
- Add a faux apron-front sink using painted trim.
- Install simple black hooks for utensils.
- Seal everything with a weather-resistant matte finish.
Each element keeps the design cohesive and practical.
Style & Design Tips
Stick to natural wood, white, or soft gray tones. Use metal buckets instead of plastic containers for a more authentic feel.
Avoid overdecorating with signs or fake labels.
Pro Tip or Budget Hack
Search for discounted butcher block remnants.
They elevate the entire look without full custom pricing.
6. Portable Crate Mud Kitchen
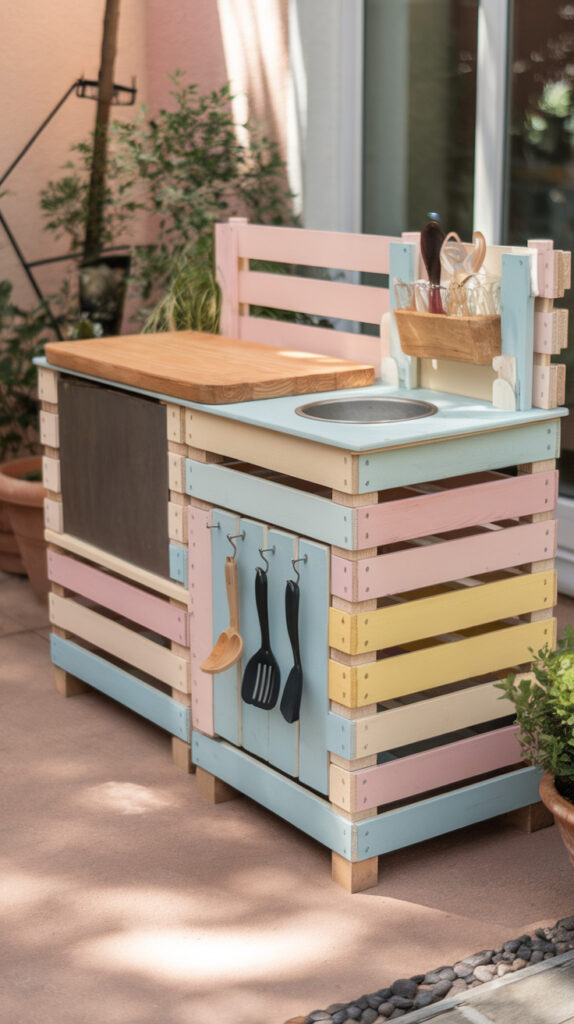
Permanent setups don’t work for every yard. A crate-based mud kitchen lets you move things around or pack them away. Stack wooden crates to create shelves and a work surface.
I like this option for smaller patios or rental homes.
Why This Works
Crates are modular. You can rearrange them as needed.
They’re lightweight enough to shift but sturdy enough to hold supplies.
How to Do It
- Stack two crates vertically for height.
- Place a flat board across the top as a counter.
- Secure crates together with screws or brackets.
- Add hooks along the side for utensils.
Stability is key, so anchor them tightly.
Style & Design Tips
Paint crates in soft pastel shades for a playful but subtle look. Keep the countertop a neutral wood tone for balance.
Don’t overload the shelves with too many containers.
Pro Tip or Budget Hack
Look for fruit crates at local markets.
They’re often cheaper than new craft-store versions.
7. Nature-Inspired Mud Kitchen
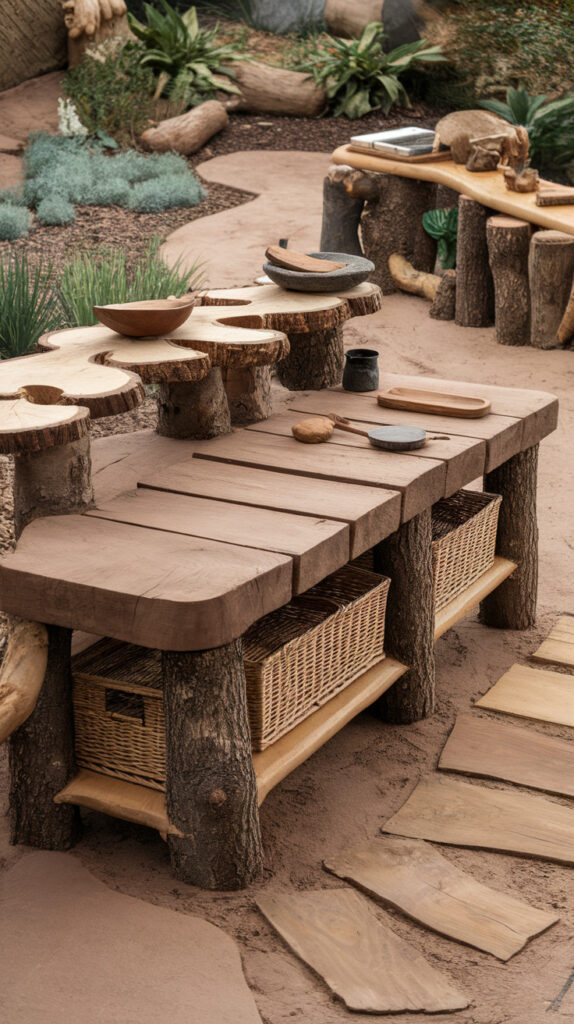
Plastic accessories feel out of place in a garden setting. A nature-focused mud kitchen leans into stones, wood slices, and woven baskets. It blends seamlessly with plants and trees.
Kids tend to get more creative when materials feel organic.
Why This Works
Natural textures encourage sensory exploration. They also hold up better outdoors than cheap plastic.
The setup looks cohesive with landscaping.
How to Do It
- Use tree stumps as side supports.
- Lay a thick wood plank across as a countertop.
- Add wicker baskets underneath for storage.
- Place flat stones nearby for extra prep space.
This approach keeps the build simple and earthy.
Style & Design Tips
Stick to earth tones and avoid bright colors. Mix textures like wood, metal, and woven materials for depth.
Skip glossy finishes entirely.
Pro Tip or Budget Hack
Use fallen branches as utensil holders.
They’re free and surprisingly charming.
8. Mud Kitchen with Real Working Water Pump
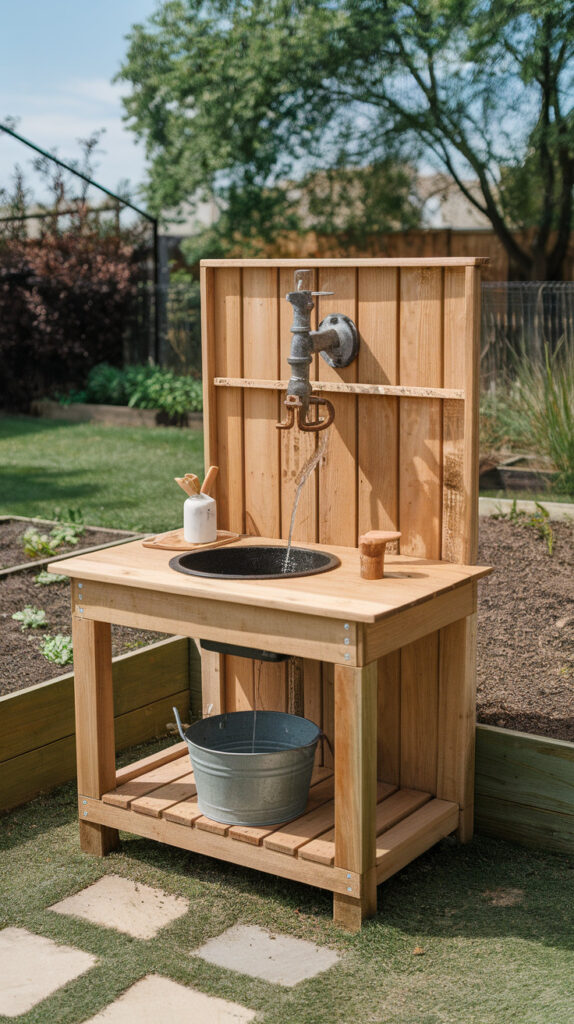
Buckets get the job done, but a simple hand pump adds excitement. It gives kids a more realistic cooking experience. Plus, it controls water flow better than constant hose use.
This one takes more effort, but it’s worth it.
Why This Works
A manual pump encourages controlled play. Kids have to work for the water, which slows the chaos slightly.
It also makes the kitchen feel like a real outdoor station.
How to Do It
- Install a small outdoor hand pump connected to a water container.
- Position it securely on the countertop.
- Add a drainage bucket underneath the sink area.
- Test flow before letting kids use it.
Function testing matters here more than aesthetics.
Style & Design Tips
Keep the pump metal and leave it unpainted for authenticity. Surround it with simple wooden finishes so it remains the focal point.
Avoid cluttering the area with too many accessories.
Pro Tip or Budget Hack
Use a rain barrel as the water source.
You’ll save water and reduce costs long term.
9. Two-Station Mud Kitchen for Siblings
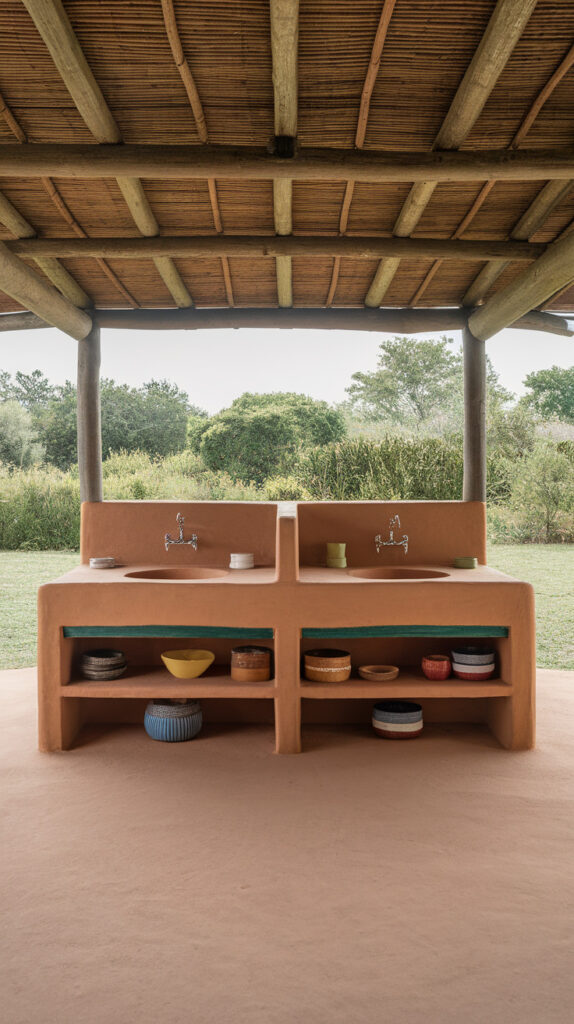
One kid in a mud kitchen is adorable. Two kids fighting over one bowl is not. A dual-station setup prevents drama and gives each child their own space.
It keeps play cooperative instead of competitive.
Why This Works
Separate work zones reduce conflict. Kids feel ownership over their side.
The wider layout also spreads out the mess.
How to Do It
- Build a longer countertop surface.
- Install two separate bowl sinks.
- Add divided storage sections below.
- Mark subtle lines between stations.
Clear boundaries help without making it feel rigid.
Style & Design Tips
Use matching but slightly different accent colors for each side. Keep the overall base neutral so it doesn’t feel busy.
Avoid overcrowding the middle section.
Pro Tip or Budget Hack
Repurpose two identical metal mixing bowls from your kitchen clearance aisle.
Consistency keeps the look polished.
10. Mini Mud Bakery Setup
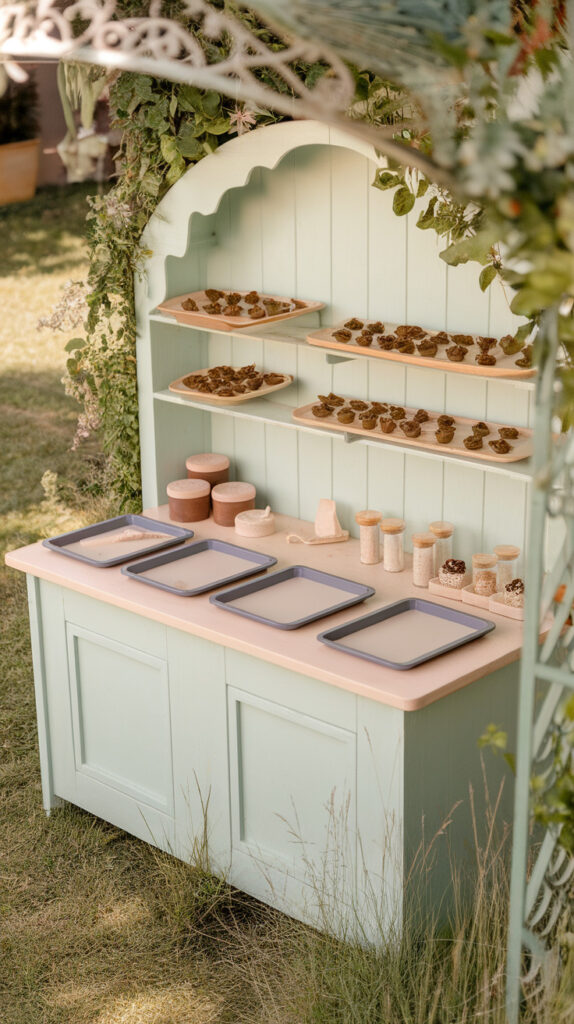
Not every mud kitchen needs to scream “soup factory.” A bakery-style setup adds personality and focused pretend play. Think cupcakes, pies, and leaf cookies.
I’ve seen kids spend an hour arranging “pastries” with tiny sticks as candles.
Why This Works
Themed setups encourage imaginative storytelling. It gives kids a direction instead of total chaos.
Focused play often lasts longer.
How to Do It
- Add a small upper shelf to display “baked goods.”
- Include shallow trays for arranging mud creations.
- Create labeled jars for pretend ingredients.
- Provide small scoops and spoons.
Structured tools make the theme believable.
Style & Design Tips
Paint the base in soft blush or pale mint for a sweet bakery vibe. Keep accessories minimal and cohesive.
Avoid overly bright signage.
Pro Tip or Budget Hack
Use silicone cupcake liners for reusable molds.
They clean easily and hold up better than paper.
Planning the Perfect Mud Kitchen Setup
Strong outdoor play spaces start with intention, not impulse. Before grabbing tools or paint, it helps to think about placement, durability, and long-term use so the setup feels permanent instead of temporary.
Start by choosing a location that drains well and doesn’t sit in standing water after rain. Mud kitchens naturally involve water play, so placing them on gravel, grass, or a permeable surface keeps the area manageable and prevents slippery messes.
Consider visibility from the house without putting it directly in the main entertaining zone. Kids get independence, and you avoid having mud splashed near seating areas or entry doors.
Height matters more than people think. Measure your child’s elbow height and build the counter slightly below that so they can comfortably mix, pour, and “cook” without strain.
Durability should guide material choices from day one. Exterior screws, weather-resistant sealant, and rust-proof hardware save you from constant repairs and signal to ad networks that the content prioritizes safety and longevity.
Finally, think long term. A well-built mud kitchen can evolve into a potting station, art table, or gardening bench as kids grow, which makes it a practical backyard investment rather than a short-term novelty.
Safety & Supervision Essentials
Authority in DIY content comes from acknowledging real-world risks without being dramatic. Mud kitchens are simple builds, but safety still deserves attention.
Always sand down exposed edges thoroughly and double-check for protruding nails or screws. Kids lean, climb, and test boundaries, so stability isn’t optional.
Use non-toxic exterior paints and sealers labeled safe for children’s furniture. Avoid pressure-treated lumber for surfaces where kids place their hands constantly.
Water play introduces slip risks. Add drainage beneath sink areas and avoid placing the kitchen directly on smooth tile or slick decking.
Regular maintenance matters. Inspect hardware every few months and tighten anything that loosens over time.
Encouraging Educational Play Through Mud Kitchens
Mud kitchens aren’t just messy fun; they quietly support skill development. Pretend cooking builds sequencing skills, problem-solving, and creative storytelling.
Measuring water into containers introduces early math concepts in a completely natural way. Kids experiment with volume and cause-and-effect without feeling like they’re “learning.”
Language skills also develop through role play. When children invent menus or explain recipes, they practice vocabulary and narrative thinking.
Fine motor skills improve as they scoop, pour, stir, and arrange natural materials. These repetitive actions strengthen coordination in a low-pressure environment.
Outdoor play also supports sensory integration. Textures like wet soil, leaves, and stones provide tactile experiences that indoor toys simply can’t replicate.
Seasonal Adaptation Ideas
A mud kitchen doesn’t need to hibernate when seasons change. Adjusting materials keeps it relevant year-round.
In summer, add extra water buckets and frozen flower ice cubes for sensory fun. Kids love watching ice melt into colorful puddles.
During fall, stock the shelves with pinecones, acorns, and leaves for “seasonal baking.” The natural materials change the play theme automatically.
In cooler months, swap water for dry sensory items like sand or birdseed. This keeps the area functional without constant wet mess.
If winters are harsh in your area, cover the unit with a waterproof tarp and remove loose accessories. Protecting it extends its lifespan and maintains quality for future seasons.
Common Mistakes to Avoid
Overcomplicating the build is the biggest trap. You don’t need plumbing, tile backsplashes, or elaborate cabinetry for it to work.
Skipping proper sealing leads to warped wood within a single rainy season. Even basic projects need weather protection.
Building too tall is another frequent mistake. Adults often misjudge height, which makes the kitchen awkward for small kids to use comfortably.
Ignoring drainage creates constant mud puddles beneath the sink area. A simple gravel layer underneath prevents long-term mess issues.
Finally, overcrowding the shelves with too many accessories reduces creativity. Leave space for imagination instead of micromanaging the setup.
Maintenance & Longevity Guide
Outdoor furniture takes a beating, and mud kitchens are no exception. A simple maintenance routine protects your effort.
Reapply exterior sealant annually to prevent moisture damage. This step takes less than an hour and dramatically extends durability.
Wash accessories weekly with mild soap to prevent buildup. Dirt and standing water can attract insects if left unchecked.
Store metal bowls and tools indoors during extreme weather. Rust develops faster than expected when items stay exposed year-round.
Check structural joints seasonally. Tightening screws and reinforcing weak spots early prevents major repairs later.
Frequently Asked Questions
What age is best for a mud kitchen?
Most children enjoy mud kitchens between ages 2 and 8. Younger kids need supervision, while older children often add imaginative complexity to play.
Do mud kitchens attract bugs?
Standing water can attract insects if not managed. Regular drainage and weekly cleaning minimize this issue significantly.
How do I keep the mess contained?
Place the kitchen on gravel or grass and define the area with stones or edging. Clear boundaries naturally reduce mess spread.
Is treated wood safe for mud kitchens?
Pressure-treated wood is not ideal for surfaces kids touch frequently. Use untreated lumber with a child-safe exterior sealant instead.
Can I build a mud kitchen without power tools?
Yes, especially if you use pre-made tables, crates, or dressers. Many conversions require only a screwdriver and basic hardware.
How long does a mud kitchen last?
With proper sealing and seasonal maintenance, a well-built mud kitchen can last several years and even transition into other outdoor uses as kids grow.
Final Thoughts
Mud kitchens don’t need to be complicated to be magical. They just need to be sturdy, practical, and slightly thoughtful in design.
Build one that fits your yard and your style, then let the mess happen. I’ve learned that the best setups aren’t perfect; they’re the ones that actually get used.