10 Christmas Mailbox Ideas for a Festive Front Yard
You pull into the driveway after a long day, and the first thing that greets you is a plain metal box on a post. A little holiday dressing fixes that fast. A Christmas mailbox sits right where guests and delivery drivers pass, so it earns more attention than almost anything else in the yard.
The good news is you don't need a ladder, a big budget, or an electrician. Most of these ideas take an afternoon and a quick trip to the craft store.
Some go simple and classic, others lean playful or rustic. Below are ten approaches that actually hold up through wind, snow, and rain.
1. Wrap It in a Classic Ribbon
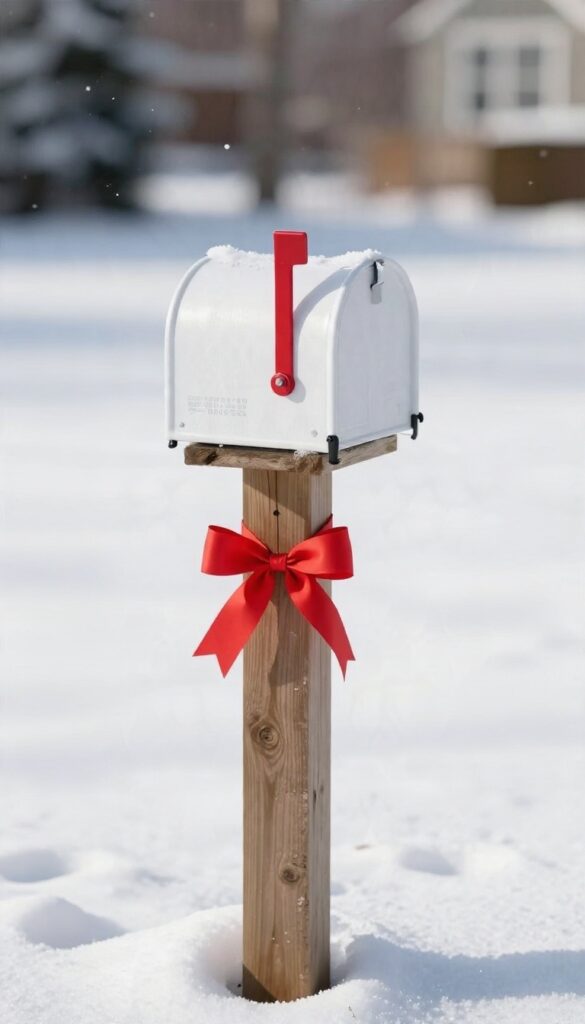
A single wide ribbon can change the whole personality of a mailbox in about ten minutes. You don't need a craft room full of supplies, just one roll of outdoor-rated ribbon and a way to keep it tight. The look reads clean and traditional, which is exactly why it works so well against a snowy yard or a plain wooden post.
The trick is choosing ribbon built for the outdoors. Satin looks gorgeous in photos but sags and spots the moment it gets damp, so reach for something with a bit of body like grosgrain, burlap, or a coated outdoor ribbon. Wider is better here, since a three- to four-inch ribbon covers more of the post and makes the wrap feel intentional rather than accidental.
Before you tie anything, wipe down the post and box so the ribbon sits flat. Then plan your wrap: most people run one band around the box and a second around the post, meeting in a bow at the front corner. That gives you a tidy focal point and hides the seam where the two lengths cross.
Pick A Ribbon That Survives The Weather
Outdoor-rated grosgrain and burlap hold their shape through rain and wind far better than satin or paper-backed ribbon. If you love the look of a softer ribbon, spray it lightly with a fabric protector and let it dry fully before wrapping. Avoid anything with glitter that flakes, since it'll end up scattered across your walkway after the first storm.
Tie It So The Wind Can't Win
A plain bow loosens fast in gusty weather, so anchor the ribbon first. Run a small zip tie or a clear adhesive hook under the box band to hold the ribbon in place, then tie your bow on top of that anchor. Finish the tails with a dot of hot glue or a tight double knot so they don't whip around and fray.
Add One Small Finishing Touch
A single sprig of faux pine, a small jingle bell, or a tiny gift tag tucked into the bow adds interest without clutter. Keep it lightweight so the ribbon doesn't droop. Skip anything heavy or dangling that could catch the wind or block the mailbox flag.
2. Drape a Lit Garland Along the Post
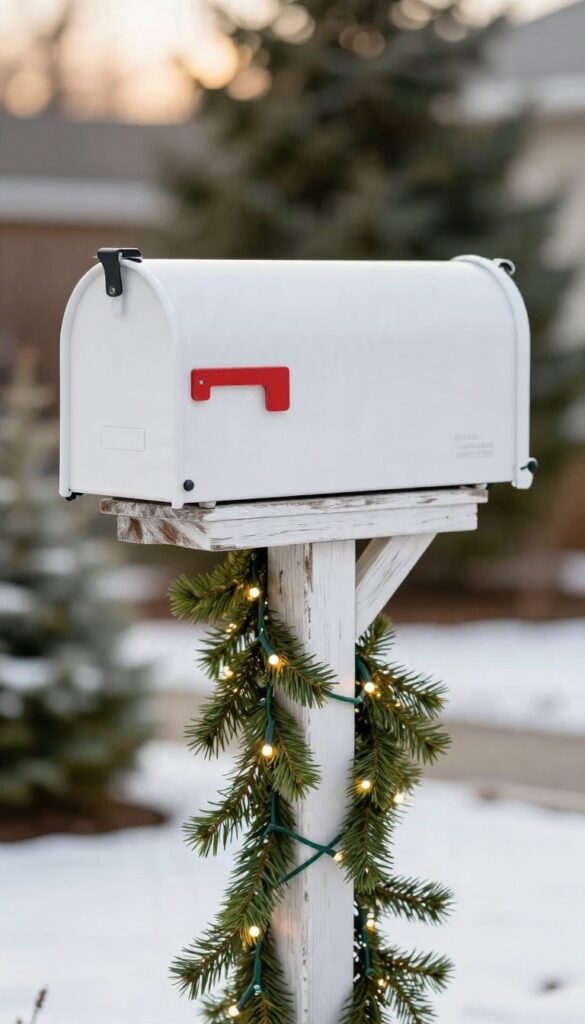
Wrapping the post in a lit garland gives your mailbox a warm glow that lasts well past sunset. It looks like a lot of effort, but a battery-powered strand does most of the work for you. No extension cords, no outlet hunting, and no tripping hazard across the yard.
The trick is picking a garland that's built for the outdoors and then anchoring it so wind and wet weather don't turn it into a tangled mess. A little planning up front keeps the lights glowing all season.
Pick Lights That Can Take The Weather
Look for strands labeled for outdoor use, ideally with an IP65 rating or better. Battery packs and wiring that aren't weather-rated will fog up or quit after the first cold, damp night. LED garlands run cooler and sip power, so a set of batteries stretches through weeks of evening glow.
Warm white reads as classic holiday, while multicolor feels more playful.
Wrap And Secure It
Start at the base of the post and spiral upward, keeping the coils fairly even so it looks intentional. Use small zip ties or green floral wire to pin the garland at a few points, then snip the tails. Leave a little slack between ties so the strand can flex in the cold without snapping.
Tuck the loose end behind the box or under a bow so nothing dangles.
Hide The Battery Pack
Mount the pack on the back or underside of the mailbox where rain can't pool on it. A small hook-and-loop strip or a zip tie holds it snug, and a zippered sandwich bag adds cheap protection from splashes. If your box has a hollow post, drop the pack inside and run the wire out through a small gap.
Check that you can still reach the switch without unwinding anything.
3. Build a Fresh Greenery Swag
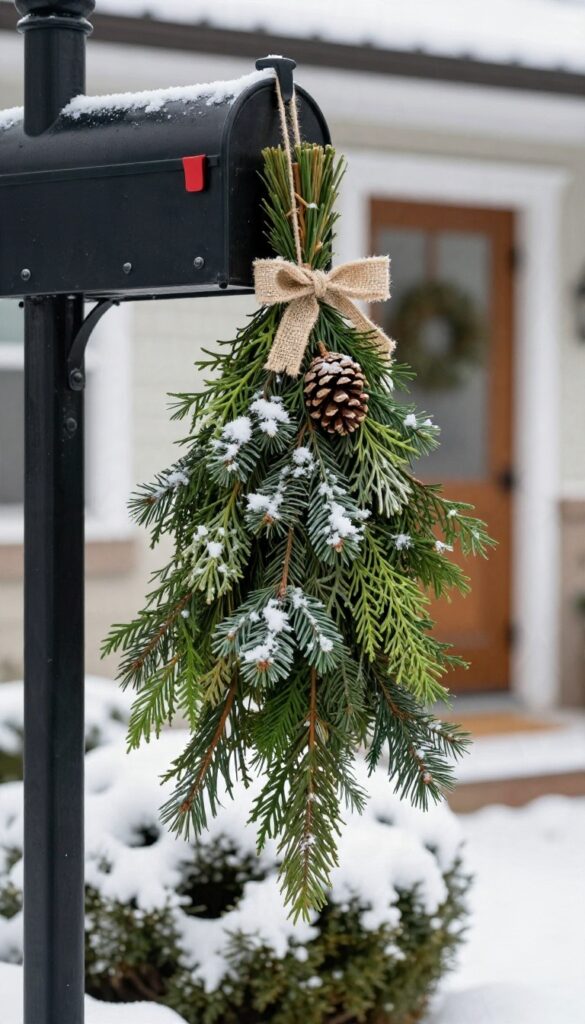
A swag is just a bundle of evergreens tied at the center and draped to both sides, and it might be the most underrated way to dress a mailbox. You get real scent, real texture, and a look that reads expensive without costing much. The trick is picking greens that survive the weather and treating them so they stay green through the season.
Fresh greens also photograph beautifully and look natural against a metal or wooden post. Best of all, you can swap the ribbon and accents each year without rebuilding the whole thing.
The basic build is simple: gather three or four kinds of branches, strip the lower needles, and wire them into a tapered bundle. Work from the center outward so the swag hangs evenly on both sides of the box. Keep the whole thing light.
A heavy swag sags, pulls at its ties, and collects snow. A few well-placed branches beat an armload every time.
Which Greens Last Longest
Not all evergreens hold up outdoors. Some drop needles fast once the temperature swings, so choose with care. Pine and cedar are the workhorses.
White pine holds its needles well and gives soft, long texture, while cedar adds a lighter green and a strong scent. Juniper and arborvitae are sturdy too and handle wind without much fuss. Eucalyptus is the wildcard.
It smells great and looks elegant, but it dries and fades faster than conifers. Use it as an accent rather than the base, and keep it toward the center where it gets a little shelter. Avoid hemlock and spruce if you want a swag that still looks good in late December, since both shed more readily.
Wiring It Together
Start with a length of floral wire and a few zip ties. Lay your longest branches at the center, then layer shorter ones on top, fanning them outward. Wrap the bundle tightly at the middle with wire, then add a second wrap a few inches out on each side to keep the shape.
Zip ties anchor the whole swag to the post or mailbox bracket without scratching the metal. Hide the ties with a ribbon or a sprig of cedar. Nobody needs to see the mechanics.
Keeping It Fresh Outdoors
Fresh greens dry out, and dry greens turn brown. A little prep goes a long way. Soak the cut ends in water for a few hours before you build, then mist the finished swag every week or so when the weather is mild.
Cold snaps actually help greens last longer, so don't worry about a hard freeze. Keep the swag out of direct sun if you can, and avoid tucking it right against a heat source like a porch light. A light spritz of anti-desiccant spray, sold at garden centers, slows moisture loss and is worth the few dollars.
Finishing Touches
Let the greens do most of the talking, then add one or two accents. A plaid ribbon at the center, a few pinecones, or a small cluster of red berries gives the swag a focal point without clutter. Skip anything that will rust or fade fast.
Stick to ribbon, natural cones, and wire, and your swag will look just as good on New Year's as it did the day you hung it.
4. Hang a Simple Wreath on the Box
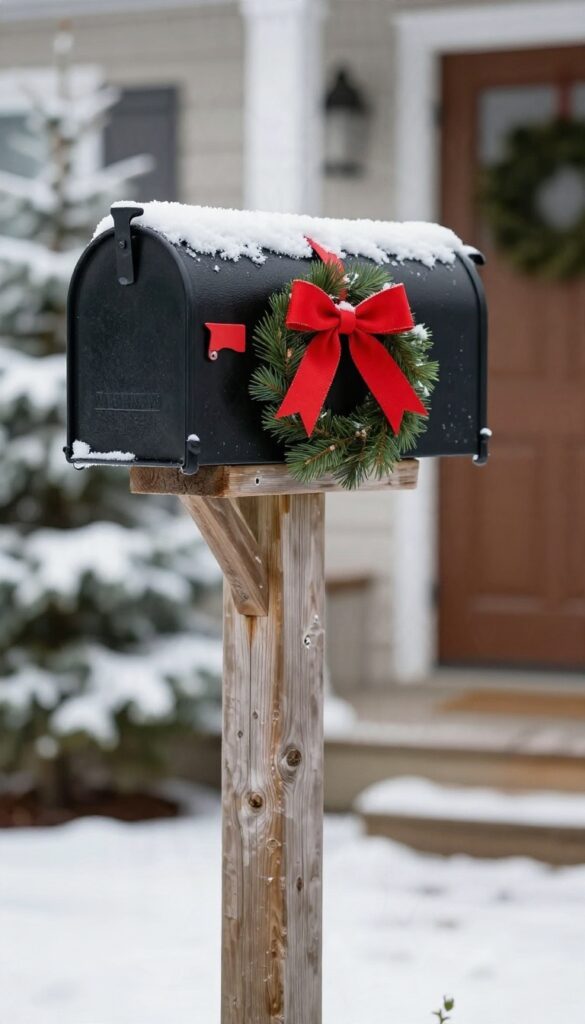
A wreath on the mailbox is about as classic as it gets, and it works on almost any style of box. The trick is getting one that fits the door or post without turning into a hassle every time the mail runs. Here’s how to keep it simple, secure, and out of the way.
You don’t need a giant wreath to make an impact. A small one—think 8 to 12 inches across—sits nicely on the front of the mailbox door or hangs from the post just below the box. The key is to size it so it doesn’t cover the flag, the latch, or the opening where the mail goes in.
If you’re hanging it on the door, make sure it’s light enough that the door still swings open easily and doesn’t sag. Mounting it securely is the difference between a wreath that lasts the season and one that ends up in the snow. A simple over-the-door hanger works for flat mailbox doors, but for curved ones, a suction cup hook or a magnetic hook holds better.
On a post, a small nail or a cup hook does the job. Just check that whatever you use can handle a little wind and won’t scratch the paint. When you pick a wreath, go for something weather-friendly.
Real evergreens look great but can dry out and drop needles; faux greenery or a grapevine base holds up better in rain and snow. Add a simple bow or a few berries for color, but keep it lightweight so it doesn’t pull on the mounting. And before you commit, test the flag and latch with the wreath in place—you want full access without having to fight the decoration every day.
Size It Right
Measure your mailbox door or post space before you buy. A wreath that’s too big will block the flag or make the door hard to open. Aim for a wreath that leaves at least an inch of clearance around the edges.
Mount It Securely
Use a hanger that matches your mailbox surface. Over-the-door hooks work on flat doors, while suction cups or magnetic hooks are better for curved ones. For posts, a small cup hook screwed in works well.
Always test the hold with a gentle tug.
Keep It Weather-ready
Choose faux greenery or a grapevine wreath that can handle moisture. Real evergreens may dry out and make a mess. Add a simple bow or berries, but keep the overall weight down so the wreath stays put.
5. Go Rustic With Burlap and Bells
Burlap and bells bring a farmhouse feel that fits right in with snowy yards and wooden fences. The texture of the fabric and the soft jingle of bells make your mailbox feel like a little holiday welcome. The trick is to layer them without going overboard, so the whole thing looks collected rather than cluttered.
Start with a wide burlap ribbon as your base. Wrap it around the mailbox post or the box itself, letting the ends hang loose. Burlap is forgiving and adds instant rustic charm.
Then add a few bells and some twine to tie it all together. Keep reading for specific ways to layer these elements.
Choosing The Right Burlap
Not all burlap is created equal. Look for a roll that's at least four inches wide for wrapping, and a narrower one for bows. Natural tan works with almost any color scheme, but you can also find burlap in red or green for a more festive pop.
Avoid loosely woven burlap that sheds; a tighter weave holds up better outdoors.
Layering Textures Without Clutter
The key to a polished look is mixing textures in moderation. Pair burlap with smooth twine and shiny bells, but limit yourself to three main materials. Too many different elements compete for attention.
Stick to burlap, bells, and maybe a sprig of greenery. That combination feels cohesive and intentional.
Making Bells Stay Put
Jingle bells can be tricky to attach securely. Use florist wire or heavy-duty twine to tie them to the burlap ribbon. Cluster three bells together for a focal point, or space them out along a swag.
To keep them from swinging too much in the wind, anchor them with a small dab of hot glue where they meet the ribbon.
Weatherproofing Your Rustic Look
Burlap can soak up moisture and start to smell if it stays wet. Spray the fabric with a water repellent before you hang it. Also, choose bells with a protective finish so they don't rust.
If your area gets heavy snow, bring the bells inside during storms to keep them looking their best.
6. Add a Miniature Scene on Top
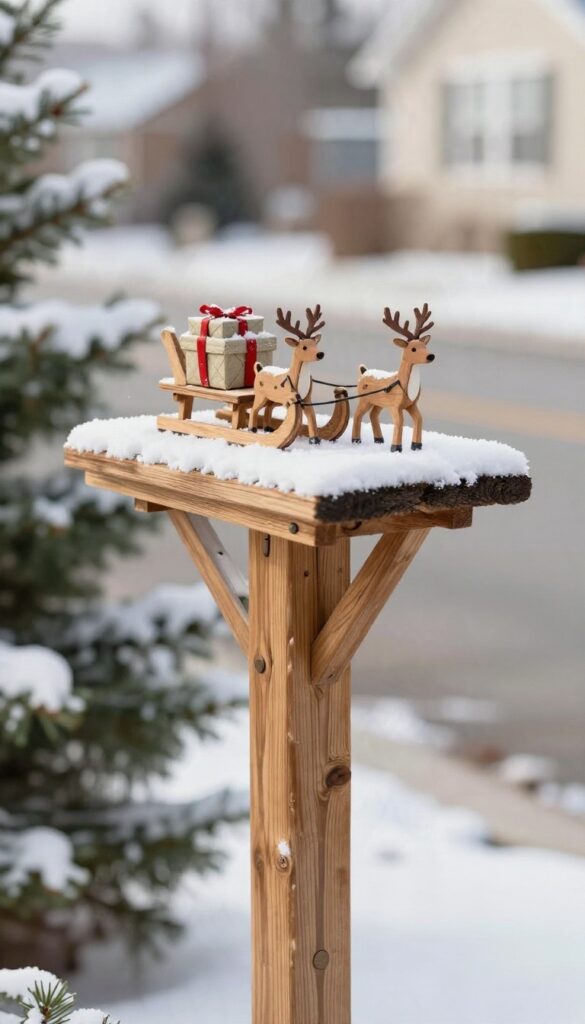
The flat cap on top of your mailbox post is prime real estate that most people ignore. A tiny sled, a pair of reindeer, or a little snow globe sitting up there gives the whole setup a focal point and a bit of story. It reads as charming from the street and gives kids something to spot as they walk by.
The trick is making that small scene stay put when the weather turns ugly.
Small props catch more wind than you'd expect, and squirrels seem to treat anything shiny as a personal challenge. A little planning up front keeps your scene intact through December and beyond. Pick pieces that are light enough to sit on the cap but heavy enough not to tumble at the first gust.
Scale matters here. A scene that's too big looks clumsy and tips easily, while one that's too small disappears from the sidewalk. Aim for props that fill roughly half the cap's width so the arrangement looks intentional without crowding the edges.
Choosing Props That Fit The Cap
A miniature wooden sled with a tiny gift on top is an easy win, and it sits flat so it barely catches wind. Small reindeer figures work well in pairs, especially if you angle them like they're pulling something. A snow globe adds a little sparkle, but go for a plastic one since glass and winter storms don't mix.
Match the finish to your mailbox. Painted wood and matte metal look right on rustic posts, while glossy ceramic or resin suits a cleaner, more modern box. Whatever you pick, check that the base is wide enough to sit stable without wobbling.
Anchoring Small Props Against Wind
Start with a base plate. A thin piece of exterior-grade plywood or a scrap of composite decking screwed to the post cap gives you a flat, secure platform to work from. From there, attach each prop with a small L-bracket or a dab of construction adhesive rated for outdoor use.
For lighter pieces, heavy-duty hook-and-loop tape lets you pull them off after the holidays without damage. Skip the tape if you get hard freezes, though, since the adhesive can let go in cold. A short screw through the base of a wooden figure is the most reliable option and barely shows.
Keeping Wildlife Out Of The Scene
Squirrels and birds will investigate anything new on a post, so avoid props with loose parts they can grab. Glue down tiny accessories like gifts or antlers so nothing comes off in a curious paw. Shiny foil and fake berries tend to attract attention, so use them sparingly or skip them.
A small motion-activated light nearby can spook nighttime visitors without being obtrusive. You can also mount the scene a few inches back from the cap's edge, which makes it harder for animals to reach from the side. Check the setup after the first big storm and tighten anything that shifted.
7. Match Your House With a Color Theme
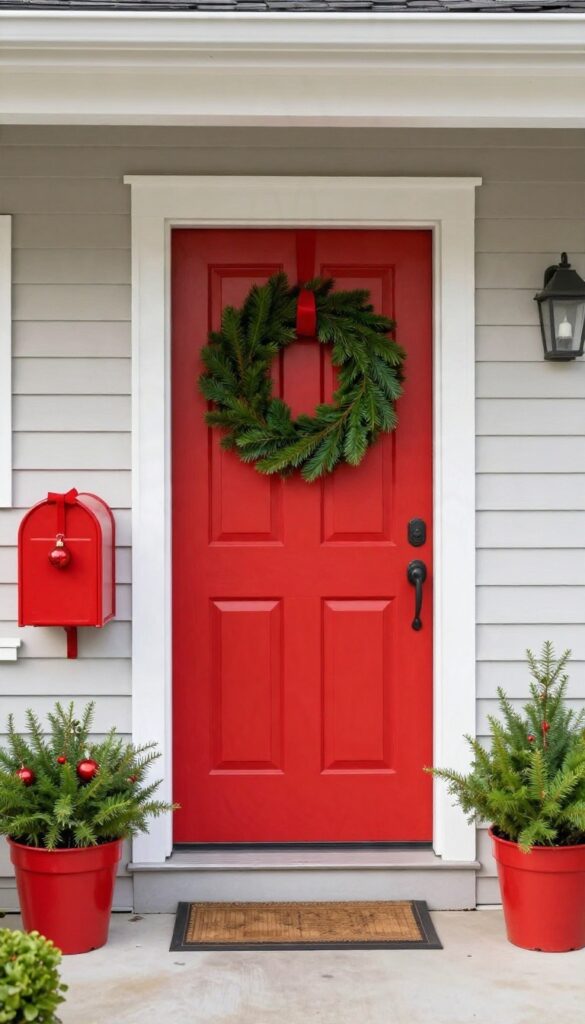
Your mailbox doesn't live in a vacuum. It sits in front of your house, next to your door, and near your porch steps, so it should feel like part of the same picture. When the colors tie together, the whole yard looks intentional instead of like a bunch of random decorations.
The trick is to pick a simple color theme and repeat it in a few spots without going overboard.
Start by looking at what's already there. Your front door, shutters, trim, and porch furniture all give you clues about which colors will work. You don't need to match everything perfectly, but echoing one or two shades makes a big difference.
Think of the mailbox as a small accent piece that pulls the scene together.
Start With Your Door Color
Your front door is the biggest color statement on the house, so use it as your starting point. If you have a red door, add a red ribbon or a few red ornaments to the mailbox. A navy door pairs nicely with silver and white, while a green door looks great with gold and natural greenery.
This doesn't mean you have to be exact, but staying in the same family keeps things cohesive.
Repeat Accents In Threes
Designers often say to repeat a color three times in a space, and that works for your front yard too. If you use red on the mailbox, try adding a red bow to the door wreath and a red planter by the steps. Three touches feel balanced without screaming for attention.
Just make sure the accents are spread out so they don't clump together.
Keep It Simple With Neutrals
If your house already has a lot going on, stick to neutral colors on the mailbox. Burlap, twine, and natural evergreens blend with almost any exterior. You can add a small pop of color with a ribbon that matches your door, but keep the rest understated.
This approach is especially handy if you like to change your decor from year to year.
8. Light the Path Around the Mailbox
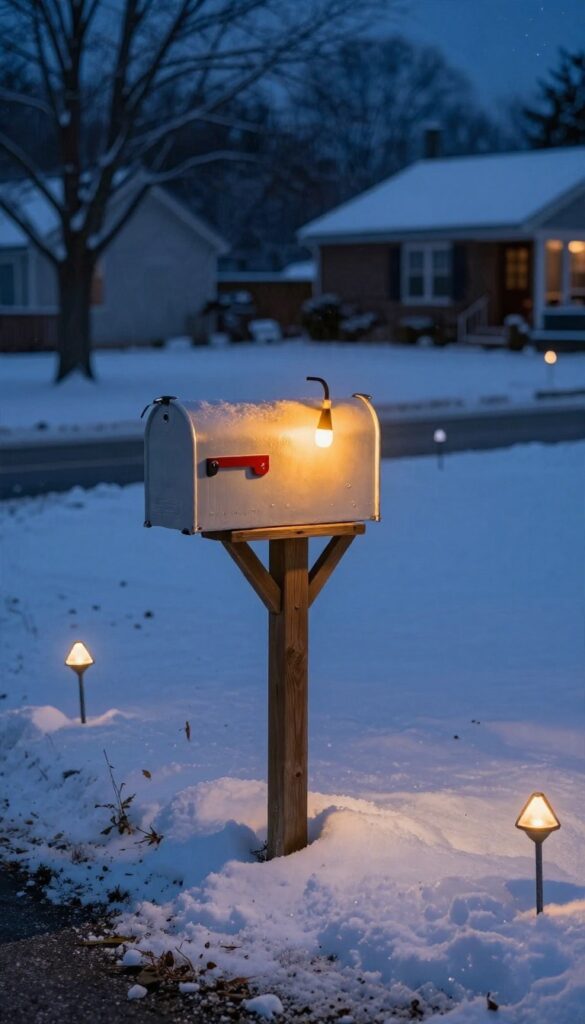
Daylight fades early in December, which means most people see your mailbox after dark. A few small lights around the post turn that plain metal box into a warm little landmark at the end of the drive. They also help guests find their footing on the walk to your door, which matters more than ever once the ground turns slick.
The trick is keeping it simple and weatherproof so it still works in February.
You don't need a full landscape lighting setup. A handful of solar stakes or a short strand of path lights around the post does the job. The goal is a soft glow that frames the mailbox and marks the path, not a runway that blinds the neighbors.
Think of it as a small triangle of light around the post: one or two on each side of the walk, angled slightly outward. That draws the eye to the box and lights the way at the same time.
Placement That Actually Works
Set your lights about a foot or two out from the post on both sides of the path. Angle them so the glow washes the mailbox and the walk rather than pointing straight up. Keep the tallest stake slightly behind the post so it silhouettes the box instead of flattening it.
If your box sits close to the street, push the lights a little farther back toward the yard. That keeps them out of the plow's path and away from passing headlights.
Spacing And Height
Space solar stakes roughly 3 to 4 feet apart along the walk. Closer than that and they start to look like a landing strip. Vary the heights a bit, maybe one taller stake near the post and shorter ones trailing off, so the line feels natural.
Keep the light heads below eye level. You want a gentle pool of light on the ground, not a glare that hits drivers pulling in.
Snow-friendly Picks
Snow buries short stakes fast, so go with models that stand at least 12 to 18 inches tall. Solar panels need sun, so pick a spot that gets a few hours of direct light even in winter, or choose lights with a battery backup. Battery-operated string lights wrapped loosely around the post work well too.
Skip anything with exposed cords near the driveway, and check that your picks are rated for outdoor winter use.
9. Keep It Weatherproof and Secure
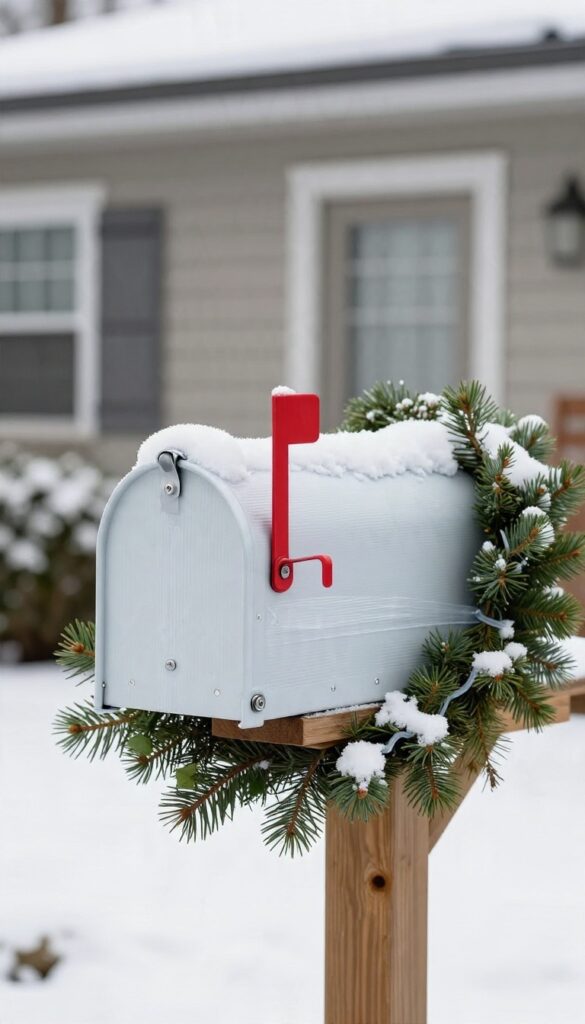
All the tinsel and garland in the world won't help if a gust of wind turns your display into a lawn ornament. December weather doesn't negotiate, so a few smart fasteners and a little planning go a long way. This is the part that keeps your mailbox looking good from the first snow through New Year's.
The goal is simple: attach decorations so they stay put without wrecking the box or trapping moisture. Pick materials that shrug off cold and wet, and check the moving parts before you call it done.
Fasteners That Survive A Storm
Outdoor-rated zip ties are the workhorse here. They grip posts, brackets, and handles without the sticky residue tape leaves behind, and you can snip them off in seconds. For anything that needs to come down easily, use UV-resistant outdoor tape or clear marine-grade tape rather than regular packing tape, which turns gummy in the cold.
Skip the tape on painted or powder-coated boxes if you can. Adhesive can pull the finish when it peels. Instead, loop ties around the post or use removable hooks rated for outdoor use.
For heavier pieces like wreaths or signs, add a small anchor, such as a screw-in hook or a weighted base, so wind can't swing the whole thing sideways.
Protect The Box And Its Moving Parts
Before you decorate, make sure the door opens freely and the flag still flips. Test both with the decorations in place, not after. A garland wrapped too tight around the hinge is the classic mistake, and it's an easy one to avoid.
Keep ribbon and greenery clear of the latch and the flag pivot. If you cover the box with fabric or a wrap, leave a gap so moisture can escape. Trapped water freezes, and frozen hardware is a headache you don't want in January.
A quick spray of silicone lubricant on the hinge and flag spring before the first freeze helps too.
Snow, Rain, And Wind Checks
After the first big weather event, walk out and give everything a tug. Loose ties and sagging garlands are easy to fix early and annoying to fix after they've frozen in place. Clear snow off the top of the box so it doesn't melt and refreeze into the door seam.
If you live somewhere with serious wind, angle decorations to shed it rather than catch it. Flat signs mounted tight to the post hold up better than anything that sticks out like a sail. And keep the path to the box clear so your mail carrier can actually reach it.
10. Try a Kid-Friendly, Playful Theme
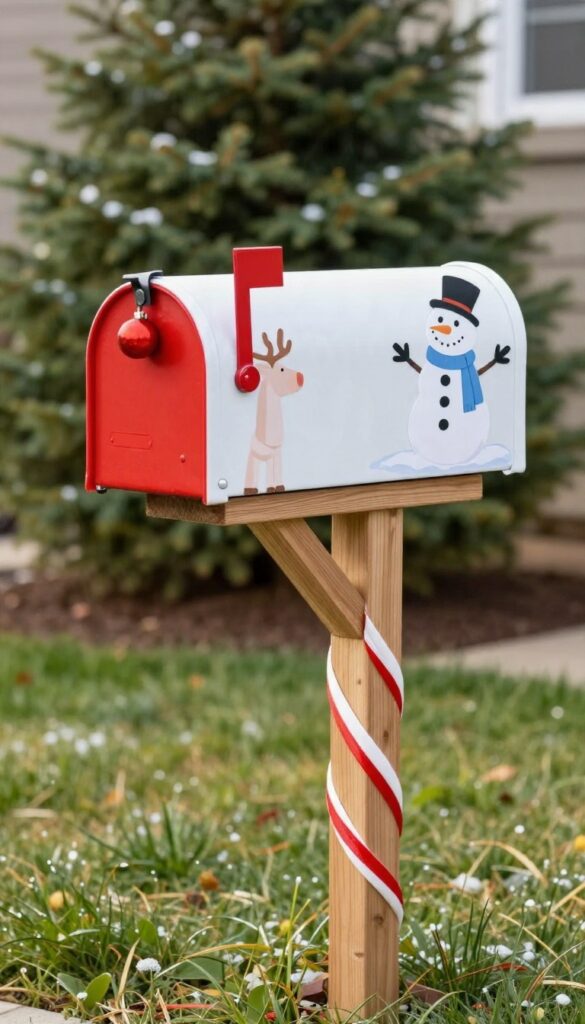
Some mailbox displays look like they were styled for a magazine cover. This one looks like it was styled by a seven-year-old, and that's the whole point. Bright colors, candy-cane stripes, and cheerful character cutouts turn the box into something kids actually point at from the car window.
The best part is how easy it is to pull off. You can swap pieces in and out each year, and most of the setup is light enough that little helpers can pitch in without you hovering. It's festive without being fussy.
A playful theme works because it doesn't take itself too seriously. You're not chasing a perfect designer look, just a display that feels fun and holds up to a few weeks of winter weather. Keep the pieces big, bold, and simple, and you'll get more smiles per dollar than almost any other approach.
Start With A Candy-cane Wrap
A candy-cane wrap is the fastest way to set the tone. Grab a roll of red-and-white striped ribbon or weatherproof tape and spiral it up the mailbox post, starting at the base and working toward the box. Secure the ends with outdoor-rated adhesive or a couple of small zip ties so it doesn't unravel in the wind.
If your post is wide, use wider ribbon for better coverage. Kids can handle this step with a little guidance, and it's forgiving if the stripes aren't perfectly even. For a mailbox that's already painted, test a small patch first to make sure the adhesive won't peel the finish when you take it down.
Add Character Cutouts That Can Take The Cold
Character cutouts are where the playful theme really lands. Think a cheerful snowman, a reindeer, or a waving Santa mounted on the side of the box or on a stake beside the post. Skip paper and thin cardboard, which turn to mush after one wet snow.
Look for painted wood, corrugated plastic, or heavy PVC cutouts instead. Attach them with screws or strong outdoor clips rather than tape, and keep them below the flag so the mail carrier still has clear access. If you have young kids, let them pick one character each.
A small lineup of cutouts feels more personal than a single store-bought set.
Keep It Safe And Simple For Little Helpers
The whole point is letting kids join in, so build the setup around jobs they can actually do. Handing over ribbon, placing lightweight cutouts, and arranging a few unbreakable ornaments keeps them involved without any risk. Save the ladder work, drilling, and anything electrical for an adult.
Keep the ground clear of loose tools while kids are helping, and set a rule that the mailbox flag stays off-limits so nobody gets pinched. A quick check that the door still opens freely and the flag moves without snagging takes ten seconds and saves your mail carrier a headache.
Make Swapping Easy Next Year
Playful displays are meant to change, so store the pieces in a way that makes next December painless. Label a single bin for cutouts, ribbon, and clips, and snap a photo of the finished setup before you take it down. The photo is the real trick.
Next year you'll know exactly where everything went without guessing, and kids can match pieces to the picture themselves. Swap a character or two each season and the display stays fresh without a full redo.
FAQ
Will decorating my mailbox break any mail delivery rules?
In the US, keep the inside of the box clear and don't block the door, latch, or flag. Decorations on the outside of the post and box are generally fine, but check with your local post office if you're unsure, since rules can vary.
How do I keep decorations from blowing away?
Use outdoor-rated zip ties, floral wire, and adhesive hooks rather than tape alone. Anchor heavier pieces to the post itself and weigh down small props or skip them in windy areas.
Can I use real greenery in freezing weather?
Yes, but expect it to dry out and drop needles over a few weeks. Soak branches before arranging and mist them occasionally, or mix real greens with faux ones for staying power.
Are battery lights safe outdoors in snow and rain?
Choose lights rated for outdoor use and tuck battery packs under a cover or inside a weatherproof box. Bring them in during heavy storms and check the seals before the season starts.
How much does a Christmas mailbox display usually cost?
A simple ribbon or wreath setup can cost under $20, while lit garlands and layered displays run higher. Most of these ideas reuse supplies you may already have from other holiday decor.
Conclusion
A festive mailbox doesn't need a full yard overhaul to make an impression. Pick two or three ideas that fit your space, your weather, and how much time you want to spend out there, then let the rest wait. Even one small touch by the curb can set the tone for the whole walk to your door.
Start with whatever greets people first, like the post or the path, and build from there. Swap pieces as the season moves along if the mood strikes. Keep it simple, keep it sturdy, and you'll smile every time you grab the mail.