15 DIY Winter Wonderland Decoration Ideas at Home
A plain living room can look like a snow-dusted cabin by the end of a weekend, and you don't need a big budget to pull it off. Most of these projects use things you already own or can grab cheap at a craft store.
The trick is layering: light, texture, and a little fake snow go a long way. Work through the list in order or cherry-pick the ones that fit your space.
Either way, you'll end up with a room that feels calm, bright, and a little bit magical.
1. Start With a Faux Snow Base

Before you hang a single snowflake or string a garland, give your surfaces something to sit on. A layer of faux snow instantly turns a bare mantel or table into a winter scene. You can make a batch in about five minutes with two common household ingredients, and it costs pennies compared to store-bought bags.
The base layer does most of the heavy lifting in a winter display. It softens hard edges, hides imperfections, and makes everything you place on top look intentional. Think of it as the foundation for the rest of your decorations.
The Two-ingredient Snow Recipe
Mix about a cup of baking soda with a few squirts of shaving cream until you get a fluffy, moldable texture. Add the shaving cream a little at a time so it doesn't get sticky. This version holds its shape well, so you can pile it up or press it around candle bases.
A No-mess Cornstarch Option
If you want something drier and longer-lasting, combine cornstarch with a small amount of water or clear hand soap until it looks like powder snow. This mix brushes off surfaces easily and works great on trays or shelves where you won't be touching it much. Store any extra in a sealed jar.
Where To Spread It
Scatter your faux snow across mantels, cake stands, wooden trays, and tabletop displays. Keep it thin near edges so it doesn't spill, and build it up around candles or small figurines for a drifted look. A little goes a long way, so start light and add more as needed.
2. Frosted Branches in a Tall Vase
Bare branches have a way of looking elegant and expensive in the right setting. Give them a frosty coating and a tall vase, and you've got a centerpiece that reads like a boutique window display. The best part is the cost: a handful of sticks from the yard and a few pantry staples get you there.
This one works in almost any room because it's tall and airy. It fills vertical space without cluttering your surfaces, which is exactly what a small space needs. Set aside about half an hour and let it dry while you tackle the next project.
Start by gathering your branches. Thin, twiggy ones with lots of little forks catch the frost best, so look for those over thick logs. Trim them to roughly one and a half times the height of your vase so they fan out nicely at the top.
Give them a quick wipe with a dry cloth to knock off loose dirt. You want a clean surface so the coating sticks evenly. Once they're prepped, you're ready to frost.
The Two-minute Frosting Method
Spray adhesive is the fast route here. Lay your branches on newspaper outside or over a drop cloth, then mist them lightly with the spray. Don't soak them; a tacky surface is all you need.
While the glue is still sticky, sprinkle Epsom salt over the branches or roll them through a shallow tray of it. The coarse crystals look surprisingly like real frost. Let them sit for a few minutes to set before you handle them.
The No-glue Option
If you'd rather skip the adhesive, fake snow spray does the job in one step. Hold the can about eight inches away and spray in short bursts, turning the branch as you go. Build it up in thin layers so it looks dusted rather than dunked.
Let the spray dry completely before moving the branches. Rushing this part smudges the coating and leaves bald patches.
Arranging It So It Looks Intentional
Drop a few inches of sand, pebbles, or floral foam into the vase first. That gives the branches something to stand in and keeps them from flopping to one side. Push the thickest branches in first, then fill the gaps with thinner ones.
Angle them slightly outward as you go so the arrangement has some width. A tight, vertical bundle looks stiff; a loose fan looks natural. Step back and tweak until it feels balanced.
Making It Last
Epsom salt can slowly absorb moisture and start to look dull, so keep the vase away from humid spots like a bathroom or a spot right over a radiator. A light re-spritz of adhesive and a fresh sprinkle freshens it up if needed. Real branches will dry out and hold their shape for weeks.
If you want to reuse the arrangement next year, store it loosely wrapped in tissue so the frost doesn't get crushed.
3. Glowing Mason Jar Lanterns

Mason jar lanterns bring a soft, snowy glow to any corner without much effort. You probably have a few jars tucked away in the kitchen, and the rest of the supplies are cheap and easy to find. These little lanterns work on shelves, windowsills, or entryway tables.
They look like tiny winter scenes, and you can make a batch in under an hour.
Start with clean, dry mason jars in any size. Fill each about halfway with fake snow, then nestle in a few small pinecones and a string of fairy lights. Battery-operated lights work best since there's no cord to hide.
Once everything is in, screw the lid on and flip the switch. The light filters through the snow and pinecones, creating a warm, dappled glow that feels cozy and festive. You can group a few jars of different heights together for more impact, or scatter them around the house for little pockets of light.
What You'll Need
Gather mason jars (pint or quart size), fake snow, small pinecones, and battery-operated fairy lights. A hot glue gun is optional for securing the lights, but not necessary. You can also add a ribbon or twine around the jar neck for extra charm.
Assembly Tips
Add the fake snow first, then arrange the pinecones so they stand upright. Wind the fairy lights loosely around the pinecones, leaving the battery pack near the top for easy access. If your lights have a timer, set them to turn on at dusk for a no-fuss glow.
Where To Place Them
These lanterns look great on mantels, bookshelves, or as a centerpiece on a dining table. They also make a welcoming touch on an entryway console or windowsill. For a safer option, use flameless LED candles instead of fairy lights if you have pets or kids.
4. A Yarn and Twine Snowflake Wall
Blank wall above the couch driving you a little crazy? A cluster of handmade snowflakes fixes that fast. They're light, they're airy, and they cost almost nothing to make.
The trick is mixing sizes and textures so the wall looks collected instead of store-bought. Popsicle sticks give you crisp, geometric flakes, while yarn-wrapped wire bends into softer, rounder shapes. Hang a dozen or so in a loose cloud and the whole room feels taller and brighter.
Start by deciding how much wall you want to cover. A tight cluster over a console table reads as a focal point, while a scattered trail drifting toward a corner feels more like falling snow. Sketch a rough layout on paper first, or tape paper templates to the wall and step back to check the spacing before you commit.
Keep the color story simple. White, cream, and a soft icy blue work with almost any room, and a single metallic flake adds a little sparkle without shouting. Once you've got your shapes made, hanging takes minutes.
Make The Popsicle Stick Flakes
Lay out six sticks in a star and glue them where they cross, then add a second layer of shorter sticks for detail. A dot of hot glue at each joint holds everything steady. Paint them white or leave the wood bare for a warmer look.
A thin coat of glitter on the tips catches light from a lamp and makes the wall feel less flat.
Bend And Wrap The Wire Version
Bend craft wire into a six-point snowflake, twisting small loops at the ends so nothing pokes through. Then wrap yarn around the whole shape, going over each arm a few times until it looks full. Mix thin twine with chunky yarn for contrast.
The wire holds the shape, so you can make these as big as you like without them sagging.
Hang Them Without Wrecking The Wall
Fishing line is your best friend here. Tie a loop around each flake and tack the other end to the wall with a small nail or a damage-free hook. Vary the drop so the flakes sit at different heights, and let a few hang lower near the edges.
That uneven rhythm is what makes the wall look like weather instead of a craft project.
5. DIY Snowball Garland

A garland made of fake snowballs is one of those projects that looks store-bought but costs almost nothing. You string together fluffy white shapes and drape them across a mantel, a stair rail, or a doorway, and suddenly the whole room reads as winter. The best part is how forgiving it is.
Cotton balls, pom-poms, and yarn-wrapped foam balls all work, so you can use whatever you already have in a drawer.
The basic idea is simple: make or gather a pile of white, round-ish objects, then thread them onto twine or string with a little space between each one. A six-foot garland usually needs somewhere between 30 and 50 snowballs, depending on how dense you want it to look. Space them closer for a full, fluffy look or wider for something airier.
Before you start threading, decide where the garland will hang. Stair rails and doorways need a longer strand, while a mantel can handle something shorter and chunkier. That decision tells you how many snowballs to make and how much string to cut.
Give yourself a few extra inches on each end for tying.
Pick Your Snowball Material
Cotton balls are the fastest option and give you that soft, cloud-like texture right out of the bag. They're light, cheap, and easy to thread with a needle, though they can shed a little if you handle them roughly. White pom-poms are sturdier and hold their shape better, which makes them great for garlands that get touched or moved.
Yarn-wrapped foam balls take more time but look the most polished. Wrap small foam spheres in white yarn until they're fully covered, then secure the end with a dot of glue. They're denser and hold up well outdoors on a covered porch, too.
Threading Without The Tangles
Use a large-eyed needle or a piece of floral wire bent into a loop to pull your string through each snowball. Cotton balls slide on easily, but pom-poms and yarn balls need a little more push. Tie a knot at the end of your string first so nothing slips off.
Work on a flat surface and keep the string loose as you go. If you pull it tight, the garland will bunch up and look lumpy instead of draping naturally. Leave a small gap between snowballs and slide them along the string to adjust spacing once you're done.
Hang It So It Drapes Right
A garland looks best when it sags a little rather than stretching tight. On a mantel, drape it in soft loops and anchor the ends with small hooks or tape. For stair rails, wrap it loosely around the handrail and let it dip between posts.
Add a few tiny touches if you want extra charm. Small twine bows, a sprinkle of faux snow, or a couple of mini pinecones tucked between the snowballs give it a little more life without making it busy.
6. Frosted Pinecone Bowl

Pinecones already look like they belong in a winter scene, so giving them a frosty finish is a small step that pays off big. A bowl of these on a coffee table or console adds texture and a natural touch without feeling fussy. The whole project takes about an hour, including drying time, and you probably have most of the supplies already.
Start by gathering pinecones—store-bought or foraged, as long as they're clean and dry. If you're using foraged ones, give them a quick rinse and let them dry completely, or bake them at 200°F for 30 minutes to kill any critters. Then you're ready to frost.
Paint Or Dip
For a light dusting, hold each pinecone by the stem and brush white craft paint over the tips only. For a heavier frost, dip the pinecone halfway into a shallow dish of paint, let the excess drip off, and set it on wax paper to dry. You can also mix paint with a little water for a wash that seeps into the crevices.
Add The Salt
While the paint is still wet, sprinkle table salt or Epsom salt over the pinecone. The salt sticks to the wet paint and gives a sparkly, icy look. Shake off the excess and let everything dry completely before arranging.
Arrange And Display
Pile the frosted pinecones in a shallow bowl or wooden tray. Mix in a few plain pinecones for contrast, or add a handful of fake cranberries for a pop of color. Place the bowl on a coffee table, console, or entryway table where it can be seen from above.
7. A Mini Winter Village on a Shelf
A single shelf can hold an entire snowy town if you give it a little imagination and a free afternoon. Cardboard houses, thrifted figurines, and a few battery tea lights do most of the work here. The best part is that it grows over time—pick up a tiny bottle-brush tree or a ceramic cottage whenever you spot one cheap, and the village keeps getting better.
You don't need a craft room or special skills to pull this off. A sturdy shelf, some cardboard, glue, and faux snow cover the basics. Everything else is optional, which means you can start small and add pieces as you find them.
Build The Cardboard Houses
Cut simple house shapes from corrugated cardboard—a box with a triangle roof is plenty. Paint them white or soft gray, then add tiny windows with a marker or scraps of colored paper. Hot glue holds the pieces together fast, and a coat of white paint hides any rough edges.
Group three or four houses at different heights so the roofline looks natural instead of flat.
Add Thrifted Figurines And Trees
Thrift stores and dollar bins are goldmines for tiny people, deer, and bottle-brush trees. Mix sizes and materials—a ceramic deer next to a plastic figure still reads as charming once the snow goes down. Tuck the trees behind the houses and place figures in front so the scene has depth.
Keep the color palette tight, sticking to whites, greens, and a little silver or red.
Light It With Battery Tea Lights
Battery tea lights give the village that warm evening glow without any cords. Hide one inside each cardboard house by cutting a small door in the back, or cluster a few behind the trees to backlight the scene. The flicker setting looks best for this, so check the switch before you tuck them away.
Swap the batteries every few weeks so the village stays lit all season.
Dust It With Faux Snow
Loose faux snow ties the whole shelf together. Sprinkle a thin layer across the shelf first, then add small drifts against the houses and trees. A little goes a long way—too much and the details disappear.
Leave a clear path in front so the figures stay visible, and keep a small brush nearby for quick touch-ups.
8. Fake Snow Windows

Windows are the one surface in your home that works double duty during winter, showing off to the neighbors outside while framing the view from your couch. Frosting them with fake snow turns a plain pane into a little scene, and it takes about as long as brewing a pot of coffee. You can go subtle with a light dusting or full-on storybook with stenciled trees and snowflakes.
The best part is how forgiving it is. If a line wobbles or a snowflake comes out lopsided, you just wipe it off and start again. No one will ever know.
Snow spray is the easiest route, and it's cheap at most big-box stores and craft shops. The trick is to spray from about a foot away in short bursts rather than one heavy blast. That gives you a soft, uneven frost that looks like real snow settling on the glass.
Work in thin layers and let each one dry for a minute or two before adding more. Build up heavier coverage near the corners and along the bottom edge, where snow would naturally pile up. Leave the middle of the pane mostly clear so light still comes through.
When you're happy with it, resist the urge to touch it. Snow spray smudges easily while wet and takes a few hours to fully set. Once it's dry, it holds up well and wipes off with a damp cloth and a little glass cleaner when the season ends.
If you don't have snow spray on hand, plain white toothpaste works surprisingly well. Squeeze a little onto a plate, dab a sponge or old toothbrush into it, and flick it onto the glass for a speckled, frosty look. It dries matte and washes off cleanly with warm water.
Stencils Make It Look Store-bought
Cut a snowflake, pine tree, or reindeer shape out of cardstock and hold it flat against the glass. Spray or dab around the edges, then peel it away slowly while the snow is still slightly tacky. The shape stays clear while everything around it frosts over.
You can buy reusable stencils for a few dollars, or print free templates and cut your own. Tape the stencil down so it doesn't shift mid-spray. For a layered look, overlap two or three shapes at different heights along the bottom of the window.
A word of caution: press the stencil firmly and don't overspray the edges. Soft, slightly fuzzy outlines actually look more like real frost than razor-sharp ones, so don't stress about perfection.
Make The Outside View Count Too
Remember that people walking by will see your handiwork from the street, and the effect reads differently from that side. Keep your designs bold and simple so they hold up from a distance. A row of small trees along the bottom edge or a few big snowflakes near the top works better than fussy detail.
If your window faces a porch light or a streetlamp, the frost will catch that glow at night and look genuinely magical. Pair it with a warm lamp inside and you've got a scene that works around the clock. One practical note: skip the frosting on any window you need to see clearly out of, like the one above the kitchen sink.
Save the fun stuff for panes you mostly look at rather than through.
Cleanup Is Half The Battle
Snow spray and toothpaste both come off, but the method matters. Start with a plastic scraper or an old credit card to lift the bulk of it, then follow with warm water and a drop of dish soap. A microfiber cloth finishes the job without streaks.
Avoid scrubbing with anything abrasive, especially on older glass or windows with a film coating. And test a small corner first if you're unsure how your windows are treated. Store your stencils flat in a folder between seasons so you can reuse them next year.
Rinse them well before putting them away, since dried spray can crust up the edges and ruin the crisp outline.
9. Cozy Flannel and Faux Fur Accents
Winter wonderland decor can lean a little frosty if you're not careful. All that white and silver looks beautiful, but it doesn't exactly invite you to curl up. Flannel and faux fur fix that fast.
They add softness and warmth without changing the snowy color palette you've already set up.
The goal is to make the room feel like a ski lodge after a day on the slopes—cozy, textured, and a little indulgent. You don't need to reupholster anything. A few swaps and layers will do the trick.
Start With Pillow Covers
Flannel pillow covers are the easiest switch. Look for plaids in red, green, or gray, or go with a solid cream flannel that reads as snowy but soft. Slip them over your existing throw pillows—no need to buy new inserts.
Mix one or two flannel pillows with your current pillows so the room doesn't feel like a cabin explosion. A single faux fur pillow in white or ivory adds a luxe touch without going overboard.
Layer In Throws And Blankets
Drape a faux fur throw over the back of the couch or the arm of a chair. It instantly makes the space look cozier and more inviting. For a softer look, try a white knit blanket with a chunky texture—it echoes the snow theme but feels warm.
Keep one throw per seating area so it doesn't get cluttered. If you have a reading chair, a small faux fur throw folded on the seat is an open invitation.
Add Small Accents
Flannel and faux fur don't have to stop at the big pieces. A flannel table runner on the dining table or a faux fur tree skirt under the Christmas tree ties the look together. You can also use faux fur stockings or a flannel wreath.
These little touches make the theme feel intentional without much effort.
10. DIY Icicle Lights for the Mantel

Icicle lights don't have to come from a big-box store. You can make your own version with clear beads, fishing line, and a strand of LED lights, and it'll look just as good—maybe better. The beads catch the glow and scatter it around, so the whole mantel gets a soft, icy shimmer.
Hang them from a mantel or window frame and you've got instant winter magic without the tangled mess of store-bought strands.
The best part is you probably already have some of these supplies. Even if you don't, a quick trip to the craft store will set you back less than a fancy coffee. And the process is simple enough to do while watching a movie.
What You'll Need
Grab a strand of LED fairy lights (battery-operated is easiest for hanging), clear plastic or glass beads in assorted sizes, and clear fishing line. You'll also want scissors and maybe a hot glue gun if you want extra security. The beads can be any shape, but teardrop or faceted ones look most like real icicles.
Stringing The Beads
Cut fishing line into varying lengths—some short, some long—to mimic natural icicles. Tie a bead to the bottom of each line, then add a few more beads above it, spacing them out. Leave a few inches of empty line at the top to attach to the light strand.
Mix bead sizes for a more organic look.
Attaching To The Lights
Tie each beaded line to the wire of your light strand, spacing them every few inches. If you're using a light strand with small bulbs, you can tie the line right above a bulb so the light shines through the beads. Once everything's attached, hang the strand along your mantel or window frame and turn it on.
Tips For A Realistic Look
Don't make all the icicles the same length—real ones vary. Also, try clustering a few beads near the top of some lines and leaving others sparse. If you want a frostier effect, lightly spray the beads with a matte clear coat before stringing.
And use warm white lights for a cozy glow, or cool white for a more icy feel.
11. A Snowy Centerpiece Tray
Centerpieces usually get stuck in one spot, which is a shame because the table is where everyone gathers. A tray fixes that problem. You build the whole snowy scene on a flat surface, then carry it wherever the action is—dinner, then the coffee table, then the sideboard when you need the room back.
It also keeps the mess contained. Faux snow, candles, and tiny trees all live inside the tray's edges, so you're not vacuuming glitter off the tablecloth every night.
Start with any tray you already own—a serving tray, a wooden cutting board, even a shallow basket with a liner. The lip matters more than the material, since it holds everything in place when you move it. Pick something with a little height on the sides and you're set.
Build in layers, bottom to top. That's the whole secret, and it takes about ten minutes once your supplies are out.
The Base Layer
Spread a thin, even layer of faux snow across the tray floor. You want enough to cover the surface but not so much that items sink and tip. A half-inch is plenty.
If you'd rather skip loose snow, use a folded white blanket, a piece of fleece, or even a stack of white napkins as the base. It reads just as wintry and won't scatter when someone bumps the table.
What Goes On Top
Cluster in odd numbers—three small evergreens, three candles, a few ornaments. Odd groupings look natural, while even ones tend to look staged. Vary the heights so your eye moves around.
A tall pillar candle next to a low sprig of pine and a small white ornament gives the tray shape. Tuck in a few pinecones or a single sprig of berries for contrast. Keep candles in glass holders or on small dishes so wax never meets the snow or the tray finish.
Moving It Around
Lift the tray with both hands and keep it level—loose snow shifts fast. Set it down gently and give it a small nudge to settle everything back into place. Before you relocate it, check that nothing tall is wobbly.
A quick press on each candle tells you if it needs a steadier base. When the season ends, pour the faux snow into a zip bag and store the whole tray setup together for next year.
12. Paper Snowflake Curtains
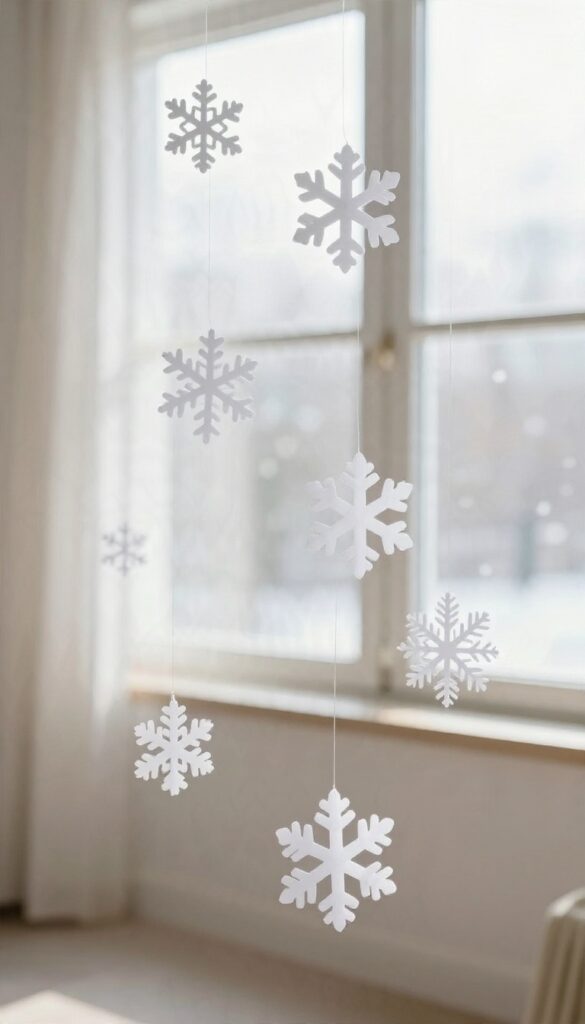
Snowflakes taped to a window look sweet but flat. String them on fishing line and they float, catching light and drifting when someone walks past. It's the kind of project you can start with a stack of printer paper and finish before your coffee goes cold.
The whole thing hinges on two cheap materials: paper and clear line. Fishing line is the secret sauce here because it disappears against a bright window, so the snowflakes seem to hang in midair. You can cut every flake by hand or mix in a few folded-and-snipped ones for variety.
Cutting A Good Batch
Fold standard printer paper into quarters or sixths, then snip wedges and notches along the folded edges. Vary the shapes so the curtain doesn't look like a copy-paste job. Coffee filters work well too, and their round shape gives you softer, more organic flakes.
Aim for 15 to 25 flakes per window so the curtain reads as full without feeling cluttered.
Hanging So They Float
Tie each flake to a length of fishing line, leaving a few inches of slack between them. Tape the top of each strand to the window frame or a tension rod, spacing strands a hand-width apart. Stagger the lengths so the bottom edge looks uneven and natural, like real falling snow.
Making It Last
Paper curls in damp rooms, so keep these away from steamy bathrooms and radiators. A light spritz of starch or a quick press under a book flattens any curl before you hang them. If you want a version that survives the season, swap paper for vellum or thin white felt.
13. Frosted Glass Candle Holders
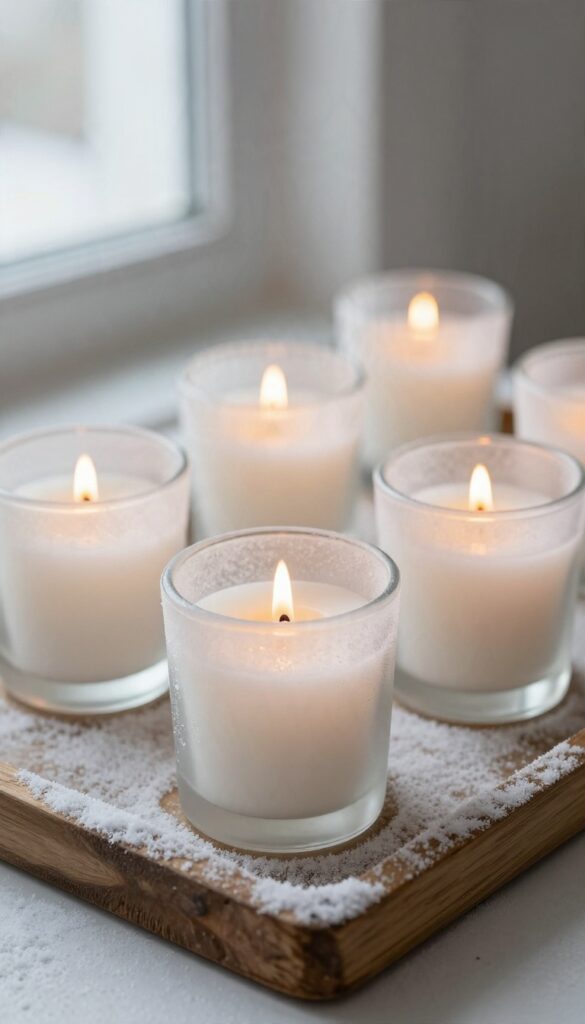
Plain glass votives can look a little too clean for a winter scene. A quick coat of Mod Podge and a roll in Epsom salt gives them a frosted, icy finish that catches the candlelight beautifully. Group a few together and you've got a soft, snowy glow without any real snow.
This project is about as simple as it gets, but the results look like something from a boutique. You'll need clean glass votives or small jars, Mod Podge, a brush, Epsom salt, and white candles. The process takes minutes, and you probably already have most of the supplies.
The key is to work in small sections so the glue doesn't dry before you add the salt. Once they're dry, arrange them on a tray or along a mantel for an instant winter vibe.
What You'll Need
Gather glass votives (any size or shape works), Mod Podge (matte or gloss), a foam brush, Epsom salt, and white or ivory candles. You might also want a paper plate or wax paper for drying. Epsom salt gives a chunkier, more realistic frost than table salt, so stick with that if you can.
Step-by-step Frosting
Start by wiping the glass clean to remove any fingerprints or residue. Brush a thin, even layer of Mod Podge over the outside of the votive, working in sections. Immediately roll the glued area in Epsom salt, pressing gently so it sticks.
Set aside to dry for about 20 minutes, then repeat on any missed spots. Let them dry completely before adding candles.
Arranging For Maximum Glow
Group holders of different heights together on a tray or a bed of faux snow. Use white or cream candles to keep the look cohesive. The frosted glass diffuses the light, creating a soft, icy glow that feels cozy and magical.
For a little extra sparkle, tuck in a few tiny fairy lights around the base.
14. A White Wreath With Natural Texture
A wreath is the first thing guests see, and a plain white one reads clean and wintry without shouting holiday. The trick is texture. All-white can go flat fast, so you break it up with yarn, faux snow, and a few pinecones to keep things interesting.
This one also earns its keep past December. Skip the red bows and reindeer and you get something that works straight through February, which is more than most holiday decor can say.
Start with a foam or wire wreath form from any craft store. Foam gives you a chunkier base and holds pins well, while wire is lighter and cheaper. Either works.
Wrap the whole thing in white yarn, working in small sections and pushing the strands tight together so no green or gray peeks through. A chunky yarn covers faster, but a thinner one lets you build up more texture. Once the base is wrapped, you add the natural bits.
Small pinecones, a few sprigs of dried greenery, and a dusting of faux snow pull it together. Keep the palette tight so it stays calm instead of busy.
Wrapping The Base
Tie your yarn to the form with a tight knot and start wrapping, overlapping each pass just a little. Push the loops together as you go so the coverage stays even. Don't stress about perfection.
A few visible gaps actually add character, and the pinecones and snow will cover the rough spots anyway. When you get back to the start, tuck the tail under a few strands and secure it with a dot of hot glue.
Adding Pinecones And Snow
Use small pinecones, not the big ones, so the wreath stays balanced. Hot glue them in clusters of two or three rather than spacing them evenly, which looks more natural. For the snow, spray a light coat of faux snow spray on the tips of the pinecones and a few spots on the yarn.
Go light. A little reads as frost, too much reads as a mess. Finish with a simple ribbon or twine loop for hanging.
Skip the bow if you want it to work past the holidays.
15. Snow-Dusted Entryway Basket
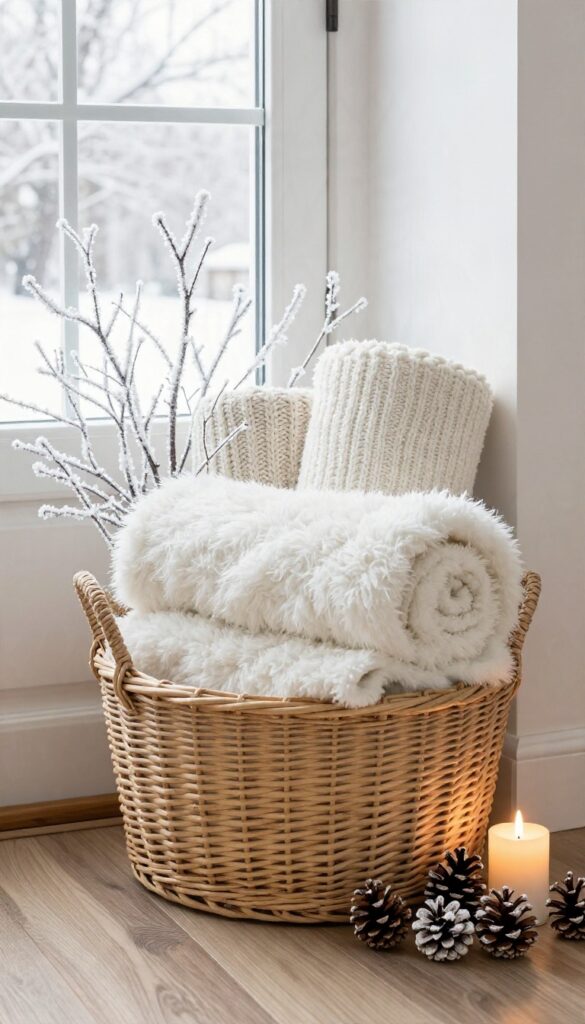
Your entryway sets the mood before anyone takes off a coat. A basket by the door does more than hold clutter—it can tell guests they just stepped into a winter scene. Fill one with soft white blankets, frosted branches, and a few battery candles, and the whole space warms up in about five minutes.
The best part is that it works with whatever basket you already have. Wicker, wire, or woven, it all reads cozy once you layer in the right textures. No outlet, no drilling, no commitment.
Start with a basket that's wider than it is tall. A low, open shape lets people see the layers inside, which is where the magic happens. If yours has a handle, tuck it down or let it lean against the wall so it doesn't block the view.
Line the bottom with a folded white throw or a piece of fleece. That base keeps everything from shifting and gives the arrangement a soft landing. Then build upward, keeping the tallest pieces toward the back.
What Goes In The Basket
Roll two or three white or cream blankets and stand them upright along one side. Fluffy faux fur and chunky knits both work, and mixing textures looks better than matching everything. Tuck frosted branches behind the blankets so they fan out like they're growing from the basket.
Add a few pinecones dusted with fake snow for weight at the front. Battery-operated candles finish it off. The flicker makes the frosty branches glow and pulls the whole thing together.
Making The Frost Look Real
Real branches work if you spray them lightly with fake snow and let them dry outside. A can of spray snow costs a few dollars and covers several stems. Don't coat every branch evenly.
Frost settles unevenly in nature, so leave some tips bare and let others look heavy with snow. That unevenness is what sells the effect. If you're using faux branches, fluff them first, then spray.
They hold the product better once the leaves are separated.
Candle Safety And Placement
Stick with battery candles here. Real flames and fabric blankets don't mix, especially in a high-traffic spot by the door. The warm-white flicker option looks more like a real flame than the bright amber ones.
Set two or three at different heights so the light spreads across the basket. Check that the battery packs are hidden under the blankets or branches. A visible plastic switch breaks the illusion fast.
Keeping It Guest-friendly
Leave a clear path around the basket so people can drop bags or set down a purse without knocking it over. If your entryway is tight, a narrower basket against the wall works just as well. Refresh the arrangement every week or so.
Blankets get squished and branches shift, and a quick fluff takes seconds. In a busy household, keep a second basket nearby for actual shoes and gloves. The decorated one stays pretty, and the practical one does the dirty work.
FAQ
How much does it cost to make a DIY winter wonderland at home?
Most of these projects cost under $10 each if you use craft-store basics and things you already own. Faux snow, Epsom salt, cotton balls, and battery lights do most of the heavy lifting, so you can build the look gradually without a big spend.
Can I reuse these decorations after winter?
Yes. Stick to neutral whites, silvers, and natural textures and most of these pieces work through January and beyond. Store faux snow and branches in sealed bins so you can pull them out again next year.
What's the easiest project for a beginner?
The mason jar lanterns and the snowball garland are the simplest starting points. Both need only a few supplies and take under an hour, and they make a visible difference right away.
How do I keep faux snow from making a mess?
Work over a tray or sheet, press the snow into place with a light adhesive, and keep loose snow away from high-traffic floors. Vacuum-friendly options like cotton batting and felt snow are good picks if you have pets or kids.
Do I need special tools for these ideas?
Not really. Scissors, glue, a hot glue gun, and some spray adhesive cover almost everything on this list. A few projects use a stencil or paintbrush, but nothing requires power tools.
Conclusion
You don't have to turn your whole house into a snow globe to get that winter wonderland feel. Pick a few ideas that match your space and your free time, then let the rest wait for another year. Start with the spot you see first when you walk in, whether that's the mantel, the entryway, or the tree.
Add one project that makes you smile, see how it feels, and build from there. A few thoughtful touches beat a house full of decorations every time.