25 Cleaning Burnt Pans Tips for Stuck Food and Grease
Burnt-on food and stubborn grease can turn your favorite pan into a frustrating mess. You don't need expensive cleaners or harsh chemicals to restore it—just a few pantry staples and a little patience.
These 25 tips target everything from light stains to caked-on residue, using methods that actually work without damaging your cookware. Each tip is practical and tested, so you can skip the guesswork and get back to cooking.
Ready to make your pans look brand new? Let's dive into the techniques that cut through the toughest grime.
1. Boil Baking Soda Water
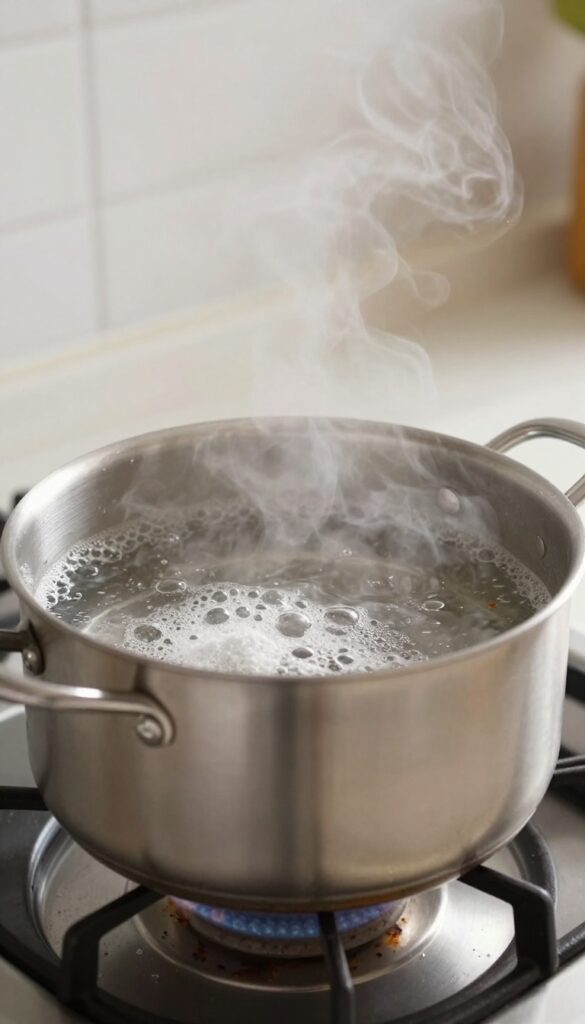
Baking soda is a gentle abrasive that works wonders on burnt pans without scratching. When combined with heat and water, it creates a fizzing reaction that helps break down stubborn food particles. This method is especially effective for light to moderate burnt-on residue and is safe for most cookware surfaces.
Fill your burnt pan with enough water to cover the affected area. Add about 2 to 3 tablespoons of baking soda, then bring the water to a boil. Let it simmer for 10 minutes, allowing the baking soda to work its magic.
As it bubbles, you'll see burnt bits start to loosen. After simmering, remove the pan from heat and let it cool slightly. Use a wooden spoon or spatula to gently scrape away the residue—it should come off easily.
If any stubborn spots remain, make a paste of baking soda and water and scrub with a soft sponge.
Why Baking Soda Works
Baking soda is alkaline, which helps neutralize acidic burnt residues. Its fine grains provide gentle abrasion without scratching your pan's surface. The heat and water activate its cleaning power, making it an effective, non-toxic solution.
Best Pans For This Method
This technique is safe for stainless steel, non-stick (with care), ceramic, and enameled cast iron. Avoid using it on unseasoned cast iron or aluminum pans, as baking soda can react with the metal or strip seasoning.
Pro Tips For Better Results
For extra stubborn spots, add a splash of white vinegar after boiling—the fizzing action boosts cleaning. Let the pan soak in the baking soda water overnight for tough, caked-on grease. Always rinse thoroughly after cleaning to remove any residue.
2. Vinegar and Baking Soda Paste
When heat and oil collide, they create a stubborn layer of carbon that laughs at regular soap. That's where this classic duo steps in. Vinegar and baking soda react to lift burnt bits without harsh scrubbing, making it a go-to for everyday pan rescues.
This method works best on stainless steel, ceramic, and enamel pans. Avoid it on non-stick surfaces, as baking soda can be too abrasive. The reaction between the acid and base creates bubbles that help dislodge food particles, while the paste itself acts as a gentle scrub.
Making The Paste
Start by sprinkling a generous layer of baking soda over the burnt area. Then, slowly pour white vinegar over it—you'll see fizzing immediately. Let the reaction settle for a minute, then mix the two into a thick paste.
Add more baking soda if it's too runny.
Applying And Waiting
Spread the paste evenly over the burnt spots, making sure to cover all the crusty areas. Let it sit for 15 minutes. This gives the mixture time to break down the burnt-on residue.
For extra-stubborn stains, you can leave it for up to 30 minutes.
Scrubbing And Rinsing
After the wait, use a non-abrasive sponge or soft brush to gently scrub in circular motions. You'll see the burnt bits lift away easily. Rinse thoroughly with warm water and dry immediately.
If any residue remains, repeat the process or follow up with a quick boil of vinegar and water.
3. Dishwasher Tablet Soak
If you have a dishwasher tablet lying around, you're holding a secret weapon against burnt pans. Those tablets are packed with enzymes and detergents designed to break down tough food residue. Drop one into your pan, add hot water, and let chemistry do the heavy lifting.
After an hour of soaking, most of the gunk will slide right off with minimal scrubbing.
This method is especially effective for greasy, baked-on stains that resist regular soap. The tablet's active ingredients soften the burnt layer, making it easy to wipe away. It's a set-it-and-forget-it solution that saves elbow grease.
How To Do It Right
Fill your burnt pan with enough hot water to cover the stained area. Drop in one dishwasher tablet (any brand works). Let it soak for at least an hour—overnight for tougher jobs.
After soaking, pour out the water and scrub with a non-abrasive sponge. Most residue will come off effortlessly. Rinse thoroughly before using the pan again.
Why It Works So Well
Dishwasher tablets contain powerful surfactants and enzymes that target proteins and fats. Unlike dish soap, they're formulated to dissolve dried-on food without excessive foaming. The hot water activates these ingredients, accelerating the breakdown of carbonized grease.
It's the same science that cleans your dishwasher's interior, just applied directly to your pan.
When To Avoid This Method
Avoid using dishwasher tablets on aluminum or non-stick pans with damaged coatings. The strong chemicals can discolor aluminum or further degrade worn non-stick surfaces. Stick to stainless steel, enameled cast iron, or ceramic pans for best results.
If you're unsure, test a small area first.
4. Salt and Oil Scrub
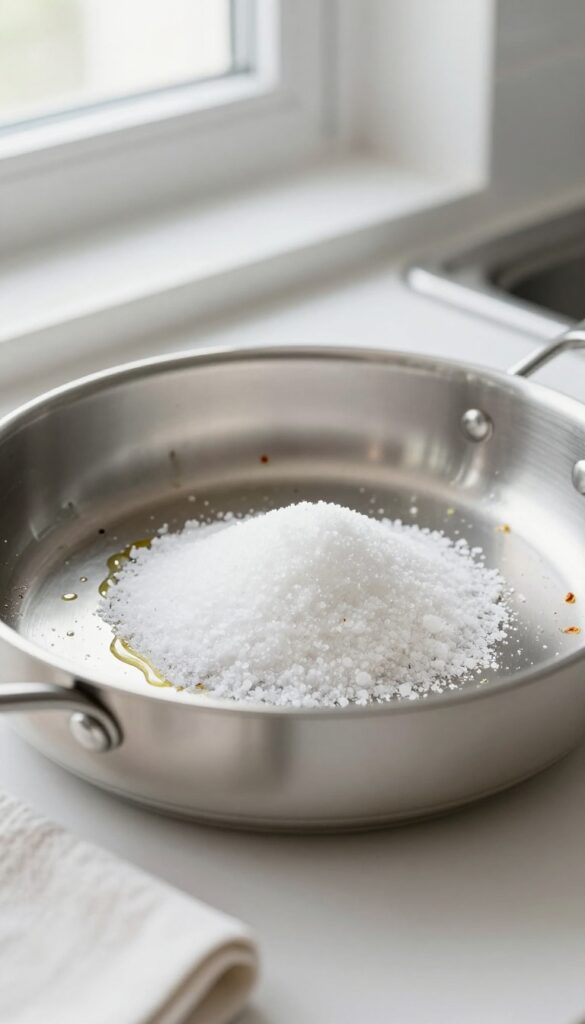
Sometimes the simplest solutions work best. When you need a quick fix for burnt-on food, reach for two kitchen staples: salt and oil. This method is especially handy because you probably already have both ingredients on hand.
It's gentle enough for most cookware but tough enough to lift stubborn residue without scratching.
Coarse salt acts as a natural abrasive, while oil helps loosen the burnt particles and protects the pan's surface. Together, they create a paste that scrubs away grime without harsh chemicals. This technique works well on stainless steel, cast iron, and non-stick pans when used gently.
How To Do It
Sprinkle a generous layer of coarse salt over the burnt area. Add just enough vegetable oil to moisten the salt, forming a thick paste. Use a paper towel or soft cloth to scrub in circular motions, applying moderate pressure.
The salt will gradually break down the burnt food, and the oil will help lift it away. Rinse with warm water and wash as usual.
Why It Works
Salt is harder than most burnt food residues but softer than metal, so it scrubs effectively without scratching. The oil reduces friction and helps dissolve grease, making it easier to wipe away. This combination is also non-toxic and safe for food contact surfaces.
Tips For Best Results
Use coarse salt like kosher or sea salt for better abrasion. Avoid table salt, which is too fine and may not be effective. If the pan is heavily burnt, let the salt-oil paste sit for 5–10 minutes before scrubbing.
For extra stubborn spots, add a squeeze of lemon juice to boost cleaning power.
5. Lemon and Water Simmer
Lemons aren't just for lemonade—they're a powerhouse for cutting through burnt-on messes. The natural acidity in lemon juice works like a gentle solvent, breaking down carbonized food without harsh scrubbing. All you need is one lemon and some water to get your pan looking fresh again.
Slice a lemon into wedges or thin rounds, place them in the pan, and add enough water to cover the burnt areas. Bring it to a boil, then reduce to a simmer and let it bubble away for about 15 minutes. The citric acid lifts the burnt residue, making it easy to wipe away with a sponge.
For extra stubborn spots, let the lemon water sit for another 10 minutes after turning off the heat. This method works best on stainless steel and non-stick pans—avoid using it on cast iron, as the acid can damage the seasoning.
Why Citric Acid Works
Citric acid is a natural chelating agent, meaning it binds to minerals and metals in the burnt food, helping to dissolve the bond between the residue and the pan surface. It's also mild enough not to scratch or corrode most cookware.
Step-by-step Simmer
Fill the pan with enough water to cover the burnt areas. Add lemon slices or a few tablespoons of bottled lemon juice. Bring to a boil, then lower the heat and simmer for 15 minutes.
Turn off the heat and let it cool slightly before scrubbing with a non-abrasive sponge.
When To Use This Method
This technique is ideal for light to moderate burnt-on food and grease stains. For thick, charred layers, you may need to repeat the process or combine it with a baking soda scrub afterward.
6. Cream of Tartar Paste
Cream of tartar is often used to stabilize egg whites or give snickerdoodles their signature tang. But it’s also a surprisingly effective cleaner for burnt pans. Mixed into a paste, it creates a mild acid that helps break down carbonized food without harsh scrubbing.
This method works especially well on stainless steel and ceramic cookware.
To make the paste, combine two tablespoons of cream of tartar with just enough water to form a spreadable consistency. Apply it generously to the burnt areas and let it sit for about 10 minutes. The acid gently loosens the burnt residue.
After the wait, scrub with a non-abrasive sponge or brush. Rinse thoroughly and dry. For extra stubborn spots, add a splash of white vinegar to the paste before applying.
Why Cream Of Tartar Works
Cream of tartar is potassium bitartrate, a natural acid that reacts with burnt food particles. Unlike baking soda, which is alkaline, the acid in cream of tartar helps dissolve carbonized grease and food without needing elbow grease. It’s gentle enough for delicate surfaces like non-stick coatings but effective enough for tough stains.
Best Pans For This Method
This paste is ideal for stainless steel, ceramic, and enameled cast iron pans. Avoid using it on uncoated aluminum or copper, as the acid can cause discoloration. For non-stick pans, test a small area first to ensure the coating isn’t damaged.
The paste works best on light to moderate burns, not rock-hard carbon layers.
Pro Tips For Maximum Effect
Let the paste sit longer for tougher stains—up to 30 minutes. If the paste dries out, reapply a thin layer of water. For extra cleaning power, sprinkle a little baking soda on top after the paste has sat, then scrub.
This creates a gentle fizzing action that lifts residue. Always rinse thoroughly to avoid any acidic aftertaste on future meals.
7. Dryer Sheet Soak
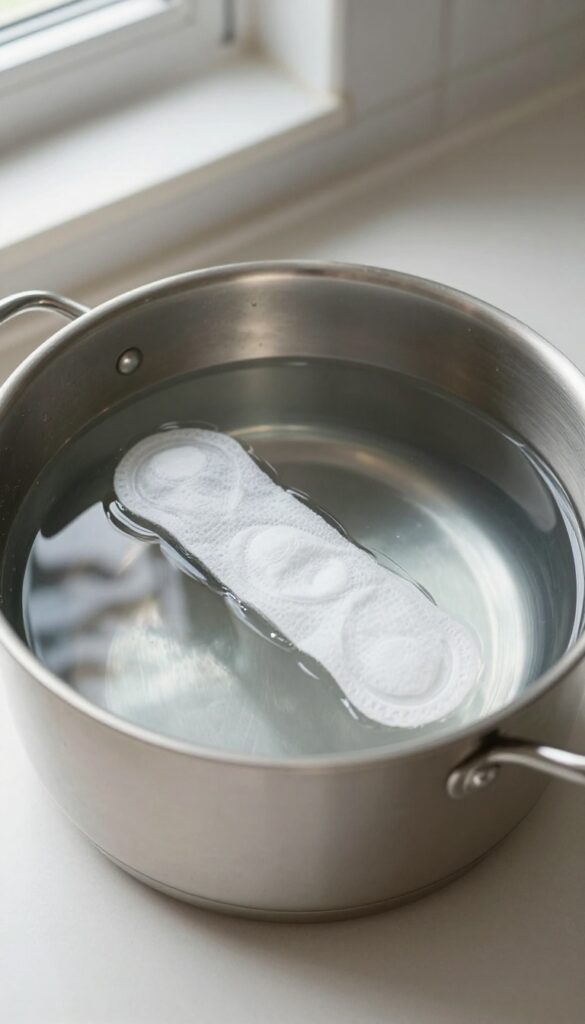
Fabric softener sheets aren't just for laundry—they can work wonders on burnt pans. The softening agents help loosen stubborn food particles without scrubbing. All you need is a dryer sheet, warm water, and a little patience.
How It Works
Dryer sheets contain surfactants and softening compounds that break down burnt-on residue. When soaked in warm water, these chemicals help lift stuck food from the pan's surface. The heat activates the ingredients, making the job even easier.
Step-by-step Soak
Fill your burnt pan with warm water—enough to cover the affected area. Add a single dryer sheet and a drop of dish soap. Let it sit overnight, or at least 8 hours.
In the morning, dump the water and wipe the pan clean. Most burnt bits will slide right off.
Tips For Best Results
Use a fresh dryer sheet for each soak—reusing one won't work as well. If the pan is heavily burnt, you can add a second sheet. Avoid this method on non-stick pans, as the chemicals might damage the coating.
For stainless steel or cast iron, it's perfectly safe.
8. Ketchup Application
Who knew the condiment in your fridge could double as a cleaning agent? Ketchup isn't just for fries—it's surprisingly effective at breaking down burnt-on food thanks to its acidity. This method works especially well on stainless steel and ceramic pans, and it's almost effortless.
Why Ketchup Works
The magic lies in the vinegar and tomato acids in ketchup. These mild acids react with the carbonized residue, loosening it without harsh scrubbing. It's a gentle yet effective approach that won't scratch your pan's surface.
How To Apply It
Squeeze a generous layer of ketchup directly over the burnt areas. Spread it evenly with a spatula or spoon, making sure the entire stain is covered. Let it sit for 30 minutes—longer for stubborn spots.
Then rinse with warm water and wipe clean. For extra grip, add a sprinkle of baking soda before scrubbing.
Tips For Best Results
Use full-sugar ketchup, not sugar-free varieties—the sugar helps with the reaction. If the pan is heavily burnt, repeat the process or let it soak overnight. This method is also great for removing tarnish from copper-bottomed pans.
9. Hydrogen Peroxide and Baking Soda
This duo creates a powerful fizzing reaction that lifts burnt food and grease without harsh scrubbing. Hydrogen peroxide acts as a mild bleach and disinfectant, while baking soda provides gentle abrasion. Together, they tackle stubborn residue safely on most pans, including stainless steel and non-stick surfaces.
How It Works
When hydrogen peroxide meets baking soda, it releases oxygen bubbles that help loosen carbonized food particles. The peroxide also breaks down grease molecules, making them easier to wipe away. This chemical reaction is strong enough to cut through baked-on grime yet gentle on your cookware.
Step-by-step Instructions
First, sprinkle a generous layer of baking soda over the burnt areas of your pan. Then pour hydrogen peroxide (3% solution) directly onto the baking soda until it's fully saturated. Let the mixture fizz and sit for about 15 minutes.
For extra tough spots, you can add a few drops of dish soap. After the wait, scrub with a non-abrasive sponge or brush, then rinse thoroughly with warm water.
Tips For Best Results
Use this method on cool pans to avoid rapid evaporation of the peroxide. If the fizzing stops quickly, add more peroxide to reactivate the mixture. For heavy buildup, you can cover the pan with a damp cloth during the 15-minute rest to keep the solution active.
Always test on a small area first if your pan has a delicate coating.
10. Bar Keepers Friend
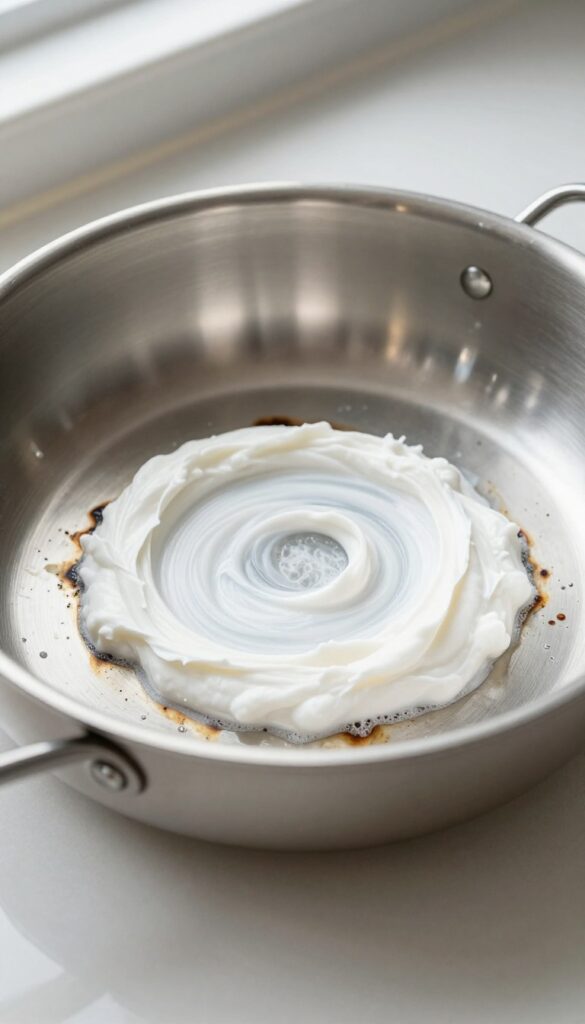
Bar Keepers Friend is a classic cleaning powder that tackles tough burnt-on messes on stainless steel pans. Its mild oxalic acid formula breaks down stains without scratching the surface. This is a go-to for anyone who wants professional-level results at home.
To use Bar Keepers Friend, sprinkle a generous amount onto the burnt area of a cool pan. Add just enough water to form a thick paste—about a tablespoon of water per tablespoon of powder. Let the paste sit for 5 minutes to allow the acid to work.
Then scrub with a non-abrasive sponge or soft brush in circular motions. Rinse thoroughly and dry. For extra-stubborn spots, repeat the process or let it sit longer.
Why It Works So Well
The oxalic acid in Bar Keepers Friend is a chelating agent that binds to metal ions in burnt food and grease, loosening them from the pan's surface. It's gentle enough for stainless steel but tough on stains. Unlike bleach-based cleaners, it won't discolor or damage your cookware.
Tips For Best Results
Always use a soft sponge or cloth to avoid scratching. Avoid letting the paste dry completely—if it starts to dry, add a splash of water. Test on a small area first if you're unsure about your pan's coating.
For enameled surfaces, check the manufacturer's instructions.
When To Skip This Method
Bar Keepers Friend is not recommended for non-stick pans, aluminum, or copper cookware. The abrasive particles and acid can damage these surfaces. Stick to stainless steel, ceramic, or glass cookware for best results.
11. Aluminum Foil Ball
When your pan has stubborn burnt bits that won't budge with a regular sponge, a crumpled aluminum foil ball can be your secret weapon. This simple trick turns a common kitchen staple into an abrasive scrubber that tackles tough residue without scratching most cookware surfaces. It's cheap, effective, and something you already have on hand.
To use this method, tear off a sheet of aluminum foil about 12 inches long. Crumple it into a tight ball roughly the size of a golf ball. Add a few drops of dish soap to the pan and a splash of warm water.
Scrub the burnt areas with the foil ball using circular motions and moderate pressure. The foil's texture lifts stuck food and grease without damaging the pan's surface, as long as you avoid non-stick coatings. Rinse and wash normally afterward.
Why It Works
Aluminum foil is soft enough to conform to the pan's shape but has enough texture to scrape away burnt residue. When crumpled, the edges create micro-abrasive points that break apart stuck-on food without the harshness of steel wool. It's a gentle yet effective physical scrub.
Best Pans To Use It On
This trick works best on stainless steel, cast iron, and enameled cookware. Avoid using it on non-stick or delicate ceramic pans, as the foil can scratch the coating. Always test on a small hidden area first if you're unsure.
Pro Tips For Best Results
Use a fresh foil ball for each pan to avoid transferring grease. For extra stubborn spots, let the soapy water sit for a few minutes before scrubbing. You can also add a pinch of baking soda to boost abrasion.
Rinse thoroughly to remove any tiny foil particles.
12. Baking Soda and Hydrogen Peroxide Paste
Sometimes burnt-on food needs more than a simple scrub. A paste made from baking soda and hydrogen peroxide creates a gentle yet effective cleaning agent that tackles tough stains without damaging your pan's surface. This combo works especially well on light-colored cookware where discoloration is more visible.
Mix baking soda and hydrogen peroxide into a thick paste. Spread on burnt areas, let sit for 20 minutes, then scrub.
Why This Combo Works
Baking soda is a mild abrasive that physically lifts grime, while hydrogen peroxide acts as an oxidizing agent that breaks down organic residue. Together, they create a fizzing action that helps dislodge stuck-on food without harsh chemicals.
Best Pans To Use It On
This paste is safe for stainless steel, enamel, and ceramic cookware. Avoid using it on non-stick pans, as the abrasive can scratch the coating. For aluminum pans, test on a small area first to prevent discoloration.
Tips For Stubborn Spots
For extra tough burnt areas, let the paste sit for 30 minutes or cover with plastic wrap to keep it moist. You can also add a few drops of dish soap for extra grease-cutting power. Rinse thoroughly after scrubbing.
13. Cola Boil
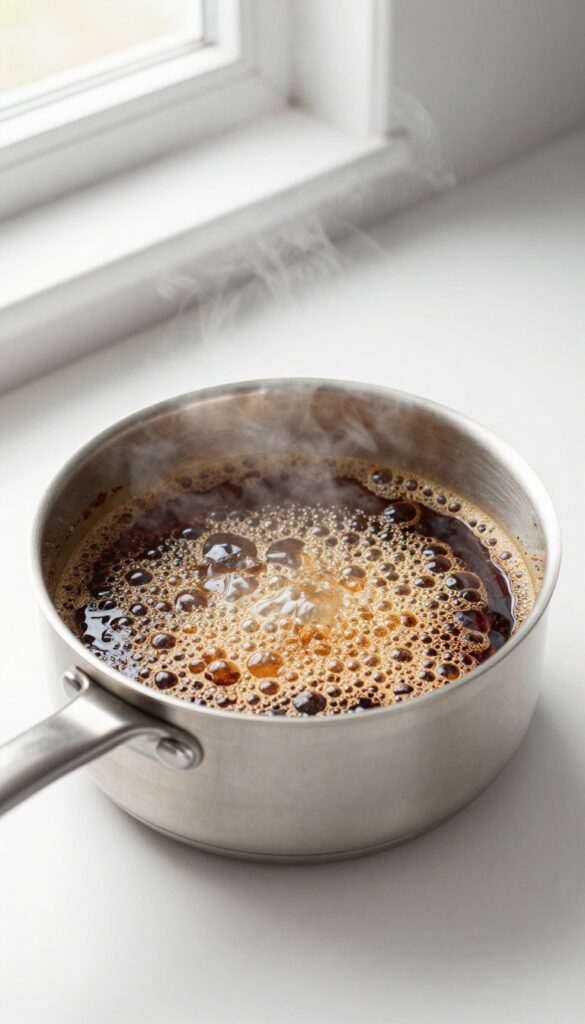
Cola isn't just a tasty drink—it's a surprisingly effective cleaner for burnt pans. The phosphoric acid in cola breaks down stubborn, charred food particles, making them easy to wipe away. This method works especially well for stainless steel and ceramic pans with dark, baked-on stains.
Pour a can of cola into the burnt pan, enough to cover the affected area. Bring it to a boil over medium heat, then reduce to a simmer for about 10 minutes. The acid will react with the burnt residue, loosening it from the surface.
After simmering, let the pan cool slightly, then pour out the cola and scrub with a sponge. For extra tough spots, use a non-abrasive scrubber. Rinse thoroughly and dry.
Your pan should look noticeably cleaner with minimal effort.
Why Cola Works
Cola contains phosphoric acid, a mild acid that dissolves mineral deposits and carbonized food. It's the same ingredient found in many commercial cleaning products. The carbonation also helps lift particles, while the sugar adds a bit of scrubbing action when you wipe.
Best Pans For This Method
This trick works best on stainless steel and ceramic cookware. Avoid using it on cast iron, as the acid can strip the seasoning. For aluminum pans, test a small area first to prevent discoloration.
Non-stick pans are fine as long as you don't use abrasive tools.
Tips For Maximum Effect
For heavily burnt pans, let the cola sit in the pan for 30 minutes before boiling. You can also add a tablespoon of baking soda after boiling for extra fizzing action. Always rinse well to remove any sticky residue.
If stains remain, repeat the process or follow up with a gentle scrub.
14. Salt and Vinegar Soak
When burnt-on food laughs at your scrubbing efforts, it's time to let chemistry do the hard work. Salt acts as a gentle abrasive, while vinegar's acidity breaks down stubborn grease and carbon deposits. Together, they create a soaking solution that softens even the toughest residue without damaging your pan's surface.
Start by covering the bottom of the pan with a generous layer of coarse salt—kosher or sea salt works best. Pour enough white vinegar to fully submerge the salt and let the mixture sit for at least an hour. For extra-stubborn burns, leave it overnight.
The salt helps lift grime as it dissolves, and the vinegar cuts through grease. After soaking, dump the liquid, add a squirt of dish soap, and scrub with a non-abrasive sponge. Rinse well.
This method works wonders on stainless steel and enameled cast iron, but avoid it on unseasoned cast iron or aluminum.
Why Salt And Vinegar Work
Salt is a mild abrasive that helps physically scrub away burnt bits without scratching. Vinegar is acidic enough to dissolve mineral deposits and break down grease, but gentle on most cookware. Together, they create a chemical reaction that loosens carbonized food, making it easy to wipe away.
Best Pans For This Method
This soak is safe for stainless steel, ceramic, glass, and enamel-coated pans. Avoid using it on bare cast iron (it can strip seasoning) or aluminum (vinegar can cause discoloration). For nonstick pans, use a soft sponge and avoid prolonged soaking to protect the coating.
Pro Tips For Stubborn Burns
If the residue is still stuck after an hour, try heating the pan on the stove for a few minutes before soaking—warm vinegar works faster. For extra power, add a tablespoon of baking soda after soaking to create a fizzing action that lifts grime. Always rinse thoroughly to remove any salty or vinegary taste.
15. Dish Soap and Baking Soda Scrub
Sometimes the simplest combination is the most effective. Dish soap breaks down grease, while baking soda provides gentle abrasion to lift burnt bits without scratching. Together, they form a powerful paste that tackles stuck-on food and greasy residue with minimal effort.
This method works best on non-stick, stainless steel, and enamel pans. For best results, let the paste sit for 10–15 minutes before scrubbing. Rinse thoroughly and dry immediately to prevent water spots.
How To Make The Paste
Sprinkle a generous layer of baking soda over the burnt areas. Add a squirt of liquid dish soap directly on top. Use a damp sponge to mix them into a thick, spreadable paste.
Add a little water if it's too dry.
Scrubbing Technique
Scrub in circular motions with the sponge, applying moderate pressure. Focus on the most stubborn spots. For extra tough residue, let the paste sit for 15 minutes before scrubbing.
Rinse with warm water and check the pan.
When To Use This Method
This scrub is ideal for light to moderate burnt-on food and greasy buildup. It's safe for daily use and won't damage most pan surfaces. Avoid using on cast iron or seasoned cookware, as it can strip the seasoning.
16. Oven Cleaner Spray
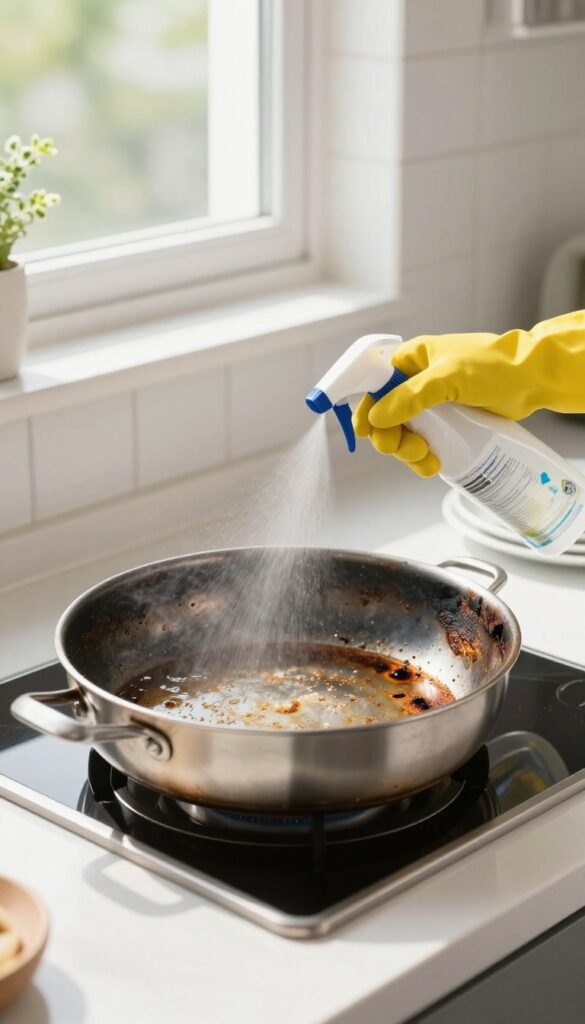
Oven cleaner isn't just for your oven—it's a powerhouse for burnt pans too. The heavy-duty chemicals break down carbonized grease and food in minutes, saving you elbow grease. Just be sure to use it safely: gloves, ventilation, and a thorough rinse are non-negotiable.
Oven cleaner spray works wonders on tough, baked-on grime that other methods can't touch. The caustic ingredients dissolve burnt residue quickly, but they demand respect. Always wear rubber gloves and work in a well-ventilated area—open a window or turn on a fan.
Spray the cleaner generously over the burnt areas, then let it sit for 15 minutes (or follow the product's instructions). For extra-stubborn spots, you can leave it on longer, but check periodically to avoid damaging the pan's finish. After the wait, rinse the pan thoroughly with hot water and wash with dish soap to remove any chemical residue.
This method is best for stainless steel and enameled cast iron; avoid it on non-stick or aluminum pans, as the chemicals can cause damage.
Why It Works So Well
Oven cleaners contain sodium hydroxide (lye) or other strong alkalis that saponify fats—essentially turning grease into soap. This chemical reaction loosens even years of built-up carbon, making it easy to wipe away. The spray format ensures even coverage, reaching into crevices and corners.
Safety First
Never skip gloves—oven cleaner can cause chemical burns. Protect your eyes with goggles if you're prone to splashing. Keep children and pets away during the process.
After rinsing, wash the pan with hot, soapy water twice to ensure no residue remains. If you have sensitive skin, consider wearing long sleeves.
Which Pans To Use It On
Stainless steel and enameled cast iron are safe bets. Avoid using oven cleaner on non-stick coatings, aluminum, copper, or any pan with a delicate finish—the chemicals can pit or discolor them. When in doubt, test a small hidden area first.
17. Pumice Stone
A pumice stone isn't just for rough feet—it's a surprisingly gentle abrasive for burnt-on messes. When wet, the porous volcanic rock creates a fine grit that lifts carbonized food without scratching harder surfaces. It's a favorite among those who maintain glass and ceramic cooktops, but it can also work on stainless steel and enameled cast iron with careful handling.
The key is to keep both the stone and the pan wet while scrubbing. Dry friction can cause scratches, especially on delicate finishes. Use light pressure and small circular motions, letting the stone do the work.
Rinse frequently to check progress and remove loosened debris.
Best Surfaces To Use It On
Pumice works wonders on ceramic, glass, and porcelain enamel cooktops. It's also safe for stainless steel and most oven-safe glassware. Avoid using it on non-stick coatings or anodized aluminum, as the abrasive can strip the finish.
How To Prep The Stone
Soak the pumice stone in water for at least 10 minutes before use. Some stones come with a handle, which gives better control. If not, you can cut one in half for a smaller, easier-to-maneuver piece.
Keep a bowl of water nearby to dip the stone as you work.
Step-by-step Scrubbing
Wet the pan surface lightly. Rub the wet pumice stone over the burnt areas using gentle, circular motions. Rinse the stone often to clear away residue.
Once the burnt bits are gone, wash the pan with soap and water to remove any grit.
18. Boiling Apple Peels
Next time you peel apples for a snack or pie, don't toss the skins—they can rescue your burnt pans. Apple peels contain pectin, a natural substance that helps loosen stubborn, stuck-on food when boiled in water. This method is gentle, chemical-free, and works especially well on stainless steel and non-stick pans.
Boiling apple peels is a surprisingly effective trick for tackling burnt-on residue. The pectin in the peels breaks down during boiling, creating a mild acidic solution that softens charred food without harsh scrubbing. It's a great way to repurpose kitchen scraps while saving your cookware.
How It Works
Pectin is a natural gelling agent found in apple skins. When you boil the peels in water, the pectin releases and interacts with the burnt food particles, helping to lift them from the pan's surface. The gentle heat also aids in loosening grease and grime, making it easier to wipe away.
Step-by-step
Start by saving apple peels from a few apples—about a cup's worth. Place them in the burnt pan and add enough water to cover the stuck-on areas. Bring the water to a boil, then reduce to a simmer and let it cook for 20 minutes.
After that, remove the peels, let the water cool slightly, and scrub the pan with a soft sponge. Most of the residue should come off easily.
When To Use This Method
This technique works best for light to moderate burnt-on food, especially on stainless steel or enamel-coated pans. It's not ideal for heavily charred or greasy messes, but it's a fantastic first step before trying stronger methods. Plus, it leaves your pan smelling faintly of apples instead of harsh chemicals.
19. Baking Soda and Water Paste
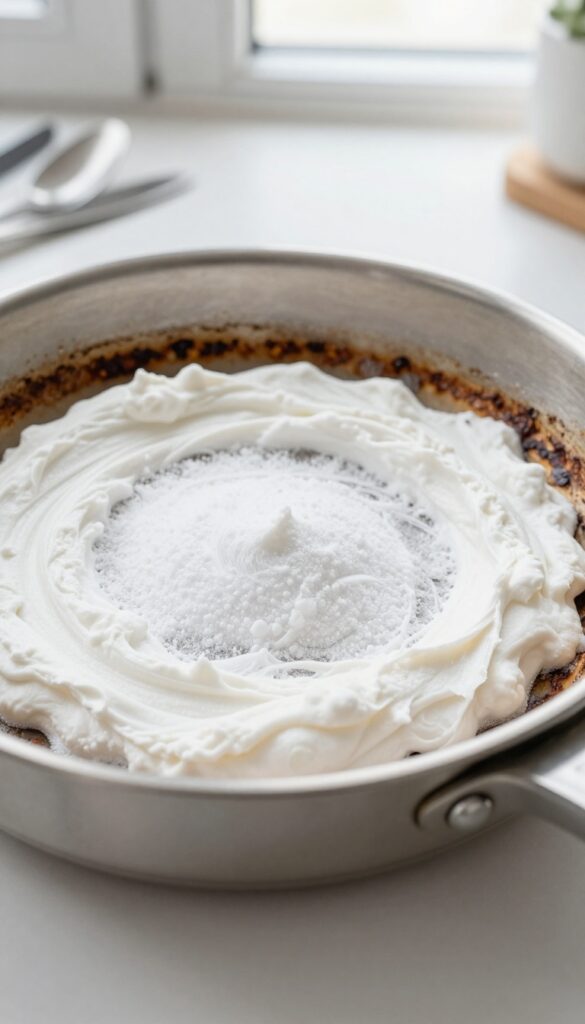
This classic combo is a kitchen workhorse for a reason. Baking soda is mildly abrasive, so it scrubs away burnt food without scratching your pans. Water turns it into a spreadable paste that clings to stuck-on spots.
Mix three parts baking soda with one part water to form a thick paste. Apply it generously over the burnt areas and let it sit for 15 minutes. The paste will start breaking down the grime.
Then scrub with a non-abrasive sponge or brush, rinse, and repeat if needed. Works great on stainless steel, non-stick, and enamel pans.
Why It Works
Baking soda is a mild alkali that reacts with acidic burnt residues, helping to loosen them. Its fine grit provides gentle abrasion that lifts stuck food without damaging the pan's finish.
Best Pans To Use It On
This method is safe for stainless steel, non-stick, ceramic, and enameled cast iron. Avoid using it on unseasoned raw cast iron, as it can strip the seasoning.
Pro Tip For Extra Power
For tougher stains, add a splash of white vinegar to the paste after applying it. The fizzing action helps lift burnt bits. Just be careful not to let it sit too long on non-stick surfaces.
20. Vinegar Soak Overnight
White vinegar is a powerhouse for breaking down burnt-on food and grease, and it couldn't be simpler to use. The acid in vinegar works slowly but surely, loosening even stubborn residue while you sleep. All you need is a bottle of vinegar and a little patience—no scrubbing required until morning.
Why It Works
Vinegar's acetic acid reacts with the carbonized food particles, softening them over time. Unlike harsh chemicals, it's gentle on most pan surfaces—stainless steel, ceramic, and glass all handle it well. Just avoid using it on uncoated aluminum or cast iron, as the acid can damage those materials.
How To Do It Right
Pour enough white vinegar into the pan to cover the burnt areas completely. Let it sit overnight—at least 8 hours. In the morning, pour out the vinegar and use a non-abrasive sponge or scrubber to wipe away the loosened grime.
For extra stubborn spots, sprinkle a little baking soda on the damp pan before scrubbing.
Pro Tips For Best Results
If the burnt layer is very thick, heat the vinegar gently on the stove for a few minutes before letting it soak—warm vinegar penetrates faster. Cover the pan with a lid or plastic wrap to prevent the vinegar smell from spreading. After scrubbing, wash the pan with soap and water to remove any vinegar aftertaste.
21. Salt and Lemon Scrub
A lemon and salt scrub is one of the simplest ways to tackle burnt-on food without resorting to harsh chemicals. The salt acts as a gentle abrasive, while the lemon's acidity helps break down grease and carbonized residue. This method works especially well on stainless steel and ceramic pans.
Cut a lemon in half, dip the cut side into a small dish of salt, and scrub the burnt areas in a circular motion. The combination of acid and grit lifts stuck-on bits without scratching most surfaces. Rinse with warm water and repeat if needed.
For extra stubborn spots, let the lemon-salt paste sit on the pan for 5–10 minutes before scrubbing.
Why This Combo Works
Lemon juice contains citric acid, which helps dissolve mineral deposits and soften burnt food. Salt provides just enough abrasion to physically scrub away residue without damaging the pan's surface. Together, they create a mild, non-toxic cleaner that's safe for food contact.
Best Pan Types
This scrub is ideal for stainless steel, ceramic, and enameled cast iron. Avoid using it on non-stick pans, as the salt can scratch the coating. For aluminum pans, the acid may cause discoloration, so test on a small area first.
Pro Tips For Tough Stains
If the burnt layer is thick, sprinkle extra salt directly onto the pan and use the lemon half as a scrubber. For dried-on messes, add a splash of water to create a paste. You can also warm the pan slightly (not hot) to make the scrub more effective.
22. Boiling Water with Baking Soda
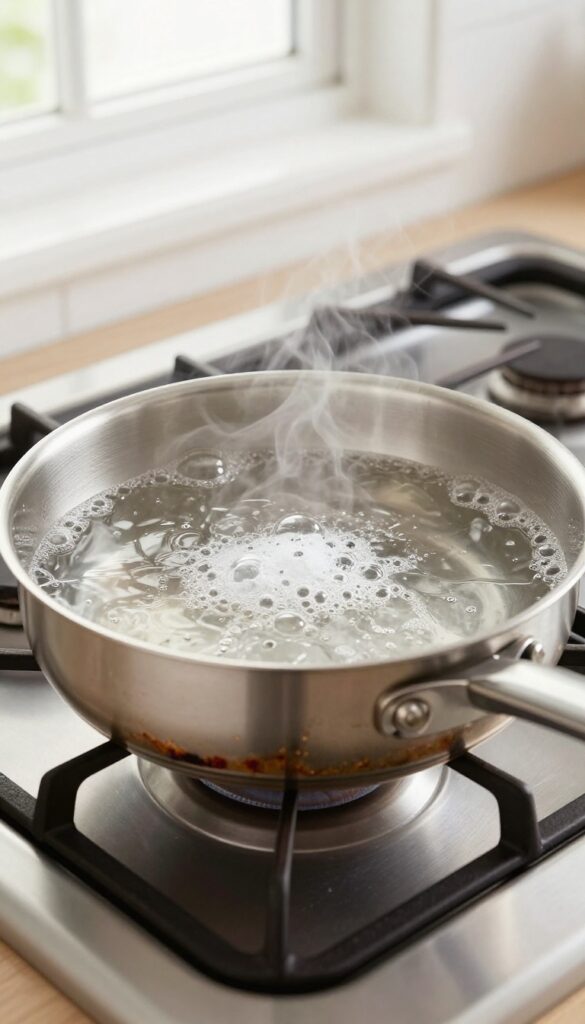
Baking soda is a classic cleaner, but boiling it takes things to another level. The heat activates the soda's mild abrasive and alkaline properties, helping to loosen burnt-on food and grease without harsh scrubbing. This method works especially well for stainless steel and enamel pans, and it's gentle enough for non-stick coatings too.
How To Do It
Fill the burnt pan with enough water to cover the stained area. Add about 1/4 cup of baking soda (or more for larger pans). Bring the water to a boil, then reduce the heat and let it simmer for 15 minutes.
Turn off the heat and let the water cool completely before pouring it out. The burnt residue should now be soft and easy to scrub away with a sponge or soft brush.
Why This Works
Boiling water helps dissolve food particles, while baking soda creates a gentle fizzing action that lifts grime. The combination is powerful enough to break down stubborn carbon deposits but safe for nearly all pan surfaces. Unlike harsh chemical cleaners, it won't damage seasoning on cast iron or strip non-stick coatings.
Pro Tips For Best Results
For extra stubborn spots, add a splash of white vinegar after boiling—the reaction will help loosen residue. If the pan is heavily burnt, let the baking soda solution sit overnight before scrubbing. Always use a non-abrasive sponge to avoid scratching, especially on non-stick or ceramic pans.
23. Non-Stick Safe Scrubber
Non-stick pans are delicate, and using the wrong scrubber can ruin their coating in seconds. You don't need to sacrifice cleaning power for safety—there are tools that tackle burnt food without scratching.
A non-scratch scrubber, like a nylon brush or a soft sponge, paired with baking soda and dish soap, lifts stuck-on residue gently. This method works best on light to moderate burnt spots without harming the non-stick surface.
Why Nylon Works
Nylon bristles are firm enough to scrub away food but soft enough to leave your pan's coating intact. Avoid metal pads or abrasive scrubbers—they'll scratch and ruin the non-stick layer.
The Baking Soda Paste Method
Mix baking soda with a little water to form a paste. Apply it to the burnt area, add a drop of dish soap, and scrub gently with your nylon brush. Rinse thoroughly and repeat if needed.
When To Replace Your Scrubber
Check your scrubber regularly for wear. A worn nylon brush can still scratch if the bristles become frayed or stiff. Replace it every few months to keep your pans safe.
24. Commercial Cookware Cleaner
Sometimes pantry staples just aren't enough. When you're dealing with a pan that looks like it survived a campfire, a dedicated commercial cookware cleaner can save the day. These products are formulated to dissolve the toughest burnt-on food and grease without damaging the surface.
When you need heavy-duty help, reach for a cleaner specifically designed for cookware. Brands like Carbon Off, Le Creuset cleaner, or Bar Keepers Friend (for certain surfaces) contain powerful degreasers and abrasives that cut through carbonized buildup. They work faster than DIY methods and often require less elbow grease.
How To Use Them Safely
Always check the label first—some cleaners are for specific materials like stainless steel or enameled cast iron. Apply the product as directed, usually by spraying or spreading it over the burnt area. Let it sit for the recommended time (often 5–15 minutes), then scrub gently with a non-abrasive sponge.
Rinse thoroughly and dry.
When To Choose Commercial Over Diy
If you've tried baking soda, vinegar, or boiling water and the burnt layer still won't budge, it's time for commercial help. These cleaners are also great for restoring pans that have been neglected for months. Just remember: they're strong—wear gloves and work in a well-ventilated area.
25. Prevention with Oil Coating
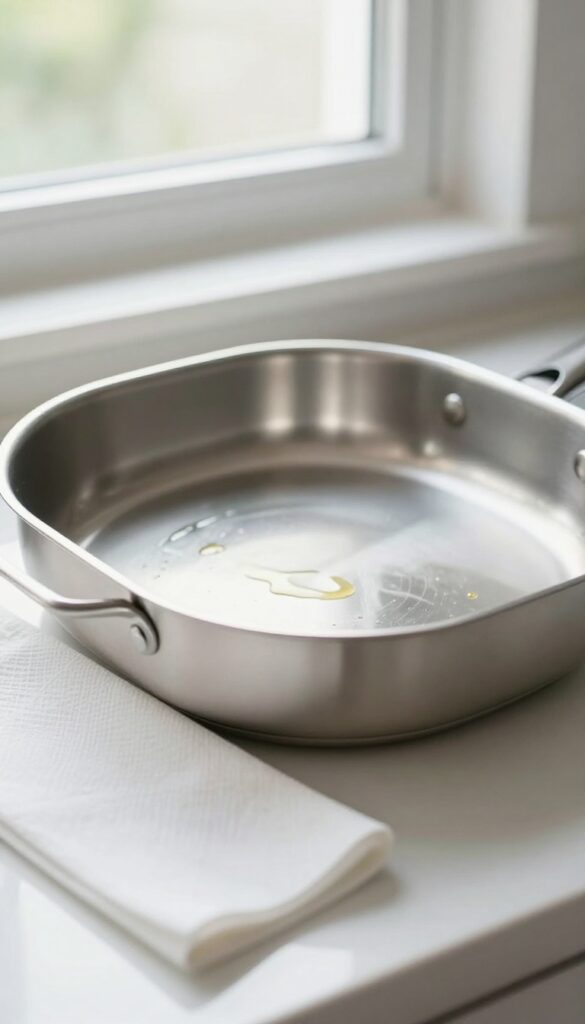
You've scrubbed and scoured, and now your pan is finally clean. But how do you keep it that way? A simple oil coating after each wash can make all the difference.
This quick habit creates a protective barrier that stops food from bonding to the surface, so your next meal slides right off.
Drying your pan thoroughly is the first step. Any moisture left behind can cause rust or interfere with the oil layer. Once it's bone-dry, apply a thin, even coat of oil—vegetable, canola, or grapeseed work well.
Use a paper towel to rub it in, then buff off any excess. The goal is a barely-there sheen, not a greasy film. This method works for stainless steel, cast iron, and carbon steel pans.
For non-stick pans, use a minimal amount of oil to avoid buildup. Over time, the oil polymerizes into a natural non-stick layer, especially on cast iron. It also prevents rust and keeps your pan looking new.
Store your pan in a dry place. If you stack pans, place a paper towel or cloth between them to protect the coating. Before cooking, you can rinse the pan quickly if the oil feels sticky, but often it's ready to go straight from the cupboard.
Why Oil Coating Works
Oil fills microscopic pores and imperfections in the pan's surface. When heated, some oils bond to the metal, creating a slick layer that food can't grip. This is the same principle behind seasoning cast iron.
For stainless steel, it reduces the chance of protein sticking during searing.
Choosing The Right Oil
Use oils with high smoke points like avocado, grapeseed, or canola. Avoid olive oil or butter, which can turn sticky or rancid. A neutral oil is best because it won't impart flavor or create a gummy residue.
Apply just enough to coat—too much will feel greasy and attract dust.
When To Reapply
Reapply after every wash, especially if you used soap or scrubbed hard. If the pan looks dull or food starts sticking again, it's time for a fresh coat. For cast iron, you might need to re-season occasionally, but a light oiling after each use keeps it in top shape.
FAQ
Can I use these methods on non-stick pans?
Yes, but avoid abrasive tools like steel wool or harsh scrubbing. Stick to baking soda paste, vinegar soaks, or non-scratch scrubbers to protect the coating.
How do I remove burnt food from stainless steel without scratching?
Use a paste of baking soda and water, or boil vinegar and water. For stubborn spots, try Bar Keepers Friend. Always scrub with a soft sponge or cloth.
Is it safe to use oven cleaner on pans?
Oven cleaner can be effective but is harsh. Use it only on oven-safe pans (not non-stick or aluminum). Wear gloves and rinse thoroughly.
Consider gentler methods first.
What if the burnt smell remains after cleaning?
Boil a mixture of water and lemon slices or vinegar in the pan for 10 minutes. This helps neutralize odors. You can also wipe with a baking soda paste.
How often should I deep clean my pans?
Deep clean only when needed, such as after a burn incident. Regular gentle cleaning after each use prevents buildup. Avoid harsh methods that can wear down the pan.
Conclusion
Burnt-on messes don't stand a chance once you know which method works for your pan's material and the type of residue. Start with the gentlest option—like baking soda and vinegar—before moving to harsher abrasives. A little patience and the right technique save you from tossing out expensive cookware.
You've now got a full toolkit to rescue even the most stubborn pans. Pick your favorite methods, keep them handy, and your cookware will look like new again.