13 Handprint Christmas Crafts Kids Can Make as Keepsakes
A friend texted me last December with a photo of a salt dough ornament her son made at age two. Her kid is now eight, and that lumpy little handprint still hangs front and center on the tree.
That's the whole appeal here: kids grow fast, and a painted hand on paper freezes a moment you can't get back. These thirteen projects range from ten-minute cards to canvas art worth framing.
Most use paint, paper, and stuff you probably already own. Pick a few to make this month, or spread them across December as a low-key advent activity.
1. Salt Dough Handprint Ornament
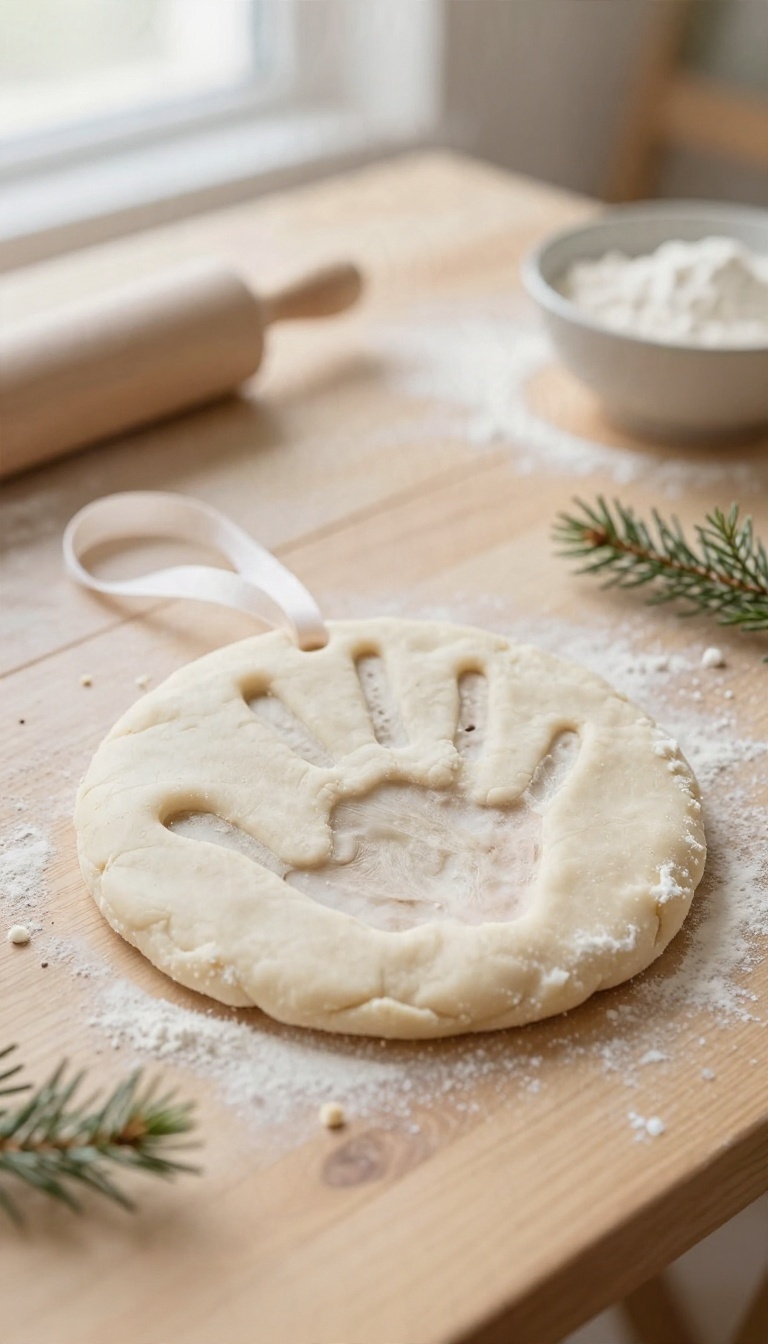
Salt dough is the gateway craft for a reason. You mix three pantry staples, press a hand in, and end up with something that looks handmade in the best way. It's cheap enough to make a batch, forgiving enough for toddlers, and sturdy enough to survive a decade of December.
The recipe barely counts as a recipe: one cup of flour, half a cup of salt, and about half a cup of water. Stir it into a dough, knead it a few minutes until it's smooth, then roll it out to about a quarter inch thick. Too thick and it cracks while drying; too thin and little fingers punch right through.
Press the hand firmly but gently, lifting straight up so the print stays clean. If you're working with a baby, you may need to guide each finger down one at a time. Poke a hole near the top for ribbon before it dries, and you're halfway there.
Getting A Clean Print
Little hands wiggle, and that's fine. Aim for a recognizable shape rather than a perfect one. Dust the dough lightly with flour before pressing so the hand doesn't stick.
If the first attempt smears, ball it up and try again. The dough holds up to several rounds.
Drying It Without Cracks
Skip the oven shortcuts that run hot. Bake at 200°F for two to three hours, flipping once, then let the ornament cool and finish drying on the counter overnight. Thick spots are where cracks start, so keep the thickness even.
If a small crack shows up anyway, a dab of paint later hides it.
Painting And Dating The Back
Acrylic paint works best and holds up over time. Paint the handprint a solid color or leave it natural with just a thin wash. Flip it over and write the child's name and the year in permanent marker or paint.
That date is the whole point. In ten years, the year matters more than the color choice.
2. Handprint Christmas Tree Card
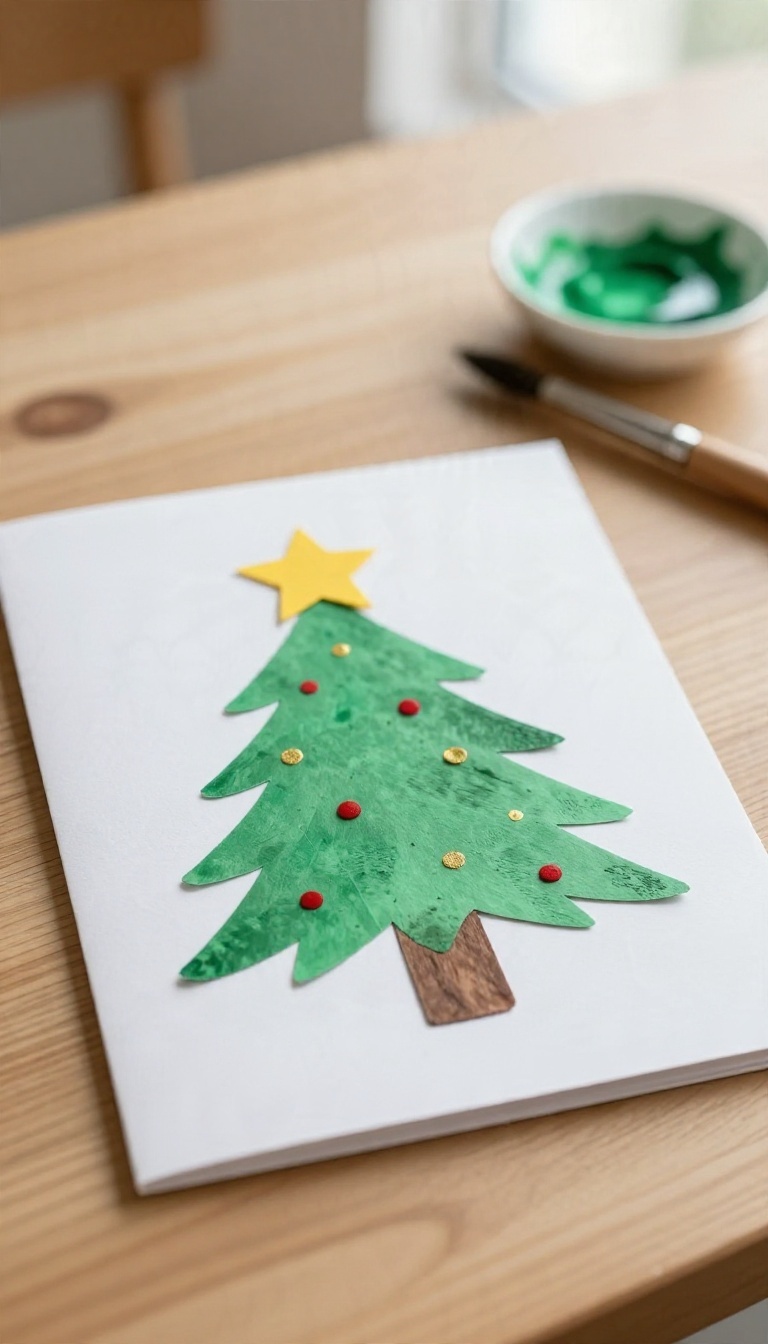
A handmade card beats a store-bought one every time, especially when it has a tiny hand stamped on it. This handprint Christmas tree card turns overlapping green prints into a festive little tree that grandparents will actually keep. It's simple enough for toddlers with help and still fun for older kids who want to add their own flair.
Start with a blank card or a piece of folded cardstock. You'll need green washable paint, a paintbrush, a star sticker or yellow paper, and a few colors for fingerprint ornaments. The key is to layer handprints from the bottom up, making each one a little smaller or lighter to create a triangle shape.
Stamping The Tree
Paint your child's hand with green paint and press it onto the card near the bottom, fingers pointing up. Repeat a few times, overlapping the prints and moving slightly upward each time to build a tree shape. For older kids, they can do it themselves; for younger ones, guide their hand gently.
Let each layer dry a bit before adding the next to avoid smudging.
Adding The Trimmings
Once the green prints are dry, add a star at the top using a sticker or a small yellow paper cutout. Then dip a fingertip in red, gold, or blue paint and dot on ornaments. A few fingerprints scattered across the tree look like tiny baubles.
Let your child decide where they go—it's their masterpiece.
Making It A Keepsake
Write the date and your child's age on the back of the card. If you want to preserve it longer, slip it into a clear plastic sleeve or frame it. Grandparents love receiving these in the mail, and the personal touch makes it a card they'll display long after the holidays.
3. Reindeer Handprint Canvas
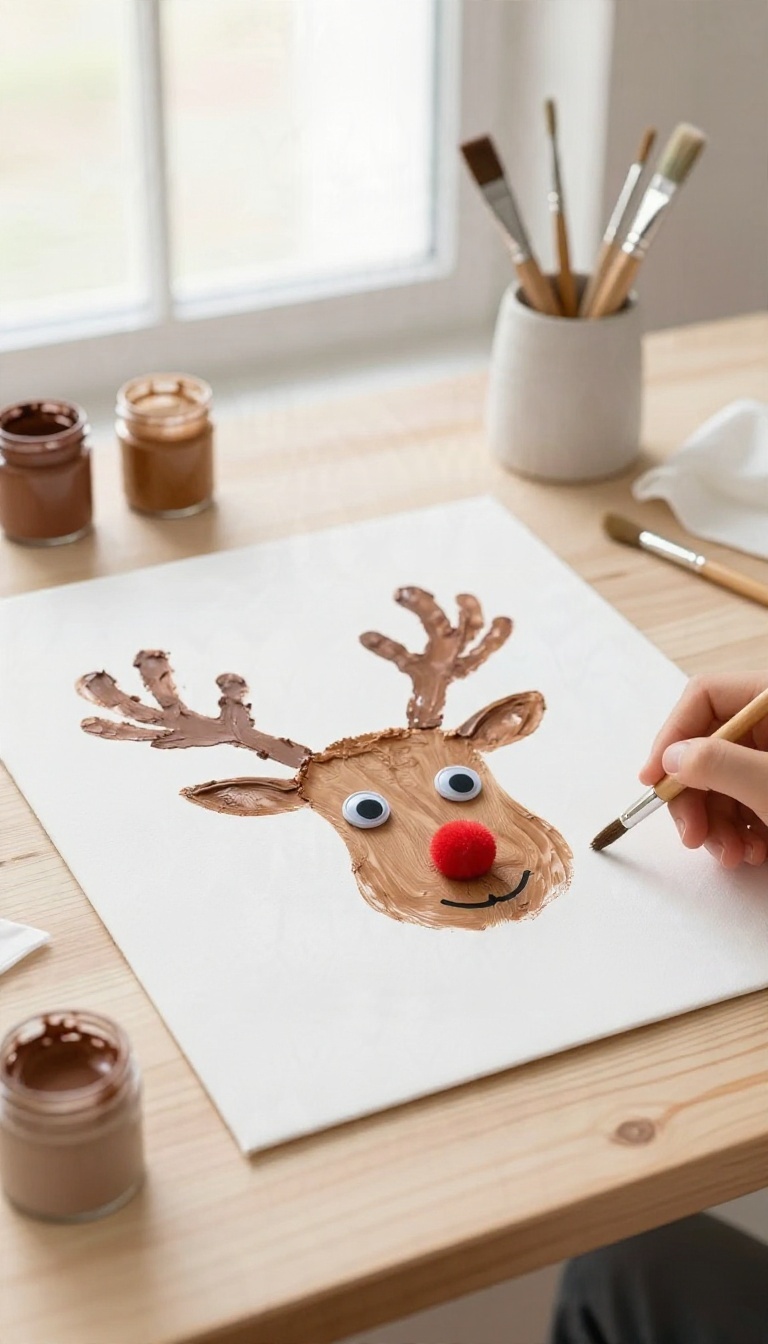
A painted handprint becomes a reindeer face with a little imagination and a few supplies. This project turns that print into a sturdy canvas you can hang every December—or all year. It's a step up from paper but still simple enough for little hands to help with.
You'll need a small canvas (5×7 or 8×10 works well), acrylic paint in brown and any antler color, a paintbrush, googly eyes, a small pom-pom for the nose, and a fine-tip marker. Start by painting your child's palm and fingers with brown paint, then press it firmly onto the canvas. The fingers become the reindeer's antlers, so spread them out a bit when you press.
Lift straight up to avoid smudging. While the paint dries, you can prep the details. Once dry, glue on googly eyes and a red pom-pom for the nose.
Use a marker to add a small smile if you like. For the antlers, your child can dip a thumb in paint and add thumbprint branches extending from the fingertips. Let everything dry completely before hanging.
This canvas works as a keepsake because it's more durable than paper. You can write the date and your child's age on the back with a permanent marker. Hang it on the wall or prop it on a shelf—it's a sweet reminder of tiny hands that won't stay tiny for long.
What You'll Need
Small canvas (5×7 or 8×10), acrylic paint (brown for the handprint, another color for antlers), paintbrush, googly eyes, small red pom-pom, craft glue, fine-tip marker, and wet wipes for quick cleanups.
Step-by-step
- Paint your child's palm and fingers with brown paint. 2.
Press the hand firmly onto the canvas, spreading fingers for antlers. 3. Lift straight up.
- Let dry. 5.
Glue on googly eyes and pom-pom nose. 6. Use a marker to draw a smile.
- Dip thumb in paint and add thumbprint branches to the antlers. 8.
Let dry completely.
Tips For A Clean Finish
Work on a covered surface and keep wipes handy. Press the hand gently but firmly—wiggling causes smudges. If you're doing this with multiple kids, label the back of each canvas with names and dates.
For a personalized touch, add a ribbon or twine for hanging.
4. Handprint Wreath Keepsake Plate
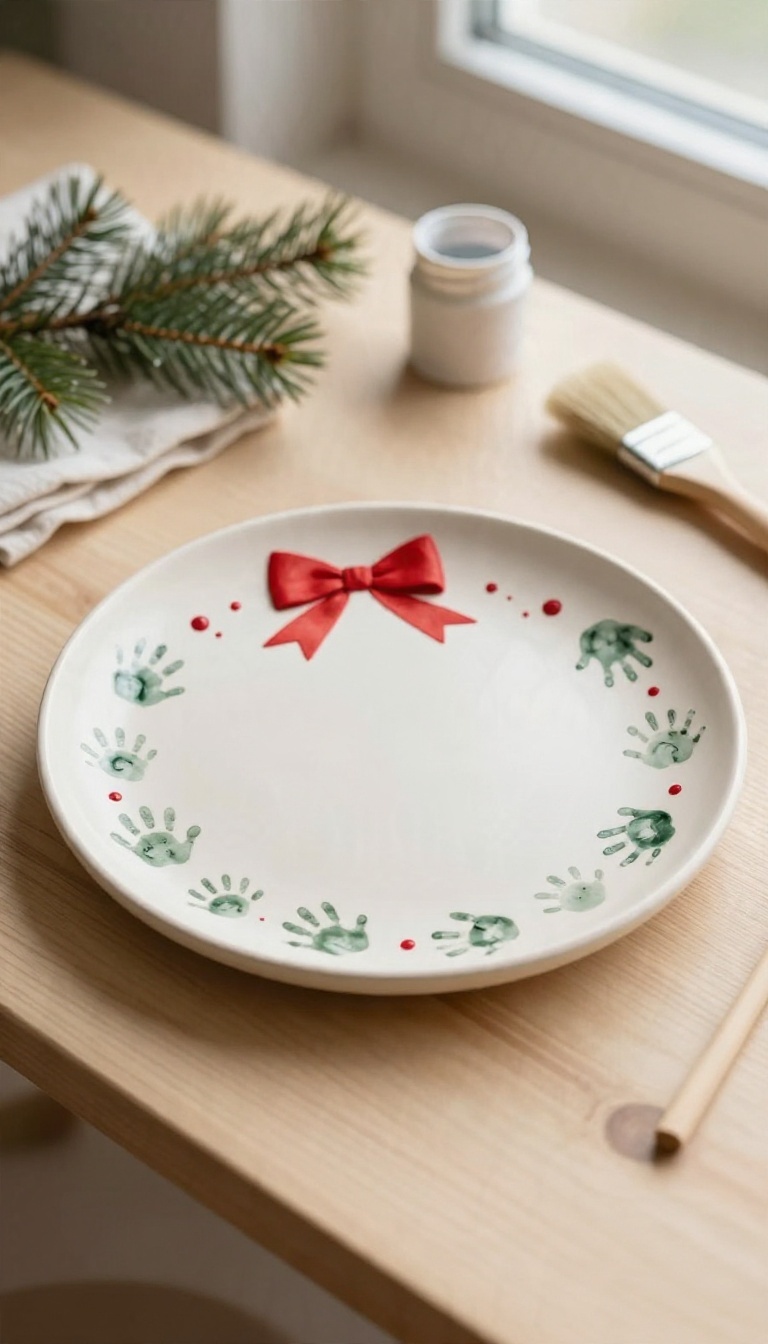
A ceramic plate turns a handprint into something you can actually use every holiday season. The ring of little hands looks like a wreath, and the plate holds up to years of cookies and display. It's a step up from paper crafts but still simple enough for a weekend afternoon.
Start with a plain, light-colored ceramic plate—white or cream works best. You'll also need food-safe acrylic paint (like enamel paint made for glass and ceramics), a foam brush, and a fine-tip permanent marker for the name and year. Make sure the plate is clean and dry before you begin.
Stamping The Handprints
Paint the child's palm and fingers with a thin, even coat of food-safe paint. Press the hand firmly onto the plate's rim, keeping fingers slightly spread to form the wreath's leaves. Repeat around the plate, overlapping slightly.
Let each print dry before adding the next—this prevents smudges.
Adding The Bow And Details
Once the handprints are dry, paint a small bow at the top of the wreath using a contrasting color. You can also add tiny red dots as berries. Use the fine-tip marker to write the child's name and the year on the back or along the bottom edge.
Let everything dry completely.
Baking For Permanence
Most food-safe paints require baking to set. Follow the paint manufacturer's instructions—usually 350°F for 30 minutes. Place the plate in a cold oven, then heat it.
After baking, let it cool completely in the oven. This makes the design dishwasher-safe (though hand washing is gentler).
5. Mitten Handprint Garland
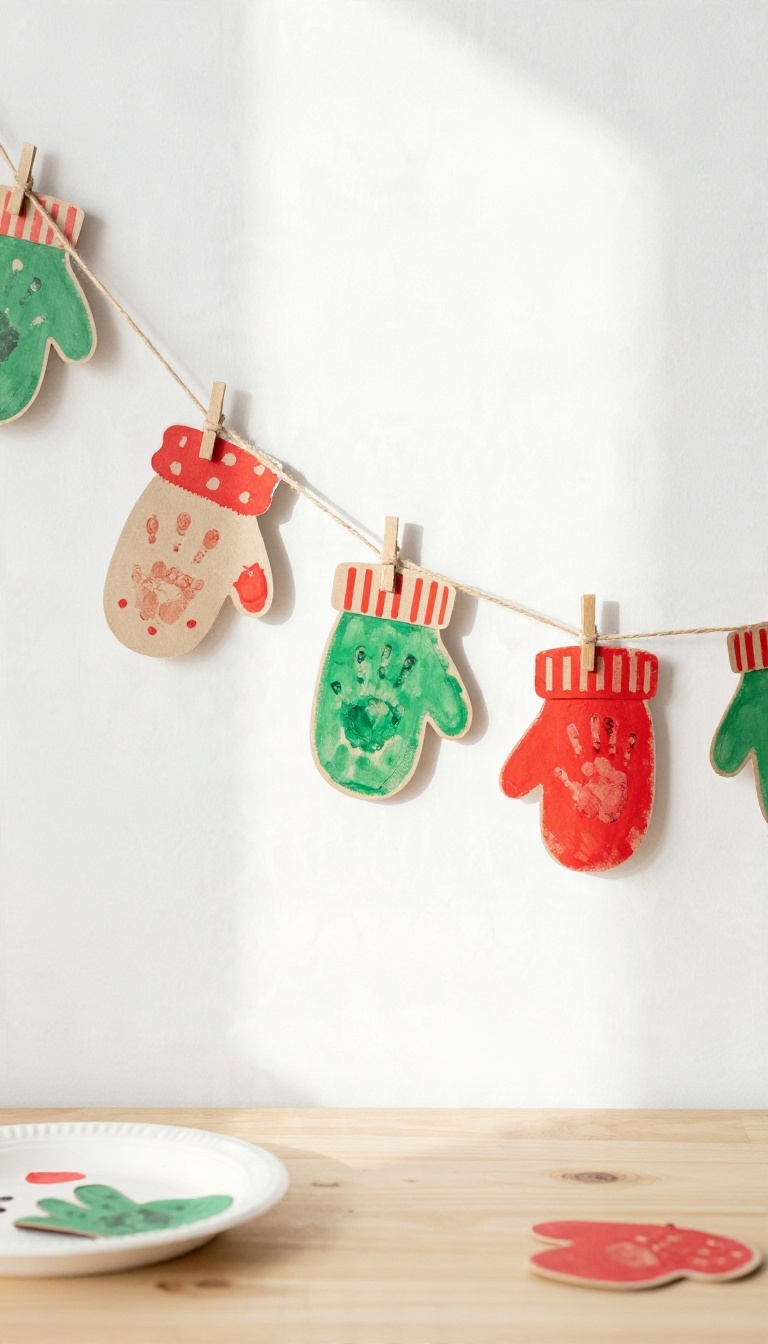
A garland that counts down the days does double duty on the wall. Each mitten holds a small handprint, and you snip one off every morning until Christmas. By the time the holiday arrives, the string is empty and the mittens are keepsakes you can tuck into a memory box.
The project stays cheap and quick. Cardstock, paint, and a length of twine cover most of it. Kids can help trace, stamp, and string, which keeps them busy for a solid afternoon.
Start by folding a sheet of cardstock in half and drawing a simple mitten outline along the fold. The fold gives you a clean, symmetrical shape once you cut it out. Trace one mitten per day you want to count, so a December 1st start means 24 mittens.
Aim for mittens about four inches tall. Bigger ones eat up wall space fast, and smaller ones make the handprint cramped. Cardstock in red, green, and cream looks festive without feeling like a classroom project. ## Stamp the Handprints Pour a shallow puddle of washable paint onto a paper plate.
Press your child's palm flat into it, then guide the hand onto the center of a mitten with the fingers pointing up toward the thumb side. Lift straight up to avoid smears. Little kids squirm, so hold their wrist steady and count to three.
If a print comes out lopsided, that's fine. The wobble is part of the charm, and you can always stamp a second mitten as a backup. Let the paint dry completely before you do anything else.
Wet cardstock tears when you punch holes, and nobody wants to redo a whole set. ## Punch, Number, and String Use a hole punch to make two holes near the top of each mitten, one on each side. Write a number on the back of each one, counting down from 24 to 1. A metallic marker shows up nicely against dark cardstock.
Thread a long piece of twine or baker's twine through the holes, tying a small knot between each mitten so they stay spaced out. Leave a loop at each end for hanging. ## Hang It and Count Down Drape the garland across a mantel, a window, or the banister. Each morning, let your kid pull off the mitten for that day and add it to a small basket nearby.
When the string is bare on Christmas Eve, gather the mittens and stack them in a keepsake box. Next year you can hang them again, and you'll have a record of how much those hands grew.
Cut The Mitten Shapes
Fold cardstock in half and draw a mitten outline along the fold so the shape comes out symmetrical. Cut one mitten per day of your countdown, roughly four inches tall. Mix red, green, and cream cardstock for a festive look that still feels homemade.
Stamp The Handprints
Spread washable paint on a paper plate and press your child's palm flat into it. Guide the hand onto the center of a mitten with fingers pointing toward the thumb side, then lift straight up. Hold little wrists steady and count to three to avoid smears, and let the paint dry fully before punching holes.
Punch, Number, And String
Punch two holes near the top of each mitten and write a countdown number on the back with a metallic marker. Thread twine through the holes, tying a small knot between each mitten to keep them spaced. Leave a loop at both ends for hanging.
Hang It And Count Down
Drape the garland on a mantel, window, or banister, and let your kid remove one mitten each morning. When the string is bare on Christmas Eve, stack the mittens in a keepsake box. Hang them again next year to see how much those hands have grown.
6. Fingerprint Lights Frame

Paint a wavy black line across a sheet of paper, and you've got the wire for a string of Christmas lights. The bulbs come next, and that's where small fingers take over. Press a thumb or fingertip into washable paint, stamp it along the line, and suddenly you have a glowing strand of color.
It's about as low-mess as painting gets. You control the wire, kids handle the dots, and the whole thing dries fast enough to frame the same afternoon. The finished piece looks cheerful on a wall and holds a set of tiny prints you'll be glad you kept.
Start with a sturdy sheet of paper or watercolor card stock, since regular printer paper can buckle once paint hits it. Draw one loose, curvy line across the page with a black marker or a thin paintbrush, leaving a little space at each end so it reads like a strand hanging in the room. Add a small rectangle at one end for the plug if you want the detail.
Then set out three or four shallow dishes of washable paint in holiday colors. Kids dip a fingertip and press it just above or below the wire, spacing the bulbs however they like. Some will cluster them, some will spread them out, and both look great.
Setting Up The Paint Station
Pour a thin layer of paint into small plates or lids so fingers don't get dunked too deep. Keep a damp cloth nearby and have kids wipe between colors so the reds and greens stay bright instead of turning muddy. A smock or an old t-shirt helps, but washable finger paint usually comes out of little hands with warm water and soap.
If you're worried about a favorite table, lay down newspaper or a silicone mat before anyone sits down.
Making The Bulbs Pop
Once the fingerprints dry, go back in with a fine-tip marker and add a tiny curved line at the top of each bulb so it looks connected to the wire. A small white dot or dash in the center of each print gives it that lit-up glow. Kids can also add a few fingerprint snowflakes or stars around the edges if there's empty space.
Let them decide, and don't fuss over perfect placement.
Framing It For The Long Haul
Trim the paper to fit a standard frame, or leave a white border for a clean matted look. A simple black or natural wood frame keeps the focus on the colors, and a glass front protects the prints from dust and fading. Write the child's name and the year on the back of the frame or on a small card tucked behind the glass.
That little note turns a cute craft into a real keepsake you'll pull out every December.
7. Handprint Santa Gift Tags
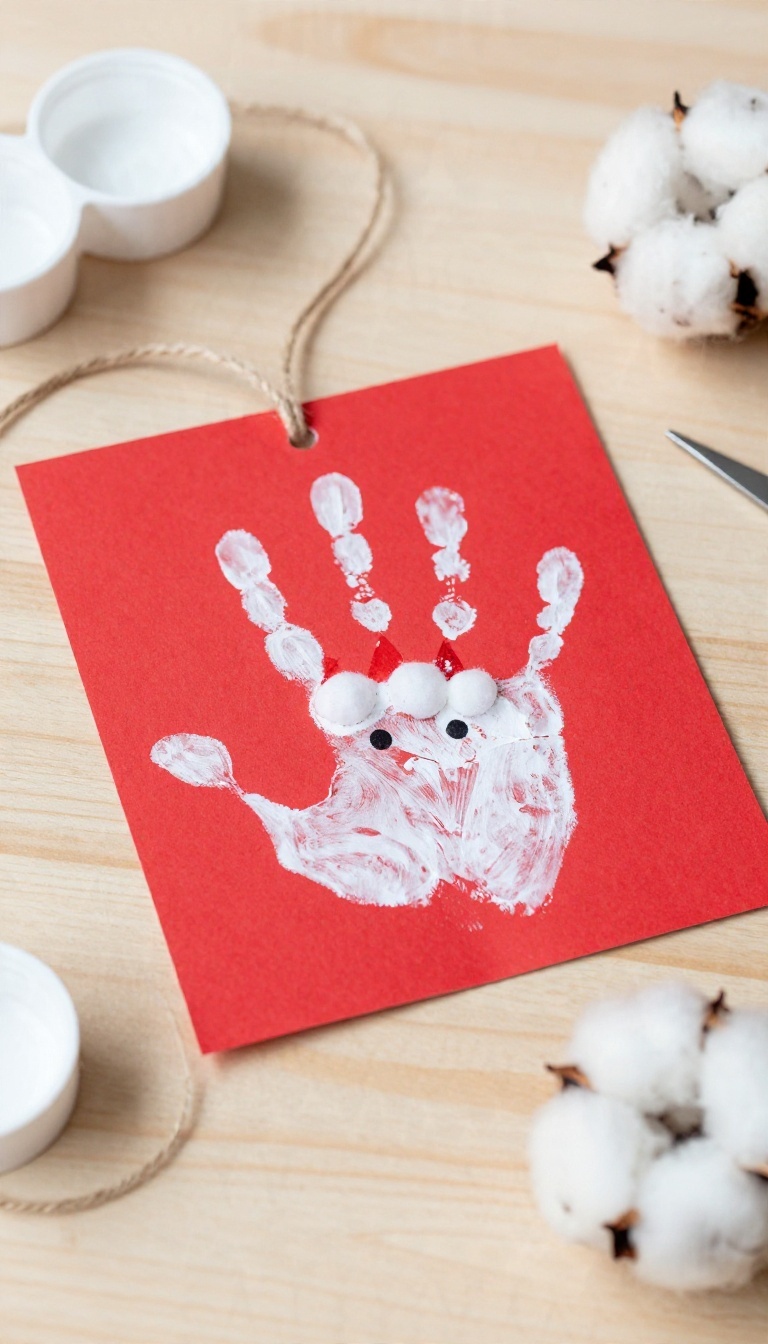
Gift tags usually get tossed with the wrapping paper, but not these. A handprint Santa tag turns a plain package into a keepsake before anyone even opens it. The process is simple: stamp a white handprint on cardstock, add a red hat and a cotton-ball beard, and punch a hole for a tag that makes every wrapped gift feel personal.
Kids love seeing their own hand turn into Santa, and you'll love how quickly these come together. Set up an assembly line and make a dozen in one sitting. They're perfect for gifts to grandparents, teachers, or anyone who appreciates a little handmade charm.
What You'll Need
Gather white washable paint, red and white cardstock, cotton balls, a fine-tip black marker, glue, scissors, and a hole punch. You'll also want a small paintbrush for the hat and a damp cloth for quick cleanups. Most of these supplies are already in your craft stash.
Step-by-step
Paint your child's palm and fingers with white paint, then press firmly onto the red cardstock. Lift straight up to avoid smudges. While it dries, cut a small red triangle for the hat and glue it above the thumbprint.
Add a cotton ball to the hat tip and a row of cotton balls along the bottom of the handprint for the beard. Use the marker to draw two small eyes above the beard. Let everything dry completely, then punch a hole in the top corner and thread with ribbon or twine.
Tips For Tiny Hands
Work quickly—white paint dries fast. Have wipes ready to clean hands before they wander. If your child is wiggly, stamp the handprint on a separate sheet and cut it out once dry, then glue it to the tag.
For older kids, let them add details like rosy cheeks or a winking eye.
Making It A Keepsake
Write the year on the back of each tag with a permanent marker. These tags double as ornaments—just loop a ribbon through the hole and hang on the tree. Grandparents especially love receiving a gift with a tag that's also a tiny piece of art.
8. Handprint Angel Ornament

Angels show up on a lot of Christmas trees, but most of them are store-bought and interchangeable. This one starts with your kid's actual hand, pressed in white paint and turned into a pair of wings. Add a simple paper body and a wooden bead head, and you've got an ornament that looks delicate but holds up to being pulled off the tree a hundred times.
It's a good project for kids who can sit still for about five minutes, which is roughly the attention span of most toddlers anyway.
The trick here is working in the right order. Paint the hand first, let it dry flat, and cut it out before you glue anything. That way the wings keep their shape and the fingers don't smudge while you're handling the paper.
Keep the paint thin. A thick glob of white acrylic will crack when the paper bends, and you want those finger outlines to stay crisp. Two light coats beat one heavy one every time.
Once the wings are dry, the rest comes together fast. The body is just a small paper shape, and the bead head sits on top with a dab of glue. Thread a loop of twine through the top before everything sets, or you'll be fishing around for a hole later.
What You'll Need
White washable paint, a sheet of white or light blue cardstock, a wooden bead about half an inch wide, a scrap of paper for the body, glue, twine, and a fine-tip marker for the face. A small paintbrush helps, but a foam brush works too. If you want a halo, a gold pipe cleaner bent into a circle does the job.
Making The Wings
Paint your child's hand white and press it firmly onto the cardstock, fingers spread wide. Lift straight up so the print stays clean. Let it dry completely, then cut around the hand shape, leaving a thin border so the fingers don't tear off.
The thumb becomes the top of the wing and the fingers fan out below, which is why spreading them matters.
Building The Body And Head
Cut a simple triangle or bell shape from paper for the angel's body and glue it over the palm area of the handprint, leaving the fingers showing as wings. Glue the wooden bead on top for the head. Draw two tiny dots for eyes with the marker, or leave the face blank if you like the simpler look.
Add the halo behind the bead if you're using one.
Hanging It On The Tree
Before the glue fully sets, make a small loop of twine and press the ends between the bead and the body, or tape it to the back. Let the whole thing dry overnight. These ornaments are light enough for any branch, and the cardstock holds up better than you'd expect.
Write the year on the back with a marker so future you remembers when those little fingers were that small.
9. Snowman Handprint Art
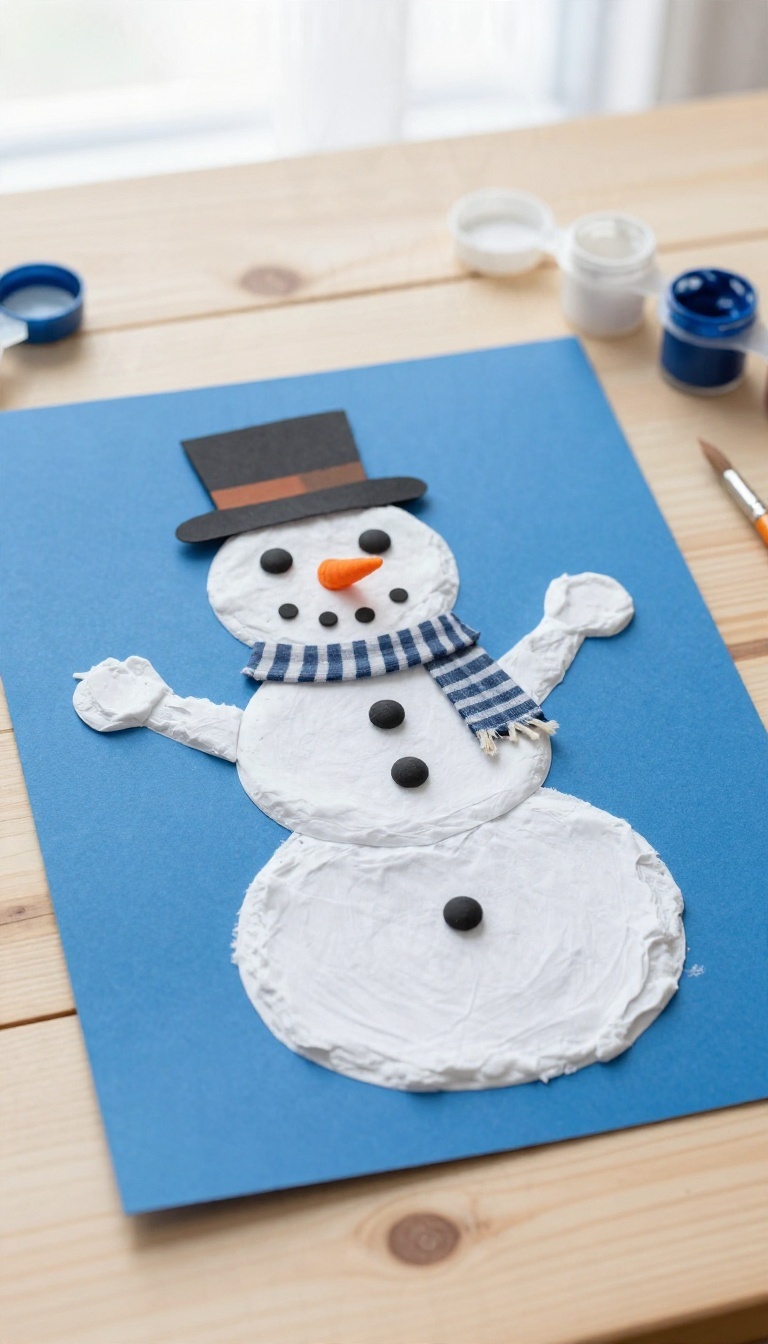
Three white handprints stacked just so become a snowman that never melts. It's a winter craft that works even after the holidays, because snowmen don't have to be packed away with the tinsel. Add fingerprint buttons and a tiny scarf, and you've got a keepsake that's equal parts cute and clever.
Start with a sheet of blue or black cardstock—the dark background makes the white handprints pop. Use white washable paint and press your child's hand three times: once for the bottom, once for the middle, and once for the top. Overlap them slightly so they form a snowman shape.
Let each print dry before adding details, or you'll end up with a smudged mess.
Getting The Prints Just Right
Little hands can be wiggly, so practice on scrap paper first. Paint the palm and fingers evenly, but don't gob it on—too much paint blurs the details. Press firmly and lift straight up to avoid smearing.
If you're making this with a baby, you might need two adults: one to hold the paper, one to guide the hand. And don't stress about perfection—imperfect prints have more character.
Turning Prints Into A Snowman
Once the white prints are dry, add fingerprint buttons down the middle using black paint. A tiny orange fingerprint makes a carrot nose, and two black dots become eyes. For the scarf, cut a thin strip of patterned paper or fabric and glue it around the neck.
You can also add a hat using a small black rectangle and a brim. Let your child decide on the accessories—a snowman with a bow tie or earmuffs is even more special.
Making It Last
This craft is simple enough for toddlers but still fun for older kids who want to add details like stick arms or falling snow. Use acid-free cardstock and archival paint if you plan to frame it. Write the date and your child's age on the back—you'll thank yourself later.
And if you're making these as gifts, consider scanning the finished art and printing it on a mug or ornament for grandparents.
10. Handprint Calendar Page
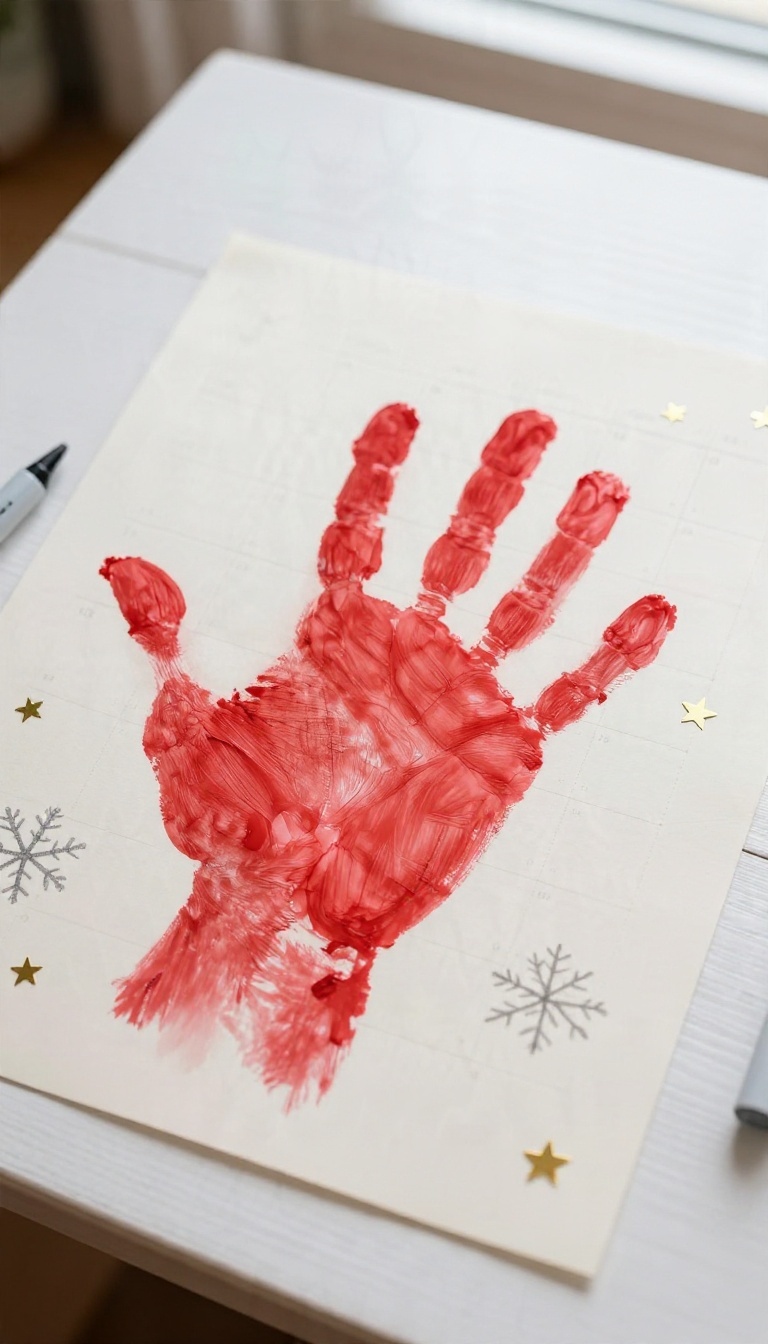
A handprint calendar page turns one afternoon of crafting into a gift that hangs around for twelve months. Instead of a single ornament that gets packed away, this project gives kids a reason to point at the fridge every morning. The idea is simple: one decorated page for a homemade calendar, with a handprint front and center and the child's name signed at the bottom.
It's practical, personal, and way more useful than another paper snowflake.
Start with a blank calendar page—either a printable template or a plain sheet of cardstock with the month written at the top. Let your child press a painted handprint somewhere in the middle, then decorate around it with stickers, drawings, or stamped shapes that match the season. The key is to keep the handprint visible and the date grid clear, so the page actually works as a calendar.
Once it's dry, have them sign their name and maybe add the year. Grandparents especially love this because they get to see the handprint every time they check the date.
Pick A Month That Matters
Choose a month with a built-in theme—December for Christmas, July for summer, or the child's birthday month. That gives the decorating a natural direction and makes the page feel intentional. If you're making a full calendar as a gift, you can assign each grandchild a different month and bind them together at the end.
Keep The Handprint Readable
A handprint covered in glitter or buried under stickers loses its charm. Paint the hand lightly, press it firmly, and let it dry completely before adding any embellishments. Use a fine-tip marker to write the month and dates so the calendar stays functional.
The handprint should be the star, not the background noise.
Turn It Into A Keepsake Gift
Hole-punch the top corner and tie the pages together with ribbon, or slide the single page into a frame with a calendar clip. Add a small photo of the child in the corner for an extra personal touch. This isn't just a craft—it's a usable gift that reminds someone of your kid every time they plan their week.
11. Family Handprint Tree Canvas
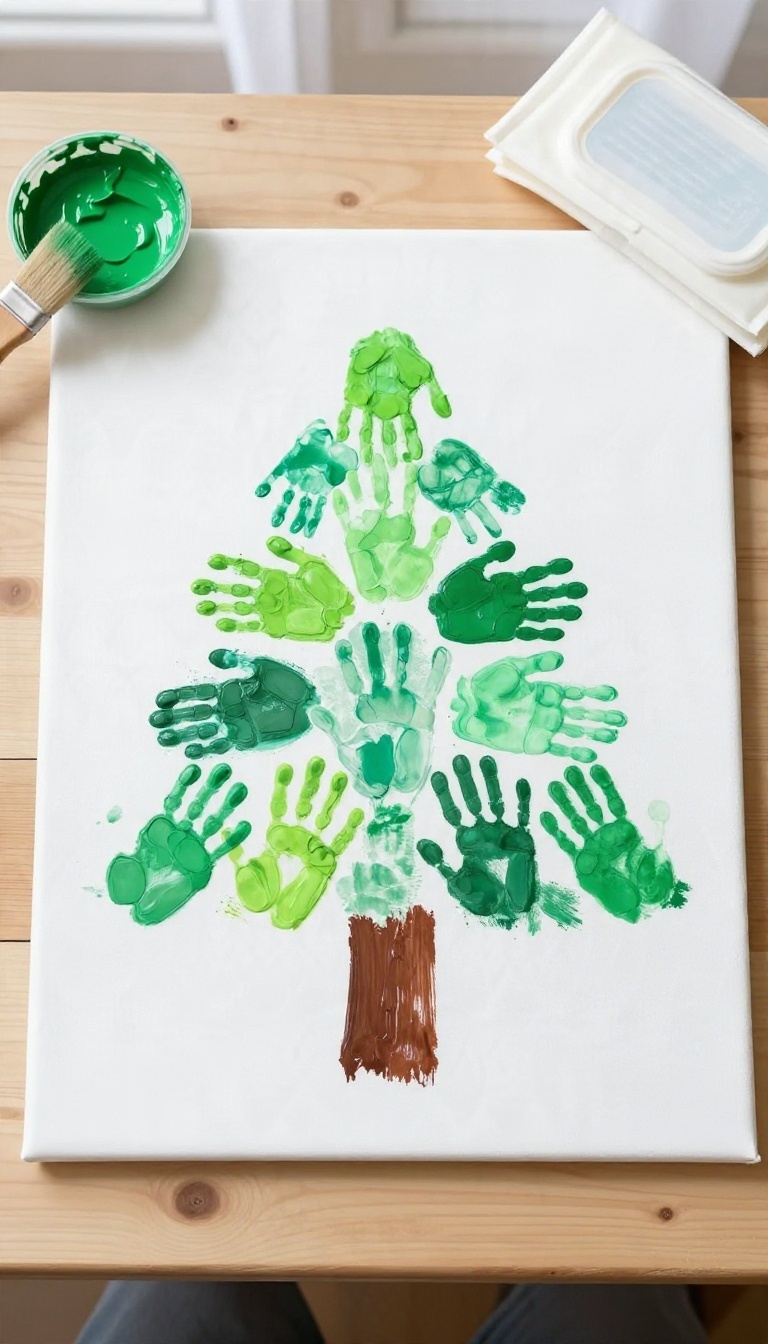
A canvas, a few colors of paint, and every pair of hands in the house. That's all it takes to build a layered Christmas tree out of handprints, one family member at a time. Each person stamps their hand in a different shade, and the overlapping prints form the branches.
The result is a single piece of art that captures a moment when everyone's hands were exactly that size.
Start with a stretched canvas, any size from 8×10 up to 16×20. Paint a simple brown trunk up the center and let it dry. Then choose a color for each family member—maybe green for the adults, lighter green for the kids, and a bright accent for the baby.
You'll stamp hands in rows, starting from the bottom and working up, overlapping slightly to create a full, bushy shape. The key is to press firmly and lift straight up so the print stays crisp. Keep baby wipes handy for quick cleanups between stamps.
Choosing Your Colors And Canvas
Pick a canvas size that fits your family. A 16×20 gives everyone room to spread out, while an 8×10 works for smaller hands or a tighter budget. For paint, acrylic craft paint is cheap and dries fast.
Choose two or three shades of green for the tree and one contrasting color for a star or ornaments. If you want a more modern look, try a monochrome palette with different tints of the same color. Just make sure each person's color is distinct enough to tell apart later.
Stamping Tips For Clean Prints
Paint the palm and fingers with a foam brush instead of dipping the hand directly—it gives you more control and avoids drips. Have the person hold their hand flat and press it onto the canvas with even pressure, then lift straight up. Practice on a scrap sheet of paper first if you're nervous.
For wiggly toddlers, stamp their hand while they're seated and distracted with a snack. And don't stress about perfection—a little smudge just adds character.
Adding Names And Dates
Once the paint is dry, use a fine-tip permanent marker to write each person's name and the year next to their handprint. You can also add a small star at the top or a few dot ornaments between the branches. If you plan to make this an annual tradition, leave space at the bottom for future years—or start a new canvas each year and line them up on a wall.
Either way, the names and dates turn a cute craft into a true keepsake.
12. Handprint Photo Ornament
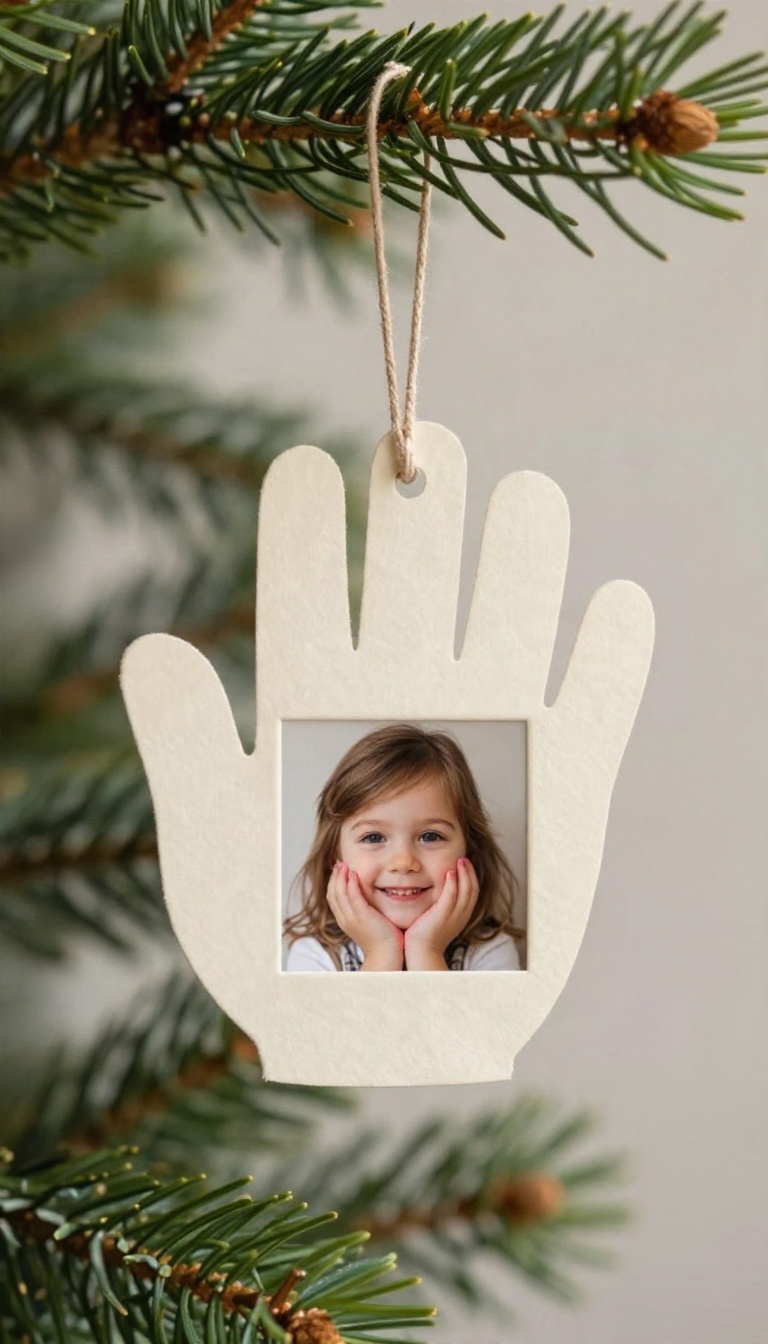
Most handprint ornaments capture a shape. This one captures a face, too. You paint a small hand, press it onto cardstock, cut it out, and glue a little photo right into the palm so the fingers curl around a tiny portrait.
Then you seal the whole thing so the paper holds up season after season. The result is a two-in-one keepsake: the hand your kid had this year and the smile that went with it, hanging together on a branch.
The trick is planning the size before anyone touches paint. A handprint big enough for a face needs a photo small enough to sit inside the palm without spilling over the fingers. Print your picture first, trim it down, and lay it on a test handprint cutout before you commit to the real thing.
Once the sizing works, the rest is quick. Paint, press, cut, glue, seal. Kids can help with almost every step, and the finished ornament looks handmade in the good way, not the messy way.
Getting The Photo Size Right
Start with the photo, not the paint. Crop a head-and-shoulders shot so the face fills a square roughly the size of your child's palm, then print it on regular paper or photo paper. Cut it out and hold it against a scrap handprint to check the fit.
Aim for the photo to cover the center of the palm with a little room to spare. If the face overlaps the fingers, the handprint gets lost. If it floats in the middle with too much empty space, the ornament looks unfinished.
A quarter inch of painted palm showing around the photo is about right. For a baby, the palm is tiny, so print small and don't worry about a tight crop. For an older kid, you have more room and can include a bit of shoulder or a favorite shirt.
Print two copies just in case one gets smudged with paint later.
Painting And Pressing The Hand
Use acrylic craft paint or washable tempera, whichever you trust around little hands. Brush a thin, even coat across the palm and fingers with a foam brush. Too much paint blurs the details, and too little leaves gaps where the fingers didn't register.
Press the hand down firmly onto white or colored cardstock and hold it for a slow count of five. Lift straight up so nothing smears. Let it dry completely before you cut, which usually takes about fifteen minutes with a thin coat.
Cut around the handprint with a small border of paper showing, or trim right to the paint line for a cleaner look. Either works. If you want a sturdier base, glue the cutout onto a second piece of cardstock before trimming again.
Gluing The Photo And Sealing It
Glue the trimmed photo into the palm with a thin layer of craft glue or a glue stick, pressing it flat so no edges lift. Smooth it from the center outward to push out air bubbles. Let it dry under a heavy book for a few minutes if the paper starts to curl.
Sealing is what makes this ornament last. Run it through a laminator, or brush on a coat of Mod Podge over the front and let it dry. Punch a hole near the top of a finger, thread a ribbon through, and tie a loop for hanging.
Write the child's name and the year on the back before you seal it. In ten years, you'll be glad you did.
13. Handprint Tea Towel or Apron
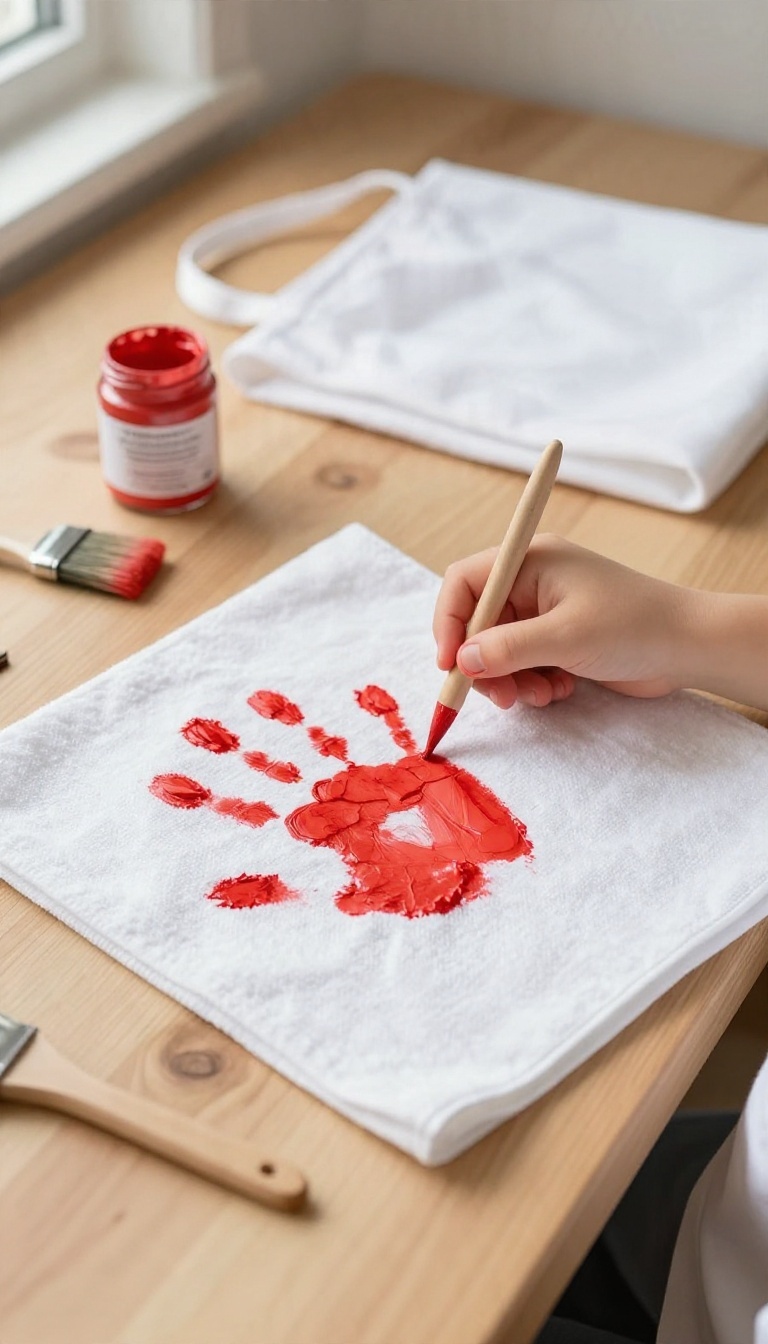
Grandparents have enough knickknacks. What they don't have is a kitchen towel that doubles as a hug every time they wipe the counter. Fabric paint and a plain tea towel or apron turn a handprint into something that actually gets used, not just displayed.
The project takes about twenty minutes of active time, plus drying. Kids love it because they get to press their whole hand into paint and slap it on fabric, which feels delightfully messy. Grown-ups love it because the result is a gift that hangs in the kitchen and gets admired daily.
You don't need a craft store run for this one. A basic cotton tea towel or a plain apron, a bottle of fabric paint, and a foam brush cover the whole supply list. The rest is just positioning and a little patience while things dry.
Pick The Right Fabric And Paint
Cotton and linen take fabric paint best. Grab a plain white or light-colored towel or apron so the handprint pops. Prewash and dry it first to remove any sizing that might block the paint from setting.
Look for fabric paint labeled permanent or machine washable. Acrylic craft paint works in a pinch if you mix it with a fabric medium, but dedicated fabric paint is easier and holds up better through repeated laundry cycles.
Get A Clean Handprint (without The Smudge)
Paint the palm and fingers with a foam brush instead of letting kids dip their hands in a puddle. A thin, even coat gives a crisp print. Too much paint and you get a blob.
Press the hand down firmly and hold for three seconds, then lift straight up. Resist the urge to wiggle. If the print smears, wipe it off with a damp cloth and try again while the paint is still wet.
Older kids can add a second color on the fingertips for a rainbow effect.
Set The Paint So It Survives The Wash
Let the towel or apron dry flat for at least 24 hours. Then flip it over and iron the back of the painted area for a few minutes on a medium setting with no steam. That heat sets the paint.
Wait a week before the first wash. After that, machine wash cold and tumble dry low. Skip bleach and fabric softener, which can break down the paint over time.
Make It Personal Without Overdoing It
Write the child's name and the year in fabric marker near the handprint, or add a small heart in the corner. Keep it simple so the handprint stays the star. If multiple kids are contributing, space their prints out and use a different color for each.
A row of tiny hands across the bottom of an apron looks intentional and sweet. For a grandparent gift, add a short message on the back in permanent marker: 'Made with love (and a little mess). '
FAQ
What kind of paint works best for handprint crafts?
Washable tempera or acrylic craft paint works for most paper and canvas projects. Use food-safe or fabric paint when the craft touches dishes, towels, or anything a child might put in their mouth.
How do I get a clean handprint without a mess?
Paint the palm and fingers with a brush instead of dipping the whole hand, then press firmly and lift straight up. Keep wipes nearby and do one hand at a time.
At what age can kids start making handprint crafts?
Babies can participate with an adult pressing their hand for them, usually around six months. Toddlers and preschoolers can help paint and press with a little guidance.
How do I keep handprint keepsakes from fading?
Use acid-free paper or canvas, seal finished pieces with a clear spray or Mod Podge, and keep them out of direct sunlight. Date the back so the memory stays clear.
Are these crafts good gifts for grandparents?
Yes, especially ornaments, plates, and calendars. Add the child's name and the year, and pair it with a photo for a gift that feels personal without costing much.
Conclusion
Thirteen crafts is plenty to choose from, so start with one that fits the supplies you already have and the age of the kid doing the stamping. Press that little hand into paint or clay, date the back, and tuck it somewhere safe. Kids grow fast, and a smudged handprint from this December will look priceless in a few years.
Make a couple, give one away, and keep one for yourself. The mess washes off—the keepsake sticks around.