17 Oven Cleaning Tips for Smoke Grease and Burnt Spills
You open the oven door and a cloud of smoke hits you. That burnt smell lingers for hours, and the blackened spills on the bottom look like a science experiment gone wrong. It doesn't have to be this way.
A clean oven isn't just about looks—it prevents smoke, improves cooking performance, and saves you from scrubbing marathons. With the right approach, you can tackle even the toughest baked-on mess.
These 17 tips cover everything from quick daily wipes to deep-cleaning hacks. No matter how dirty your oven is, there's a solution here that fits your schedule and supplies.
1. The Baking Soda and Vinegar Paste Method
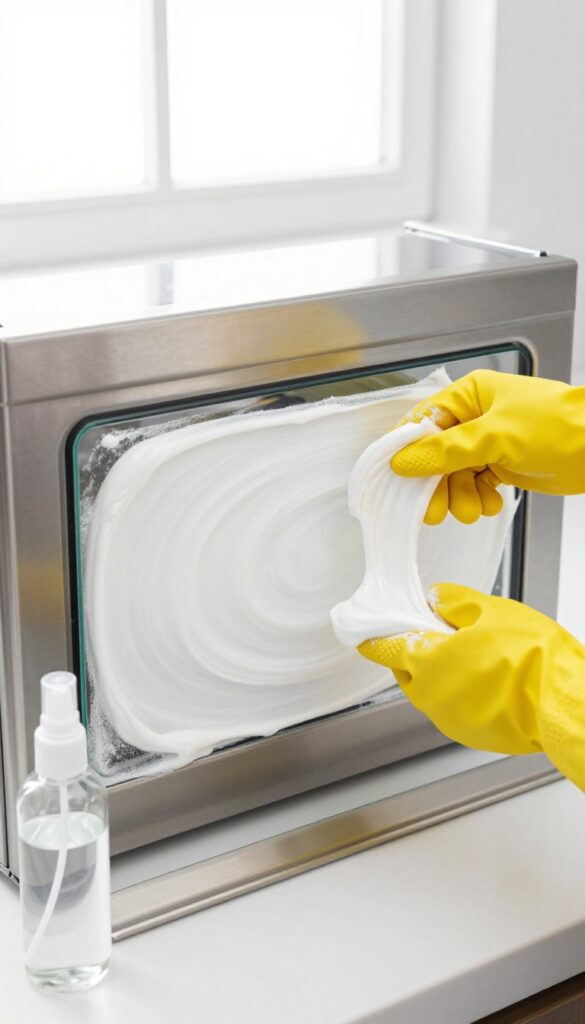
If you want a deep clean without harsh chemicals, this classic combo is your best friend. Baking soda gently scrubs away grease while vinegar reacts to lift carbonized spills. It’s cheap, non-toxic, and surprisingly effective.
Making The Paste
Mix ½ cup baking soda with 2–3 tablespoons water until it forms a spreadable paste. Add a little more water if it’s too thick. You want it thick enough to stick to vertical surfaces without dripping.
Applying And Waiting
Spread the paste over the interior of the oven, avoiding heating elements. Pay extra attention to burnt-on spills. Let it sit overnight—at least 12 hours.
The longer it sits, the easier the grime will lift.
The Vinegar Reaction
Spray white vinegar over the dried paste. It will fizz and bubble, loosening stubborn residue. Wipe everything down with a damp cloth.
For tough spots, scrub gently with a non-abrasive sponge.
Final Rinse
After wiping, do a final pass with a clean damp cloth to remove any leftover baking soda. If you see white streaks, they’ll disappear after the oven heats up. That’s it—no fumes, no fuss.
2. Use a Lemon Steam Clean for Light Grease
If your oven has only a light layer of grease and no burnt-on crust, skip the heavy-duty scrubbing. A lemon steam clean is a gentle, natural way to cut through fresh grease and freshen the air at the same time. The acidic vapor loosens grime without any harsh fumes, making it perfect for a quick refresh between deep cleans.
How It Works
The citric acid in lemon juice breaks down grease molecules, while the steam helps lift them from surfaces. Heat activates the process, turning water into vapor that carries the acid into every corner. This method is most effective on light to moderate grease that hasn't baked into a hard crust.
Step-by-step Instructions
Slice one lemon into thin rounds and place them in a shallow oven-safe dish filled with about an inch of water. Put the dish on the bottom rack and preheat the oven to 250°F. Let it run for 30 minutes, then turn off the heat and let the steam sit for another 10 minutes.
Open the door carefully—steam will rush out. Wipe down the interior with a damp cloth; the grease should come off easily.
When To Use This Method
This technique works best for routine maintenance after cooking fatty foods like bacon or roasting vegetables. It's also a good first step before tackling stubborn spots—the steam softens them so you can scrub less. Avoid using it on self-cleaning oven liners or if your oven has a continuous-clean coating, as the moisture could damage them.
3. The Dishwasher Pod Hack for Burnt Spills
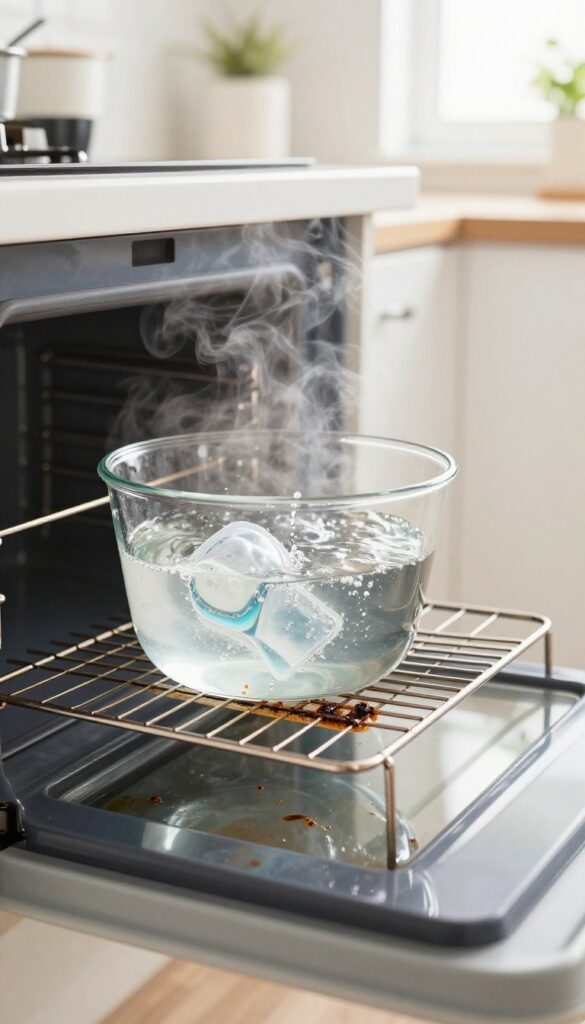
Dishwasher pods aren't just for dishes. Drop one into a bowl of hot water, place it in your oven at 200°F for 20 minutes, and watch the steam and enzymes work together. The result?
Burnt spills wipe away with almost no elbow grease. This trick is a game-changer for anyone who hates scrubbing.
The enzymes in dishwasher pods break down grease and burnt food on a molecular level. When heated, they release steam that loosens caked-on grime. After 20 minutes, just let the oven cool slightly, then wipe with a damp cloth.
No harsh fumes, no scrubbing for hours.
Why It Works So Well
Dishwasher pods contain powerful enzymes and surfactants designed to dissolve tough food residue. The hot water activates them, and the enclosed oven environment traps steam, softening burnt spills. This method is especially effective for recent spills that haven't been baked on for weeks.
Step-by-step Guide
Fill an oven-safe bowl with 2 cups of hot water. Drop in one dishwasher pod (any brand works). Place the bowl on the middle rack.
Set the oven to 200°F and let it run for 20 minutes. Turn off the oven, let it cool for 10 minutes, then wipe the interior with a sponge or microfiber cloth. Rinse the cloth frequently.
When To Use This Hack
This hack is best for moderate burnt spills—think dried-on cheese or caramelized sugar. For years of built-up grease, you may need a heavier cleaner. Avoid using it on self-cleaning oven liners or if your oven has a delicate coating.
Always check your manual first.
4. Commercial Oven Cleaner for Heavy-Duty Jobs
When the baked-on grease has turned into a crusty black layer that laughs at baking soda, it's time to bring out the big guns. Commercial oven cleaners are formulated to dissolve the toughest carbon deposits in minutes, saving you from elbow grease and frustration. Just be prepared to work in a well-ventilated space and wear gloves—these products are powerful for a reason.
For ovens with thick, burnt-on spills that have been accumulating for months, a foaming oven cleaner like Easy-Off is your best bet. The key is to apply it on a cold surface (never preheat first! ) and let it sit for 15–20 minutes. The foam penetrates and breaks down the carbon, so all you need is a damp cloth to wipe it away.
Rinse thoroughly afterward to avoid chemical residue.
When To Use It
Reach for a commercial cleaner only when gentler methods have failed. It's ideal for the oven floor, walls, and racks with heavy buildup. Avoid using it on self-cleaning oven liners or aluminum surfaces, as it can cause damage.
Safety First
Always wear rubber gloves and open a window or turn on the range hood. The fumes are strong, so keep kids and pets away. If you have a gas oven, make sure the pilot light is off and the gas is disconnected before spraying near the burner.
Application Tips
Spray an even layer, focusing on the worst spots. Don't let it dry out—if it starts to dry, respray or cover with plastic wrap to keep it moist. After wiping, do a final pass with a vinegar-water solution to neutralize any leftover chemicals.
5. The Self-Cleaning Cycle Done Right
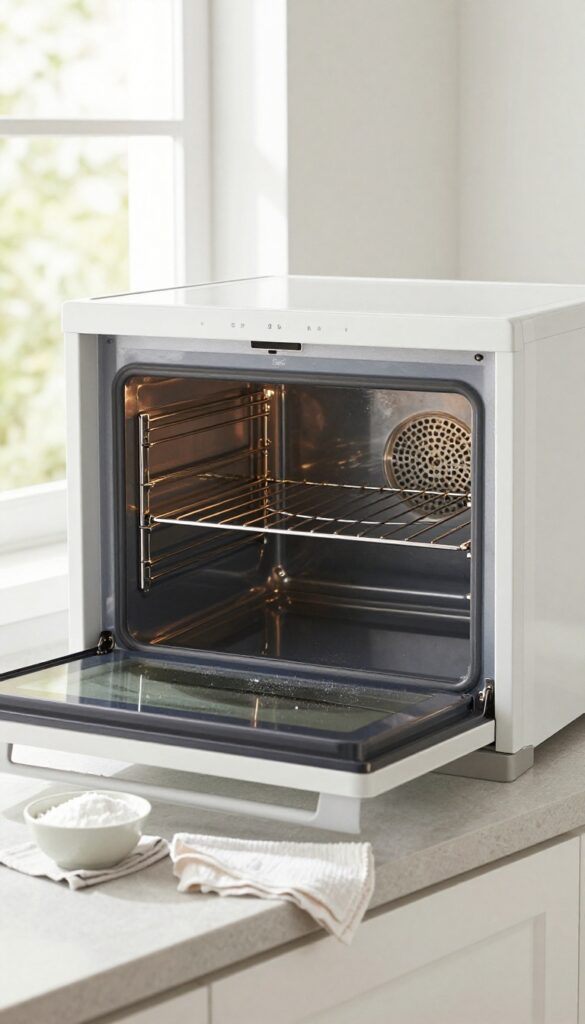
Most modern ovens come with a self-cleaning feature, but using it wrong can lead to smoke, smells, or even damage. When used correctly, it’s a powerful tool that turns spills into ash with minimal effort. Here’s how to get it right every time.
The self-cleaning cycle heats your oven to over 800°F, incinerating food residue into a fine ash that wipes away easily. But it’s not something you should run after every meal—overuse can strain components. Reserve it for heavy buildup, and always follow these steps to avoid problems.
Prep The Oven First
Remove all oven racks before starting the cycle. The high heat can discolor or warp them, and they’re easier to clean separately. Also take out any pans, foil, or oven thermometers.
Wipe up loose debris to reduce smoke.
Ventilate And Stay Nearby
Open windows and turn on your kitchen exhaust fan—the cycle can release strong odors and some smoke. Don’t leave the house while it’s running. If you have pets or respiratory issues, consider alternative methods.
Clean Up After Cooldown
Once the cycle finishes and the oven cools completely (this can take hours), simply wipe the ash with a damp cloth. Avoid using harsh cleaners on the residue. If stubborn spots remain, a gentle scrub with baking soda paste works well.
When To Skip Self-clean
Avoid using self-clean on ovens with delicate electronics or if your oven is older than 15 years—the extreme heat can damage wiring or control boards. Also skip it if the oven has a large spill of sugary or fatty foods, which can smoke heavily or even ignite.
6. Steam Clean with a Dedicated Oven Cleaner Tool
Steam cleaning is one of the most effective ways to remove stubborn grease and burnt food without scrubbing yourself into exhaustion. A handheld steam cleaner with a brush attachment uses high-temperature steam to blast away grime on contact, making it ideal for glass doors, corners, and racks. It's chemical-free, so you don't have to worry about fumes or residue, and it works fast on messes that have been baking for weeks.
Using a steam cleaner is straightforward: fill the reservoir with water, let it heat up, and then aim the steam nozzle at the greasy or burnt areas. The brush attachment helps loosen the grime as you go, and you can wipe away the dissolved residue with a microfiber cloth. For glass oven doors, steam cuts through the foggy grease layer in seconds, leaving them streak-free.
Focus on corners and crevices where baked-on spills hide—the steam penetrates cracks that sponges can't reach.
Why Steam Works So Well
Steam cleaning relies on heat and moisture to soften and dissolve burnt-on food and grease. The high temperature (over 200°F) breaks down the bonds between the grime and the oven surface, so you don't need harsh chemicals. It's especially good for glass, as steam doesn't scratch or leave streaks like abrasive cleaners can.
Plus, it sanitizes as it cleans, killing bacteria and neutralizing odors.
Best Practices For Steam Cleaning
Always let the oven cool completely before steaming—thermal shock can crack glass. Work in sections, starting from the top and moving down so drips don't re-soil clean areas. Use a microfiber cloth to wipe away the loosened gunk immediately, and rinse the brush attachment frequently to avoid spreading grease.
For heavy buildup, let the steam sit for a few seconds before scrubbing.
What To Avoid
Never use a steam cleaner on self-cleaning oven liners or any surface that isn't heat-safe. Avoid steaming near electrical components or heating elements. Don't oversaturate the oven—excess moisture can damage seals or cause rust over time.
Stick to a handheld steamer with a targeted nozzle rather than a full-size steam mop.
7. The Salt and Baking Soda Scrub for Glass Doors
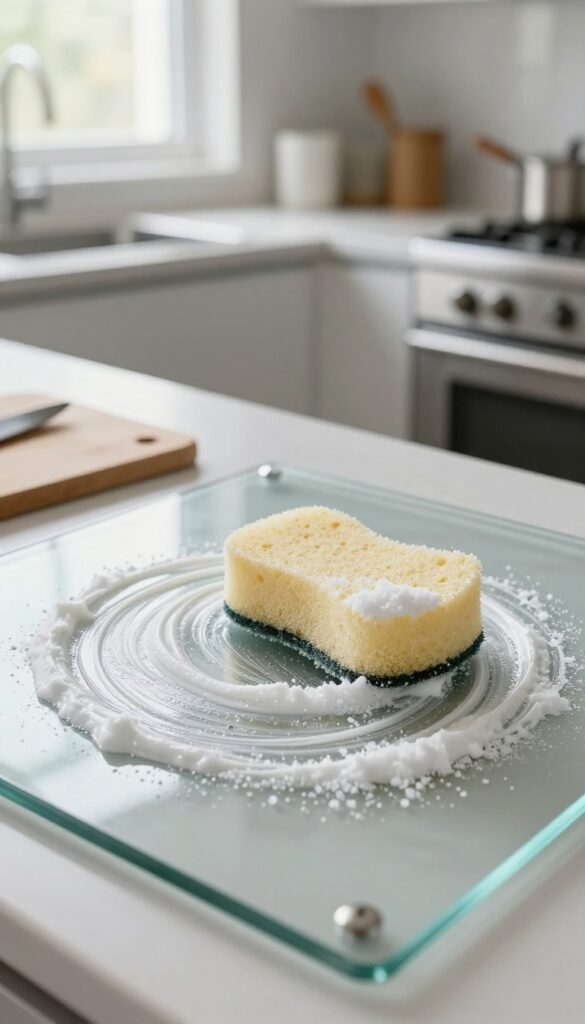
Oven glass doors collect a stubborn film of grease and smoke residue that regular cleaners can't touch. A simple paste of coarse salt and baking soda creates an abrasive scrub that lifts baked-on grime without scratching the glass. This homemade solution is cheap, non-toxic, and surprisingly effective.
Mix equal parts coarse salt and baking soda with just enough water to form a thick paste. Apply it to the cool oven door glass using a damp sponge or cloth. Let the paste sit for 15 minutes so the abrasives can work on the grease.
Then scrub gently in circular motions, focusing on stubborn spots. Rinse thoroughly with a clean wet cloth and wipe dry. The salt provides extra grit while baking soda helps neutralize odors and break down grease.
Why Coarse Salt Works Best
Table salt is too fine and dissolves quickly, losing its scrubbing power. Coarse salt or kosher salt stays granular longer, giving you more scrubbing action. If you only have fine salt, use a bit less water so the paste stays thick.
Avoid Scratches On Tempered Glass
This paste is safe for oven glass because both salt and baking soda are softer than glass. Avoid using metal scrubbers or abrasive pads with this method. A soft sponge or microfiber cloth is all you need.
When To Use This Method
This scrub is ideal for moderate to heavy grease buildup on glass doors. For light smudges, a vinegar-water spray works fine. For burnt-on crust, combine this paste with a longer soak or a razor blade scraper.
8. Use a Pumice Stone on Stubborn Burnt Spots
Sometimes the baked-on spills on your oven floor are so stubborn that no spray or paste can touch them. That's where a pumice stone comes in. It's a simple, low-tech tool that physically abrades the carbon without scratching the enamel—if you use it correctly.
A pumice stone is a porous volcanic rock that works like a super-fine sandpaper. When wet, it gently wears away burnt-on residue without damaging the oven's surface. It's especially effective on flat, non-coated oven floors where spills have turned into hard, black crusts.
The key is to keep the stone wet and use light pressure—let the stone do the work, not your elbow grease.
How To Prepare The Stone And Surface
Start by wetting the pumice stone thoroughly. You want it dripping wet, not just damp. Then, wet the burnt spot on the oven floor with a little water or a spray of vinegar.
The moisture acts as a lubricant and prevents scratching. Never use a dry pumice stone on any surface—it will leave scratches.
The Right Technique For Best Results
Hold the wet stone at a slight angle and rub the burnt spot with gentle, circular motions. You'll see a grayish paste form as the carbon wears away. Rinse the stone frequently to remove residue and keep it wet.
Continue until the spot is gone or significantly reduced. For large areas, work in small sections.
When Not To Use A Pumice Stone
Avoid using a pumice stone on glass, ceramic, or coated surfaces like the oven door or self-cleaning liners. It can scratch or damage these finishes. Also, don't use it on enamel that's chipped or cracked—the stone can make it worse.
Stick to the bare metal or porcelain oven floor only.
9. The Ammonia Fume Trick for Extreme Grime
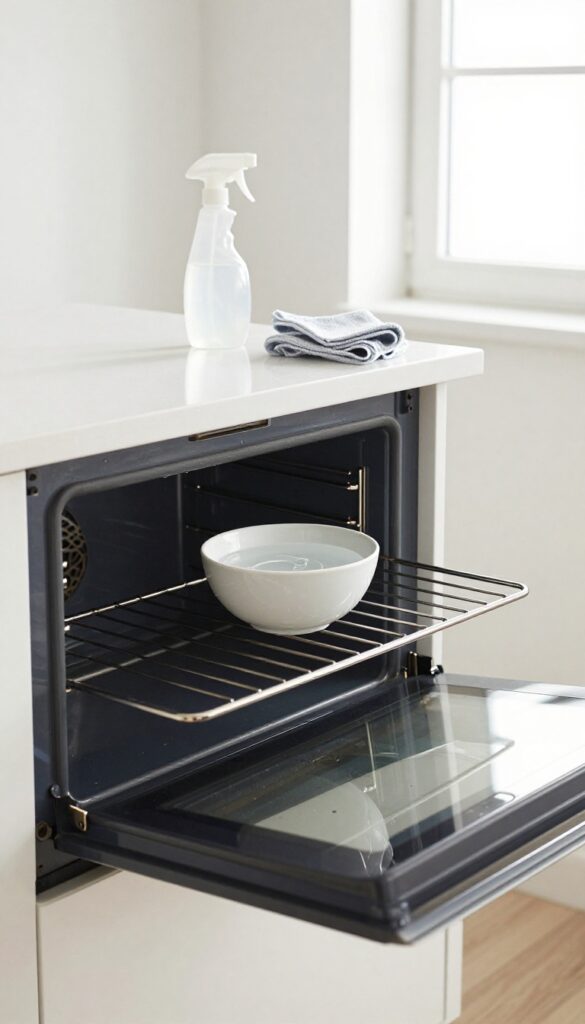
If you've got a layer of carbon so thick it feels like concrete, ammonia fumes are your secret weapon. This old-school method uses chemistry instead of elbow grease. The ammonia vapors soften the toughest burnt-on residue overnight, so you can wipe it away the next morning with minimal effort.
This method is powerful, so you need to use it safely. Never mix ammonia with bleach or any other cleaner—the fumes can be toxic. Keep the kitchen well-ventilated by opening windows and turning on the exhaust fan.
Also, remove any food or utensils from the oven before starting.
How It Works
Place a small bowl of household ammonia (not diluted) on the top rack of a cold oven. Close the door and leave it overnight, at least 8 to 12 hours. The ammonia fumes react with the carbonized grease, breaking it down into a soft, soapy residue.
In the morning, the grime will wipe off easily with a damp cloth or sponge.
Safety First
Ammonia has strong fumes, so ventilation is key. Keep windows open and avoid breathing in the vapors. Wear rubber gloves to protect your skin.
If you have a gas oven, make sure the pilot light is off and the oven is completely cool. Never use this method with the oven on or warm.
After The Fume Treatment
Once the grime is softened, wipe down all surfaces with a mixture of warm water and a few drops of dish soap. Rinse thoroughly with a clean damp cloth to remove any ammonia residue. Dry with a soft towel.
If any stubborn spots remain, repeat the process or use a baking soda paste for spot treatment.
10. Line the Bottom with a Baking Sheet or Foil
Spills happen, especially when you're roasting or baking something that bubbles over. Instead of scrubbing a baked-on mess later, stop it before it starts. A simple barrier on the bottom rack catches drips and keeps your oven floor clean.
Place a large baking sheet or a sheet of heavy-duty aluminum foil on the lowest rack position. Make sure it's large enough to catch any drips from dishes above. When it gets dirty, just swap it out—no scrubbing required.
This trick works for everything from bubbling casseroles to juicy roasts. Just remember not to cover the oven floor directly, as that can block airflow and heat distribution.
Why It Works
The baking sheet or foil acts as a drip pan, catching grease and food particles before they hit the oven floor. Since the oven floor gets the hottest, spills there bake on fast. By intercepting them, you avoid that tough, blackened crust.
What To Use
Heavy-duty aluminum foil is cheap and disposable. For a reusable option, use a rimmed baking sheet that fits your oven rack. Avoid foil that's too thin—it can tear.
Also, never line the oven bottom itself; always place the barrier on a rack.
When To Replace
Check the liner after each use. If it's covered in grease or burnt bits, swap it out. For heavy cooking, you might need a fresh sheet every few uses.
Keeping it clean prevents smoke and odors during future cooking.
11. Clean Oven Racks with a Trash Bag Soak
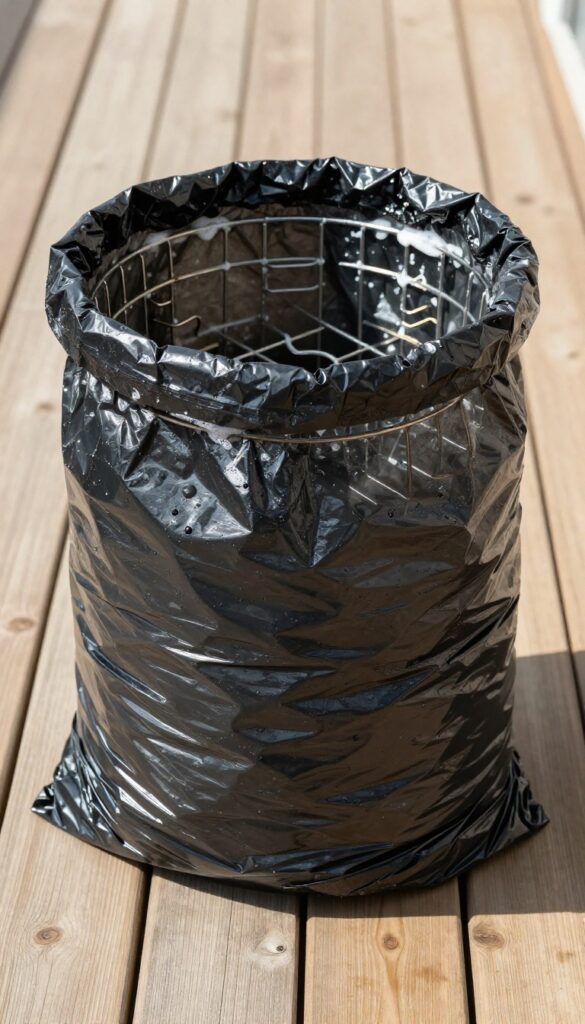
Oven racks are a pain to scrub by hand, especially when grease has baked into a hard, sticky coating. But there's a trick that does the hard work for you: a trash bag soak. It's almost magical—just bag, soak, rinse, and watch the grime fall off.
What You'll Need
Grab a heavy-duty trash bag (the thick, black contractor bags work best), 1/2 cup of ammonia or powdered dishwasher detergent, and a sunny spot outdoors. That's it. No special tools or expensive cleaners.
The Soak Setup
Place your oven racks inside the bag. Pour the ammonia or detergent over them, then seal the bag tightly. Give it a gentle shake to coat the racks.
Leave the bag in direct sunlight for 4–6 hours. The heat and fumes break down the grease without any scrubbing.
Rinse And Reveal
After the soak, take the racks out (wear gloves if using ammonia) and rinse them with a hose or in a bathtub. The grime should slide off with just a soft brush or sponge. If any stubborn spots remain, a quick scrub with a paste of baking soda and water will finish the job.
12. Use a Scraper for Thick Carbon Deposits
When baked-on spills turn into a crusty, blackened layer that laughs at your sponge, it's time to bring out a scraper. A plastic or metal scraper designed for ovens can chip away thick carbon deposits without damaging the surface. Work gently and pair it with a paste cleaner for the best results.
Choose The Right Scraper
Not all scrapers are oven-safe. Plastic scrapers are gentle on enamel and glass, while metal scrapers work faster on tough carbon but risk scratching. Look for one with a comfortable handle and a sharp, straight edge.
Avoid using razor blades or paint scrapers—they can gouge the surface.
Soften First, Scrape Second
For best results, apply a baking soda paste or a commercial oven cleaner to the carbon deposits and let it sit for 15–20 minutes. This softens the crust, making it easier to scrape off without excessive force. Then, hold the scraper at a shallow angle and push gently.
Repeat until the surface is clean.
Finish With A Wipe-down
After scraping, wipe the area with a damp cloth to remove any residue. If you used a chemical cleaner, follow up with a vinegar-water rinse to neutralize odors. Your oven floor will look almost new, and future cleanings will be much easier.
13. The Cream of Tartar Paste for Stubborn Stains
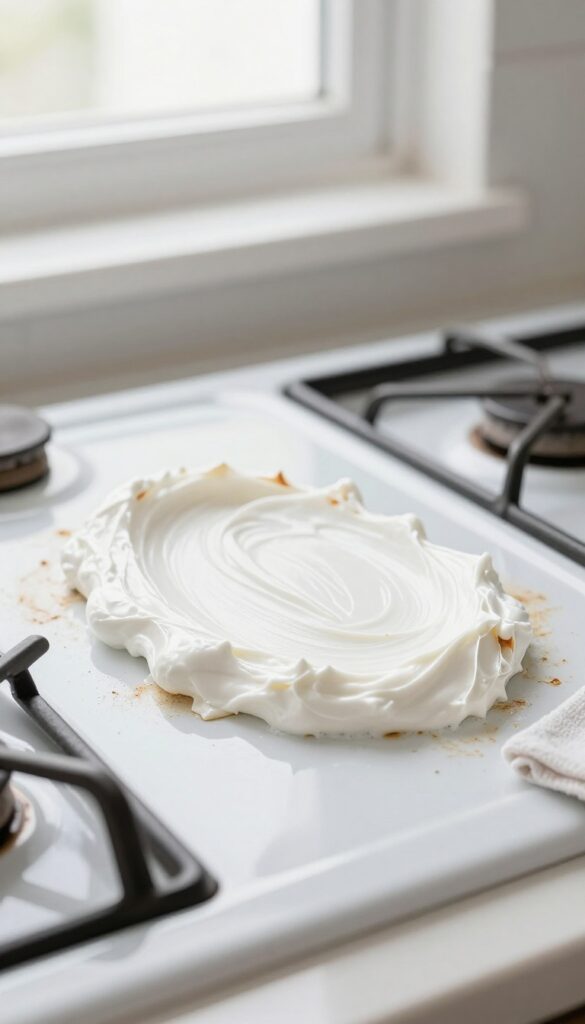
Some stains just won't budge with regular cleaners, especially on enamel surfaces. Cream of tartar, a mild acid, can lift discoloration without harsh scrubbing. Mixed with hydrogen peroxide or water, it forms a paste that tackles those lingering marks.
Cream of tartar is a pantry staple that doubles as a gentle abrasive. Its acidity breaks down mineral deposits and baked-on residue, making it ideal for white or light-colored enamel. The paste works best on stains that are set but not burnt to a crisp.
How To Make The Paste
Combine two tablespoons of cream of tartar with enough hydrogen peroxide (or water) to create a thick, spreadable paste. Hydrogen peroxide adds a mild bleaching effect, but water works fine for regular stains. Stir until smooth.
Application And Waiting
Apply the paste directly to the stain using a spatula or your fingers (wear gloves). Spread it evenly, about 1/8 inch thick. Let it sit for 10–15 minutes until it dries and cracks.
This drying time allows the acid to work.
Wiping Away The Residue
Once dry, wipe the paste off with a damp cloth. The stain should come with it. For stubborn spots, gently scrub with a non-abrasive sponge.
Rinse thoroughly with water. If any residue remains, repeat the process.
14. Prevent Smoke with a Grease Barrier
Smoke happens when grease hits hot surfaces and burns. But what if you could stop it before it starts? A simple grease barrier does exactly that—it coats the oven walls so spills slide off instead of sticking.
This trick is all about preparation. Before you roast or bake anything that might splatter, apply a thin layer of dish soap or a commercial oven protector spray to the interior walls. The barrier creates a slick surface that catches grease but won't let it bond.
After cooking, a quick wipe with a damp cloth removes both the barrier and the mess.
How To Apply A Grease Barrier
Start with a cool oven. Use a clean sponge or spray bottle to apply a thin, even coat of liquid dish soap or a dedicated oven protector. Focus on the back and side walls where grease splatters most.
Avoid the heating elements and oven floor to prevent excess smoke. Let it dry for a few minutes before preheating.
Best Products For The Job
Dawn dish soap works great in a pinch—just dilute it slightly with water. For a more durable barrier, try commercial oven protector sprays like Easy-Off Fume Free Oven Cleaner or Bar Keepers Friend Oven & Grill Cleaner. These are designed to withstand high heat and make cleanup effortless.
When To Use This Method
Use the grease barrier for high-splatter dishes like roasting chicken, baking casseroles, or broiling fish. It's also perfect for holiday cooking when you're making multiple dishes and don't want to scrub between batches. Skip it for low-mess items like cookies or bread.
15. Use a Microfiber Cloth for Final Polish
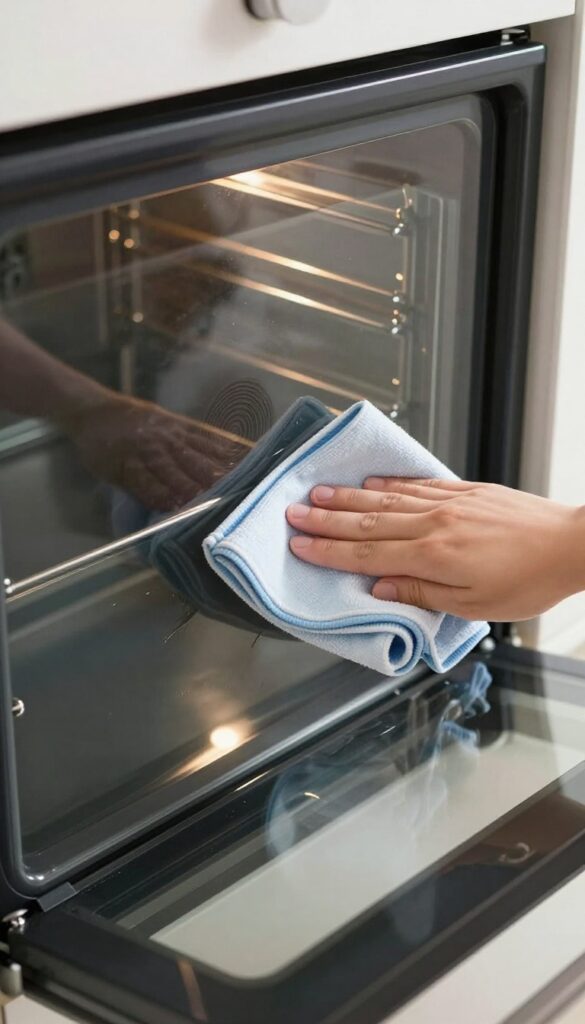
You've scrubbed, rinsed, and wiped down the oven interior. But when you close the door, you notice streaks and a dull film on the glass. That last step can make or break the whole cleaning session.
A dry microfiber cloth is the secret to a showroom shine. It grabs dust and lint instead of pushing them around, leaving surfaces spotless. Plus, it prevents those annoying fibers from sticking to the glass or enamel.
After all the heavy lifting, grab a clean, dry microfiber cloth. Fold it into quarters for better control. Start with the oven door glass, using circular motions to buff away any remaining cleaner or water spots.
Then move to the interior walls, ceiling, and floor. Pay extra attention to corners where residue tends to collect. The microfiber's static charge picks up fine particles that paper towels leave behind.
For stubborn streaks, slightly dampen a corner of the cloth with distilled water and buff again. Finish by wiping the door seal gently—avoid snagging the fibers. The result is a streak-free, lint-free finish that keeps your oven looking clean longer.
Why Microfiber Works Best
Microfiber cloths have split fibers that create a large surface area. This traps grease, dust, and moisture inside the cloth rather than spreading them around. Unlike cotton or paper towels, microfiber doesn't leave lint or scratches on glass and enamel.
It's also reusable—just wash with mild detergent and avoid fabric softener to keep the fibers effective.
Step-by-step Buffing Technique
Start with a completely dry cloth. Use firm, circular motions on the glass door to remove streaks. For the interior, work in small sections, overlapping each pass.
Flip the cloth frequently to a clean side. If you encounter sticky residue, lightly mist the cloth with water or a vinegar solution (1: 1 water to white vinegar) and buff again. Finish with a dry pass to remove any moisture.
When To Replace Your Cloth
Microfiber cloths lose their effectiveness over time. Replace them when they feel rough, start to smell musty, or leave streaks instead of removing them. Typically, after 30–50 washes, it's time for a new set.
Store clean cloths in a sealed bag to keep them dust-free.
16. The Vinegar and Water Rinse for Residue Removal
After all that scrubbing and spraying, you might think the job is done. But leftover cleaner residue can cause smoke, affect food taste, and even damage the oven surface over time. A simple vinegar and water rinse is the perfect final step to neutralize any remaining chemicals and leave your oven fresh.
Mixing equal parts white vinegar and water in a spray bottle gives you a gentle, food-safe solution that cuts through alkaline residues. Spray it generously on all interior surfaces, including the door, walls, and bottom. Let it sit for a minute or two, then wipe with a clean, damp cloth.
The vinegar smell disappears quickly as it dries, leaving no chemical aftertaste or fumes.
Why Vinegar Works So Well
Most commercial oven cleaners are alkaline, meaning they have a high pH. Vinegar is acidic, so it neutralizes those alkaline residues on contact. This not only removes any slippery film but also prevents white spots or streaks from forming.
Plus, vinegar is a natural deodorizer—it absorbs and eliminates lingering odors instead of just covering them up.
How To Do The Final Rinse Right
Start with a clean spray bottle and distilled white vinegar (no need for fancy apple cider stuff). Fill it halfway with vinegar, then top off with water. Shake gently.
Mist all surfaces lightly—you don't need to soak them. Use a microfiber cloth or a soft sponge to wipe in one direction, rinsing the cloth frequently. For stubborn residue spots, spray directly and let it sit for five minutes before wiping again.
When To Skip This Step
If you used a natural cleaner like baking soda and water, you can skip the vinegar rinse—there's no chemical residue to neutralize. Also, avoid vinegar on cast iron or unsealed aluminum surfaces inside the oven (like some heating elements). Stick to a plain water wipe for those areas.
Always check your oven manual if you're unsure about material compatibility.
17. Regular Maintenance with a Weekly Quick Wipe
Deep cleaning an oven is a chore nobody looks forward to. But you can dramatically cut down on how often you need to do it by staying on top of small messes. A quick weekly wipe is the easiest habit to adopt, and it pays off every time you cook without smoke or smell.
The secret to an oven that always looks decent is consistency. You don’t need to scrub for hours if you never let grime bake on in the first place. A few minutes each week keeps surfaces clean and prevents the buildup that leads to smoke and burnt odors.
Why Weekly Wipes Work
Grease and food particles harden when exposed to high heat repeatedly. A weekly wipe removes them before they turn into carbonized crust. This also stops smoke from forming during your next roast or bake.
What You’ll Need
Just a soft cloth or sponge, warm water, and a mild dish soap. Avoid abrasive pads that scratch the enamel. For glass doors, a vinegar-water mix works great without streaks.
How To Do It Right
Wait until the oven is completely cool. Remove racks and wipe the interior from top to bottom. Pay extra attention to the bottom and door edges where spills collect.
Dry with a clean cloth to avoid water spots.
When To Deep Clean Anyway
Even with weekly wipes, you’ll still need a deep clean every few months for stubborn spots or if you’ve had a major spill. But the job will be much faster and easier.
FAQ
How often should I deep clean my oven?
Deep clean every 3–6 months depending on use. If you see smoke or smell burnt residue frequently, clean sooner.
Can I use oven cleaner on the heating elements?
No. Avoid spraying cleaner directly on heating elements. Wipe them gently with a damp cloth if needed, but never soak them.
Is it safe to mix baking soda and vinegar for oven cleaning?
Yes, but use them sequentially. Apply baking soda paste, let it sit, then spray vinegar to create a fizzing reaction that lifts grime. Do not mix in a closed container.
How do I remove burnt-on sugar spills from the oven?
Use a paste of baking soda and water, let it sit for 30 minutes, then scrub with a non-abrasive pad. For tough spots, add a little hydrogen peroxide.
What should I do if my oven smokes during self-cleaning?
Open windows for ventilation. Some smoke is normal as residue burns off. If smoke is excessive, cancel the cycle and clean manually first.
Conclusion
A clean oven isn't just about appearances—it means better-tasting food and a safer kitchen. Start with the tips that match your biggest mess, whether it's baked-on grease or stubborn smoke stains. Try one or two methods this weekend, and you'll see how much easier oven cleaning can be.
The real trick is staying on top of spills as they happen.
A quick wipe after each use prevents buildup and saves you from heavy scrubbing later. You've got all the tools now to keep your oven looking and performing like new. Pick your favorites and make them a habit.