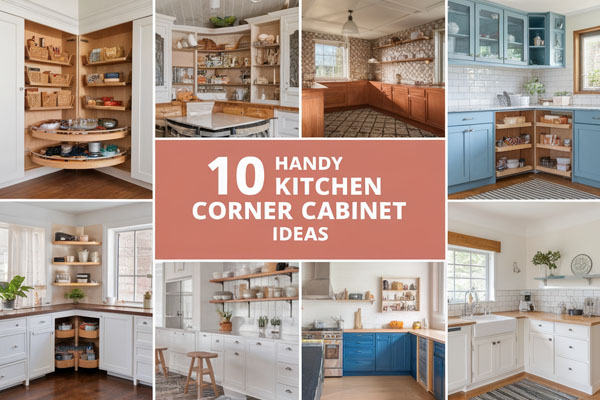
10 Small Corner Kitchen Ideas for Tiny Spaces
Corners decide whether a small kitchen feels efficient or frustrating. Ignore them, and you lose storage, counter space, and flow without even realizing it.
Use them well, and suddenly the whole room works harder without getting bigger.
Tiny kitchens don’t need miracles. They need smart decisions in the right spots, especially where two walls meet and most people give up.
1. Install a Custom Corner Floating Shelf Stack
Dead corners collect clutter fast. They either turn into awkward gaps or become dumping zones for random jars and appliances you rarely use. A stack of floating shelves in that corner changes the entire dynamic and gives you vertical storage without adding bulk.
I’ve tried bulky corner cabinets before, and honestly, they felt heavy in a small space. Floating shelves, on the other hand, keep things light and visually open while still being practical. They make the corner look intentional instead of forgotten.
Why This Works
Open shelving reduces visual weight, which matters a lot in tiny kitchens. When you keep the lines clean and vertical, your eyes move upward instead of focusing on tight floor space.
You also gain flexible storage that adapts to your habits. Everyday bowls, mugs, or spices stay within reach without crowding your main counters.
How to Do It
- Measure from counter height up to ceiling to plan spacing properly.
- Install sturdy L-brackets or hidden brackets rated for kitchen weight.
- Space shelves 10–14 inches apart depending on what you plan to store.
- Anchor into studs whenever possible to prevent sagging over time.
Each step keeps the shelves safe and proportional. Skipping proper support leads to warped boards and regret.
Style & Design Tips
Use solid wood or matte laminate for a clean look that doesn’t overpower the room. Keep the color close to your cabinets so the corner blends instead of shouting for attention.
Avoid overcrowding the shelves. Negative space matters just as much as storage in small kitchens.
Pro Tip or Budget Hack
If custom shelves cost too much, buy straight shelves and trim one side at a hardware shop for a snug corner fit. Paint them the same color as your wall to create a subtle built-in look.
2. Add a Diagonal Corner Sink
Most small kitchens shove the sink along a wall, which eats up prime counter space. Placing it diagonally in the corner frees both adjacent walls for prep and storage. It looks unusual at first, but the functionality makes sense.
I’ve seen this setup in older apartments, and it actually works better than expected. You get elbow room without losing workflow.
Why This Works
A diagonal sink uses an otherwise awkward angle. Instead of fighting the corner, you let it hold the plumbing and give yourself longer counters on both sides.
It also improves the work triangle slightly. Prep on one side, cook on the other, clean in between.
How to Do It
- Remove existing cabinetry in the corner.
- Install a 36-inch diagonal corner base cabinet.
- Choose a compact single-bowl sink to maximize usable space.
- Adjust plumbing lines carefully to fit the new angle.
Each step ensures the sink feels integrated instead of forced into place.
Style & Design Tips
Pick a stainless steel or undermount white sink for a clean finish. Avoid oversized farmhouse styles unless your kitchen has enough depth.
Add a slim faucet with a pull-down sprayer to keep the area functional without visual clutter.
Pro Tip or Budget Hack
If a full remodel isn’t realistic, consider a corner bar sink instead. It’s smaller, cheaper, and still frees up counter flow.
3. Create a Built-In Corner Breakfast Nook
Empty corners near windows often sit unused. A compact L-shaped bench instantly turns that space into a breakfast nook without needing a full dining table.
I love this option because it doubles as storage if you build it right. Tiny kitchens benefit from furniture that works overtime.
Why This Works
Benches tuck into corners tighter than chairs ever could. You remove awkward circulation space and gain seating that hugs the walls.
Storage underneath also hides bulky items like extra paper towels or small appliances.
How to Do It
- Measure corner width and depth carefully.
- Build a simple plywood bench frame anchored to studs.
- Add hinged lids or drawers for hidden storage.
- Top with high-density foam cushions for comfort.
Anchoring the structure keeps it sturdy. Lightweight freestanding benches tend to shift and feel temporary.
Style & Design Tips
Choose neutral cushions and washable fabric for practicality. Keep the bench base the same color as your cabinets to make it feel built-in.
Avoid bulky tables. A slim round pedestal table keeps movement easy.
Pro Tip or Budget Hack
Repurpose two small storage benches and push them together in an L-shape. Secure them with brackets to create a custom look without full carpentry work.
4. Install a Lazy Susan Corner Cabinet
Corner base cabinets can become black holes. You toss something inside and forget it exists until you move houses.
A Lazy Susan solves that mess with rotating shelves that bring everything forward. It’s simple but incredibly effective.
Why This Works
Rotating trays eliminate deep, unreachable space. Instead of crawling halfway into the cabinet, you spin the shelf and grab what you need.
That convenience encourages organization instead of chaos.
How to Do It
- Remove existing fixed shelves inside the cabinet.
- Install a two-tier rotating Lazy Susan system.
- Adjust height settings based on stored items.
- Test rotation to ensure smooth movement before final tightening.
Smooth rotation matters. If it sticks, you won’t use it properly.
Style & Design Tips
Keep heavy items on the lower tier for stability. Use small bins to separate categories like baking tools or canned goods.
Avoid stacking too high. Rotation works best when items stay below the shelf lip.
Pro Tip or Budget Hack
If replacing the entire cabinet isn’t possible, buy a standalone Lazy Susan tray and place it inside. It won’t be perfect, but it’s better than wasted depth.
5. Add a Corner Appliance Garage
Small appliances clutter counters fast. Blenders, toasters, and coffee machines compete for space, especially near corners.
A corner appliance garage hides them behind a lift-up or sliding door while keeping them plugged in and ready.
Why This Works
You preserve counter space without sacrificing convenience. Everything stays accessible but visually contained.
Corners work well for this because they’re often awkward for regular cabinets.
How to Do It
- Install a corner upper cabinet with a retractable door.
- Add an interior outlet for convenience.
- Measure appliance height before final installation.
- Keep ventilation in mind for heat-producing devices.
Planning outlet placement saves frustration later.
Style & Design Tips
Match the cabinet finish to existing cabinetry for a seamless look. Use matte hardware for a modern touch.
Avoid overfilling the space. Stick to 1–2 frequently used appliances.
Pro Tip or Budget Hack
Convert an existing corner cabinet by removing the bottom panel and adding a small countertop surface inside. It mimics a custom appliance garage for less.
6. Install Corner Drawers Instead of Standard Cabinets
Standard corner cabinets waste space at the back. Corner drawers pull everything forward in an angled layout that actually makes sense.
They cost more upfront, but the payoff in daily usability is huge.
Why This Works
Drawers provide full visibility. You see everything at once instead of digging blindly.
Angled fronts also soften harsh corner lines, which visually improves tight kitchens.
How to Do It
- Remove the existing corner base cabinet.
- Install a pre-made corner drawer unit.
- Secure the structure to adjacent cabinets.
- Test glide mechanisms before final adjustments.
Smooth glides prevent long-term frustration.
Style & Design Tips
Choose soft-close hardware for a polished feel. Keep drawer handles minimal to avoid visual noise.
Avoid overstuffing heavy cookware into the top drawer.
Pro Tip or Budget Hack
If full corner drawers exceed budget, add pull-out organizers inside the existing cabinet for similar access.
7. Use Open Corner Pegboard Storage
Walls near corners often remain empty. Installing a pegboard transforms that space into flexible vertical storage.
I’ve used pegboards in small kitchens before, and they’re surprisingly practical when styled correctly.
Why This Works
Pegboards adapt easily. You rearrange hooks and shelves whenever your needs change.
They also lift utensils off counters, freeing up precious prep space.
How to Do It
- Mount pegboard panels securely into studs.
- Paint or finish before installation.
- Add hooks, mini shelves, and baskets.
- Organize by frequency of use.
Securing into studs ensures the board supports real kitchen weight.
Style & Design Tips
Paint the pegboard the same color as your wall for subtle impact. Use matching metal hooks to keep the look cohesive.
Avoid overcrowding every hole. Let the design breathe.
Pro Tip or Budget Hack
Cut a standard pegboard to fit the exact corner dimensions instead of buying custom panels.
8. Create a Corner Pantry Tower
If your kitchen lacks a pantry, the corner can handle that job. A tall corner cabinet maximizes vertical storage without widening the footprint.
Height becomes your best friend in tiny spaces.
Why This Works
Vertical storage multiplies capacity. You use space that would otherwise sit empty above eye level.
A narrow tower also keeps floor area clear, which makes the kitchen feel less cramped.
How to Do It
- Install a floor-to-ceiling corner cabinet unit.
- Add adjustable interior shelves.
- Use labeled bins for categories.
- Keep heavier items at waist height.
Adjustable shelves allow flexibility as your storage needs evolve.
Style & Design Tips
Choose light-colored cabinetry to prevent visual heaviness. Add interior lighting if possible.
Avoid dark finishes unless the kitchen already has strong lighting.
Pro Tip or Budget Hack
Stack two ready-made cabinets and trim them together for a custom tower effect without full custom pricing.
9. Add a Compact Corner Prep Station
Some corners sit near windows or between cabinets and go unused. Turning that area into a mini prep station adds functionality without a full island.
A small butcher block surface can transform the workflow.
Why This Works
Dedicated prep space prevents overcrowding near the stove. It separates tasks and improves efficiency.
Even 18 inches of counter makes a difference in a tight layout.
How to Do It
- Install a narrow corner countertop extension.
- Add a small drawer underneath for tools.
- Mount a magnetic knife strip nearby.
- Keep essentials only within reach.
Limiting tools keeps the station purposeful.
Style & Design Tips
Use butcher block for warmth or match your existing countertop for cohesion. Keep decor minimal and functional.
Avoid placing heavy decor here. This space should stay practical.
Pro Tip or Budget Hack
Repurpose a sturdy side table and secure it to the wall for a semi-built-in look.
10. Install Corner Under-Cabinet Lighting
Corners often look darker simply because cabinets block overhead light. Adding under-cabinet lighting brightens that exact problem area.
Good lighting makes a small kitchen feel more open without knocking down walls.
Why This Works
Task lighting improves visibility for prep and cleaning. It also highlights backsplashes and keeps corners from feeling neglected.
Light draws attention upward instead of emphasizing tight floor space.
How to Do It
- Install LED strip lights under corner cabinets.
- Choose warm white for a balanced tone.
- Hide wiring behind trim or inside cabinets.
- Test brightness levels before final mounting.
Proper placement prevents glare on glossy surfaces.
Style & Design Tips
Use slim LED strips instead of bulky fixtures. Keep cords hidden to maintain a clean look.
Avoid overly cool lighting that makes the kitchen feel sterile.
Pro Tip or Budget Hack
Battery-powered LED strips work well for renters who can’t hardwire fixtures.
Small Corner Kitchen Planning Strategy: Start With Function, Not Furniture
Most small kitchen upgrades fail because people shop before they measure. Corners especially require precision since even a two-inch miscalculation can throw off cabinet doors, drawers, or appliance clearance. Before adding anything, define what the corner actually needs to solve.
Start by identifying your biggest daily frustration. Is it lack of prep space, poor storage access, or countertop clutter? The right corner solution should remove a bottleneck in your workflow, not just look good in photos.
Measure wall length, ceiling height, outlet placement, and walking clearance. Tiny kitchens demand breathing room, so always account for how cabinet doors and drawers open.
Think in zones rather than random upgrades. One corner can become a prep zone, another storage-heavy, and another seating-focused if space allows.
Prioritize vertical storage whenever possible. Height expands capacity without shrinking movement space.
Finally, balance visual weight. If one corner holds a tall pantry tower, keep the opposite side lighter with open shelving or low cabinetry to avoid a boxed-in feeling.
Layout Foundations: Understanding Corner Workflow in Tiny Kitchens
Small kitchens revolve around efficiency. The classic work triangle—sink, stove, refrigerator—still applies, but corners often interrupt that flow if poorly designed.
When planning corner upgrades, observe how you move during cooking. Do you pivot frequently between sink and stove, or do you prep in one spot and cook in another?
Corners near high-traffic paths should remain visually open. Installing bulky cabinetry in tight walkways creates daily frustration.
Corners near prep zones benefit from task lighting and accessible storage. This supports smoother transitions between chopping, mixing, and cooking.
Also consider how many people use the kitchen at once. If two people cook regularly, avoid corner seating that blocks circulation.
Foundation decisions determine whether a corner feels intentional or accidental. Treat corners like strategic assets, not leftover spaces.
Storage Psychology: Why Corners Feel Cluttered (And How to Fix It)
Corners naturally attract clutter because they sit slightly out of direct view. Items placed there feel hidden but not truly organized.
That illusion encourages stacking and forgetting. Over time, the corner becomes a visual and functional dead zone.
The solution lies in visibility and accessibility. Rotating trays, pull-out drawers, and open shelving prevent items from disappearing into the back.
Group items by frequency of use. Daily essentials should remain within arm’s reach, while seasonal or specialty items can occupy higher or deeper storage areas.
Clear containers improve recognition. When you see what you have, you buy less and waste less.
Keeping corners intentional reduces stress. Organized spaces influence how calmly and efficiently you cook.
Budget Planning for Small Corner Upgrades
Corner solutions range from simple $20 fixes to custom cabinetry investments. Planning a realistic budget prevents half-finished upgrades.
Start with small-impact improvements like lighting or pegboards if funds are limited. These changes deliver noticeable functional gains without construction.
Mid-range upgrades include Lazy Susans, pull-out organizers, and countertop extensions. They improve daily usability without full remodeling.
High-investment options like corner drawers or custom pantry towers require precise installation. While expensive upfront, they dramatically increase long-term value.
Always account for installation costs. Even small cabinetry modifications may require professional adjustments.
Set a phased plan if needed. Improve one corner at a time rather than overwhelming your budget.
Common Mistakes to Avoid
Ignoring measurement accuracy causes the most expensive mistakes. Even slight misalignments in corners create gaps, uneven surfaces, or unusable cabinets.
Overloading open shelving leads to visual chaos. Keep decor balanced and avoid stacking heavy items too high.
Choosing dark finishes in a poorly lit corner makes the kitchen feel smaller. Light tones and proper lighting preserve openness.
Installing bulky seating without testing clearance blocks movement. Always mock up layouts with painter’s tape before committing.
Forgetting electrical planning limits functionality. Appliance garages and prep stations need accessible outlets.
Prioritizing trend over practicality results in regret. Corners should serve daily habits first and aesthetics second.
Maintenance & Long-Term Functionality
Corner upgrades must remain easy to maintain. Deep cabinets collect dust and crumbs if not regularly cleaned.
Rotating shelves require occasional tightening to keep smooth motion. Neglecting hardware shortens lifespan.
Under-cabinet lighting should be installed with accessible wiring for future replacement. Hidden systems are great, but they must remain serviceable.
Open shelving demands discipline. Rotate items and declutter monthly to prevent overcrowding.
Moisture-prone areas near sinks need proper sealing. Corners often hide leaks longer than flat walls.
Long-term usability ensures your investment continues to serve you years down the line.
Safety Considerations in Tight Kitchen Corners
Sharp countertop edges at corners increase bump risks. Rounded or slightly beveled edges improve safety without sacrificing style.
Heavy upper cabinetry requires proper anchoring. Corners sometimes lack solid stud support, so reinforcement may be necessary.
Avoid placing high-heat appliances in enclosed appliance garages without ventilation. Heat buildup can damage cabinetry.
Ensure proper lighting near prep stations to reduce knife-related accidents. Visibility directly impacts safety.
Childproofing matters in small kitchens. Corner drawers and low cabinets should include safety latches if needed.
A well-designed corner protects both workflow and well-being.
Frequently Asked Questions
1. Are corner cabinets worth it in small kitchens?
Yes, when designed properly. Features like rotating trays or pull-out drawers turn awkward depth into accessible storage.
2. What is the best way to brighten a dark kitchen corner?
Install under-cabinet LED lighting and choose light-colored finishes. Even subtle lighting upgrades dramatically improve visibility.
3. How much space do I need for a corner breakfast nook?
You typically need at least 48 inches along each wall for comfortable bench seating. Smaller layouts can still work with slim benches and compact tables.
4. Can renters upgrade kitchen corners without remodeling?
Yes. Use freestanding corner shelves, battery-operated lighting, and removable pegboards to add functionality without permanent changes.
5. Are corner drawers better than Lazy Susans?
Corner drawers provide full visibility and smoother access. Lazy Susans are more budget-friendly and easier to retrofit into existing cabinets.
6. How do I prevent corner clutter from returning?
Assign specific categories to each corner and declutter monthly. Visibility and organization systems keep buildup under control.
Final Thoughts
Small corner kitchens don’t need more square footage. They need smarter use of the square footage already there.
When you treat corners as opportunities instead of obstacles, the whole layout shifts. Try one or two of these ideas first, see how your space responds, and build from there.