15 Cleaning a Cast Iron Skillet Tips for Safe Shine
A dull, sticky cast iron skillet can make cooking feel like a chore, but restoring its non-stick shine doesn't require harsh chemicals or expensive tools. With a few simple techniques using pantry staples and the right scrubbing tools, you can keep your skillet looking like new and performing at its best.
These 15 tips cover everything from daily cleaning to deep restoration, so you can tackle any mess with confidence. Whether you're dealing with rust, stuck-on food, or flaking seasoning, each method is practical and easy to follow.
Let's get your cast iron back to its slick, shiny glory.
1. Scrub with Coarse Salt and a Paper Towel
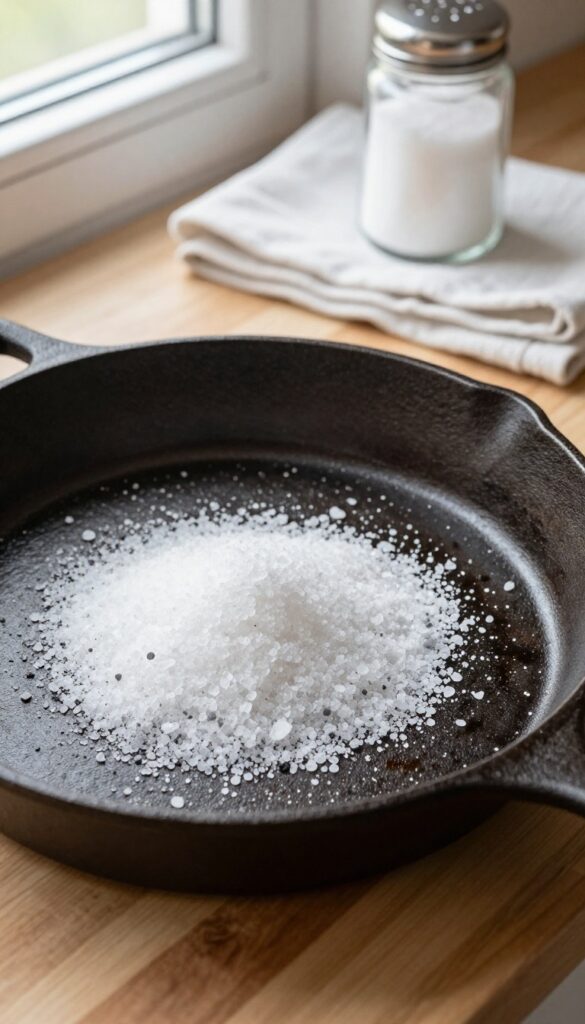
Kosher salt isn't just for seasoning—it's a gentle abrasive that lifts stuck-on food without scratching your skillet's seasoning. This method is quick, uses what you already have in the kitchen, and leaves your pan clean and ready for the next use.
When food clings stubbornly to your cast iron, reach for the salt shaker instead of a steel scrubber. Coarse salt provides enough grit to dislodge particles without damaging the polymerized oil layer that gives cast iron its non-stick properties. A folded paper towel gives you control and prevents salt from scattering everywhere.
This technique works best on warm (not hot) skillets, as heat helps loosen residue but can burn your hands if the pan is too hot. After scrubbing, rinse with hot water and dry immediately to prevent rust. You'll be amazed at how a sprinkle of salt can restore that smooth, slick surface.
Why Salt Works Best
Salt crystals are hard enough to scrape off burnt bits but soft enough to leave seasoning intact. Unlike metal scrubbers or abrasive cleaners, salt won't strip away the non-stick coating you've built up over time. Plus, it's food-safe and leaves no chemical residue.
Step-by-step Salt Scrub
After cooking, let the skillet cool until it's warm to the touch. Sprinkle about two tablespoons of coarse kosher salt into the pan. Fold a paper towel into a thick square, grasp it firmly, and scrub in circular motions, focusing on stuck-on areas.
The salt will turn gray as it absorbs grease and food particles. Rinse thoroughly with hot water and dry with a clean towel.
When To Avoid This Method
If your skillet has rust spots or the seasoning is flaking, skip the salt scrub—it can worsen damage. Instead, use a chainmail scrubber or a gentle soap wash. Also, avoid salt on enameled cast iron, as it can scratch the coating.
2. Use a Chainmail Scrubber for Tough Residue
When a soft sponge just won't cut it, a chainmail scrubber is your best friend. Made from stainless steel rings, it's tough enough to scrape off burnt-on food without damaging the seasoning. Plus, it's easy to clean and lasts for years.
A chainmail scrubber is a game-changer for cast iron care. Unlike steel wool, which can strip seasoning, the flexible rings glide over the surface, removing gunk while preserving the non-stick layer. Use it with hot water for the best results—no soap needed unless you're dealing with grease.
Rinse thoroughly and dry immediately to prevent rust.
Why Chainmail Works
The secret lies in the material. Stainless steel is harder than burnt residue but softer than your skillet's seasoning. The open weave lets food particles fall through, so you're not just pushing them around.
It's also rust-resistant, so it won't leave orange marks on your pan.
How To Use It Right
Start by heating the skillet with a little water until it simmers. Then, scrub in a circular motion with the chainmail. The heat loosens stubborn bits, making them easier to remove.
For extra grip, wear a silicone oven mitt or hold the scrubber with a cloth.
When To Skip It
If your skillet has flaking seasoning or bare spots, stick to gentler methods like salt scrubbing until you re-season. Chainmail is for maintenance, not repair. Also, avoid using it on enameled cast iron—it can scratch the coating.
3. Avoid Soap—Unless You Know the Right Kind
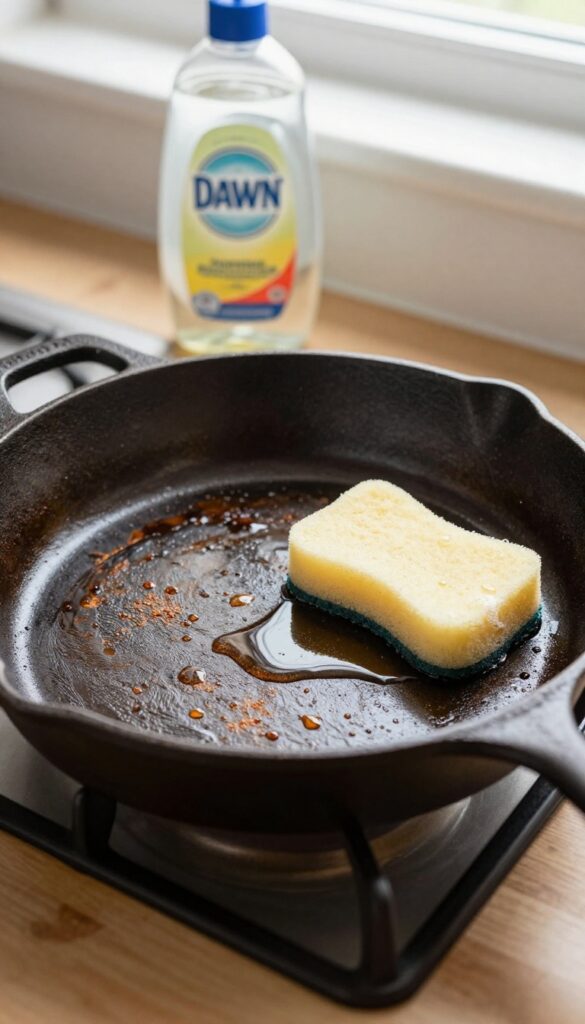
For years, the rule was simple: never use soap on cast iron. That advice came from a time when lye-based detergents stripped seasoning in seconds. Today's mild dish soaps are much gentler, but you still need to be careful.
If your skillet has a solid, well-built seasoning, a little soap won't hurt. But if the seasoning is thin or patchy, stick to soap-free methods to avoid stripping it further.
The key is knowing your skillet's seasoning condition and choosing the right soap. Modern mild dish soaps, like Dawn or Seventh Generation, are generally safe for well-seasoned pans. They cut grease without damaging the polymerized oil layer.
However, avoid harsh detergents labeled as "heavy-duty" or "grease-fighting"—those often contain stronger surfactants that can break down seasoning over time. If your skillet is new or has thin seasoning, skip soap entirely. Instead, use hot water and a stiff brush or salt scrub.
When Soap Is Safe
If your skillet has a dark, glossy, and slick surface, it's well-seasoned. A quick wash with a tiny drop of mild soap and a soft sponge is fine. Rinse immediately and dry thoroughly.
This is especially helpful for cutting through greasy residue after cooking bacon or frying. Just don't let it soak—prolonged exposure to water can cause rust.
When To Skip The Soap
If your skillet looks dull, has gray patches, or feels rough, the seasoning is fragile. Soap can strip what little coating remains. Stick to hot water and a stiff brush, or use coarse salt and a paper towel to scrub away food bits.
After cleaning, apply a thin layer of oil and heat it on the stove to reinforce the seasoning.
The Right Way To Use Soap
Use only a drop or two of mild soap. Never use metal scrubbers or abrasive pads with soap—they'll scratch the seasoning. Lather gently with a non-scratch sponge, rinse with hot water, and dry immediately with a lint-free towel.
Then place the skillet on low heat for a minute to evaporate any remaining moisture. Follow up with a light oil rub to keep the seasoning happy.
4. Dry Immediately to Prevent Rust
Rust is the enemy of a well-seasoned skillet, and it only takes a few drops of water to start the damage. The moment your skillet is clean, drying it properly is just as important as the washing itself. A quick towel dry helps, but a brief stint on the stove guarantees every bit of moisture evaporates.
After washing, dry your skillet thoroughly with a towel and then warm it on the stove for a minute. Any moisture left behind can cause rust spots.
Why Moisture Is The Enemy
Cast iron is porous, so water can seep into the seasoning layer if left on the surface. Even a thin film of water can oxidize the iron, creating orange rust patches that are hard to remove without stripping the pan. Drying immediately seals the deal.
The Towel-and-stove Method
Start by wiping the skillet dry with a clean dish towel or paper towel. Then place it on a burner over low heat for 1–2 minutes. You'll see the last traces of steam disappear.
This step also opens the pores slightly for a light oil rub if you're applying a maintenance coat.
What To Avoid
Don't let your skillet air-dry in the dish rack or leave it wet in the sink. And never put a wet cast iron away in a cabinet—trapped moisture leads to rust. If you notice rust starting, scrub it off with steel wool and reseason the spot.
5. Apply a Thin Layer of Oil After Every Wash
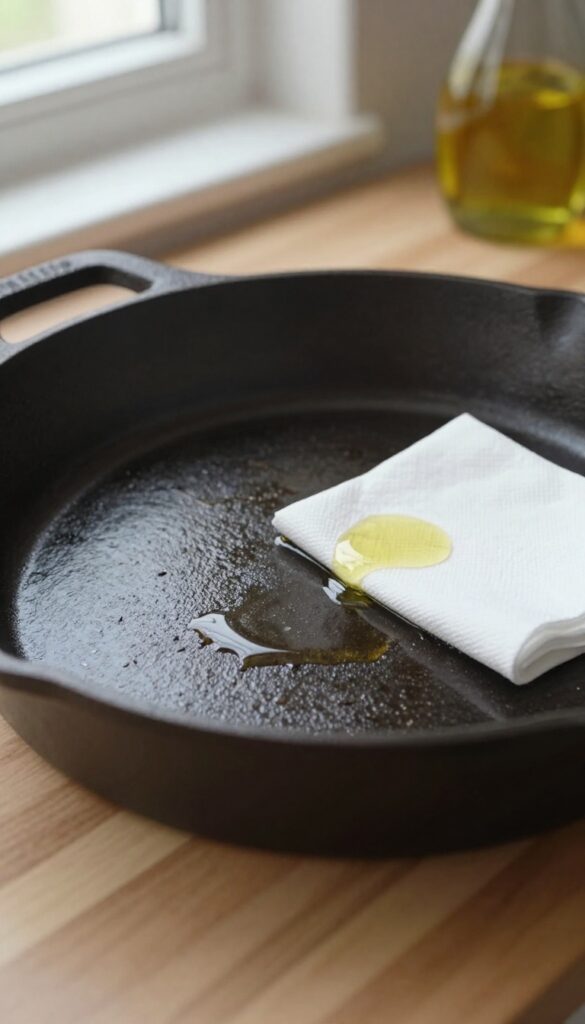
Once your skillet is clean and dry, the final step is what locks in that slick, non-stick surface. A quick oil rubdown after every wash keeps the seasoning healthy and gives the pan a subtle shine that makes it look almost new. It only takes a few seconds, but it makes a big difference over time.
After washing and drying your skillet, place it on a warm burner for a minute or two. Then, add just a few drops of vegetable oil or flaxseed oil to the pan. Use a paper towel to rub the oil into a thin, even layer over the entire cooking surface, including the sides and handle.
The goal is a barely-there coating—if it looks greasy, you've used too much. Finally, let the skillet cool completely before storing. This routine reinforces the seasoning layer, protects against moisture, and keeps your pan ready for the next meal.
Why A Thin Layer Matters
Too much oil can turn sticky or gummy, especially if the pan isn't hot enough to polymerize it. A thin layer ensures the oil bonds to the existing seasoning, creating a smooth, durable surface. Think of it as a light moisturizer for your skillet—enough to protect, not so much that it feels oily.
Best Oils For The Job
Vegetable oil, canola oil, and flaxseed oil are all great choices because they have high smoke points and polymerize well. Avoid olive oil or butter for this step—they can leave a sticky residue. Flaxseed oil is especially popular for its hard, shiny finish, but any neutral oil with a high smoke point works fine.
When To Oil And When To Skip
Oil after every wash if you cook frequently, but if the skillet sits unused for weeks, a light oiling before storage helps prevent rust. Skip the oil if you're about to store the pan for a long time in a humid environment—instead, give it a very light coat and place a paper towel inside to absorb moisture.
6. Remove Rust with a Potato and Baking Soda
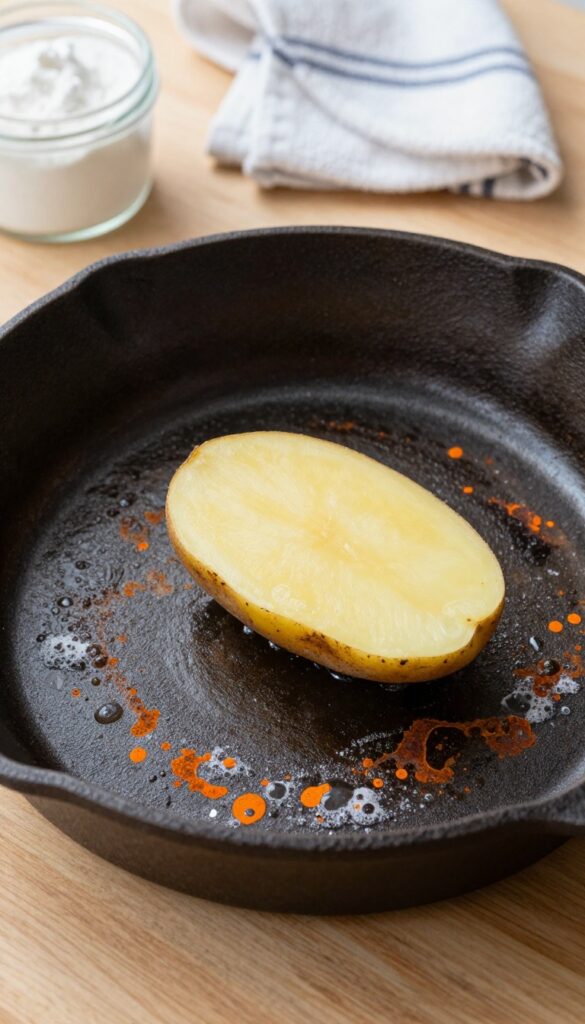
Rust spots can appear even on the best-loved skillets, but you don't need a chemical rust remover. A raw potato and baking soda make a surprisingly effective rust-busting duo. The oxalic acid in the potato naturally breaks down rust, while the baking soda adds gentle abrasion.
This method is simple, cheap, and safe for your seasoning. You'll be amazed how easily rust lifts away without harsh scrubbing.
How It Works
Potatoes contain oxalic acid, which reacts with iron oxide (rust) to form a soluble compound that rinses away. Baking soda acts as a mild abrasive to help scrub off loosened rust without damaging the skillet's surface.
Step-by-step Instructions
Cut a raw potato in half. Dip the cut side into a small dish of baking soda. Scrub the rusty areas in a circular motion, applying light pressure.
Rinse with warm water and dry immediately. Repeat if needed for stubborn spots.
When To Use This Method
This trick works best for light to moderate surface rust. For deep rust or pitting, you may need a more aggressive approach like steel wool or a vinegar soak. Always dry the skillet thoroughly after treatment to prevent new rust.
7. Strip and Reseason When Seasoning Is Flaking
Sometimes your skillet's seasoning gets so uneven, patchy, or sticky that no amount of light cleaning will fix it. Flaking seasoning can leave black specks in your food, and a sticky surface is just unpleasant to cook on. When you've tried scrubbing and oiling but the problem keeps coming back, it's time to start over from scratch.
Stripping the old seasoning and applying a fresh layer is the most reliable way to get back to a smooth, non-stick finish.
Stripping and reseasoning sounds dramatic, but it's a straightforward process that uses common household items. You'll remove all the old seasoning down to bare metal, then build a fresh layer with your preferred oil. The result is a clean slate that, with proper care, will last for years.
When To Strip Vs. When To Touch Up
A few small bare spots can usually be fixed with a quick stovetop seasoning. But if more than half the surface is flaking, if the seasoning is thick and peeling, or if the skillet feels sticky even after washing, stripping is the better choice. Also strip if you've inherited an old skillet with unknown crud or if you accidentally used too much oil and created a gummy layer.
Two Safe Stripping Methods
The easiest method uses yellow-cap oven cleaner (the kind with lye). Spray the skillet inside and out, place it in a plastic bag, and let it sit for 24 to 48 hours. Then scrub off the softened seasoning with a nylon brush.
Alternatively, you can soak the skillet in a 50/50 vinegar-water solution for an hour to remove rust and light seasoning, then scrub. Both methods are safe for cast iron and don't require power tools.
Reseasoning From Scratch
After stripping, wash the skillet with soap and water, then dry it thoroughly. Apply a very thin layer of a high-smoke-point oil like grapeseed, flaxseed, or avocado oil. Wipe off as much oil as you can—almost like you're trying to remove it.
Then bake the skillet upside down in a 450°F oven for an hour. Let it cool in the oven. Repeat this process three to four times for a durable, slick seasoning.
8. Use the Oven Self-Cleaning Cycle for Deep Stripping
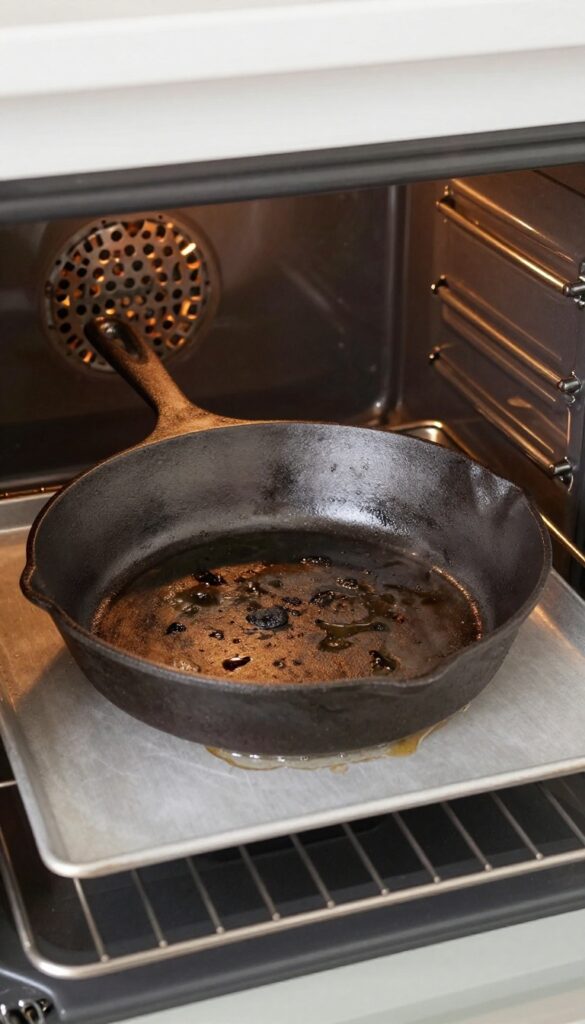
When your skillet's seasoning is beyond repair—flaking, sticky, or uneven—sometimes the only fix is a complete reset. The oven self-cleaning cycle is a powerful tool that burns off every trace of old seasoning, leaving you with a bare, gray pan ready for a fresh start. This method is aggressive, so only use it on pans that are truly beyond saving.
The self-cleaning cycle reaches temperatures around 800°F, which incinerates all carbonized oil and food residue. It's a drastic step, but it's the fastest way to strip a pan down to raw iron without sanding or chemical strippers. Just be prepared for some smoke and a bit of smell—open a window and remove any plastic handles or knobs first.
When To Use This Method
Reserve the self-cleaning cycle for pans with thick, gummy seasoning, rust that won't scrub off, or an off smell that won't go away. If your skillet has a few sticky spots, try a stovetop scrub or vinegar soak first. This is the nuclear option.
How To Do It Safely
Place the empty skillet upside down on the top rack of your oven, with a sheet of foil or a baking sheet on the lower rack to catch any drips. Run the self-cleaning cycle (usually 2–4 hours). Let the oven cool completely before opening.
The pan will be hot and may look ashy—that's normal. Wash it with warm water and a stiff brush, then dry immediately and apply a thin layer of oil to prevent rust.
What To Expect After
Your skillet will emerge with a matte gray or slightly brownish surface. It's completely bare, so you'll need to reseason it from scratch. This is your chance to build an even, durable seasoning layer.
Follow your usual seasoning method—apply a thin oil coat and bake at 450°F for an hour—and repeat 2–3 times for best results.
9. Clean Sticky Residue with a Baking Soda Paste
Sticky residue on cast iron often comes from burnt-on oils or sugary foods that didn't get fully removed. A baking soda paste is a gentle abrasive that lifts that gunk without damaging the seasoning. It's cheap, non-toxic, and works in minutes.
Mix three parts baking soda with one part water to form a thick paste. Apply it directly to the sticky spots and let it sit for 2–3 minutes to soften the residue. Then scrub gently with a non-abrasive pad or soft brush in circular motions.
Rinse thoroughly with warm water and dry immediately. If the stickiness persists, repeat the process or let the paste sit longer. This method is safe for regular use and won't strip your seasoning like harsh detergents would.
Why Baking Soda Works Without Damage
Baking soda is mildly alkaline, which helps break down fatty acids and burnt sugars. Its fine crystalline structure provides gentle abrasion that scrubs away residue without scratching the metal or removing the polymerized oil layer. Unlike steel wool or harsh scouring powders, it's safe for well-seasoned skillets.
When To Use This Method
Use the paste when you have sticky patches after cooking sticky foods like maple-glazed bacon, sugary stir-fries, or cheesy dishes. It's also great for removing residue left by cooking sprays. Avoid it if your seasoning is already thin or flaking—in that case, a full strip and reseason might be better.
Rinsing And Drying Tips
After scrubbing, rinse the skillet with warm water to remove all paste. Don't use soap unless necessary, as it can strip seasoning. Dry the skillet thoroughly with a towel, then place it on a low stove burner for a minute to evaporate any hidden moisture.
A thin coat of oil afterward will keep the surface slick.
10. Never Soak Cast Iron in Water
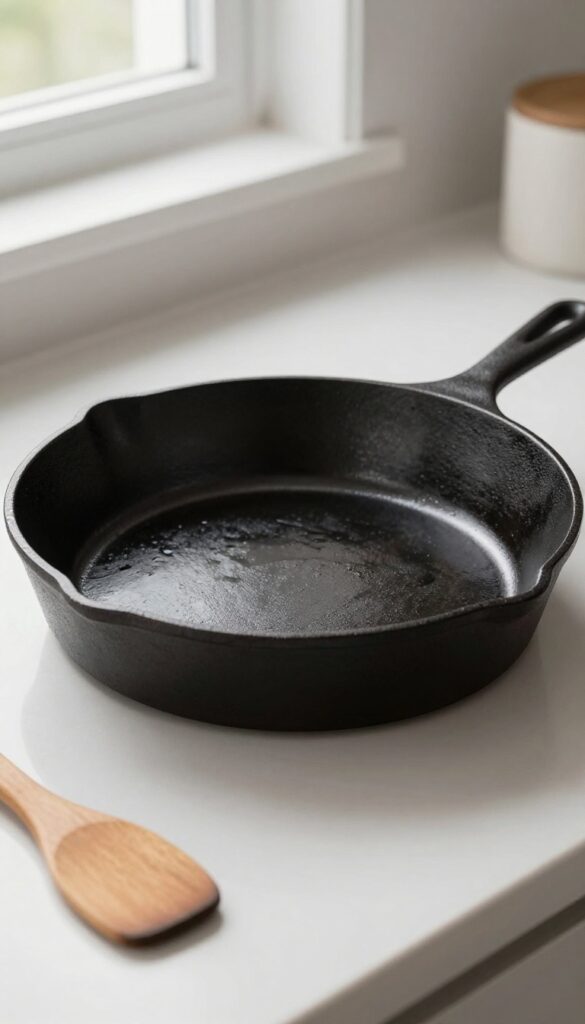
It's tempting to let a stubborn pan soak in the sink overnight, but cast iron hates prolonged water exposure. Soaking can quickly lead to rust and ruin the carefully built seasoning. The good news is you don't need to soak—there's a smarter way to loosen stuck food without damaging your skillet.
Soaking a cast iron skillet in water is one of the fastest ways to damage it. Water seeps into the porous iron, causing rust spots and lifting the seasoning. Even a short soak can leave the surface vulnerable.
Instead of soaking, use heat and a little water to release stuck-on bits. Boil a small amount of water in the pan for a minute or two, then scrape gently with a wooden spatula. The steam and heat will loosen food without harming the seasoning.
After cleaning, dry the skillet immediately over low heat or with a towel to prevent moisture from lingering.
Why Soaking Causes Rust
Cast iron is porous, and when left in water, moisture seeps into the metal. This leads to rust, especially if the seasoning is thin or damaged. Rust not only looks bad but also flakes into food and creates rough spots that are hard to clean.
Even a brief soak can start the process, so it's best to avoid it entirely.
The Boil-and-scrub Method
If food is stubbornly stuck, add about half an inch of water to the skillet and bring it to a boil. Let it bubble for a minute, then remove from heat. Use a wooden spatula or stiff brush to scrape the loosened bits.
The boiling water softens residue without soaking the iron. Once clean, pour out the water and dry the pan thoroughly.
Drying Immediately After Cleaning
After any water contact, dry your skillet right away. Place it on a low burner for a minute or two to evaporate all moisture, then wipe with a clean towel. This step prevents flash rust and keeps the seasoning intact.
Never let a wet skillet air-dry—that's an invitation for rust.
11. Use a Plastic Scraper for Delicate Cleaning
A hard plastic scraper, like the ones made by Lodge, is a game-changer for daily cast iron maintenance. It lets you remove stuck-on food without damaging the seasoning or scratching the surface. This tool is especially useful when you want to avoid a heavy scrub that might strip away the non-stick layer.
Plastic scrapers are inexpensive, durable, and designed specifically for cast iron. They have a flat edge that can get under burnt bits and lift them off with minimal effort. Unlike metal spatulas, they won't gouge the seasoning, and unlike steel wool, they won't leave fine scratches that can lead to rust.
Keep one by your sink and use it after every cooking session to keep your skillet in top shape.
How To Use A Plastic Scraper
After cooking, let the skillet cool slightly so it's warm but not hot. Run it under warm water (no soap needed for basic cleaning) and use the scraper to gently push off any stuck food. Work in the direction of the pan's curve to avoid pressure on one spot.
Rinse and dry immediately.
When To Reach For A Scraper
Use a plastic scraper for everyday messes like scrambled eggs, seared meat residue, or sautéed vegetables. If you have stubborn, burnt-on layers, you may need to combine it with a gentle scrub or a salt paste. For delicate tasks like cleaning after cooking acidic foods, a scraper is ideal because it won't react with the pan.
Where To Find A Good Plastic Scraper
Lodge makes a popular plastic scraper that's widely available online or in kitchen stores. You can also find generic versions at hardware stores or online retailers. Look for one with a comfortable handle and a rigid edge that won't flex too much.
Some scrapers come with a built-in chainmail scrubber on one side for extra versatility.
12. Season with Flaxseed Oil for a Hard, Shiny Finish
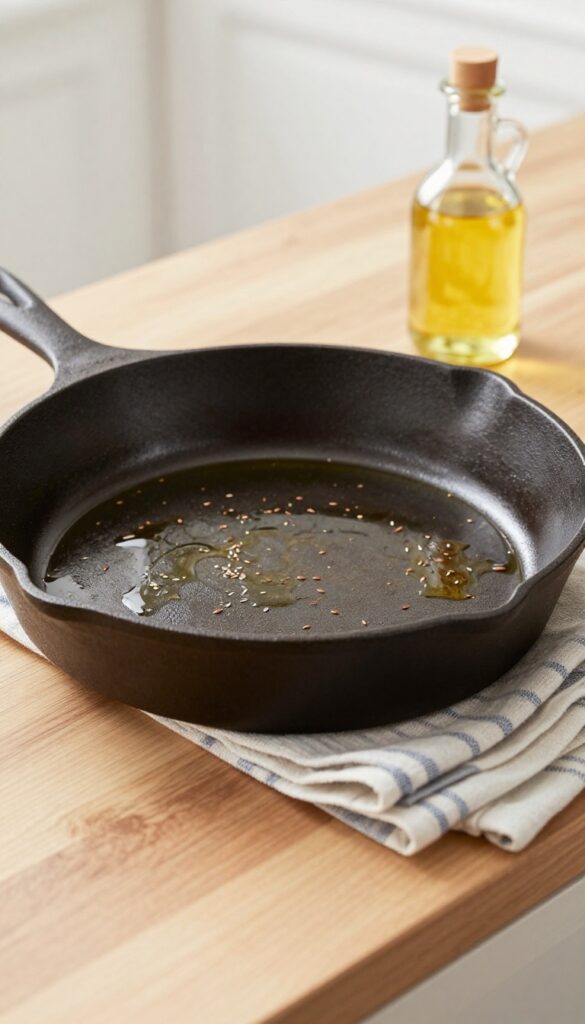
Flaxseed oil, also known as linseed oil, is a favorite among cast iron enthusiasts for creating a seasoning that's both hard and glossy. Its high levels of alpha-linolenic acid cause it to polymerize into a tough, durable layer that feels almost like glass. While it takes more effort than standard vegetable oils, the result is a near-nonstick surface that looks stunning and performs beautifully.
To season with flaxseed oil, start by thoroughly cleaning and drying your skillet. Apply a tiny amount of oil to a lint-free cloth and rub it all over the pan, inside and out. The key is to wipe off as much oil as possible—you want a microscopically thin layer.
Place the skillet upside down in a cold oven, put a baking sheet on the lower rack to catch drips, then heat to 450°F. Bake for one hour, then let it cool completely in the oven. Repeat this process three to five times for best results.
The seasoning will build gradually, becoming harder and shinier with each coat. Be patient: flaxseed oil seasoning can be brittle if applied too thick, so thin layers are essential.
Why Flaxseed Oil Works So Well
Flaxseed oil has a unique chemical structure that promotes rapid polymerization—the process where oil turns into a solid, plastic-like coating. This creates a seasoning that's harder and more resistant to wear than oils like canola or vegetable. The glossy finish also makes food release easier and gives your skillet a professional, well-cared-for look.
Step-by-step Seasoning Process
- Clean and dry your skillet completely. 2.
Apply a drop of flaxseed oil and rub it all over with a paper towel. 3. Buff off all excess oil until the pan looks dry.
- Place upside down in a cold oven with a foil-lined baking sheet below. 5.
Set oven to 450°F and bake for one hour. 6. Turn off oven and let skillet cool inside without opening the door.
- Repeat 3-5 times for a durable, shiny finish.
Tips For Best Results
Use only 100% pure flaxseed oil—avoid blends or additives. Apply the thinnest layer possible; any excess will create sticky spots. For even coverage, use a lint-free cloth or a dedicated seasoning cloth.
After each coat, inspect the surface for any pooling and wipe it away before baking. Store your seasoned skillet in a dry place and avoid cooking acidic foods for the first few uses to let the seasoning fully cure.
13. Store with a Paper Towel Inside to Absorb Moisture
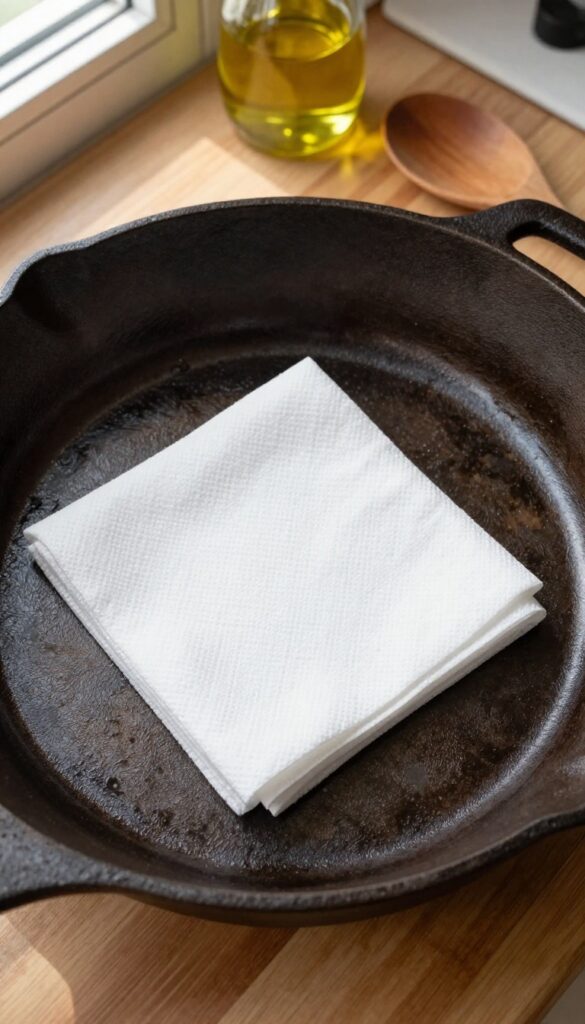
Even after you've dried your skillet thoroughly, lingering humidity in the air can sneak in and cause rust spots over time. A simple paper towel tucked inside acts like a moisture magnet, keeping the interior bone dry between uses. This trick is especially valuable if you live in a humid climate or store your skillet in a cabinet that doesn't get much airflow.
Grab a standard paper towel, fold it into a square or rectangle that fits flat inside the skillet, and place it in the center. The towel will wick away any condensation that forms from temperature changes or ambient moisture. Replace the paper towel every few weeks or whenever it feels damp.
This small habit can extend the life of your seasoning and prevent that dreaded orange rust from ever appearing.
Why It Works
Cast iron is porous on a microscopic level, so even after wiping it dry, tiny amounts of moisture can remain trapped. A paper towel absorbs that residual moisture and creates a dry microclimate inside the pan. Without that buffer, water molecules can bond with the iron and start oxidation—aka rust.
When To Replace The Towel
Check the paper towel every couple of weeks. If it feels damp or shows any discoloration, swap it out for a fresh one. In very humid environments, you might need to change it weekly.
Don't reuse the same towel; once it's absorbed moisture, it's less effective.
A Note On Lint
Some paper towels leave behind lint or fibers, which can stick to the seasoning. To avoid that, use a lint-free option like a coffee filter or a microfiber cloth cut to size. If you do use a standard towel, give the skillet a quick rinse and dry before your next use to remove any loose bits.
14. Cook Fatty Foods First to Build Seasoning
After a deep clean, your skillet's seasoning might be thin or patchy. Instead of reaching for spray oils, let the pan's first few meals do the work for you. Fatty foods naturally deposit layers of oil that polymerize into a durable, non-stick surface with each use.
Cooking fatty foods is one of the easiest ways to build seasoning without extra effort. The key is to start with foods that release plenty of fat as they cook, like bacon, chicken thighs, or fatty steaks. As the fat renders and coats the pan, it fills in microscopic gaps and forms a protective layer.
Avoid acidic ingredients like tomatoes or vinegar during these first few cooks, as they can strip the fresh seasoning. Stick to high-heat searing or frying to encourage polymerization. Over time, you'll notice the pan becoming darker and more non-stick with each meal.
Why Fatty Foods Work Best
When you cook fatty meats, the rendered fat spreads evenly across the surface and reaches high temperatures. This heat causes the fat molecules to bond with the iron, creating a hard, slick coating. Unlike a thin layer of oil wiped on in the oven, cooking fat gets absorbed and baked in more thoroughly.
Best Foods For Your First Cooks
Bacon is a classic choice, but beware of sugar-cured bacon that can leave sticky residue. Opt for unsmoked or low-sugar varieties. Chicken thighs, duck breast, and burgers are also excellent.
For a quick seasoning boost, fry up some potato skins in oil – the starch helps bond the oil to the pan.
What To Avoid After A Deep Clean
Skip watery vegetables, tomato sauce, citrus, and wine for the first few uses. These can react with the bare iron and cause rust or patchy seasoning. Stick to dry, high-fat cooking methods like pan-frying, searing, or shallow frying until the seasoning looks even and dark.
15. Know When to Replace Your Skillet
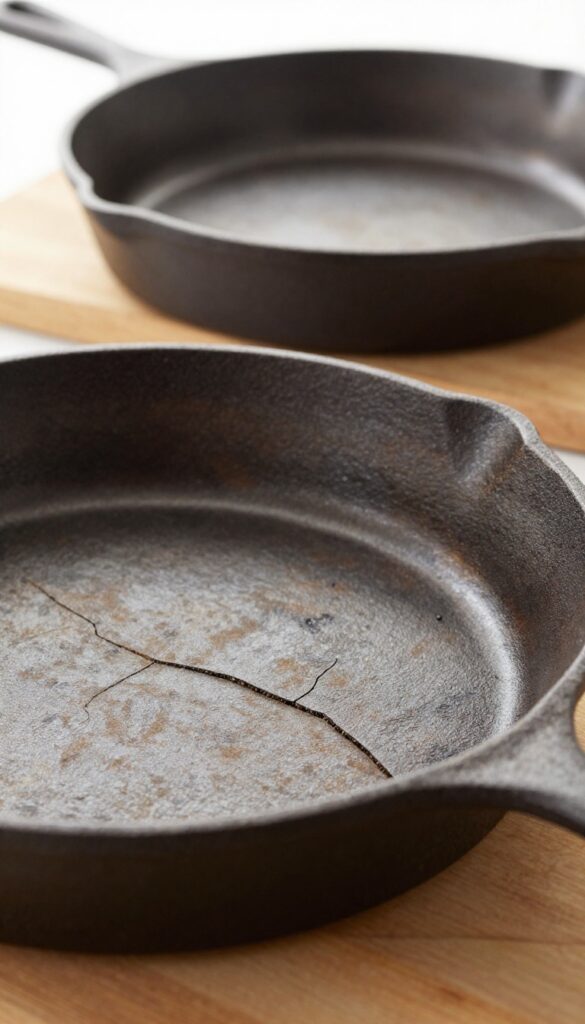
Cast iron skillets are famously durable, often passed down through generations. But even the best pans have a breaking point. Knowing when to retire yours keeps your cooking safe and your food tasting great.
Most cast iron damage is cosmetic—surface rust, minor scratches, or uneven seasoning can be fixed. But certain issues are deal-breakers. Cracks, warping, or deep pitting compromise the pan's structure and can pose safety risks.
A cracked skillet can shatter under heat, while warping causes uneven cooking. Deep pits trap food and bacteria, making proper cleaning impossible. If you spot any of these problems, it's time to shop for a replacement.
Don't feel bad—you've likely gotten years of use. A new skillet is an investment in many more years of great meals.
Cracks And Warping
Cracks often appear after a thermal shock—like running cold water over a hot pan. Even hairline cracks weaken the iron. Warping happens from uneven heating, especially on glass-top stoves.
Both issues are permanent and dangerous. A warped skillet wobbles and can cause oil to pool, leading to burnt spots or even tipping.
Deep Pitting And Rust Holes
Pitting occurs when rust eats into the metal, creating small craters. Light pitting can sometimes be sanded out, but deep pitting is a lost cause. If you can feel grooves with your fingernail, the surface integrity is compromised.
Rust holes are even worse—they mean the iron is thinning and may eventually break through.
Safety First
Don't risk cooking on a damaged skillet. A crack can expand during heating, sending shards into your food. Warped pans can cause oil to spill over, creating a fire hazard.
And deep pits can harbor bacteria even after washing. When in doubt, replace it. A new Lodge skillet costs around $20–$30—cheap insurance for your safety.
FAQ
Can I use soap on my cast iron skillet?
Yes, a small amount of mild dish soap is fine for well-seasoned pans. Avoid harsh detergents or soaking in soapy water.
How do I remove rust from cast iron?
Scrub with a potato half dipped in baking soda, or use fine steel wool. Then rinse, dry, and reseason immediately.
Why does my food stick to cast iron?
Usually because the seasoning is too thin or damaged. Try cooking more fatty foods or reseasoning with a high-smoke-point oil.
Can I put cast iron in the dishwasher?
Never. Dishwasher detergent and high heat will strip the seasoning and cause rust. Always hand wash.
How often should I season my cast iron skillet?
After every wash with a thin oil layer, and do a full oven seasoning whenever the surface looks dull or food starts sticking.
Conclusion
A well-seasoned cast iron skillet is a kitchen workhorse that gets better with age. By following these cleaning tips, you'll keep it non-stick and rust-free without stripping the seasoning.
Pick the methods that fit your cooking style, and make them a habit. Your skillet will reward you with years of reliable, delicious meals.