15 Cast Iron Cleaning Ideas for Skillets Pans and Griddles
You just finished a perfect sear on a steak, and now your cast iron skillet looks like a battlefield. Baked-on bits, grease splatters, and that beautiful seasoning you've built up over time—it's all in the balance.
Cleaning cast iron isn't like washing a nonstick pan; one wrong move can strip the surface you've worked hard to develop. But with the right techniques, you can keep your cookware looking great and cooking even better.
These 15 ideas cover everything from daily maintenance to deep cleaning, so you can tackle any mess without fear.
1. The Salt Scrub for Stuck-On Food
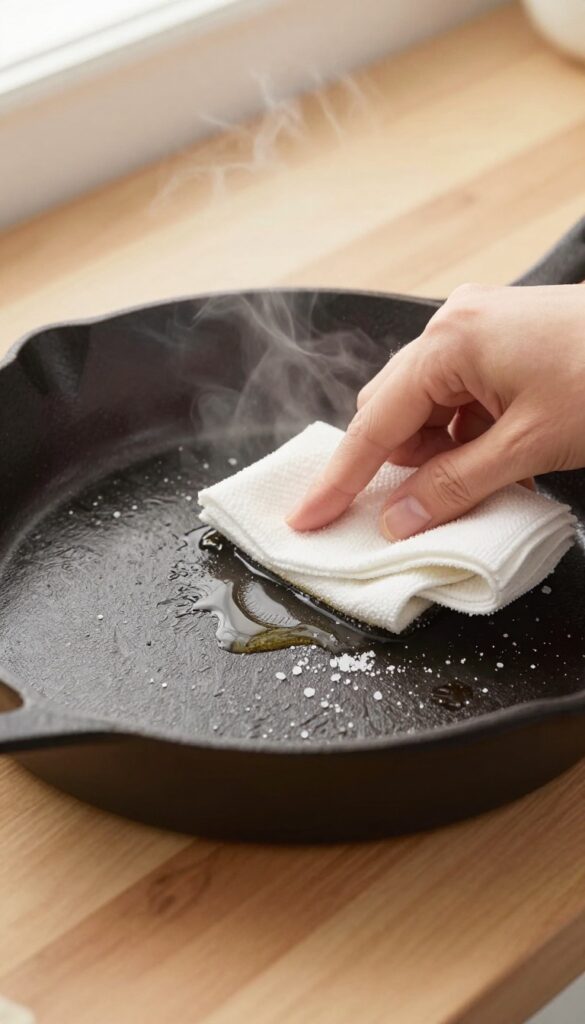
When food sticks stubbornly, reach for coarse salt. Sprinkle a generous amount in the pan, add a little oil, and scrub with a paper towel or a soft brush. The salt acts as a gentle abrasive that lifts debris without damaging seasoning.
This method works best for fresh messes—right after cooking, while the pan is still warm. Avoid using soap or water first, as that can strip seasoning. The salt scrub is also great for removing burnt-on oil residue before it becomes a permanent stain.
Why Salt Works So Well
Coarse salt is hard enough to scrape off food particles but soft enough not to scratch the seasoning. Combined with a little oil, it creates a paste that lifts grime while conditioning the surface. Plus, it's non-toxic and cheap.
Step-by-step Salt Scrub
Let the pan cool slightly but stay warm. Add 2 tablespoons of coarse salt and a tablespoon of oil. Use a folded paper towel or a silicone brush to scrub in circular motions.
Rinse with hot water and dry immediately.
When Not To Use This Method
Avoid salt scrubs on enameled cast iron—the abrasive can scratch the coating. Also, skip it if your seasoning is already flaking; you might worsen the damage. Stick to gentle washing for delicate surfaces.
2. Boiling Water for Burnt-On Residue
Some messes are just too stubborn for salt alone. When you've got a thick, carbonized layer that laughs at scrubbing, it's time to bring in the big guns—boiling water. This method uses heat and moisture to break down the toughest burnt-on bits without damaging your seasoning.
Start by filling your skillet or pan with about an inch of water. Place it on the stove over high heat and bring it to a rolling boil. Let it boil for 2-3 minutes, then use a wooden spatula or a stiff nylon brush to scrape the softened residue.
The boiling water loosens the bond between the food and the iron, making it easy to lift away. Once you've removed the bulk of the gunk, let the pan cool completely before washing with mild soap and water. Dry thoroughly and apply a thin layer of oil to protect the surface.
Why Boiling Works So Well
Heat expands the iron slightly, while steam penetrates the carbonized layer. This combination weakens the grip of burnt-on food, so it releases without aggressive scrubbing. It's especially effective for pans with years of built-up residue.
Best Practices For Safety
Always use a wooden or silicone utensil to scrape—metal can scratch the seasoning. Let the pan cool naturally after boiling; never plunge a hot pan into cold water, as thermal shock can crack the iron. And keep the handle dry to avoid burns.
When To Skip This Method
If your pan has a weak or patchy seasoning, boiling water can strip it further. Reserve this technique for pans with robust seasoning or for deep cleaning before reseasoning. For everyday messes, stick to gentler methods.
3. Chainmail Scrubber for Heavy Duty Cleaning
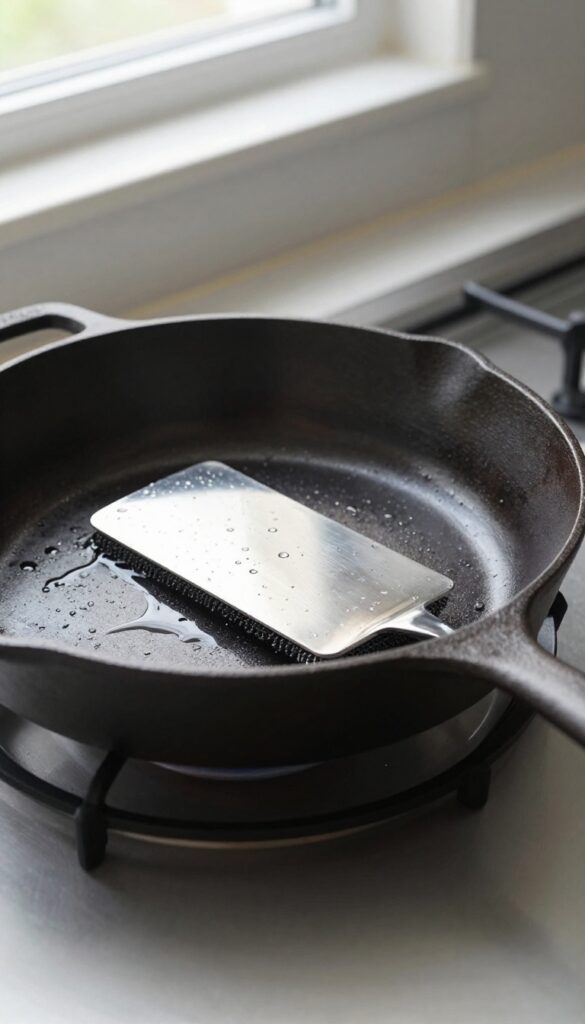
A stainless steel chainmail scrubber is a game-changer for cast iron. It removes stuck-on food and rust without scratching the seasoning. Use it with hot water and a little soap if needed, then dry and oil immediately.
For those tough, baked-on messes that salt alone can't handle, a chainmail scrubber is your best friend. The interlocking rings create a gentle abrasive surface that lifts debris without damaging the seasoning. It's especially effective on carbon buildup around the edges or stubborn bits after searing.
Rinse the pan with hot water, scrub in circular motions, and watch the gunk release. Follow up with a thorough dry and a thin layer of oil to protect the surface.
Why Chainmail Works
The stainless steel rings are hard enough to scrape off food but soft enough not to scratch the polymerized oil layer. Unlike steel wool, which can strip seasoning, chainmail targets only the loose particles. It's also rust-resistant and easy to clean itself—just rinse and hang to dry.
How To Use It Right
Start with a dry or lightly wet pan. Scrub with the chainmail in a circular motion, applying moderate pressure. For extra stuck-on bits, add a pinch of coarse salt as an additional abrasive.
Rinse with hot water, then dry immediately on the stove over low heat. Finish with a drop of oil wiped over the entire surface.
When To Avoid It
Don't use chainmail on a brand-new or freshly seasoned pan—wait until the seasoning is well-established. Also avoid using it with harsh detergents, as that can strip the seasoning. Stick to hot water and a tiny bit of mild soap if needed.
4. The Potato and Salt Trick for Rust
Rust spots on cast iron can feel like a death sentence, but they're often fixable with a common kitchen staple: the humble potato. This old-school trick uses the natural oxalic acid in potatoes to break down rust while coarse salt acts as a gentle abrasive. It's cheap, chemical-free, and surprisingly effective for light to moderate rust.
Start by cutting a raw potato in half. Dip the cut side into coarse salt or baking soda—both work well, though salt is more abrasive. Scrub the rusty area firmly, applying a bit of pressure.
The potato will release moisture and oxalic acid, which helps dissolve rust, while the salt scrubs it away. Rinse with warm water, dry thoroughly, and apply a thin layer of oil to prevent new rust from forming. For stubborn spots, repeat the process or let the potato sit on the rust for a few minutes before scrubbing.
Why It Works
Potatoes contain oxalic acid, a natural compound that reacts with iron oxide (rust) to break it down. The salt provides the mechanical scrubbing power, while the potato's moisture helps create a paste. This combination is gentle enough not to damage the underlying seasoning but tough on rust.
When To Use This Method
This trick is best for surface rust or small patches. If your pan is heavily rusted or flaking, you may need to strip and fully re-season. But for a skillet that's been sitting in a damp cupboard or got a little rusty after a wash, the potato and salt method is a quick fix.
Aftercare Tips
Once the rust is gone, rinse the pan with warm water and dry it immediately on a low burner. Rub a thin layer of vegetable oil or flaxseed oil over the entire surface, then heat until it just starts to smoke. Let it cool, and your pan is ready to use again.
This step is crucial to seal the iron and prevent rust from returning.
5. Baking Soda Paste for Stubborn Stains
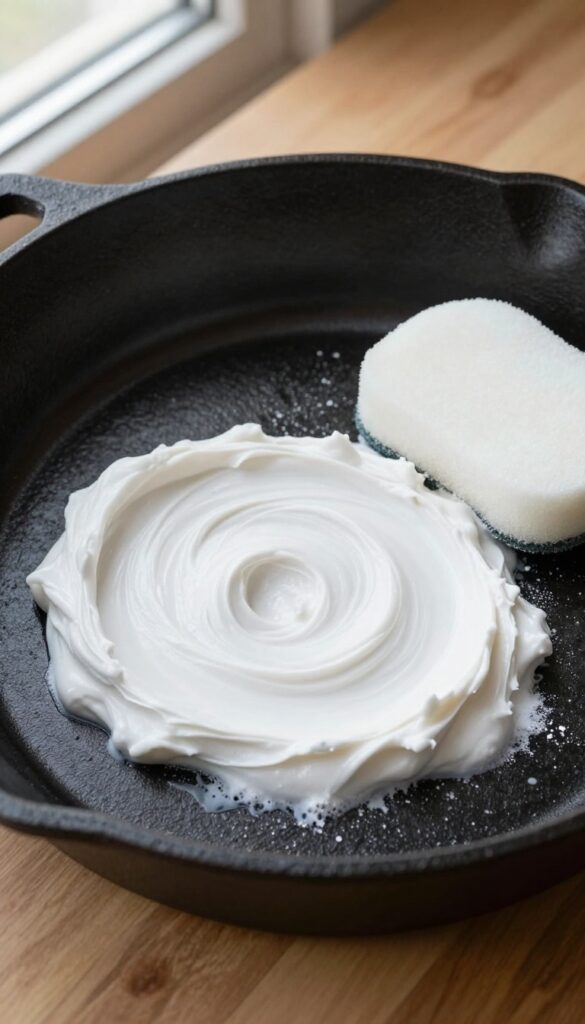
Sometimes a simple salt scrub or hot water rinse just won't cut it. When you're dealing with discoloration or sticky residue that refuses to budge, baking soda steps in as a gentle yet effective cleaner. It's mild enough not to damage your seasoning but strong enough to lift those tough spots.
Baking soda is a pantry staple that doubles as a non-abrasive cleaner for cast iron. Its fine particles help scrub away stains without scratching the surface, and it's safe to use on seasoned cookware. This method is perfect for light rust spots, burnt-on food, or areas where the seasoning looks uneven.
Making The Paste
Mix about two tablespoons of baking soda with just enough water to form a thick paste. You want it spreadable but not runny. Adjust the ratio as needed—a little more powder if it's too thin, a splash of water if it's too dry.
Applying And Scrubbing
Spread the paste over the stained areas and let it sit for 5 to 10 minutes. Then scrub gently with a non-abrasive sponge or a soft brush. Work in circular motions, focusing on the discolored spots.
Rinse thoroughly with warm water and dry immediately.
When To Use This Method
Use baking soda paste for light to moderate stains that don't respond to regular cleaning. It's especially good for removing residue from acidic foods or for brightening the cooking surface. Avoid using it on heavily rusted pans—those need a more aggressive approach.
6. Vinegar Soak for Rust Removal
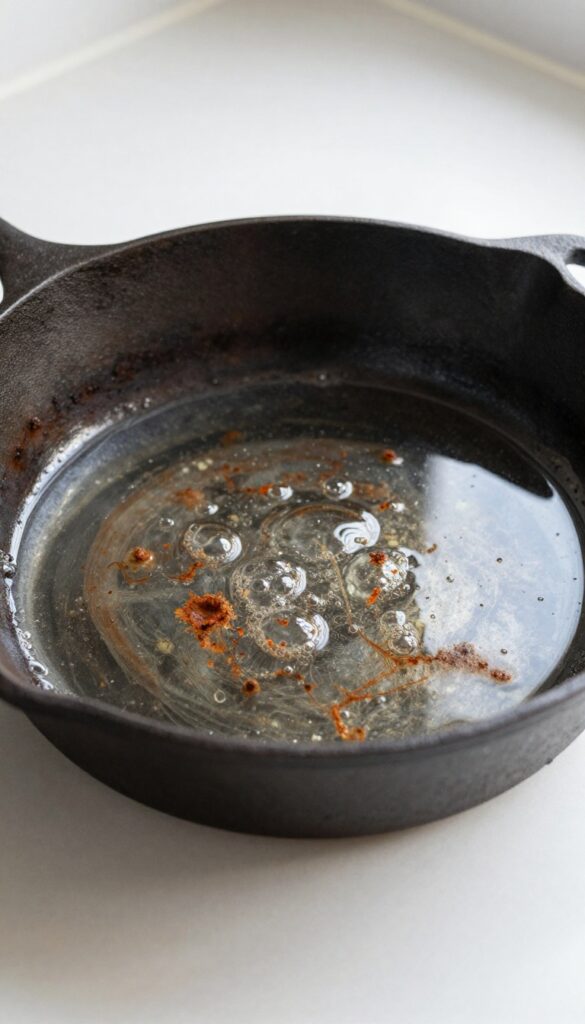
Rust on cast iron looks scary, but a simple vinegar soak can bring your pan back to life. The acetic acid in white vinegar reacts with rust, loosening it so you can scrub it away. This method works best for pans with moderate to heavy rust, but you need to watch the clock carefully.
For pans with significant rust, mix equal parts white vinegar and water and soak for 15-30 minutes. Longer soaks can damage the iron, so keep an eye on it. Scrub with a brush, rinse thoroughly, dry immediately, and re-season.
Why Vinegar Works
White vinegar is mildly acidic, which dissolves iron oxide (rust) without eating into the metal—as long as you don't overdo it. The 50/50 dilution is strong enough to lift rust but gentle enough to preserve the pan's structure.
Step-by-step Soak
Fill your sink or a tub with equal parts white vinegar and warm water. Submerge the rusty pan completely. Set a timer for 15 minutes, then check.
If rust is still heavy, continue in 5-minute increments, but never exceed 30 minutes total.
After The Soak
Remove the pan and scrub with a stiff brush or steel wool under running water. The rust should come off easily. Rinse thoroughly with water, then dry immediately with a towel.
Place on a warm stove for a few minutes to evaporate any leftover moisture, then apply a thin layer of oil and re-season in the oven.
7. Dish Soap: Yes, You Can Use It
For years, the rule was absolute: never let soap touch your cast iron. That advice comes from a time when seasoning was made of animal fats that could be stripped by harsh lye-based soaps. Modern cast iron seasoning is a layer of polymerized oil, chemically bonded to the pan.
A little mild dish soap won't hurt it.
The key is to use a small amount of mild dish soap and avoid soaking. Soap helps break down grease and lift stuck-on food without damaging the seasoning. After washing, rinse thoroughly and dry immediately with a towel or over low heat.
This method is especially useful for pans that have been used for fish or other strongly flavored foods, where a salt scrub might not remove the odor.
When Soap Is Safe
Stick to mild, phosphate-free dish soaps. Avoid anything with bleach, citrus, or abrasive additives. A drop or two on a soft sponge is plenty.
If your pan has a well-seasoned, dark surface, soap won't penetrate. The polymerized layer is tough and non-porous.
How To Wash With Soap
Wash by hand with warm water and a non-abrasive sponge. Scrub gently to remove food residue. Rinse thoroughly to remove all soap.
Dry the pan completely—place it on a burner over low heat for a minute or two to evaporate any moisture. Apply a thin layer of oil afterward to keep the seasoning fresh.
What To Avoid
Never use steel wool or harsh scouring pads with soap—they can scratch the seasoning. Avoid dishwashers entirely; the high heat and detergents will strip the pan. Also, don't let the pan soak in soapy water; prolonged exposure can weaken the seasoning.
8. The Oven Self-Clean Cycle for Stripping
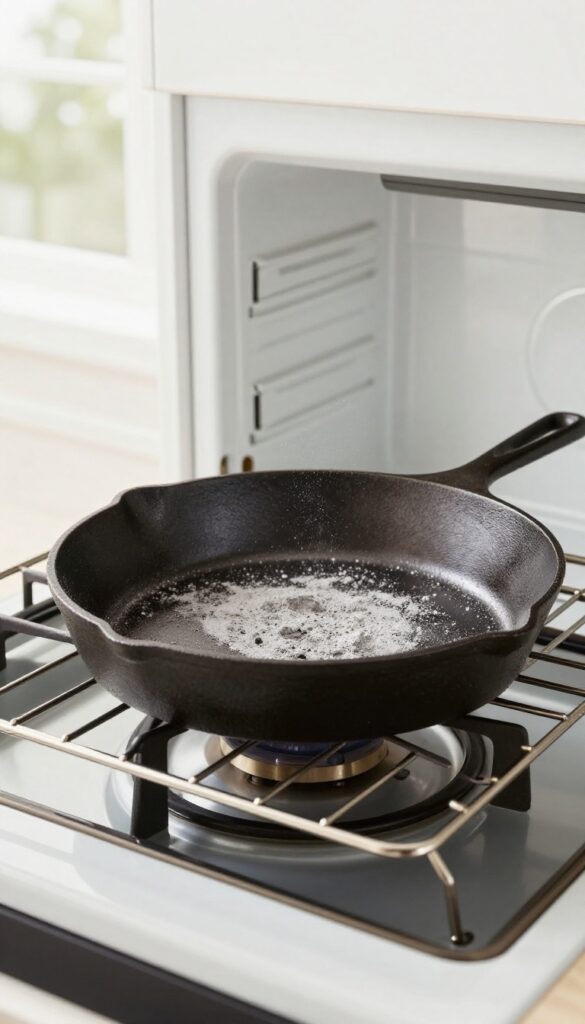
If you need to completely strip old seasoning, place the pan in a self-cleaning oven. The high heat turns everything to ash. Let it cool, then wash and re-season from scratch.
Use this method only for heavily damaged pieces.
The self-cleaning cycle is a powerful tool for cast iron restoration. It's not for everyday cleaning—it's a last resort for pans with caked-on gunk, rust, or flaking seasoning. The oven reaches temperatures around 900°F (480°C), which incinerates all organic material.
After the cycle, you're left with bare metal ready for a fresh start. This method is fast and requires no chemicals, but it can warp thin pans or damage oven components, so use it sparingly.
When To Go Nuclear
Reserve the self-clean cycle for pans that are beyond saving with gentler methods. Signs include thick, sticky buildup, rust spots that won't scrub off, or seasoning that's flaking into your food. If your pan has a smooth surface but just needs a touch-up, skip this method—it's overkill.
Step-by-step Instructions
First, remove any plastic or wooden handles—they'll melt. Place the pan upside down on the top rack to allow grease to drip off. Run the self-clean cycle (usually 2-4 hours).
Once it's done and the oven is cool, the pan will have a layer of gray ash. Wipe it off with a damp cloth, then wash with soap and water. Dry immediately and apply a thin coat of oil before storing.
Safety And Caveats
Self-cleaning ovens can produce smoke and odors, so open windows and turn on ventilation. Some ovens lock during the cycle, so plan accordingly. Avoid this method for antique or thin pans—they may warp.
Also, check your oven manual; some manufacturers advise against using the cycle for non-oven purposes.
9. Lye Bath for Deep Restoration
When your cast iron has decades of baked-on gunk or a previous owner's neglect, scrubbing just won't cut it. A lye bath is the nuclear option that dissolves old seasoning without any elbow grease. It's the go-to method for restoring vintage pans to bare iron.
Lye (sodium hydroxide) breaks down organic buildup like a charm. You'll need a plastic container with a tight lid, water, and pure lye crystals (available at hardware stores). Mix one tablespoon of lye per gallon of cold water—always add lye to water, not the other way around, to avoid a violent reaction.
Submerge the pan completely and let it sit for a few days. The old seasoning will slough off like dead skin. Afterward, rinse thoroughly with water and vinegar to neutralize any residue.
Wear heavy-duty gloves and safety glasses throughout; lye is caustic and can burn skin or eyes. Never use an aluminum container—lye reacts with it.
Safety First
Lye is no joke. Work in a well-ventilated area, keep kids and pets away, and have a vinegar solution nearby to neutralize spills. Always pour lye into water, not water into lye, to prevent splashing.
After the bath, dispose of the solution by pouring it down the drain with plenty of running water. Never mix lye with other chemicals.
What To Expect
After a few days, the gunk will be soft and gooey. You can wipe it off with a paper towel or scrub gently with a nylon brush. Rinse the pan in a vinegar-water bath (1: 1) to neutralize any leftover lye, then wash with soap and water.
The pan will be completely bare—ready for a fresh seasoning.
When To Use A Lye Bath
This method is best for heavily crusted pans, rust-free vintage finds, or when you want to strip seasoning evenly without abrasive scrubbing. It's overkill for everyday cleaning but perfect for restoration projects. Avoid lye on enameled cast iron—it can damage the coating.
10. Electrolysis for Rust Removal
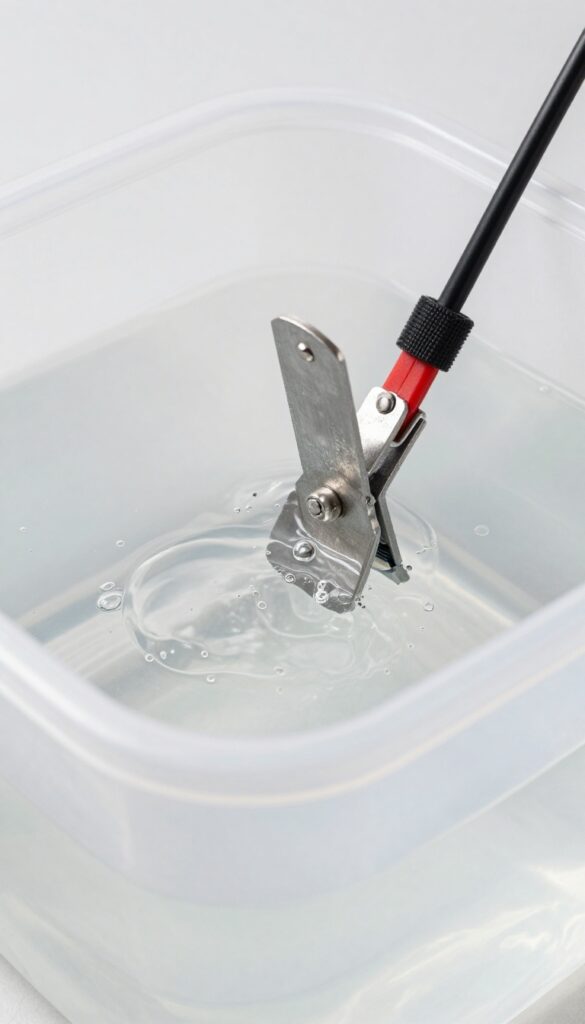
When rust has taken hold deep in the pores of your cast iron, scrubbing and soaking might not be enough. Electrolysis uses a low-voltage electrical current to lift rust and old seasoning right off the surface, leaving bare, clean metal behind. It sounds technical, but with a few common items and some basic safety, you can restore even the most neglected skillet.
Electrolysis works by turning rust into harmless iron particles that fall away from the pan. You'll need a plastic tub (not metal), water, washing soda (not baking soda), a sacrificial anode (a piece of steel like a flat bar or old pan), and a manual battery charger (not an automatic one). Connect the positive lead to the anode and the negative lead to your cast iron, submerge both without letting them touch, then plug in the charger.
Bubbles will form as the current does its work. Leave it for 12–24 hours, then scrub off any residue under running water. Dry immediately and apply a thin layer of oil to prevent flash rust.
This method is thorough but requires careful setup and a well-ventilated area—never use it indoors or near sparks.
Setting Up Your Electrolysis Tank
Find a plastic container large enough to hold your pan fully submerged. Fill it with water and add one tablespoon of washing soda per gallon. Stir until dissolved.
Place the sacrificial anode along one side of the tub—a piece of rebar or an old cast iron pan works well. Attach the positive (red) clamp of your battery charger to the anode. Attach the negative (black) clamp to your rusty skillet.
Make sure the two metal pieces do not touch each other, or you'll create a short circuit. Lower the skillet into the water, then plug in the charger. You should see bubbles rising from the anode and the pan within minutes.
Safety First: What To Watch For
Electrolysis produces hydrogen gas, which is flammable. Always do this outdoors or in a very well-ventilated garage with no pilot lights or open flames. Never use an automatic battery charger—it may not provide a steady current or could shut off.
Use a manual charger set to 2 amps (10 amps max for large pieces). Wear rubber gloves and safety glasses. Keep children and pets away.
When you're done, unplug the charger before removing clamps. Dispose of the water by pouring it down a drain—it's non-toxic.
After Electrolysis: Finishing The Job
Once the rust is gone, the pan will look gray and dull. Rinse it with clean water and scrub with a stiff brush to remove any loose residue. Dry it immediately with a towel, then place it on a warm stove burner to evaporate all moisture.
While it's still warm, apply a very thin layer of vegetable oil or flaxseed oil all over. Wipe off the excess with a paper towel—if it looks greasy, you used too much. Then bake the pan upside down in a 400°F oven for one hour.
Repeat the oiling and baking process two or three times to build a solid initial seasoning.
11. The Paper Towel and Oil Wipe for Daily Care
Not every cleaning session needs to be a production. In fact, the best way to keep your cast iron in top shape is to give it a quick wipe after every use. This simple habit takes just seconds but does wonders for preserving that non-stick seasoning you've worked hard to build.
Why A Quick Wipe Works
After cooking, your pan is still warm. That's the perfect time to grab a paper towel and a tiny amount of cooking oil. The oil helps lift any loose food particles while leaving behind a thin, protective layer.
This prevents rust and keeps the seasoning smooth. No scrubbing, no soaking—just a 30-second wipe.
The Right Oil For The Job
You don't need anything fancy. A neutral oil with a high smoke point works best—think canola, vegetable, or grapeseed oil. Avoid olive oil for daily wiping because it can turn sticky over time.
Just a few drops on a folded paper towel is enough. Rub it all over the cooking surface, including the sides and handle.
When To Skip The Soap
For most everyday cooking—like frying eggs, searing meat, or sautéing veggies—a dry paper towel wipe is all you need. If there are stubborn bits, add a pinch of coarse salt and use the paper towel as a gentle scrubber. The salt acts as an abrasive without damaging the seasoning.
Then wipe clean and apply a fresh oil layer.
12. Avoiding Soap for Well-Seasoned Pans
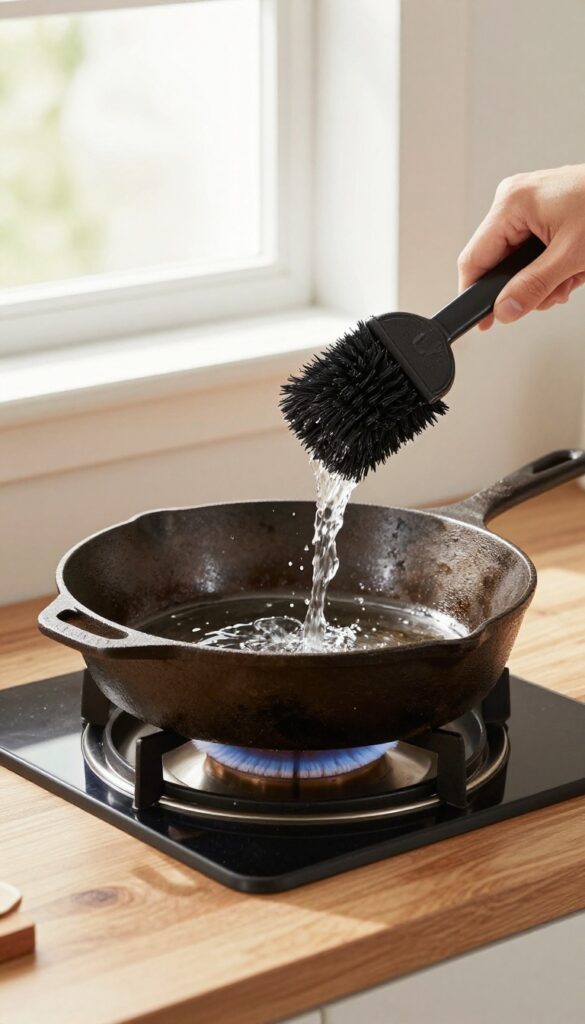
If your pan has a deep, glossy seasoning, you might skip soap entirely. Hot water and a stiff brush are often enough. The seasoning itself is non-stick and naturally antimicrobial, so minimal cleaning is fine.
For pans with a well-developed seasoning, soap is unnecessary. Hot water and a brush remove food particles without stripping the oil layers. This method preserves the patina and reduces maintenance.
When To Skip Soap
If your pan is slick and dark, you can clean with just hot water and a brush. Avoid soap unless you've cooked something particularly greasy or sticky.
How To Clean Without Soap
Rinse the pan under hot water and scrub with a stiff brush or chainmail scrubber. Dry immediately with a towel or over low heat to prevent rust.
13. Using a Plastic Scraper for Delicate Surfaces
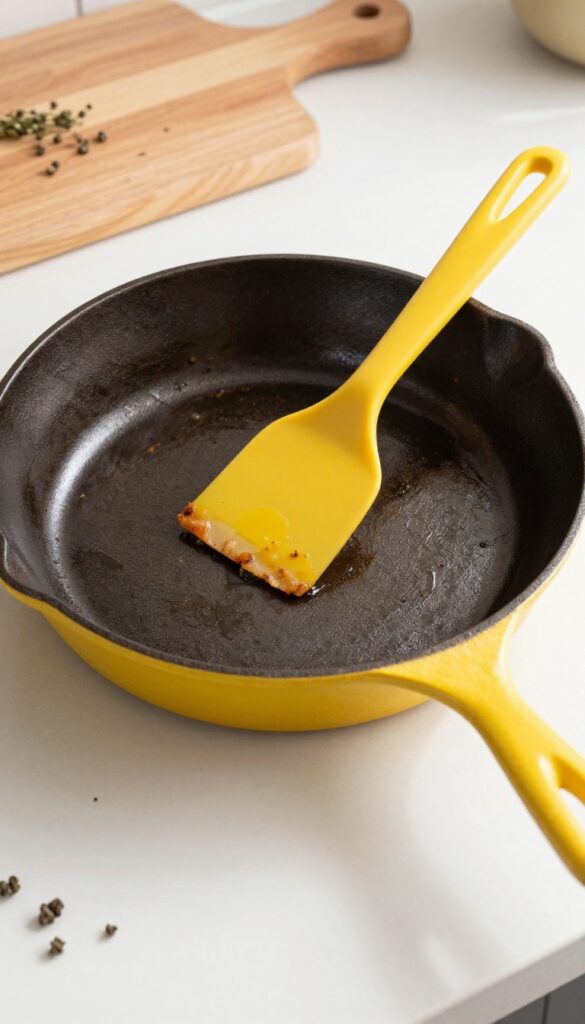
Not every stuck-on bit needs heavy scrubbing. A plastic or silicone scraper can slide right under cooked-on food without harming your seasoning. It's a low-effort tool that works especially well after a short soak or while rinsing with hot water.
Plastic scrapers are cheap, gentle, and surprisingly effective. They're ideal for pans with a well-developed seasoning where you want to avoid any abrasion. Keep one by your sink and use it as a first pass before reaching for a brush or sponge.
It saves time and protects your skillet.
Why Plastic Over Metal
Metal scrapers can gouge seasoning and leave scratches that hold onto food. Plastic or silicone is firm enough to dislodge crusty bits but soft enough to leave your seasoning intact. It's the safer choice for daily maintenance.
Best Technique For Stubborn Bits
Let the pan cool slightly, then add a splash of hot water. Use the scraper at a low angle to lift off food. If bits resist, let the pan soak for a few minutes first.
The scraper will then glide through the softened residue.
When Not To Use A Scraper
Avoid using a scraper on bare iron or newly seasoned pans where the coating is thin. It's best for well-seasoned surfaces. Also, don't scrape so hard that you shave off seasoning – gentle pressure is all you need.
14. Drying on the Stove to Prevent Rust
Moisture is enemy number one for cast iron. Even after you've scrubbed and rinsed, tiny droplets can linger in the pores of the metal. If you let the pan air dry, those droplets turn into rust spots by morning.
Drying your skillet on the stove is the quickest way to banish every bit of water. A few minutes of gentle heat evaporates moisture from places a towel can't reach. Then a light oiling seals the deal, protecting your seasoning and keeping rust away.
After washing, place the pan on a warm burner for a few minutes to evaporate all moisture. Then rub a thin layer of oil over the surface. This step is crucial—cast iron rusts quickly if left wet.
Why Stove Drying Works
Cast iron is porous at a microscopic level. Water seeps into those tiny gaps, and if left to evaporate slowly, it can cause flash rusting. Heating the pan on the stove speeds up evaporation, driving moisture out before it has a chance to oxidize the iron.
The heat also opens the pores slightly, allowing oil to penetrate deeper for better protection.
How To Do It Right
Set your burner to medium-low—no need for high heat. Place the clean, wet pan on the burner and let it warm for two to three minutes. You'll see the water sizzle and disappear.
Once the pan is completely dry, turn off the heat. Use a paper towel or a lint-free cloth to apply a very thin layer of cooking oil (vegetable, canola, or grapeseed) to the entire cooking surface. Then let the pan cool completely before storing.
Common Mistakes To Avoid
Don't crank the heat too high, or you risk warping the pan or burning off your seasoning. Also, don't skip the oiling step—drying alone leaves the surface vulnerable. And never store the pan while it's still warm; residual heat can trap moisture inside a cabinet or drawer.
15. Re-Seasoning After Every Deep Clean
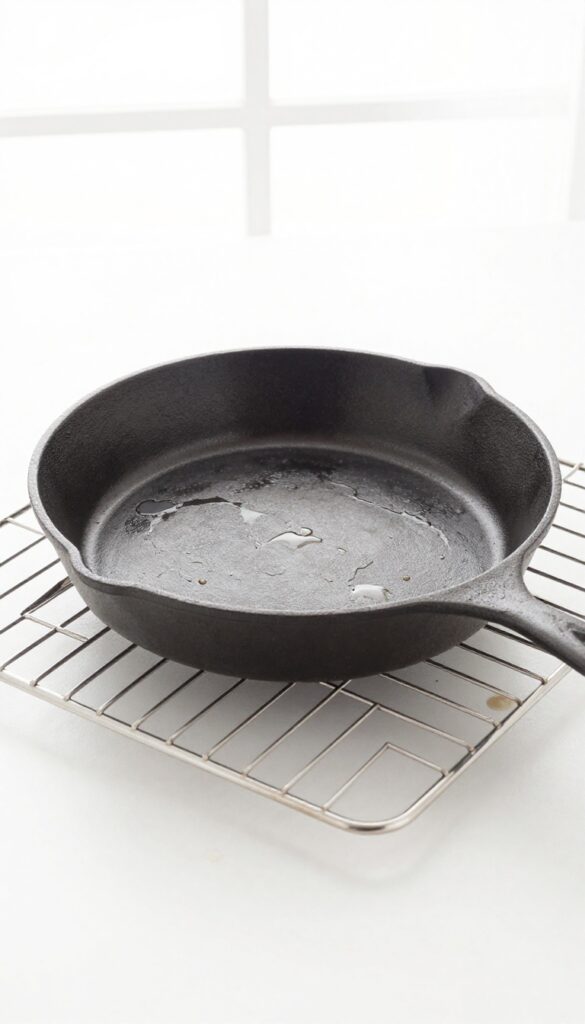
You've stripped your pan down to bare metal or scrubbed it within an inch of its life. Now what? If you walk away without re-seasoning, that pristine surface will rust before you know it.
Re-seasoning after a deep clean isn't optional—it's the step that locks in all your hard work and gets your pan back to its non-stick glory.
Re-seasoning after a deep clean ensures your cast iron is protected and ready to cook. The process is simple: dry the pan completely, apply a thin layer of oil, and bake it upside down to polymerize the oil into a new seasoning layer. This restores the non-stick surface and prevents rust from forming.
Why Re-seasoning Matters After A Deep Clean
Deep cleaning—whether with steel wool, vinegar soaks, or lye—removes not just gunk but also the protective seasoning layer. Bare cast iron is highly reactive and will rust quickly if exposed to moisture. Re-seasoning rebuilds that barrier, sealing the metal and giving you a fresh, slick cooking surface.
Choosing The Right Oil For Re-seasoning
Not all oils are equal for seasoning. Flaxseed oil creates a hard, durable layer but can flake if applied too thick. Grapeseed and vegetable oils are more forgiving and widely available.
Avoid olive oil or butter—they have low smoke points and will burn, leaving a sticky residue.
Step-by-step Re-seasoning Process
First, dry your pan completely on the stove over low heat. Then, apply a very thin layer of oil—wipe it on, then try to wipe it off with a clean cloth; you want only the faintest sheen. Place the pan upside down in a 450°F oven with a baking sheet on the rack below to catch drips.
Bake for one hour, then let it cool in the oven.
FAQ
Can I use soap on cast iron?
Yes, a small amount of mild dish soap is safe for modern cast iron with polymerized seasoning. Avoid soaking or using harsh detergents.
How do I remove rust from cast iron?
Use a vinegar soak (equal parts water and vinegar) for 15-30 minutes, then scrub with a brush. Rinse, dry thoroughly, and re-season immediately.
What is the best oil for seasoning cast iron?
Flaxseed oil creates a hard, durable seasoning, but grapeseed, vegetable, or canola oil also work well. Avoid olive oil as it can become sticky.
Can I put cast iron in the dishwasher?
No. Dishwasher detergent is too harsh and will strip seasoning, and the high heat can cause rust. Always hand wash.
How often should I season my cast iron?
Season when the surface looks dull, food starts sticking, or after a deep clean. Regular oiling after each use helps maintain it.
Conclusion
Keeping your cast iron clean doesn't have to be a chore. With these 15 ideas, you can handle everything from daily grease to stubborn rust without stressing over your seasoning. The key is matching the method to the mess—gentle scrubs for light residue, stronger tactics for deep restoration.
Remember, a well-maintained pan gets better with age. So pick the technique that fits your situation, and enjoy cooking with cookware that only improves over time.