25 Cleaning Stainless Steel Sink Tips for a Bright Finish
A stainless steel sink should gleam, not show water spots or greasy smudges. But daily use leaves behind hard water stains, rust flecks, and dullness that regular soap can't fix. The good news is you already have most of the tools in your pantry—baking soda, vinegar, even olive oil—to restore that bright, mirror-like finish.
These 25 tips are practical, gentle on the metal, and designed to work with your routine. From quick daily wipes to weekly polishing tricks, each idea targets a specific problem without harsh scrubbing.
Ready to make your sink shine like new again? Let's get started.
1. Wipe Dry After Every Use
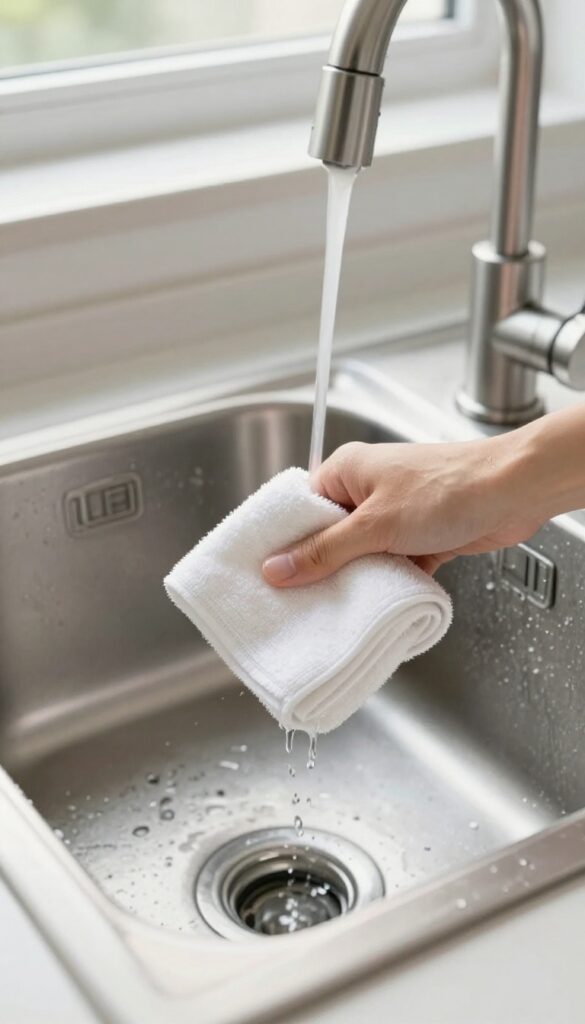
Water spots and mineral deposits are the fastest way to dull a stainless steel sink. A quick wipe-down after each use prevents these blemishes before they form. It takes just a few seconds and keeps the finish looking bright and new.
Drying your sink after every use is the single most effective habit for maintaining a bright finish. When water sits on stainless steel, minerals in the water evaporate and leave behind hard white spots. Over time, these deposits can etch the surface, making it look permanently cloudy.
A soft microfiber cloth or a dedicated sink towel is perfect for this task. Keep one within reach so you can quickly dry the basin after washing dishes or rinsing produce. This simple step also helps prevent rust from forming around the drain area.
Why Water Spots Form
Tap water contains calcium and magnesium. When water droplets dry on stainless steel, these minerals are left behind as white or chalky spots. The longer the water sits, the harder the spots are to remove.
Drying immediately stops this process.
Best Cloth For The Job
Use a soft, lint-free microfiber cloth. Paper towels can leave tiny scratches, and rough sponges may dull the finish. Microfiber absorbs water quickly and polishes the surface at the same time.
Make It A Habit
Store a small towel under the sink or hang it on the faucet. After you finish in the kitchen, give the sink a quick dry. It becomes automatic after a few days and keeps your sink looking like new.
2. Use a Microfiber Cloth for Daily Cleaning
Your stainless steel sink sees a lot of action every day—food scraps, soap residue, and water splashes. The quickest way to keep it looking bright is to wipe it down after each use. But not all cloths are safe.
Scratchy sponges or old rags can leave fine scratches that trap grime and dull the finish. Microfiber cloths are the perfect tool for daily care because they lift dirt and oil without damaging the surface.
Microfiber is made of ultra-fine synthetic fibers that are split during manufacturing, creating tiny hooks that grab dust, grease, and bacteria. When used damp, these fibers trap particles instead of pushing them around, so you get a streak-free shine without harsh chemicals. For daily cleaning, simply wet a clean microfiber cloth with water or a few drops of mild dish soap, wipe the sink in the direction of the grain (the visible lines in the metal), and rinse with fresh water.
Then dry with a separate dry microfiber cloth to prevent water spots. Avoid using fabric softener when washing microfiber cloths, as it clogs the fibers and reduces their effectiveness. Replace cloths once they start to smell or lose their grip.
Why Microfiber Works Best
Unlike cotton or paper towels, microfiber doesn't shed lint or leave behind fibers. Its electrostatic charge attracts dust and oil, lifting them away rather than smearing them around. The fibers are also soft enough to avoid scratching the metal, even with repeated use.
How To Use It Correctly
Always wipe along the grain of your sink—usually in straight lines from the faucet to the drain. This minimizes visible scratches and helps water sheet off evenly. Use a damp cloth for cleaning and a dry one for buffing to a high shine.
Caring For Your Microfiber Cloths
Wash them separately in warm water with mild detergent, and skip the bleach and fabric softener. Air-dry or tumble on low heat. Well-maintained cloths can last for hundreds of washes.
3. Rinse with Hot Water Before Scrubbing
Hot water is your first line of defense against stuck-on grime. A quick rinse before you scrub loosens grease and food particles, making your cleaning efforts far more effective. Plus, it helps prevent scratches by reducing the need for aggressive scrubbing.
Why Hot Water Works
Heat breaks down oils and softens dried residue. When you run hot water over the sink for 30 seconds, you're essentially pre-treating the surface. This step is especially helpful after cooking, when grease splatters have had time to harden.
The Right Way To Rinse
Use the hottest water your tap can deliver. Let it flow over the entire sink basin, paying extra attention to the corners and drain area. Swish the water around with a soft sponge to dislodge loose debris.
Then drain and proceed with your cleaner of choice.
Avoid Common Mistakes
Don't skip this rinse and go straight to scrubbing with a dry sponge—that pushes grit around and can scratch the finish. Also, avoid using cold water first, as it can cause grease to congeal and stick harder. Always start with hot.
4. Make a Paste with Baking Soda and Water
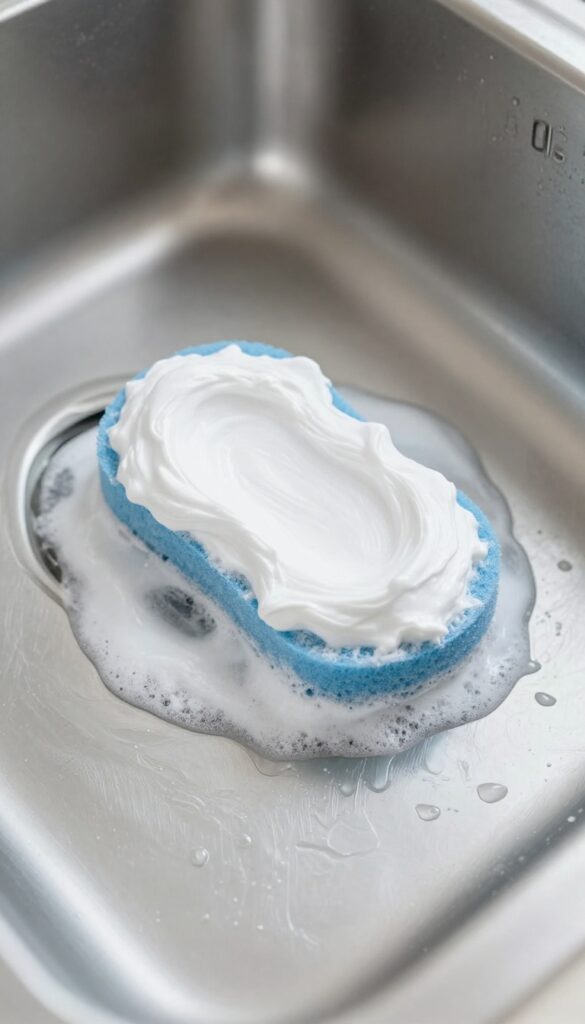
Baking soda is a gentle abrasive that lifts grime without scratching stainless steel. When mixed with a little water, it turns into a paste that targets stuck-on food, water spots, and light discoloration. This method is especially useful for cleaning the sink basin without harsh chemicals.
For gentle scrubbing, mix baking soda with a little water to form a paste. Apply with a soft sponge, scrub gently, then rinse thoroughly. This paste works wonders on dried-on food and light stains without damaging the finish.
Why Baking Soda Works
Baking soda is mildly alkaline, which helps break down acidic residues like coffee or tomato sauce. Its fine particles provide just enough abrasion to lift dirt without scratching the metal's surface. Plus, it's odorless and safe for food preparation areas.
How To Make And Apply The Paste
In a small bowl, mix three parts baking soda with one part water until it forms a thick, spreadable paste. Use a soft sponge or microfiber cloth to apply the paste to the sink surface. Work in circular motions, focusing on stained or dull areas.
Let it sit for 5 minutes for tougher spots, then scrub gently.
Rinsing And Drying Tips
After scrubbing, rinse the sink thoroughly with warm water to remove all baking soda residue. Any leftover paste can leave a white film if not fully rinsed. Dry the sink with a soft towel immediately to prevent water spots and restore shine.
5. Polish with Olive Oil for Extra Shine
Olive oil isn't just for cooking—it's a secret weapon for stainless steel. A tiny drop on a microfiber cloth buffs the surface to a brilliant shine, filling in microscopic scratches and repelling water spots. The key is using it sparingly; too much leaves a greasy film that attracts dust.
Why Olive Oil Works So Well
Stainless steel looks dull when light scatters off tiny scratches and uneven surfaces. Olive oil has a high refractive index that smooths out these imperfections, creating a mirror-like finish. It also leaves a thin protective layer that makes future cleaning easier.
How To Apply It The Right Way
Start with a clean, dry sink. Put one drop of olive oil on a clean microfiber cloth—no more. Rub it into the metal in the direction of the grain using small circular motions.
Then flip the cloth to a dry section and buff away any excess. You'll see an instant glow.
Avoid These Common Mistakes
Don't use too much oil—a single drop covers a standard sink. Never apply oil to a wet surface; it won't spread evenly and can trap moisture. And skip vegetable or canola oils; they're stickier and don't buff out as cleanly.
Stick with light olive oil for best results.
6. Remove Hard Water Stains with Vinegar
Hard water stains are those stubborn white or cloudy spots that refuse to budge with regular cleaning. They're caused by mineral deposits left behind when water evaporates. White vinegar is a natural acid that dissolves these deposits without harming the sink's finish.
It's cheap, non-toxic, and works fast.
Spray undiluted white vinegar directly onto the stained areas. Let it sit for 3 to 5 minutes—longer for heavy buildup. Then wipe with a soft cloth or sponge and rinse thoroughly with water.
For tough stains, you can soak a paper towel in vinegar and lay it over the spot for 10 minutes. Always rinse well to prevent any vinegar smell from lingering.
Why Vinegar Works So Well
Vinegar contains acetic acid, which reacts with the alkaline minerals in hard water stains. This reaction breaks down the deposits, making them easy to wipe away. Unlike harsh chemical cleaners, vinegar is gentle on stainless steel and won't cause pitting or discoloration when used correctly.
Step-by-step Application
Fill a spray bottle with white vinegar. Spray the stained areas generously. Wait 3-5 minutes.
Use a microfiber cloth or soft sponge to wipe in the direction of the grain. Rinse with water and dry with a clean cloth to avoid new water spots.
Tips For Stubborn Spots
For older or thicker deposits, soak a paper towel in vinegar and press it against the stain. Leave it for 10-15 minutes, then scrub gently with a soft brush. Repeat if needed.
After rinsing, buff dry with a microfiber cloth for extra shine.
7. Tackle Rust Spots with Lemon Juice
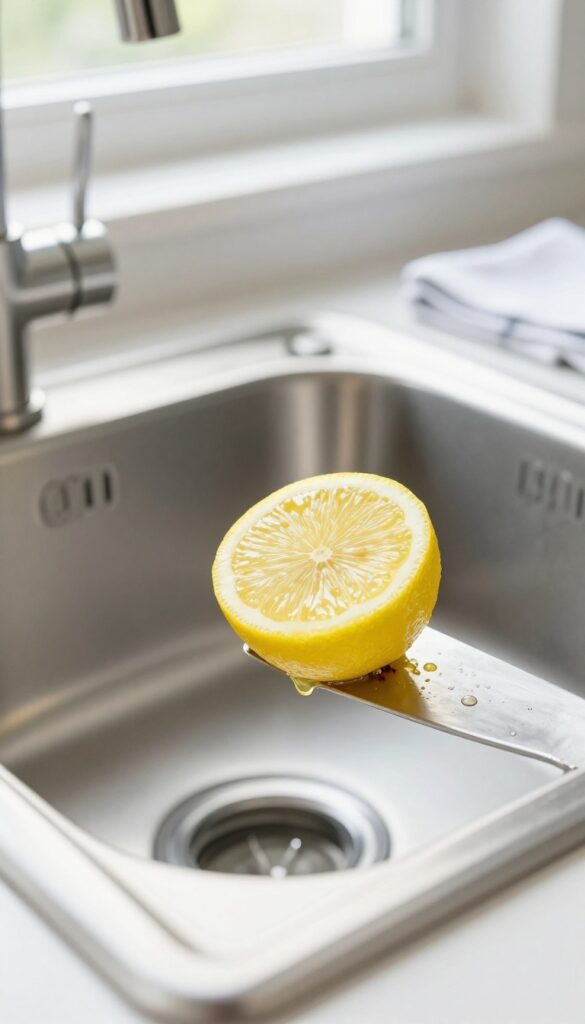
Rust spots on a stainless steel sink can be alarming, but they don't require harsh chemicals to remove. A simple lemon—something you likely have in your kitchen—can lift those orange specks naturally. The citric acid in lemon juice breaks down rust without scratching the metal, making it a safe and effective solution.
When you spot rust, grab a fresh lemon and cut it in half. Rub the cut side directly over the rust spots, applying gentle pressure. Let the juice sit for a minute or two, then rinse thoroughly with warm water.
Dry the sink immediately with a soft cloth to prevent new water spots. For stubborn rust, sprinkle a little baking soda on the lemon half before rubbing—it adds gentle abrasion.
Why Lemon Juice Works
Citric acid is a natural chelating agent, meaning it binds to metal ions like iron (which causes rust) and helps lift them away. Unlike bleach or ammonia, lemon juice is gentle on stainless steel and won't damage the protective oxide layer. Plus, it leaves a fresh, clean scent.
Best Practices For Rust Removal
Always test lemon juice on a small, hidden area first to ensure it doesn't affect the finish. After treating rust, rinse thoroughly—acid left too long can dull the surface. Dry immediately with a microfiber cloth to avoid water spots.
For extra shine, follow up with a drop of olive oil on a soft cloth and buff the area.
When To Avoid Lemon Juice
If your sink has a colored or coated finish, lemon juice may cause discoloration. Stick to plain stainless steel sinks. Also, avoid using lemon juice on deep scratches or pitted rust, as acid can worsen damage.
In those cases, consider a stainless steel repair kit instead.
8. Use a Soft Sponge or Cloth Only
Not all cleaning tools are sink-friendly. Steel wool and abrasive pads may seem effective, but they leave micro-scratches that trap grime and dull the finish over time. The fix is simple: switch to soft sponges, microfiber cloths, or nylon brushes to keep that mirror-like shine intact.
Your sink's finish depends on what touches it. Hard scrubbers create tiny grooves that collect residue and make future cleaning harder. Soft materials lift dirt without damaging the surface, preserving the protective layer that gives stainless steel its luster.
Why Abrasives Are The Enemy
Steel wool and scouring pads are too aggressive for stainless steel. They scratch the surface, leaving it vulnerable to water spots and rust. Even a single pass can create visible marks that are impossible to reverse.
Best Tools For The Job
Microfiber cloths are ideal because they trap particles without scratching. Non-scratch sponges and soft nylon brushes work well for stuck-on food. Always check the label to ensure the product is safe for stainless steel.
How To Clean Without Scratching
Rinse the sink first to remove loose debris. Apply your cleaner with a soft cloth in the direction of the grain. Avoid circular motions, which can highlight scratches.
Rinse thoroughly and dry with a separate microfiber cloth.
9. Clean Along the Grain
Stainless steel has a directional grain—those subtle lines you can see when light hits the surface. Cleaning against the grain creates micro-scratches that dull the finish over time. By working with the grain, you keep the surface smooth and reflective.
Always wipe or scrub in the same direction as the grain. This simple habit prevents swirl marks and keeps the sink looking polished. It takes just a second to check the grain direction before you start cleaning.
How To Find The Grain
Look at your sink under bright light. The grain runs in one direction—usually lengthwise or in a circular pattern around the basin. Run your finger across it; you'll feel a slight texture one way and smoothness the other.
That smooth direction is with the grain.
Tools That Respect The Grain
Use a soft microfiber cloth or a non-abrasive sponge. Apply gentle pressure and move in straight lines, not circles. For stubborn spots, a soft-bristle brush works well if you follow the grain.
Polishing With The Grain
When you polish with a stainless steel cleaner or a dab of olive oil, always buff along the grain. This enhances the natural shine and hides minor imperfections. A final wipe with a dry cloth in the same direction gives that mirror finish.
10. Disinfect with Hydrogen Peroxide
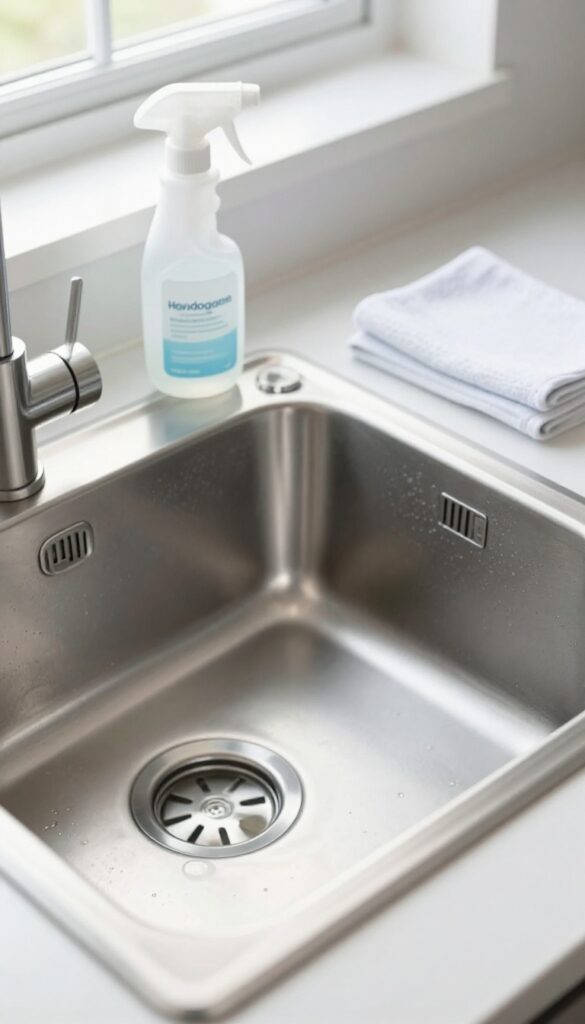
Hydrogen peroxide is a gentle yet effective disinfectant that won't damage your stainless steel sink. Unlike bleach, it doesn't produce harsh fumes, making it safer for indoor use. A quick spray and rinse routine can kill germs and leave your sink looking bright.
Hydrogen peroxide is a fantastic option for disinfecting your stainless steel sink without the strong smell or potential damage of bleach. It breaks down into water and oxygen, so it's environmentally friendly too. Simply spray a 3% solution onto the sink surface, let it sit for a few minutes to kill bacteria and viruses, then rinse thoroughly with water.
For extra shine, dry the sink with a soft cloth afterward. This method is especially useful after handling raw meat or poultry, ensuring your sink is hygienic without harsh chemicals.
Why Hydrogen Peroxide Works
Hydrogen peroxide is a powerful oxidizer that destroys microorganisms by breaking down their cell walls. It's effective against a wide range of germs, including E. coli and salmonella, yet it's safe for stainless steel when used correctly. Unlike abrasive cleaners, it won't scratch the surface, and it doesn't leave behind a chemical residue that can dull the finish.
How To Apply It Safely
Pour or spray a small amount of 3% hydrogen peroxide directly onto the sink. Spread it evenly with a soft sponge or cloth, ensuring full coverage. Let it sit for 3–5 minutes—longer if you're targeting tough germs.
Then, rinse thoroughly with warm water and dry with a microfiber cloth to prevent water spots. Avoid mixing hydrogen peroxide with vinegar or bleach, as this can create harmful fumes.
When To Use This Method
This disinfecting technique is ideal after preparing raw meats, poultry, or fish, as well as after someone in the household has been ill. It's also a good weekly maintenance step to keep your sink germ-free. For daily cleaning, stick with mild soap and water, but bring out the hydrogen peroxide when you need an extra level of sanitation.
11. Remove Grease with Dish Soap and Warm Water
Grease buildup from cooking oils, food scraps, and daily use can leave your sink looking dull and grimy. Instead of reaching for harsh degreasers, a simple solution of mild dish soap and warm water works wonders. It's gentle on the stainless steel finish yet tough on grease, restoring shine without damaging the surface.
To effectively remove grease, start by filling your sink with warm water and adding a few drops of mild dish soap. Swish the water to create suds, then use a soft sponge or cloth to wipe down the entire sink surface, paying extra attention to areas where grease tends to accumulate, like around the drain and the bottom corners. Rinse thoroughly with clean warm water to remove all soap residue, as leftover soap film can dull the finish.
Finally, dry the sink with a microfiber cloth to prevent water spots and bring back the shine.
Why Dish Soap Works Best
Mild dish soap is formulated to break down grease without being abrasive. Unlike all-purpose cleaners that may contain harsh chemicals, dish soap is gentle enough for daily use and won't strip the protective layer of your stainless steel sink. Its surfactants lift grease particles away from the surface, allowing them to be rinsed off easily.
The Right Way To Rinse
Rinsing thoroughly is key to avoiding soap film. Use warm running water and run your hand over the surface to ensure no slippery residue remains. For extra assurance, you can do a final wipe with a damp cloth dipped in plain water.
This step prevents dullness and keeps the sink looking bright.
Drying For A Streak-free Finish
After rinsing, immediately dry the sink with a clean, soft microfiber cloth. This prevents water spots and mineral deposits from forming, which can make the sink look cloudy. Drying also helps maintain the stainless steel's natural luster and reduces the need for frequent deep cleaning.
12. Buff with a Dry Microfiber Cloth
That final step—drying—makes all the difference between a clean sink and a truly brilliant one. Water droplets left behind evaporate into mineral deposits, dulling the finish. A dry microfiber cloth wicks away every trace of moisture while lifting any lingering dust or cleaning residue, leaving the surface streak-free and glossy.
Microfiber is the MVP here because its ultra-fine fibers trap particles without scratching the metal. Unlike cotton towels, which can leave lint or smears, microfiber polishes as it dries. Use a clean, dry cloth and work in the direction of the grain for maximum shine.
Why Microfiber Beats Paper Towels
Paper towels seem convenient, but they often contain binders that can leave a hazy film on stainless steel. Microfiber, on the other hand, is designed to absorb many times its weight in water and trap debris in its fibers. Plus, it's reusable—just wash and dry between uses.
The Direction Matters
Always buff along the grain of the stainless steel, not against it. The grain is the subtle directional texture visible on the surface. Buffing with the grain polishes the metal evenly and minimizes the appearance of scratches.
Against the grain, you risk highlighting imperfections.
When To Buff
Buff immediately after cleaning and rinsing. Don't let the sink air-dry, because hard water spots will form. A quick once-over with a dry microfiber cloth takes less than a minute and locks in that mirror-like finish.
13. Use a Commercial Stainless Steel Cleaner
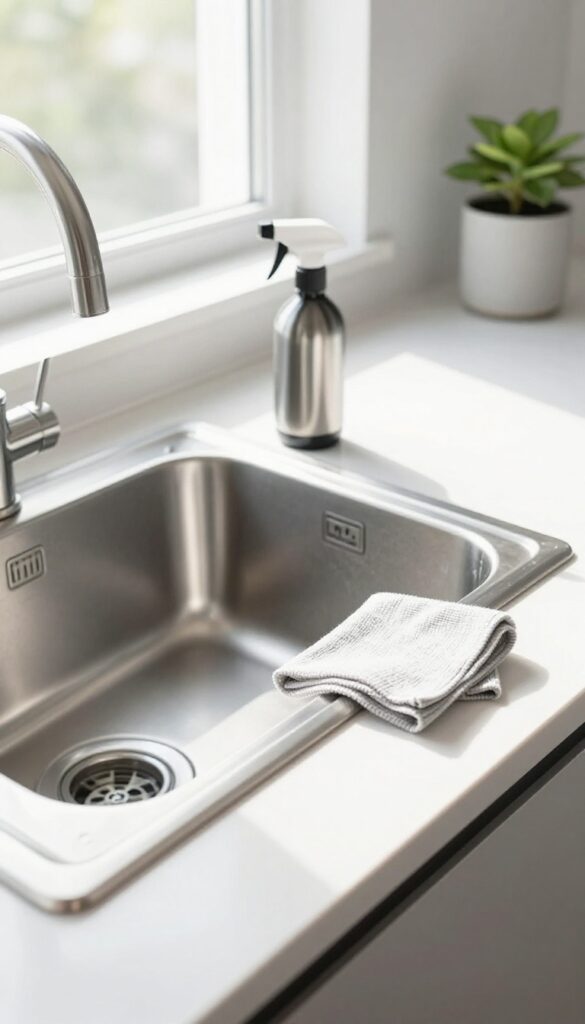
Sometimes your sink needs more than a DIY fix. A dedicated stainless steel cleaner can deliver that showroom shine in minutes. These products are formulated to remove stubborn residues and leave a protective barrier that repels water and fingerprints.
Choose The Right Formula
Look for a cleaner labeled non-abrasive and safe for food contact surfaces. Avoid products with bleach or ammonia, which can pit the metal. Spray-on foams and wipes are convenient, but a cream polish often gives a deeper shine.
How To Apply For Best Results
Start with a clean, dry sink. Spray or apply a small amount of cleaner onto a microfiber cloth—never directly onto the sink to avoid streaks. Rub in the direction of the grain using circular motions, then buff with a dry section of the cloth until the surface gleams.
When To Use It
Reserve commercial cleaners for weekly or bi-weekly deep cleaning, not daily use. Overuse can build up residue. After heavy cooking or if your sink looks dull despite regular cleaning, a quick polish with a dedicated cleaner restores that factory-fresh look.
14. Avoid Bleach and Chlorine Cleaners
Bleach might seem like a quick fix for disinfecting your sink, but it's actually one of the worst things you can use on stainless steel. The chlorine in bleach reacts with the metal, causing pitting—tiny holes that trap dirt and moisture. Over time, this leads to permanent discoloration and rust spots that ruin that bright finish you're working so hard to maintain.
Stick to gentle, non-abrasive cleaners like mild dish soap, baking soda paste, or specialized stainless steel sprays. These clean effectively without compromising the protective chromium oxide layer that keeps your sink shiny and resistant to stains. If you need to sanitize, use hydrogen peroxide or a vinegar-water solution instead.
What Bleach Does To Stainless Steel
Bleach attacks the surface on a microscopic level. The chlorine ions break down the passive layer of chromium oxide, exposing the raw steel underneath. This makes the sink more vulnerable to rust and corrosion.
Even diluted bleach can cause damage if left in contact too long, so it's best to avoid it entirely.
Safer Alternatives For Disinfecting
For a deep clean that kills germs without harming your sink, try hydrogen peroxide. Pour a small amount directly onto the surface, let it fizz for a few minutes, then rinse thoroughly. You can also use a mixture of equal parts white vinegar and water—just don't let it sit too long, as vinegar is acidic.
Rinse immediately after.
What About Bleach-based Sprays?
Many all-purpose cleaners and disinfecting wipes contain bleach or chlorine compounds. Check labels carefully. If you see sodium hypochlorite or chlorine bleach listed, don't use them on your sink.
Opt for products labeled "safe for stainless steel" or stick to simple homemade solutions.
15. Remove Tea and Coffee Stains with Baking Soda
Tea and coffee leave stubborn brown rings and patches in stainless steel sinks. These stains come from tannins that bond to the metal surface, and regular dish soap often won't budge them. Baking soda's mild abrasiveness lifts those stains without scratching, making it the perfect remedy.
Make A Thick Paste
Mix three parts baking soda with one part water in a small bowl. Stir until it forms a spreadable paste—think toothpaste consistency. If it's too runny, add more baking soda; too thick, add a few drops of water.
Apply And Let It Sit
Spread the paste directly over the tea or coffee stains using a soft cloth or your fingers. Make sure the stain is fully covered. Let it sit for 10 minutes.
This gives the baking soda time to break down the tannins.
Scrub Gently And Rinse
After 10 minutes, scrub the area with a soft sponge or microfiber cloth in the direction of the grain. Use light pressure—baking soda does the work. Rinse thoroughly with warm water, then dry with a clean towel to reveal a spotless finish.
16. Prevent Scratches with a Sink Grid
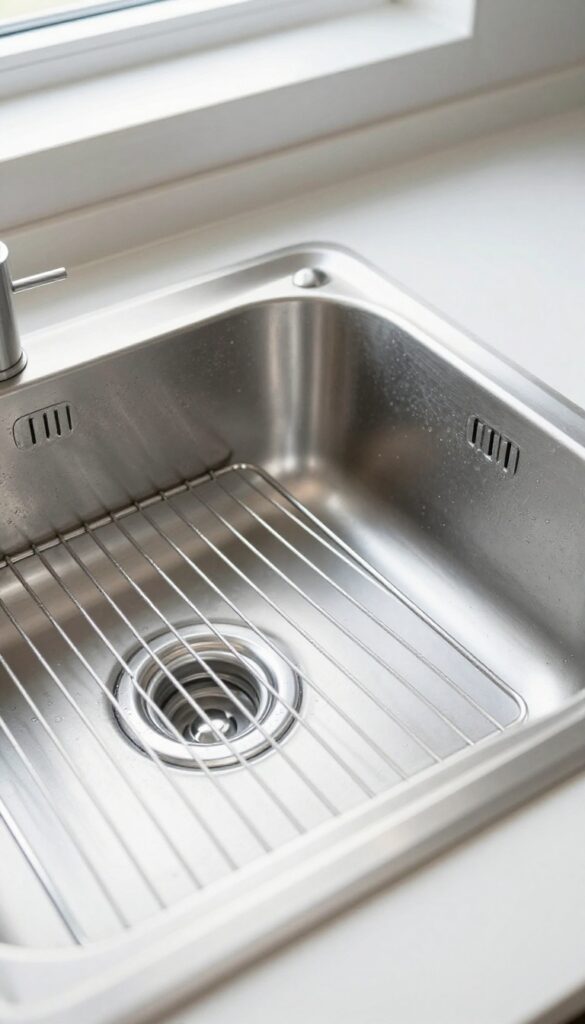
Scratches are the enemy of a shiny stainless steel sink. Every time you set down a heavy pot or drag a pan across the bottom, you risk leaving permanent marks. A sink grid is a simple, affordable solution that keeps your sink looking new.
A sink grid sits at the bottom of your sink, creating a barrier between your cookware and the stainless steel surface. It absorbs impact and prevents scratches from pots, pans, and utensils. Plus, the grid allows water to drain freely, so your sink dries faster and stays cleaner.
Choose The Right Grid
Look for a grid made of stainless steel or coated wire that matches your sink size. Avoid plastic grids, which can trap moisture and cause rust spots. Measure your sink basin before buying to ensure a snug fit.
Clean The Grid Regularly
The grid itself can collect food debris and grime. Rinse it after each use and give it a weekly scrub with mild soap and water. This prevents buildup that could transfer back to your sink.
Pair With A Bottom Mat
For extra protection, place a silicone or rubber mat under the grid. This cushions the impact even more and prevents the grid from sliding around. Just make sure the mat has drainage holes to avoid standing water.
17. Clean the Drain and Garbage Disposal Regularly
Your sink might look spotless, but if the drain smells funky or the disposal is clogged, that shine doesn't matter. Odors and grime build up in the plumbing, especially if you don't flush it regularly. A quick weekly routine keeps everything fresh and prevents nasty smells from creeping back up.
Flush With Hot Water And Baking Soda
Once a week, pour a pot of boiling water down the drain. Follow it with half a cup of baking soda. Let it fizz for a few minutes, then flush again with hot water.
This breaks down grease, soap scum, and food particles that cling to the pipes.
Freshen The Disposal With Citrus
Grab a few lemon or orange peels and toss them into the garbage disposal. Run cold water and turn the disposal on for about 30 seconds. The citrus oils neutralize odors and leave a clean scent.
Avoid using harsh chemical cleaners—they can damage the disposal blades.
Don't Forget The Rubber Gasket
The rubber splash guard around the disposal opening collects gunk and mold. Lift it up and scrub both sides with an old toothbrush and a paste of baking soda and water. Rinse well.
This simple step eliminates a major source of sink odors.
18. Use a Magic Eraser for Stubborn Marks
Some stains just won't budge with baking soda or vinegar. Coffee rings, scuff marks from pots, or dried-on food can leave your sink looking grimy. That's where a melamine sponge—often sold as Magic Eraser—comes in handy.
It's like a super-fine sandpaper that lifts stubborn grime without scratching the stainless steel.
A melamine sponge works by micro-abrasion, meaning it gently wears away the top layer of the stain. For stainless steel, this is safe as long as you don't scrub too hard. The key is to dampen the sponge thoroughly and wring out excess water.
Then rub the marked area with light to moderate pressure. You'll see the stain lift almost immediately. Rinse the sink well afterward to remove any residue from the sponge.
When To Reach For A Magic Eraser
Use it for tough spots like dried coffee rings, tea stains, or black scuff marks from aluminum pans. It's also great for removing sticky residue from stickers or tape. Avoid using it on brushed or textured finishes, as it might dull the grain.
Stick to mirror-polished sinks for best results.
How To Use It Without Damaging Your Sink
Always dampen the sponge first—never use it dry. Test on a small hidden area first to check for any adverse reaction. Rub gently in the direction of the grain if your sink has a brushed finish.
After cleaning, rinse thoroughly with water and dry with a soft cloth. This prevents any leftover particles from causing micro-scratches.
Alternatives To Magic Eraser
If you don't have a Magic Eraser, a soft nylon scrub pad with a bit of baking soda paste works similarly. Or try a non-abrasive cleaner like Bar Keepers Friend. For eco-friendly options, use a dampened microfiber cloth with a drop of dish soap and a sprinkle of baking soda.
19. Dry with a Squeegee for a Streak-Free Finish
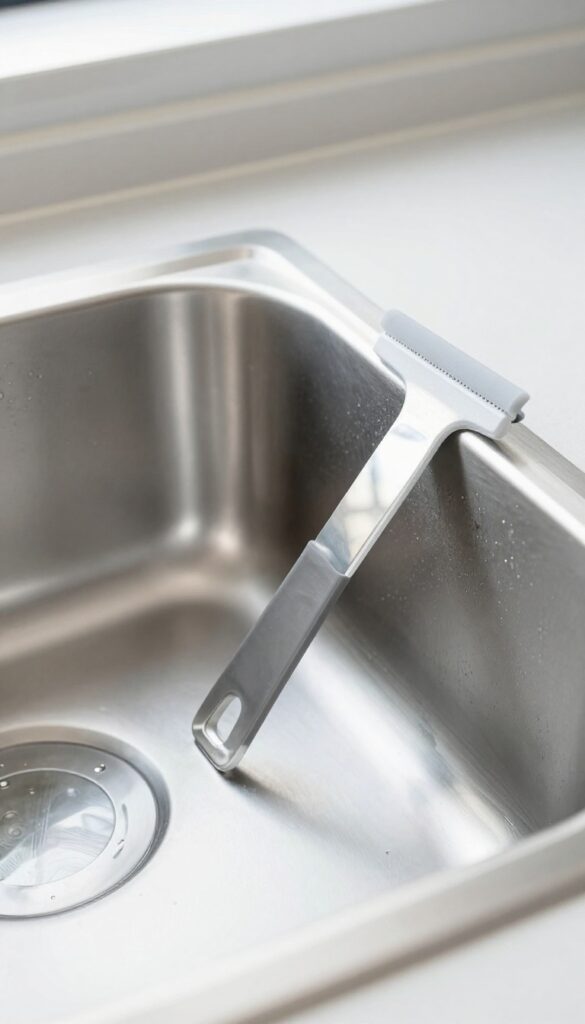
You probably think of a squeegee as a window tool, but it works wonders on stainless steel sinks too. After rinsing, a quick pass with a small squeegee removes all standing water, preventing mineral deposits and water spots before they form. The result is a mirror-like finish without any wiping or buffing.
Using a squeegee is one of the fastest ways to dry a large sink basin. It takes just seconds and leaves no lint or streaks. Plus, it reaches corners and curves that towels often miss.
Keep a dedicated squeegee near your sink for daily use.
Why It Beats A Towel
Towels can leave behind fibers, especially if they're old or rough. Even microfiber cloths can hold onto grease or detergent residue. A squeegee glides over the metal, pushing water straight to the drain without any contact that could scratch or smear.
It's also easier to clean—just rinse it off after each use.
How To Squeegee Like A Pro
Start at the top of the sink and pull the squeegee downward in overlapping strokes. Work from one side to the other, covering the entire basin. For the bottom, use short horizontal sweeps.
Don't forget the rim and the area around the drain. A final vertical pass across the whole sink ensures no puddles remain.
Best Squeegee For The Job
Look for a small handheld squeegee with a soft rubber blade—about 4 to 6 inches wide. Avoid metal or hard plastic frames that could scratch. A silicone blade is ideal because it's flexible and won't leave marks.
Some kitchen stores even sell squeegees designed specifically for sinks.
20. Polish with Baby Oil for a Protective Layer
Baby oil isn't just for skin. A tiny amount on your stainless steel sink creates a thin, invisible barrier that repels water and fingerprints. This trick leaves the surface silky smooth and extra shiny, and it takes less than a minute.
Why Baby Oil Works So Well
Baby oil is mineral oil with a light fragrance. It's non-toxic, food-safe in trace amounts, and won't damage stainless steel. The oil fills microscopic pores in the metal, smoothing the surface so water beads up and rolls off instead of leaving spots.
Fingerprints also wipe away much easier because the oil prevents direct contact with the metal.
How To Apply It The Right Way
Start with a clean, dry sink. Put just a few drops of baby oil on a soft, lint-free cloth—microfiber works great. Rub it onto the sink in circular motions, covering the entire basin and the sides.
Then take a clean part of the cloth and buff it dry. You'll see an immediate glow. Use very little oil; too much will feel greasy.
How Often Should You Do This?
Once a week is plenty for most households. If your sink gets heavy use or you have hard water, you might want to do it twice a week. The protective layer lasts through several washes, but once water starts beading less, it's time to reapply.
Avoid using baby oil on textured or brushed finishes—it's best for mirror-polished sinks.
A Quick Safety Note
Baby oil can make the sink slippery when wet, so rinse well if you apply it near the drain area. Also, don't use it on the inside of a sink that's used for food prep unless you wash the sink with soap afterward. For everyday use, the thin film is safe, but it's better to be cautious.
21. Remove Limescale with a Vinegar and Water Soak
Limescale buildup can turn a gleaming sink into a cloudy mess, especially in areas with hard water. While daily wiping helps, heavy deposits need a deeper treatment. A simple vinegar and water soak cuts through mineral crusts without scratching the stainless steel.
For heavy limescale, fill the sink with a mixture of equal parts vinegar and water, let it soak for 15 minutes, then drain and rinse. This acidic solution dissolves calcium and magnesium deposits, leaving the surface smooth and bright. Follow up with a quick wipe to remove any loosened residue.
Why Vinegar Works
White vinegar is mildly acidic, which breaks down the alkaline minerals in limescale. It's gentle enough for stainless steel but effective at softening stubborn deposits. The soak allows the vinegar to penetrate thick layers without scrubbing.
Soaking Tips
Plug the drain and fill the sink with warm water (not hot) to help the vinegar work faster. Add a cup of vinegar for every two cups of water. Let it sit for 15 minutes—longer if the buildup is severe.
For vertical surfaces, use a vinegar-soaked cloth pressed against the stains.
After The Soak
Drain the mixture and rinse the sink thoroughly with cool water. Wipe dry with a microfiber cloth to prevent new water spots. If any limescale remains, repeat the process or use a baking soda paste for gentle abrasion.
22. Use a Toothbrush for Tight Spots
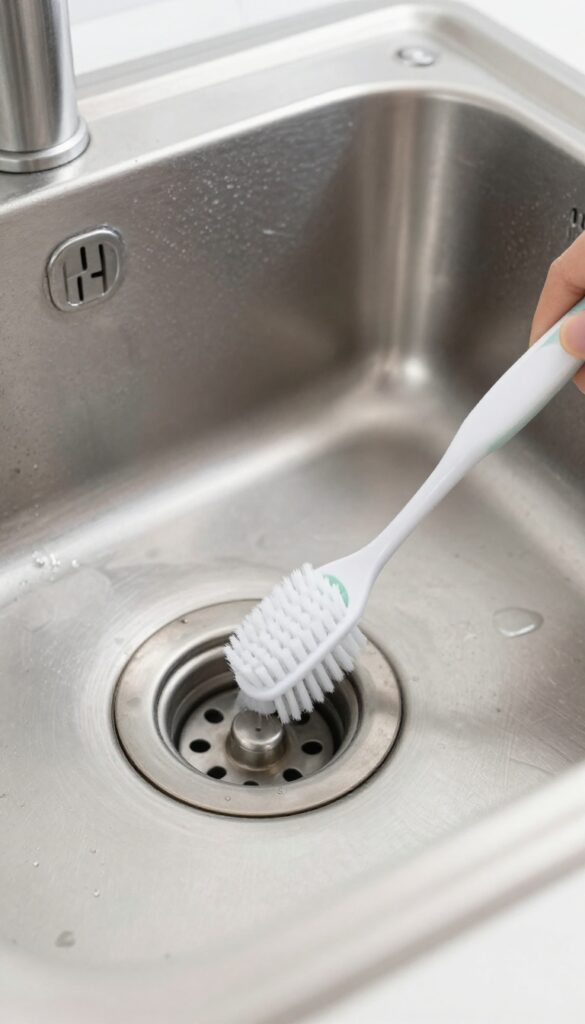
Even the most diligent sink cleaning can miss those tiny crevices where grime loves to hide. Corners around the rim, the base of the faucet, and the drain opening are prime real estate for buildup. A soft-bristled toothbrush is the perfect tool to reach these tight spots without scratching the stainless steel.
It lets you apply gentle pressure exactly where it's needed.
Grab an old toothbrush with soft bristles—avoid hard bristles that can mar the finish. Dip it into your chosen cleaner (a baking soda paste or a diluted vinegar solution works well) and scrub those hard-to-reach areas in small circular motions. Pay special attention to the drain flange and the crevice where the sink meets the countertop.
Rinse thoroughly with warm water and dry with a microfiber cloth to prevent water spots.
Around The Drain
The drain area collects food particles, soap scum, and hard water deposits. Use the toothbrush to scrub the rim of the drain and the inside of the flange. For stubborn buildup, let a baking soda and vinegar paste sit for a few minutes before scrubbing.
Faucet Base And Corners
The base of the faucet and the back corners of the sink are often neglected. Angle the toothbrush to get into these tight spaces. A little elbow grease here prevents long-term staining and keeps your sink looking uniform.
Edges And Seams
If your sink has a rim or a seam where it meets the counter, grime can accumulate. Gently scrub along these lines with the toothbrush. Rinse well to remove any cleaner residue.
23. Avoid Leaving Metal Utensils in the Sink
It's tempting to drop a wet spoon or fork in the sink and deal with it later. But those metal utensils can be surprisingly damaging to your stainless steel sink. Left sitting, they can cause rust spots, scratches, and even discoloration that's tough to remove.
The key is to break the habit of leaving utensils in the sink. Rinse them off and either dry them immediately or place them in the dishwasher or a drying rack. If you do find rust spots from a forgotten utensil, a paste of baking soda and water can gently lift them.
For deeper scratches, a stainless steel polish or a fine-grit scratch remover can help restore the finish. Prevention is always easier than repair, so make it a rule: no metal utensils left in the sink overnight.
Why Metal Utensils Cause Damage
When metal utensils sit in a damp sink, they can react with the stainless steel surface. Different metals can cause galvanic corrosion, leading to tiny rust spots. Plus, the weight and edges of utensils can scratch the finish, especially if they're moved around or stacked.
How To Remove Rust Spots
If you notice rust spots, don't panic. Make a paste with baking soda and a little water, apply it to the spots, and gently scrub with a soft cloth or sponge. Rinse thoroughly and dry.
For stubborn spots, a non-abrasive stainless steel cleaner or a dab of lemon juice can work wonders.
Preventive Habits To Adopt
Train yourself to remove utensils as soon as you're done using them. Keep a drying rack or a small container next to the sink for immediate placement. After washing, give the sink a quick wipe with a microfiber cloth to remove any moisture.
This simple routine can keep your sink looking pristine.
24. Rinse with Distilled Water to Prevent Spots
Hard water is a sneaky culprit behind those stubborn white spots that appear as soon as your sink dries. Tap water contains minerals like calcium and magnesium that cling to the surface and leave a cloudy residue. The fix is simpler than you think: switch to distilled water for the final rinse.
Why Distilled Water Works
Distilled water has been boiled and condensed, removing nearly all dissolved minerals. Without those minerals, there's nothing left behind to form spots. A quick rinse with distilled water after your regular cleaning routine leaves the metal surface clean and spot-free as it dries.
How To Apply It
After washing and rinsing your sink with tap water, do one final rinse with distilled water. You can pour it from a jug or use a spray bottle for even coverage. Let the sink air dry or gently wipe with a microfiber cloth.
No need to dry it completely—the lack of minerals means no spots even if water droplets remain.
When To Use This Trick
Use distilled water for the final rinse every time you clean your sink, especially if you live in a hard-water area. It's also great for a quick refresh between deep cleans. Keep a spray bottle of distilled water under the sink for easy access.
25. Establish a Weekly Deep-Clean Routine
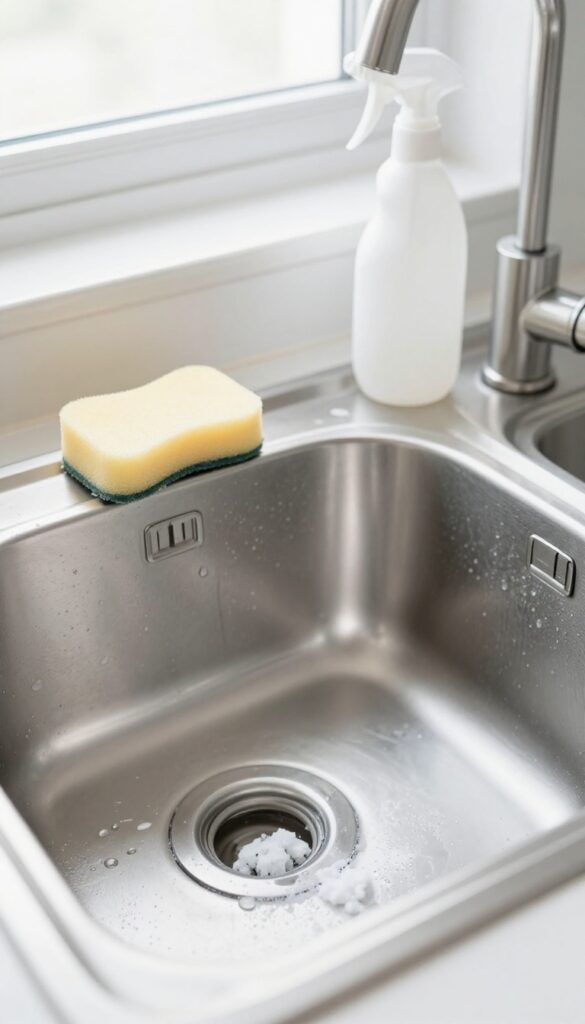
Daily wipes keep your sink presentable, but a weekly deep-clean routine is what really restores that factory-fresh gleam. Setting aside just 10 minutes each week prevents grime from building up and keeps the stainless steel looking bright and mirror-like. This simple four-step process—scrub, rinse, polish, buff—targets all the hidden residue that daily cleaning misses.
A consistent weekly routine makes a huge difference. Start by sprinkling baking soda over the damp sink surface and scrubbing gently with a soft sponge. This lifts dried-on food and mild stains without scratching.
Then rinse thoroughly with white vinegar to dissolve any remaining film and neutralize odors. After drying, apply a few drops of mineral oil or olive oil to a soft cloth and rub it along the grain. Finally, buff with a dry microfiber cloth to bring out the shine.
That's it—your sink will look like new every week.
Step 1: Baking Soda Scrub
Wet the sink, sprinkle baking soda over the entire surface, and scrub with a non-abrasive sponge in circular motions. Focus on the basin floor and corners where residue collects. Rinse well before moving on.
Step 2: Vinegar Rinse
Pour white vinegar into a spray bottle and mist the sink generously. Let it sit for 2–3 minutes to break down any leftover baking soda and mineral deposits. Rinse with warm water and dry with a soft towel.
Step 3: Oil Polish
Apply a few drops of mineral oil or olive oil to a clean, lint-free cloth. Rub it into the stainless steel following the grain. This fills tiny pores and creates a protective barrier against water spots and fingerprints.
Step 4: Final Buff
Use a dry microfiber cloth to buff the entire sink in long, straight strokes along the grain. This step removes excess oil and brings out a brilliant, streak-free shine that lasts all week.
FAQ
Can I use bleach to clean my stainless steel sink?
No, bleach can damage the protective layer and cause pitting or discoloration. Stick to mild cleaners like dish soap, vinegar, or baking soda.
What is the best daily cleaner for stainless steel sinks?
A mixture of mild dish soap and warm water is safe and effective for daily cleaning. Always rinse and dry to prevent water spots.
How often should I deep clean my stainless steel sink?
A weekly deep clean with baking soda and vinegar helps maintain shine and prevent buildup. Daily wiping and drying keeps it looking fresh between deep cleans.
Can I use vinegar on stainless steel?
Yes, vinegar is safe for stainless steel when used in moderation. It effectively removes hard water stains and disinfects. Rinse thoroughly after use to avoid any acidic residue.
Conclusion
You don't need a cabinet full of specialty products to keep your stainless steel sink gleaming. These 25 tips prove that simple ingredients like baking soda, vinegar, and a microfiber cloth can banish water spots and restore that factory shine. Pick a few methods that fit your routine and stick with them.
Start with one technique this week, maybe the vinegar rinse or the mineral oil polish. You'll notice how much easier it is to maintain that bright finish when you have the right tricks on hand. Your sink will stay spotless with minimal effort.