15 Cleaning Cast Iron Tips for Safe Seasoned Skillets
Your cast iron skillet can handle decades of cooking, but one wrong scrub can strip its hard-earned seasoning. The good news? You don't need harsh chemicals or complicated routines to keep it nonstick and rust-free.
These 15 tips focus on gentle, effective methods that protect your pan's patina while making cleanup a breeze. From salt scrubs to quick stovetop drying, each technique is designed to preserve that slippery, seasoned surface you've worked so hard to build.
Ready to keep your skillet in prime condition for years to come? Let's dive into the smartest ways to clean cast iron without ruining its seasoning.
1. Scrub with Coarse Salt and a Paper Towel
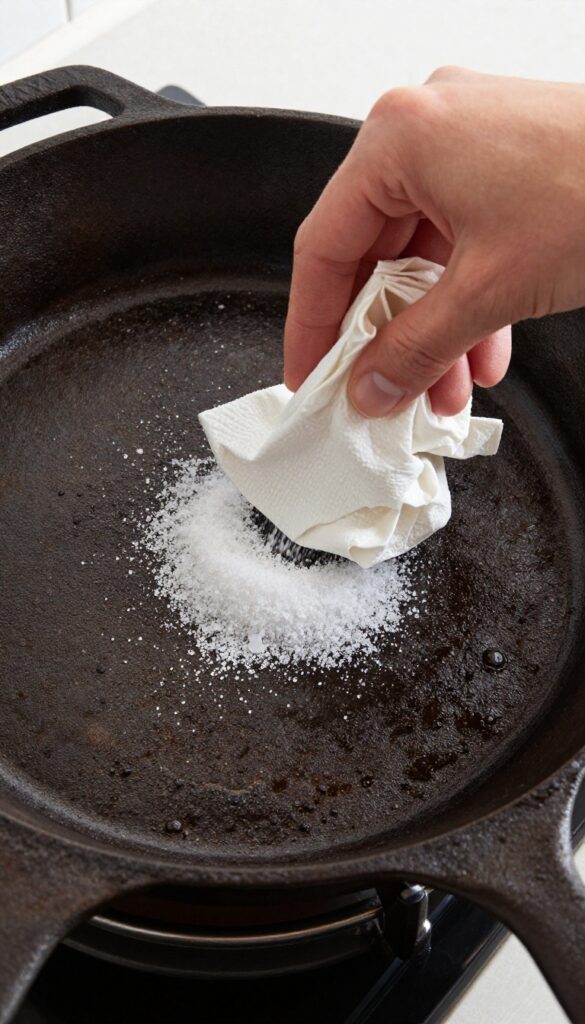
Kosher salt is a secret weapon for cast iron care. Its coarse crystals act as a gentle abrasive that lifts stuck-on food without scratching the seasoning. This method is simple, cheap, and works every time.
You probably already have salt in your pantry, so there's no need for special cleaners. It's also safe—no chemicals that might leach into your next meal. Just a few seconds of scrubbing and your pan is ready to rinse.
Start by letting your skillet cool slightly after cooking. Pour a generous layer of kosher salt onto the surface—about two tablespoons should do. Add a splash of water to dampen the salt, then grab a paper towel.
Scrub in circular motions, focusing on any stubborn bits. The salt will break them down without damaging the seasoning. Once you're satisfied, rinse the pan under warm water to remove the salt and debris.
Dry it thoroughly with a clean towel or by heating it on the stove. This method works best for light to moderate residue. For heavy buildup, you might need to repeat or combine with other techniques.
Why Kosher Salt Works Best
Table salt is too fine and can dissolve too quickly, while rock salt is too harsh. Kosher salt's larger, irregular flakes provide just the right abrasion. They break down stuck-on food without scraping away the polymerized oil that makes your pan nonstick.
When To Use This Method
Use the salt scrub after cooking foods that tend to stick, like eggs or fish. It's also great for removing burnt-on bits from searing meat. Avoid using it if your seasoning is very new or thin, as even gentle abrasion could be too much.
Pro Tip: Save The Salt
You can reuse the salt for multiple scrubs if it's not too dirty. Just let it dry on a plate and store it in a jar. But if it's greasy or full of food particles, toss it and start fresh.
2. Deglaze with Water While the Pan Is Still Warm
One of the easiest ways to clean a cast iron skillet is to let the pan do most of the work for you. Right after you finish cooking, while the skillet is still warm but not scorching hot, add a splash of water and watch the magic happen. The steam lifts stuck-on bits, and a quick scrape with a wooden spatula leaves the surface nearly spotless.
Deglazing is a technique borrowed from professional kitchens, and it works beautifully on seasoned cast iron. The key is timing: hit the pan while it's warm enough to sizzle but not so hot that the water evaporates instantly. Use just enough water to create a thin layer of steam across the bottom.
Then, with a gentle scraping motion, dislodge any food residue. This method is especially effective after searing meat or cooking eggs, where bits tend to cling. Once you're done, pour off the murky water, give the pan a quick wipe, and you're ready for the next step.
Why Warm Is Better Than Hot
If the pan is too hot, the water will flash to steam before it can loosen anything. If it's too cold, the bond between food and seasoning holds tight. Aim for a temperature where a drop of water dances across the surface—about 200–250°F.
That sweet spot lets the steam penetrate and lift residue without shocking the metal.
Tools That Won't Scratch
Reach for a wooden spatula, silicone scraper, or bamboo turner. Metal utensils can gouge the seasoning, especially if you're scraping with force. A wooden edge is firm enough to dislodge stuck bits but gentle enough to leave your patina intact.
If you don't have one, a stiff nylon brush also works.
When To Skip This Method
Avoid deglazing if your pan has any bare iron spots or if the seasoning looks thin. The steam can penetrate exposed metal and cause flash rusting. Stick to this trick only when your seasoning is dark, smooth, and well-established.
For newer pans, use the salt scrub method instead.
3. Use a Chainmail Scrubber for Tough Residue
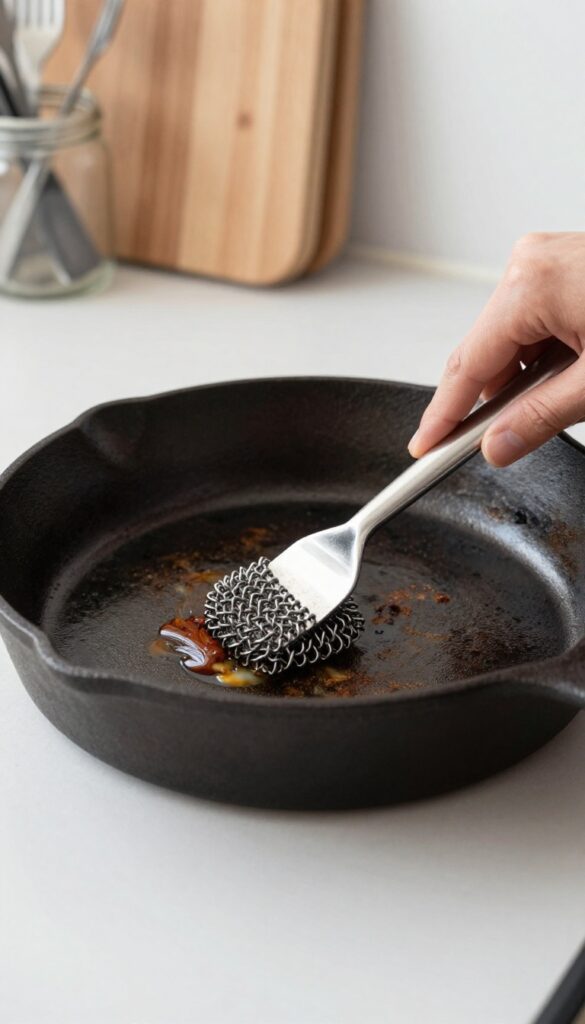
Sometimes a soft sponge just doesn't cut it. When you've got burnt-on cheese or stuck-on bits from searing, a chainmail scrubber is your best friend. These stainless steel mesh pads are tough on gunk but gentle on seasoning, so you can scrub without fear.
A chainmail scrubber works like a charm on stubborn residue without scratching the seasoned surface. The key is to use gentle circular motions and let the metal links do the work. After scrubbing, rinse the pan with warm water and dry it immediately to prevent rust.
This tool is especially useful for pans with a well-developed patina that can handle a bit of abrasion.
Why Chainmail Works
The interlocking stainless steel rings create a scrubbing surface that's aggressive enough to dislodge food particles but smooth enough not to scrape off seasoning. Unlike steel wool, which can be too harsh, chainmail is designed for cast iron care. It's also rust-resistant and easy to clean.
How To Use It
Wet the pan slightly, then scrub in small circles. Focus on the stuck-on spots, but avoid pressing too hard. Rinse thoroughly and check for any remaining residue.
If needed, repeat. Always dry the pan on the stove over low heat to ensure no moisture lingers.
Caring For Your Scrubber
After use, rinse the chainmail scrubber and hang it to dry. It won't rust, but keeping it dry prevents bacteria growth. Replace it if the rings start to deform or if it becomes too loose.
A good chainmail scrubber can last for years with proper care.
4. Avoid Soap Unless Absolutely Necessary
For decades, the golden rule of cast iron care was never use soap. While modern dish soaps are milder and won't instantly ruin your seasoning, they can still gradually wear it down over time. The safest approach is to rely on soap only when you absolutely need it, like after cooking something particularly greasy or sticky.
Most of the time, hot water and a stiff brush or salt scrub are all you need to clean your skillet. Soap is a degreaser, and while it won't dissolve seasoning in one wash, frequent use can slowly strip the polymerized oil layers that make your pan nonstick. Save soap for those rare occasions when water and salt just won't cut it.
When Soap Is Okay
If you cook fish, bacon, or anything with a strong odor, a tiny drop of mild dish soap can help remove lingering smells. Similarly, if your pan has a sticky residue that won't budge with salt, a quick soapy wash is better than scrubbing aggressively. Rinse thoroughly and dry immediately.
The Daily Clean Routine
For everyday cleaning, scrape out food bits with a metal spatula, rinse with hot water, and scrub with a stiff brush or chainmail scrubber. If needed, add coarse salt and a bit of water to create a gentle abrasive paste. Rinse, dry on the stove, and apply a thin layer of oil.
Signs You Used Too Much Soap
If your pan starts looking dull, feels sticky, or food begins to stick more than usual, you might be overusing soap. In that case, switch back to water-and-salt cleaning for a few weeks. You can also do a quick stovetop seasoning by wiping a thin layer of oil and heating until it smokes.
5. Dry Immediately on the Stove
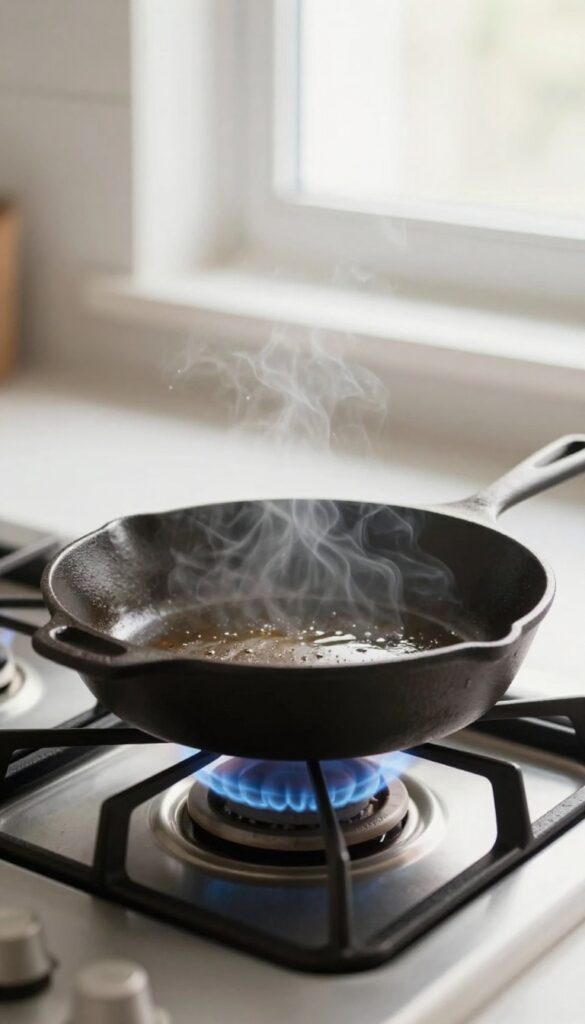
Water is cast iron's enemy number one. Even a few droplets left on the surface can start rusting your skillet overnight. That's why drying immediately after washing is a non-negotiable step.
Skipping this step is the fastest way to undo all your careful cleaning. But drying on the stove does more than just prevent rust—it also preps the pan for a light oiling, locking in that seasoned finish.
Why Stovetop Drying Works Best
A towel can't reach every microscopic crevice in cast iron. Moisture hides in the pores of the metal, and even a seemingly dry pan can harbor enough water to cause rust spots. Placing the skillet over low heat for a minute forces all that hidden moisture to evaporate.
The gentle heat also opens the metal's pores slightly, making it ready to absorb a thin layer of oil.
The Right Way To Do It
After rinsing, give the skillet a quick wipe with a clean towel to remove bulk water. Then set it on a burner over low heat—never high, which can warp the pan or burn off seasoning. Let it sit for about one minute, or until you see the last wisps of steam disappear.
Touch the handle to confirm it's warm but not hot. Then immediately apply a tiny amount of oil and rub it in.
What Not To Do
Never let the pan sit wet in the sink or on a dish rack. Avoid putting a hot skillet under cold water, which can cause thermal shock and cracking. Also, don't skip the stovetop step even if you think you've dried it thoroughly with a towel.
A minute on the stove is cheap insurance against rust.
6. Apply a Thin Layer of Oil After Each Wash
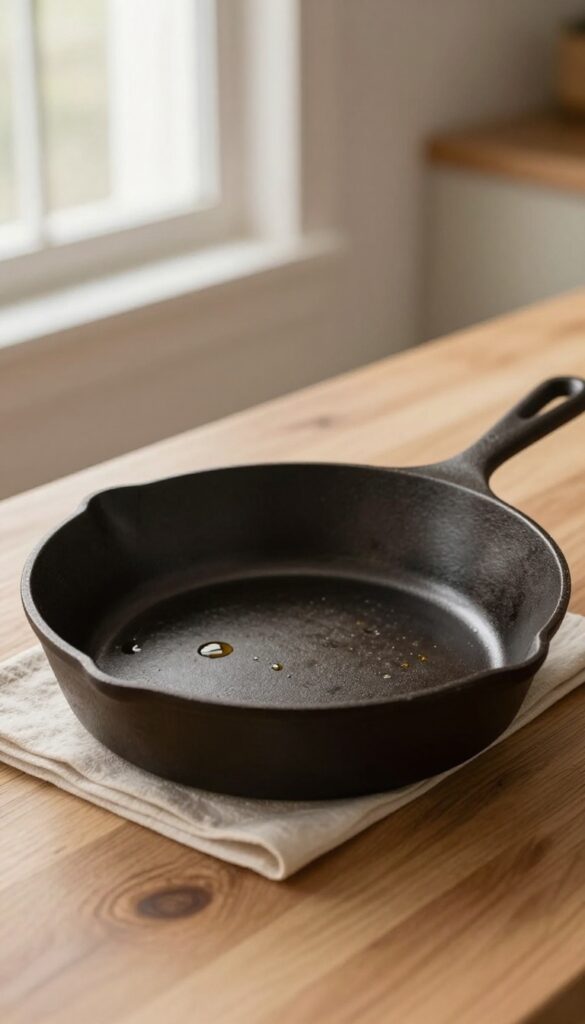
That last step after drying is what seals the deal. A quick oil rub doesn't just make the pan look nice—it feeds the seasoning and keeps moisture from settling in. Think of it as a tiny shield that preps your skillet for its next meal.
Once your skillet is completely dry and still warm (not hot), grab a paper towel and add just a few drops of oil. Vegetable, canola, or flaxseed oil all work great. Rub it all over the cooking surface, including the sides and handle.
Then take a clean towel and buff off any excess. You want a sheen, not a puddle. This micro-layer bonds with the existing seasoning, filling in tiny gaps and creating a smooth, nonstick finish.
It also prevents rust from forming overnight. Make it a habit after every wash, and your skillet will only get better with time.
Why Warm Pan Matters
Applying oil to a warm pan helps it spread evenly and soak into the pores of the iron. If the pan is cold, the oil sits on top and can turn sticky. If it's too hot, the oil may smoke and burn off.
Aim for that just-warm-to-the-touch temperature after drying on the stove.
Which Oil To Choose
Flaxseed oil creates a hard, durable layer but can be pricey. Vegetable and canola oils are affordable and work well for everyday seasoning. Avoid olive oil—it has a low smoke point and can leave a gummy residue.
Whatever you pick, use it sparingly.
The Buffing Trick
After rubbing oil on, take a fresh paper towel and buff the surface until it looks dry. This removes excess oil that could turn sticky or attract dust. The goal is a microscopic layer that feels almost dry to the touch.
Your pan should look matte, not glossy.
7. Never Soak Cast Iron in Water
It's tempting to drop a crusty skillet into a sink full of soapy water and walk away. But that soak is a one-way ticket to rust city. Water is the enemy of seasoning, and prolonged contact will cause it to peel and flake.
Instead of soaking, use a gentler method that lifts stuck-on food without damaging your pan's hard-earned patina.
Soaking cast iron in water is a common mistake that leads to rust and ruined seasoning. The porous iron absorbs moisture, which oxidizes into rust and breaks down the polymerized oil layer. Even a short soak can cause damage if the pan isn't dried immediately.
The better approach is to address stuck food directly without submerging the pan.
Deglaze With Liquid
If food is stubbornly stuck, add a splash of water, broth, or vinegar to the hot pan and let it simmer for a minute. The steam and bubbling action will loosen debris without soaking. Use a wooden spatula or chainmail scrubber to gently scrape while the liquid works.
This method is fast and preserves seasoning.
Boil Water For Tough Residue
For burnt-on gunk, fill the skillet with about an inch of water and bring it to a boil. Let it boil for 2-3 minutes, then use a spatula to scrape off the softened bits. Pour out the water, rinse briefly, and dry immediately.
This technique avoids prolonged soaking while still making cleanup easy.
Dry Thoroughly After Any Water Contact
Whenever your skillet touches water, dry it completely. Place it on a warm stovetop burner for a minute or two to evaporate all moisture. Then apply a thin layer of oil to protect the surface.
This habit ensures that even if you deglaze or boil, your seasoning stays intact.
8. Use a Plastic Scraper for Delicate Cleaning
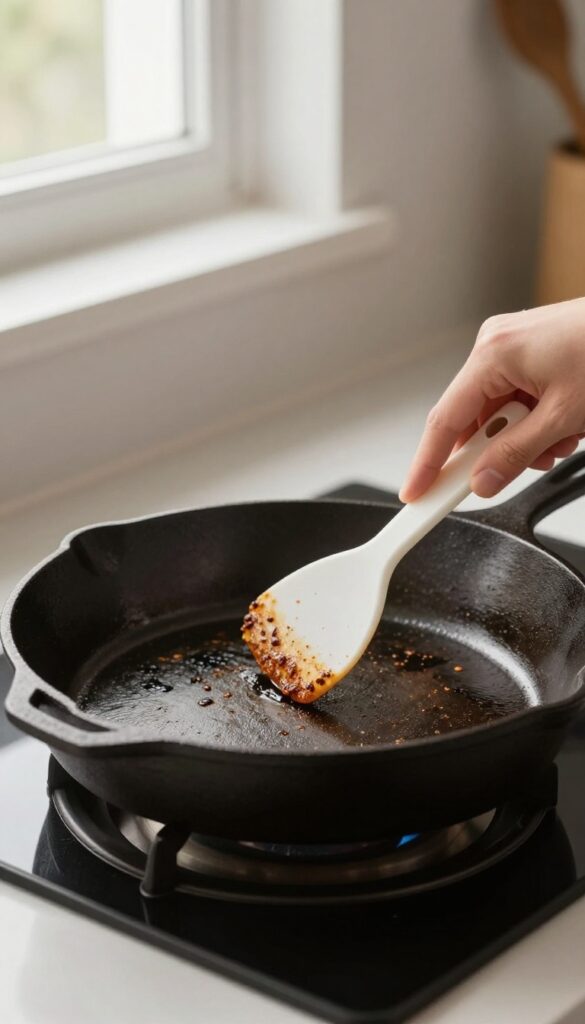
A hard plastic scraper is a simple tool that makes a big difference when cleaning cast iron. It lifts stuck-on food without scratching the seasoning. This is especially handy for bits that won't budge with a sponge or brush.
Plastic scrapers are cheap, durable, and widely available. They work best on warm (not hot) pans. Hold the scraper at a slight angle and gently push it across the surface to dislodge residue.
Rinse or wipe away the loosened bits, then proceed with a salt scrub or a quick rinse.
Why Plastic Over Metal
Metal scrapers can gouge seasoning and leave scratches that invite rust. Plastic is firm enough to remove food but soft enough to leave your patina intact. It's the safest option for daily use.
When To Use It
Reach for the plastic scraper after cooking sticky or burnt-on foods like eggs, cheese, or caramelized onions. It's also great for dislodging baked-on grease before a deeper clean. Use it on a warm pan for best results.
Care And Storage
Wash the scraper with soap and water after each use. Store it with your other cast iron tools so it's always handy. Avoid using it on hot pans, as extreme heat can warp the plastic.
9. Remove Rust with a Potato and Baking Soda
Rust spots on a cast iron skillet can feel like a death sentence, but they're often fixable with a humble potato. This kitchen hack uses the natural oxalic acid in potatoes to lift rust without damaging the seasoning underneath. It's a gentle, chemical-free method that works surprisingly well on light to moderate rust.
When you spot orange rust on your skillet, don't reach for steel wool yet. A potato and baking soda combo can save your pan with minimal effort. The acid in the potato reacts with the rust, while the baking soda provides a mild abrasive to scrub it away.
This method is safe for the skillet's surface and won't strip the seasoning if you're careful.
Why Potatoes Work For Rust Removal
Potatoes contain oxalic acid, a natural compound that breaks down iron oxide (rust). When you cut a potato in half and dip it in baking soda, you create a gentle scrubbing tool that chemically lifts rust. Unlike harsh abrasives, this method won't scratch the pan's surface or remove the seasoning layer.
Step-by-step Rust Removal
Start by cutting a raw potato in half. Dip the cut side into baking soda, coating it generously. Scrub the rusted areas of your skillet in circular motions, applying light pressure.
Rinse with warm water and dry immediately. Repeat if needed. For stubborn spots, let the potato sit on the rust for 10 minutes before scrubbing.
When To Use This Method
This technique is best for light surface rust that hasn't pitted the metal. If your skillet has deep rust or flaking, you may need to strip and reseason. Always dry your skillet thoroughly after cleaning to prevent new rust from forming.
A quick stovetop heat-dry and a thin oil coat will keep it protected.
10. Re-season in the Oven When Needed
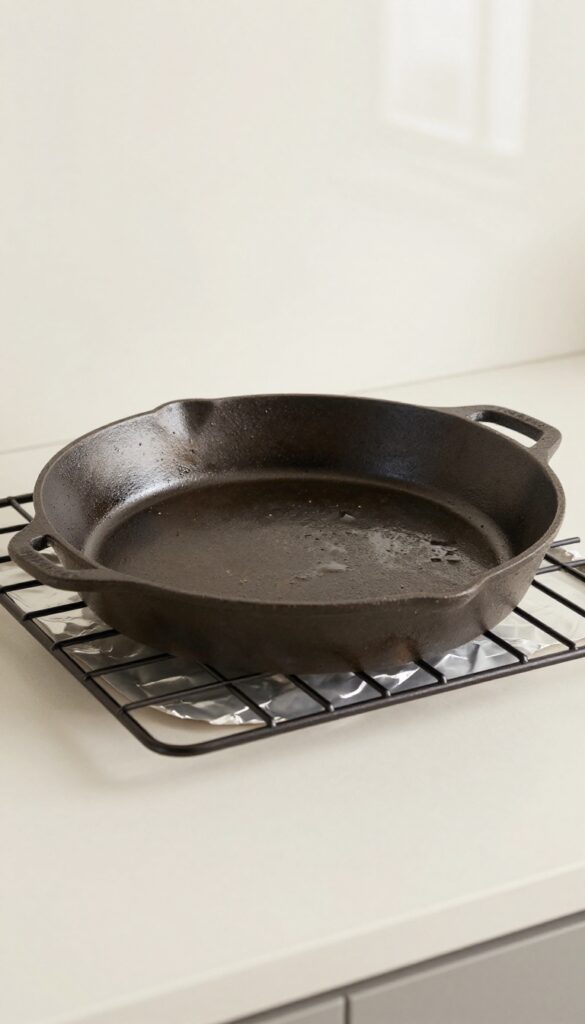
Even with the best care, your skillet's seasoning can start to look patchy or feel sticky. Maybe you cooked something acidic, or a scrubbing session went a little too hard. That's your cue to give it a proper oven re-seasoning, which is easier than you think.
Oven re-seasoning restores a smooth, non-stick surface by bonding a fresh layer of oil to the iron. It's the most reliable way to fix uneven seasoning without starting from scratch.
When To Re-season
Look for dull spots, visible bare metal, or a sticky feel. If food starts sticking even after proper preheating, it's time. A quick stovetop touch-up might not be enough for larger areas.
How To Do It Right
Wash and dry the skillet thoroughly. Apply a very thin layer of a high-smoke-point oil (like grapeseed or flaxseed) all over, inside and out. Place it upside down on the oven's middle rack with a foil-lined baking sheet on the rack below to catch drips.
Bake at 450°F for one hour, then let it cool in the oven.
Repeat If Needed
One coat often does the trick, but for heavily worn pans, repeat the process 2–3 times. Let each layer cool completely before applying the next. The result is a dark, glassy finish that feels like new.
11. Clean After Cooking Acidic Foods Immediately
Acidic ingredients like tomatoes, vinegar, and citrus can react with bare iron, leading to metallic flavors and damaged seasoning. The reaction happens fast, so waiting even an hour can cause pitting or rust spots. A quick cleanup right after cooking keeps your skillet safe and your food tasting great.
When you cook with acidic foods, the pan's seasoning takes a hit. The acid can strip away layers of polymerized oil, leaving the iron exposed. Washing and drying immediately prevents that exposure from turning into rust.
After cleaning, a light oil coat helps rebuild the seasoning barrier, so your skillet stays nonstick.
Why Acidic Foods Are Risky
Tomatoes, wine, citrus, and vinegar all have a pH low enough to dissolve seasoning. Even a short simmer can cause the pan to leach iron into your food, giving it a metallic taste. The longer the food sits, the more damage occurs.
That's why immediate action is key.
The Right Way To Clean After Acid
Use hot water and a stiff brush or non-abrasive scrubber. Avoid soap if your seasoning is thin, but a tiny drop of mild dish soap is fine for a well-seasoned pan. Dry thoroughly with a towel or on the stove over low heat.
Then rub a thin layer of oil—like vegetable or flaxseed—over the entire surface.
When To Reseason
If you notice dull patches or a grayish tint after cleaning, your seasoning needs reinforcement. Apply a thin oil coat and heat the pan upside down in a 400°F oven for an hour. This quick reseasoning fills in the gaps and restores the nonstick surface.
12. Use a Stiff Nylon Brush for Everyday Cleaning
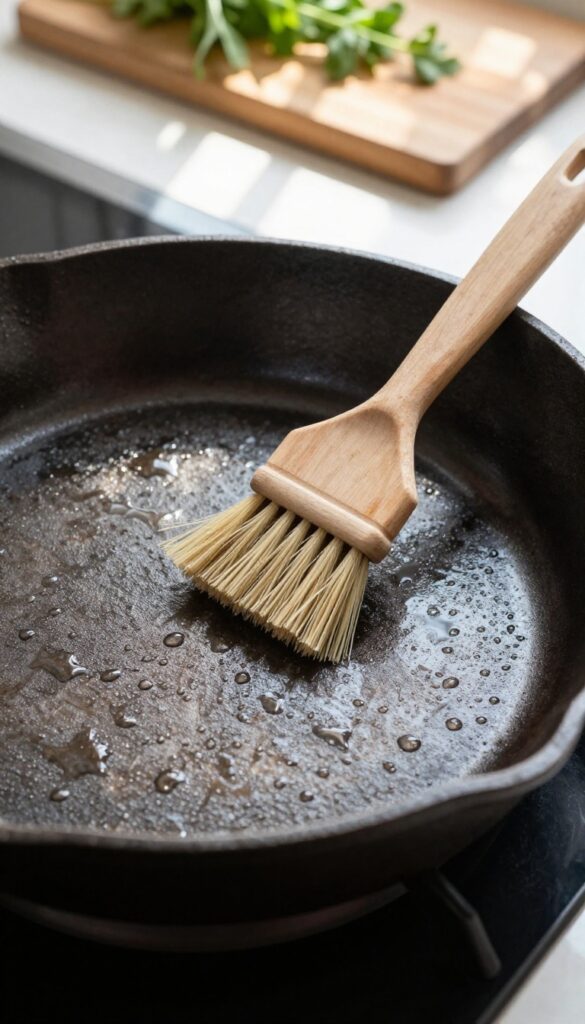
A stiff nylon brush is one of the most versatile tools for daily cast iron care. Unlike steel wool or abrasive pads, nylon bristles are tough on stuck-on food but gentle on seasoning. This makes it perfect for quick cleanups after everyday cooking—no soaking or scrubbing required.
For most meals, a quick scrub under hot running water with a nylon brush is all you need. The firm bristles dislodge bits of food without scratching the seasoned surface. Rinse thoroughly, then dry immediately with a towel or over low heat.
This routine keeps your skillet ready for the next use without any extra effort.
Choose The Right Brush
Look for a brush labeled "stiff nylon" or "heavy-duty" with densely packed bristles. Avoid brushes with metal or abrasive fibers. A long handle protects your hands from hot water, and a shape that fits the skillet's curve helps reach edges.
Hot Water Is Key
Always use hot water—it helps loosen grease and food residue without needing soap. The heat also keeps the pan warm, which prevents thermal shock. Run the water directly over the brush as you scrub for best results.
When To Use A Little Soap
If you cooked something especially greasy or sticky, a drop of mild dish soap is fine. The nylon brush works the soap into a gentle lather that rinses away easily. Just be sure to rinse thoroughly and dry completely afterward.
Drying After Brushing
After scrubbing, towel-dry the skillet immediately. Then place it on a stovetop burner over low heat for a minute or two to evaporate any remaining moisture. This step prevents rust and keeps the seasoning intact.
13. Store with a Paper Towel Inside to Absorb Moisture
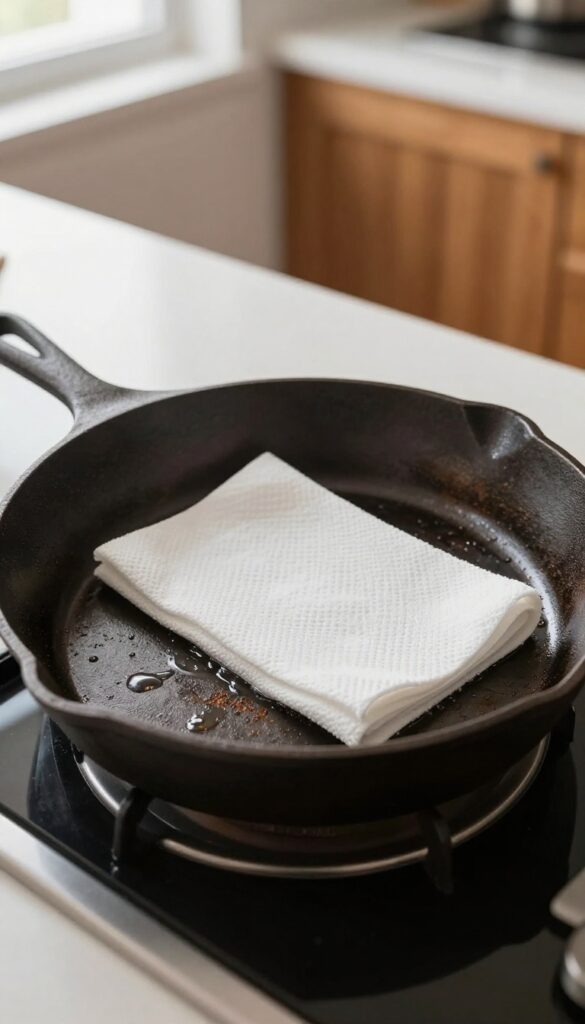
Even after thorough drying, a cast iron skillet can collect moisture in a closed cabinet, especially in humid climates. That trapped humidity is a direct invitation for rust. The fix is simple: a folded paper towel placed inside the skillet acts as a moisture wick, keeping the interior dry between uses.
This low-effort habit can save your seasoning from unexpected rust spots. Just remember to swap out the paper towel every few days or whenever it feels damp. If you live in a particularly humid area, check it more often.
The towel absorbs any lingering moisture that condensation or humidity might leave behind, giving your skillet a dry, rust-free environment.
Why It Works
Paper towels are highly absorbent and create a physical barrier between the skillet's surface and humid air. By wicking away moisture, they prevent the electrochemical reaction that leads to rust. This is especially important if you store your skillet in a basement, near a dishwasher, or in any area with fluctuating humidity.
Best Practices For Different Climates
In dry climates, you might only need to change the paper towel once a week. In coastal or rainy regions, check it every two to three days. If the towel feels damp, replace it immediately.
For extra protection, you can also place a silica gel packet inside the skillet, but a paper towel is cheaper and easier to replace.
What To Avoid
Don't use colored or printed paper towels, as the dyes can transfer to the skillet's surface. Stick to plain, unbleached white towels. Also, avoid storing the skillet with the lid on if you use a paper towel, as that can trap moisture instead of letting it escape.
Leave the lid slightly ajar or store the skillet without a lid.
14. Avoid Metal Utensils That Gouge Seasoning
Your seasoning is a delicate layer of polymerized oil, not a sheet of armor. Metal spatulas, forks, and spoons can easily scratch or chip that surface, especially when you're scraping up browned bits or flipping food. Over time, those tiny gouges turn into weak spots where seasoning flakes off and rust can take hold.
Switching to gentler materials is one of the simplest ways to extend the life of your skillet's patina. Wood, silicone, and nylon tools are tough enough for everyday cooking but soft enough to leave your seasoning intact. Once you make the switch, you'll notice fewer touch-ups and a smoother cooking surface.
The main reason to avoid metal utensils is simple: they're harder than your seasoning layer. Even a light scrape can leave micro-scratches that accumulate over time. These scratches create entry points for moisture and food acids, leading to rust spots and uneven seasoning.
High-carbon steel spatulas are especially aggressive because they're thin and sharp. Metal utensils also tend to make that awful screeching sound against cast iron. That noise is your seasoning crying out for help.
It's a clear sign that the tool is abrading the surface. If you hear it, switch tools immediately. Finally, metal utensils can transfer metallic flavors to your food if they scrape off tiny iron particles.
This is rare but possible, especially with acidic dishes. Sticking to wood or silicone eliminates that risk entirely.
Best Alternatives To Metal
Wooden spatulas and spoons are classic for a reason. They're sturdy, heat-resistant, and naturally gentle on seasoning. Look for hardwoods like maple or beech that won't splinter.
Silicone spatulas and turners are excellent for nonstick cooking because they flex around food without scraping. Nylon tools are also a good budget-friendly option, but check their heat rating—most are safe up to 400°F, which covers stovetop use but not broiling.
When Metal Is Okay (and When It's Not)
If your seasoning is thick and well-established (years old, dark black, and glossy), an occasional metal spatula won't ruin it. Many cast iron enthusiasts use metal fish spatulas for flipping eggs without issue. The key is to avoid scraping aggressively or using sharp-edged tools.
Never use metal on a new or thin seasoning. And never use a metal scrubber or chainmail on a seasoned surface—that's for removing rust only.
How To Test Your Tools
Run the edge of your utensil gently across your palm. If it feels sharp or catches on your skin, it's too aggressive for your skillet. Another test: drag the tool across an old, seasoned skillet you don't care about.
If it leaves visible scratch marks, don't use it on your good pan. When in doubt, choose wood or silicone—they're forgiving and effective.
15. Don't Use Self-Cleaning Oven Mode on Cast Iron
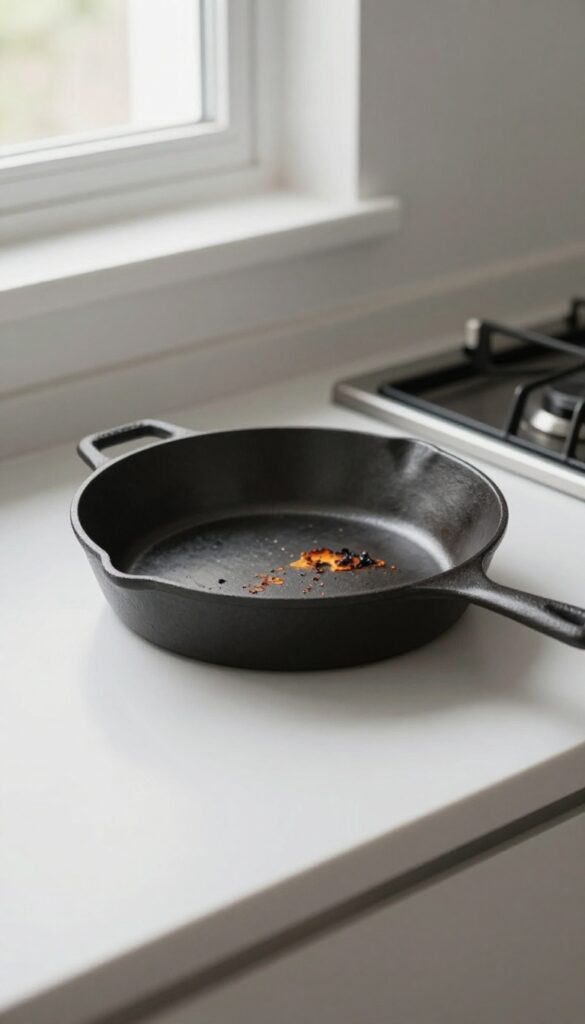
Your oven's self-cleaning cycle cranks up to over 800°F to burn off food spills. That extreme heat is a disaster for cast iron. It can warp the pan, destroy the seasoning, and even cause the iron to crack.
Stick to gentler re-seasoning methods instead.
Self-cleaning cycles subject cast iron to temperatures far beyond what it's designed for. The intense heat can cause the metal to expand unevenly, leading to permanent warping. It also burns off all seasoning, leaving the pan bare and vulnerable to rust.
Worse, thermal shock from rapid cooling after the cycle can crack the skillet. Avoid this shortcut entirely.
Why High Heat Harms
Cast iron is tough, but it's not invincible. Self-cleaning oven temperatures exceed 800°F, while seasoning typically polymerizes around 400-500°F. At those extremes, the seasoning carbonizes and flakes off.
The pan itself can warp, creating a wobble on flat stovetops. Even if the pan survives, you'll have to start seasoning from scratch.
Safe Re-seasoning Alternatives
If your skillet needs a fresh coat of seasoning, use the oven at 400-450°F. Apply a thin layer of oil (flaxseed, grapeseed, or vegetable oil work well) and bake upside down for an hour. For spot fixes, use the stovetop: heat the pan, rub in a dab of oil, and let it smoke until it turns glossy.
These methods are gentle and effective.
What About Stubborn Baked-on Gunk?
If you have burnt-on residue, skip the self-clean cycle. Instead, simmer water in the skillet for a few minutes to loosen debris, then scrub with a stiff brush and coarse salt. For tough spots, use a chainmail scrubber.
Dry immediately and apply a light oil coating. This preserves your seasoning without risking damage.
FAQ
Can I use dish soap on cast iron?
Yes, but sparingly. A drop of mild dish soap is fine for cutting grease, but avoid soaking or scrubbing vigorously. Rinse thoroughly and dry immediately.
How do I fix a rusty cast iron skillet?
Scrub rust with a potato and baking soda or fine steel wool, then rinse, dry, and re-season in the oven. The key is removing all rust before oiling.
Why does my cast iron food taste metallic?
Metallic taste usually means the seasoning is too thin or damaged. Re-season the pan with a few thin oil layers, and avoid cooking acidic foods until the seasoning builds up.
How often should I season my cast iron?
Season only when the surface looks dry, patchy, or food starts sticking. For most users, a light oiling after each wash is enough, with full oven seasoning once or twice a year.
Can I put cast iron in the dishwasher?
Never. Dishwasher detergent and high heat will strip seasoning and cause rust. Always hand wash with minimal soap and dry immediately.
Conclusion
Keeping your cast iron skillet in prime condition doesn't require a chemistry degree or a cabinet full of specialty cleaners. A few simple habits—like using salt for scrubbing, drying on the stove, and oiling after each use—will keep that seasoning strong and your cooking surface slick.
Stick with these 15 tips, and your skillet will only get better with time. Now go ahead and cook that perfect fried egg or seared steak with confidence.