25 Easy Cleaning Oven Tips for Less Scrubbing Today
You open the oven door and see baked-on spills from last week's lasagna. The thought of scrubbing for hours makes you want to close it right back up. But cleaning your oven doesn't have to be a back-breaking chore.
With the right techniques, you can cut through grease and grime in minutes. Many solutions use ingredients you already have in your pantry. No harsh chemicals or endless elbow grease required.
These 25 tips focus on smart methods that do the hard work for you. From steam power to overnight soaks, each idea saves time and effort. Your oven will look spotless with far less scrubbing.
1. Steam Clean with a Bowl of Water
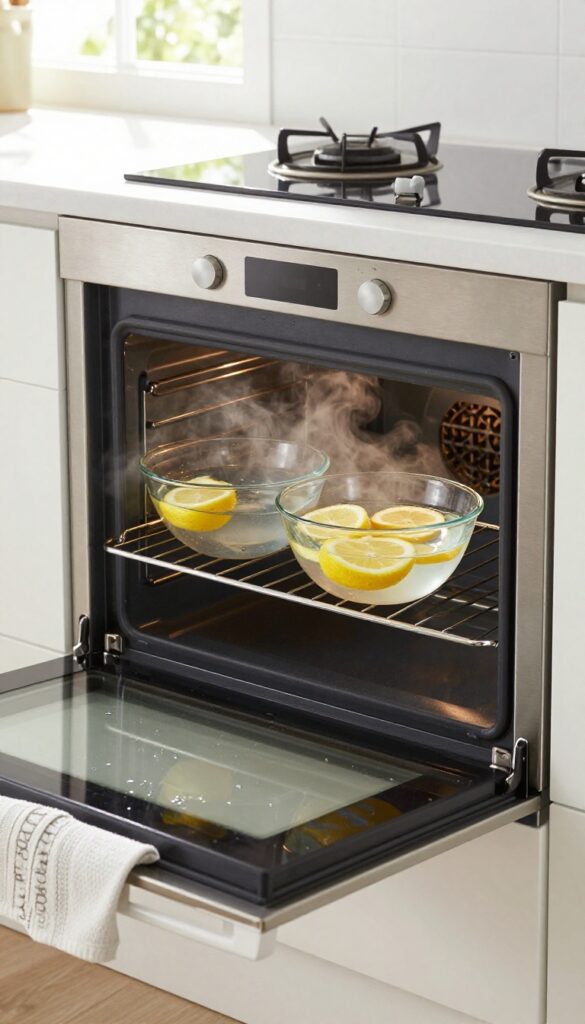
Steam is a powerful, natural cleaner that softens even the most stubborn baked-on messes. All you need is a bowl of water and a few minutes of heat. This method works wonders on light to moderate grime without any scrubbing.
How It Works
Fill an oven-safe bowl with about a cup of water and place it on the bottom rack. Heat your oven to 250°F and let it run for 20–30 minutes. The steam will condense on the walls and loosen dried food particles.
Wipe Down After
Turn off the oven and let it cool slightly. Open the door and wipe the interior with a damp cloth or sponge. Most of the grime will come off effortlessly.
For tough spots, gently scrub with a non-abrasive pad.
Add Lemon For Freshness
For extra cleaning power and a fresh scent, add a few lemon slices to the water. The citrus helps cut through grease and leaves your oven smelling clean.
2. Baking Soda Paste for Stubborn Spots
Baking soda is a gentle abrasive that cuts through grease without scratching your oven's surface. When mixed with water, it turns into a paste that clings to vertical surfaces and crevices. This method works best on dried-on spills that steam alone can't remove.
Mix equal parts baking soda and water to form a spreadable paste. Apply a thick layer over greasy areas and let it sit overnight. The next day, wipe away the paste with a damp cloth—grime comes off easily.
For extra stubborn spots, spray a little vinegar on the paste before wiping to boost the cleaning reaction.
How To Make The Perfect Paste
Use a 3: 1 ratio of baking soda to water for a thick consistency that won't drip. Stir until it resembles frosting. Add a drop of dish soap for extra grease-cutting power.
Where To Apply It
Focus on the oven floor, door glass, and racks. Avoid heating elements and the door seal. Use a spatula or brush to spread the paste evenly.
Tips For Faster Results
If you're short on time, let the paste sit for at least 2 hours. For baked-on carbon, sprinkle baking soda directly on a damp sponge and scrub gently.
3. Vinegar Spray to Neutralize Residue
After the baking soda paste has done its job, you need something to rinse away the loosened grime. White vinegar is the perfect partner. Its acidity reacts with the baking soda to create a fizzy reaction that lifts stubborn residue and cuts through any remaining grease.
Once you've let the baking soda paste sit for at least 12 hours or overnight, spray a generous amount of white vinegar over the dried paste. You'll see it start to fizz and bubble almost immediately. This reaction helps break down any leftover gunk and makes wiping much easier.
Let it sit for about 10 minutes, then use a damp cloth or sponge to wipe away the mixture. For tough spots, spray a little extra vinegar and scrub gently with a non-abrasive pad. The vinegar also neutralizes odors, leaving your oven fresh and clean.
Why Vinegar Works So Well
White vinegar is a mild acid that dissolves grease and mineral deposits. When it meets the alkaline baking soda, the fizzing action physically lifts debris from surfaces. This chemical reaction is gentle on your oven's enamel but tough on grime.
Plus, vinegar is non-toxic and safe for food contact areas.
How To Apply For Best Results
Fill a spray bottle with undiluted white vinegar. After the baking soda paste has dried, spray the vinegar liberally over all pasted areas. You want enough to create visible fizzing.
Let it work for 10–15 minutes, then wipe with a damp cloth. For vertical surfaces, spray and let it drip down to cover more area. Repeat if needed.
Dealing With Stubborn Spots
If some residue remains after the first wipe, spray vinegar directly on those spots and let it sit for another 5 minutes. Use a plastic scraper or a soft sponge to gently remove the loosened gunk. Avoid steel wool or abrasive scrubbers that can scratch the oven surface.
4. Lemon Juice for Fresh Scent and Grease Cutting
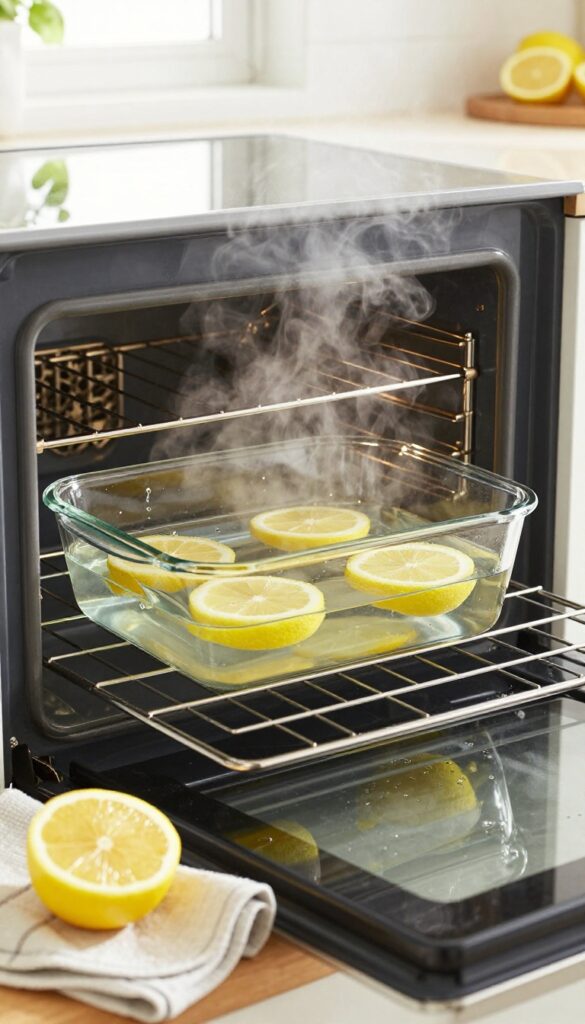
Lemon juice isn't just for lemonade—it's a powerhouse cleaner. The citric acid breaks down grease and leaves your oven smelling like a citrus grove. This method is especially great for light to moderate buildup and when you want a fresh scent without artificial fragrances.
How It Works
Fill an oven-safe dish with water and add the juice of two lemons (or 1/4 cup bottled lemon juice). Place it on the middle rack and heat the oven to 250°F for 30 minutes. The steam carries the acidic lemon vapor, which loosens grime and neutralizes odors.
After cooling, simply wipe down the interior with a damp cloth.
Best For Light To Moderate Messes
This method works wonders for fresh spills or light grease films. For heavy baked-on crud, you may need to combine it with a baking soda paste. But for routine maintenance, lemon steaming keeps your oven fresh and clean with minimal effort.
Extra Freshness Boost
After steaming, you can also rub a cut lemon half directly on stubborn spots. The acidity gives an extra scrub. Then wipe clean.
Your kitchen will smell amazing, and your oven will sparkle.
5. Use a Pumice Stone on Glass Doors
Glass oven doors take a beating. Splatters from casseroles and roasting pans bake on until they look like a foggy mess. You might think you need a special cleaner, but a simple pumice stone works wonders.
Pumice stones are soft enough not to scratch glass when used properly. The trick is keeping the stone wet and using light pressure. The stone gently abrades the baked-on crud without damaging the surface.
This method is fast and requires almost no scrubbing effort. Just a few gentle passes and your oven door will be clear again.
Why Pumice Works On Glass
Pumice is a porous volcanic rock that acts as a mild abrasive. On glass, it's gentle enough to avoid scratches but tough enough to remove carbonized grease. The key is water—it acts as a lubricant, letting the stone glide smoothly.
Never use a dry pumice stone; it can leave micro-scratches. When wet, the stone's surface wears down slightly, exposing fresh abrasive particles that lift grime.
Step-by-step: How To Use A Pumice Stone
Start by wetting the pumice stone thoroughly. Dip it in water and let it soak for a minute. Then, wet the oven glass too.
Gently rub the stone over the baked-on spots using circular motions. Apply light pressure—let the stone do the work. Rinse the glass periodically to check your progress and remove residue.
Once the glass is clear, wipe it down with a clean damp cloth. Your oven door will look brand new.
Tips For Best Results
Use a pumice stone specifically designed for cleaning (not for calluses). These are softer and less likely to scratch. Work in small sections and keep both the stone and glass wet.
If the stone starts to feel smooth, rub it on a rough surface like concrete to expose fresh grit. Avoid using pumice on tinted or coated glass—check your oven manual first. For stubborn spots, let the stone sit on the area for a minute before rubbing.
6. Dishwasher Tablet Hack for Tough Spills
Dishwasher tablets are designed to break down baked-on food and grease. They work just as well inside your oven. All you need is one tablet and some warm water.
Drop a dishwasher tablet into a bowl of warm water and let it dissolve. Dip a sponge or cloth into the solution and apply it directly to the tough spills. Let it sit for about 30 minutes so the enzymes can work.
After that, scrub lightly with the same sponge. The grime should lift off with minimal effort. Rinse with a damp cloth to remove any residue.
Why It Works
Dishwasher tablets contain powerful enzymes and surfactants that target grease and food particles. These ingredients are stronger than typical dish soap but safe for oven surfaces when diluted. The warm water activates the cleaning agents, making them more effective.
Best Spills To Target
This hack works wonders on dried-on cheese, burnt sauce, and sticky sugar-based spills. Avoid using it on self-cleaning oven liners or surfaces with special coatings. Test a small spot first if you're unsure.
Pro Tips
For extra stubborn spots, make a paste with the dissolved tablet and a little baking soda. Apply it thickly and let it sit for an hour. Use a plastic scraper to gently lift the softened gunk.
Always rinse thoroughly to avoid any soapy residue.
7. Salt and Baking Soda Scrub for Burnt-On Food
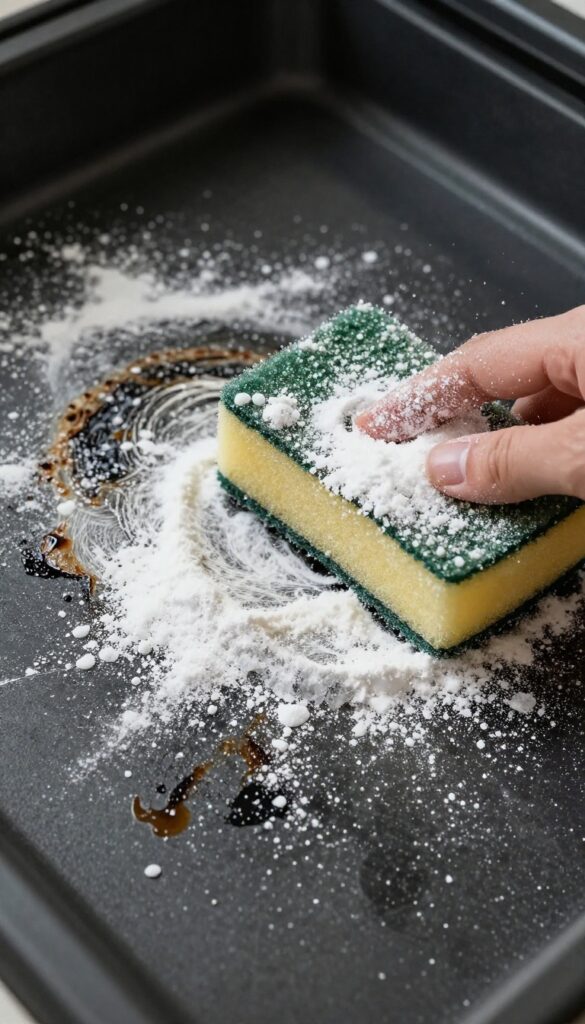
Sometimes a little grit is exactly what you need. When food has baked onto the oven floor or racks, a gentle abrasive scrub can lift it without scratching. Salt and baking soda together make a powerful yet safe combination that tackles stubborn spots fast.
Sprinkle salt and baking soda on a damp sponge to create a gentle abrasive scrub. Works wonders on burnt-on spots without damaging the surface.
Why This Combo Works
Baking soda is mildly alkaline, which helps break down grease and food particles. Salt adds extra abrasion without scratching, making it safe for enamel and glass surfaces. Together, they create a scrub that's tough on grime but gentle on your oven.
How To Apply The Scrub
Dampen a non-scratch sponge and sprinkle a generous amount of salt and baking soda directly onto it. Scrub the burnt-on areas in circular motions. For extra stubborn spots, let the mixture sit for 5–10 minutes before scrubbing again.
Rinse with a clean damp cloth.
Best Uses And Precautions
This method works great on oven floors, walls, and racks. Avoid using it on self-cleaning oven liners or non-stick surfaces, as the abrasion could damage them. Always test a small hidden area first.
8. Cream of Tartar for Stubborn Stains
Some oven stains just won't budge, no matter how hard you scrub. That's where cream of tartar comes in. This common baking ingredient is a mild acid that works wonders on baked-on messes.
Mixed into a paste, it targets discoloration and residue without scratching your oven's enamel surface.
Cream of tartar is a natural whitener and mild abrasive. When combined with water, it forms a paste that clings to vertical surfaces and dries slowly, giving it time to break down stains. It's especially effective on white or light-colored enamel interiors where dark spots stand out.
After the paste dries, simply wipe it away with a damp cloth, and the stains often come off with it.
How To Make The Paste
Mix equal parts cream of tartar and water—start with 2 tablespoons of each. Stir until it forms a thick, spreadable paste. If it's too runny, add more cream of tartar; if too thick, add a few drops of water.
Apply the paste directly to the stain using a spatula or your fingers (wear gloves).
Application Tips
Spread the paste in a thick layer over the stain. Let it sit for at least 30 minutes, but for stubborn spots, leave it overnight. The paste will dry and crack, which is normal.
Once dry, use a damp sponge or cloth to wipe it off. For extra toughness, gently scrub with a soft brush.
Why It Works So Well
Cream of tartar is potassium bitartrate, a byproduct of winemaking. Its mild acidity helps dissolve alkaline residues like baked-on grease and protein. Unlike harsh chemicals, it's non-toxic and safe for food surfaces.
It also leaves a clean, streak-free finish without strong odors.
9. Use a Razor Blade for Caked-On Gunk
Sometimes a good soak or baking soda paste just isn't enough. When you're facing thick, blackened crust that feels more like charcoal than food, it's time to bring out the big guns. A simple razor blade can be your best friend for those stubborn spots that refuse to budge.
The key is technique. Hold the blade at a very low angle—almost flat against the surface—and push gently. You're not trying to dig into the oven floor; you're just lifting the gunk away.
Always use a scraper designed for glass cooktops or a standard razor blade holder to keep your fingers safe. Work in small sections, and wipe away debris as you go. This method works wonders on the oven floor and sides, but avoid using it on enamel-coated surfaces that scratch easily.
Safety First
Before you start, make sure the oven is completely cool. Wear a thick glove or use a holder to protect your hand. Never use a dull blade—it can slip and cause injury.
Keep a damp paper towel nearby to collect the scraped-off bits.
Best Surfaces To Scrape
Razor blades work best on smooth, non-porous surfaces like the oven floor's ceramic or glass coating. Avoid using them on aluminum or painted interiors, as they can scratch. If you're unsure, test in a hidden corner first.
After Scraping, Wipe Down
Once you've removed the bulk of the gunk, follow up with a damp cloth or a mild cleaner to pick up any residue. This leaves your oven floor smooth and ready for the next use.
10. Oven Cleaner with Fume-Free Formula
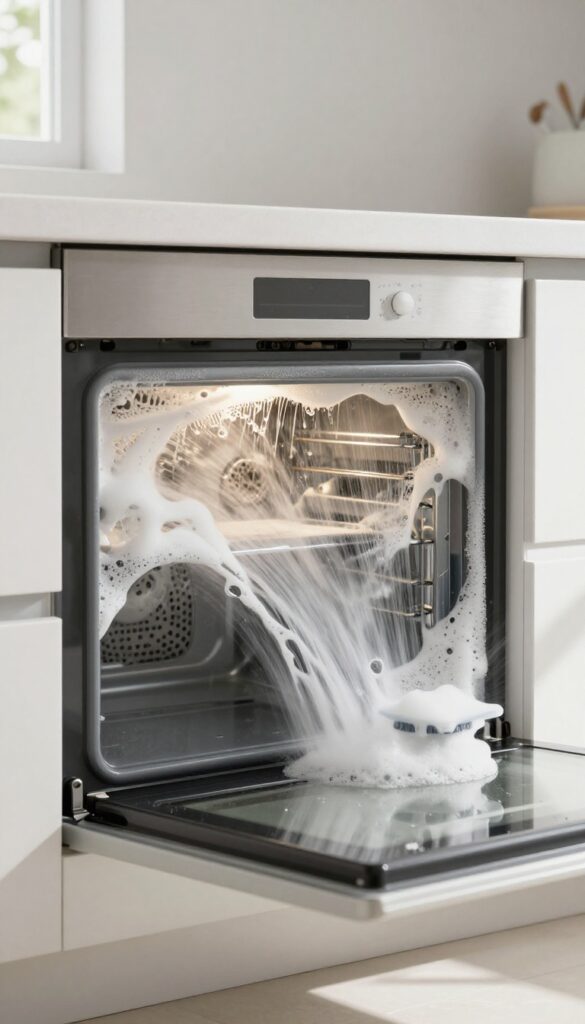
For those stubborn, baked-on messes that laugh at baking soda, a heavy-duty cleaner is your best bet. But you don't have to sacrifice fresh air for a clean oven. Fume-free formulas pack serious grease-cutting power without the overpowering chemical smell that lingers for days.
These cleaners work by breaking down carbonized grease and food residue on contact. The key is to choose a non-toxic, biodegradable option that's safe for you and your kitchen. Apply it generously, let it sit for the recommended time (usually 15-30 minutes), and then wipe away the grime with a damp cloth.
No scrubbing required.
How Fume-free Cleaners Work
Instead of harsh fumes, these cleaners use enzymes or plant-based solvents to dissolve grease. They're just as effective but without the headache-inducing odors. Simply spray or spread the gel, wait, and wipe.
Application Tips For Best Results
For maximum effectiveness, apply the cleaner to a warm (not hot) oven. The warmth helps activate the formula. Avoid using it on self-cleaning oven seals or heating elements.
Always wear gloves to protect your skin.
Top Brands To Try
Look for brands like Easy-Off Fume Free, Carbona Oven Cleaner, or Eco-Ver. Read labels to ensure it's non-toxic and biodegradable. These are widely available online or at grocery stores.
11. Line the Bottom with Aluminum Foil
One of the simplest ways to keep your oven clean is to stop messes before they start. A single sheet of aluminum foil on the bottom rack can save you from scrubbing baked-on drips. It's a passive trick that works while you cook.
Place a sheet of heavy-duty aluminum foil on the lowest oven rack, shiny side up. Make sure it's large enough to catch any spills or splatters from dishes above. The foil acts as a disposable liner—after cooking, just let it cool, then toss it and replace with a fresh sheet.
This method works best for foods that bubble over, like casseroles, pies, or roasted vegetables. Avoid using foil directly on the oven floor, as it can trap heat and damage the heating element. Stick to the rack for safe, effective protection.
Why It Works
Aluminum foil creates a barrier between your food and the oven surface. Drips land on the foil instead of baking onto the enamel. Since you replace it after each use, there's never a chance for buildup.
It's a zero-effort way to maintain a clean oven.
Pro Tips For Best Results
Use heavy-duty foil to prevent tearing. Cut it slightly larger than your dish to catch stray splatters. For extra protection, crimp the edges to form a shallow tray.
Never cover the entire rack—leave gaps for air circulation to avoid uneven cooking.
When To Skip This Trick
Avoid using foil on the oven floor or near the heating element—it can cause fire hazards or damage. Also, skip it for broiling, as high heat can melt foil onto the oven. Stick to the middle or lower rack for regular baking and roasting.
12. Use a Silicone Mat for Easy Cleanup
A silicone baking mat isn't just for cookies. Place one on the lower rack before you bake anything that might bubble over or drip. It catches spills as they happen, so your oven stays clean.
Silicone mats are heat-resistant up to 500°F and non-stick, making them perfect for catching messes. After baking, just let the mat cool, then wash it in the sink with soap and water. No scrubbing required.
The mat protects the oven floor from drips and spills, so you don't have to deal with baked-on crud later. It's a simple preventive step that saves hours of cleaning.
Why Silicone Works So Well
Silicone is flexible, non-porous, and easy to wipe clean. Unlike foil, it won't tear or leave residue. And unlike a metal pan, it can conform to the rack's shape, catching drips from all angles.
Where To Place The Mat
Put the mat on the lowest rack, directly under whatever you're baking. For extra protection, you can also place one on the rack below a casserole dish or pie. Just make sure the mat doesn't block airflow.
Cleaning The Mat
Once the mat has cooled, rinse it under hot water and scrub gently with a sponge. Stubborn spots can be soaked in warm, soapy water for a few minutes. The mat dries quickly and is ready to use again.
13. Self-Cleaning Cycle – Use It Wisely
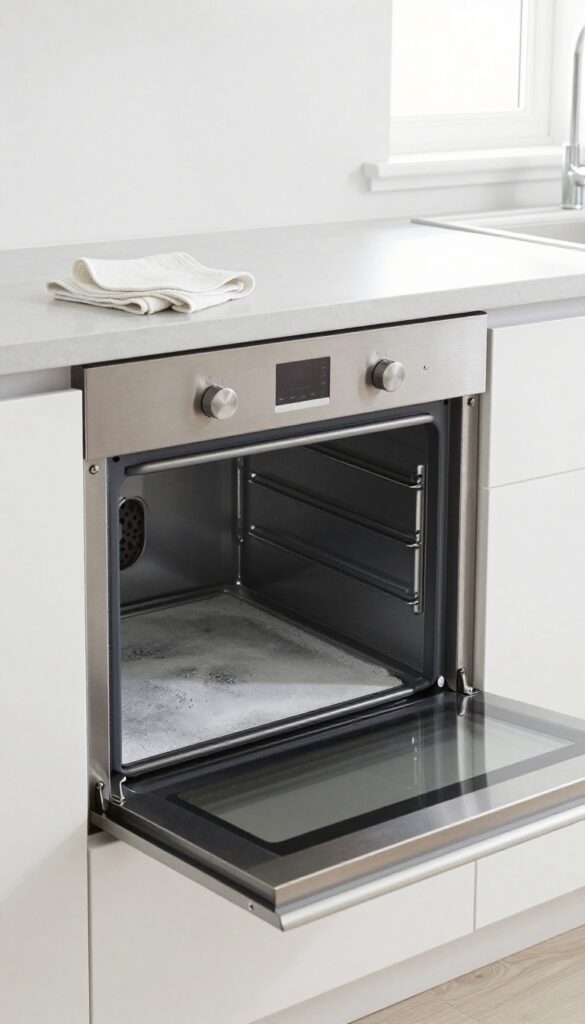
Your oven's self-cleaning feature can be a real timesaver, but it's not something you want to use every week. When used correctly, it burns off food residue at high heat, leaving only ash behind. The key is knowing when to run it and how to handle the aftermath without damaging your oven.
The self-cleaning cycle heats your oven to around 800°F, turning spills into ash. Once the cycle finishes and the oven cools, simply wipe away the ash with a damp cloth. But be careful: using this cycle too often can wear down heating elements and damage door seals.
Reserve it for heavy buildup, not routine maintenance. Also, never use oven cleaners or liners during a self-clean—they can cause smoke or damage.
When To Hit The Button
Only run the self-cleaning cycle when you have significant baked-on messes, like a casserole overflow or a pie spill. For light splatters, stick to steam cleaning or a baking soda paste. Frequent self-cleaning can shorten your oven's lifespan, so save it for the tough stuff.
Prep Your Oven First
Before starting, remove all racks, pans, and any aluminum foil. Wipe out loose debris to reduce smoke. Make sure the kitchen is well-ventilated—open a window and turn on the exhaust fan.
The cycle can produce strong odors and heat, so keep pets and kids away.
After The Cycle Ends
Let the oven cool completely before opening the door. Then, use a damp microfiber cloth to wipe up the ash. Avoid using any cleaning sprays or abrasive pads—they can react with the residue.
For stubborn ash spots, a little water on the cloth is all you need.
14. Baking Soda and Hydrogen Peroxide for Tough Spots
Some stains just won't budge with a simple baking soda scrub. That's where hydrogen peroxide steps in to save the day. When combined, these two pantry staples create a powerful paste that tackles even the most stubborn baked-on spots.
The peroxide acts as a mild bleaching agent, breaking down burnt-on food while the baking soda provides gentle abrasion. Together, they work like a charm without any harsh fumes.
For those stubborn, crusty patches that seem welded to your oven, this paste is your secret weapon. It's safe, effective, and uses ingredients you probably already have.
Making The Paste
In a small bowl, mix three parts baking soda with one part hydrogen peroxide. Stir until it forms a thick, spreadable paste. It should be like toothpaste—not too runny or too dry.
Application And Wait Time
Apply the paste directly to the tough spots using a spatula or your fingers (wear gloves if you prefer). Spread it generously over the stain. Let it sit for at least an hour—overnight is even better for really old grime.
Scrubbing And Rinsing
After the wait, dampen a sponge or soft scrub brush and gently scrub the area. The paste will have loosened the gunk, so it comes off easily. Wipe away residue with a damp cloth.
Repeat if needed for extra stubborn spots.
15. Use a Spray Bottle with Vinegar and Dish Soap
Vinegar and dish soap are a powerhouse duo for cutting through oven grease. Mixing them in a spray bottle creates a solution that loosens grime without harsh chemicals. Just spray, wait, and wipe—it's that simple.
Combine equal parts white vinegar and dish soap in a spray bottle. Shake gently to mix. Spray generously on greasy areas, especially the oven door and walls.
Let it sit for 15 minutes to break down the grease. Then wipe clean with a damp cloth or sponge. For stubborn spots, scrub gently with a non-abrasive pad.
Rinse with water and dry.
Why This Combo Works
Vinegar is acidic and cuts through grease naturally, while dish soap lifts and emulsifies oils. Together, they create a powerful cleaner that's safe for most oven surfaces. No need for store-bought degreasers.
Best Uses
This spray is ideal for light to moderate grease buildup on oven walls, door glass, and racks. It's also great for spot-cleaning spills before they bake on. Avoid using on self-cleaning oven seals or aluminum surfaces.
Pro Tips For Best Results
Heat the oven slightly (warm, not hot) before spraying to activate the vinegar. Let the solution sit longer for tough stains. Use a microfiber cloth for streak-free shine.
Rinse thoroughly to avoid vinegar smell.
16. Steam Clean with a Wet Towel
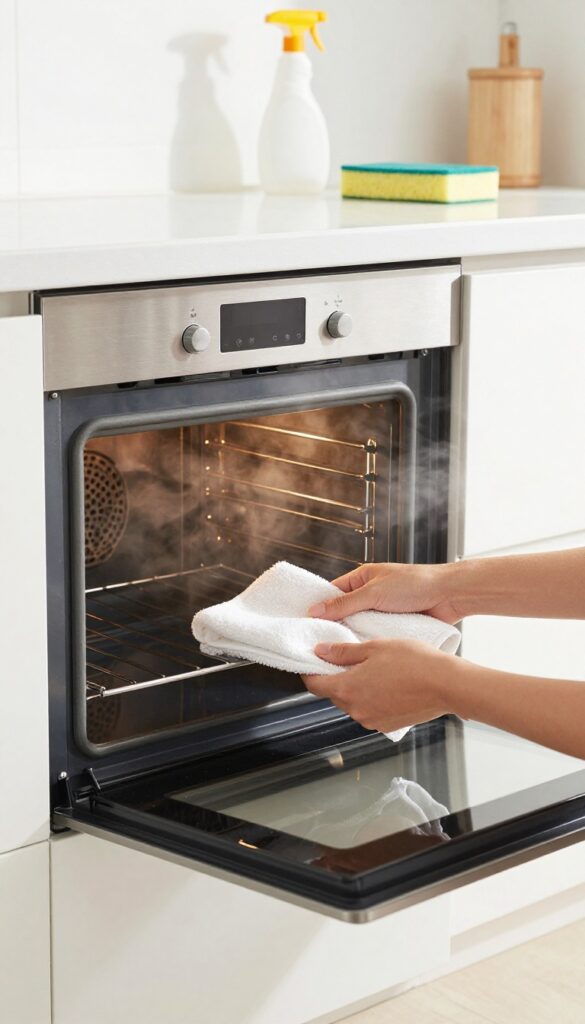
Steam is a powerful, chemical-free way to loosen baked-on grease and food residue. This method uses just a towel and water to get your oven cleaner with minimal effort. The heat turns the water into steam, which softens the grime so you can wipe it away easily.
This technique works best for light to moderate buildup. It's a great quick fix before a deeper clean or when you just need to freshen up the oven. The towel traps the steam, creating a localized sauna effect that targets stubborn spots.
What You'll Need
Grab a thick, clean towel (an old bath towel works perfectly) and soak it with water. Wring it out so it's damp, not dripping. You don't want water pooling in the oven.
Also, make sure the oven is cool before you start.
Step-by-step
Place the damp towel on the oven rack where the mess is worst. Close the oven door and set the temperature to 250°F. Let it heat for 20 minutes.
The steam will soften the grime. After 20 minutes, turn off the oven and let it cool slightly. Use the towel (careful, it's hot) to wipe away the loosened residue.
Repeat if needed.
Pro Tips
For extra stubborn spots, add a few drops of dish soap to the towel before placing it in the oven. You can also target specific areas by positioning the towel directly over tough stains. Always let the oven cool before wiping to avoid burns.
17. Use a Plastic Scraper to Avoid Scratches
Metal scrapers and steel wool might seem like the quickest way to remove burnt-on gunk, but they leave behind scratches that make future cleaning harder. Those tiny grooves trap grease and food particles, creating a rough surface that stains more easily. A simple plastic scraper is the smarter, gentler alternative.
Plastic scrapers are designed to be firm enough to lift baked-on residue but soft enough to protect your oven's enamel or glass. They're especially useful for cleaning the oven door window without leaving permanent marks. Use a plastic scraper in combination with a baking soda paste or a commercial oven cleaner for best results.
Why Plastic Works Better
Unlike metal, plastic won't gouge the smooth surface of your oven. It glides over the enamel, prying off carbonized spills without damaging the finish. This keeps your oven looking new and prevents future grime from sticking to rough patches.
How To Use A Plastic Scraper
First, apply your cleaning solution and let it sit for 10-15 minutes to soften the grime. Then hold the scraper at a 45-degree angle and gently push it forward. Work in small sections, wiping away debris as you go.
Rinse the scraper often to avoid smearing residue back onto the surface.
Where To Find A Good Plastic Scraper
Most hardware stores or kitchen supply shops carry plastic scrapers, often in a set with different blade widths. You can also use a plastic putty knife from the paint aisle. Avoid any scraper with a metal blade or sharp edges, as those can still cause scratches.
18. Soak Oven Racks in Hot Water and Dish Soap
Oven racks often bear the brunt of spills and splatters. Instead of scrubbing them inside the oven, pull them out and let a hot bath do the heavy lifting. This overnight soak method is almost effortless and yields sparkling results.
Remove the racks and place them in a large bathtub or a heavy-duty trash bag. Fill with hot water and add a generous squirt of dish soap. Let them soak overnight.
In the morning, wipe or scrub gently with a sponge—the grime slides right off. Rinse and dry before sliding back into the oven.
Why This Works
Hot water loosens baked-on grease, while dish soap breaks down oil molecules. The long soak gives the solution time to penetrate tough residue, so you barely need to scrub.
Best Setup For Soaking
If your racks are too long for the sink, use a bathtub or a large plastic bin. For a trash bag method, place racks inside, add water and soap, tie the bag, and let it sit. Just be sure the bag is leak-proof.
After-soak Care
Once clean, dry racks thoroughly to prevent rust. If any spots remain, a paste of baking soda and water can tackle them. Rinse again and they're good as new.
19. Use a Dryer Sheet for Burnt-On Grease
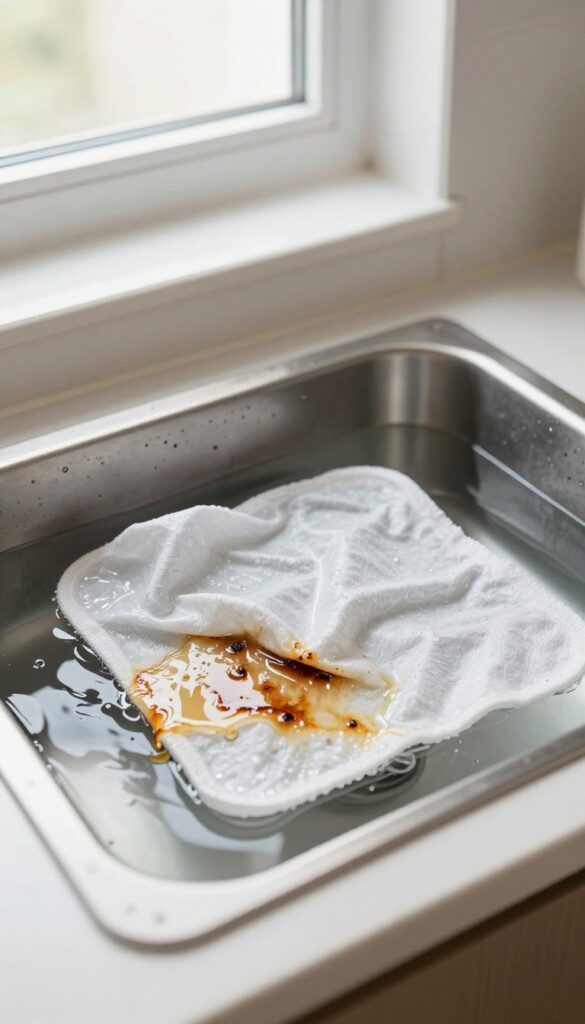
Burnt-on grease can feel impossible to remove, but a humble dryer sheet might be your new best friend. The fabric softener contains surfactants that help loosen stubborn residue without harsh scrubbing. It's a surprisingly effective trick that requires almost no effort.
This method works best on fresh to moderate burnt-on spots. For older, crustier stains, you may need to repeat the process or combine it with another technique.
How It Works
Dryer sheets are coated with softening agents that break down grease and food particles. When soaked in warm water, these chemicals become activated and help lift the grime from the oven surface. The sheet also provides a gentle abrasive action when you wipe.
Step-by-step Instructions
Wet a dryer sheet with warm water and place it directly over the greasy spot. Let it sit for 20 minutes to allow the softener to penetrate. Remove the sheet and wipe the area with a damp cloth or sponge.
Rinse and repeat if needed.
Tips For Best Results
Use unscented or lightly scented sheets to avoid leaving a strong fragrance in your oven. Make sure the oven is cool before applying. For vertical surfaces, press the sheet firmly so it stays in place.
This trick also works on glass oven doors.
20. Ammonia Fumes for Deep Cleaning
Ammonia isn't just for windows. When used correctly, its fumes can loosen the toughest baked-on grime without you lifting a finger. This method is perfect for when you need a deep clean but want to avoid hours of scrubbing.
This technique relies on the power of ammonia vapors to soften stubborn residue overnight. It's a set-it-and-forget-it approach that delivers impressive results with minimal effort.
How It Works
Ammonia releases strong fumes that break down grease and carbonized food. By placing a bowl inside a sealed cold oven, the vapors circulate and soften the grime, making it easy to wipe away the next morning.
Step-by-step Instructions
Remove oven racks and place a small glass bowl with ½ cup of ammonia on the top shelf. Close the oven door and leave it overnight (at least 8 hours). The next day, open the oven and let it air out for 15 minutes.
Then wipe down surfaces with a damp cloth. For stubborn spots, use a non-abrasive sponge.
Safety Tips
Always work in a well-ventilated area. Wear gloves and avoid inhaling fumes. Keep ammonia away from children and pets.
Never mix ammonia with bleach or other cleaners.
21. Use a Magic Eraser on Glass and Enamel
A Magic Eraser isn't just for crayon marks on walls. Dampen one and gently rub the oven's glass door or enamel interior. The melamine foam acts like micro-fine sandpaper, lifting light stains and grease without harsh chemicals.
It's a quick, low-effort fix for everyday grime.
Why It Works
Melamine foam is made of incredibly fine fibers that create friction on a microscopic level. When dampened, it gently abrades dirt and grease, removing them without scratching most surfaces. It's especially effective on smooth, non-porous surfaces like oven glass and enamel.
How To Use It
Dip a Magic Eraser in water and squeeze out excess so it's damp, not dripping. Gently rub the stained area in circular motions. Rinse the eraser frequently to avoid spreading grease.
Wipe the surface with a clean, damp cloth afterward to remove any residue. No soap needed.
When To Skip It
Avoid using a Magic Eraser on textured or matte finishes, as it can cause dullness. Test on a small hidden area first. For heavy baked-on spills, try a paste of baking soda and water or a commercial cleaner.
The eraser is best for light to moderate stains.
22. Cornstarch Paste for Greasy Spills
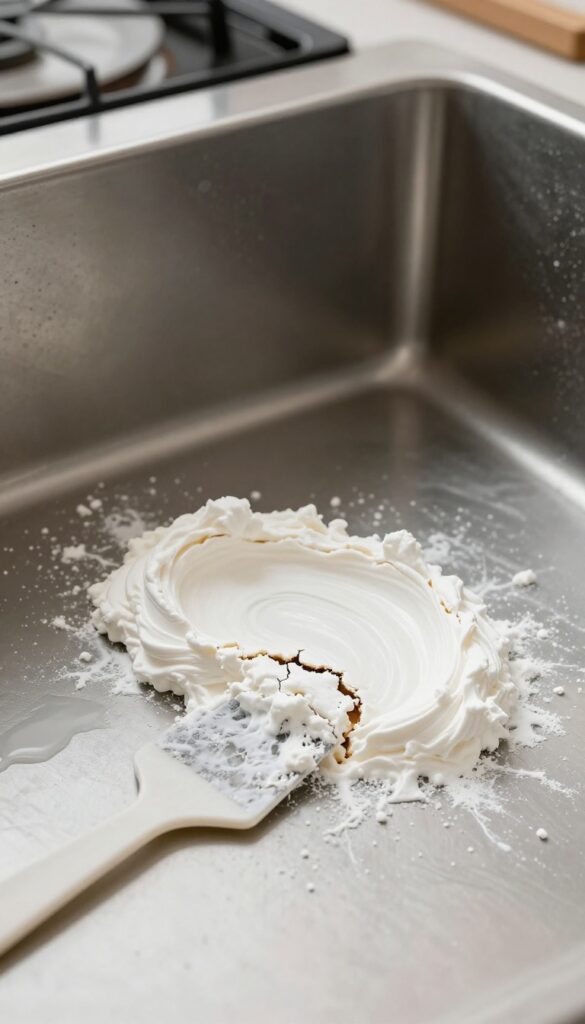
Greasy spills in the oven can be stubborn, but cornstarch offers a simple fix. This pantry staple absorbs oil like a sponge, making cleanup a breeze. You don't need harsh chemicals—just cornstarch and water.
Cornstarch paste works wonders on fresh or baked-on grease. It's gentle on surfaces but tough on oil. Here's how to use it effectively.
How To Make The Paste
Mix equal parts cornstarch and water in a small bowl. Stir until you get a thick, spreadable paste. Adjust the ratio if needed—add more cornstarch for thicker consistency, more water if it's too stiff.
Application And Waiting Time
Spread the paste over the greasy spill with a spatula or your fingers (wear gloves). Make sure it's thick enough to cover the stain completely. Let it sit for 15 to 20 minutes, or until the paste dries and cracks.
The cornstarch absorbs the grease during this time.
Scraping Off The Residue
Once dry, use a plastic scraper or a spatula to lift the paste off. The grease comes with it, leaving a clean surface. For any leftover bits, wipe with a damp cloth.
No scrubbing needed.
23. Use a Toothbrush for Crevices and Edges
An old toothbrush reaches tight spots around the door seal and corners. Dip in baking soda paste and scrub to remove hidden grime. It’s a simple tool that makes a big difference in hard-to-reach areas.
Why A Toothbrush Works
The bristles are firm enough to scrub but soft enough not to scratch. The small head fits into narrow gaps where sponges can't go. Plus, you can angle it to get into corners and along the door seal.
How To Make The Paste
Mix baking soda with a little water until it forms a thick paste. Add a drop of dish soap for extra grease-cutting power. Dip the toothbrush into the paste and start scrubbing the crevices.
Where To Focus
Pay special attention to the door seal, where crumbs and grease build up. Also hit the corners of the oven floor and around the heating element. These spots often get neglected but collect the most grime.
24. Wipe Down After Each Use
Getting into the habit of wiping your oven after every use is a game-changer. While the oven is still warm, a quick pass with a damp cloth lifts spills before they have a chance to bake on. This simple step slashes the time you spend on deep cleaning later.
Make it a routine to grab a damp cloth as soon as you finish cooking. The residual heat softens food residue, making it easy to wipe away. Focus on the bottom and sides where splatters tend to land.
For tougher spots, a drop of dish soap on the cloth helps. This habit takes less than a minute but saves you hours of scrubbing down the road.
Why Warm Works Best
Heat is your ally here. When the oven is warm, grease and food particles are still loose. Once they cool and harden, they bond to the surface.
Wiping while warm prevents that bond from forming. Just make sure the oven isn't scorching hot—let it cool for a few minutes after turning it off so you don't burn yourself.
What To Use
A microfiber cloth is ideal because it traps grime without leaving lint. Dampen it with warm water—no need for harsh cleaners. For sticky spots, add a tiny squirt of mild dish soap.
Avoid abrasive sponges or scrub pads that can scratch the enamel. Keep a dedicated cloth near the oven so you're always ready.
When To Skip This Step
If you've used the self-cleaning cycle or if there's a large spill that's already burned on, a damp wipe won't cut it. In those cases, wait and use a deeper cleaning method later. But for everyday cooking, this quick wipe keeps your oven in great shape with minimal effort.
25. Use a Commercial Oven Cleaner with Caution
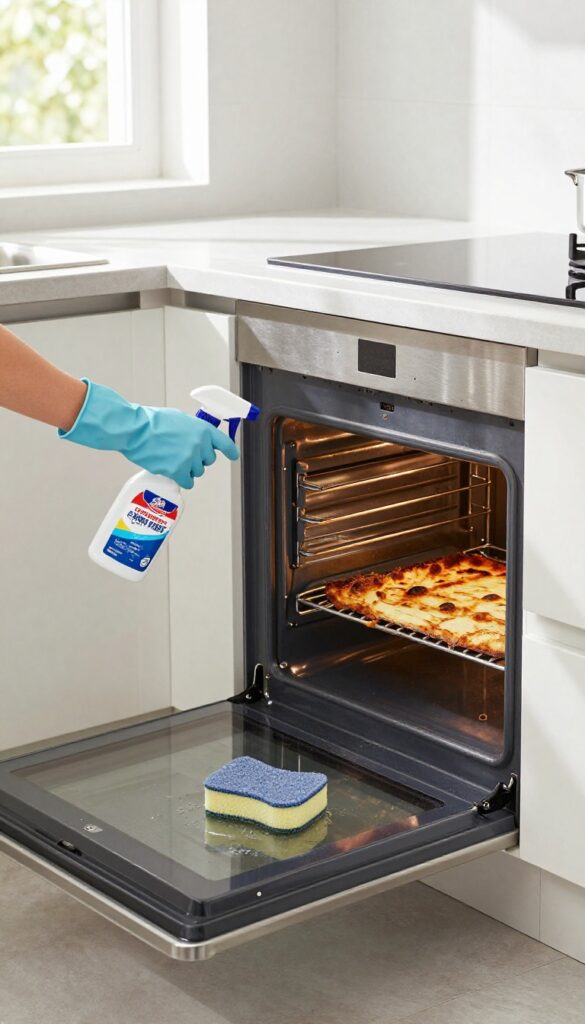
Sometimes the natural methods just don't cut it. When you're facing a thick, baked-on crust that laughs at baking soda and vinegar, it's time to bring in the big guns. Commercial oven cleaners are powerful, but they demand respect.
These heavy-duty formulas are designed to dissolve the toughest grease and carbon deposits in minutes. However, they contain strong chemicals like sodium hydroxide that can irritate skin and lungs. Always follow the label instructions to the letter.
Gear Up First
Before you spray, put on rubber gloves and safety glasses. Open windows and turn on the exhaust fan. The fumes are no joke.
Keep kids and pets out of the kitchen during application.
Apply And Wait
Spray the cleaner evenly on cold surfaces. Avoid heating elements and the fan. Let it sit for the time specified on the can—usually 20 to 30 minutes.
Don't let it dry out.
Wipe And Rinse
After the wait, wipe away the loosened grime with a damp sponge. Rinse repeatedly with clean water to remove all chemical residue. A vinegar-water wipe helps neutralize any leftover alkalinity.
Final Safety Check
Before using the oven, run it at 350°F for 15 minutes to burn off any remaining fumes. If you smell chemicals, stop and rinse again. Your oven should be odor-free before cooking.
FAQ
How often should I clean my oven?
Light cleaning after each use prevents buildup. A deep clean every 3-6 months keeps your oven in good condition, depending on usage.
Can I use baking soda and vinegar together?
Yes, but use them separately. Baking soda paste first, then spray vinegar to activate. The fizzing helps lift grime, but don't mix them in a sealed container.
Is it safe to use ammonia in the oven?
Ammonia can be effective but requires caution. Use in a well-ventilated area, avoid mixing with bleach, and wear gloves. Never heat ammonia in the oven.
How do I clean the oven door glass?
Use a pumice stone or baking soda paste on the glass. For tough spots, a razor blade at a low angle works. Avoid abrasive pads that scratch.
What should I avoid when cleaning an oven?
Avoid harsh abrasives like steel wool, which scratch surfaces. Don't use oven cleaner on self-cleaning oven seals, and never spray electrical components.
Conclusion
Cleaning your oven doesn't have to be a dreaded task. With these 25 tips, you can tackle grease and grime using simple ingredients and smart techniques. From steam cleaning to natural pastes, each method reduces scrubbing and saves time.
Pick a few tips that fit your needs and make them part of your routine. Your oven will stay cleaner longer, and you'll spend less effort on maintenance. A sparkling oven is just a few easy steps away.