13 Living Room Wall Art Ideas Adding Curated Personality
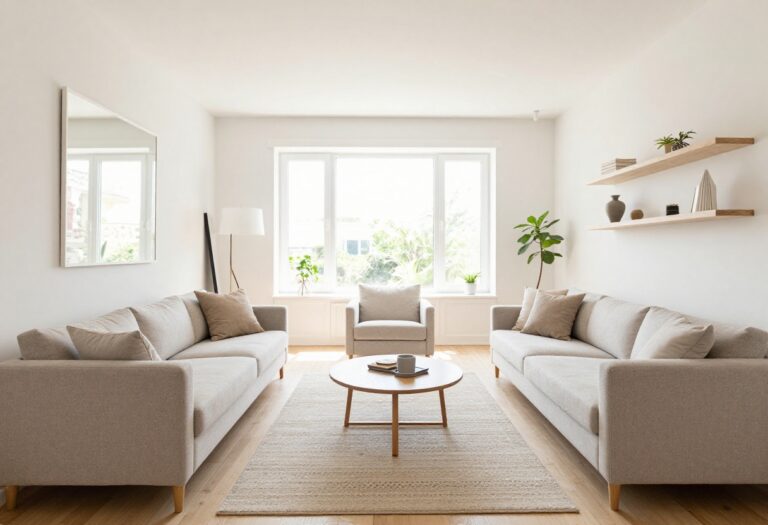
Blank walls can make even the nicest living room feel unfinished. But filling them with art doesn't have to mean spending a fortune or hunting down rare pieces. With a little creativity, you can build a wall display that feels personal, polished, and perfectly you.
The key is to think beyond traditional framed prints. Mix in objects, textures, and DIY touches that tell your story. Whether you're working with a tiny rental or a spacious family room, these ideas keep your budget happy and your walls interesting.
Ready to give your living room walls some love? Here are 13 wall art ideas that prove style and savings can absolutely go together.
1. Gallery Wall with Thrifted Frames
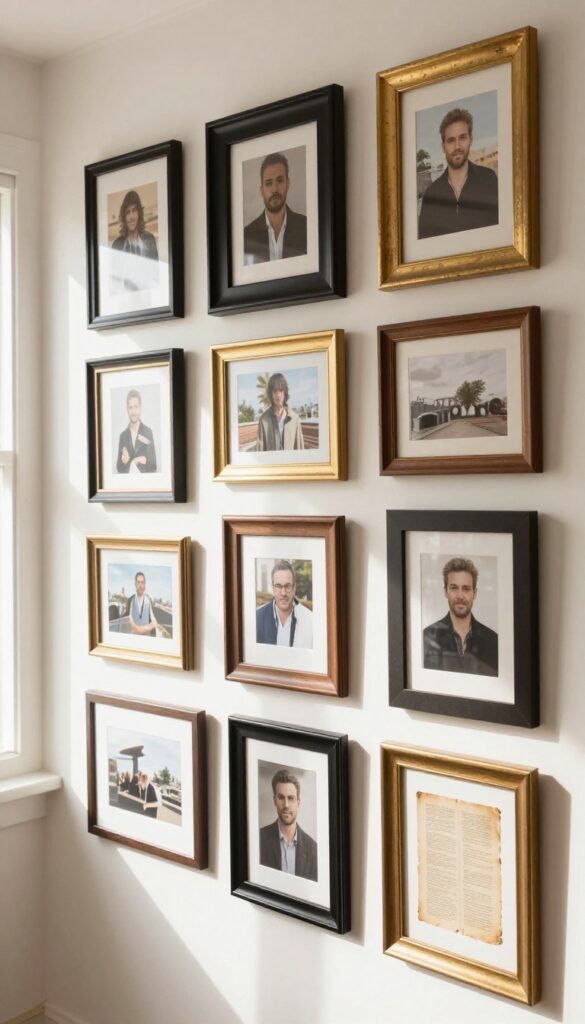
A gallery wall is one of the easiest ways to turn a blank wall into a conversation starter. By using thrifted frames, you keep costs low and add instant character—no two frames will ever look exactly the same. The trick is to mix shapes and sizes, then decide whether to unify them with paint or let their original finishes shine.
Start by collecting frames from thrift stores, garage sales, or even flea markets. Look for interesting details like carved wood, chipped gold leaf, or unusual shapes. Once you have a good stack, lay them out on the floor to plan your arrangement.
For a cohesive look, spray paint all the frames the same color—matte black or warm brass work well. If you prefer an eclectic vibe, keep them as-is and use the artwork to tie everything together. Fill the frames with personal photos, vintage postcards, or pages cut from old books.
The mix of textures and tones creates a curated, collected-over-time feel that instantly warms up a living room.
Best Colors For A Unified Look
If you want a polished gallery wall, painting all frames the same color is a game-changer. Black, white, or a muted gold creates a cohesive backdrop for any artwork. For a softer feel, try sage green or dusty blue—these tones blend well with neutral walls and add a subtle pop of color.
Layout Tip For Easy Hanging
Avoid the headache of measuring by tracing each frame onto kraft paper, cutting out the shapes, and taping them to the wall. Move the paper templates around until the arrangement feels balanced. Then just hammer nails through the paper—no math required.
Budget-Friendly Swap
- Can't find enough frames? Thrift stores often sell framed mirrors or art that you can repurpose. Remove the original contents and replace with your own.
- You can also use clip frames or simple wooden frames from dollar stores and paint them for a custom look.
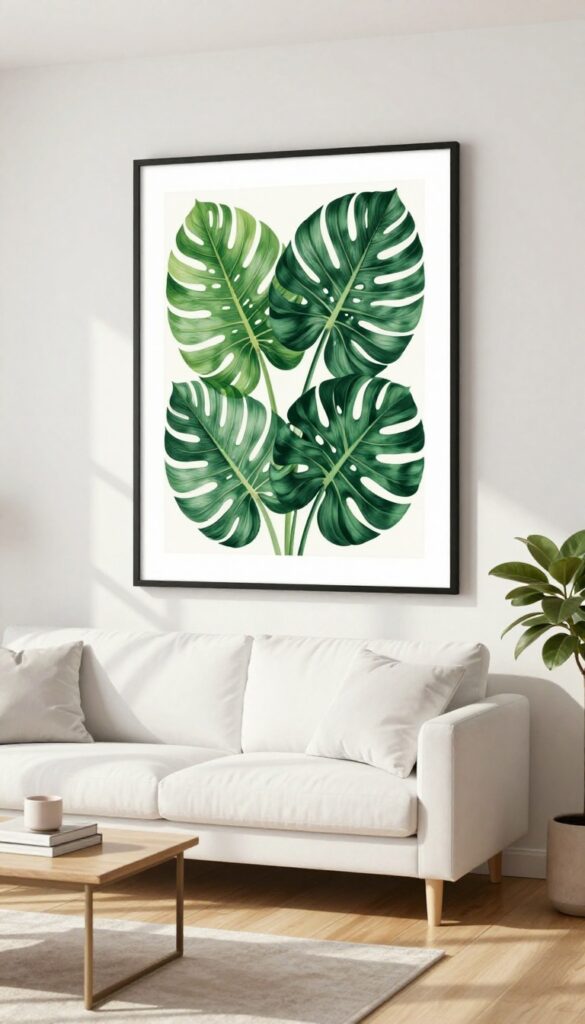
2. Oversized Wall Decals
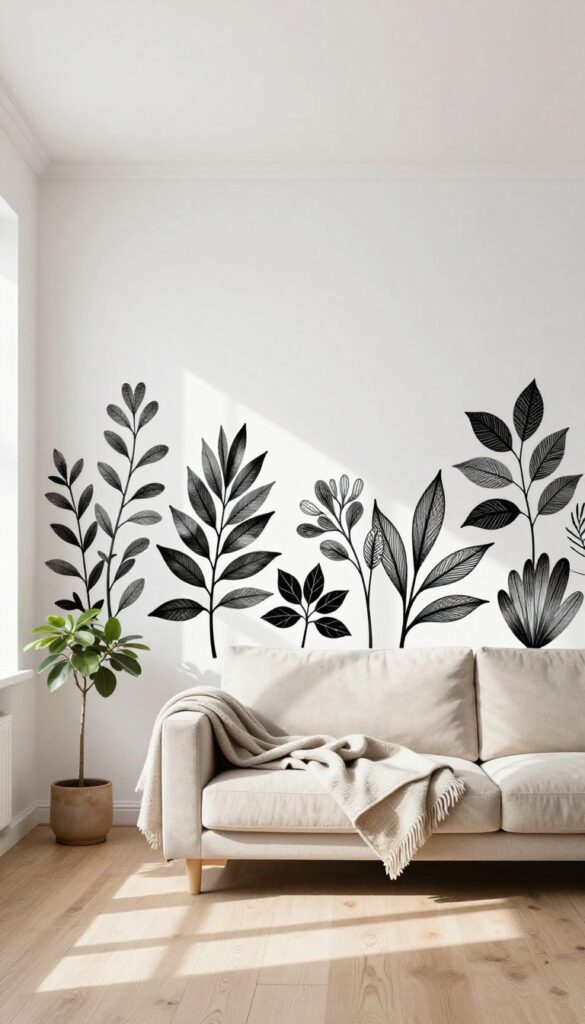
Peel-and-stick decals have come a long way from those tiny stars you stuck on a dorm room ceiling. Today’s oversized wall decals are bold, sophisticated, and surprisingly easy to live with. They give you the look of a mural or large-scale art without the commitment or cost.
Best of all, they’re renter-friendly—no paint, no nails, no landlord drama.
Choose a large botanical, abstract shape, or a meaningful quote to fill a blank wall with personality. Decals cost a fraction of a painted mural and take minutes to apply. They also remove cleanly when you’re ready for a change, making them perfect for apartments or anyone who likes to refresh their space often.
For maximum impact, go big—a decal that spans at least half the wall width creates a focal point that feels intentional and curated.
Best Placement
The most effective spot is a wall that’s visible as soon as you enter the room, like the one behind a sofa or opposite the main seating area. Avoid placing decals behind furniture that will block the view. A clear, uncluttered wall lets the decal breathe and become the star.
Style Pairing
Match the decal’s vibe to your room’s style. A black-and-white abstract shape works in modern or minimalist spaces, while a leafy botanical adds warmth to boho or Scandinavian rooms. For a playful touch, try a decal that mimics a gallery wall—like several small framed shapes arranged in a cluster.
Application Tip
Before sticking, clean the wall with a damp cloth and let it dry completely. Use a credit card or squeegee to smooth out air bubbles from the center outward. If the decal is huge, consider having a friend help you hold and position it so it stays straight.
3. DIY Abstract Canvas Art
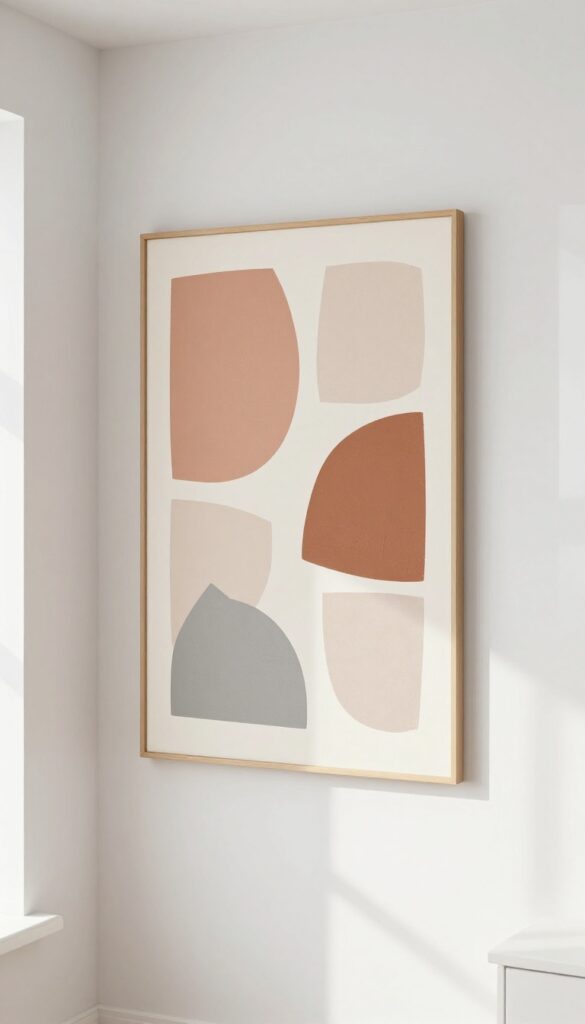
Blank walls can feel a little intimidating, especially when you're working with a tight budget. But you don't need a gallery budget to get gallery-worthy art—just a trip to the craft store and a free afternoon. DIY abstract canvas art is one of those projects that looks way more expensive than it actually is, and it gives you total control over the colors and scale.
Grab a cheap canvas (or a few) and some acrylic paint in colors that tie into your room's palette. Painter's tape is your best friend here: use it to mask off sharp geometric shapes, then peel it away for crisp lines. Or try a simple pour technique—just mix paint with a pouring medium, pour it over the canvas, and tilt to cover.
No artistic skill required, just a little patience and a steady hand. The result is a custom piece that looks like it cost ten times what you spent.
Best Color Combos
Stick with two or three colors from your existing decor for a cohesive look. Neutrals like beige, taupe, and cream feel sophisticated, while a pop of navy or emerald adds depth. If your room leans warm, try terracotta and blush; for cool tones, go with slate blue and soft gray.
Finishing Touch
Once the paint is dry, consider adding a subtle texture with a palette knife or a dry brush. A light sanding between layers can soften edges and give the canvas a more polished, gallery-like feel. Hang it at eye level, and group smaller canvases in a grid for maximum impact.
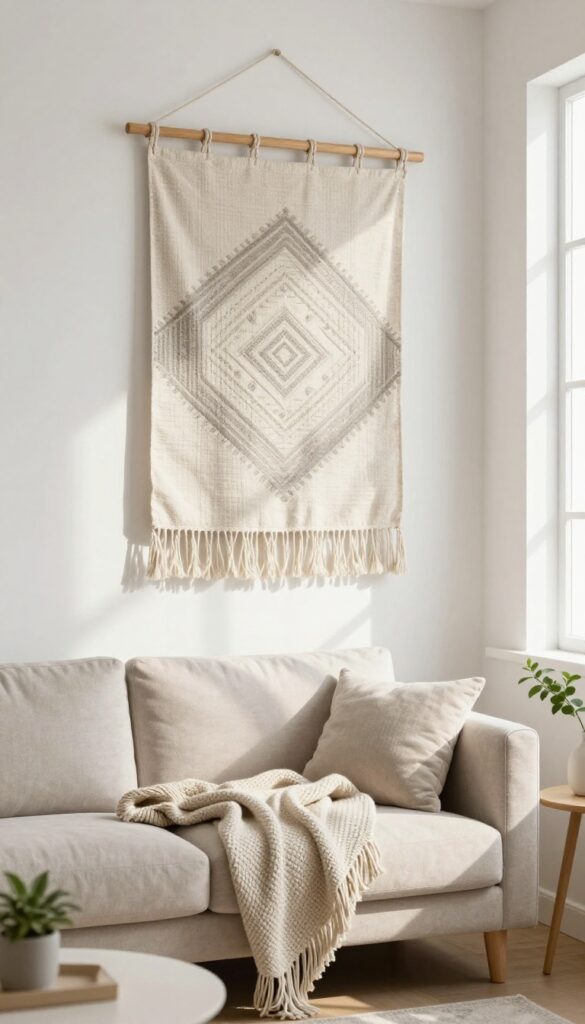
4. Fabric Wall Hangings
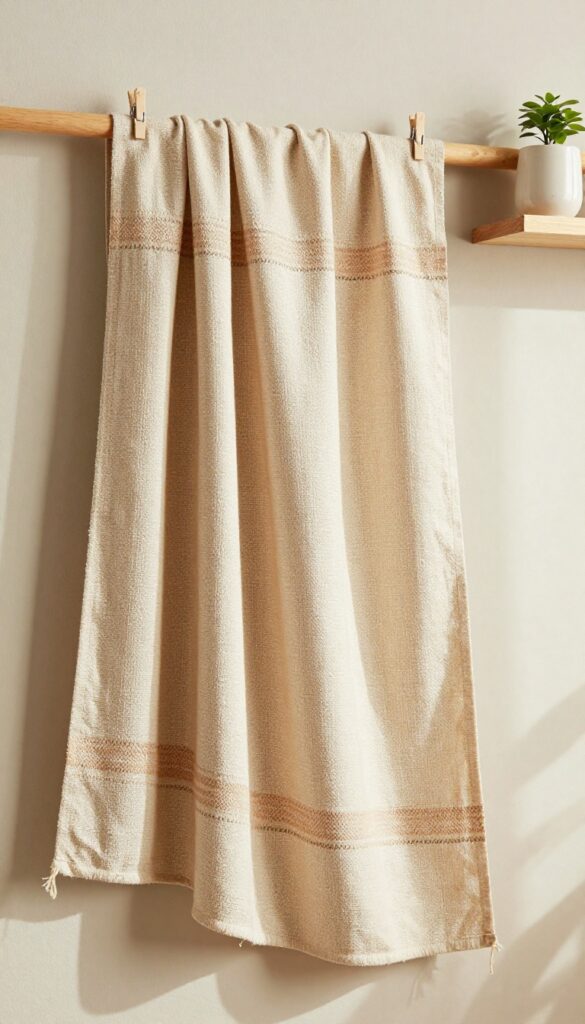
Soft textiles on the wall instantly warm up a room and add a layer of personality that feels collected over time. A fabric hanging breaks up the hard surfaces and brings in pattern and texture without the commitment or cost of a large framed piece. Whether it's a vintage scarf, a piece of embroidered fabric, or a woven textile, this idea feels approachable and easy to swap out when your mood changes.
Drape a vintage scarf, a piece of embroidered fabric, or a woven textile over a wooden dowel. Secure with tacks or clips. It adds softness and pattern without the cost of a framed piece.
This works especially well in living rooms where you want a focal point that feels relaxed and personal. The fabric brings in color and texture that can tie together other soft furnishings like throw pillows or a rug.
Best Fabrics To Try
Look for lightweight woven textiles like vintage kilim scraps, cotton scarves with bold prints, or even a linen tea towel with a hand-embroidered detail. Heavier fabrics like a wool blanket or a tapestry can also work, but make sure the dowel is sturdy enough. The key is choosing something with a pattern or color that echoes other elements in the room.
Hanging And Styling Tips
- Use a simple wooden dowel or a brass curtain rod for a more polished look. Attach the fabric with small clips or tacks so you can easily change it out. Hang it at eye level, and consider pairing it with a small shelf or a single sconce to create a vignette.
- Keep the rest of the wall minimal so the fabric remains the star.
Budget-Friendly Swap
- If you don't have a vintage scarf or textile, check thrift stores or your own closet. An old silk scarf or a piece of fabric from a sewing project can work perfectly. You can also use a flatweave placemat or a cotton napkin with a nice pattern.
- The dowel can be a simple branch from outside or a cheap wooden rod from a craft store.
5. Framed Wrapping Paper or Wallpaper Samples
A single piece of paper can do more for your walls than you might expect. Buy a roll of beautiful wrapping paper or a wallpaper remnant, cut it to size, and pop it into an inexpensive frame. The result looks custom and intentional, not like a last-minute craft project.
It’s a clever way to add pattern, color, or a subtle texture without committing to a whole wall of wallpaper.
This idea works especially well in living rooms where you want a curated gallery wall or a standout piece without the price tag of original art. Choose a wrapping paper with a bold botanical print, geometric pattern, or even a marble effect. Wallpaper remnants work great too—many home improvement stores sell single panels or leftovers at a deep discount.
The frame can be a simple black or white one from a big-box store, or you can go thrifted for extra character. Under $20 and you have a piece that looks like it came from a boutique.
Best Patterns To Try
- Stick with patterns that have a clear repeat or a large-scale motif—tiny all-over prints can look busy when framed. Think oversized florals, abstract brushstrokes, or a classic stripe. If you want a more subtle look, try a textured paper like a faux linen or a metallic foil.
- The key is to choose something that complements your existing decor, not competes with it.
Framing And Placement Tips
- Use a frame with a mat to give the paper some breathing room—it instantly feels more polished. For a gallery wall, mix framed papers with a few small mirrors or personal photos. In a small living room, one large framed paper above a sofa makes a strong focal point without overwhelming the space.
- Keep the glass clean and avoid direct sunlight to prevent fading over time.
6. Macrame or Rope Art
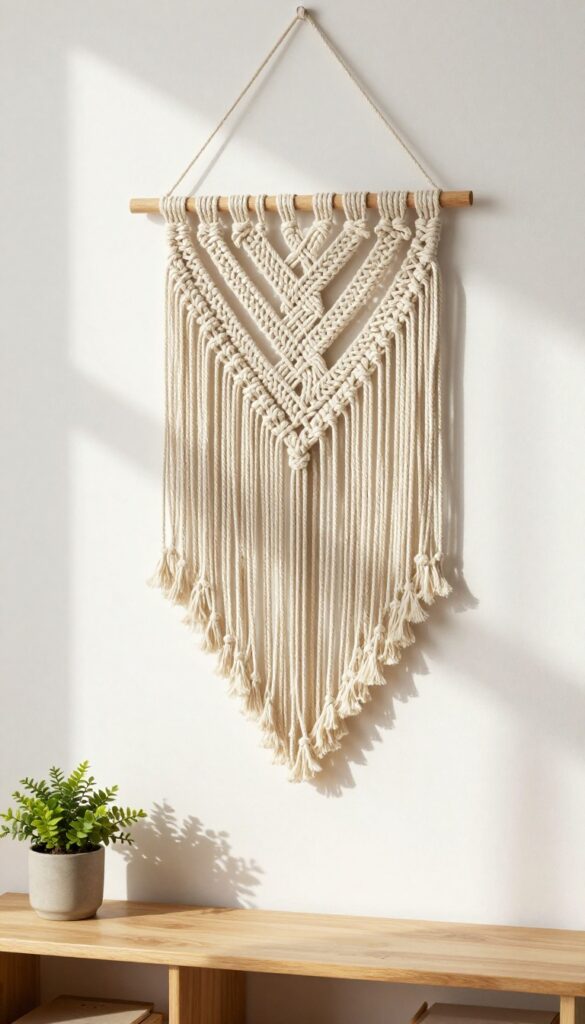
Macrame wall hangings bring a soft, handmade feel to any room without costing a fortune. With just a few basic knots, cotton rope, and a wooden ring or dowel, you can create a custom piece that adds boho texture and instant personality. It’s one of those projects that looks way more expensive than it actually is, and it’s surprisingly forgiving for beginners.
Macrame art is perfect for filling a blank wall with warmth and dimension. The natural fibers soften hard edges and pair beautifully with plants, wood furniture, and neutral tones. Hang a single large piece above a sofa or group smaller ones for a gallery-like display.
Because you control the size and pattern, it’s easy to match your exact space and style.
Best Materials
- Stick with 100% cotton rope—it’s soft, easy to work with, and holds knots well. A 3/8-inch thickness gives a nice chunky look without being too bulky. For the base, a wooden dowel or brass ring adds a natural or modern touch.
- You can find all of these at craft stores or online for under $20.
Budget-Friendly Swap
- Instead of buying a pre-made macrame piece, make your own. A 100-foot skein of cotton rope costs around $10 and can yield several small hangings. There are countless free tutorials online for beginner knots like the square knot and lark’s head.
- You’ll save money and get exactly the size and design you want.
Styling Tip
Hang macrame against a light wall to let the texture pop, or layer it over a larger piece of art for depth. Pair with a trailing plant on a nearby shelf to echo the organic lines. For a cohesive look, stick to neutral rope colors like cream, beige, or soft gray.
7. Plate Wall Display

Thrift stores and dollar bins are goldmines for mismatched plates that can become a one-of-a-kind wall feature. Instead of hiding them in a cabinet, let them shine as an eclectic cluster that adds instant personality to your living room. This budget-friendly idea turns everyday dishware into art, and the best part is that no two plates need to match—the more varied, the better.
A plate wall display is a conversation starter that costs pennies compared to store-bought art. Start by collecting plates in different sizes, colors, and patterns—think floral, geometric, or solid hues. Arrange them on the floor first to find a layout that feels balanced but not too symmetrical.
Use adhesive plate hangers (no damage to walls) and hang them in a loose circle or organic cluster. The visual effect is playful yet curated, adding texture and color without overwhelming the room.
Where To Find Plates
- Hit up thrift stores, garage sales, or even your own kitchen cabinets for plates that have seen better days. Look for chipped edges or faded prints—they add character. Dollar stores often have surprisingly pretty options for under $2 each.
- Mix in a few solid-colored plates to break up busy patterns and create visual rest stops.
Arrangement Tips
- Lay out your plates on the floor or a large table to experiment with spacing. Keep about 2-3 inches between plates for a cohesive look. Use a level to ensure the cluster doesn't drift sideways, but don't stress over perfection—a slight organic feel adds charm.
- You can also include a small mirror or a round woven basket in the mix for extra texture.
Budget-Friendly Swap
- If you don't want to buy plates, use paper plates or plastic ones painted with acrylics. They're lightweight and easy to hang with double-sided tape. For a more durable option, hit up a flea market and negotiate bulk deals.
- Either way, you'll spend under $20 for a full wall display.
8. Shadow Box with Found Objects
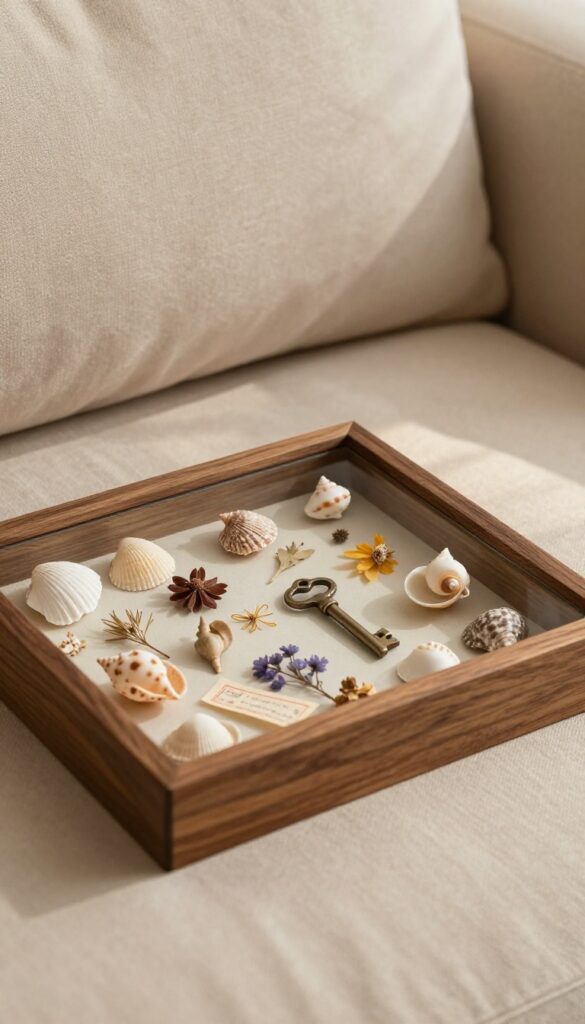
There's something special about turning little mementos into wall art. A shadow box gives you a chance to display those tiny treasures that usually end up in a drawer—seashells from a beach trip, dried flowers from a garden, vintage keys from a flea market, or ticket stubs from a favorite concert. Because it's three-dimensional, it adds depth and texture to your wall that a flat frame just can't match.
And the best part? It's practically free if you use things you already have.
Shadow boxes are a budget-friendly way to create a custom art piece that reflects your own story. You can find a deep frame at a thrift store for a few dollars, then fill it with objects that have meaning to you. The result is a conversation starter that feels personal and curated, not like something you bought off a shelf.
Plus, you can change the contents whenever you want, so your wall art evolves with your life.
Best Materials To Use
- Stick to lightweight items that won't damage the frame backing. Think pressed leaves, small shells, old keys, coins, or fabric scraps. Avoid anything heavy or bulky that might cause the glass to bulge.
- Arrange them on a neutral background like felt or linen for a clean look.
Layout And Styling Tip
- Lay your items out on a flat surface first to play with composition. Try a balanced cluster or a simple linear arrangement. Use a tiny dab of hot glue or double-sided tape to secure each piece.
- Leave some negative space so the objects don't look crowded.
Budget-Friendly Swap
Instead of buying a new shadow box, repurpose an old picture frame with a deep profile. Paint it to match your room, then add a piece of foam board as the backing. You can cover the foam with fabric or paper for a custom background at almost no cost.
9. Large-Scale Photo Prints from Your Phone
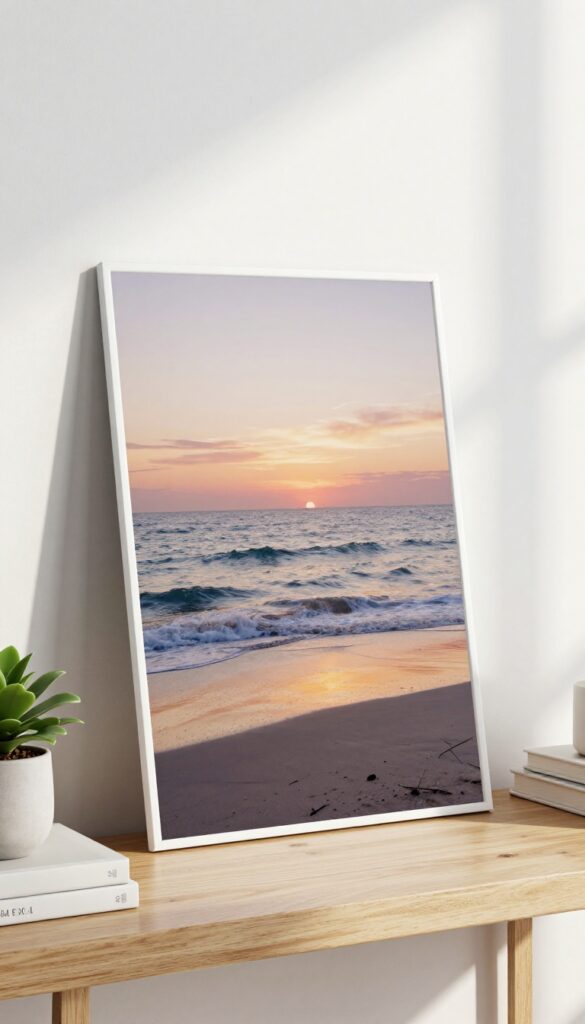
You don’t need a fancy art budget to make a big visual impact. That stunning landscape you shot on vacation or the candid portrait of your kid laughing can become a statement piece. Print it large—think 24×36 inches or bigger—on a budget printing site, mount it on foam board, or simply clip it into a frame.
The result feels personal, intentional, and costs a fraction of store-bought art.
This idea works because it turns your everyday memories into gallery-worthy decor. The key is picking a high-resolution photo with strong composition and good lighting. Blurry or low-res images will look pixelated when blown up, so choose wisely.
Once printed, the foam board mount gives it a clean, frameless look that feels modern and lightweight. Clip frames add a bit of warmth with visible edges. Either way, you get a custom piece that no one else has.
Choosing The Right Photo
- Look for images with plenty of empty space or a clear focal point. Landscapes, architectural details, and macro shots work especially well. Avoid busy patterns or tiny subjects that get lost when enlarged.
- Edit the photo lightly to boost contrast and sharpness before uploading.
Budget-friendly Printing Tips
Use online services like MPix, Artifact Uprising, or even Costco Photo Center for affordable large prints. Choose matte paper to reduce glare and give a more art-like finish. Foam board mounting adds a few dollars but eliminates the need for a frame—perfect for a clean, contemporary look.
Placement And Styling
- Lean the mounted print against a wall on a console table or shelf for a casual vibe. Or hang it as a solo statement above a sofa. Keep surrounding decor minimal—let the photo breathe.
- A single large print can anchor a whole room without needing additional wall art.
10. Tapestry or Blanket as Wall Art
Sometimes the most striking wall art isn't something you buy framed—it's something you already have folded in a closet. A lightweight tapestry or a pretty blanket can cover a large wall instantly, adding color, pattern, and soft texture all at once. This approach is especially handy for renters who can't paint or for anyone wanting to hide an awkward wall without a major commitment.
Plus, it's one of the most budget-friendly ways to make a big visual impact.
Hanging a tapestry or blanket is surprisingly simple. Use a curtain rod with clip rings or a wooden dowel with rope—no heavy hardware needed. The fabric softens the room acoustically and brings a cozy, lived-in feel that framed art sometimes lacks.
Choose a piece that complements your existing palette: a muted geometric for a calm space, a bold floral for a pop of energy, or a chunky knit for warmth. This idea works beautifully above a sofa, behind a bed, or in a reading nook where you want to wrap yourself in comfort.
Best Fabrics For The Job
- Lightweight cotton, linen, or wool blends hang best without pulling the rod down. Avoid heavy quilts or thick fleece that sag. A thin vintage scarf or a flatweave throw works perfectly.
- If you're worried about wrinkles, give it a quick steam before hanging.
Hanging Hardware Made Easy
A tension curtain rod inside a window frame or between two walls is great for renters. For a more permanent look, use a decorative curtain rod with finials. Clip rings let you swap pieces seasonally—try a light linen in summer and a chunky knit in winter.
Styling Around The Tapestry
Keep the rest of the wall simple so the fabric stays the focal point. Add a floor lamp nearby to cast soft light on the texture, or layer a small shelf below with a few plants and books. This creates a curated vignette without competing with the fabric's pattern.
11. Pressed Flower Frames

There's a quiet charm to pressed flower frames that store-bought art can't quite match. They bring a soft, organic feel to your walls, like a tiny preserved garden. Best of all, you can make them for next to nothing by foraging leaves and blooms from your own backyard or a neighborhood walk.
Pressed flower frames are an easy, budget-friendly way to add natural texture and a personal touch to your living room. The process is simple: gather flat flowers or leaves, press them between heavy books for about a week, then arrange them in a simple frame. The result is delicate, one-of-a-kind wall art that costs almost nothing if you forage your own greenery.
This idea works especially well in a cozy reading nook or above a console table, where the soft colors can complement neutral or pastel palettes.
Best Flowers To Use
- Thin, flat flowers press best. Try pansies, daisies, ferns, or baby's breath. Avoid thick blooms like roses, which can mold.
- For a cohesive look, stick to one or two colors—like pale pink and white—for a calm, curated feel.
Framing And Display Tips
Use a simple frame with a white or light wood finish to keep the focus on the flowers. A mat with a cutout adds a polished touch. Group two or three frames in a small cluster for more visual interest, or hang one alone as a subtle accent.
Budget-Friendly Swap
Skip the expensive framing store. Thrift a basic frame, remove the existing print, and insert your pressed flowers between the glass and a piece of white cardstock. You can also use a shadow box for a slightly deeper look, but a flat frame works best for pressing.
12. Book Page or Map Collage
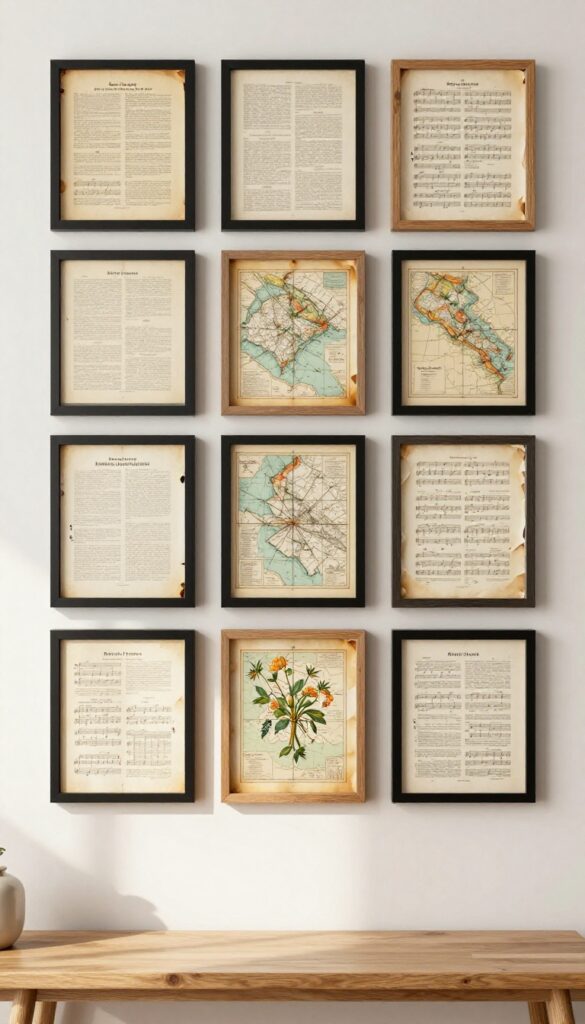
Old books and maps have a quiet charm that digital prints just can't match. Tearing out pages from a worn atlas, a vintage dictionary, or even a sheet music book gives you a collection of textures and typography that feels both personal and nostalgic. Arranged in a grid or layered inside a single large frame, they create a focal point that's literary, budget-friendly, and endlessly customizable.
This is one of the most affordable wall art ideas because you probably already have the materials—or can pick them up for a few dollars at a thrift store. The key is to choose pages with varied content: maps with interesting coastlines, dictionary pages with ornate letters, or sheet music with handwritten notes. Mix them in a way that feels cohesive but not too matchy.
A black or natural wood frame keeps the focus on the paper itself, while a white frame gives it a cleaner, more modern look. For a quick update, swap out pages seasonally or whenever you find a new favorite.
Best Paper Sources
- Thrift stores and library sales are goldmines for old books and atlases. Look for books with yellowed pages, deckled edges, or unique illustrations. Sheet music from garage sales often has beautiful cover art and handwritten notes.
- If you want a specific theme, search for vintage road maps or botanical prints online—they're usually cheap and easy to frame.
Arrangement Tips
- For a clean look, arrange pages in a symmetrical grid using identical frames. For something more relaxed, layer pages slightly off-center in one large frame, letting edges peek out. Use double-sided tape or small glue dots to keep them in place without damaging the paper.
- If you're using a frame with a mat, cut the mat to create a window that shows off the best part of each page.
Budget-friendly Frame Idea
Instead of buying multiple frames, use one large frame and create a collage inside it. You can also use clipboards or washi tape to attach pages directly to the wall for a temporary, low-commitment look. This works especially well in rental spaces where you can't nail into walls.
13. Floating Shelves with Rotating Displays

Walls don't have to be permanent decisions. Floating shelves give you the freedom to change your mind whenever you feel like it, which is perfect for anyone who loves variety but doesn't have the budget for a full gallery wall. Swap out small art prints, framed photos, and little objects every few weeks, and your wall stays fresh without costing a thing.
It's a low-commitment way to keep your living room feeling curated and personal.
The trick is to treat your shelves like a mini gallery that evolves with your mood. Start with a few staple pieces—maybe a favorite ceramic vase or a small sculpture—and rotate the rest. When you switch out items, you'll notice how different combinations change the whole energy of the room.
Plus, it encourages you to actually display things you love instead of hiding them in drawers.
Best Layout For A Dynamic Wall
- Arrange shelves at different heights to create visual interest. A good rule is to place them about 8 to 12 inches apart vertically, but don't be afraid to stagger them. Group items in odd numbers—three or five objects per shelf—and vary the heights using small stacks of books or risers.
- Leave some empty space so the wall doesn't feel cluttered.
Budget-friendly Swap Ideas
- You don't need to buy new art every month. Frame postcards, pages from old calendars, or your own phone photos. Thrift stores are goldmines for small frames and unique knick-knacks.
- Another idea: print out free art downloads from the internet and swap them seasonally. It costs pennies but looks intentional.
Styling Tip For Cohesion
Stick to a consistent color palette across your rotating items so the shelf always feels harmonious. Even if you swap pieces, keeping the same two or three accent colors ensures the display looks polished. Metallic accents like brass or copper add a subtle thread of continuity.
FAQ
How can I make my living room wall art look cohesive on a budget?
Stick to a consistent color palette or frame style. Even if the art pieces are different, repeating colors or frame finishes ties them together. Using the same mat color in frames also helps.
What's the best way to hang a gallery wall without damaging walls?
Use removable adhesive strips designed for frames. They hold well but come off cleanly. For heavier pieces, use picture hooks with small nails—holes are easy to patch later.
Can I use temporary wall art in a rental?
Absolutely. Peel-and-stick decals, washi tape art, and fabric hangings are all renter-friendly. Command strips work for lightweight frames.
Avoid anything that requires drilling or strong adhesive.
How do I choose the right size art for my living room wall?
A good rule is that art should cover about two-thirds to three-quarters of the width of the furniture below it. For a large empty wall, one big piece or a cluster of smaller pieces works best.
What if I don't have a lot of wall space?
Use vertical space with tall, narrow pieces or a stack of small frames. Lean art on shelves or the floor. A single statement piece can have more impact than several small ones.
Conclusion
Your living room walls are a blank canvas waiting for your personal touch. With these budget-friendly ideas, you can create a space that feels curated and cozy without the designer price tag. The best part?
You can change things up whenever the mood strikes.
Start with one idea that excites you, and build from there. Even small changes—like a new frame or a DIY canvas—can shift the whole energy of the room. Happy decorating!