13 Ideas for Vintage Ornaments on a Nostalgic Tree
A bare tree with a box of mismatched ornaments can feel more like a chore than a tradition. The fix isn't buying more stuff. It's choosing pieces with a past, then arranging them so the whole tree tells a story.
Vintage ornaments solve that problem fast. They bring color, character, and a little history to branches that modern baubles leave flat. You don't need a designer budget either.
Below are 13 ideas that range from quick flea market scores to heirloom rescues. Pick a few, mix them with what you already own, and let the tree look like it has been collecting memories for decades.
1. Start With a Box of Flea Market Misfits
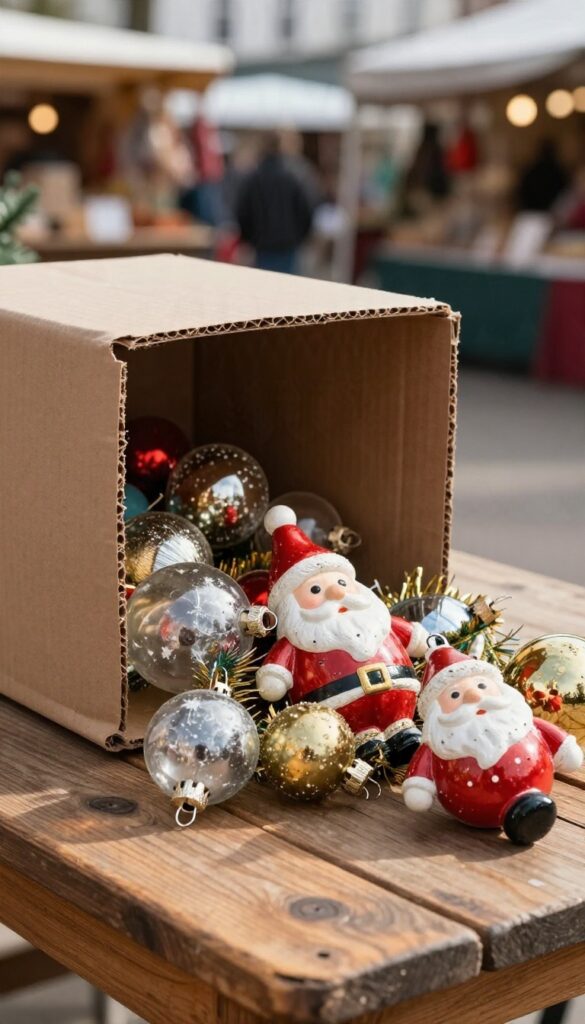
The best vintage trees rarely start with a plan. They start with a cardboard box someone priced at five bucks because it was too jumbled to sort. That box is your goldmine.
Mismatched, slightly scratched, and missing a hook or two, those ornaments carry more charm than any matched set from a big-box aisle. Your first move is simple: go hunting before you go shopping.
Flea markets, estate sales, and thrift stores are where vintage ornaments actually live. You just have to know how to look, what to skip, and why the imperfect pieces often win. Hit the cheap tables first, not the display cases.
Dealers separate the shiny stuff from the junk, and the junk is usually where the personality hides. A box of random glass balls, a bag of tarnished tinsel, a shoebox of painted Santas: grab those and sort later.
Where To Hunt And What To Pay
Estate sales are the best bet for real vintage because whole households get liquidated at once. Go on the last day when prices drop, and dig through boxes under tables where nobody else bothers to look. Thrift stores are hit-or-miss but cheap, so check the seasonal aisle year-round, not just in December.
Flea markets reward early birds for selection and latecomers for deals, so pick your strategy and stick to it. Expect to pay a dollar or two per ornament for common glass and painted pieces. Shiny Brites, mercury glass, and figural ornaments can run higher, but you don't need those to build a great tree.
Set a loose budget per box and walk away when a seller gets greedy. There's always another box.
What To Check Before You Buy
Hold each piece up to the light and look for cracks, especially around the cap where the hanger attaches. A hairline crack will eventually split, and loose caps mean the glass is already stressed. Skip anything with active flaking paint if you have kids or pets, since old finishes can be a concern.
Check the hanger loop and cap for rust, and give the ornament a gentle shake to hear for loose glitter or broken bits inside. Missing paint is fine. Missing structure is not.
A little wear tells a story; a shattered ornament tells you to put it back.
Why Mismatched Beats Perfect
A matched set looks like a store display. A mismatched collection looks like a life. When colors, shapes, and eras collide, the tree gains depth and the eye keeps moving instead of gliding past identical baubles.
Mix glass with tin, round with figural, faded with bright. The tension is the point. You're not decorating to a theme; you're layering years of finds into something that feels collected rather than bought.
That's the whole appeal of a nostalgic tree.
2. Rescue Family Heirlooms Without Ruining Them
Grandma's glass Santa has been wrapped in tissue since 1994, and there's a reason for that. Old ornaments are often more delicate than they look, and a little caution goes a long way. The goal is to get those pieces onto the tree, not keep them boxed up forever.
You don't need a museum conservator's toolkit. A soft brush, some patience, and smarter hanging habits handle most of the work. Here's how to bring fragile hand-me-downs back into the light without wrecking them.
Start by figuring out what you're actually dealing with. Some ornaments are sturdier than their age suggests, while others will shed paint if you look at them wrong. A quick once-over before you touch anything saves a lot of regret.
Once you know the material, cleaning becomes a gentle, low-stakes job. Then you hang them so gravity and friction don't do the damage for you.
Clean Gently, Or Not At All
Dust is the enemy, not dirt. A soft makeup brush or a clean paintbrush lifts loose dust from glass, tinsel, and painted surfaces without scratching. Work over a towel so anything that falls lands soft.
Skip the water on anything old. Moisture creeps under paint and glitter, and it can loosen old glue in a hurry. If a piece is truly grimy, a barely damp cloth on a stable, unpainted area is the most you should risk.
Never soak a vintage ornament, and don't spray cleaner near it. For paper or cotton ornaments, dry brushing is the whole job. When in doubt, leave the patina alone; a little age is part of the charm.
Hang It So It Can't Fall
Original metal caps and thin wire loops fail more often than the ornaments themselves. Swap flimsy hangers for a sturdy ornament hook, and check that the cap still grips the neck before you trust it. For heavy glass pieces, hang them on lower, sturdier branches near the trunk.
That cuts down on swing and gives the branch less leverage to droop. A little floral wire wrapped around the branch and cap adds security without looking messy. Keep fragile ornaments away from walkways, pets, and the tree's edge.
If a piece is especially precious, hang it high and toward the back where bumps are unlikely.
Display The Delicate Ones Differently
Not every heirloom belongs on the tree. A shadow box or a small shelf lets you show off the most fragile pieces year-round without risking a fall. Group a few together and they read as a collection, not clutter.
You can also nestle tiny ornaments into a wreath or a bowl of greenery on the table. They stay visible and safe, and guests still get the story. Rotate a couple onto the tree each year so nothing feels permanently retired.
3. Add Shiny Brite and Mercury Glass for Instant Glow
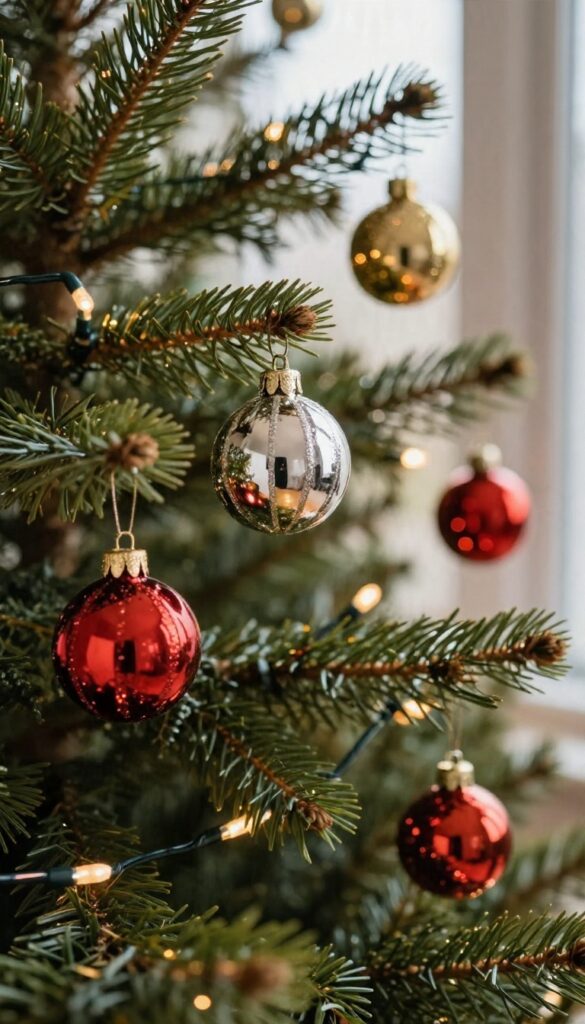
Glass ornaments from the 1940s through the 1960s do something modern plastic can't: they grab the tree lights and throw them back at you. Shiny Brite and mercury glass baubles turn a string of bulbs into a soft, scattered glow. A handful of them will brighten an entire tree.
The trick is knowing what you're buying and where to hang it. A little knowledge goes a long way here, and most of it is easy to pick up.
Shiny Brite ornaments came out of a New York company in the late 1930s, and they defined the look of mid-century Christmas. The glass is thin, the paint is bright, and many of them wear a stenciled design or a stripe of glitter. Mercury glass is the older cousin, with a silvery mirrored finish that came from a double-walled glass technique.
Both catch light in a way that flat finishes simply can't.
Why Glass Glows
A glass ornament acts like a tiny mirror. The curved surface bends light from the bulbs and spreads it across the branch instead of just reflecting one bright dot. Mercury glass takes that further.
Its silvered interior bounces light back through the outer glass, so the whole bauble seems to light up from inside. That's why a single mercury glass ball can look like it's plugged in. Shiny Brite ornaments work the same way, just with color.
Red, green, and gold glass push warm light around the tree, which is what gives vintage trees that cozy, almost candlelit feel.
Spotting Reproductions
Plenty of new ornaments copy the Shiny Brite look, and some are honestly pretty good. A few checks will keep you from overpaying. Look at the cap first.
Original caps are usually metal, often with a brand name stamped on top, and they tarnish with age. New caps tend to be shiny, thin, and blank. Check the paint.
Vintage paint has small chips and wear around the shoulders, and the glitter is often a little sparse. Perfect paint on a sixty-year-old ornament is a red flag. Finally, feel the weight.
Real vintage glass is light and slightly fragile, and the neck where the cap sits often shows a rough or uneven edge from hand finishing.
Where To Hang Them
Placement matters more than quantity. Hang the biggest mercury glass pieces low and toward the front, where the lights hit them directly and people can see the reflection up close. Shiny Brite ornaments do well in clusters rather than scattered evenly.
Group three or four of the same color on one branch section, then leave a gap before the next cluster. The repetition reads as intentional. Keep the most delicate glass away from the edges where pets and elbows go.
Tuck those pieces higher up and slightly inside the branches, where they still catch light but stay out of the danger zone.
4. Hang Vintage Cookie Cutters and Kitchen Kitsch
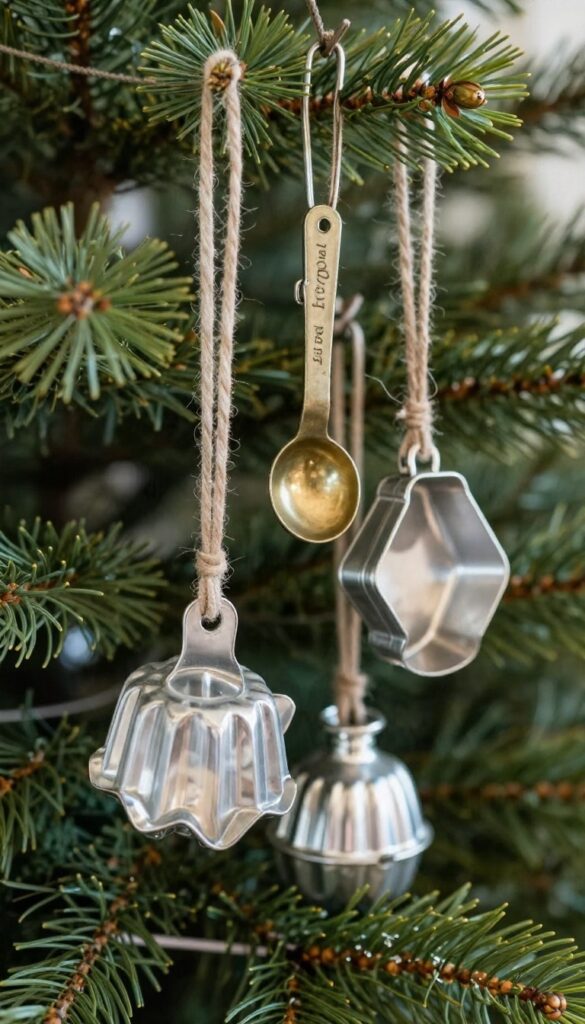
Your kitchen drawers might be hiding the best ornaments on the tree. Old tin cookie cutters, jello molds, and measuring spoons have a charm that no big-box store can fake. They're small, lightweight, and full of stories from holidays past.
Turn them into ornaments and you get a tree that feels like a retro kitchen come to life.
The best part? You probably already own half of these. And the ones you don't have are easy to find at estate sales, flea markets, or even your grandma's basement.
The key is to mix shapes, finishes, and a little bit of whimsy.
Cookie Cutters With Character
Tin cookie cutters come in every shape imaginable—stars, hearts, animals, even Santa. Look for ones with a little patina or a faded label. A quick loop of twine or a small ornament hook through the top and they're ready to hang.
Group similar shapes together for a cohesive look, or scatter them for a playful vibe.
Jello Molds And Measuring Spoons
Aluminum jello molds have a great mid-century feel. Their fluted edges catch the light and add texture to the tree. Hang them individually or cluster a few for a bigger statement.
Measuring spoons—especially the odd sizes—make quirky little ornaments. Tie them with ribbon and let them dangle like tiny bells.
Mix In Other Kitchen Kitsch
Don't stop at cookie cutters. Vintage bottle openers, tiny strainers, and even old keys from kitchen cabinets can join the fun. Just keep the scale small so the tree doesn't get cluttered.
A mix of metals—silver, copper, and brass—adds warmth and variety.
5. Use Old Postcards and Christmas Cards as Ornaments
Paper tends to get tossed in the recycling bin after the holidays, but some of those cards deserve better. A 1950s Santa postcard or a card from a family member who's no longer around can hang on the tree just as well as any glass bauble. The trick is figuring out how to display them without wrecking them.
You probably have a shoebox of these tucked away somewhere. Dig it out and see what's worth showing off. Old cards bring color, handwriting, and a story that no store-bought ornament can match.
The appeal here is simple: paper ornaments are cheap, personal, and endlessly varied. You can rotate them year to year, and you don't have to worry about a fragile finial cracking on the floor. Just remember that paper needs a little protection to survive another few decades.
Clips And Ribbon Are Your Friends
Miniature clothespins, paper clips, and small binder clips all work for hanging cards. Clip one to the top corner of the card, then loop a bit of ribbon or twine through the clip and tie it to a branch. This keeps the card itself untouched, which matters if it's old or has sentimental value.
Ribbon does double duty. A velvet or satin ribbon adds a vintage feel, and a wider ribbon spreads the weight so the card hangs straight. For a lighter look, use baker's twine or thin cotton string.
Skip anything that might leave a mark, like colored pipe cleaners or tape.
Punch A Hole If The Card Can Take It
A single hole punch in the top center of a card gives you a clean, classic ornament. Reinforce the hole with a small circle of cardstock or a sticker on the back so the paper doesn't tear. Then thread a ribbon or ornament hook through and hang it.
This works best on sturdier cards, like vintage postcards or thick greeting cards. Flimsy paper will sag and tear over time. If you're unsure, test the card by giving it a gentle tug before you commit.
Keep Moisture And Light Away
Paper absorbs moisture, and that means warping, spotting, and mold. Hang cards away from drafty windows, radiators, and anything that gets damp. If your tree sits near a humid spot, consider sealing the card in a clear plastic sleeve first.
Light is the other enemy. Direct sun fades ink and yellows paper fast. Keep cards out of harsh sunlight, and store them in a dark, dry box after the season ends.
Acid-free sleeves and a cool closet will keep them looking sharp for years.
6. String Vintage Beads and Garlands Instead of Tinsel
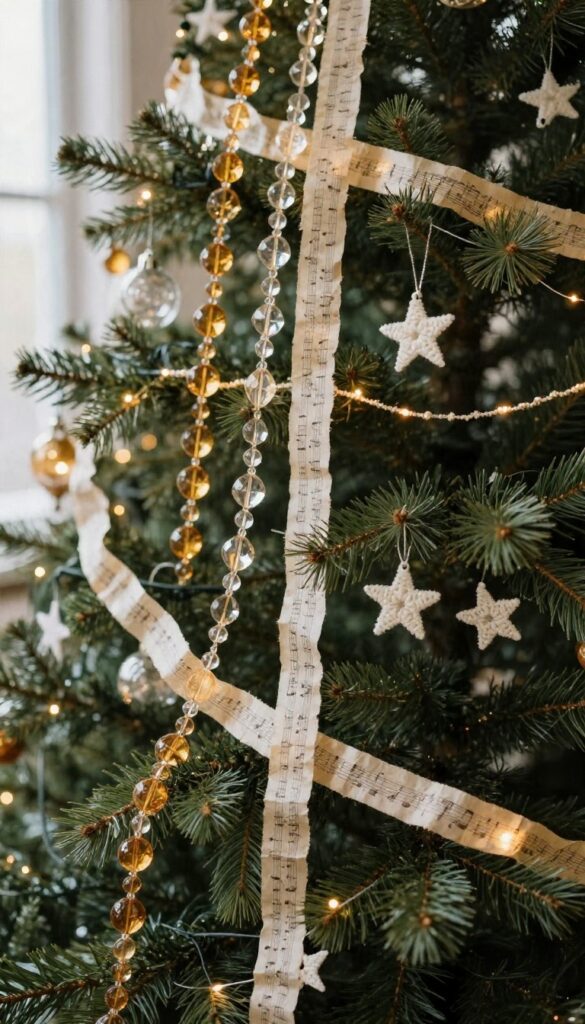
Tinsel has its place, but it tends to look the same on every tree. Swap it for strands with actual texture and you get a tree that reads as handmade rather than store-bought. The good news is that most of these garlands cost almost nothing.
Old glass beads, paper chains, and crocheted strands turn up at estate sales and thrift shops all the time, and they drape better than the shiny stuff anyway. The trick is mixing a few different materials so the tree gets depth. A little sparkle, a little softness, and a little paper go a long way.
Hunt For Old Glass Bead Strands
Look for the long strands of faceted glass beads that used to hang in doorways or dress up a lamp. They show up in jewelry lots and boxed holiday collections, often for a few dollars. Drape them in loose swags rather than tight lines.
Let them sag a little between branches so the beads catch the lights from different angles. If a strand breaks, don't toss it. Restring the beads on thin wire or fishing line and you have a custom garland that matches your tree's palette.
Make Paper Chains Worth Keeping
Paper chains get a bad rap because most of us made them in elementary school. Do them with the right paper and they look genuinely vintage. Use old sheet music, pages from a damaged book, or leftover wrapping paper in muted tones.
Cut strips about an inch wide and loop them with a dab of glue or a staple. Mix in a few metallic strips for contrast. The whole thing takes an evening and costs next to nothing.
Crocheted And Fabric Garlands Add Softness
A crocheted strand of tiny stars or snowflakes brings a warmth that glass and metal can't. If you don't crochet, these are common at craft fairs and estate sales. Fabric scraps tied in simple knots work too.
Cut strips of old flannel or calico, tie them onto a long piece of twine, and you have a rustic garland in under an hour. Hang these lower on the tree where they can be touched. They soften the harder edges of glass ornaments above them.
Layer Your Strands For Depth
One garland looks lonely. Two or three layered together look intentional. Run a bead strand high, a paper chain through the middle, and a fabric garland low.
Vary the swag lengths so they don't line up like stripes. Keep the colors related but not identical. A little mismatch is what makes it feel collected rather than bought as a set.
7. Make Salt Dough and Bread Dough Throwbacks
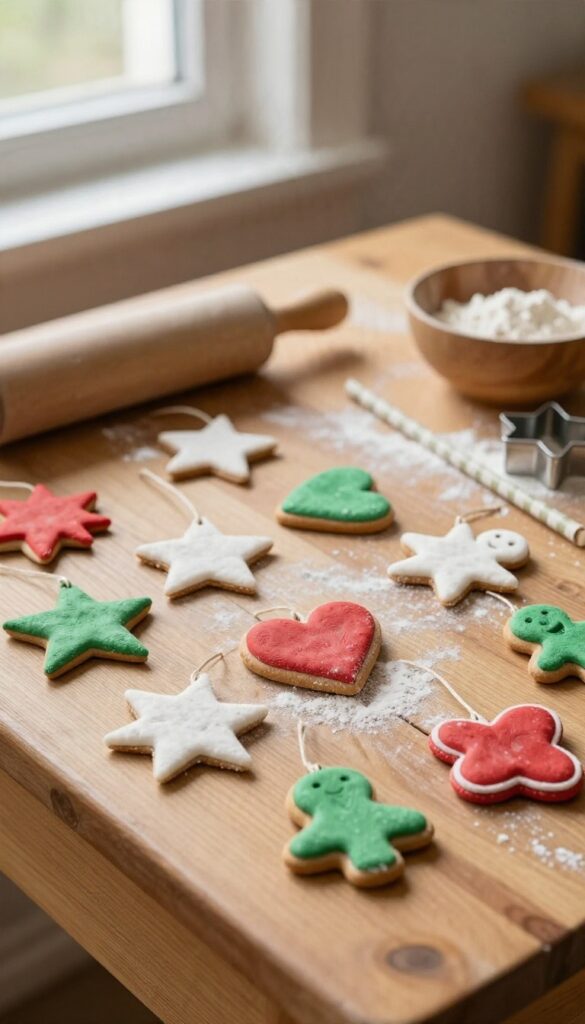
Salt dough ornaments were a staple of school craft tables and grandma's kitchen long before anyone thought to call them vintage. They're made from flour, salt, and water—ingredients you probably already have—and they bake up into sturdy little shapes that take paint beautifully. The charm is in their imperfections: slightly uneven edges, a fingerprint here and there, and a homemade look that no factory can copy.
Best of all, you can make a whole batch in an afternoon and have ornaments that feel like they've been on the tree for decades.
The appeal of dough ornaments is that they're cheap, forgiving, and genuinely fun to make. You don't need special tools or artistic talent. A few cookie cutters, a rolling pin, and a straw for holes are enough to get started.
And because they're so inexpensive, you can experiment without worrying about wasting materials. Once you've got the basics down, you can customize them to match your tree's vintage vibe. Think classic shapes like stars, hearts, and gingerbread men, or go for more intricate designs like snowflakes and reindeer.
The key is to keep the shapes simple and the decorations nostalgic. After baking, you'll want to seal them properly so they last. A coat of clear acrylic spray or a brush-on sealer will protect them from moisture and keep the colors vibrant.
Store them wrapped in tissue paper, and they'll be ready to hang year after year.
The Basic Dough Recipe
All you need is 1 cup of flour, 1/2 cup of salt, and about 1/2 cup of water. Mix the dry ingredients first, then add water slowly until the dough comes together. Knead it for a few minutes until smooth.
If it's too sticky, add a little more flour; if it's crumbly, add water a teaspoon at a time. Roll it out to about 1/4 inch thick and cut your shapes. Don't forget to poke a hole for hanging before baking.
Bake at 200°F for 2-3 hours, flipping halfway, until completely dry.
Painting And Sealing
Acrylic paint works best for dough ornaments because it's opaque and dries quickly. Stick to a vintage palette: muted reds, greens, golds, and creams. You can also use stamps or stencils for details.
Once the paint is dry, seal both sides with a clear acrylic spray or brush-on varnish. This step is crucial—it keeps moisture out and prevents cracking. Let them dry completely in a well-ventilated area before hanging.
Adding Vintage Touches
To make your dough ornaments look like they've been around for years, try a few tricks. Rub a little brown paint or antiquing medium into the crevices and wipe it off the raised areas. Add a touch of glitter to edges for a subtle sparkle.
Use twine or ribbon instead of wire hangers. And don't be afraid to let the kids help—their uneven paint jobs and wobbly handwriting add to the charm.
8. Frame Vintage Ornaments in Shadow Boxes
Some ornaments are too fragile to hang. Mercury glass that sheds its silver, a paper angel with a torn wing, a bauble that lost its cap years ago—these pieces still deserve a spot in the holiday display. A shadow box gives them one without asking them to survive another season on a branch.
The trick is treating the box as part of the tree's story rather than a separate craft project. Group a few boxes on a wall near the tree, or lean one on a mantel behind the branches. Suddenly the ornaments that would have stayed in a box are visible again, and you don't risk crumbling them further.
You also get to decide how much protection each piece needs. A shallow frame works for flat ornaments and small figurines. A deeper box handles three-dimensional pieces and lets you layer in fabric or old wrapping paper behind them.
Choosing The Right Box Depth
Measure your thickest ornament before you buy anything. A box that's too shallow won't close over a round bauble, and one that's too deep swallows a flat piece. Most craft stores sell shadow boxes in a few standard depths, so bring a tape measure and test the fit.
For very fragile glass, leave a little breathing room. You want the ornament held in place, not pressed against the glass where a bump could crack it.
Securing Fragile Pieces Without Damage
Skip the hot glue. It can pull finish off old glass and leave a permanent scar. Instead, tie a thin thread through the ornament's existing loop and anchor it to the back of the box with a small pin or a dab of museum putty.
For pieces with no loop, a bed of cotton batting or crumpled tissue holds them gently in place. The goal is support, not adhesion, so you can lift the piece out later if you ever want to.
Building A Background That Sets Them Off
A plain white backing makes colored glass pop, but it can also look a little clinical. Try a scrap of vintage wallpaper, an old holiday card, or a square of velvet in a deep green or red. The background should recede so the ornament stays the star.
If you're framing several boxes, keep the backings related. Matching paper or a shared color family makes a wall of shadow boxes read as one display instead of a random collection.
Hanging And Rotating The Display
Arrange the boxes at eye level where people actually stop to look. A tight cluster of three or five works better than a single lonely frame, and it gives you room to swap pieces each year. Label the back of each box with the ornament's story if you know it—who owned it, what year it's from.
That note turns a pretty object into a keepsake your family will actually ask about.
9. Go Retro With Plastic Figurines and Pixies
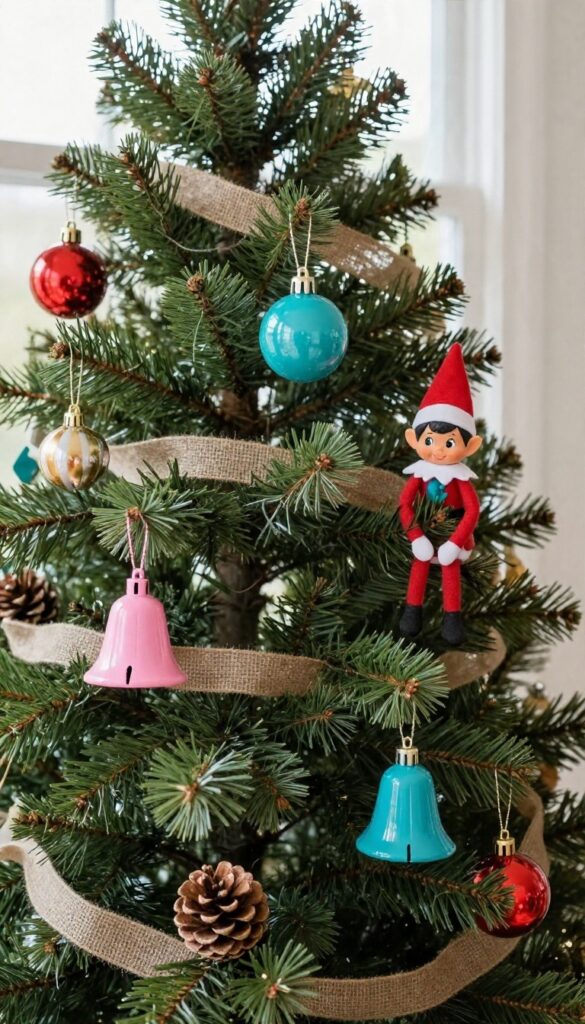
Mid-century plastic ornaments have a charm that's hard to fake. Think shiny hard plastic bells, candy-colored balls, and those little knee-hugger elves with pointy hats and painted faces. They're cheap, sturdy, and full of personality.
The tricky part is keeping them from turning your tree into a toy store shelf. A pile of plastic figurines can look chaotic fast. A little restraint and a clear plan keep the retro vibe without the clutter.
The trick with plastic figurines is treating them like accents, not the main event. Let them peek out from branches instead of lining them up in a row. A pixie tucked near a light, a plastic Santa half-hidden behind a pine sprig, and suddenly the tree feels discovered rather than decorated.
Grouping helps too. Cluster a few plastic pieces in one area so they read as a deliberate collection. Spread them evenly and they just look scattered.
Mix Plastic With Natural Textures
Plastic can look flat next to more plastic. Balance it with wood, fabric, or real greenery. A hard plastic bell hanging beside a felt ribbon or a pinecone softens the shine and makes the retro piece pop.
Try pairing bright plastic balls with burlap or twine loops. The contrast gives those 1950s colors somewhere to breathe.
Give The Elves A Home
Knee-hugger elves and pixies work best when they have a spot that feels intentional. Perch one on a sturdy branch near the trunk, or let a pair sit together on a shelf of needles. Avoid hanging them at the very tips where they'll swing and spin.
If you have several, rotate them year to year. A few out at a time keeps each one special instead of turning the tree into a display case.
Watch The Color Story
Vintage plastic comes in loud, happy colors. Pick two or three shades and repeat them around the tree so the eye has somewhere to land. Too many colors and the figurines start fighting each other.
Sticking to a loose palette also makes modern ornaments blend in. A single red pixie reads as a highlight when the rest of the tree leans green and gold.
10. Mix in Vintage Tins and Tart Tins
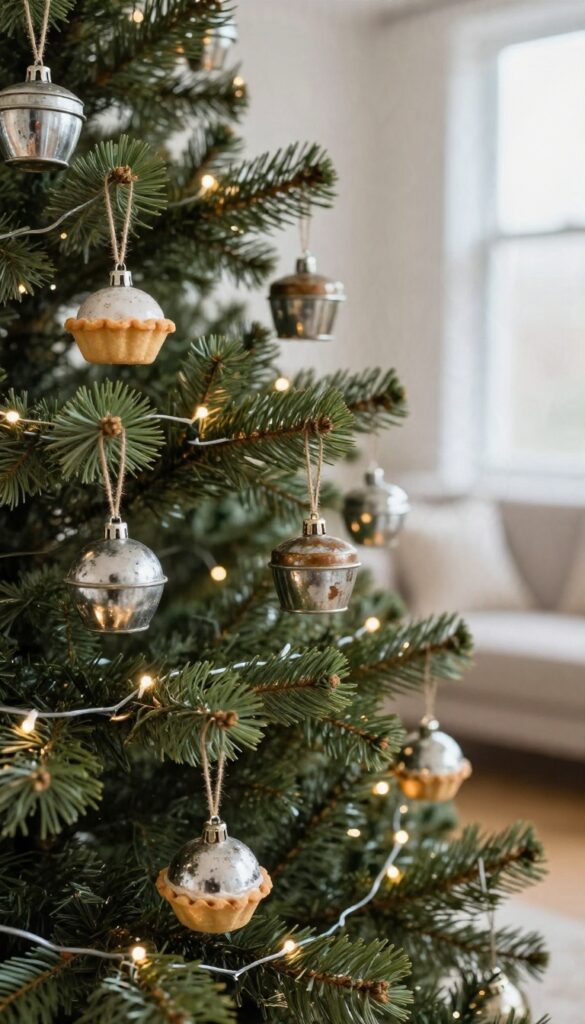
Every kitchen has a few tins hiding in the back of a cabinet, and they make surprisingly good ornaments. Old cookie tins, tea tins, and mini tart pans have the kind of worn patina that new decorations try hard to fake. They also fill space fast, which matters when your tree has bald spots between the big pieces.
The best part is how they catch the light. Metal throws a warm glow back at the string lights, so the tree looks fuller without adding more bulbs. Grab a few from a thrift store or your own pantry and give them a second life on the branches.
Tins work because they're light, sturdy, and already have a story. A dented lid or faded label just adds character here. You don't need to hunt for perfect pieces, and honestly the imperfect ones look better on a nostalgic tree.
Start with what you've got, then build from there.
Pick The Right Tins
Small is the rule. A tin the size of your palm hangs nicely and won't drag a branch down. Tea tins, spice tins, and mini tart pans hit that sweet spot.
Skip anything heavy or rusted through. A little surface wear is fine, but you don't want flakes dropping onto the tree skirt. Wipe each one down and let it dry fully before you hang it.
Add A Hanger Without Damage
You don't have to drill holes or glue anything permanent. A loop of twine or thin ribbon around the rim holds most tins just fine. For tart pans, thread the twine through the fluted edge and tie a knot.
Paper clips bent into a hook also work for tins with a small lip. Keep the hanger short so the tin sits close to the branch instead of swinging.
Place Them Where They Catch Light
Hang tins near the lights, not in the shadowy back of the tree. The metal bounces that glow around and makes the whole thing feel warmer. Cluster two or three at different depths so they don't line up like buttons.
Tart pans are the quiet stars here. Angle a few so the fluted edges face out, and let the light do the rest.
11. Add Old Keys, Buttons, and Sewing Notions
Drawers and tins around the house often hold small metal and sewing odds and ends that never see daylight. Those orphaned keys, mismatched buttons, and spare spools can become some of the most personal ornaments on your tree. They cost almost nothing, and they carry a quiet story that store-bought pieces can't match.
The trick is to treat them like tiny artifacts, not random clutter. Group them by material or color, give them a simple hanging method, and let their worn surfaces do the talking. A little planning keeps the tree from looking like a junk drawer exploded on the branches.
Pick Pieces With A Past
Old keys are the easiest win. Skeleton keys, suitcase keys, and little brass keys from forgotten locks all have a shape that reads as vintage without trying. Look for keys with a bit of tarnish or a stamped pattern on the bow.
Buttons work the same way: shell, bone, and early plastic buttons have a depth that modern ones lack. Sewing notions like wooden spools, thimbles, and small scissors add texture and a craft-room feel. Choose items that are light enough to hang and sturdy enough to survive a season on the tree.
Hang Them Without Damage
You don't need to drill holes or glue anything permanent. For keys, loop a narrow ribbon or piece of twine through the bow and tie a small knot. For buttons, thread a piece of thin wire or baker's twine through the shank or holes, then twist it into a loop.
Spools can hang from a ribbon wrapped around the center. If you want to keep the original patina, avoid polishing. A tiny dot of craft glue on a knot keeps things secure without harming the piece.
Keep The Look Collected, Not Cluttered
Scatter these small ornaments rather than clustering them all in one spot. Repeat a material two or three times across the tree so the eye catches a rhythm. Mix sizes: a large skeleton key can anchor a branch, while tiny buttons fill gaps near the lights.
Stick to one or two metal finishes, like brass and pewter, so the group feels intentional. If you have a mix of colors, sort them into warm and cool piles and use one family per section of the tree.
12. Use Vintage Ribbon and Lace for Soft Texture
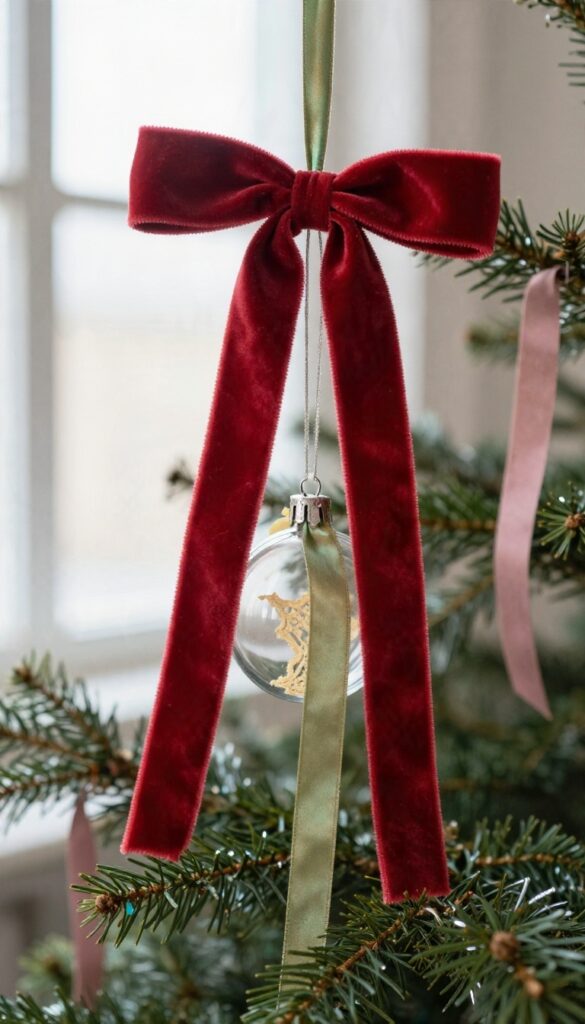
Shiny ornaments reflect light, but they don't do much for the eye when the whole tree is hard and slick. Ribbon and lace fix that. A few scraps of old velvet or a length of yellowed lace add the softness that makes a nostalgic tree feel lived-in instead of store-bought.
The good news is you probably don't need to shop for this. Thrift stores, estate sales, and the bottom of a sewing drawer turn up plenty of ribbon and trim that's already got the right faded look. The trick is knowing where to put it so it reads as intentional texture, not leftover craft clutter.
Start with the ribbon you can find, then work it into bows, wraps, and hanger ties. Lace works best as small accents rather than full garlands. Together they break up the shine and give the tree a softer, older feel.
Hunt Down The Right Ribbon
Velvet ribbon is the star here. It has a matte finish and a slight crush that looks great next to glass and tinsel. Look for deep reds, faded greens, mustard, and dusty pink at thrift shops or in old sewing boxes.
Satin ribbon works too, but go for the worn, slightly limp kind rather than stiff new spools. Grosgrain in a narrow width adds a nice ribbed texture without stealing attention. Skip anything with a printed pattern unless it's genuinely old and charming.
If you find a roll that's frayed at the end, don't toss it. Trim the edge and use the rest. A little wear is the point.
Make Bows That Look Collected
Simple loop bows beat fussy, perfect ones. Fold a length of ribbon into two loops, pinch the middle, and tie it off with a thin strip of the same ribbon or a bit of twine. Attach these to the tree itself, not just the ornaments.
Tuck them into gaps between branches, or tie one to the top of a plain glass ball to give it a vintage hanger. Cluster two or three small bows together for a fuller look. Vary the sizes.
A tree where every bow is identical looks staged. Mix a big velvet bow with smaller lace ones and let them sit at different heights.
Wrap Branches And Ornaments
Ribbon doesn't have to stay in bow form. Wrap a strip loosely around a thick branch near the trunk, then let the ends dangle. It adds color and softness where the tree is usually bare.
You can also wrap small ornaments. Tie a ribbon around the middle of a plain ball or a wooden spool ornament and knot it at the back. This hides the hanger and gives cheap ornaments a handmade feel.
For a fuller effect, weave a long strand of wide ribbon through the branches in a loose spiral. Keep it slack so it drapes instead of pulling tight.
Use Lace As A Soft Accent
Lace scraps make lovely small touches. Cut short lengths and tie them around ornament hangers, or fold a piece into a tiny pouch and tuck a small bauble inside. Old lace doilies can be cut into quarters and used as backing for flat ornaments or as soft caps on top of round ones.
The frayed edges are fine. They add to the aged look. If you have a long piece of lace trim, drape it loosely across a few branches rather than stringing it like garland.
It reads as texture, not decoration, and that's exactly what a nostalgic tree needs.
13. Finish With a Vintage Tree Topper and Skirt
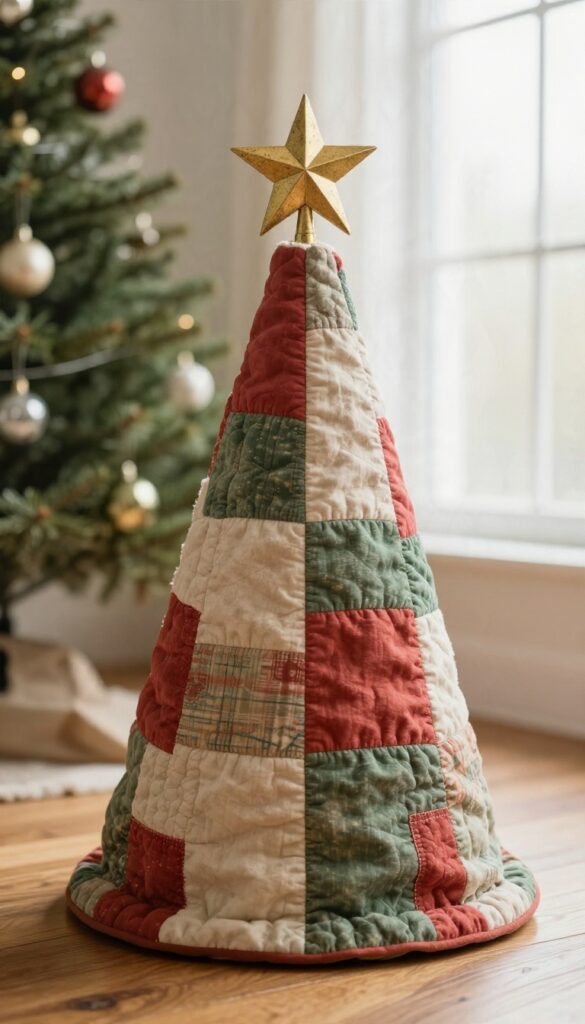
The last few minutes of decorating decide whether the tree reads as vintage or just decorated. A topper and a skirt bookend everything else, so they carry more weight than their size suggests. Get these two right and the whole nostalgic look snaps into focus.
Most people treat the topper as an afterthought, grabbing whatever came in the box. On a vintage tree, that crown is the first thing the eye lands on. Pick one with some age or some personality, and the rest of the ornaments suddenly look intentional instead of random.
Pick A Topper With A Past
A classic five-point star in tarnished gold or faded red is the safest bet, and it works with almost any color scheme. An angel with a paper or fabric face brings warmth, especially if the wings have lost a little stiffness over the years. And a Santa hat topper leans playful, which suits a tree loaded with novelty ornaments.
Check flea markets and estate sales before you buy new. Original glass or tin toppers show up often enough, and the wear only helps the look. If you find one with a missing tip or a bent finial, that's character, not damage.
Ground It With A Skirt That Feels Handmade
A quilted tree skirt in a faded patchwork pattern softens the base and echoes the handmade feel of older ornaments. Crocheted skirts, especially the round ripple kind, add texture and a nice bit of nostalgia for anyone who grew up with one. Even a simple burlap or flannel skirt in a muted color can work if the tree is busy up top.
Skip the shiny satin numbers. They fight the vintage mood and show every wrinkle. Look for cotton, wool, or anything that looks like it came out of a sewing basket.
Tie The Two Ends Together
Repeat one color or material from the topper in the skirt to make the tree feel finished. A red star on top and a skirt with red patches, for example, pull the eye down the whole tree. It's a small trick, but it makes the setup look deliberate.
Don't overthink it. Two pieces that feel like they belong to the same era will do more than a dozen perfectly matched modern ones.
FAQ
Where can I find affordable vintage ornaments?
Thrift stores, estate sales, flea markets, and online resale sites are the best bets. Look for boxed sets, mixed bags, and lots sold cheap because one or two pieces are damaged.
How do I clean old glass ornaments without damaging them?
Dust gently with a soft brush first. For grime, wipe with a barely damp cloth and mild soap, then dry right away. Avoid soaking painted or glittered pieces.
Are vintage ornaments safe to hang on a real tree?
Most are fine, but glass and fragile pieces should hang on sturdy upper branches away from lights that get hot. Use ribbon or twine loops instead of sharp metal hooks near kids and pets.
Can I mix vintage and new ornaments on the same tree?
Absolutely. Use new ornaments as filler and background, then let vintage pieces stand out in clusters near the front and at eye level.
How do I store vintage ornaments so they last?
Wrap each piece in acid-free tissue or soft cloth, keep sets together in labeled boxes, and store them somewhere dry and cool away from direct sunlight.
Conclusion
Vintage ornaments work best when they look collected, not staged. Pull out what you already have, add one or two new pieces that fit your tree, and let the rest of the list wait until next year. Your tree doesn't need to match a photo or a theme someone else picked.
A few meaningful ornaments and a little breathing room will do more than a packed branch ever could. Hang them, step back, and enjoy the memories looking back at you.