10 Backyard DIY Ideas for Easy Weekend Outdoor Upgrades
Your backyard has good bones, but it's missing that pull that makes you want to hang out there. Maybe the patio feels bare, the lighting is an afterthought, or the garden beds look tired. The good news?
You don't need a contractor or a huge budget to fix it. These 10 projects are designed for a single weekend. Most use basic tools and materials you can grab at any home improvement store.
Some take an afternoon, others a full day, but none require a permit or a professional. Pick one that fits your space and your energy level. Then get outside and make it happen.
1. Build a Simple Gravel Patio for Instant Hangout Space
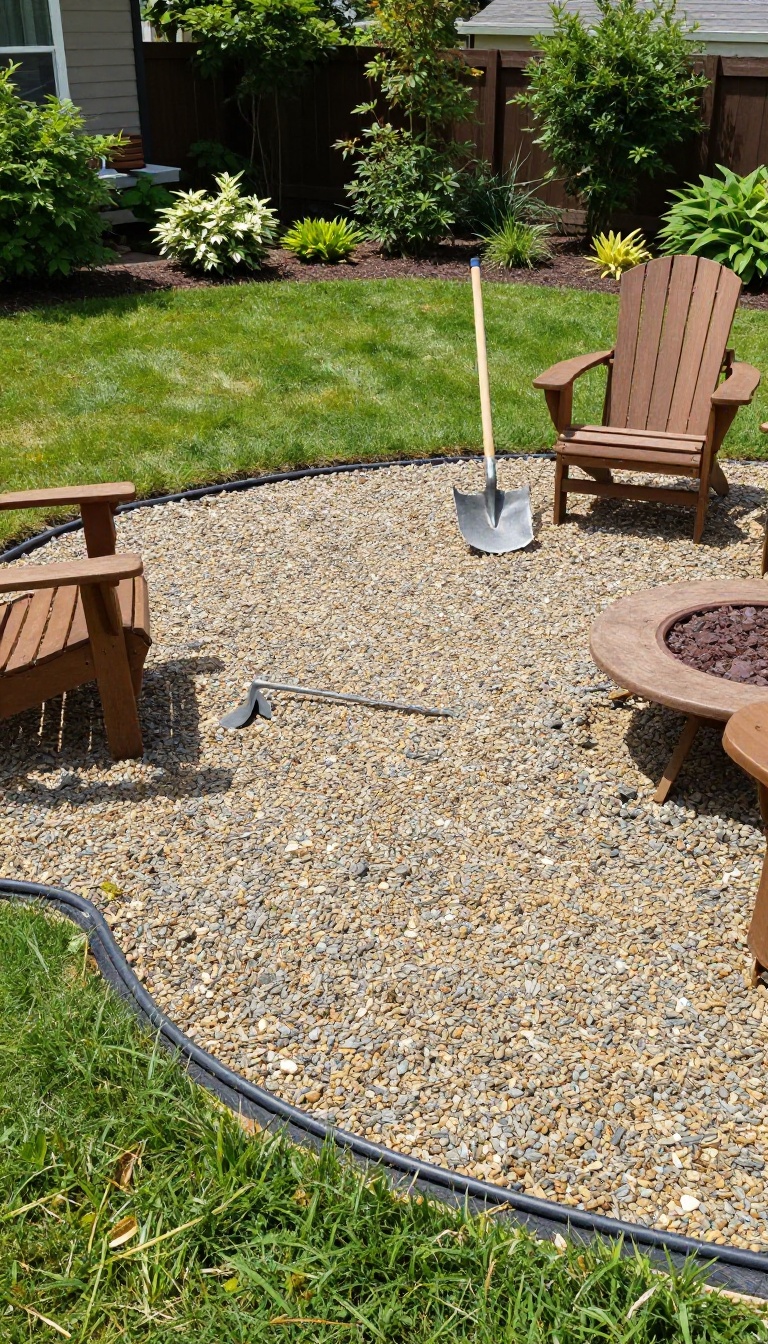
A gravel patio is the fastest way to turn a patch of bare dirt or sad grass into a real destination. You skip the concrete truck, the permit office, and the week of curing time. With a few bags of crushed stone and a free weekend, you get a solid surface for chairs, a fire pit, and whatever else you drag outside.
The whole project comes down to three things: digging out the area, locking down the base, and spreading the top layer. Get those right and the patio will hold up through rain, foot traffic, and the occasional dropped marshmallow. Get them wrong and you'll be fighting weeds and ruts by next spring.
Start by marking your shape. A garden hose laid on the ground makes a surprisingly good guide, and you can tweak the curves until it looks right from the kitchen window. Once you're happy, grab a shovel and a wheelbarrow.
Dig And Level The Base
Clear the grass and dig down about four inches across the entire footprint. Roots and sod go in the compost or a yard waste bag, not back in the hole. Rake the dirt smooth and check the slope with a long level.
You want a gentle tilt away from the house, roughly an inch of drop for every eight feet, so water runs off instead of pooling near your foundation.
Fabric, Gravel, And Compaction
Roll out landscape fabric over the bare dirt and overlap the seams by a few inches. This is the step people skip, and it's the one that keeps weeds from punching through your new patio. Dump three to four inches of crushed stone on top, then compact it with a hand tamper or a rented plate compactor.
Tamp in two passes, once after the first layer and again after you top it off. The surface should feel firm underfoot, not loose and shifty.
Finishing Touches That Make It Feel Intentional
Edge the patio with pavers, pressure-treated lumber, or a simple trench to keep the gravel from wandering into the lawn. A crisp edge makes the whole thing look planned rather than dumped. Set a couple of Adirondack chairs and a fire pit in the middle, then add a string of lights overhead.
The gravel does the heavy lifting, but the layout is what makes people want to sit down and stay a while.
2. Hang String Lights for a Cozy Evening Ambiance
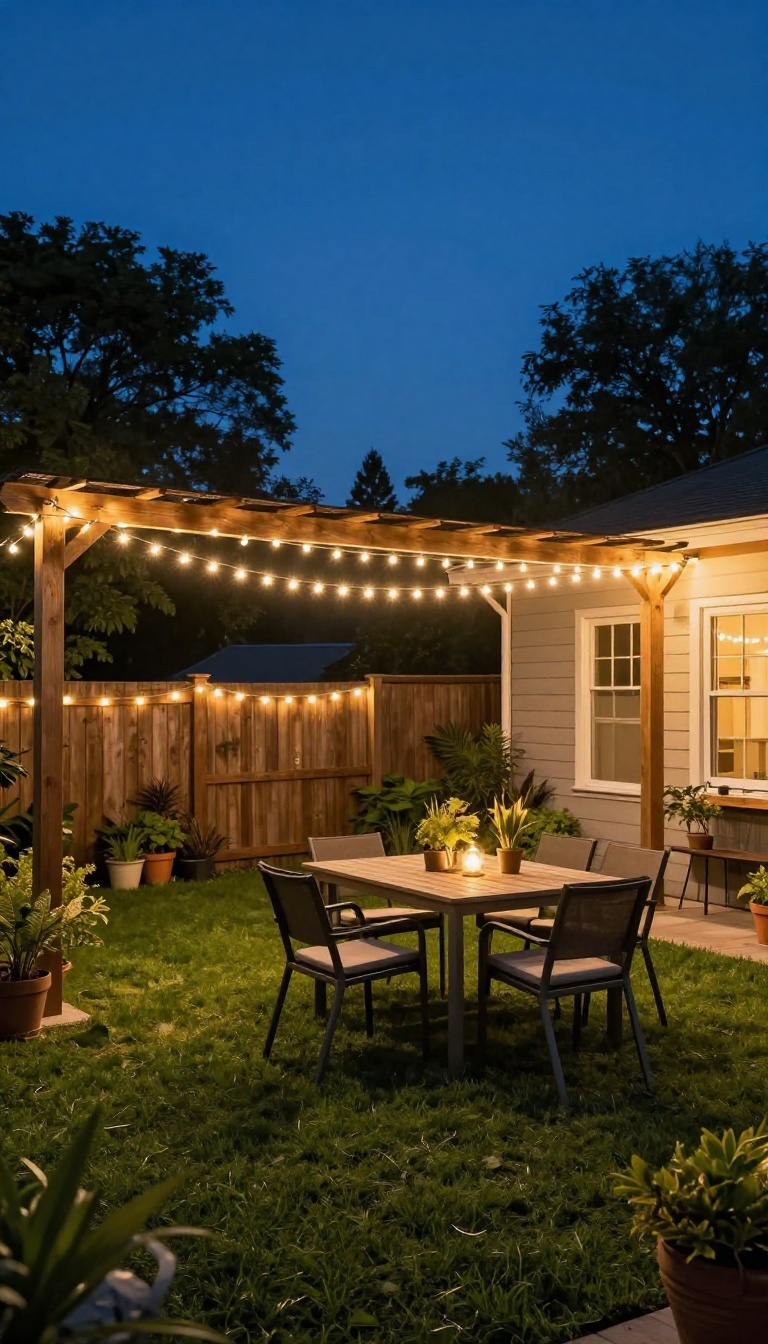
String lights are one of those upgrades that change how your yard feels after sunset. They add a soft glow that makes even a simple patio feel like a destination. You don't need a fancy setup—just a plan for where to hang them and the right kind of lights for outdoor use.
The trick is to create a canopy of light without making it look like a tangled mess. Start by mapping out your space. Do you want lights over a dining table, along a fence, or zigzagging across the entire yard?
Once you know the layout, you can choose your anchor points and the style of lights that fits your vibe.
Pick The Right Lights
Not all string lights are built for the outdoors. Look for strands labeled for exterior use, with weather-resistant bulbs and wiring. LED options cost a bit more upfront but use less power and last for years.
Warm white is the classic choice for a cozy feel, but you can also find soft globe bulbs or vintage-style Edison strands if you want a bit more character.
Find Your Anchor Points
You can hang lights from just about anything sturdy: fence posts, pergola beams, trees, or even tall shepherd's hooks planted in the ground. If your yard is wide open, consider installing a couple of wooden poles specifically for this purpose. Just make sure whatever you use can handle a bit of tension and wind.
For a cleaner look, run a guide wire between anchors and attach the lights to that.
Hang Them Safely And Securely
Avoid stapling lights directly to surfaces—it can damage the cord and create a safety hazard. Instead, use plastic clips or zip ties designed for string lights. Leave a little slack between anchors so the wires aren't pulled tight; this helps them survive storms and temperature changes.
If you're using an extension cord, keep the connection off the ground and away from standing water.
Set The Mood
Once your lights are up, play with the arrangement. Drape them in gentle swoops rather than straight lines for a more relaxed look. Add a dimmer switch if you want to control the brightness—it's a small upgrade that makes a big difference.
Pair the lights with a few candles or lanterns on the table, and you've got an instant evening retreat.
3. Install a DIY Privacy Screen with Wood Slats
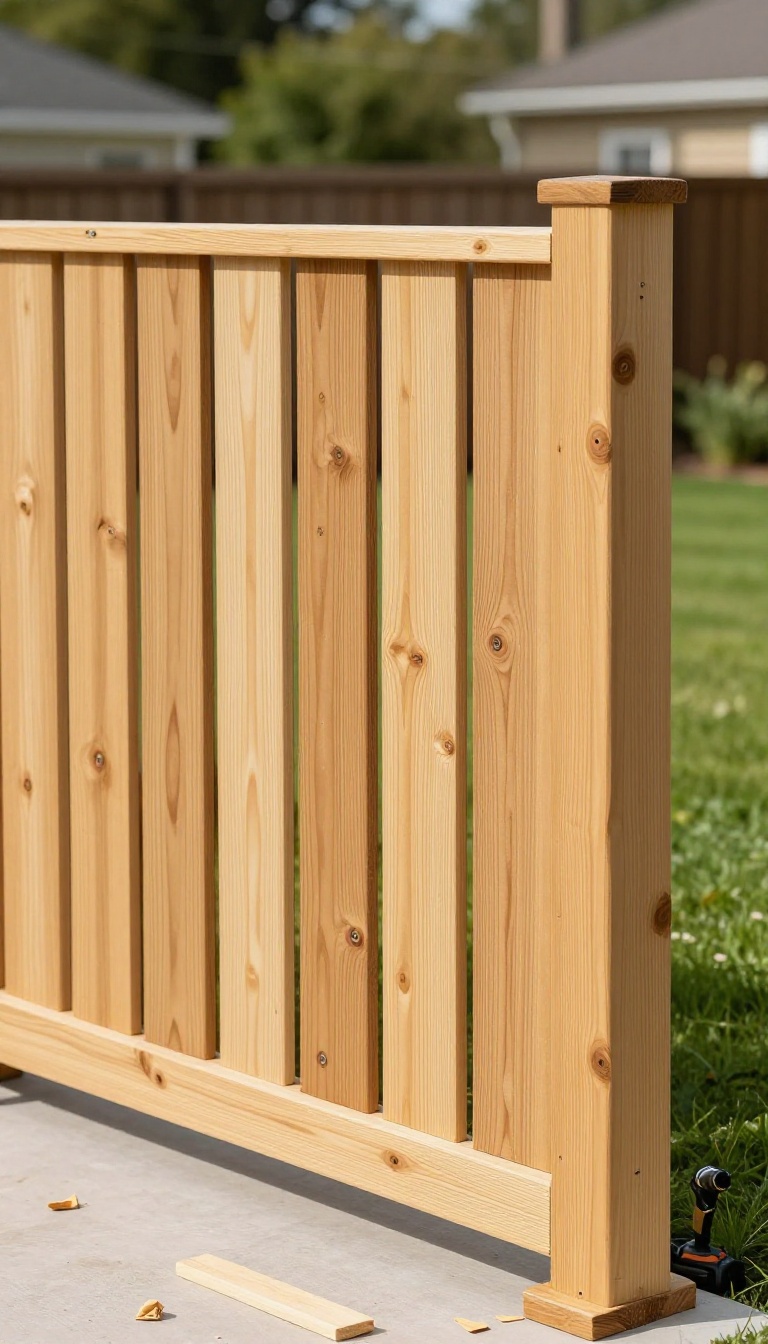
A privacy screen made from wood slats solves two problems at once: it blocks sightlines from neighbors and adds a clean, modern look to your yard. You can build it as a freestanding panel or mount it directly to an existing fence. Either way, it's a straightforward weekend project that doesn't require a contractor.
The materials are simple: cedar slats, a few support posts, and basic hardware. Cedar holds up well outdoors and ages nicely without much maintenance. You'll need a drill, a saw, and a level.
Most people finish this in a day.
The key to a good-looking privacy screen is consistent spacing and a solid frame. Don't rush the layout—measure twice and dry-fit your slats before you commit to screws. A screen that's slightly off will be noticeable, so take the extra few minutes to get it right.
Materials And Tools
You'll need cedar 1×2 or 1×3 slats, two or three 4×4 posts (if freestanding), exterior screws, and concrete mix for post footings. For tools: a drill, circular saw or miter saw, level, tape measure, and a shovel. Cedar is worth the extra cost because it resists rot and insects naturally.
If you're mounting to an existing fence, you can skip the posts and use fence brackets instead.
Spacing And Layout
Decide how much privacy you want. Tight spacing (1/2 inch) blocks more view but uses more wood. Wider spacing (1 to 2 inches) lets light through and feels airier.
A common approach is 1-inch gaps for a good balance. Mark your spacing on a scrap board to use as a template, then clamp it to your frame as you attach each slat. This keeps everything uniform.
Building And Installing
For a freestanding screen, dig post holes about 2 feet deep, set the posts in concrete, and let them cure overnight. Then build a frame with horizontal rails and attach the slats vertically. For a fence-mounted version, screw vertical supports to the existing fence posts, then attach slats horizontally or vertically.
Check for level as you go. Finish with a clear sealant if you want to preserve the cedar color.
4. Create a Raised Garden Bed from Cedar Boards
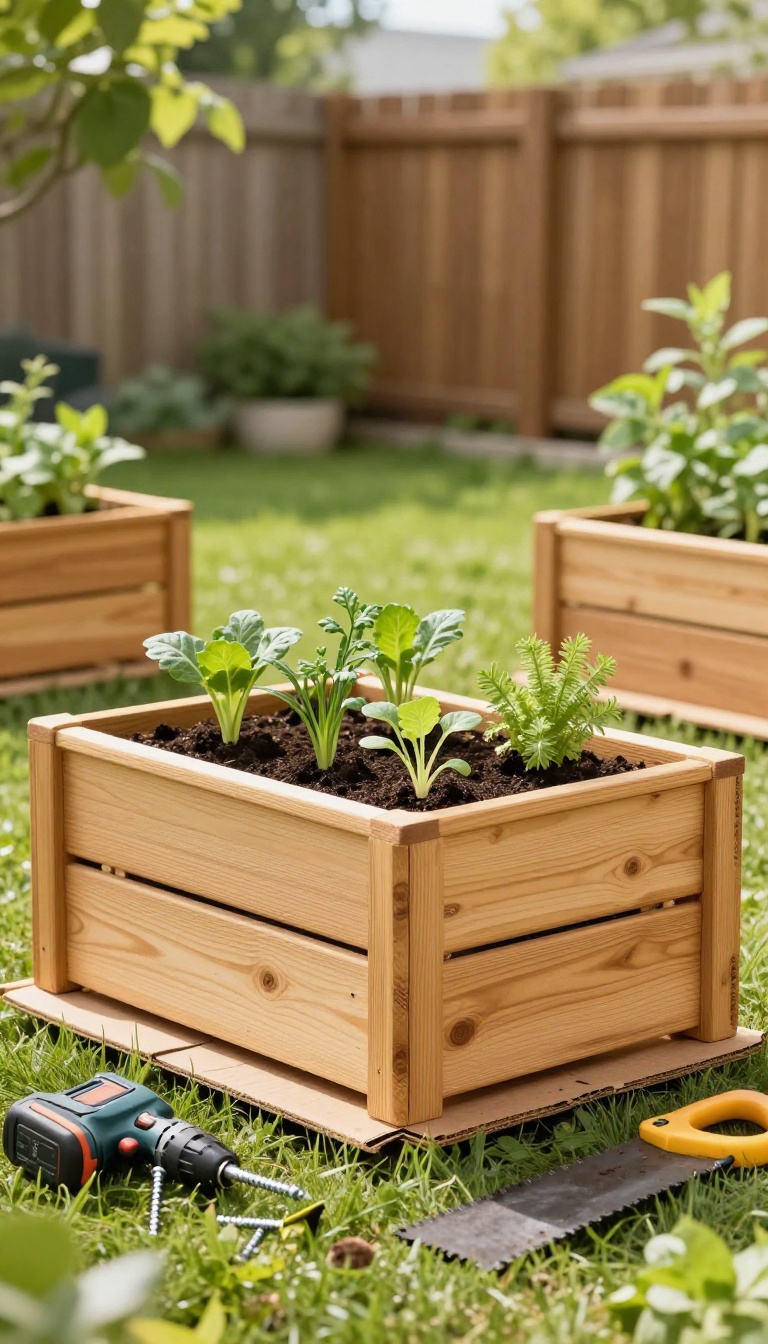
Raised beds fix a lot of common garden problems in one shot. They drain better, warm up faster in spring, and save your back from all that bending. Cedar is the go-to material because it resists rot naturally and looks good doing it.
You can build a simple 4×8 bed in an afternoon with basic tools and a few boards from the lumber yard.
A 4×8 raised bed is a sweet spot for most yards. It's big enough to grow a real harvest but small enough that you can reach the middle from either side. Cedar boards come in common sizes that make assembly straightforward, and you don't need any fancy joinery.
Just cut, drill, and screw. The best part? You can place it right over existing grass or dirt.
No tilling required. Just lay down cardboard or landscape fabric, set the frame, and fill it with a good soil mix. Your plants will thank you, and your knees will too.
Gather Your Materials And Tools
For a 4×8 bed that's about 10 inches deep, you'll need six 2×10 cedar boards cut to 8 feet and six cut to 4 feet. That gives you two stacked layers for strength and depth. Grab a box of 3-inch exterior screws, a drill, a saw, and a level.
A power miter saw makes quick work of the cuts, but a handsaw works fine if you take your time. Don't forget a tape measure and a pencil.
Assemble The Frame
Lay out two 8-foot boards and two 4-foot boards to form a rectangle. Pre-drill holes to avoid splitting the cedar, then screw the corners together. Repeat for the second layer.
Stack the second layer on top, offsetting the corners so the seams don't line up. Screw the layers together. Check for square by measuring diagonally from corner to corner—both measurements should match.
Prep The Site And Fill
Pick a spot that gets at least six hours of sun. Clear any rocks or debris, then lay down cardboard or weed barrier. Set the frame in place and level it by digging out high spots or adding soil under low corners.
Fill with a mix of topsoil, compost, and a little sand for drainage. Leave about an inch of space below the rim for watering. Plant right away or let it settle for a few days.
5. Add a Mulch Pathway to Define Your Garden Layout
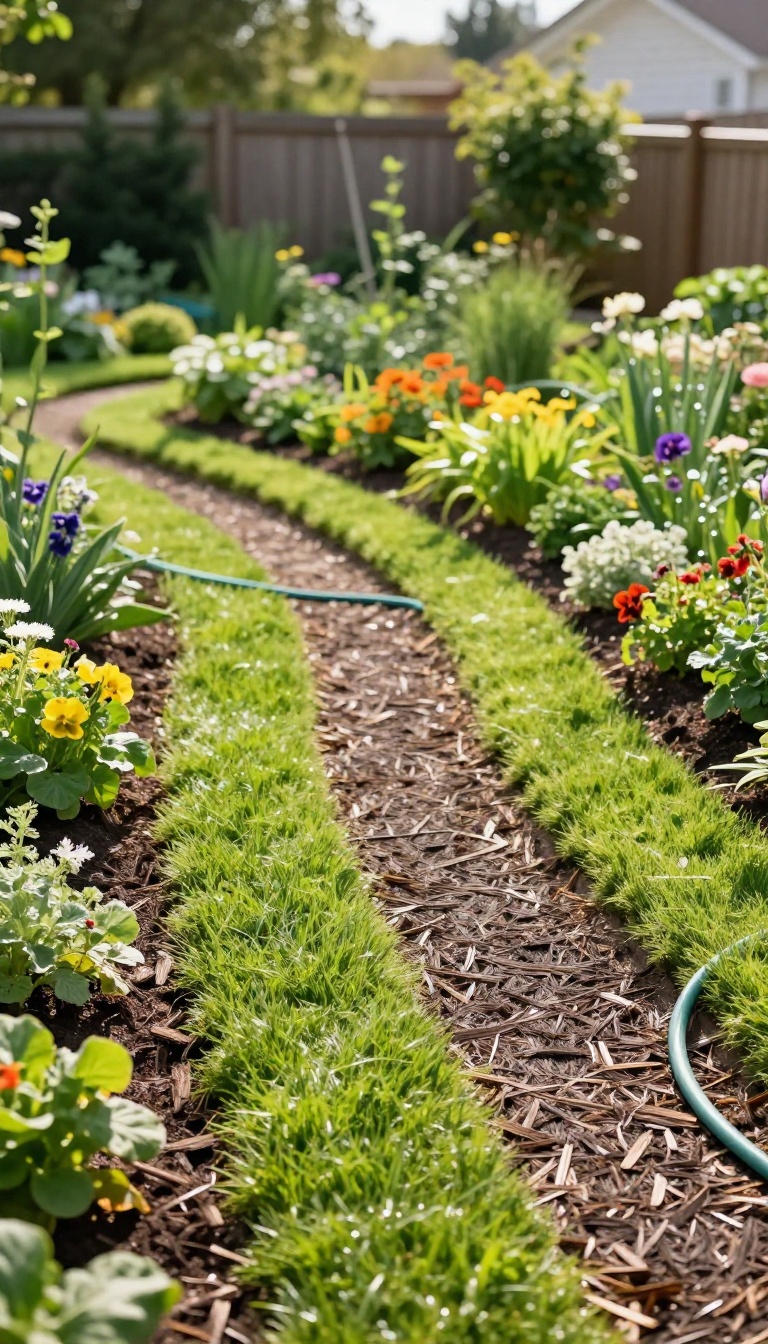
A mulch pathway does more than look tidy—it tells your feet where to go and keeps your garden beds from blending into the lawn. You can lay one in a single afternoon using cardboard and mulch, no digging required. It's a simple way to carve out clean lines, suppress weeds, and make the whole yard feel intentional.
Start by mapping your route. Walk your yard and decide where you naturally step—between the gate and the patio, along the vegetable beds, or around a tree. Use a garden hose or a line of flour to mark the edges.
Aim for at least 3 feet wide so two people can pass comfortably. Once you're happy with the shape, you're ready to prep.
Prep The Ground
Mow the grass or weeds as low as possible. Don't bother removing them—you'll smother them. If the area is uneven, rake it roughly level.
For extra staying power, edge the pathway with a spade to create a clean trench. This step takes 30 minutes and makes a huge difference in how crisp the final path looks.
Lay Cardboard And Mulch
Cover the entire path with a single layer of plain cardboard, overlapping the edges by at least 6 inches. Avoid glossy or waxy boxes. Soak the cardboard with water so it hugs the ground.
Then dump 3 to 4 inches of mulch on top—shredded hardwood, pine bark, or straw all work. Rake it smooth and pack it down with your feet.
Maintain And Refresh
For the first few weeks, pull any weeds that sneak through the edges. After that, the cardboard breaks down and feeds the soil while blocking new growth. Top off the mulch once a year to keep it looking fresh.
If you want a more permanent edge, add steel or stone borders, but it's optional.
6. Build a Floating Deck with Pre-Cut Joists
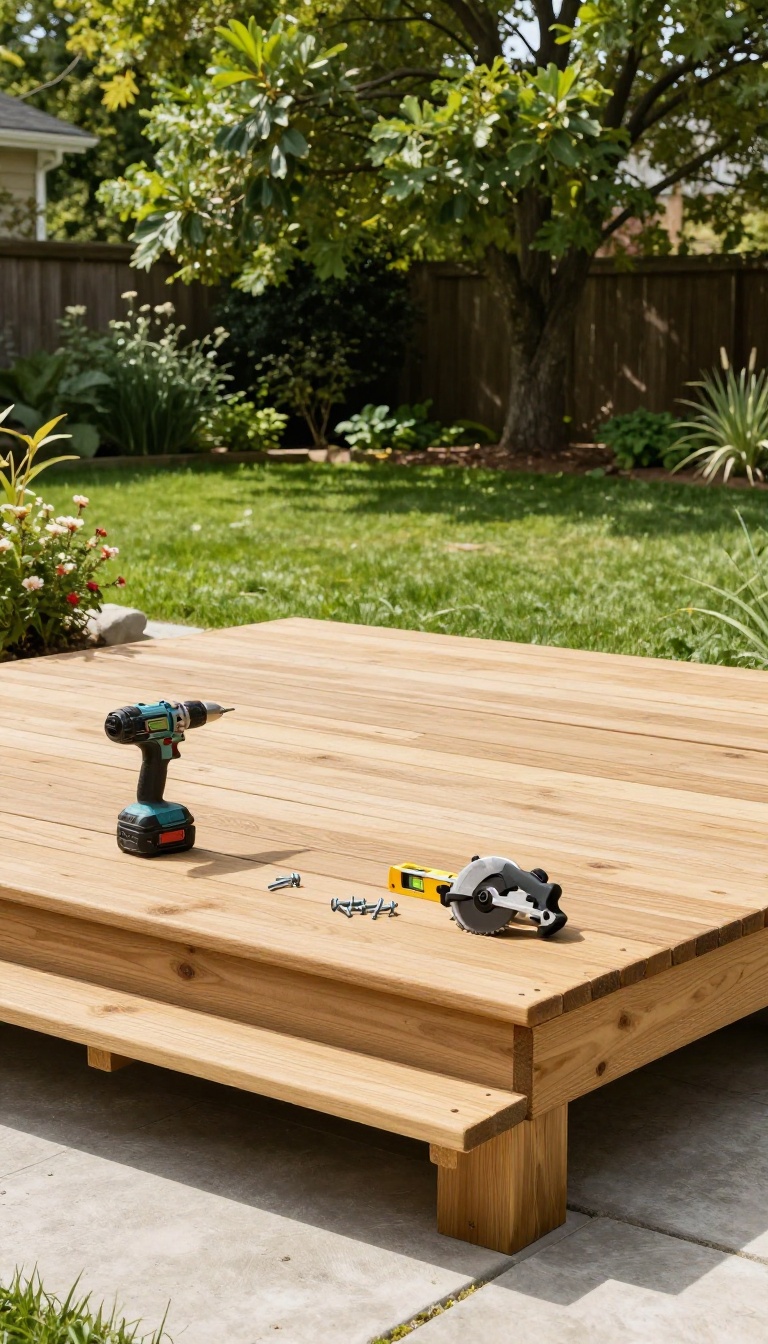
A floating deck sits on the ground instead of being attached to your house or buried in concrete. It uses concrete blocks as footings and pressure-treated lumber for the frame, so you skip digging holes and mixing concrete. The result is a sturdy, low-profile platform you can build in a weekend.
This project works best on flat, well-drained ground. You'll need 4×4 or 2×6 pressure-treated lumber, concrete deck blocks, and galvanized hardware. Pre-cut joists save time, but you can also have the store cut them for you.
The deck floats on the blocks, which means it can shift slightly with frost—so leave a small gap from any structure.
Plan Your Layout
Measure the area and decide on the deck size. A common size is 10×12 feet, but you can go smaller or larger. Mark the ground with stakes and string.
Place concrete blocks every 4 feet along the perimeter and in the middle for support. Make sure the blocks are level with each other—use a long board and a level to check.
Build The Frame
Cut your pressure-treated lumber to size. Create a rectangular frame with 2×6 boards, then add joists every 16 inches on center. Use galvanized screws or joist hangers to secure everything.
Flip the frame over and place it on the concrete blocks. Check for level and add shims if needed.
Add Deck Boards
Lay your deck boards perpendicular to the joists. Leave a small gap between boards for drainage—about 1/8 to 1/4 inch. Use a spacer to keep gaps consistent.
Secure each board with two screws per joist. Trim any overhanging boards with a circular saw. Finish with a stain or sealer to protect the wood.
7. Make a Vertical Herb Garden from Pallet Wood
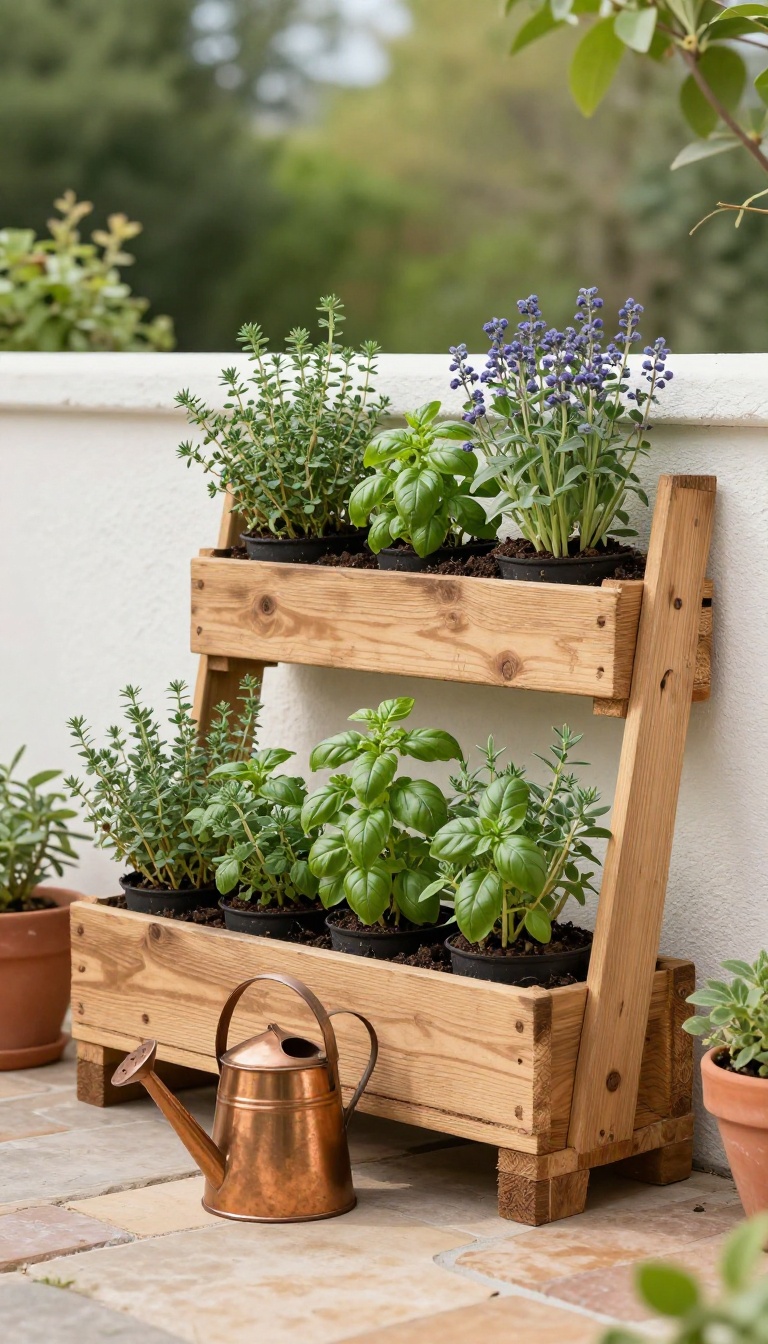
A pallet is basically a free planter waiting to happen. Lean it against a wall, fill the slats with soil, and you've got a vertical herb garden that takes up almost no ground space. It works especially well on small patios, narrow side yards, or any wall that gets a few hours of sun.
You'll need one pallet, some landscape fabric, and a bag or two of potting mix to get started.
Not every pallet is safe to grow food in, so pick yours carefully before you start cutting. Look for the stamp on the wood and avoid anything marked MB, which means it was fumigated with methyl bromide. HT means heat-treated, and that's the one you want.
Once you've got a clean pallet, the build is mostly stapling and filling. You're turning the gaps between slats into planting pockets, so the whole thing becomes a living wall of herbs by midsummer.
Pick And Prep The Right Pallet
Set the pallet on a flat surface and give it a quick once-over. Sand any rough spots, then wipe it down so you're not planting into dust and grit. If you want a cleaner look, hit it with a coat of exterior paint or stain and let it dry fully before adding soil.
Line It And Fill The Pockets
Staple landscape fabric across the back and over the bottom openings so soil stays put but water can still drain. Flip it upright, then fill each row with a lightweight potting mix. Leave a little headroom so you can tuck in plants without spilling dirt everywhere.
Plant, Water, And Hang
Small herbs like thyme, oregano, basil, and chives slot into the rows nicely. Water gently at first so the mix settles, then mount the pallet on a wall or fence with sturdy screws or brackets. Check moisture every couple of days, since vertical planters dry out faster than ground beds.
8. Set Up a DIY Fire Pit with Pavers and a Steel Ring
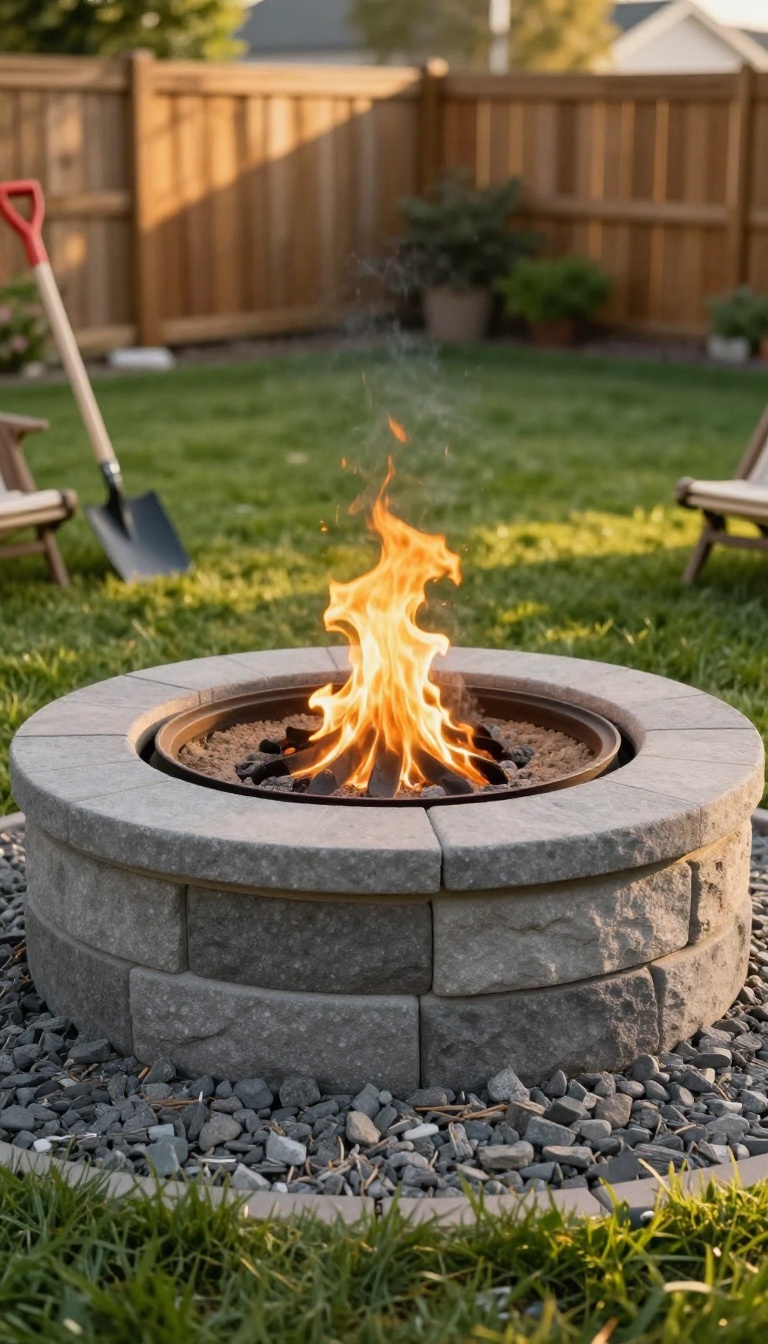
A fire pit turns a plain patch of grass into the spot everyone gravitates toward after dark. You can build one in a few hours using retaining wall blocks and a steel insert, no mortar or special skills required. The result is a safe, sturdy ring that looks like it came from a landscape supply yard.
The basic idea is simple: stack two or three courses of retaining wall blocks in a circle, then drop a steel fire ring insert into the center. The blocks hold the heat and give you a ledge for drinks or marshmallow sticks. The steel ring keeps the fire contained and protects the blocks from cracking.
Start by picking a spot at least 10 feet from your house, fence, or low-hanging branches. Clear the area of grass and roots, then level the ground with a shovel and a hand tamper. Spread a 2-inch layer of paver base or crushed gravel and compact it firmly.
Set the first course of blocks in a circle, checking level as you go. Add the second and third courses, staggering the seams like you would with bricks. Once the ring is stacked, place the steel insert inside and fill the gap between the insert and blocks with sand or small gravel.
Choose The Right Blocks And Insert
Look for retaining wall blocks with a lip on the back—they lock together and keep the ring from shifting. You'll need about 30 to 40 blocks for a 36-inch fire pit, depending on the size. For the insert, a 30- to 36-inch steel ring with a solid bottom works best.
It keeps ash contained and adds a layer of safety.
Prep The Ground Properly
A fire pit is heavy, so a flat base matters. Dig out a circle about 6 inches wider than your finished pit. Tamp the soil, add gravel, and tamp again.
Check level in several directions. If the ground slopes, your blocks will wobble and the ring won't sit right.
Stack, Level, And Finish
Start with the first course, then check level after every few blocks. Stack two or three courses total—higher than that and you risk instability. Once the insert is in, add a cap of sand or gravel around the top edge for a clean look.
Let the pit settle for a day before lighting a fire.
9. Install a Drip Irrigation System for Potted Plants
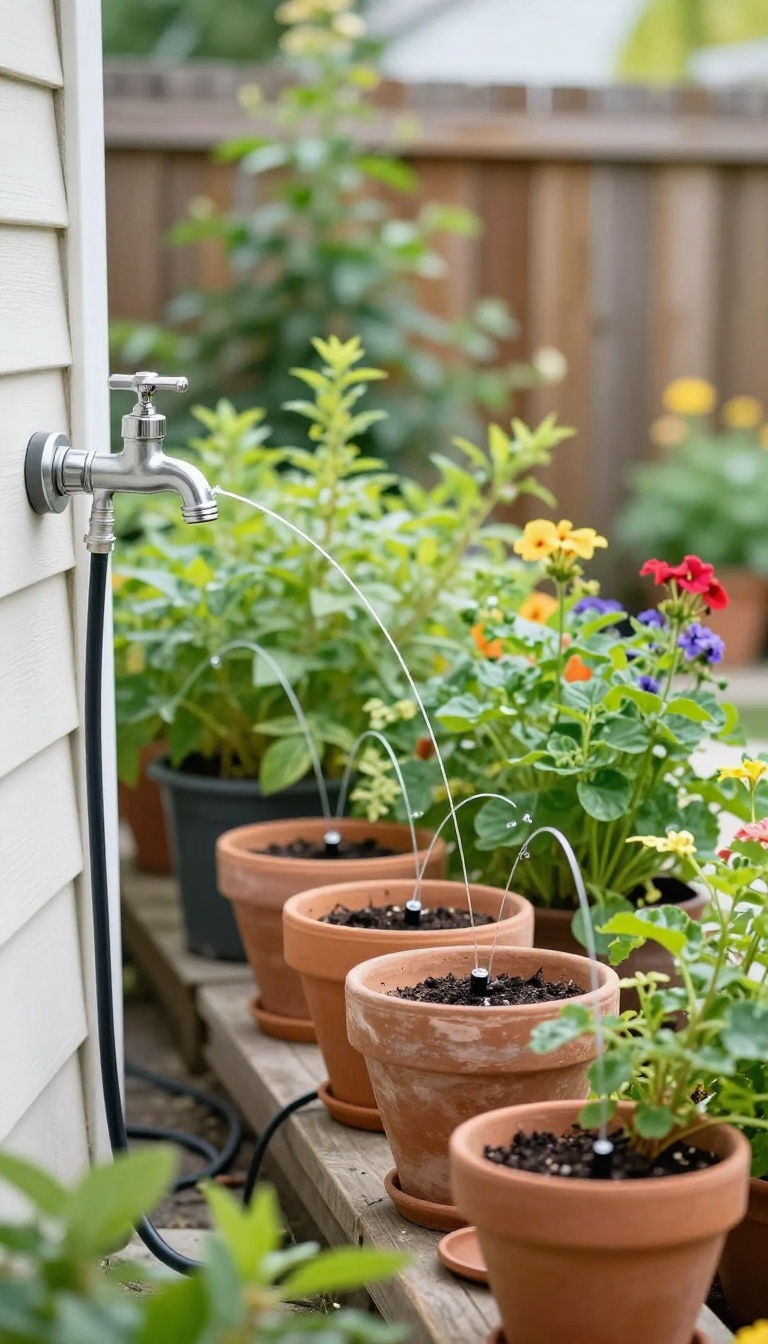
Hand-watering containers gets old fast, especially when you're juggling a dozen pots that dry out at different rates. A drip irrigation system with a timer takes that daily chore off your plate and gives your plants consistent moisture. It's one of those weekend upgrades that keeps paying off all season.
You don't need a fancy setup to make this work. A basic kit with a hose faucet timer, some half-inch tubing, and a handful of drip emitters covers most backyard container collections. The timer screws onto your outdoor spigot, the tubing runs along the ground or fence line, and thin spaghetti lines branch off to each pot.
Once it's dialed in, you just check the timer every couple of weeks and refill the batteries. The whole install takes an afternoon, and you can expand it later if you add more pots.
Map Your Pots Before You Buy Anything
Walk your yard and count every container you want on the system. Note how far each one sits from the faucet and whether they're clustered or spread out. That rough map tells you how much tubing you need and where to place emitters.
Grouping pots by similar water needs makes the whole system easier to tune later.
Pick The Right Emitters For Each Pot
Small pots need low-flow emitters, usually half a gallon per hour, while larger planters or hanging baskets might need one or two gallons per hour. If you mix them up, some plants drown while others stay dry. Buy an assortment pack so you can swap emitters after the first week if something looks off.
Adjustable emitters cost a little more but give you wiggle room.
Set The Timer And Watch The First Week
Start with a short run time, maybe five to ten minutes once a day, and check your pots each morning. If water runs out the bottom, cut the time back. If the soil still feels dry an inch down, add a few minutes or a second cycle.
After a week you'll know the sweet spot, and you can pretty much forget about it until the seasons change.
10. Build a Simple Outdoor Bench from 2x4s
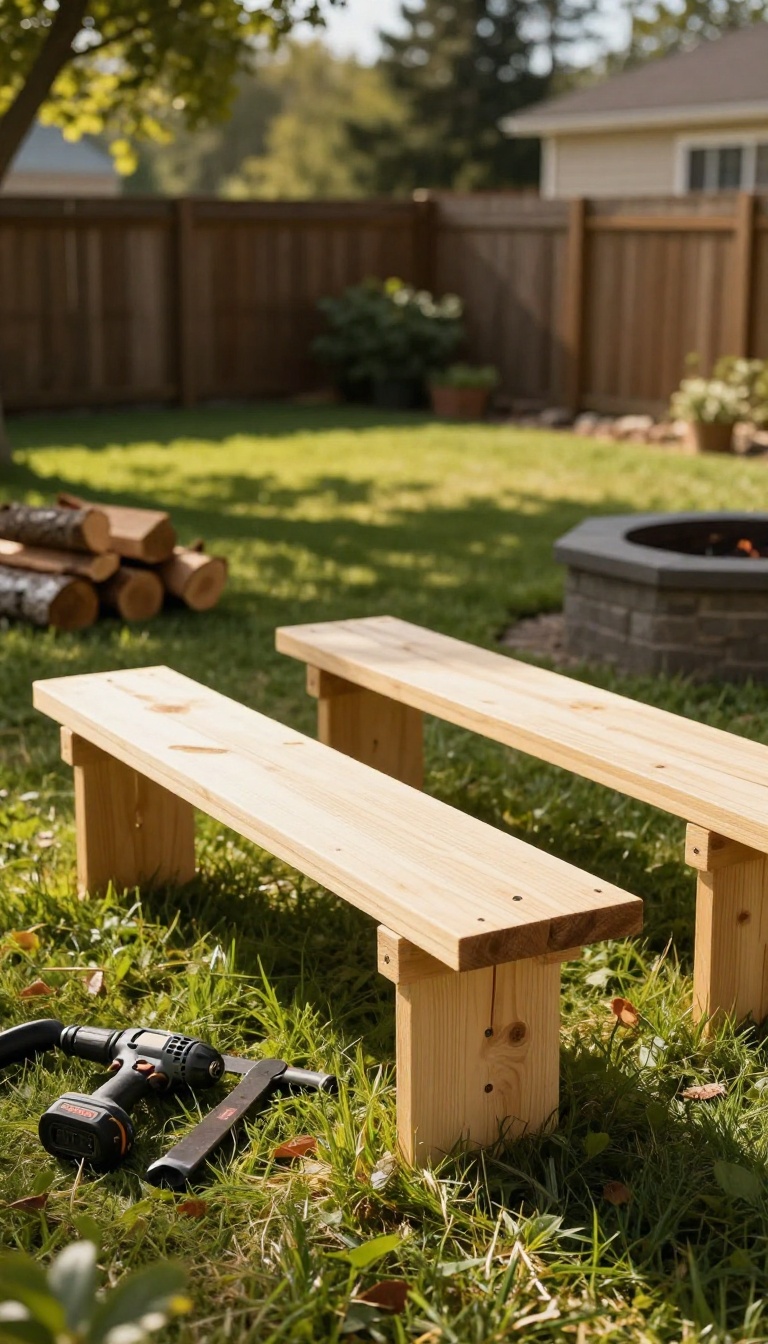
A basic 2×4 bench gives you sturdy extra seating for cookouts, fire pit nights, or just sipping coffee while the dog runs laps. It costs a fraction of a store-bought piece and takes an afternoon, even if you've never built furniture before. You only need a handful of boards, a saw, and a drill.
The classic design uses four legs, two long seat rails, and a few cross supports. You can build it at any length, but a 4-foot bench is a good starting point because it seats two adults comfortably without needing a middle leg. Pressure-treated lumber holds up best outdoors, though cedar looks nicer if you plan to stain it.
Grab 2x4s that are straight and dry, and let them acclimate in your garage for a day or two before cutting.
Cut List And Layout
For a 4-foot bench, cut two seat rails at 48 inches, four legs at 16 inches, and four cross supports at 14 inches. Lay the seat rails flat and mark where the legs will attach—about 6 inches in from each end. Clamp a scrap board across your marks as a fence so every leg lines up square.
If you're using a circular saw, a speed square helps you make clean crosscuts without measuring twice.
Assembly That Stays Tight
Pre-drill every screw hole to keep the 2x4s from splitting, especially near the ends. Attach the legs to the inside of the seat rails with two 3-inch exterior screws per joint. Then run the cross supports between the legs to stop the bench from wobbling side to side.
Set the whole thing on a flat surface before you tighten the final screws so it doesn't rock.
Sanding And Weather Protection
Give every edge a quick pass with 120-grit sandpaper, then round over the corners where people will sit. Wipe off the dust and brush on an exterior stain or clear sealer. One coat is enough for the first season, but a second coat before winter will keep the wood from graying.
Let it dry overnight before you move it to its spot.
FAQ
What tools do I need for these backyard DIY projects?
Most projects require a drill, circular saw, level, tape measure, and shovel. A rubber mallet and staple gun help with specific tasks like gravel patios and string lights.
How much do these weekend upgrades typically cost?
Costs range from $50 for a mulch pathway to $300 or more for a floating deck. Most fall between $100 and $200, depending on materials and your yard size.
Can I do these projects alone, or do I need help?
Many are solo-friendly, like the herb garden or drip irrigation. For heavier tasks like building a deck or fire pit, a second pair of hands makes it safer and faster.
Do I need a permit for any of these DIY backyard ideas?
Generally, no. Floating decks and fire pits usually don't require permits if they're low to the ground and away from structures. Check local rules for anything over 30 inches tall.
How do I keep these upgrades looking good long-term?
Use pressure-treated or cedar lumber, apply a sealant to wood surfaces, and refresh mulch annually. String lights and drip lines last longer if you store them during harsh winters.
Conclusion
Most weekend upgrades fail because people try to do all ten at once. Pick the one project that fixes your biggest daily annoyance, whether that is a dark patio, a bare fence, or a sad patch of dirt. Finish it, then live with it for a few weeks.
You will learn pretty fast what your yard actually needs next. Add another idea when you have a free Saturday and some spare cash. The goal is a space you use more, not a checklist you complete.