23 Cleaning Oven Racks Tips for Grease and Burnt Spots
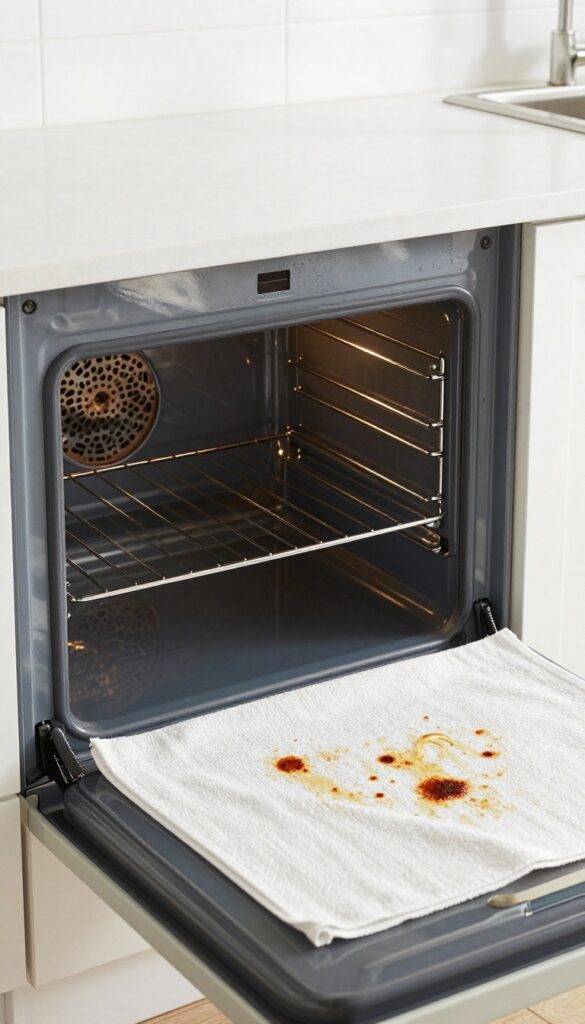
You pull open the oven door and there they are: oven racks coated in a stubborn layer of baked-on grease and charred bits. It’s a sight that makes you want to close the door and pretend it doesn’t exist.
But those racks don’t have to stay that way. With the right approach, you can restore them to like-new condition without spending hours scrubbing or using harsh chemicals.
These 23 tips will walk you through everything from quick daily maintenance to deep-cleaning methods that tackle even the toughest burnt spots. Let’s turn that grimy mess into a sparkling success.
1. The Dishwasher Trick for Lightly Soiled Racks
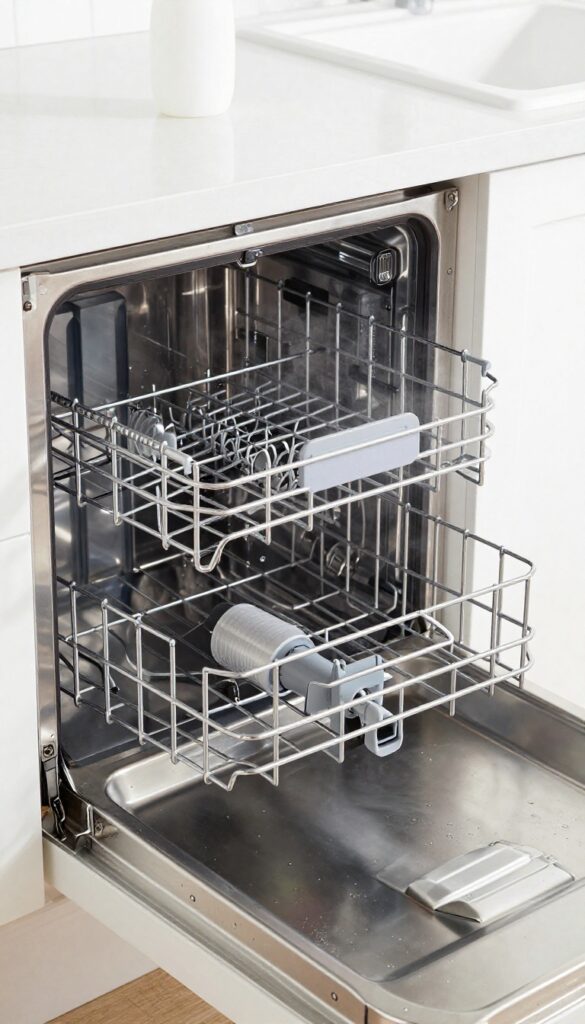
Not every oven rack needs a heavy-duty scrub session. If yours have just a thin layer of grease or a few light spots, your dishwasher can do the heavy lifting. This method is perfect for regular maintenance or when you've caught the mess early.
Place the racks upright in the dishwasher, making sure they don't block the spray arms. Use a heavy-duty cycle with a degreasing detergent—add a bit of white vinegar to the rinse aid compartment for extra power. Let the cycle run fully, then check the racks.
Most light grease will be gone, and you can wipe off any remaining residue with a damp cloth.
Check Your Dishwasher Size
Not all racks fit in all dishwashers. Measure your oven racks and compare them to your dishwasher's interior height and width. If they're too long, try placing them diagonally or skip this method.
Also, remove any rubber bumpers or plastic ends—they can melt or get damaged.
Use The Right Detergent
Standard dishwasher pods work, but a degreasing detergent (like one with enzymes) gives better results. Add a tablespoon of baking soda to the bottom of the dishwasher for extra scrubbing power. Avoid using bleach—it can discolor metal racks.
Inspect After The Cycle
When the cycle ends, pull out the racks and check for any missed spots. If you see stubborn bits, a quick scrub with a non-abrasive sponge should finish the job. Dry the racks immediately to prevent water spots or rust.
2. Ammonia Soak for Stubborn Grease
When scrubbing just won't cut it, ammonia is your secret weapon. This method uses fumes to break down the toughest grease without elbow grease. It's a set-it-and-forget-it solution that works overnight while you sleep.
Why Ammonia Works
Ammonia is a powerful degreaser that cuts through baked-on grease and carbonized food. The fumes penetrate every crevice, loosening grime so it rinses away easily. It's especially effective for racks with years of buildup.
How To Do It Safely
Place your oven racks inside a heavy-duty trash bag. Pour 1/2 cup of clear ammonia into the bag, then seal it tightly. Let it sit overnight in a well-ventilated area or outdoors.
The next day, remove the racks and rinse them thoroughly with hot water. Wear gloves and avoid inhaling fumes.
Final Rinse And Dry
After the soak, use a stiff brush or sponge to remove any remaining residue. Rinse with hot water until no ammonia smell remains. Dry completely before placing back in the oven.
Your racks will look like new.
3. Baking Soda and Vinegar Paste
If your oven racks have a moderate layer of grease and burnt-on food, this classic combo is a game-changer. Baking soda and vinegar work together to lift grime without harsh scrubbing. The paste clings to vertical surfaces, making it perfect for those vertical rack bars.
Mix equal parts baking soda and white vinegar to form a thick, spreadable paste. Apply it generously to the racks, covering all greasy areas. Let it sit for 30 minutes—the chemical reaction helps break down the buildup.
Then scrub with a non-abrasive pad or sponge. Rinse thoroughly with warm water and dry completely before returning to the oven.
Why This Paste Works
Baking soda is mildly abrasive, so it helps physically loosen grime. Vinegar is acidic, which dissolves grease and neutralizes odors. Together, they create a fizzing action that lifts burnt spots without damaging the metal.
Pro Tips For Best Results
For extra stubborn spots, let the paste sit longer—up to an hour. If the paste dries out, spritz with a little water to reactivate. Avoid using steel wool, which can scratch the rack's finish.
A nylon scrub brush works great for getting into crevices.
When To Use This Method
This method is ideal for racks with moderate buildup that hasn't turned into thick, black crust. For light cleaning, you can skip the long soak. For heavy, burnt-on layers, you might need a stronger method like ammonia or oven cleaner.
4. The Garbage Bag Method with Dish Soap
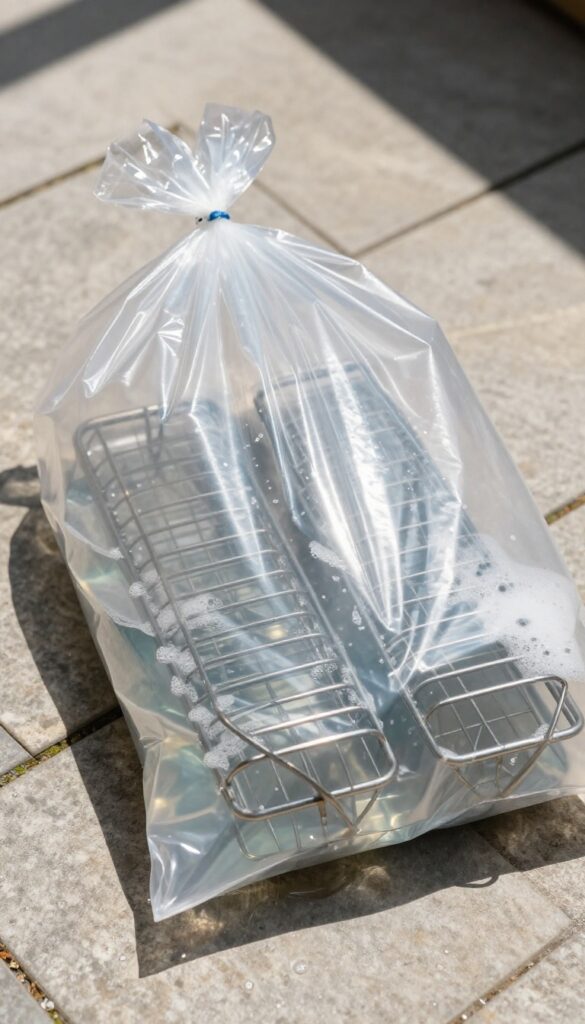
If you want a deep clean with almost no elbow grease, the garbage bag method is hard to beat. It uses the sun's heat and dish soap to loosen grime while you do other things. This technique works best on a warm, sunny day and is perfect for racks that aren't caked with years of buildup.
This method is surprisingly effective and requires minimal effort. The combination of hot water, dish soap, and solar heat creates a gentle degreasing environment that softens burnt-on residue. After a few hours, a simple shake and rinse can leave your racks looking almost new.
What You'll Need
Grab a heavy-duty garbage bag (preferably clear or white to let sunlight in), about 1/4 cup of dish soap, and enough hot water to fully submerge the racks. You'll also need a sunny spot outdoors. That's it.
Step-by-step Instructions
Place one or two racks inside the bag. Add the dish soap and then fill the bag with hot water until the racks are covered. Seal the bag tightly—you can tie it or use a twist tie.
Lay the bag flat on a driveway or patio in direct sunlight. Let it sit for at least 3-4 hours, or longer if the grime is stubborn. After soaking, carefully open the bag (watch out for hot water), shake the racks vigorously, and rinse with a hose.
Most of the grease and burnt spots should slide right off.
Pro Tips For Best Results
For extra tough spots, add 1/2 cup of baking soda to the bag along with the dish soap. If you don't have sun or it's cold, use the hottest tap water and let the bag sit in a warm spot indoors, though it may take longer. Always check the bag for leaks before carrying it to avoid a soapy mess.
5. Use a Dryer Sheet for Burnt-On Spots
Dryer sheets aren't just for laundry. The fabric softener coating on them can actually help break down tough, carbonized residue on oven racks. It's a surprisingly effective trick that requires minimal effort.
Grab a used or new dryer sheet, soak it in warm water, and lay it directly over the burnt spots. Let it sit for about 20 minutes. The softening agents in the sheet will start to loosen the grime.
After that, simply scrub with a sponge or brush—the burnt bits should come off much easier. Rinse the rack thoroughly afterward to remove any residue.
Why It Works
Dryer sheets contain surfactants and softening agents that help dissolve grease and baked-on food. When combined with heat and moisture, these compounds penetrate the burnt layer, making it easier to scrub away without harsh chemicals.
Best Practices
Use a fresh sheet for best results, though a used one can still work in a pinch. Make sure the sheet is fully saturated and in direct contact with the burnt spots. For extra stubborn areas, you can leave it on longer or even wrap the sheet around the rack.
What To Avoid
Don't use dryer sheets on non-stick or coated racks, as the abrasives could damage the surface. Stick to stainless steel or chrome racks. Also, avoid using this method in the oven itself—only on racks removed from the oven.
6. Cream of Tartar and Hydrogen Peroxide
For those stubborn burnt spots that laugh at regular cleaners, cream of tartar teams up with hydrogen peroxide to deliver a knockout punch. This dynamic duo creates a gentle abrasive paste that breaks down carbonized grime without scratching your oven racks. It's a kitchen staple solution that's both effective and non-toxic.
When baking soda fails, this paste steps up. The cream of tartar provides mild abrasion while the hydrogen peroxide bubbles away grease and lifts burnt residue. It's especially good for racks with patchy, stubborn spots that need targeted treatment.
Making The Paste
Mix equal parts cream of tartar and hydrogen peroxide in a small bowl until it forms a thick, spreadable paste. You'll need about 2 tablespoons of each for a standard rack. Adjust quantities as needed—the consistency should be like toothpaste, not runny.
Application And Dwell Time
Apply the paste generously to the burnt areas using a spatula or an old brush. Let it sit for 15 minutes—longer for heavily caked spots. The peroxide works during this time to soften the grime, making scrubbing much easier.
Scrubbing And Rinsing
After the wait, scrub with a non-scratch sponge or a nylon brush. The paste will loosen the burnt bits, so you won't need heavy pressure. Rinse thoroughly with warm water and dry immediately to prevent any residue.
7. Self-Cleaning Oven Cycle (with Caution)
You might think the self-cleaning cycle is a one-stop solution for everything inside your oven, including the racks. But using it with the racks in place can actually do more harm than good. The extreme heat—often exceeding 800°F—can discolor the metal, warp the racks, and ruin their smooth glide.
Worse, it can damage the protective coating, leaving them prone to rust. So before you hit that button, take the racks out and clean them separately. Your racks (and your oven) will thank you.
The self-cleaning cycle is a powerful tool, but it's not designed for oven racks. Leaving them inside can cause the chrome or nickel plating to bubble, peel, or discolor permanently. The high heat can also warp the racks, making them difficult to slide in and out.
If you've already run the cycle with racks inside, inspect them for damage. If they're warped or the finish is compromised, it's safer to replace them. For future cleans, always remove the racks first.
Clean them using one of the other methods in this article, then wipe down the oven interior before starting the cycle.
What Happens When You Leave Racks In
The self-cleaning cycle heats the oven to extreme temperatures to burn off food residue. While this is effective for the oven walls, the racks can suffer. The intense heat can cause the metal to expand unevenly, leading to warping.
The protective coating may also discolor or flake off, exposing the bare metal to moisture and eventually rust. In some cases, the racks can become stuck in the oven due to expansion, making them impossible to remove until they cool—and even then, they might not slide freely again.
How To Use The Self-cleaning Cycle Safely
To protect your racks, remove them before starting the cycle. Wipe down the oven interior to remove loose debris, then run the cycle according to your oven's instructions. Once the cycle finishes and the oven cools, wipe away the ash residue.
For the racks, clean them separately using a gentler method like baking soda paste or a commercial oven cleaner. This way, you get a spotless oven and undamaged racks.
A Note On Oven Rack Materials
Not all oven racks are created equal. Some are made from stainless steel, others from chrome-plated steel. Self-cleaning cycles are particularly harsh on chrome-plated racks, as the coating can degrade.
If your racks are stainless steel, they might withstand the heat better, but it's still not recommended. Check your oven manual for specific guidance. When in doubt, play it safe and remove the racks.
8. Bar Keepers Friend for Stainless Steel Racks
Bar Keepers Friend isn't just for kitchen sinks and countertops. This powdered cleaner is a powerhouse when it comes to stainless steel oven racks. It uses oxalic acid to cut through baked-on grease and carbon deposits without scratching the metal.
The result is a bright, like-new finish that makes your racks look fresh out of the box.
Bar Keepers Friend is a gentle abrasive that works chemically, not just mechanically. It's safe for stainless steel and won't damage the chrome finish on most oven racks. The powder activates with water, creating a mild acid that dissolves burnt-on food and grease.
How To Apply
Wet the rack slightly, then sprinkle Bar Keepers Friend powder directly onto the surface. Use a damp sponge or soft cloth to scrub in a circular motion. Focus on the worst spots, but cover the whole rack for even cleaning.
Rinse thoroughly with water and dry immediately to prevent water spots.
Tackling Stubborn Burnt Spots
For extra-stubborn areas, make a paste by mixing Bar Keepers Friend with a few drops of water. Let it sit on the spot for 5–10 minutes before scrubbing. The paste gives the cleaner more contact time to break down tough carbon.
Repeat if needed, but usually one round does the trick.
Rinsing And Drying
Rinse the rack with plenty of warm water to remove all residue. Any leftover powder can leave a white film or cause dullness. Dry the rack with a clean towel or let it air dry completely before sliding it back into the oven.
A dry rack prevents rust and keeps it looking polished.
9. Lemon Juice and Salt Scrub
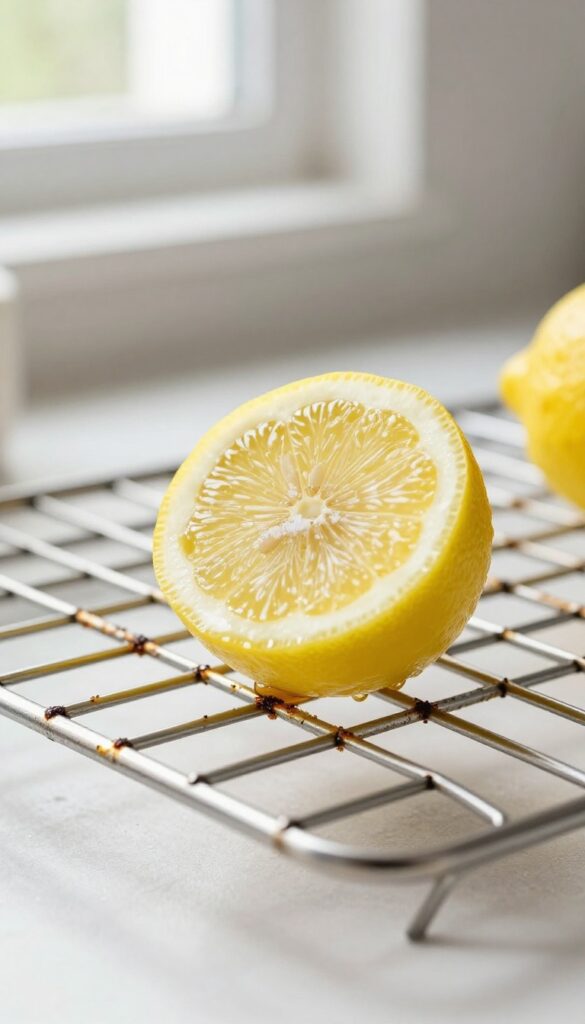
Sometimes the best cleaning solutions are already sitting in your kitchen. Lemons and salt might seem too simple to tackle baked-on grease, but this dynamic duo works surprisingly well. The citric acid breaks down grease while the salt acts as a gentle abrasive—no harsh chemicals needed.
This method is especially handy when you only have one or two racks to clean and don't want to set up a full soaking station. It's quick, smells great, and leaves your racks with a fresh citrus scent.
Why It Works
Lemon juice is a natural degreaser thanks to its acidity. It helps loosen the bond between grease and metal, making scrubbing much easier. Salt provides the grit to physically scrub away burnt-on bits without scratching the metal surface.
How To Do It
Cut a lemon in half and dip the cut side into a small bowl of salt. Scrub the rack firmly, focusing on greasy or burnt areas. Rinse with warm water and repeat if needed.
For extra stubborn spots, let the lemon-salt mixture sit for a few minutes before scrubbing.
When To Use This Method
This scrub works best on light to moderate grease and burnt spots. For heavily caked-on grime, you might need to combine it with a longer soak or a stronger cleaner. It's also great for a quick refresh between deep cleans.
10. Oven Cleaner Spray (Heavy-Duty)
When scrubbing and natural remedies aren't cutting it, it's time to bring out the big guns. Commercial oven cleaners are formulated to dissolve the toughest baked-on grease and carbonized food. They work fast, but they also contain strong chemicals, so you need to handle them with care.
Here's how to use them safely and effectively.
Commercial oven cleaners like Easy-Off are designed for heavy-duty grease and burnt spots. They typically contain sodium hydroxide or other caustic agents that break down carbon deposits. While highly effective, they require careful handling to avoid skin irritation and fumes.
Always work in a well-ventilated area, preferably outdoors, and wear rubber gloves and eye protection. Follow the product instructions precisely—usually you spray the racks, let them sit for a specified time (often 20-30 minutes), then wipe or rinse clean. Some cleaners require the racks to be placed in a plastic bag to keep the spray from drying out.
After cleaning, rinse thoroughly with water to remove any chemical residue before putting the racks back in the oven. This method is perfect for racks with years of buildup that other methods can't touch.
Preparation And Safety
Before you start, lay down newspapers or a drop cloth to protect your work surface. Put on heavy-duty rubber gloves and safety goggles. Make sure the area is well-ventilated—open windows or work outside.
Remove the racks from the oven and place them on the covered surface. Read the product label carefully; different brands have different dwell times and instructions.
Application And Dwell Time
Shake the can well and spray an even coat over the entire rack, focusing on greasy or burnt areas. For extra stubborn spots, apply a thicker layer. Place the rack inside a large plastic trash bag (if recommended) and tie it closed.
Let it sit for the time specified on the label—usually 20 to 30 minutes. Avoid leaving it on longer than recommended, as it can damage the metal.
Rinsing And Final Cleanup
After the dwell time, remove the rack from the bag (if used) and rinse it thoroughly with hot water. Use a scrub brush or sponge to loosen any remaining residue. Repeat rinsing until all traces of the cleaner are gone.
Dry the rack completely before returning it to the oven. Dispose of the bag and gloves properly, and wash your hands thoroughly.
11. Boiling Water and Baking Soda Soak
If your oven racks are caked with years of grease and burnt-on food, a simple scrub won't cut it. You need a method that softens that crust without elbow grease. That's where the boiling water and baking soda soak comes in.
It's a set-it-and-forget-it approach that works wonders on heavy buildup.
This method is perfect for racks that look like they've never been cleaned. The combination of heat and alkaline baking soda breaks down tough grease and carbon deposits, making them slide off with minimal effort. It's cheap, non-toxic, and uses ingredients you already have.
What You'll Need
Gather a large container big enough to submerge your racks—a plastic storage bin, a utility sink, or even a clean bathtub works. You'll also need boiling water (enough to cover the racks), 1 cup of baking soda, and a scrub brush or sponge. Optional: rubber gloves to protect your hands.
The Soaking Process
Place the racks in your container. Sprinkle the baking soda evenly over them, then pour in the boiling water until the racks are fully submerged. The water will fizz as the baking soda reacts.
Let them soak overnight, or at least 8 hours. For extra-stubborn spots, add another half cup of baking soda and a splash of white vinegar before the water.
Scrubbing And Rinsing
After soaking, lift the racks out—the grime should be loose and flaking. Use a scrub brush or a non-scratch sponge to remove any remaining residue. Rinse thoroughly with warm water.
If any burnt spots persist, make a paste of baking soda and water, apply it, and scrub again. Dry the racks completely before putting them back in the oven.
12. The Foil Ball Scrubber
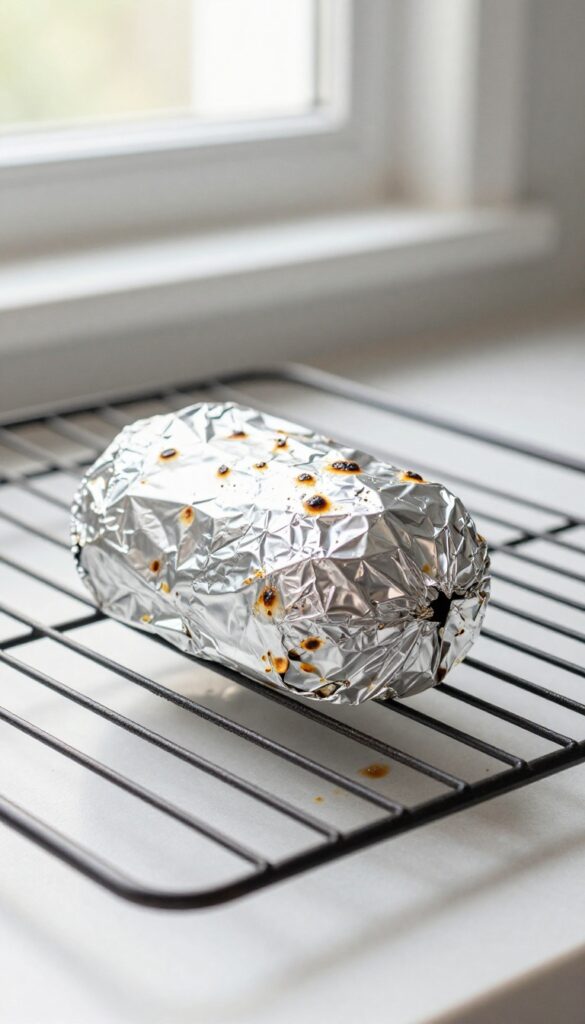
Sometimes the simplest tools work best. Crumple a sheet of aluminum foil into a tight ball, and you've got a scrubber that's tough on burnt spots but gentle on metal racks. The foil creates enough friction to loosen carbonized grease without scratching the surface, especially when paired with a little dish soap.
This method is perfect for those stubborn patches that resist baking soda or commercial cleaners. It's cheap, requires no special equipment, and works in minutes.
How To Make And Use It
Tear off a sheet of heavy-duty aluminum foil about 12 inches long. Crumple it into a tight ball roughly the size of a golf ball. Wet the rack and apply a few drops of dish soap.
Scrub the burnt areas using firm circular motions. The foil will gradually soften and conform to the rack's shape, reaching into crevices.
Why It Works Without Scratching
Aluminum foil is softer than the stainless steel or chrome plating on most oven racks. The ball's crumpled edges create abrasive points that break down burnt residue, but the metal itself isn't hard enough to gouge the rack's finish. Just avoid using it on non-stick or coated racks, as it could damage those surfaces.
When To Use This Method
The foil ball scrubber is best for localized burnt spots or areas that other methods missed. It's not ideal for cleaning an entire rack because it's time-consuming. Use it as a targeted tool after soaking or applying a paste.
For heavy buildup, combine it with a baking soda soak first.
13. Steam Cleaning with a Pot of Water
Steam is a powerful, chemical-free way to loosen baked-on grease and burnt food. This method uses the oven's own heat to create steam that softens grime, making it easy to wipe away. It's especially useful for racks that are too large to fit in a sink or for a quick refresh between deep cleans.
Place a heatproof dish or oven-safe pot filled with water on the lowest rack or oven floor. Heat the oven to 250°F (120°C) and let it run for 20 minutes. The steam will condense on the racks, softening any stuck-on residue.
After turning off the oven and letting it cool slightly, remove the racks and wipe them down with a damp cloth. For stubborn spots, a gentle scrub with a non-abrasive sponge may be needed. This method works best for light to moderate buildup and can be repeated as necessary.
Why Steam Works So Well
Steam penetrates the porous surface of burnt-on grease, rehydrating it so it loosens from the metal. Unlike harsh chemicals, steam is safe for all oven rack types, including those with non-stick coatings. It also avoids the fumes and residue that come with commercial oven cleaners.
Tips For Best Results
Use distilled water to prevent mineral deposits on your racks. Adding a splash of white vinegar to the water can boost the steam's cleaning power. Make sure the dish is deep enough so it doesn't boil dry during the 20-minute cycle.
For extra stubborn grime, let the steam sit for an additional 10 minutes before wiping.
When To Use This Method
Steam cleaning is ideal for routine maintenance or when you need a quick clean without disassembling the oven. It's not a substitute for heavy-duty scrubbing on racks with years of buildup, but it can make that job easier by pre-softening the grime. Use it after cooking particularly messy dishes to prevent buildup from hardening.
14. Ketchup for Burnt-On Grease
You might think ketchup belongs only on burgers and fries, but it's also a surprisingly effective cleaner for burnt-on grease on oven racks. The acidity in ketchup helps break down carbonized grime, making it easier to scrub away without harsh chemicals. This trick works especially well on stubborn spots that resist other methods.
Spread a generous layer of ketchup directly over the burnt spots on your oven rack. Let it sit for at least 30 minutes—longer for really tough buildup. The acidity will start dissolving the carbonized grease.
After the wait, scrub the area with a non-abrasive sponge or brush. Rinse thoroughly with water and dry. You'll likely see a noticeable difference, and the rack will smell fresh, not like vinegar or chemicals.
Why Ketchup Works
Ketchup contains vinegar and tomato acids, both of which are mild enough not to damage metal but strong enough to break down burnt-on grease. The thick consistency also helps it cling to vertical surfaces, so it stays in place while working.
Best Practices For Best Results
For maximum effect, apply ketchup to a warm (not hot) rack—heat helps activate the acids. Cover the ketchup with plastic wrap to prevent it from drying out. If the burnt spots are extra stubborn, let it sit overnight.
Always rinse thoroughly after scrubbing to avoid any sticky residue.
15. Dish Soap and Dryer Sheet Combo
Sometimes the best cleaning hacks come from combining everyday household items in unexpected ways. The dish soap and dryer sheet duo is a prime example—it uses the degreasing power of soap and the anti-static, fabric-softening properties of dryer sheets to lift stubborn grime. This method is gentle enough for regular use but effective on moderate buildup.
Fill a large sink or tub with the hottest tap water you can handle. Add a generous squirt of dish soap (Dawn works great) and drop in 3–4 used or new dryer sheets. Submerge the oven racks completely and let them soak for at least an hour—overnight for tougher deposits.
The heat and soap loosen grease while the dryer sheets help break down burnt-on residue. After soaking, scrub with a non-abrasive sponge or brush; rinse thoroughly and dry. The racks come out shiny with minimal elbow grease.
How It Works
Dish soap is formulated to cut through grease, and hot water speeds up the process. Dryer sheets contain surfactants and softening agents that help lift and trap oily particles, making them easier to rinse away. The combination creates a powerful yet gentle cleaning solution that won't damage the metal finish.
Best Practices
Use a container large enough to fully submerge the racks—a bathtub or plastic storage bin works well. For extra stubborn spots, add a second round of soaking with fresh sheets. Avoid using this method on racks with a non-stick coating, as the heat and chemicals may cause damage.
Always rinse racks thoroughly after cleaning to remove any residue.
When To Use This Method
This combo is ideal for moderately soiled racks with baked-on grease but not heavy carbonized crust. It's a great middle-ground between a quick wipe and a heavy-duty chemical soak. If your racks haven't been cleaned in months, this method can save you from harsh scrubbing.
16. Use a Magic Eraser for Light Marks
Not every stain on your oven racks needs a heavy-duty chemical soak or hours of scrubbing. For those light, surface-level marks that haven't had time to bake into a thick crust, a simple melamine sponge—often sold as a Magic Eraser—can work wonders. It's a low-effort fix that saves you from dragging out the big guns.
How It Works
Melamine foam acts like ultra-fine sandpaper, lifting dirt and grease from smooth surfaces with just water. Dampen the sponge until it's moist but not dripping, then gently rub the light spots on your oven racks in a circular motion. You'll see the grime transfer to the sponge almost instantly.
When To Use It
This method is best for fresh spills, light grease smears, or spots that appear after a quick wipe-down. If you're dealing with thick, baked-on carbon, the Magic Eraser will wear down too fast and won't be effective. Save it for maintenance cleaning between deep soaks.
Important Caveat: Avoid Coated Racks
Many modern oven racks have a porcelain or non-stick coating that can be scratched by abrasive materials. The Magic Eraser is abrasive, so never use it on coated racks unless you're sure the coating is durable enough. Test on a small hidden area first, or stick to coated racks only if the manufacturer explicitly allows it.
17. Vinegar and Cornstarch Paste
Vinegar is a go-to for cutting through grease, but when you add cornstarch, you get a paste that clings to vertical surfaces and really digs into burnt spots. The cornstarch soaks up the grease while the vinegar breaks it down, making wiping effortless.
This two-ingredient paste is perfect for those extra-greasy racks that need a little extra attention before a full soak. It’s cheap, non-toxic, and works surprisingly well.
How To Make The Paste
Mix equal parts white vinegar and cornstarch in a small bowl. Stir until it forms a thick, spreadable paste. If it’s too runny, add more cornstarch; if too thick, add a splash of vinegar.
Application And Waiting Time
Use a brush or your fingers (wear gloves) to spread the paste over greasy or burnt areas. Coat it generously. Let it sit for 15–30 minutes, or until the paste dries and cracks slightly.
The drying process helps pull out the grease.
Wiping It Clean
Once dry, take a damp cloth or sponge and wipe the paste away. Most of the grease and burnt bits will come off with it. For stubborn spots, scrub gently with a non-abrasive pad.
Rinse the rack thoroughly with water and dry it.
18. Pressure Washer for Outdoor Cleaning
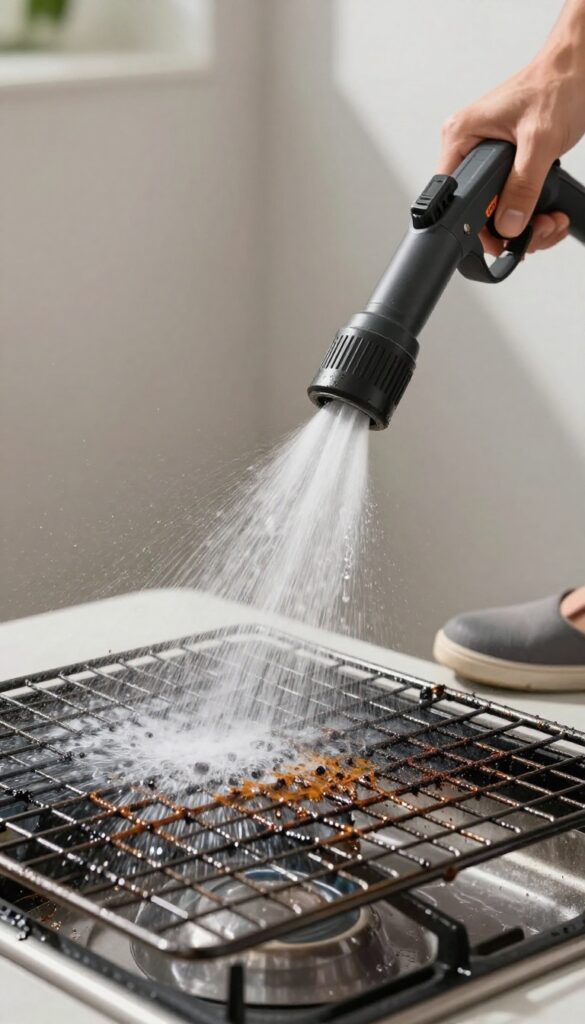
If you have a pressure washer sitting in the garage, it's time to put it to work on those greasy oven racks. This method is fast, satisfying, and requires almost no scrubbing. Just make sure you take the racks outside first — this is definitely not an indoor job.
Using a pressure washer blasts away loose debris and softened grease in seconds. It's especially effective after a pre-soak or a session with a degreaser. The key is to use a wide-angle nozzle (at least 40 degrees) to avoid bending the thin wires.
Keep the nozzle moving and stay at least 12 inches away from the rack. Safety note: Always wear eye protection and closed-toe shoes. The water pressure can send grease particles flying, and you don't want that in your eyes.
Also, be mindful of the direction you spray — you don't want to accidentally blast mud or dirt back onto the clean rack.
Pre-soak For Better Results
For the best outcome, give the racks a quick spray with a degreaser or a soak in hot, soapy water for 15–20 minutes before hitting them with the pressure washer. This loosens the burnt-on gunk so the water can do its job more effectively. If you skip this step, you might still need to scrub a few stubborn spots afterward.
Drying And Finishing
After pressure washing, shake off excess water and let the racks dry completely in the sun. The UV rays help kill any remaining bacteria and prevent rust. Once dry, give them a quick wipe with a microfiber cloth to remove any water spots.
They'll look almost new.
19. The Oven Rack Bag (Commercial Product)
If you want a truly hands-off approach, there's a product designed specifically for this job: the oven rack cleaning bag. Brands like Easy-Off make a heavy-duty bag that you fill with water and a cleaning solution, seal your racks inside, and let the chemistry do the work. No scrubbing, no soaking in a bathtub—just drop, seal, and wait.
These bags are essentially large, leak-proof plastic bags that can hold oven racks flat. You add warm water and a compatible cleaner (often included or recommended), place the racks inside, seal the bag, and let it sit for several hours or overnight. The solution breaks down grease and burnt-on food, so when you pull the racks out, a quick rinse is all they need.
It's a great option if you have multiple racks to clean or if you want to avoid harsh fumes from oven cleaners.
How It Works
The bag creates a contained environment where the cleaning solution can work without evaporating. The racks are fully submerged, so every surface gets treated evenly. Most brands recommend leaving the racks in the bag for at least 4 hours, but overnight yields the best results for heavy buildup.
Pros And Cons
The biggest advantage is convenience—you set it and forget it. No scrubbing, no mess. On the downside, these bags are single-use and can be pricey compared to DIY methods.
Also, you need enough space to lay the bag flat while it sits.
Tips For Best Results
Make sure the water is warm (not hot) to activate the cleaner. Use the recommended amount of cleaner—too little won't work, too much can cause residue. After soaking, rinse the racks thoroughly with water and dry them immediately to prevent rust.
20. Toothbrush for Tight Corners
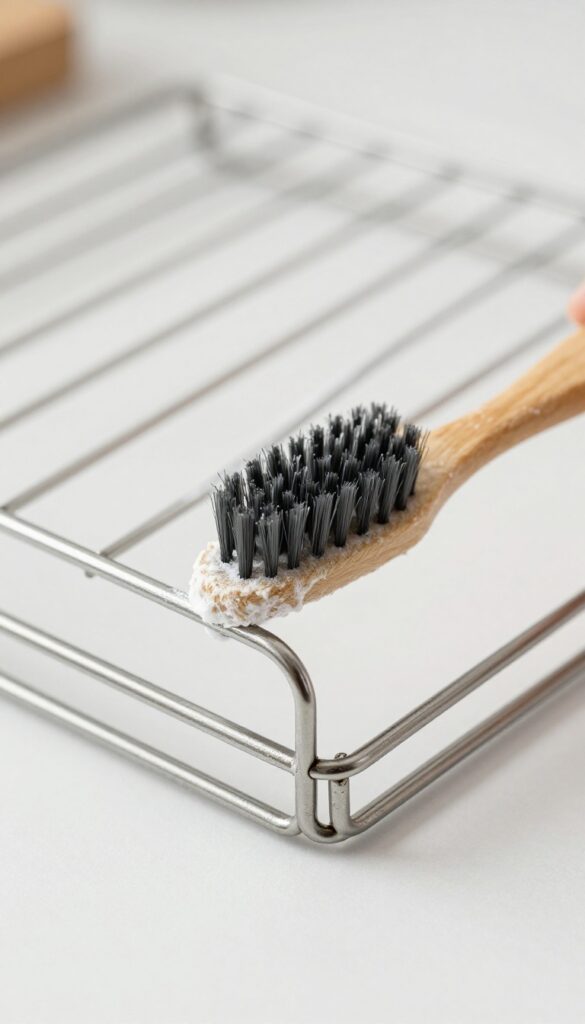
Even after a good soak, those little corners where the rack bars meet the frame can still hold onto baked-on grime. A full-size sponge or scrub brush just won't fit into those narrow gaps. That's where an old toothbrush becomes your best friend.
Dip the toothbrush into a thick baking soda paste—just mix baking soda with a little water until it forms a spreadable consistency. Work the bristles into each joint and crevice, using short back-and-forth motions. The paste will cut through grease while the bristles dislodge stubborn burnt bits.
Rinse with hot water and repeat if needed. This method is especially effective for racks with intricate wire patterns or welded intersections.
Why A Toothbrush Works Best
The small, firm bristles of a toothbrush can reach spots that larger brushes miss. They also provide enough scrubbing power to break down carbonized residue without scratching the metal. Plus, the handle gives you good control, so you can apply pressure exactly where it's needed.
Making The Perfect Baking Soda Paste
For the best results, use a 3: 1 ratio of baking soda to water. Mix it in a small bowl until it looks like frosting. If the paste is too runny, it won't cling to vertical surfaces.
Too thick, and it won't spread easily. Adjust as you go, and don't be afraid to add a drop of dish soap for extra grease-fighting power.
Pro Tip: Work In Sections
Don't try to do the entire rack at once. Focus on one joint or corner at a time. Rinse the toothbrush frequently to avoid redepositing grime.
For really stubborn spots, let the paste sit for five minutes before scrubbing. This gives the baking soda time to break down the burnt-on grease.
21. Prevent Future Buildup with Liners
Cleaning oven racks is a chore you’d probably rather avoid. The best way to cut down on future scrubbing sessions is to stop the mess before it starts. Oven liners and aluminum foil are simple tools that catch drips and spills, keeping your racks cleaner for longer.
Using oven liners or foil is one of the easiest preventive measures you can take. They sit at the bottom of your oven and catch anything that falls during cooking. This means less grease and burnt-on food ends up on your racks.
You just remove the liner, wipe it down, and you’re done.
Choosing The Right Liner
Not all liners are created equal. Look for non-stick, heat-resistant liners that are designed specifically for ovens. They should be able to withstand temperatures up to 500°F.
Avoid using regular aluminum foil directly on the oven floor—it can cause heat damage and affect airflow. Instead, use heavy-duty foil or a proper oven liner.
How To Set It Up
Place the liner on the bottom rack or directly on the oven floor, depending on the product instructions. If using foil, make sure it’s tucked under the racks to prevent it from shifting. Leave some space around the edges for air circulation.
Replace the liner when it gets too dirty or after several uses.
Maintenance Tips
Check the liner regularly and remove any large debris. Most liners can be wiped clean with a damp cloth or washed in the sink with mild soap. Avoid using abrasive cleaners that could damage the non-stick coating.
A clean liner means less work for you later.
22. Wipe Racks After Each Use
The easiest way to keep oven racks clean is to stop grime from building up in the first place. A quick wipe after every use takes just seconds but saves you from hours of scrubbing later. Make it a habit and you'll rarely face a tough cleaning session again.
Once the oven has cooled down enough to touch safely, grab a damp cloth or sponge and run it over the racks. Focus on any spots where food dripped or grease splattered. Fresh spills come off effortlessly, while baked-on residue requires much more effort.
This simple step keeps your racks looking presentable and prevents that sticky layer from forming.
Why It Works
Heat causes grease and food particles to bond with metal surfaces. When you wipe them away while they're still soft, you break that cycle. A few seconds of wiping now can eliminate the need for soaking, scrubbing, or chemical cleaners later.
What To Use
A microfiber cloth or a soft sponge with warm water is usually enough. For stubborn spots, add a drop of dish soap. Avoid abrasive scrubbers that can scratch the rack's finish.
Keep a dedicated cloth near the oven so you can grab it easily after cooking.
When To Wipe
Wait until the oven is cool enough to touch—usually 15 to 20 minutes after turning it off. Wiping while the rack is still warm can help loosen grease, but make sure it's not hot enough to burn you. If you forget, do it the next morning before preheating again.
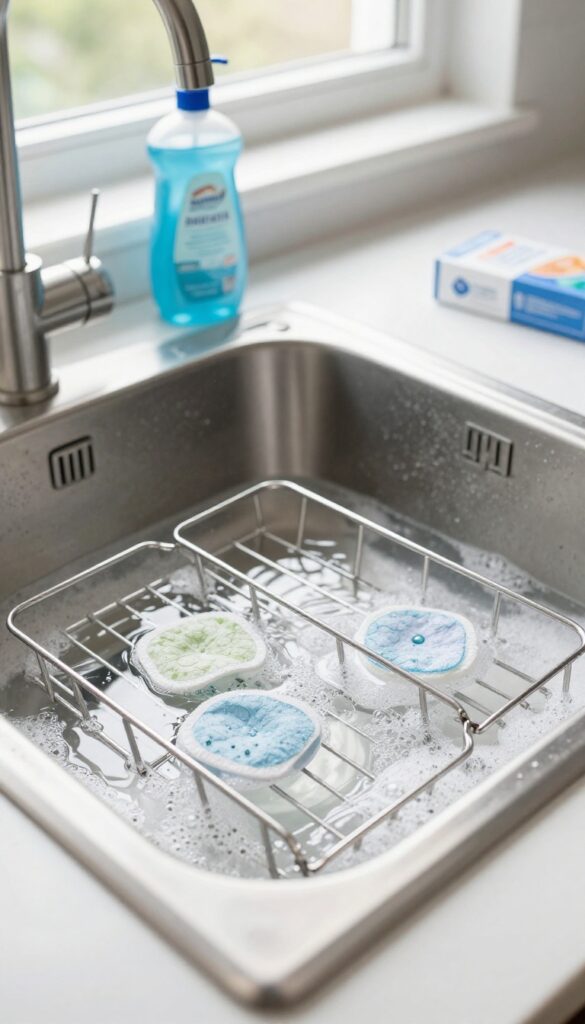
23. Soak in Hot Water and Dishwasher Tablet
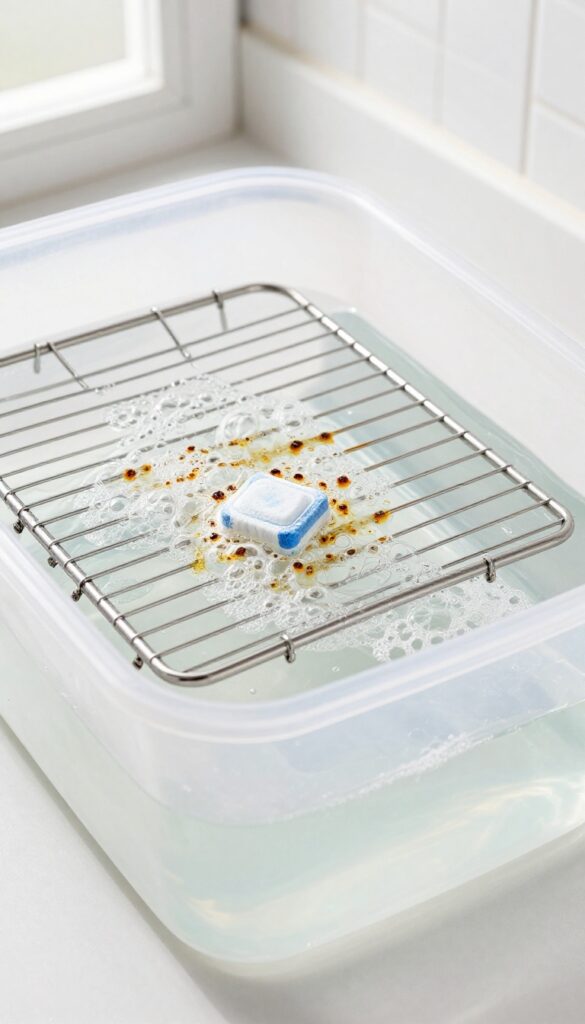
You might not think of dishwasher tablets as a cleaning tool for oven racks, but they actually work wonders. The enzymes and surfactants in those little tabs are designed to break down tough, baked-on food residue—exactly what you're dealing with on your racks. All you need is a bathtub or large plastic bin, hot water, and a couple of tablets.
Drop one or two dishwasher tablets into a tub of hot water and stir until they dissolve. Submerge your oven racks completely and let them soak for at least a few hours, or overnight for heavy buildup. The enzymes go to work on the grease and burnt spots, loosening them without any scrubbing on your part.
When you pull the racks out, most of the grime will rinse right off. A quick scrub with a soft brush on any remaining spots, and you're done.
Why It Works So Well
Dishwasher tablets contain powerful degreasers and enzymes that target protein-based stains and grease. The hot water activates these ingredients, helping them penetrate the baked-on layers. Unlike harsh oven cleaners, this method is gentler on the metal and safer for you to handle.
Best Practices For Maximum Results
Use the hottest tap water you can get—around 140°F is ideal. Make sure the racks are fully submerged; weigh them down if they float. For extra stubborn spots, add a second tablet after two hours.
Rinse thoroughly with clean water and dry immediately to prevent water spots.
What To Avoid
Don't use this method on aluminum racks, as the high heat and alkalinity can cause discoloration or pitting. Also, avoid mixing dishwasher tablets with bleach or ammonia—the combination can create harmful fumes. Stick to plain hot water and the tablet alone.
FAQ
Can I put oven racks in the dishwasher?
Yes, if they fit and are not coated with a special finish. Use a heavy-duty cycle and avoid mixing with dishes. Check manufacturer guidelines first.
How do I clean oven racks without scratching them?
Use non-abrasive cleaners like baking soda paste, and scrub with soft sponges or nylon brushes. Avoid steel wool or harsh scouring pads.
Is it safe to use ammonia to clean oven racks?
Yes, but in a well-ventilated area. Seal racks in a bag with ammonia and let sit overnight. Rinse thoroughly to remove all residue.
What is the best method for burnt-on spots?
A paste of baking soda and hydrogen peroxide, or a commercial oven cleaner, works well. For tough spots, try the ammonia bag method.
How often should I clean oven racks?
Every 3-6 months, or when you notice heavy buildup. Wiping after each use can extend the time between deep cleans.
Conclusion
Cleaning oven racks doesn’t have to be a dreaded chore. With these 23 tips, you can choose the method that fits your schedule and the level of grime you’re dealing with. Whether you prefer a quick wipe-down or a deep soak, your racks can look brand new again.
Try a few of these techniques and see which ones work best for you. Your future self—and your next batch of cookies—will thank you.