13 Felt Ornament Ideas You Can Make for Your Christmas Tree
A bare branch on the tree and a scrap of felt on the table is all it takes to start a new tradition. Felt is forgiving, cheap, and easy to cut, which makes it a great fit for a first ornament or a fast weekend project.
You do not need a sewing machine or a drawer full of supplies. Most of these ideas use basic hand stitches, a little stuffing, and whatever colors you already have.
Pick one to try this week, or work through the list year by year. Either way, you end up with ornaments that actually mean something on your tree.
1. Classic Peppermint Candy Swirl
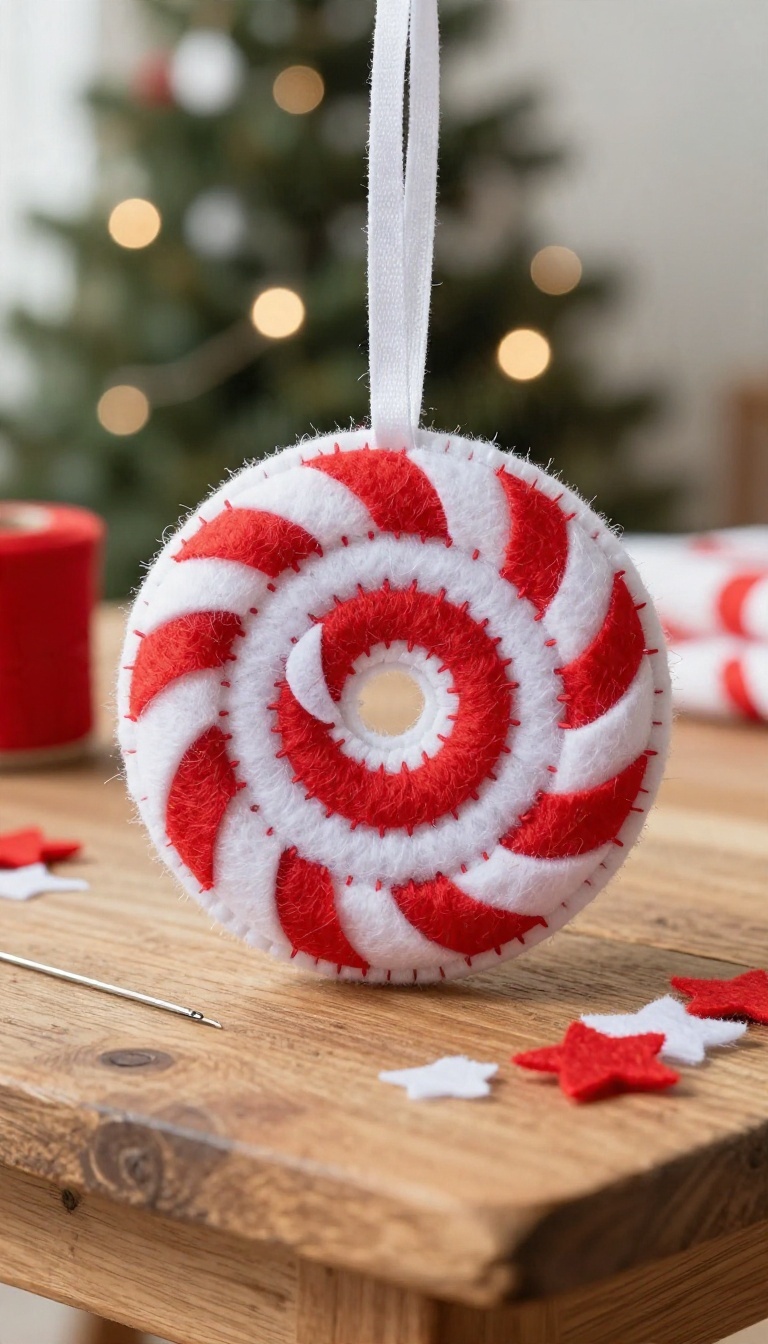
A peppermint swirl feels like Christmas in ornament form. It's a simple round shape with a spiral of red and white felt, and it comes together with basic running stitches. Even if you've never sewn felt before, you can finish one in an afternoon.
This ornament works because it's forgiving. The swirl doesn't have to be perfect, and the stitching is mostly straight lines. Plus, you only need two colors of felt, some thread, and a bit of stuffing.
The result is a cheerful, classic piece that looks great on any tree.
What You'll Need
Gather white and red felt, matching thread, a needle, scissors, a small amount of polyester stuffing, and a thin ribbon for hanging. You'll also want a circle template—a cup or jar lid works fine. A fabric marker or chalk helps trace the swirl, but you can freehand it if you're feeling brave.
Making The Swirl
Cut two white circles and two red circles of the same size. Stack one white and one red circle, then cut a spiral shape through both layers so you get a red spiral and a white spiral. Swap the centers: place the red spiral on the white circle and the white spiral on the red circle.
Pin them in place. Using a simple running stitch, sew along the edges of the spirals with contrasting thread. This holds the swirls down and adds a handmade look.
Stitching And Stuffing
Place the two decorated circles wrong sides together. Sew around the outer edge with a running stitch, leaving a small opening. Lightly stuff the ornament with polyester filling—don't overstuff, or the stitches will strain.
Sew the opening closed. Attach a loop of ribbon at the top for hanging. Trim any loose threads, and your peppermint swirl is ready for the tree.
2. Tiny Felt Gingerbread People

Gingerbread men might be the most cheerful shape in all of Christmas, and they shrink down beautifully into felt. A batch of tiny ones takes one evening, a couple of felt squares, and about three colors of thread. The trick is to keep the shape simple.
A basic cookie cutter does the design work for you, and the icing is just embroidery. Once you make one, you will want a whole row of them across the tree.
Start with a gingerbread man cookie cutter around three inches tall. Trace it onto felt with a fine pen or chalk, then cut two matching pieces for each ornament. Smaller is cuter here, so resist the urge to go big.
Stack the two pieces and stitch around the edge with a simple running stitch or blanket stitch, leaving a small gap at the bottom. Add a pinch of stuffing through the gap so the ornament puffs up a little, then close it up. A flat gingerbread man works too, but the stuffed version feels nicer in the hand.
Stitching The Icing Details
Use white or cream thread to embroider the icing. A few straight stitches across each wrist and ankle read as cuffs, and a simple smile and two dot eyes finish the face. For the buttons, make three small cross stitches down the belly.
If you want extra detail, add a tiny bow at the neck with a scrap of ribbon or a couple of red stitches. Keep the lines loose and slightly imperfect. Hand-stitched icing looks better when it is not too neat.
Choosing Colors And Felt
Classic brown felt with white icing is hard to beat, but do not stop there. Try tan with red stitching, or a soft gray with silver thread for a cooler look. A dark brown gingerbread person with gold details looks especially nice against tree lights.
Wool blend felt holds its shape better than the cheap acrylic squares, and it does not pill as fast. If you are making a batch, buy a half yard and cut several at once. You will get more ornaments than you expect.
Making A Batch In One Evening
Set up an assembly line: cut all the shapes first, then stuff them all, then stitch the icing on each one. Working in stages goes much faster than finishing one ornament at a time. A batch of six to eight is realistic in a single evening while watching a movie.
Use a ribbon loop about three inches long, folded and stitched into the top seam before you close the ornament. That way the hanger is secure and hidden.
3. Layered Christmas Tree with Button Baubles
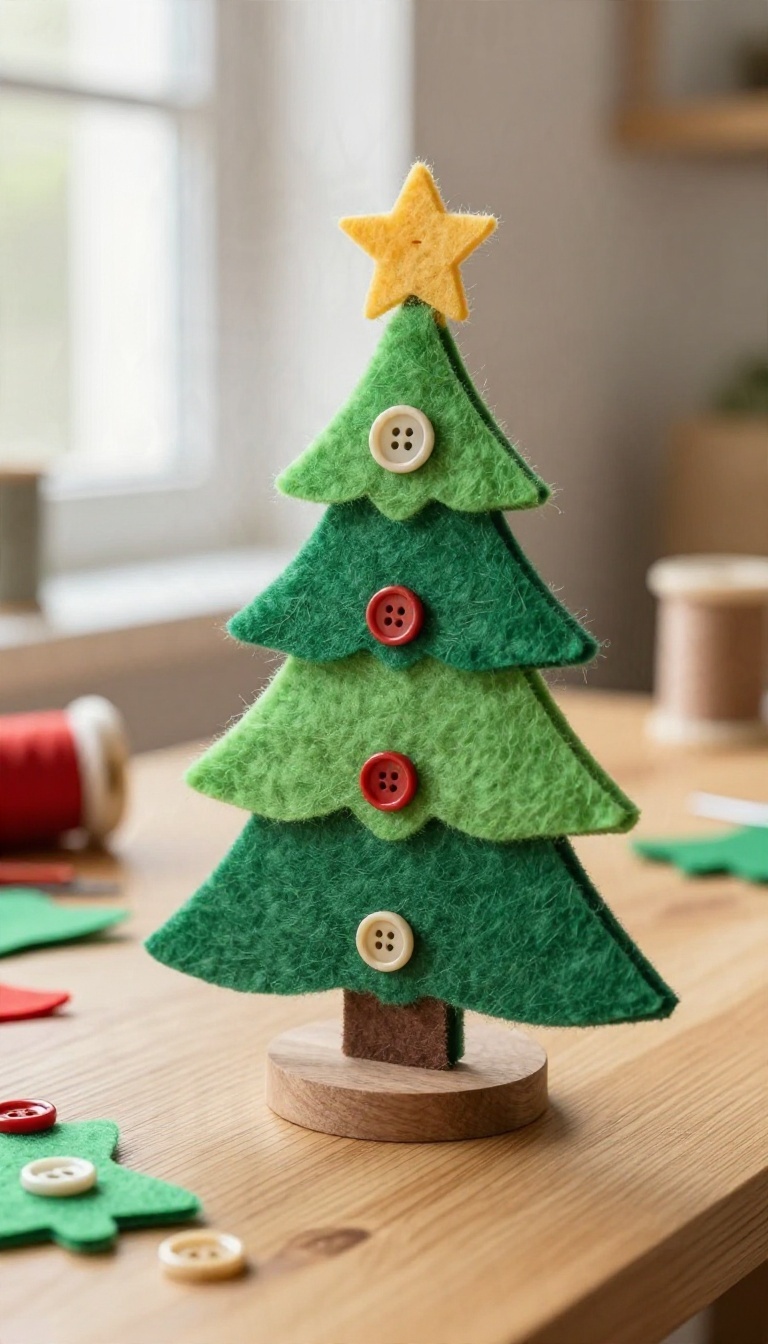
Three triangles and a handful of buttons turn into a tree that looks like it took way more planning than it did. The trick is stacking the felt shapes largest to smallest so each layer peeks out below the one above it. Once you stitch them together, the buttons do the rest of the work as tiny ornaments.
This is a good one to make in batches because the shapes are simple and the supplies are minimal. Cut a few sets at once, then sit down with a needle and thread while something plays in the background. You end up with a stack of ornaments that all look a little different depending on your button choices.
The whole ornament comes down to three triangles and a few small details. Keep the layers slightly offset so the tree reads as a tree and not a solid green blob. A little planning on the front end saves you from re-cutting later.
Cutting The Three Layers
Start with a paper template for each size: a large triangle around four inches tall, a medium one around three, and a small one around two. Fold your felt in half before cutting so you get clean, symmetrical shapes with less trimming. A sharp pair of scissors matters more than fancy felt here.
Use two shades of green if you want the layers to stand out, or go with one color and let the stitching do the separating. Cut a small notch at the top of the largest triangle so you have a spot for the hanging loop later.
Stitching The Stack
Center the medium triangle on the large one, then the small one on top, nudging each down slightly so the points line up at the bottom. Pin them in place so nothing shifts while you sew. A simple running stitch down the center of the tree holds everything together and adds a nice handmade detail.
Leave a small gap at the very top and bottom if you plan to add a trunk or hanger. Tie off your thread on the back so the knots stay hidden.
Sewing On The Button Baubles
Small buttons in red, gold, or white make quick ornaments, and you only need three to five per tree. Space them out so they look scattered rather than lined up in a row. Mix sizes for a more playful look, or keep them uniform for something tidier.
Sew each button through all the felt layers where possible so it doubles as extra hold. A contrasting thread color makes the stitching pop, and it is a fun way to use up odds and ends from your button jar.
Finishing Touches
A small brown felt rectangle stitched at the bottom works as a trunk, and a loop of twine or ribbon at the top lets it hang. If you want a little sparkle, add a single tiny bead above each button. Keep it simple, though, because the layered shape already does a lot of the visual work.
Let the ornament sit flat for a minute before hanging it so the felt settles. These stack nicely in storage and hold up well year after year.
4. Stuffed Felt Snowman with Scarf

A snowman ornament that's soft enough to squeeze and simple enough for small hands to help with. You'll stack three felt circles, stuff them lightly, and finish with a tiny scarf that adds a pop of color. It's a forgiving project that looks charming even if the circles aren't perfectly round.
Start by cutting two circles of each size—small, medium, and large—from white felt. Use a cup or jar as a template if you want consistent shapes. Then stack them from largest to smallest, overlapping slightly, and pin them in place.
Sew around the edges with a simple running stitch, leaving a small opening at the bottom of each circle. Stuff each circle with a pinch of polyester fiberfill, then sew the openings closed. Finally, cut a thin strip of colored felt for the scarf, wrap it around the neck between the medium and large circles, and tack it down with a couple of stitches.
Add a loop of thread at the top for hanging.
Cutting And Stacking
Cut two circles of each size from white felt. A large circle for the body, a medium for the middle, and a small for the head. Stack them with the largest at the bottom, overlapping by about a quarter inch.
Pin the layers together to keep them from shifting while you sew.
Stuffing Without Overstuffing
Use small pieces of fiberfill and add just enough to give the snowman a soft, puffy look. Overstuffing will make the circles bulge and distort the shape. Leave a small opening in each circle for stuffing, then stitch it closed with a ladder stitch for a clean finish.
Adding The Scarf And Face
Cut a thin strip of felt in a contrasting color for the scarf. Wrap it around the neck and secure it with a few stitches. For the face, use small black beads or French knots for eyes and a mouth, and a tiny orange felt triangle for the nose.
Keep the features simple so the snowman stays cute and uncluttered.
5. Felt Holly Leaves and Berry Cluster
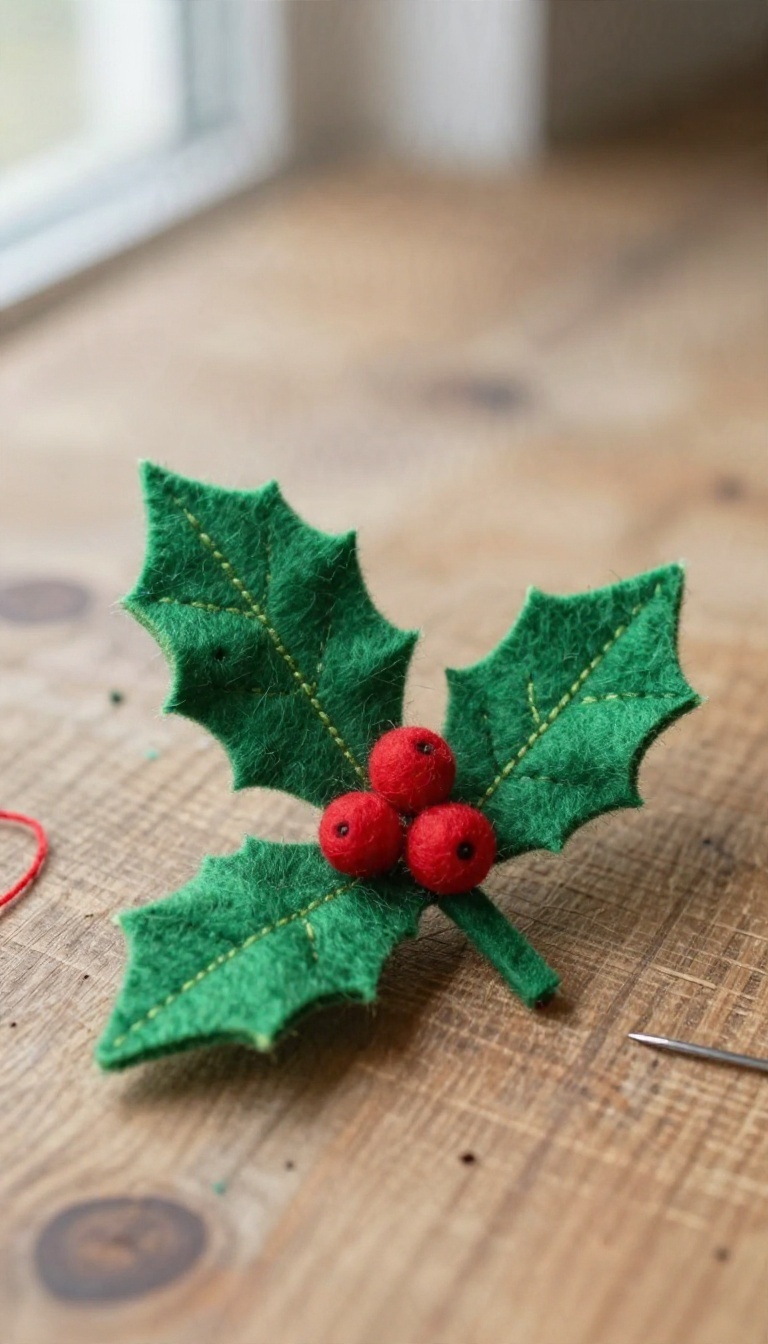
Holly is one of those shapes that reads as Christmas instantly, even at two inches tall. A small cluster of pointed leaves and bright red berries works as a filler ornament, tucking into the bare spots between bigger pieces without stealing the show. The best part is how little fabric it takes.
You can cut the whole sprig from scraps, which makes this a smart project for using up the odds and ends left over from other ornaments.
## Cutting the Leaves Holly leaves have a distinct outline: a rounded body that tapers to a sharp point at the tip. Fold your felt in half and cut a leaf shape freehand, or sketch a simple template on paper first. You want pairs that match, so cut two leaves per sprig at the very least.
If you want the classic look, snip a few shallow notches along the edges to suggest the points. Keep them small. Deep cuts weaken the felt and make the leaf floppy. ## Stitching and Shaping A simple blanket stitch around the edge gives each leaf a clean finish and a little definition.
Use a contrasting thread if you want the stitching to show, or match it for a softer look. Before you close the leaf, slide in a tiny bit of stuffing. Just enough to give it a slight puff.
A flat leaf looks fine, but a lightly stuffed one catches the light better on the tree. ## Assembling the Berry Cluster Cut three to five small circles of red felt for the berries. Sew them into a tight bunch, overlapping slightly so they read as a cluster rather than loose dots. Stitch the leaves to the back of the berry bunch, fanning them out so the points face different directions.
Add a loop of thread or thin ribbon at the top, and the sprig is ready to hang.
Cutting The Leaves
Fold the felt and cut matching leaf shapes, then add small notches along the edges for the classic holly look. Keep the notches shallow so the felt stays sturdy.
Stitching And Shaping
A blanket stitch around the edge gives a clean finish, and a pinch of stuffing inside adds a soft puff that catches the tree lights.
Assembling The Berry Cluster
Sew three to five red felt circles into a tight bunch, then stitch the leaves behind them in a fan. Add a hanging loop at the top and you're done.
6. Simple Felt Star with Blanket Stitch Edge
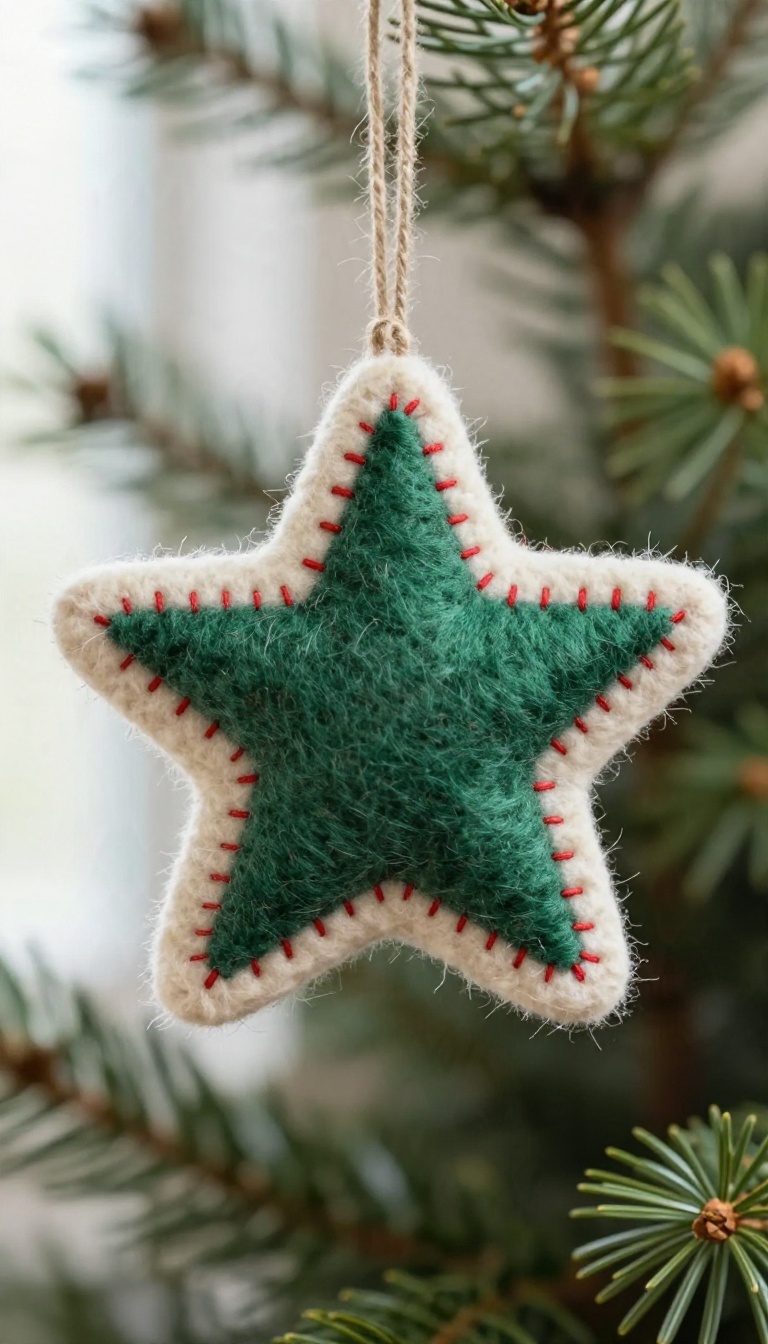
Stars show up everywhere at Christmas, but a handmade felt one has a charm that store-bought can't match. The shape is just five straight points, so you can cut it freehand or use a cookie cutter as a guide. A blanket stitch around the edge turns a plain cutout into something that looks intentionally crafted.
The blanket stitch does double duty here: it seals the two layers together and adds a visible, tidy border. Even if your stitches are a little uneven, the result reads as handmade in the best way. Choose a contrasting thread color to make the stitching pop, or match it closely for a subtler look.
Cutting A Clean Star
Fold your felt in half and cut a triangle for the top point, then two smaller triangles on each side. Or trace a star-shaped cookie cutter for consistency. Cut two identical stars so you can stitch them together with a small amount of stuffing in between.
Stitching The Blanket Edge
Thread a needle with embroidery floss and knot the end. Bring the needle up through both layers at the edge, then make a vertical stitch over the edge, catching both layers. Space your stitches evenly around the star, keeping the tension relaxed so the felt doesn't pucker.
Finishing Touches
Before you close the last point, add a tiny bit of polyester fiberfill to give the star a little puff. Then sew a loop of ribbon or twine at the top for hanging. Trim any stray threads and gently shape the points with your fingers.
7. Mini Felt Stocking with Embroidered Cuff

A tiny stocking hanging on the tree has a way of making the whole thing feel more personal, especially when it has a name stitched across the top. This one stays small and simple, but the embroidered cuff is what turns it into a keepsake. Make one for each person in the house and you've got a matching set that still feels individual.
The shape is about as basic as ornaments get: a boot silhouette, a folded cuff, and a little loop for hanging. What sets it apart is the cuff, where a few letters or a short name do all the work. Keep the felt colors classic, or let everyone pick their own and watch the tree turn into a family portrait.
Cut And Sew The Stocking Shape
Fold a piece of felt in half and sketch a small stocking freehand, roughly four inches tall, with a rounded toe and a straight top. Cut through both layers so you get a matching front and back. Pin them together and sew around the edge with a simple running stitch, leaving the top open.
Clip the curve at the toe and heel before you turn it right side out, which keeps the fabric from bunching. A little polyester stuffing in the toe gives it some shape without turning it into a plush toy. Press it flat with your fingers once it's stuffed.
Add A Contrasting Cuff
Cut a rectangle of felt in a second color, wide enough to wrap around the top and about an inch and a half tall. Fold it in half lengthwise and slip it over the stocking opening so it covers the raw edges. Stitch along the bottom of the cuff with a running stitch or a blanket stitch if you want a little more texture.
White against red or cream against green are the safest combos, but don't be afraid to go bright. The cuff is small, so even a bold color stays tasteful.
Embroider A Name Or Initial
Thread a needle with embroidery floss and stitch the name or first initial right onto the cuff before you attach it, or after if you're confident in your placement. Backstitch gives you clean, readable letters, while a chain stitch looks a little softer and more handmade. Sketch the letters lightly with a chalk pencil first if you're nervous.
For longer names, shrink the lettering or use just the first initial and a small date underneath. Finish with a loop of twine or ribbon at the top corner so it hangs straight.
8. Felt Reindeer with Pipe Cleaner Antlers
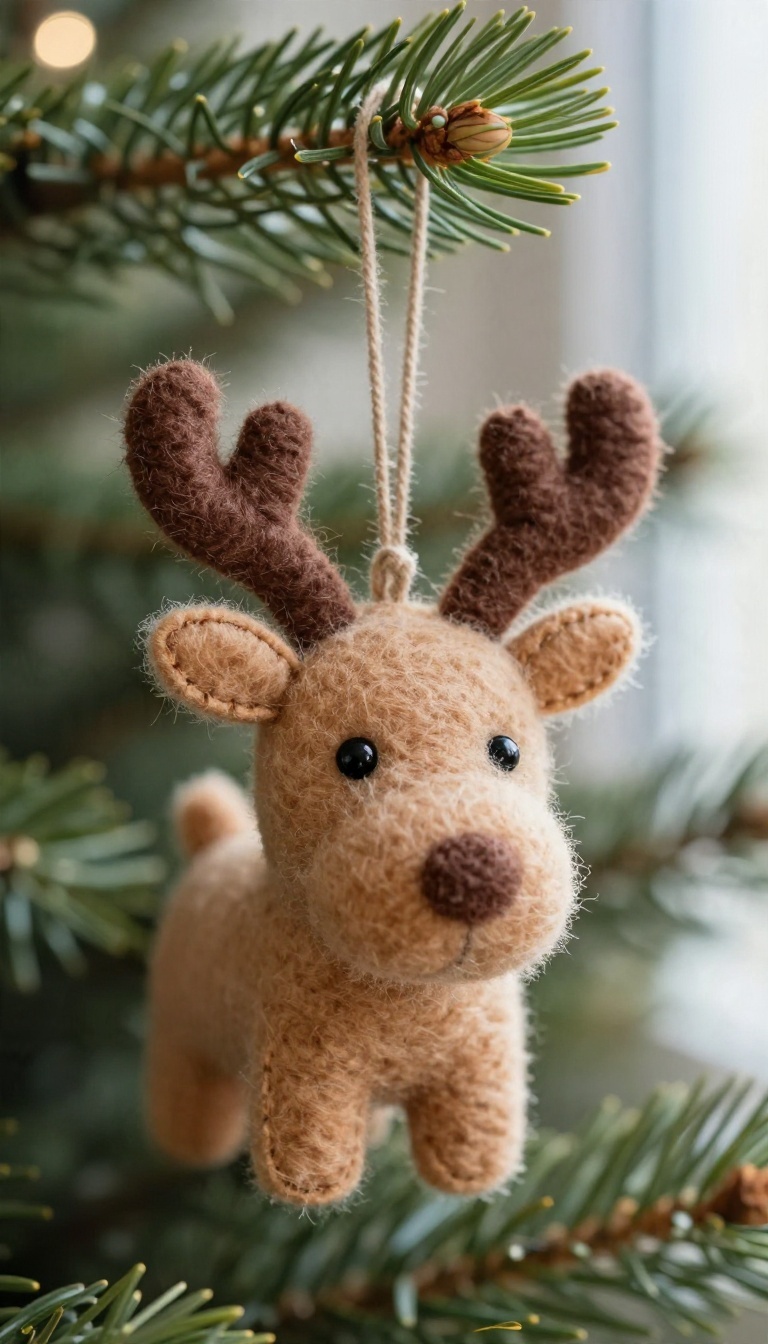
Reindeer ornaments usually lean either cute or elegant, and this one lands firmly on cute. A rounded felt head, a couple of tiny ears, and a pair of pipe cleaner antlers give you a playful little face that stands out against the branches. The best part is how fast it comes together.
You can cut the head freehand, skip the embroidery if you want, and still end up with something that looks intentional. It's a good project to make in batches while you watch something in the background.
The shape is basically a fat teardrop or a rounded triangle, whichever you find easier to cut. Once you have one you like, use it as a template for the rest so the reindeer feel like a set. Pipe cleaners do the heavy lifting here.
They hold their shape, they're cheap, and they give the ornament a little dimension that flat felt can't. Twist them on and the whole thing reads as a reindeer in seconds.
Cutting And Stitching The Head
Fold your felt in half and cut two matching head shapes at once. A rounded top with a slightly narrower snout works well, and a head about three inches tall feels right on a standard tree. Sew the two pieces together with a simple running stitch, leaving a small gap at the bottom.
Add a light pinch of stuffing so the face puffs out a little, then close the gap. If you'd rather skip the stuffing, a single-layer head with a felt backing works too and dries flat if it ever gets damp.
Adding The Face
Two small black beads make easy eyes, but French knots or a few tight stitches work just as well and hold up better around pets and kids. A tiny felt circle for the nose finishes the snout. Keep the face low on the head so there's room for antlers up top.
A small stitch of white or cream for a muzzle highlight is optional, but it does make the reindeer look a little friendlier.
Twisting On The Antlers
Cut a brown pipe cleaner in half and twist each piece into a simple Y shape. Poke the base of each antler through the top of the head and bend the tip inside so it can't pull back out. You can also stitch a small felt loop to the back for hanging, or thread the ornament hook right through the antler base.
Trim the antler tips so they're not sharp, and give them a slight bend so they look natural rather than stiff.
9. Wool Felt Mitten Pair

A pair of tiny mittens tied together with a bit of string might be the coziest thing you can hang on a tree. They read as winter instantly, and the matching halves give you a nice little rhythm wherever you put them. You can hang them as one ornament or split them up and let the string do the decorating.
The shape is about as simple as felt gets, so this is a good project if you want something quick that still looks finished. Cut two mitten outlines per half, stitch them together, and leave the cuff open just long enough to stuff. A little polyfill gives them a soft, puffy look without turning them into pillows.
What makes the pair work is the connection between them. A short length of yarn, twine, or embroidery floss ties the two mittens together, and that string becomes part of the design rather than an afterthought. Keep it loose enough to drape naturally when it hangs.
Cutting A Clean Mitten Shape
Fold your felt in half and cut both layers at once so the two sides match exactly. A simple mitten outline with a rounded top and a straight cuff is easiest to keep symmetrical. If you want a thumb, cut it slightly shorter and wider than you think, since felt flattens out once it's stitched.
Stitching And Stuffing
A blanket stitch around the edge hides the seam and gives the mitten a handmade border. Sew all the way around except for a small gap at the cuff, then add a pinch of stuffing and close it up. Keep the stuffing light so the mitten stays flat enough to hang nicely.
Joining The Pair
Cut your string long enough that the mittens sit a few inches apart when hung. Stitch one end securely inside each cuff so the string won't pull loose over time. A small felt loop at the top of the string lets the whole thing hang from a branch.
Ways To Use The Pair
Hang the joined pair as a single ornament and let it sway as one piece. Or separate the mittens and run the string along a garland for a repeating accent. Add a name or a tiny snowflake to each cuff if you want them to feel personal.
10. Felt Angel with Ribbon Wings
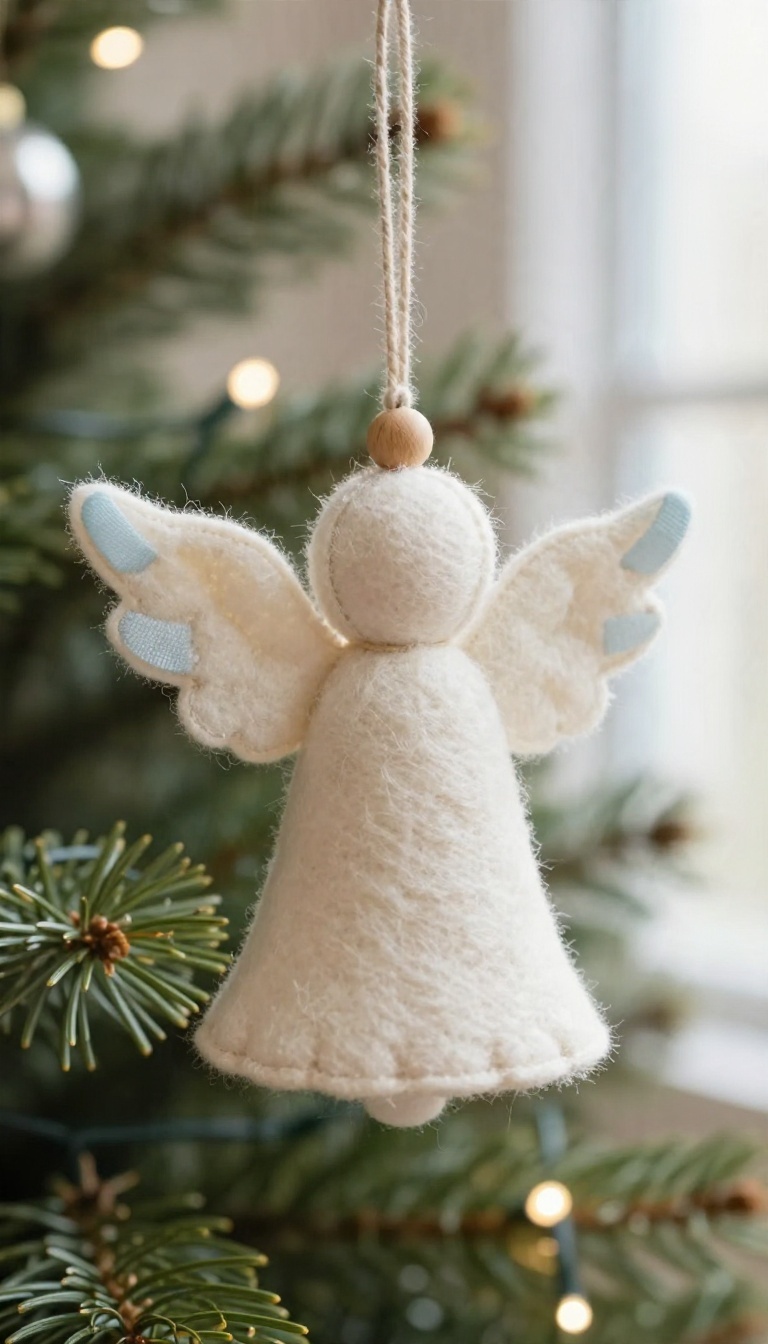
Angels are one of the oldest ornaments on any tree, and a felt version keeps that traditional feel without any fuss. The whole thing comes together from three simple parts: a felt body, a wooden bead for the head, and a pair of ribbon wings. It looks handmade in the best way, soft and a little imperfect, which is exactly what you want on a tree with a cozy, old-fashioned look.
You can make one in about twenty minutes once you have the supplies, and most of that time is drying glue rather than actual work. The shape is forgiving, so small mistakes disappear into the felt. Make a few in different ribbon colors and you have a matched set that still feels personal.
What You'll Need
Gather felt for the body, a wooden bead around 12 to 15mm for the head, a scrap of ribbon for the wings, and a small loop of twine or thread for hanging. A little craft glue or a needle and thread will hold everything together. Cream, ivory, or soft gray felt gives the most traditional look, but pale blue and dusty rose work nicely too.
Shaping The Body And Head
Cut a simple bell or teardrop shape from felt, roughly three inches tall, and fold it in half so the sides meet. Stitch or glue the edges closed, leaving the top open for the head. Slide the wooden bead into that opening and secure it with a dot of glue, then add a tiny loop of twine at the very top for hanging.
Draw two small dots for eyes with a fine marker if you want a face, or leave it blank for a cleaner look.
Adding The Ribbon Wings
Cut two short lengths of ribbon, about two inches each, and fold them into soft loops. Glue or stitch them to the back of the body just below the head so they fan out like wings. A sheer or satin ribbon catches the tree lights nicely, while a matte grosgrain keeps things understated.
Let everything dry flat before you hang it, and give the wings a gentle press so they hold their shape.
11. No-Sew Felt Ball Garland Ornament
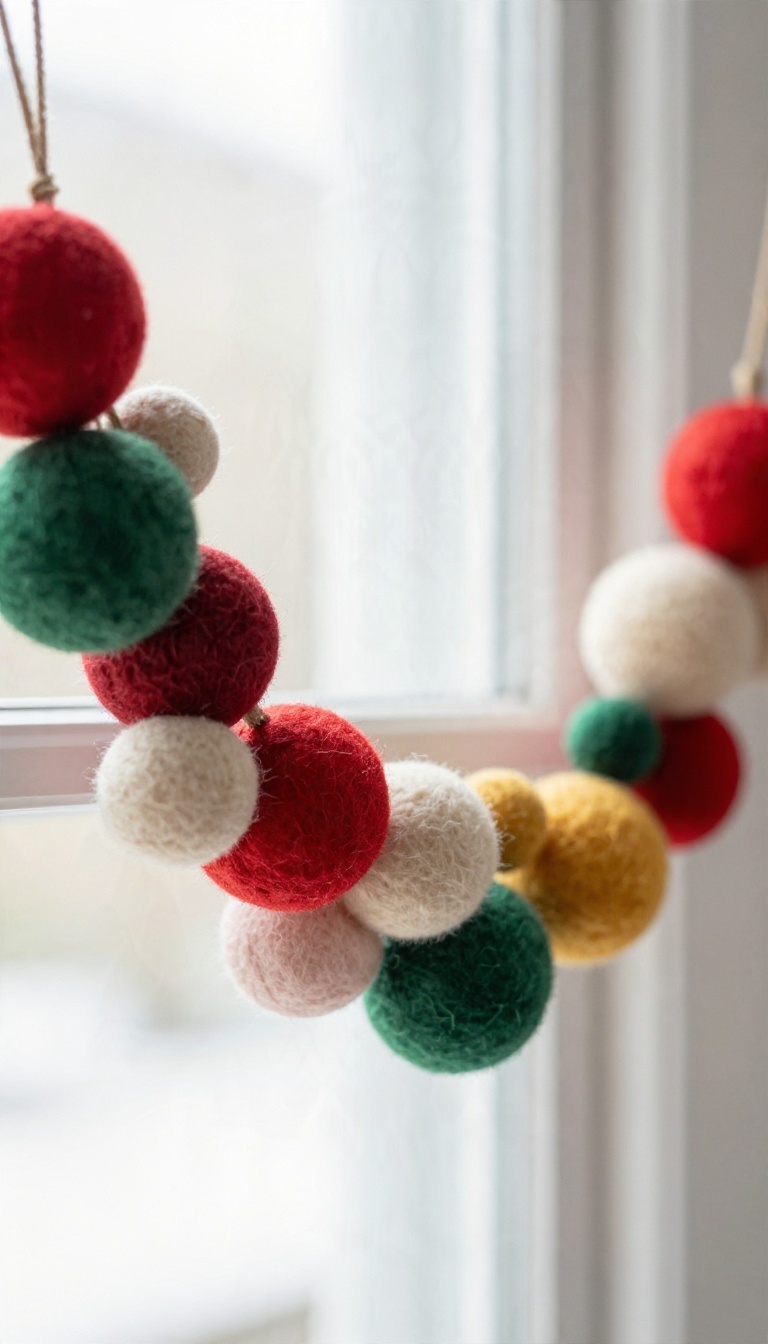
Felt balls are the quiet workhorses of a handmade tree. They add color and texture without any stitching, and you can make a whole strand while watching a movie. Thread a short length onto twine and you have a lightweight ornament that fills gaps between bigger pieces.
The best part is how little fabric it takes. Scraps too small for anything else still roll into usable balls, so this is a good project for the bottom of your felt bin.
You have two ways to get the balls, and both work fine. Rolling them by hand gives you a soft, slightly irregular shape that looks handmade in the good way. Cutting circles and stacking them gives you a tighter, more uniform ball if you want a cleaner look.
Either method takes about the same amount of time once you get going. Pick whichever suits your patience and the felt you have on hand.
Make The Balls
For rolled balls, cut a long strip of felt about an inch wide. Roll it tightly from one end, adding a dot of craft glue every few turns so it holds. Keep rolling until you reach the size you want, then glue the tail down flat.
For cut circles, trace and cut several same-size rounds, then stack them with glue between each layer. Press them together firmly and let them dry. A small circle on top and bottom hides the raw edges and rounds out the shape.
String And Hang
Cut a piece of twine a little longer than you want the finished strand. Tie a knot at one end, then thread the balls on with a large needle or by pushing the twine through with a skewer. Leave a small gap between each ball so the strand drapes instead of standing stiff.
Tie a loop at the top for hanging, and you are done. A short strand works as an ornament, while a longer one makes a nice garland across a mantel or doorway.
Color And Size Tips
Mix two or three colors that already show up elsewhere on your tree so the garland ties things together. Alternating sizes adds more interest than uniform balls, and it uses up odds and ends of felt. If you want a fuller look, make a few extra balls and keep them in a jar.
They are handy for filling bare spots or dressing up a gift wrap in a pinch.
12. Felt Poinsettia Flower with Layered Petals
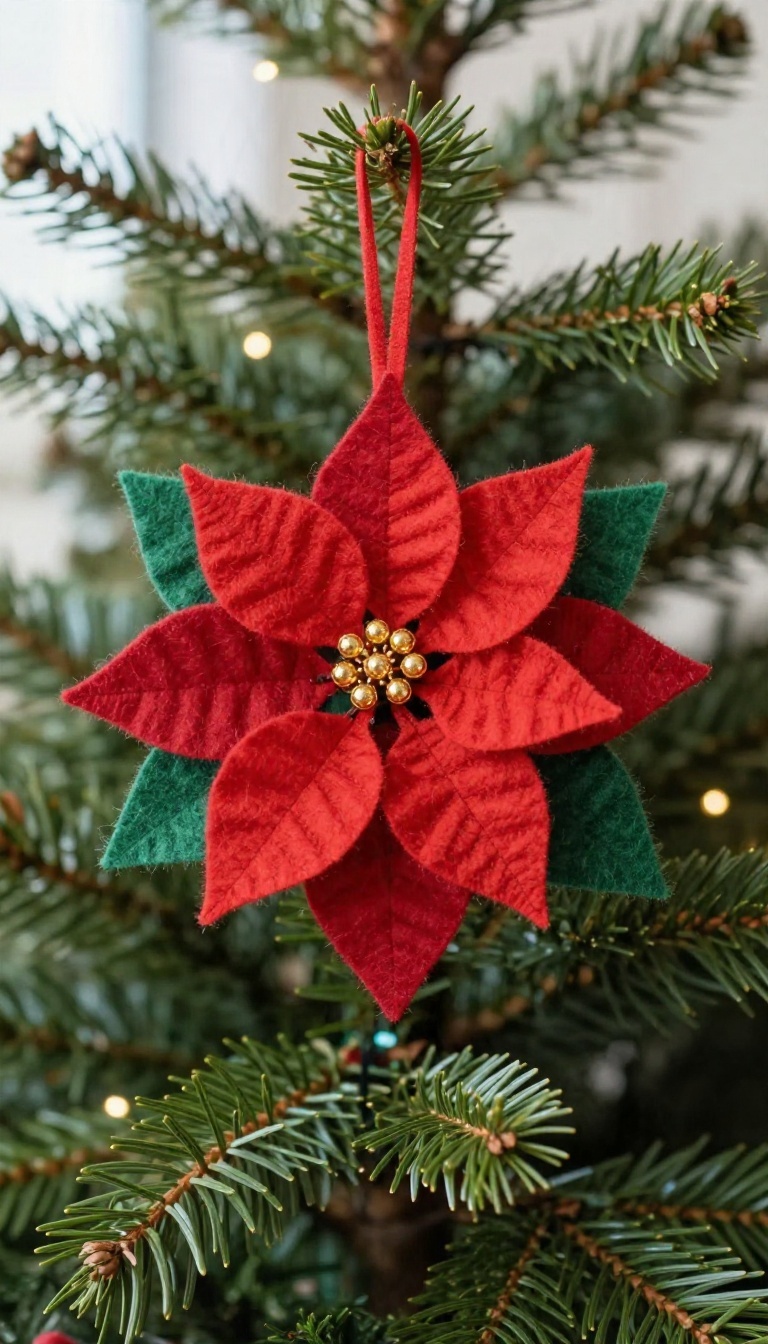
Poinsettias show up everywhere in December, but they rarely make it onto the tree as an ornament. A felt version fixes that. Layered pointed petals in two shades of red give it real depth, and a beaded center adds just enough sparkle to catch the tree lights.
The flower reads as bold from across the room, which is exactly what you want from an ornament that sits near the front of the branches. It also uses up small felt scraps, so it's a good project for the odds and ends left over from other ideas on this list.
The trick with a felt poinsettia is building it in layers so the petals overlap instead of sitting flat. You cut two sizes of pointed petals, stack them, and let the smaller ones sit on top. A backing circle holds everything together and gives you a clean spot to attach the hanger.
You can keep the palette classic with two reds, or go softer with cream and blush. Either way, the contrast between the shades does most of the visual work.
Cutting The Petals
Make a simple petal template from cardstock: a teardrop shape with a pointed tip, about two inches long. Cut six large petals in your darker shade and six smaller ones, roughly an inch and a half, in the lighter shade. Sharp scissors matter here.
Felt dulls blades fast, and ragged edges show up more on pointed shapes than on round ones. Snip slowly around the tip so it stays crisp.
Layering And Stitching
Arrange the large petals in a circle on your backing, overlapping the edges slightly, and pin them in place. Lay the smaller petals on top, offset so they fill the gaps between the larger ones. Stitch through all the layers with a few small stitches near the center, then run a simple running stitch around the middle of each top petal to hold it down.
Keep your thread matched to the felt so the stitches blend in.
Adding The Beaded Center
Sew a cluster of small gold or pearl beads into the middle of the flower, working outward from the center point. Five to seven beads usually looks right, but you can pile on more for a fuller look. Finish by stitching a loop of ribbon to the back of the backing circle.
A doubled thread and a few tight stitches will keep it secure through years of hanging.
13. Keepsake Felt Ornament with a Photo

Some ornaments hold a memory better than any store-bought bauble ever could. A tiny felt frame with a photo tucked inside turns a plain piece of wool into something you actually look forward to hanging each December. It works for a baby's first Christmas, a favorite vacation shot, or a goofy picture of the dog wearing antlers.
The whole thing comes together in an afternoon, and it costs almost nothing if you already have felt scraps and a printer. You are basically building a soft little picture frame, then stitching it shut so the photo stays put. Start with a simple shape and let the photo do the heavy lifting.
Cut The Frame And The Backing
Pick a shape that suits your photo. A rounded rectangle or a simple circle keeps the focus on the face, while a heart or a star adds a little holiday flavor. Cut two identical pieces from your main felt color.
Then cut a smaller window out of the front piece, either with sharp scissors or a craft knife against a cutting mat. A window about half an inch smaller than the photo on each side looks balanced. If you want a cleaner edge, cut the front frame from two layers and stitch around the window before assembling.
It takes a few extra minutes and makes the opening look intentional instead of wobbly.
Prep And Place The Photo
Print your photo on matte paper or cardstock, then trim it to fit behind the window with a small overlap on all sides. Matte paper photographs better than glossy here because it does not catch the light or glare through the opening. Slide the photo behind the window and check the framing before you commit.
You want the face or the moment centered, not clipped at the chin or the edge. Once it looks right, hold it in place with a tiny dab of glue or a couple of small stitches so it does not shift while you sew.
Stitch It Closed And Add A Hanger
Place the photo between the front frame and the back piece, then pin the layers together. A simple blanket stitch around the outer edge gives a tidy finish and hides the raw felt edges at the same time. If blanket stitch feels fussy, a running stitch close to the edge works fine too.
Leave a small gap at the top, then fold a loop of ribbon or twine and stitch it into place as you close the seam. Knot it off inside so nothing shows on the front. Add a little embroidery if you like, such as a name and a year stitched along the bottom of the frame.
That small detail is what makes it feel like a keepsake instead of a craft project.
FAQ
What kind of felt works best for Christmas ornaments?
Wool or wool-blend felt holds its shape and stitches cleanly, while acrylic felt is cheaper and easier to find. Use acrylic for quick kid projects and wool blend for ornaments you want to keep for years.
Do I need a sewing machine to make felt ornaments?
No. Most felt ornaments work fine with basic hand stitches like running stitch and blanket stitch. A few ideas on this list need no sewing at all.
How do I hang a felt ornament on the tree?
Sew a small ribbon loop or a piece of twine into the top seam before you close the ornament. A simple knot and a dot of glue also work for lightweight shapes.
How much stuffing should I use inside a felt ornament?
Use just enough to round out the shape without stretching the seams. A light layer of polyester fiberfill keeps ornaments soft and helps them hold their form.
Can kids help make these felt ornaments?
Yes. Cutting simple shapes, gluing buttons, and threading twine are good jobs for kids. Save the needle work for older children or adults.
Conclusion
Thirteen ideas is a lot to choose from, so start with the one that matches the felt you already have in your stash and the time you can actually spare. A simple star or a tiny mitten takes an afternoon, while a detailed bird might stretch across a few evenings. Either way, you end up with something soft and homemade hanging on the tree.
Don't worry about perfect stitches or matching sizes. A slightly crooked snowman or a lopsided heart still looks charming once it's up there with the lights.