13 Brick Patio Ideas With Classic Character and Warmth
Brick patios have a way of feeling grounded and welcoming, like they’ve been part of the house forever. But that doesn’t mean you’re stuck with a plain, flat surface.
With a little planning and some creative touches, you can turn a basic brick layout into a space that’s full of personality and warmth. Whether you’re starting from scratch or giving an existing patio a refresh, these ideas range from simple weekend projects to more involved renovations.
The best part? Many of them are easier on the wallet than you might think, especially if you’re willing to do some of the work yourself.
1. Classic Herringbone Pattern
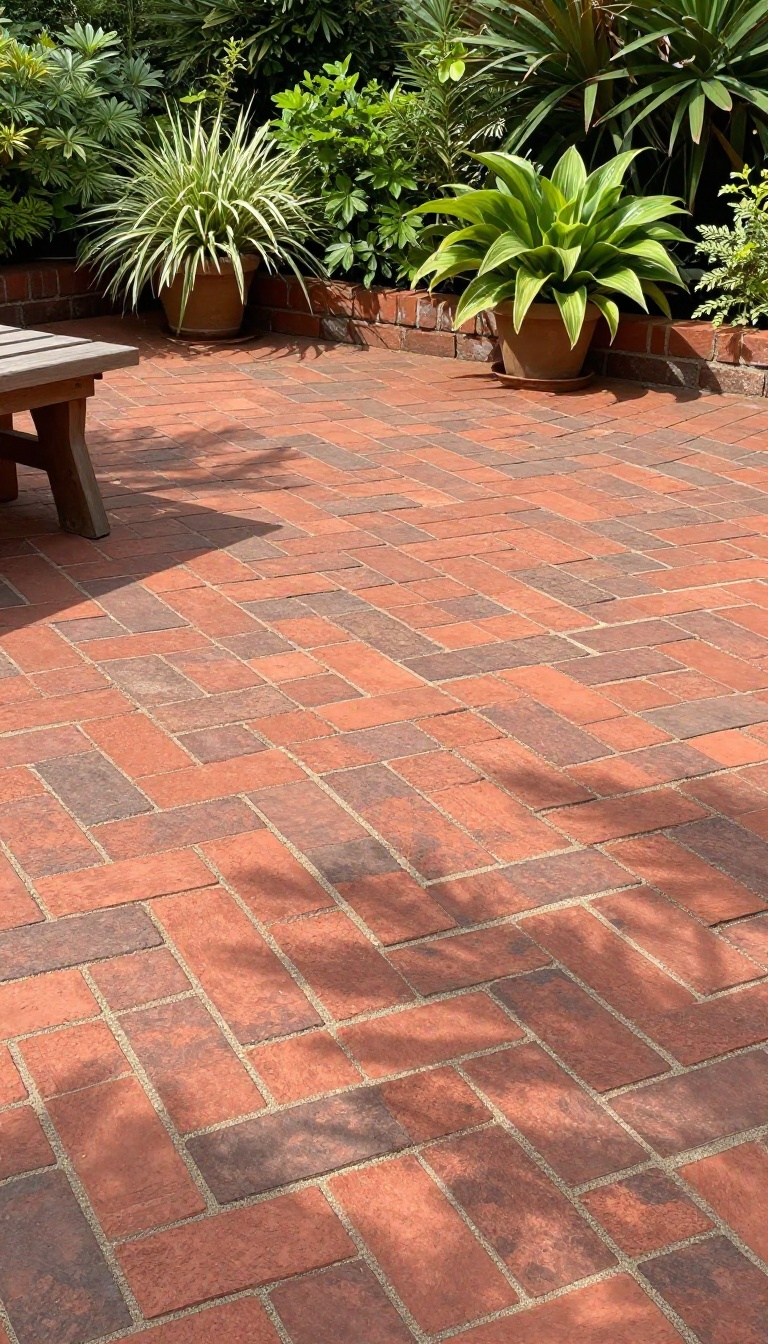
If you want a brick patio that feels both classic and dynamic, herringbone is a go-to. The pattern’s zigzag lines draw the eye and add texture without overwhelming the space. It’s a favorite for good reason—it’s sturdy, timeless, and works with almost any home style.
Herringbone isn’t just about looks; it’s also incredibly durable. The interlocking layout distributes weight evenly, making it ideal for high-traffic areas and even for parking if you ever need it. Plus, the pattern naturally hides minor imperfections, so small shifts or stains are less noticeable.
Installation does require some patience, but the payoff is worth it. You’ll need to plan your layout carefully, especially around edges and curves. But once you get the hang of it, the rhythm of placing bricks becomes almost meditative.
Why Herringbone Works
The herringbone pattern isn’t just a pretty face. Its angled bricks lock together, creating a surface that resists shifting and cracking. That’s why you see it on driveways and walkways that get heavy use.
For a patio, it means less maintenance over time and a surface that stays level and stable.
Tips For A Clean Installation
Start by laying out the pattern on paper or with a dry run before you commit. Use string lines to keep your angles consistent, and cut bricks as needed for edges. A plate compactor will help settle everything evenly.
And don’t forget to sweep sand into the joints—it locks the bricks in place and keeps weeds out.
Pairing With Landscaping
Because herringbone has a strong visual rhythm, it pairs beautifully with simple, low-maintenance landscaping. Think boxwoods, ornamental grasses, or a few potted plants. Avoid overly busy flower beds that compete with the pattern.
Let the patio be the star, and use greenery to soften the edges.
2. Mixed Materials: Brick and Stone
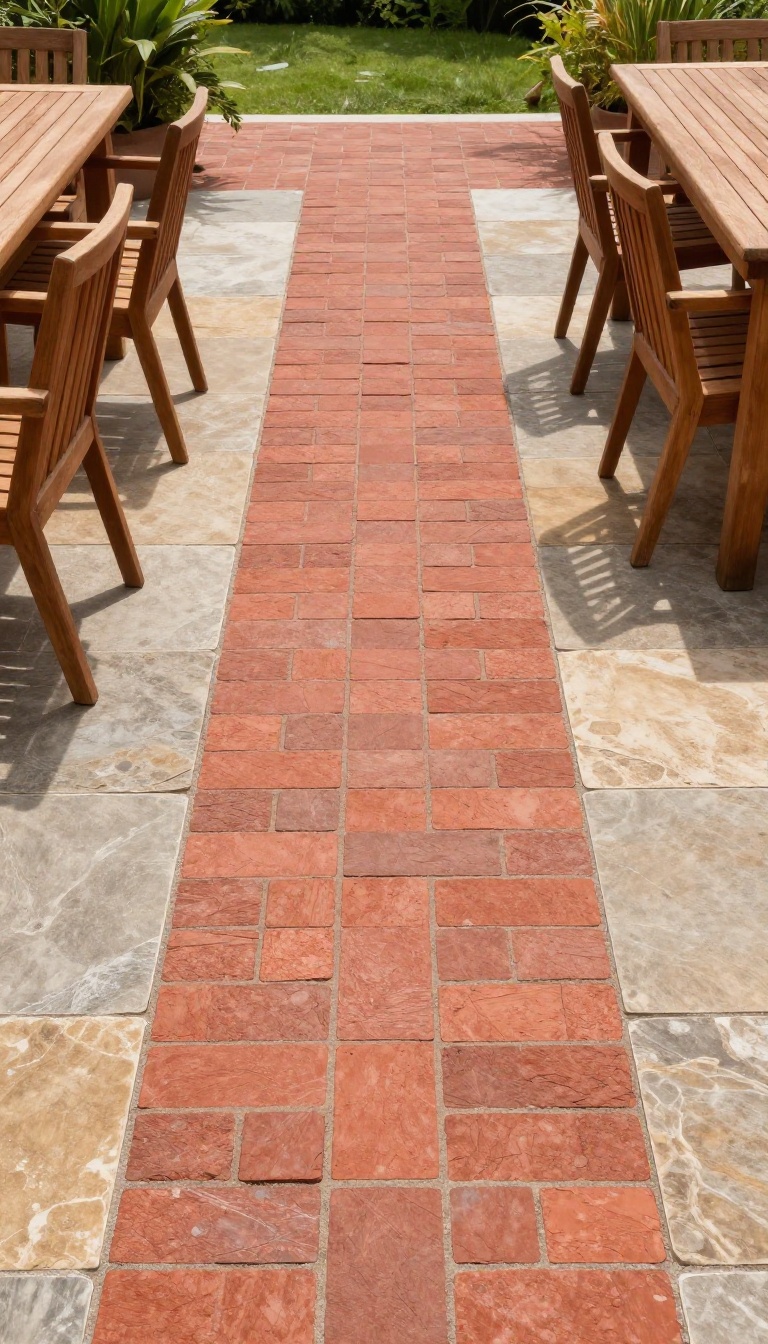
Pairing brick with natural stone or concrete pavers creates a patio that feels custom and full of character. The contrast in texture and color breaks up the uniformity of a single material, giving your outdoor space more visual interest. It's a practical way to define different zones, like a dining area or a walkway, without adding permanent walls.
Mixing materials is all about balance. Use brick for the main surface because it's warm and classic, then add stone as a border or in random accents. This approach works whether you prefer a formal look with clean lines or something more rustic and organic.
The key is to choose colors that complement each other—think warm reds and browns with cool grays or earthy tans.
Borders That Define The Space
A stone border around a brick patio instantly gives it a finished, intentional look. You can use large, flat flagstones for a natural feel or cut concrete pavers for a more uniform edge. The border also helps keep the brick in place and prevents shifting over time.
Accent Patterns And Inlays
Instead of using stone only on the edges, weave it into the brick pattern. Create a diamond or medallion in the center of the patio using contrasting stone pavers. Or, lay a row of stone between sections of brick to add rhythm and break up large areas.
This works especially well in walkways or between seating areas.
Blending With The Landscape
If your patio sits next to a garden or lawn, mixing in stone helps it blend more naturally with the surroundings. Use irregular, natural stone pieces along the edges to create a soft transition. This is a great option if you want your patio to feel like it's been there for years, not just installed.
3. Brick Border with Gravel Fill
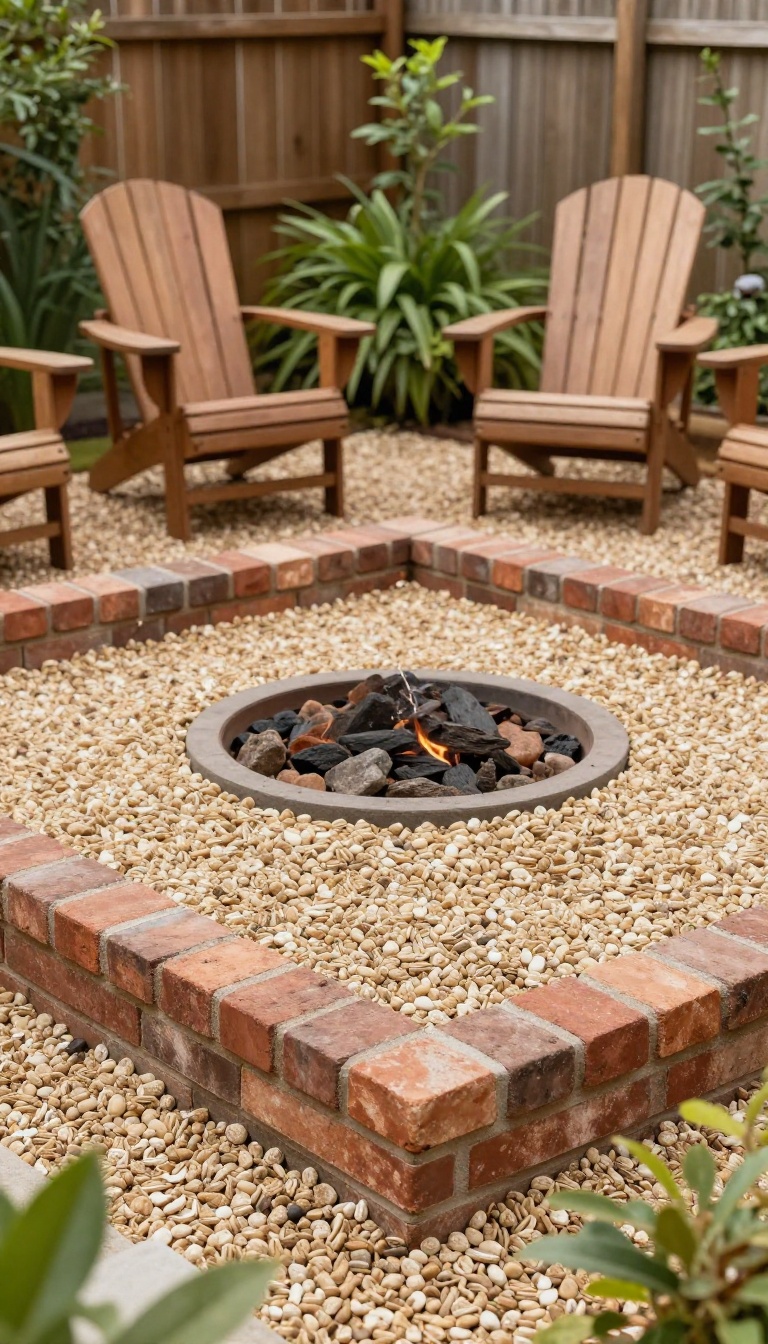
A brick border with a gravel fill is a smart way to stretch your budget while still getting that classic brick look. The solid perimeter defines the space, while the loose gravel inside keeps things casual and easy to maintain. It's a great pick for a side yard, a fire pit area, or anywhere you want a relaxed, cottage-garden vibe.
This design is all about contrast: the crisp, linear brick edge against the soft, textured gravel. It's also one of the most forgiving DIY projects—you don't need perfect grading or a perfectly level base for the gravel. Just dig out the area, lay a sturdy border, and pour in the gravel.
The result is a patio that feels intentional but not overly fussy.
Why Gravel Works So Well
Gravel is a champion at drainage. Rainwater seeps right through, so you won't deal with puddles after a storm. It also helps with weed control if you lay down a landscape fabric underneath.
And if you ever need to access a utility line or change the layout, you can just rake the gravel aside and lift the bricks.
Choosing The Right Brick
Go for a brick that's rated for exterior use, like pavers or old reclaimed bricks. They're more durable and can handle foot traffic and weather. For the border, you can lay them flat, on edge, or even in a soldier course for a taller, more defined edge.
Just make sure they're set in a concrete or sand base so they stay put.
Picking The Perfect Gravel
Pea gravel is a popular choice because it's smooth and comfortable underfoot. Crushed stone, on the other hand, locks together better and is less likely to shift. Think about how you'll use the space—if you'll be walking barefoot, pea gravel is gentler.
If you'll be placing furniture, crushed stone provides a more stable base.
Maintenance And Longevity
Gravel will need a little topping up every few years as it settles or gets kicked around. Raking it occasionally keeps it looking neat. The brick border, if properly installed, can last for decades.
This is a patio that gets better with age, developing a natural, lived-in charm.
4. Circular Brick Patio
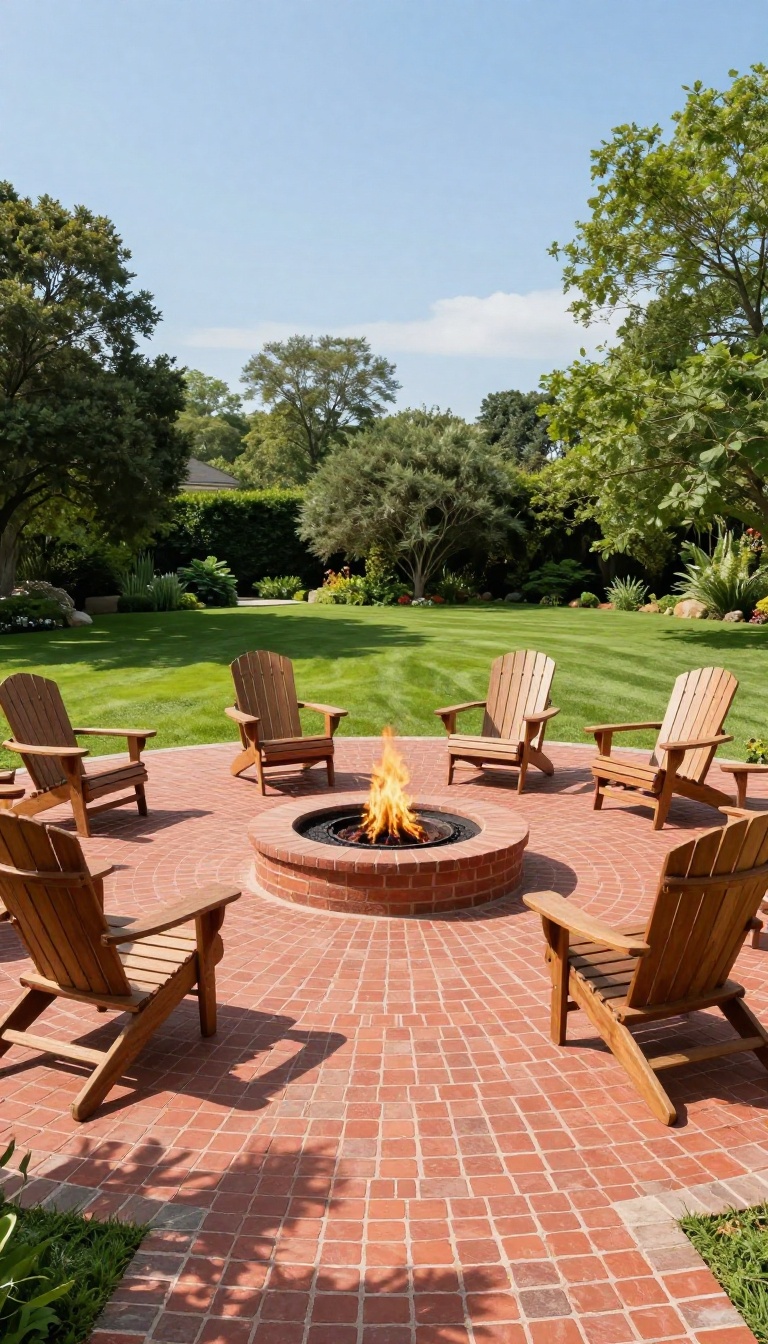
Who says a patio has to be a rectangle? A circular brick patio breaks the mold and adds a soft, organic feel to your yard. The curved shape draws the eye and naturally encourages people to gather in the center, making it perfect for conversation circles or a cozy fire pit setup.
Plus, the round form can make a small space feel larger and more inviting.
Building a circular patio might sound tricky, but it’s actually a manageable DIY if you plan carefully. The key is to set a strong center point and work outward in rings. You can use a simple string and stake to mark your circle, then lay bricks in a radial pattern or a running bond that follows the curve.
The result is a patio that feels intentional and charming, almost like it grew right out of the ground.
Choosing The Right Pattern
For a circular patio, you have two main pattern options. A radial pattern, where bricks fan out from the center like spokes, emphasizes the round shape and looks striking. A running bond, where bricks are laid in a spiral or concentric circles, gives a more subtle, classic feel.
Both work well, but radial patterns require more cutting at the edges, so factor in extra time and materials.
Tips For Laying The Curve
Start by excavating your circle to the desired depth, then add a base of compacted gravel and sand. When laying bricks, work from the center outward, using a rubber mallet to seat each brick. For the outer edge, you’ll need to cut bricks to fit the curve—a wet saw makes this much easier.
Finish with polymeric sand in the joints and a sturdy edge restraint to keep everything in place.
Design Ideas To Enhance The Circle
A circular patio pairs beautifully with a central fire pit or a small water feature. You can also surround it with flower beds or low lighting to highlight the shape at night. If you want extra visual interest, mix in a contrasting brick color for the outer ring or add a border of stone pavers.
The circle becomes a natural focal point that ties your whole landscape together.
5. Brick Patio with Fire Pit
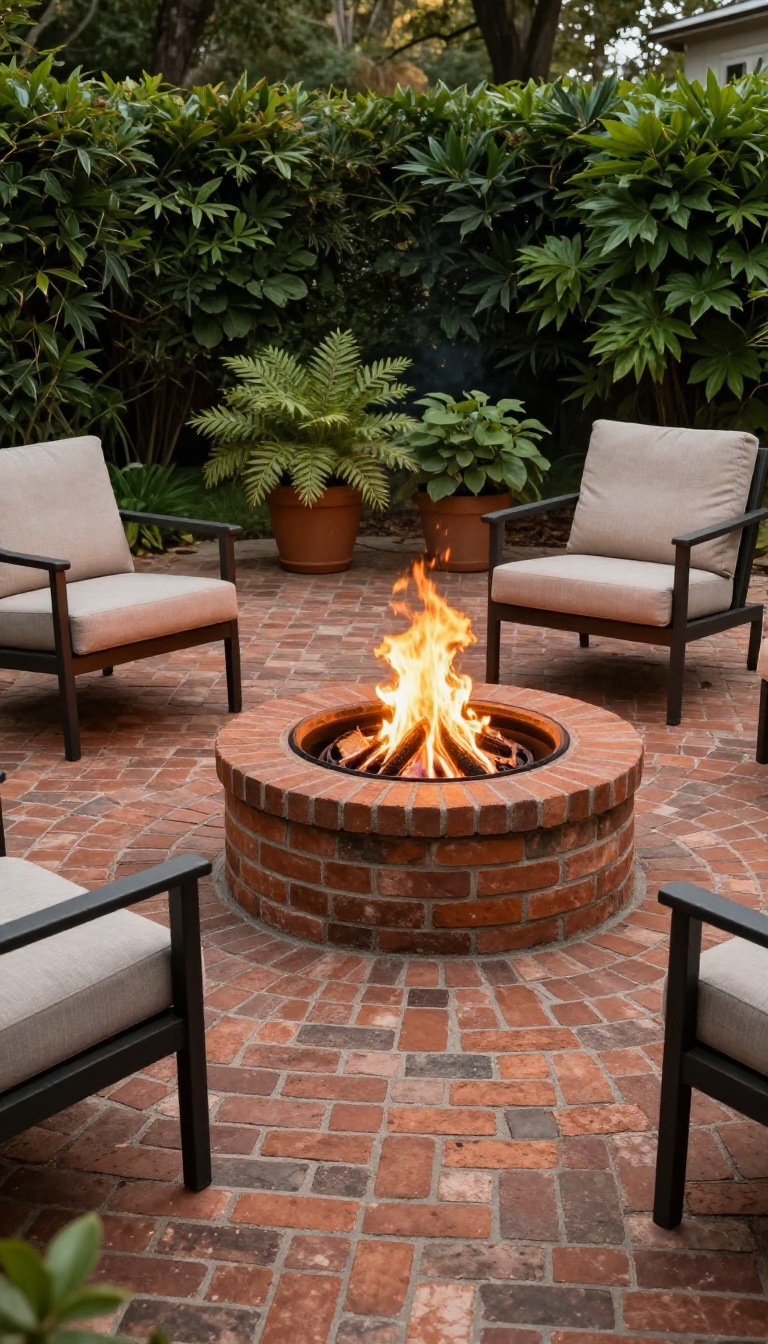
There’s nothing quite like gathering around a fire on a cool evening, and when your patio is made of brick, the combination feels even more inviting. A built-in fire pit adds a natural focal point and extends the usability of your outdoor space well into the fall. The warm tones of the brick and the fire’s glow create a cozy, timeless atmosphere that’s hard to beat.
A built-in fire pit can be the centerpiece of your brick patio, turning it into a year-round gathering spot. The key is to design it so it feels intentional and blends seamlessly with the brickwork. You can choose a fire pit that matches your patio’s brick for a cohesive look, or go with a contrasting color to make it stand out.
Either way, the fire pit becomes more than just a heat source—it’s a place where people naturally gravitate.
Choosing The Right Fire Pit Style
When it comes to fire pits, you have a few options. A round, bowl-style fire pit is classic and works well for smaller patios. For larger spaces, a square or rectangular pit can double as a table when not in use.
You can also go with a gas fire pit for easy lighting and control, or stick with wood-burning for that authentic crackle and smell. Think about how you plan to use the space and what fits your lifestyle best.
Seating Arrangements That Work
The right seating can make or break the fire pit experience. Built-in benches around the pit are a great way to maximize seating and keep the area open. Or, you can use individual chairs that can be moved around for flexibility.
Consider adding cushions and pillows for comfort, and make sure there’s enough space between the seating and the fire for safety. The goal is to create an inviting circle where everyone feels included.
Integrating The Fire Pit With Brick
To make the fire pit feel like it belongs, integrate it with the brick patio. You can build the pit using the same brick as the patio for a seamless look, or use a different shade to create a subtle contrast. A raised border around the pit can double as extra seating or a place to rest drinks.
If you’re working with an existing patio, you can still add a fire pit by building it on top of the brick or cutting out a section and pouring a concrete base.
6. Basketweave Pattern
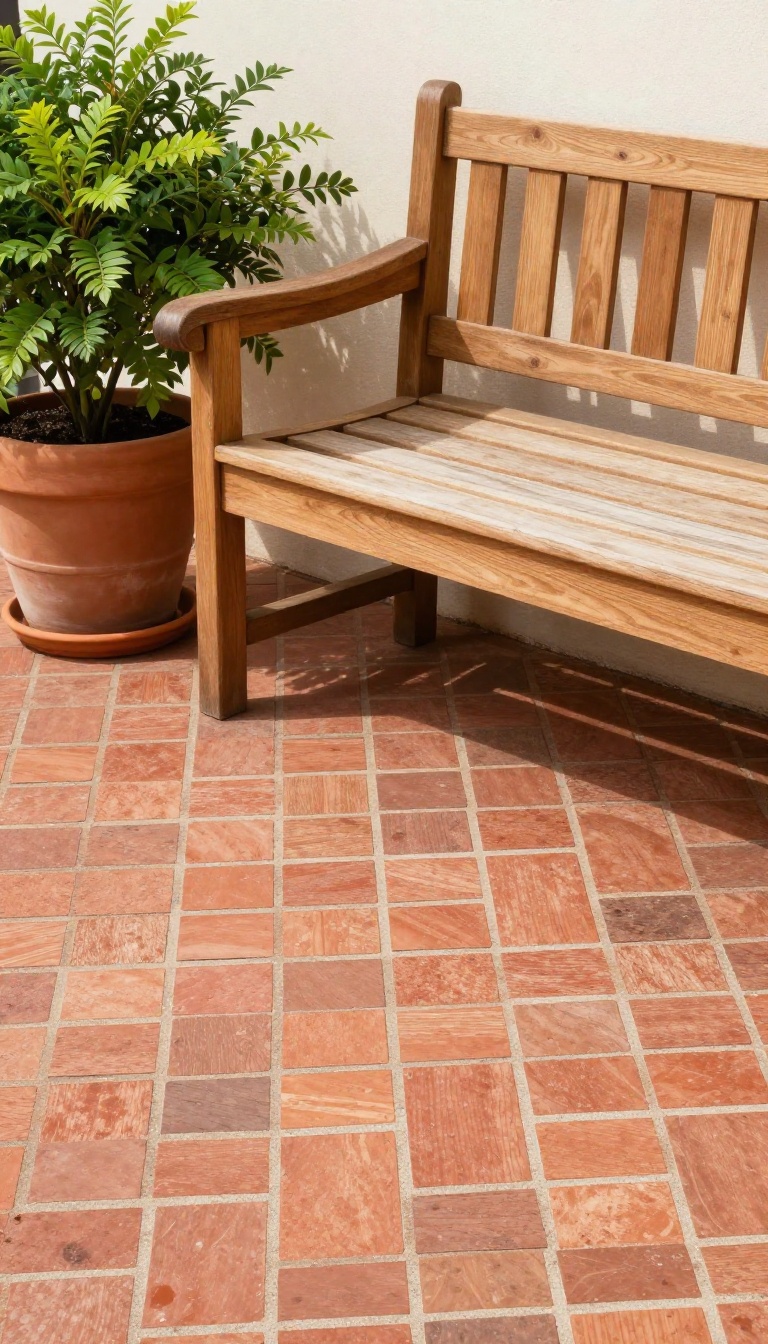
If you want a brick patio that feels both timeless and visually interesting, the basketweave pattern is a fantastic choice. It creates a woven, textured look that adds depth and character to any outdoor space. This pattern works especially well in formal gardens or with traditional home styles, giving your patio a classic, handcrafted feel.
The basketweave pattern is achieved by laying pairs of bricks side by side, alternating their orientation to create a checkerboard-like weave. This simple technique produces a sturdy, interlocking surface that’s both elegant and durable. It’s a great option if you want a patio that stands out without being too flashy.
Why Choose Basketweave?
Basketweave offers a unique blend of charm and stability. The interlocking pattern distributes weight evenly, making it less likely to shift or settle over time. Plus, its classic look pairs beautifully with brick edging, flower beds, or a simple fire pit.
Installation Tips
Start with a solid base of compacted gravel and sand to ensure proper drainage. Lay the bricks in pairs, alternating directions, and use a rubber mallet to level them. Finish with polymeric sand to fill the joints and lock everything in place.
Design Variations
You can mix things up by using different brick colors or adding a border in a contrasting pattern. For a more modern twist, try a larger basketweave with bigger pavers. The possibilities are endless, and the result is always eye-catching.
7. Brick Patio with Pergola
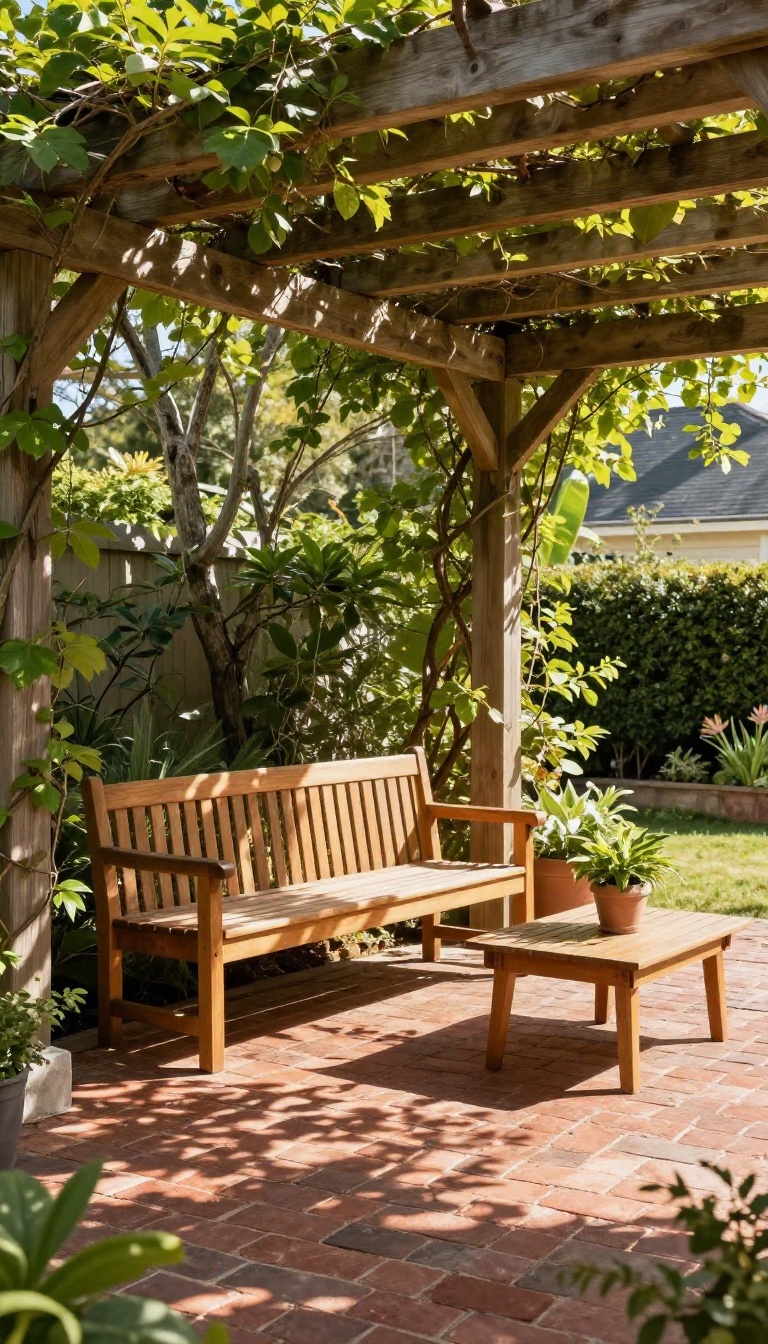
A pergola can turn a sunny brick patio into a comfortable retreat, offering shade and a clear sense of purpose. The natural warmth of brick pairs beautifully with wood beams, creating an inviting spot that feels both open and cozy. Adding climbing plants softens the structure and gives the space a lush, lived-in feel.
When you add a pergola above your brick patio, you’re not just adding shade—you’re creating a focal point that anchors the whole area. The contrast between the rugged brick and the clean lines of wood adds visual interest, while the overhead structure makes the patio feel like an outdoor room. Plus, a pergola can be as simple or as elaborate as you want, from a basic freestanding frame to one attached to your house.
Choosing The Right Pergola Style
Think about the style of your home and how you plan to use the space. A rustic, natural wood pergola with rough-hewn beams suits a cottage or farmhouse vibe, while a sleek, painted design fits a more modern aesthetic. Attached pergolas are great for easy access from the house, but freestanding ones can define a separate lounge or dining area.
Consider the size of your patio and the amount of shade you need—adjustable louvers or a retractable canopy offer flexibility.
Planting Vines For Charm And Privacy
Climbing vines are the secret to making a pergola feel magical. Choose fast-growing, non-invasive options like clematis, wisteria, or climbing roses, and train them up the posts. Over time, they’ll weave through the beams, creating dappled shade and a natural privacy screen.
If you want quicker coverage, annual vines like morning glories or hyacinth beans work well. Just make sure to provide sturdy support and prune regularly to keep them in check.
Furnishing And Lighting For Comfort
With the pergola in place, it’s time to make the space comfortable. Use outdoor furniture that invites relaxation—think deep-seated sofas, a dining set, or a couple of rocking chairs. Add outdoor curtains on one or two sides for extra shade and a touch of elegance.
For evenings, string lights or lanterns hung from the beams create a warm glow. You can also add a ceiling fan or a portable heater to extend the season.
8. Reclaimed Brick Patio
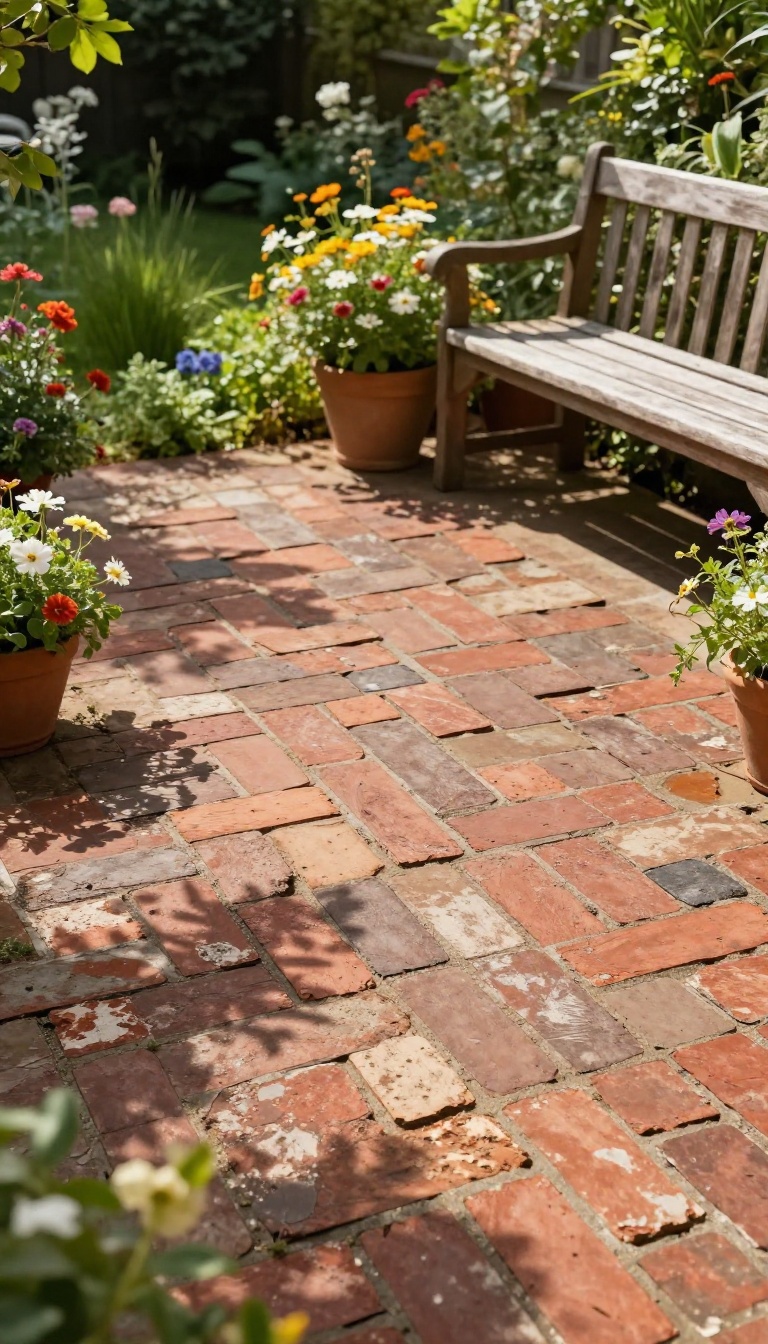
If you’re drawn to the worn, time-tested look of old brick, a reclaimed patio might be your perfect match. Salvaged bricks bring a sense of history that new bricks simply can’t replicate, with their chipped edges, varied hues, and subtle imperfections. Plus, it’s an eco-friendly choice that can save you money if you find a good local source.
Reclaimed brick patios have a unique charm that feels both rustic and refined. The weathered surfaces and irregular tones create a warm, old-world atmosphere that blends beautifully with gardens and traditional architecture. And because each brick has its own story, your patio will have a character that’s impossible to duplicate.
Sourcing reclaimed bricks takes a little effort, but the payoff is worth it. Check demolition sites, architectural salvage yards, or online marketplaces. You might even find free bricks from someone tearing down an old wall or chimney.
Just be sure to clean them properly and inspect for structural integrity—some old bricks may be too soft or damaged for outdoor use.
Where To Find Reclaimed Bricks
Start by calling local demolition companies or checking sites like Craigslist and Facebook Marketplace. Architectural salvage stores often have a steady supply, though prices vary. You can also ask bricklayers or contractors—they might have leftovers from projects.
If you’re patient, you can score bricks for a fraction of the cost of new ones.
Cleaning And Preparing Old Bricks
Old bricks may have mortar, dirt, or paint on them. Use a wire brush or a pressure washer to remove loose debris. For stubborn mortar, a chisel and hammer work, but it’s time-consuming.
Soak the bricks in water before laying to prevent them from sucking moisture out of the mortar too quickly, which can weaken the bond.
Laying A Reclaimed Brick Patio
The installation process is similar to a new brick patio, but you’ll need to account for uneven sizes. Sort bricks by thickness and shape, and use a sand or gravel base to level them. A flexible mortar or polymeric sand will help accommodate variations.
Plan your pattern ahead—running bond or herringbone work well, but you might need to mix sizes for a more organic look.
9. Brick Patio with Built-in Seating
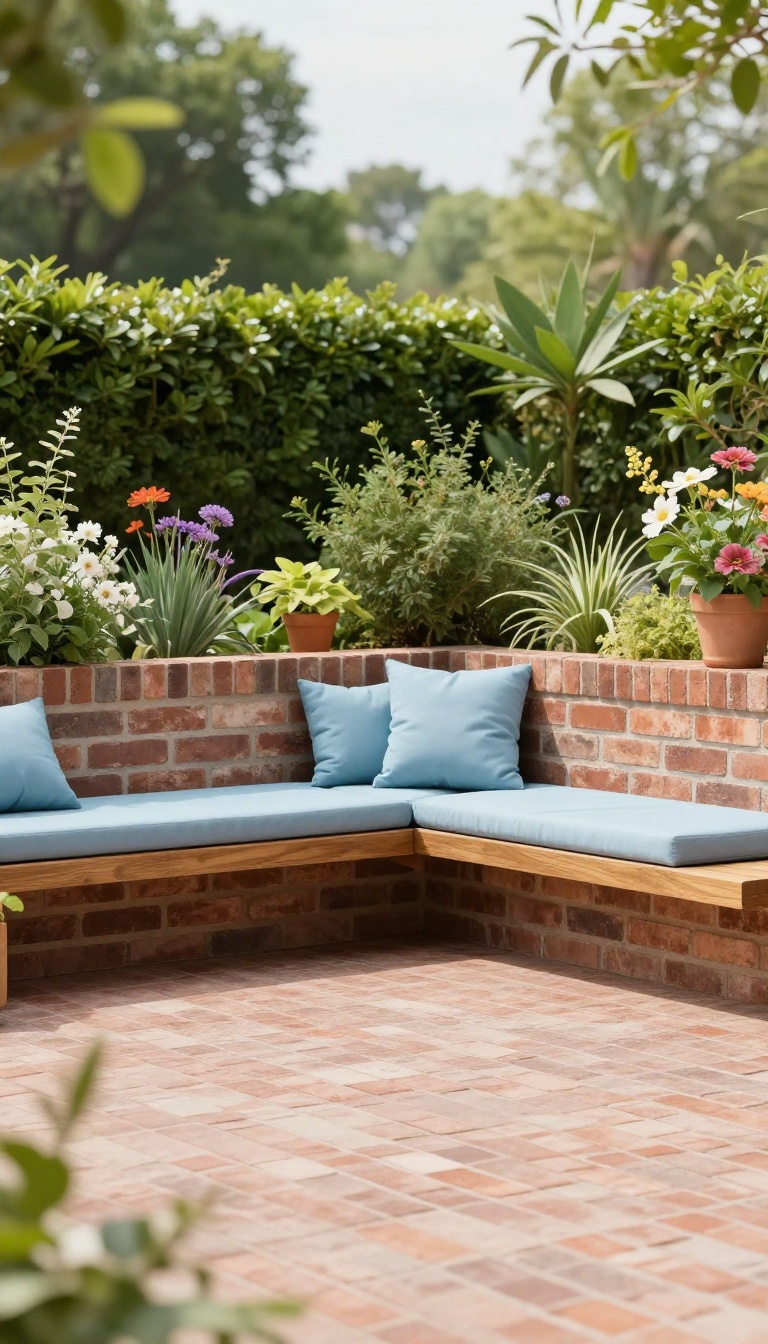
When you’re designing a patio, seating often takes up a lot of room, especially if you’re working with a smaller space. Built-in seating solves that problem by tucking benches right into the brickwork. It’s a smart way to maximize your patio’s function without cluttering it with extra furniture.
Built-in seating isn’t just practical—it also gives your patio a polished, custom look. Low brick walls can double as planters or define the edge of your patio, while benches provide a cozy spot to sit and chat. You can even add outdoor cushions for comfort and a splash of color.
Why Choose Built-in Seating?
Built-in seating saves space and keeps your patio tidy. Unlike movable chairs, it’s always there when you need it, and it doesn’t blow away in the wind. Plus, it creates a seamless connection between the patio and your home’s architecture, making the whole area feel more intentional.
Design Ideas For Built-in Benches
One simple approach is to build a low brick wall around the perimeter of your patio, then top it with a wooden or stone seat. You can also create a U-shaped seating area around a fire pit or a rectangular bench along one side. For extra flair, leave gaps in the brickwork to plant flowers or herbs.
Comfort And Customization Tips
Don’t forget the cushions! Outdoor cushions in a bright color or a weather-resistant fabric can make your built-in seating as comfortable as any chair. Add throw pillows for a cozy touch, and consider building in small side tables or a ledge for drinks.
You can also vary the height of the walls to create a more dynamic look.
10. Two-Tone Brick Design
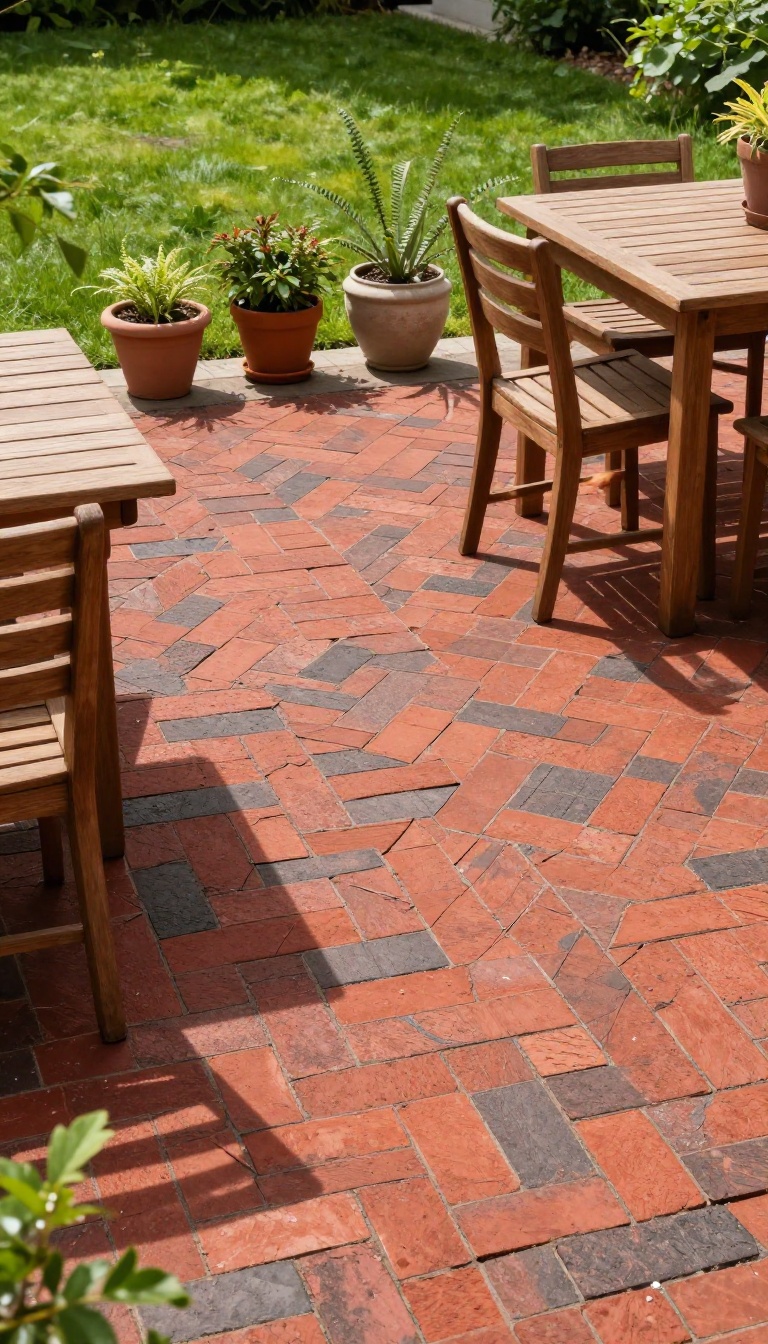
A two-tone brick patio is a clever way to add depth without overwhelming the space. By pairing classic red bricks with a contrasting shade like brown or charcoal, you can create subtle patterns that catch the eye. It’s a budget-friendly trick that makes your patio feel custom-designed, even if you’re laying it yourself.
The key is to use the contrast intentionally. You might outline the entire patio with a darker border to define the area, or weave in a few accent bricks here and there for a playful touch. A checkerboard effect is bolder, but you can tone it down by using the second color sparingly.
The result is a space that feels more dynamic and inviting, while still keeping that timeless brick charm.
Border And Edge Accents
One of the simplest ways to use two tones is to frame your patio with a contrasting brick border. This creates a clean, finished look that guides the eye and defines the seating area. You can choose a darker shade for the border to anchor the space, or go lighter to keep it airy.
It’s an easy upgrade that works with almost any layout.
Checkerboard And Pattern Play
If you’re feeling bolder, a checkerboard pattern made from alternating red and brown bricks adds a playful, retro vibe. For a more subtle approach, try laying the contrasting bricks in a diagonal stripe or a herringbone accent within a standard running bond. These patterns draw attention without being too loud, making them perfect for entertaining spaces.
Blending With The Landscape
Think about how the brick colors interact with your home’s exterior and garden. A warm red brick might complement a brick house, while a brown or tan shade can tie in with wood accents or stone features. Use the two tones to bridge the patio with its surroundings, creating a cohesive outdoor living area that feels naturally connected.
11. Brick Patio with Outdoor Kitchen
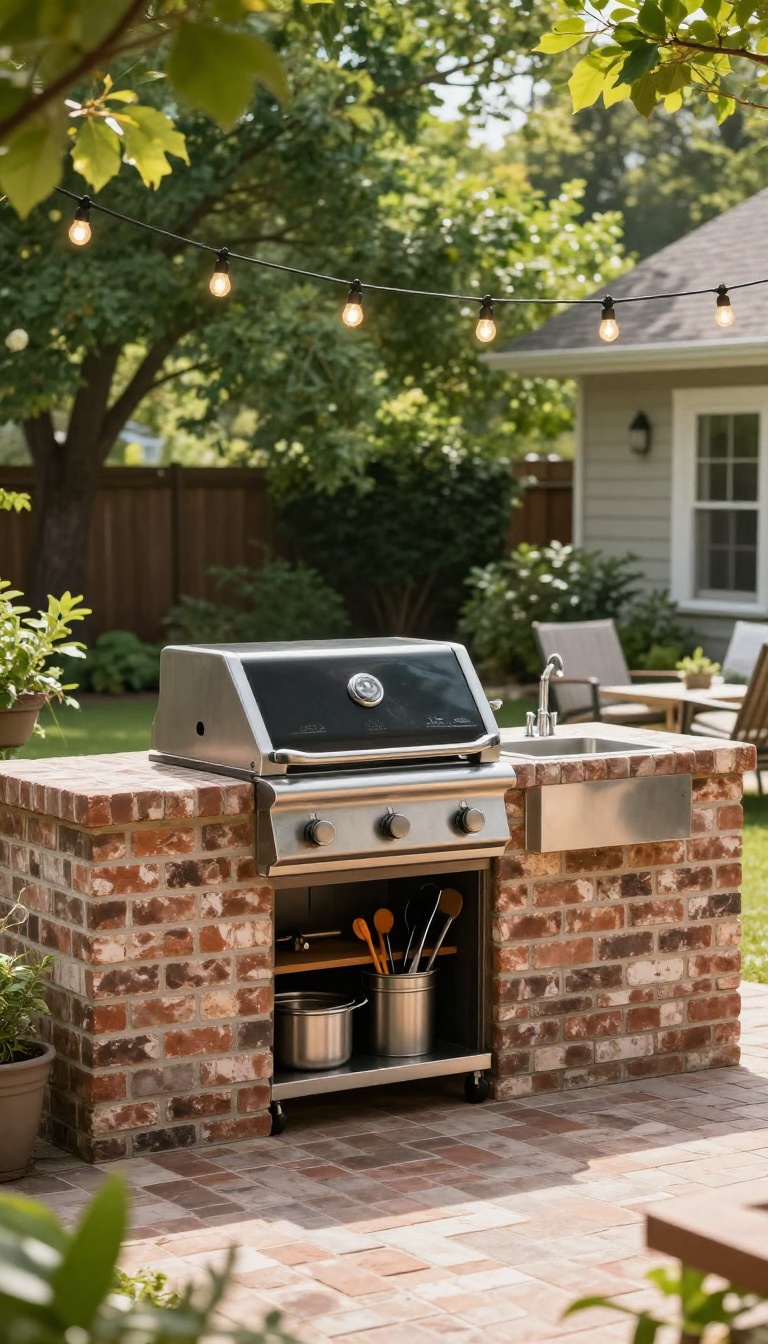
If you love cooking and hosting, an outdoor kitchen can turn your brick patio into the heart of your backyard. Brick is naturally heat-resistant and durable, making it an ideal material for a built-in grill or countertop. This setup not only adds function but also creates a warm, inviting space that’s perfect for summer gatherings.
Designing an outdoor kitchen around your brick patio starts with planning the layout. Think about how you move between the grill, prep area, and seating. A simple L-shaped or straight-line counter works well for most spaces.
You can also add a sink or mini-fridge for extra convenience. The key is to keep the flow smooth so you’re not stuck in a corner while guests mingle.
Choosing The Right Grill And Countertop
For a built-in grill, go with stainless steel for longevity and easy cleaning. Pair it with a brick or stone countertop that matches your patio. Brick countertops can be sealed to resist stains and weather.
If you prefer a lighter look, consider a concrete or tile top with brick accents.
Adding Storage And Convenience
Incorporate cabinets or shelves beneath the counter to store grilling tools, plates, and supplies. A small pull-out trash bin is a smart addition. You can also add a side burner for sauces or a pizza oven for a fun twist.
These details make your outdoor kitchen feel as functional as an indoor one.
Lighting And Ambiance
String lights overhead or install under-counter LED strips to keep the area bright after sunset. Lanterns or small sconces on the brick wall add warmth. Consider a dimmer switch to adjust the mood from lively to cozy.
Good lighting makes your outdoor kitchen usable well into the evening.
12. Brick Patio with Garden Beds
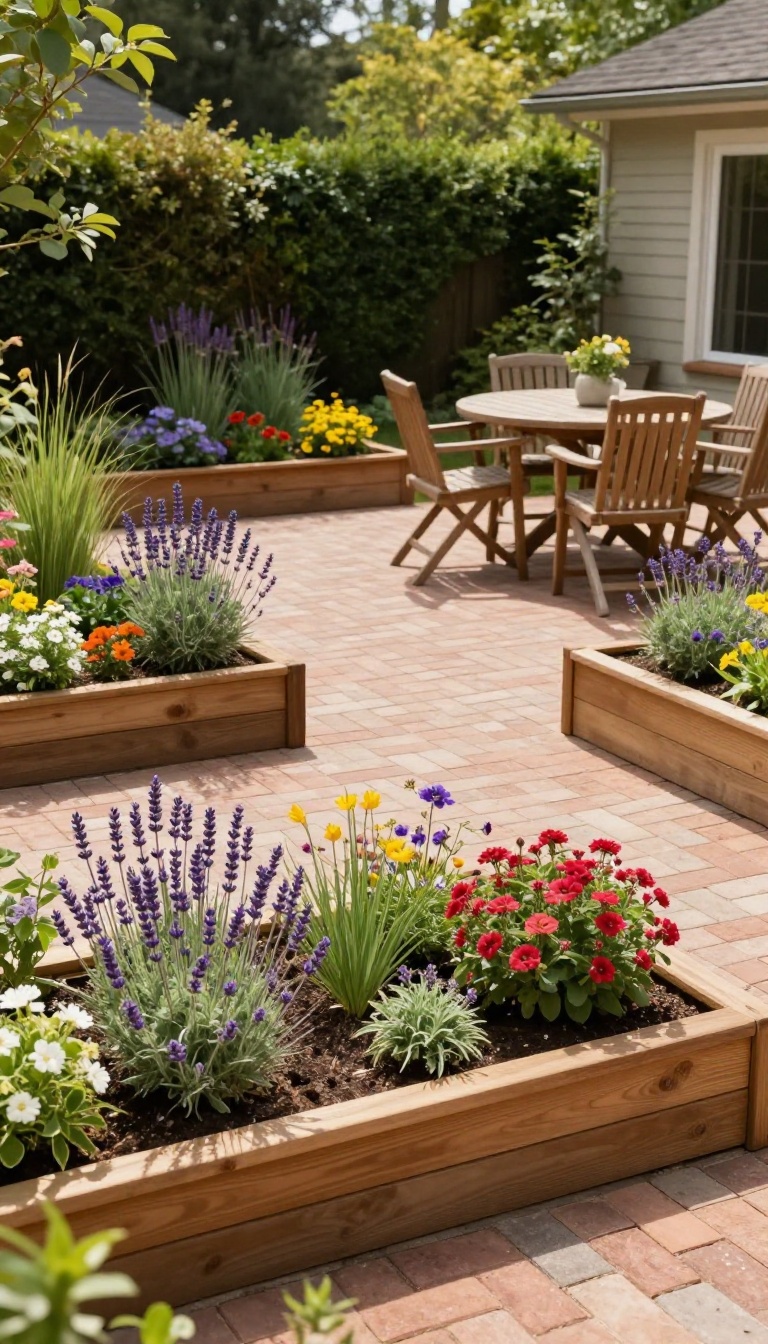
A brick patio can feel a little stark if it's all hardscape. Adding raised garden beds around the edges softens the look and brings in color and life. It's a simple way to make the space feel more inviting and connected to the rest of your yard.
Raised garden beds do more than just add beauty. They help define the patio area, creating a natural boundary that makes the space feel cozy and enclosed. Plus, they're practical: you can grow herbs, flowers, or even vegetables right next to your seating area, making it easy to snip fresh basil for a drink or enjoy the scent of blooming roses while you relax.
Choosing The Right Plants
Pick plants that thrive in your climate and match the amount of sunlight your patio gets. For sunny spots, consider lavender, salvia, or ornamental grasses. In shadier areas, hostas, ferns, and impatiens work well.
Mixing heights and textures adds visual interest, and using a few evergreen shrubs ensures year-round structure.
Building The Beds
You can build raised beds from wood, stone, or even brick to match your patio. If you're handy, a simple DIY project with cedar planks is affordable and looks great. Make sure the beds are at least 12 inches deep for most plants.
Line the bottom with landscape fabric to prevent weeds, and fill with quality soil.
Design And Layout Tips
Place the beds along the perimeter of your patio, leaving enough room for walking and seating. You can create a continuous border or break it up with gaps for pathways. Adding a low brick wall or edging can tie the beds into the patio design.
Consider adding outdoor lighting to highlight the plants in the evening.
13. Brick Patio with Lighting
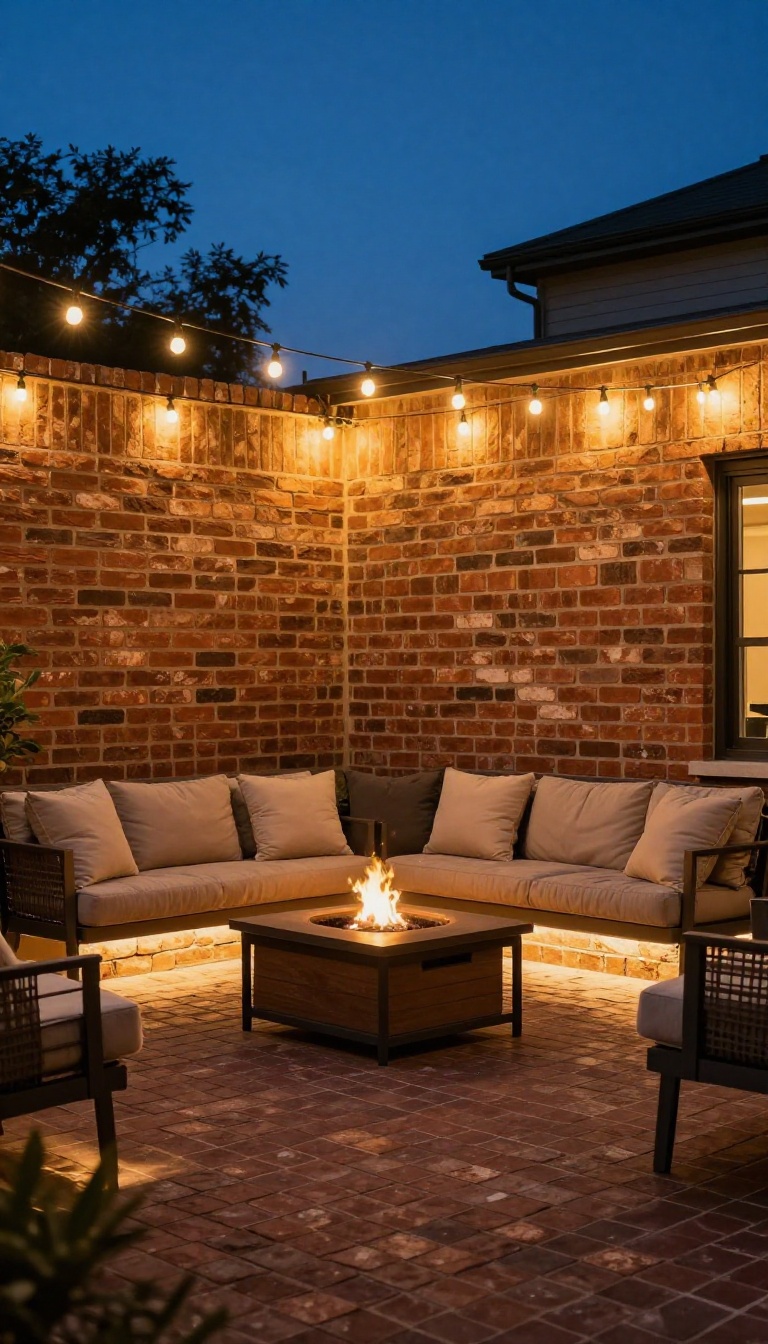
Good lighting can turn a brick patio into a magical evening retreat. The warm tones of brick pair beautifully with soft, layered light, creating a cozy and inviting atmosphere. Whether you want to highlight the texture of the bricks or simply make the space safer after dark, there are plenty of ways to illuminate your patio.
Start by thinking about how you use your patio at night. Do you need bright light for dining, or a softer glow for conversation? A mix of lighting types usually works best.
Path lights guide the way, string lights add a festive feel, and spotlights can showcase special features like a fire pit or a garden wall. Built-in LED strips along steps or under benches provide subtle, modern illumination that also improves safety.
Layered Lighting For Every Mood
Don't rely on one single light source. Combine overhead string lights with low-level path lights and accent lights to create depth. Use dimmers or smart bulbs to adjust the brightness depending on the occasion.
For a warm, inviting glow, choose bulbs with a color temperature around 2700K to 3000K.
Highlight The Brick Texture
Brick has a natural, tactile quality that looks stunning when lit from the right angle. Use uplights placed at the base of a brick wall or pillar to cast shadows that emphasize the mortar lines. Or, install recessed lights in the patio surface itself to graze the brick pattern and create a dramatic effect.
String Lights For A Festive Touch
String lights are an easy and affordable way to add charm. Drape them overhead across the patio, or hang them along a fence or pergola. Choose classic Edison bulbs for a vintage feel, or opt for weatherproof LED string lights that can stay up year-round.
They instantly make the space feel more celebratory and welcoming.
FAQ
What is the best brick pattern for a patio?
The best pattern depends on your style and the shape of your patio. Herringbone is durable and classic, while basketweave offers a more traditional look. For a modern twist, try a running bond or a circular pattern.
How much does it cost to install a brick patio?
Costs vary widely based on materials, labor, and size. On average, you might spend between $10 and $20 per square foot for a professionally installed brick patio. DIY installation can save on labor costs but requires time and effort.
How do I maintain a brick patio?
Regular sweeping and occasional rinsing with a hose will keep it clean. For stains, use a mild detergent and a brush. Sealing the bricks every few years can help protect them from moisture and wear.
Can I install a brick patio myself?
Yes, with proper preparation and patience, a DIY brick patio is achievable. You’ll need to excavate, lay a gravel base, and sand, then set the bricks. It’s labor-intensive but can save money.
How do I prevent weeds from growing between bricks?
Use polymeric sand in the joints, which hardens when wet and helps block weeds. Also, ensure a proper base and edging to keep weeds from creeping in from the sides.
Conclusion
Brick patios offer a timeless appeal that fits almost any home. Whether you choose a simple pattern or add features like a fire pit or pergola, the key is to make it your own.
Start with a plan that matches your budget and skill level, and you’ll enjoy a beautiful outdoor space for years to come. So grab some inspiration, pick your favorite idea, and get ready to transform your backyard.