11 Gazebo Ideas Backyard Outdoor Enclosed for Cozy Privacy
A backyard gazebo should feel like a private room, not a buggy pavilion everyone can see into. The fix usually comes down to how you enclose it, and that choice changes everything about how often you actually use the space.
Screens, curtains, glass, and even climbing vines can turn an open frame into a cozy retreat you'll want to sit in every evening. The tricky part is matching the enclosure to your climate, budget, and how much privacy you really need.
Some setups take an afternoon and a few hundred dollars, while others are built to handle winter. None of them require a contractor unless you want one.
1. Screened Sanctuary with Magnetic Closure
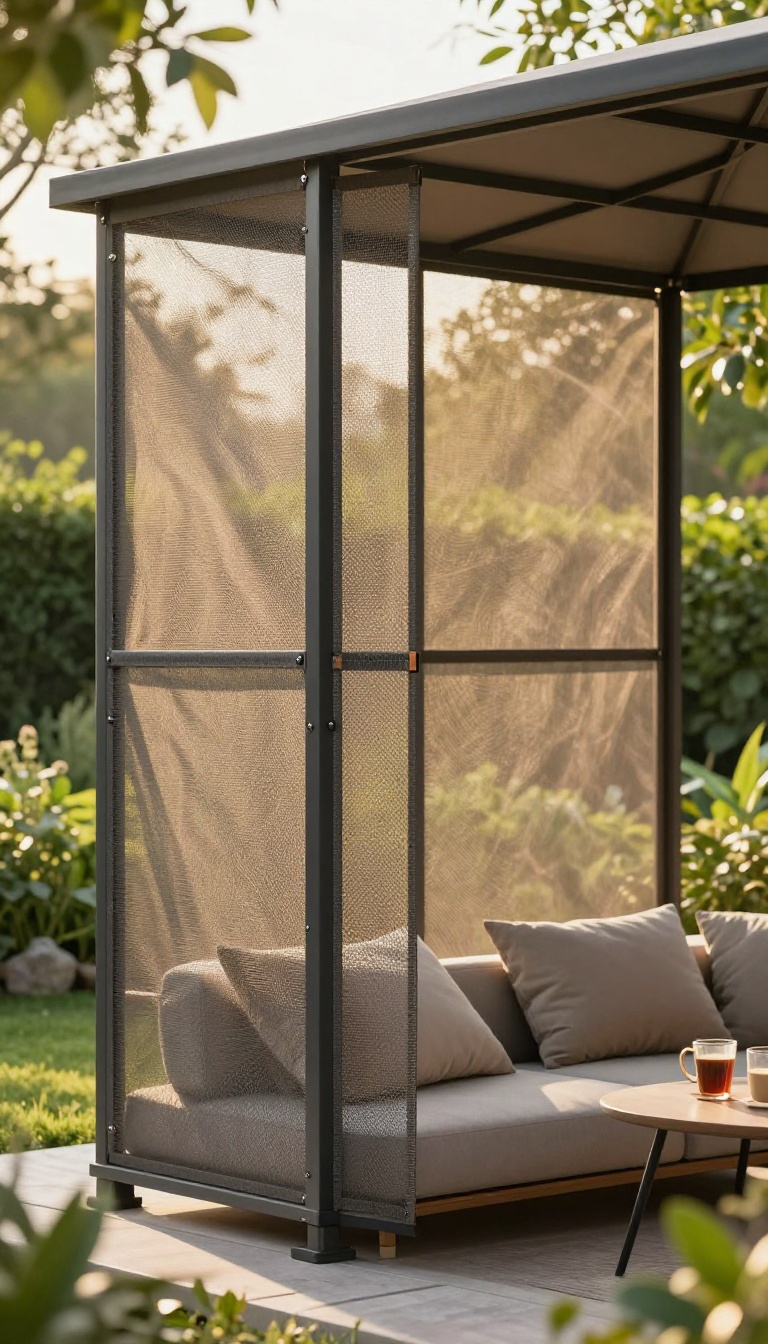
A screened gazebo with magnetic closures gives you the best of both worlds: fresh air without the mosquitoes. The fine mesh keeps tiny bugs out, while magnetic strips let you walk in and out hands-free. It's a simple upgrade that makes evening lounging feel private and bug-free.
Screened enclosures are a classic for a reason. They block insects, reduce wind, and add a layer of privacy without blocking your view. Magnetic closures take it a step further by making entry and exit effortless.
You can carry a tray of drinks or a sleeping toddler and still slip through without fumbling with zippers. Most kits use fiberglass or polyester mesh with sewn-in magnets that snap shut behind you. Installation is straightforward: you attach the screen panels to your gazebo frame with hooks, snaps, or adhesive strips.
Some kits are custom-sized, but many are adjustable to fit standard 10×10 or 12×12 frames. Once installed, you'll notice the difference immediately. No more swatting at mosquitoes or worrying about flies landing on your snack plate.
The space stays airy, and on mild evenings, you can leave the screens closed and still enjoy a cross breeze.
Choosing The Right Mesh
Not all screen mesh is created equal. Standard fiberglass mesh is affordable and durable, but it can block some airflow. Polyester mesh is finer and lets more air through, but it's slightly less tear-resistant.
If you live in a humid climate, look for mesh treated with mildew resistance. For pet owners, a heavier-duty mesh like pet screen can handle claws without ripping.
Magnetic Vs. Zipper Closures
Magnetic closures are convenient, but they rely on the magnets lining up perfectly. If the screen gets misaligned, gaps can form. Zippers are more secure but require two hands.
A hybrid option uses magnets for the main entry and zippers for side panels. Think about how you'll use the space: if you're often carrying things, magnets win. If you need a tight seal for winter, zippers are better.
Installation Tips For A Snug Fit
Measure your gazebo's openings before buying any kit. Screens that are too loose will flap and tear; too tight and they'll strain the frame. Use a staple gun or heavy-duty adhesive tape to secure the edges.
For a cleaner look, add a trim piece over the staples. Test the magnetic closure a few times to ensure it snaps shut on its own. If it doesn't, adjust the tension or add extra magnets.
2. Curtained Cabana with Weighted Hem
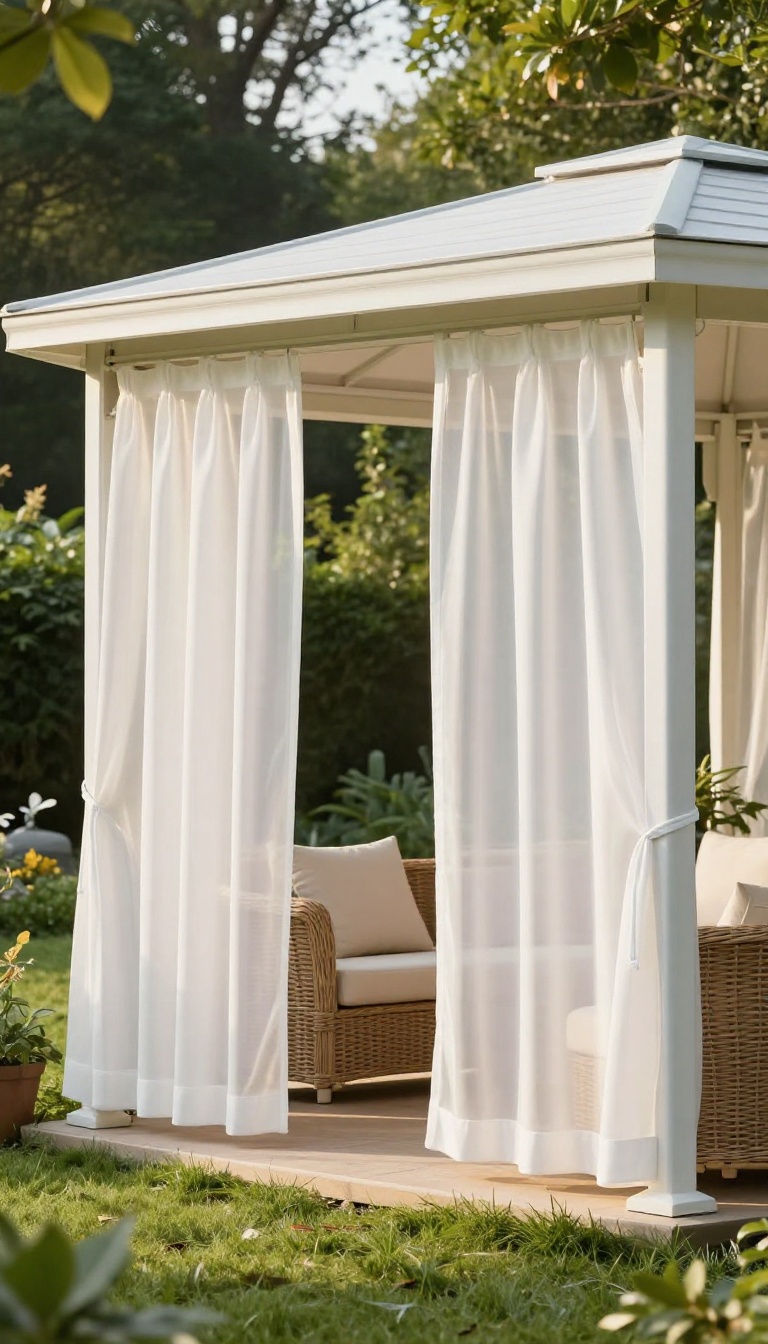
Curtains turn a gazebo into a room you can open or close in seconds. They hang from a track or rod around the perimeter, and weighted hems keep them from flapping in the breeze. It’s a simple upgrade that gives you privacy, shade, and a softer look without blocking the whole structure.
The magic is in the hem. A little weight sewn into the bottom of each panel keeps fabric hanging straight instead of flying up like a sail. That means you can leave curtains partially open for airflow and still get a clean, finished look.
It also cuts down on that annoying snapping sound on windy days. You can hang curtains on a ceiling-mounted track, a cable system, or a sturdy rod. Tracks are the smoothest for daily use, but rods cost less and install in an afternoon.
Either way, measure your opening and add a few extra inches so panels overlap when closed. That overlap is what actually gives you privacy.
Choosing The Right Fabric
Outdoor curtains need to handle sun, rain, and humidity. Look for solution-dyed acrylic or treated polyester—they resist fading and mildew. Canvas is durable but heavy, so make sure your rod or track can take the weight.
If you want light and privacy, a lined panel works better than a single thin layer.
Track Vs. Rod: Which Setup Works Better
A ceiling track lets curtains glide around corners and stack neatly at one side. It’s the best choice for gazebos with angled or curved frames. A rod is simpler and cheaper, but you’ll need straight runs and enough brackets.
For a quick weekend project, a cable kit with snap hooks is a solid middle ground.
How To Add Weight Without Ruining The Look
You don’t need to sew. Clip-on curtain weights or a chain in the hem pocket add just enough drag. Some people use small washers wrapped in fabric, but ready-made weights look cleaner.
Aim for 2 to 4 ounces per panel—too much and the fabric pulls; too little and it still flaps.
3. Glass Panel Retreat for Year-Round Use
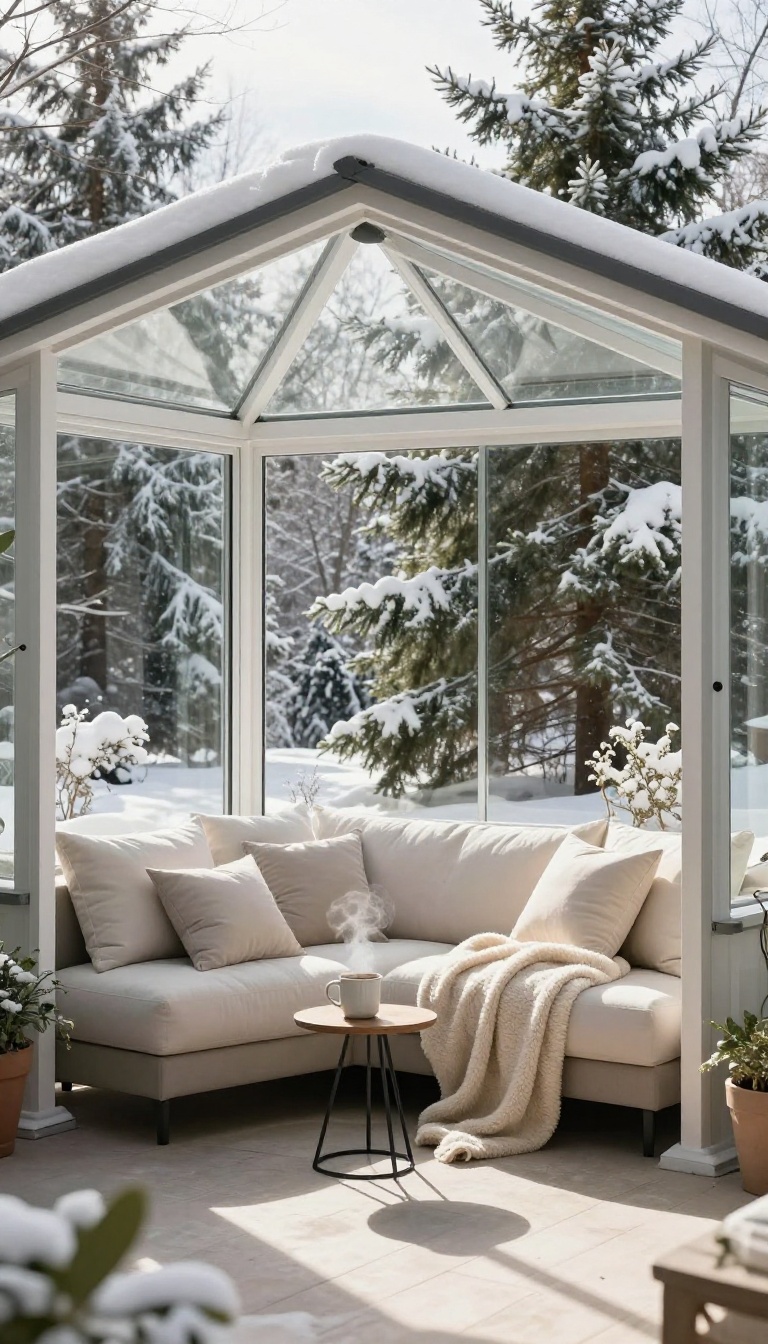
Glass panels turn a basic gazebo into a sunroom you can enjoy in every season. Instead of swapping screens for storm windows each fall, sliding glass doors stay put and keep the space comfortable year-round. You get unobstructed views, real wind protection, and a quiet retreat that feels intentional rather than improvised.
The biggest shift with glass is how it changes your relationship with the outdoors. You still see everything—the trees, the sky, the snow falling—but you're not fighting the elements to do it. That means morning coffee in January or a rainy afternoon reading session become normal, not special occasions.
Glass also cuts noise in a way screens and curtains can't. If you live near a busy road or just want a calmer vibe, that alone can justify the upgrade. And because the panels slide or stack, you can open things up on mild days without losing the option to close them fast.
One practical note: glass adds weight, so your gazebo frame needs to handle it. Most kits designed for glass will say so upfront. If you're retrofitting, check with the manufacturer before you buy panels.
Sliding Vs. Fixed Panels
Sliding panels give you flexibility—open a few for breeze, close them when the wind picks up. Fixed panels cost less and seal tighter, but you lose the option to open up. A mix works well: sliders on the main seating side, fixed glass on the back wall for privacy and insulation.
Comfort And Climate Control
Glass alone doesn't heat or cool the space, but it blocks wind and holds some warmth from the sun. In colder zones, add a small space heater or a pellet stove rated for enclosed areas. In hot climates, choose low-E glass or add shade sails overhead to keep the greenhouse effect in check.
Maintenance And Cost Realities
Glass needs cleaning more often than screens, especially if you have trees nearby. Budget for a squeegee and a few minutes each week. Expect to pay more upfront than screen or curtain setups, but the extended usability often balances that out over a few years.
4. Roll-Down Shade and Privacy Screen Combo
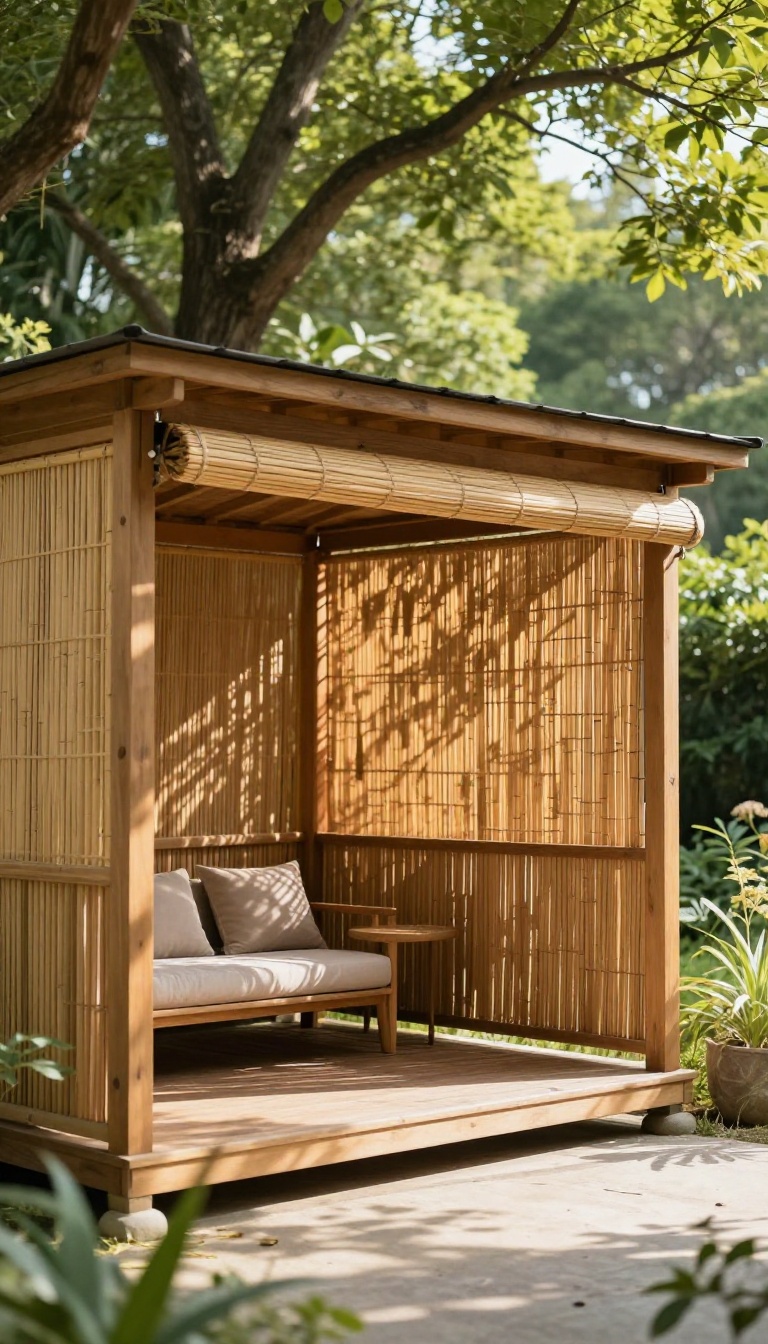
Not every side of your gazebo needs the same treatment. The afternoon sun hits one side hard, while the neighbor's second-story window stares straight at the other. A roll-down shade and privacy screen combo lets you solve both problems without sealing the whole structure.
You get light control where it matters and sightline control where you need it.
The idea is simple: put roll-up shades on the sunny side and a fixed or semi-fixed privacy screen on the exposed side. Bamboo, reed, or outdoor fabric shades roll down when the sun is low and roll up when you want the breeze. The privacy screen stays put, blocking the view that bothers you most.
This approach works because most yards have one or two problem directions, not four. You don't need to enclose everything. You just need to break the line of sight and cut the glare where it actually hits.
It's also one of the cheaper ways to make a gazebo feel private. A single roll-down shade and one screen panel can cost less than a full curtain set, and they install with basic hardware.
Choosing The Right Shade Material
Bamboo and reed shades block harsh sun and add a warm, natural look. They don't block wind, so they're best for calm, sunny spots. Outdoor fabric shades, often sold as solar or roller shades, give you more control.
Some block up to 90 percent of UV rays while still letting in light. Look for fade-resistant, mold-resistant fabric if your gazebo stays damp. Avoid cheap indoor roller blinds.
They warp, fade, and sag within a season. Spend a little more on something rated for outdoor use and you'll get years out of it.
Picking A Privacy Screen That Lasts
Privacy screens come in woven fabric, bamboo, metal, and composite slats. Fabric screens are light and easy to hang, but they flap in wind and fade over time. Bamboo and reed screens look great and breathe well.
They're a solid pick for a neighbor-facing side that doesn't get pounded by rain. Metal or composite slat screens cost more, but they hold up in wind and weather. If your gazebo sits in an exposed spot, this is the one to buy.
Mounting Without Damaging The Frame
Most gazebo frames accept hooks, brackets, or zip ties without drilling. Use stainless hardware if you live near the coast. For roll-down shades, mount the roller at the top beam and add a simple cleat or hook at the bottom to hold it down.
That keeps it from flapping when the wind picks up. Privacy screens can hang from the top rail with carabiners or S-hooks. That makes them easy to remove for cleaning or storage in winter.
Mixing Shade And Screen For Real Comfort
Put the shade where the sun hits in the late afternoon. That's usually the west side. Put the screen where the view is worst, often the side facing a neighbor or street.
Leave at least one side open for airflow. A fully closed gazebo gets stuffy fast, even with a screen. If you want more flexibility, use two roll-down shades on adjacent sides.
You can drop one, drop both, or roll them up as the day changes.
5. Lattice and Climbing Vine Enclosure
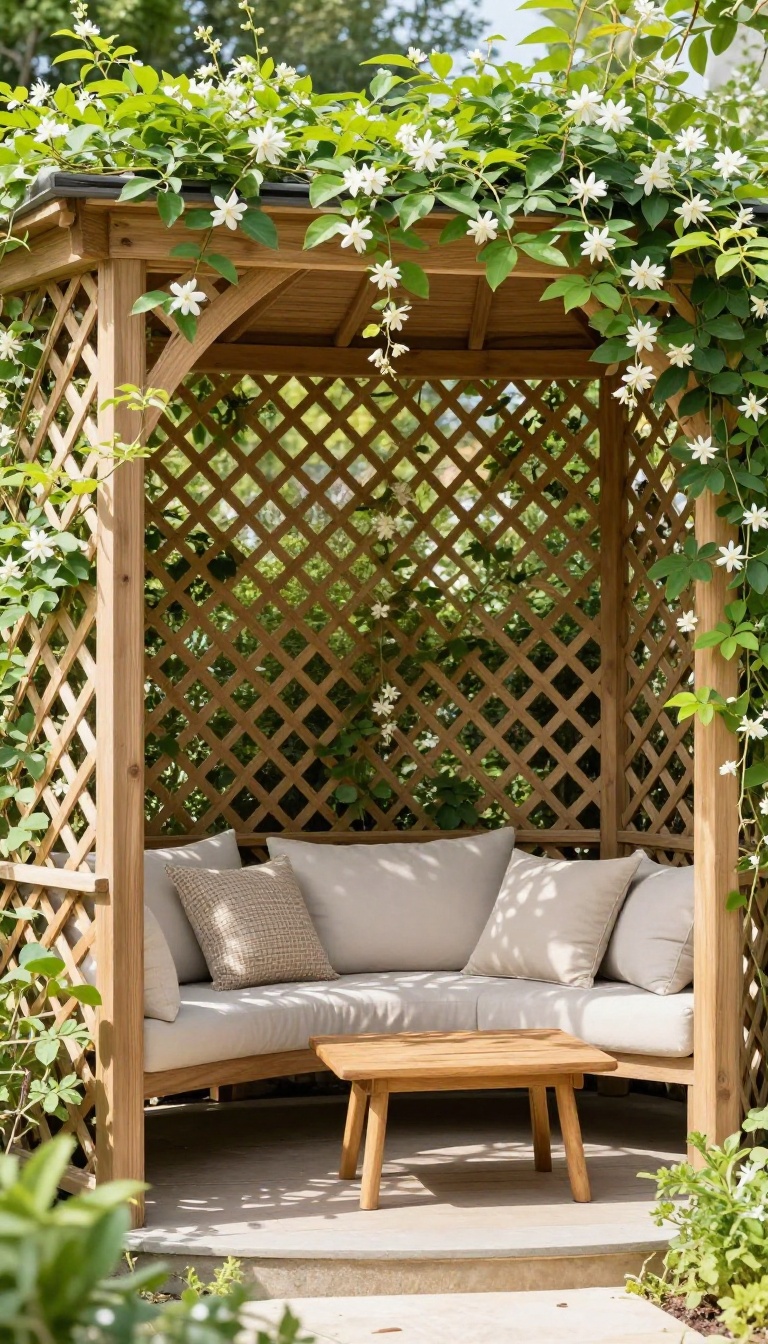
Lattice panels give you a privacy screen that grows and changes with the seasons. Attach them to the gazebo frame and let climbing plants like jasmine, ivy, or clematis fill in the gaps. The result is a living wall that feels soft, secluded, and a little bit magical.
Lattice works because it blocks sightlines without blocking air. You get the enclosed feeling of a solid wall, but breezes still move through and the space never feels stuffy. It's an affordable upgrade, too, since a few panels and some fast-growing vines cost far less than glass or custom screens.
The trick is choosing the right vine for your climate and how much maintenance you're willing to do. Some plants stay neat and manageable, while others will try to take over the whole gazebo by August. A little planning now saves you a summer of wrestling with runaway tendrils later.
Choosing The Right Lattice
Not all lattice is built to hold plants. Look for wood or vinyl panels with openings at least an inch wide so vines can weave through easily. Pressure-treated wood works fine, but vinyl or composite lasts longer and won't rot where moisture collects.
Size matters, too. Panels that are too flimsy will sag under the weight of mature vines. Go with a thicker grid or add a simple frame behind the lattice for extra support.
If your gazebo has metal posts, you can often attach lattice with zip ties or U-brackets without drilling.
Picking Vines That Behave
Jasmine smells incredible and grows fast, but it needs sun and regular trimming. Ivy is tough and shade-friendly, though it can cling to surfaces and leave marks. Clematis offers big, colorful blooms and stays relatively tidy if you prune it at the right time.
Annual vines like morning glory or moonflower are a smart choice if you want a quick screen without a long-term commitment. They die back in winter, so you start fresh each spring. For a permanent green wall, go with evergreen climbers that keep their leaves year-round in your growing zone.
Training And Upkeep
Vines don't always grow where you want them. Check them every week or two and gently guide new shoots through the lattice instead of letting them bunch up in one spot. A little weaving early on gives you even coverage instead of a lopsided curtain of leaves.
Trim anything that starts reaching for the roof or creeping toward nearby plants. Keep an eye out for pests like aphids, especially in humid weather. A quick spray with water or insecticidal soap usually handles it before it becomes a problem.
Making It Feel Cozy
Once the vines fill in, the gazebo feels like a secret garden room. Add a few string lights woven through the lattice for evening glow, or hang a small lantern from the center beam. Soft cushions and a lightweight rug warm up the space without competing with the greenery.
If you want more privacy on one side, double up the lattice or add a solid panel behind it. That gives you a backdrop for the vines and blocks the view from a specific angle. Just leave at least one side open so the space doesn't feel closed in.
6. Cozy Corner with Heater and Blankets
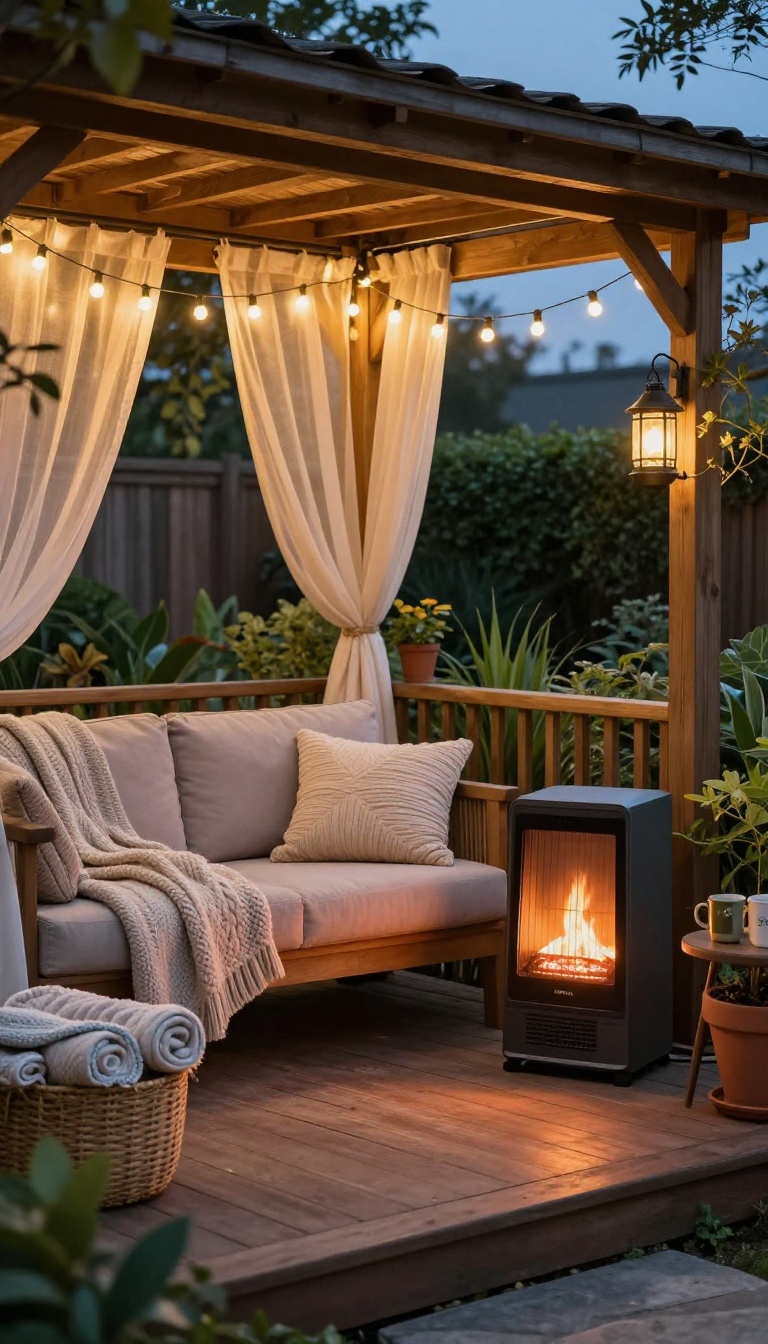
Cold evenings kill more gazebo time than rain ever does. You sit down for five minutes, the chill creeps in, and suddenly you're back inside watching TV. A dedicated warm corner solves that.
Pick one spot, set up a small heater, stack blankets within reach, and you've got a micro-zone that stays comfortable long after the sun drops. It works because you're heating a person-sized area instead of the whole gazebo. That's cheaper, faster, and way more effective on a windy night.
The trick is treating one corner like its own tiny room. You don't need to warm the entire structure, just the six feet around your seat. That means a loveseat or a pair of chairs angled toward each other, a heater pointed at that pocket of space, and blankets close enough to grab without standing up.
Everything else in the gazebo can stay cold and it won't matter. This setup also gives the space a natural focal point. Instead of furniture scattered around the perimeter, you get one obvious place to land.
Pick The Right Heater
Electric patio heaters work best under a gazebo because there's no open flame and no fuel to store. Look for a tower or pyramid style with a tip-over shutoff, and check that your outlet or extension cord can handle the wattage. If you don't have power out there, a small propane heater is the next best option.
Just keep it away from curtains, blankets, and anything else that could catch, and never run it in a fully sealed enclosure. Mounted infrared heaters are worth considering if you have a beam to attach them to. They heat objects and people rather than the air, so they hold up better when the wind picks up.
Build The Blanket Station
A wicker basket beside the loveseat does the job, but a small lidded storage bench is better if rain can blow in. Either way, keep the blankets dry and within arm's reach. Go for fleece or a thick cotton throw that holds warmth without feeling heavy.
Two or three is plenty for a loveseat, and rotating them keeps the stack from looking like laundry. If you want the corner to feel intentional, match the blanket colors to your cushions. It's a small detail that makes the whole zone look designed instead of improvised.
Make The Seating Work For Two
A loveseat beats two separate chairs here because it shares warmth and takes up less floor space. Angle it toward the best view, not toward the middle of the yard. Add a small side table for mugs, a book, or a phone.
If you plan to use the corner in winter, a weatherproof outdoor rug underneath makes a surprising difference by blocking cold from the floor. String lights or a single warm lamp overhead finish the mood. Keep the light low and warm rather than bright white, and the corner will read as cozy even before anyone sits down.
7. Outdoor Rug and Ambient Lighting Zone
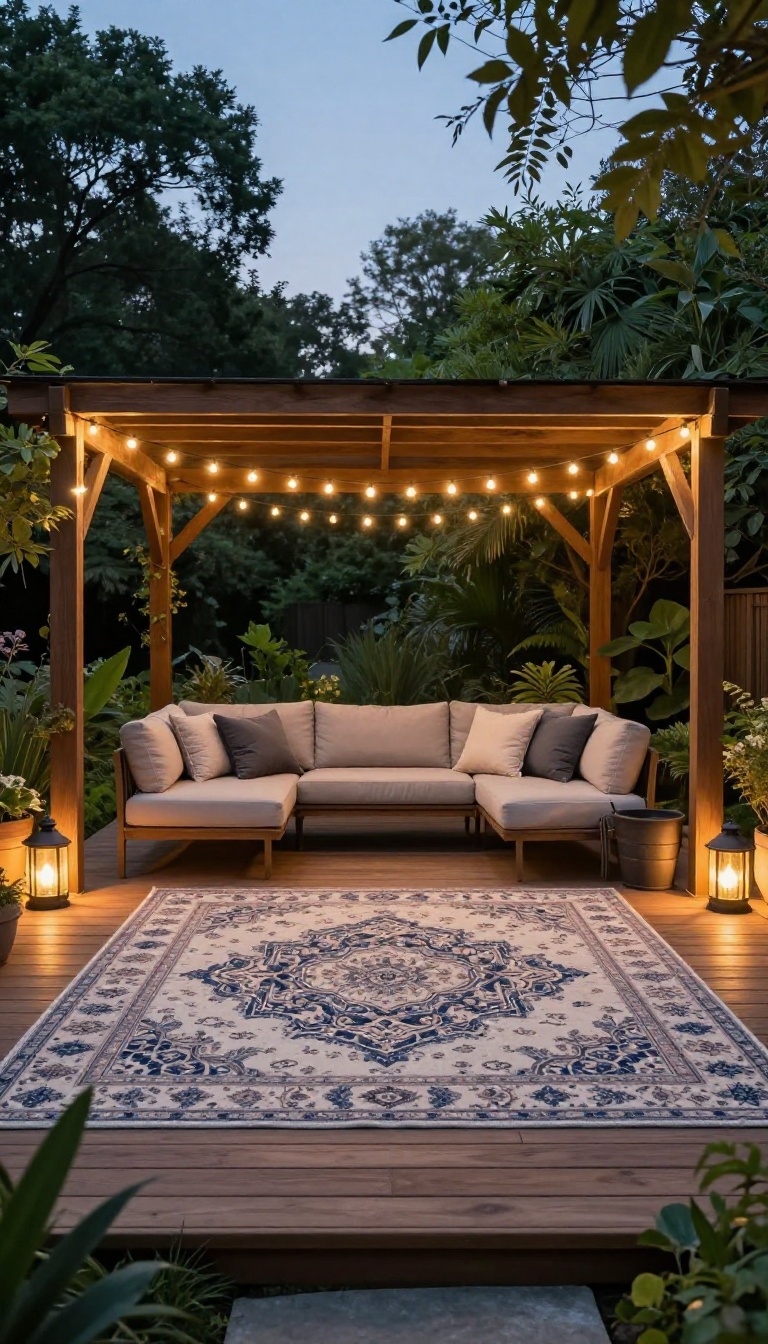
A rug and a few lights can make a gazebo feel like a finished room, even when the sides are still open. The rug gives your eye a clear boundary, so the space reads as intentional instead of random patio furniture. Then, once the sun drops, warm lighting takes over and keeps that enclosed feeling going after dark.
Start with a weather-resistant rug sized to fit inside the posts, leaving a small border of flooring exposed. That border keeps the rug from looking like wall-to-wall carpet and makes the boundary obvious. Material matters more than pattern here.
Polypropylene, recycled plastic, or solution-dyed acrylic handles sun, rain, and foot traffic without falling apart. For lighting, skip the harsh white bulbs and go warm. String lights, lanterns, or small solar path lights around the perimeter all work.
The goal is a soft glow that defines the edges without lighting up the whole yard. Layer two or three sources so you can adjust the mood depending on the night. Run an outdoor-rated extension cord or use solar and battery options if you don't have power nearby.
Cable clips and zip ties keep cords tidy along the frame. A dimmer switch or smart plug makes it easy to go from bright dinner lighting to a low evening glow without unplugging anything. When the rug and lights work together, the gazebo feels private even without curtains.
The floor tells you where the room ends, and the light tells you where it begins. It's a simple upgrade that changes how you use the space every single evening.
Pick A Rug That Can Take The Weather
Look for rugs labeled for outdoor use and UV resistance. Flat-weave styles dry faster and don't trap moisture like thick plush ones. A size that leaves 6 to 12 inches of floor around the edges keeps the look clean and prevents tripping on curled corners.
Layer Warm Light Around The Perimeter
Wrap string lights around the top rails or drape them between posts. Add a couple of lanterns on the floor or a small table for lower-level glow. Warm-white bulbs in the 2200K to 2700K range give that cozy, enclosed feel without looking yellow or dim.
Keep Power Simple And Safe
Use outdoor-rated cords and connections, and route them along the frame so nobody trips. Solar stake lights or rechargeable lanterns work great if you don't have an outlet nearby. A smart plug or dimmer lets you control everything from your phone or a single switch.
8. Privacy Hedges and Potted Plants Around the Base
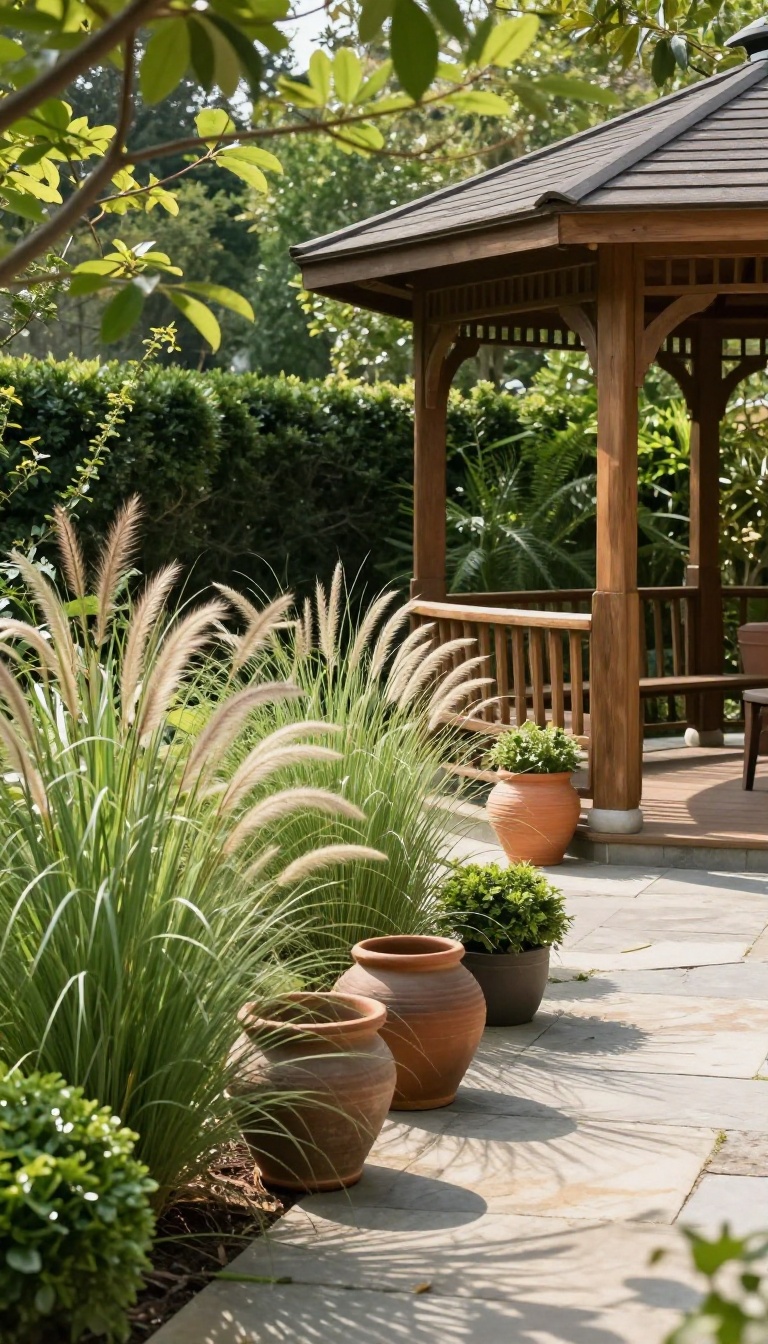
Most people focus on the walls of a gazebo and forget the bottom two feet. That lower band is exactly where passing neighbors, parked cars, and wandering eyes do their looking. Ring the base with greenery and the whole structure starts to feel tucked into the yard instead of dropped on top of it.
Plants also soften the hard lines of posts, rails, and concrete footings. They hide the messy bits and give the eye something living to land on. Best of all, you can start small and add more over a weekend or two.
Pick Plants That Stay Full At Eye Level
You want height that reaches roughly chest-high, not ankle-high. Ornamental grasses like maiden grass or feather reed grass shoot up fast and sway in the breeze, which adds movement around a still frame. Boxwood, inkberry, and dwarf holly hold their shape year-round and give you a clean, formal edge.
Skip anything that stays under two feet unless you're using it as a filler in front. The point is blocking sightlines, and short plants won't do it. Check your growing zone before you buy, since a hedge that dies in January leaves you exposed all winter.
Use Pots To Control Placement And Height
Potted plants are the flexible option because you can move them, swap them, and raise them on stands. A row of tall planters along the open side of the gazebo gives you instant privacy without digging a single hole. Group them in odd numbers and vary the heights so it doesn't look like a fence of identical buckets.
Go bigger than you think you need. A 24-inch planter with a five-foot grass looks intentional, while a small pot with a small plant disappears. If you rent or move often, pots are also the only option that travels with you.
Layer Evergreens With Seasonal Color
Evergreens do the heavy lifting in winter when everything else is bare. Plant or pot them first, then tuck annuals, ferns, or flowering shrubs in front for spring and summer interest. The evergreen keeps your privacy line intact while the seasonal plants keep the base from looking static.
This layering also hides the pots themselves, which matters if you're using plastic or basic terra cotta. A skirt of lower plants makes the whole arrangement read as a garden bed rather than a collection of containers.
Keep Maintenance Realistic
Hedges need trimming, and pots need watering, sometimes daily in July. Set up drip irrigation on a timer if you're planting more than a few containers, or choose drought-tolerant options like ornamental grasses and lavender. Group pots near a spigot so hauling the hose isn't a chore.
If you travel a lot, lean toward evergreens in large pots with water reservoirs. They forgive a missed week far better than thirsty annuals. A little planning here keeps the privacy screen looking good instead of turning into a brown reminder of good intentions.
9. Convertible Screen and Solid Wall Mix
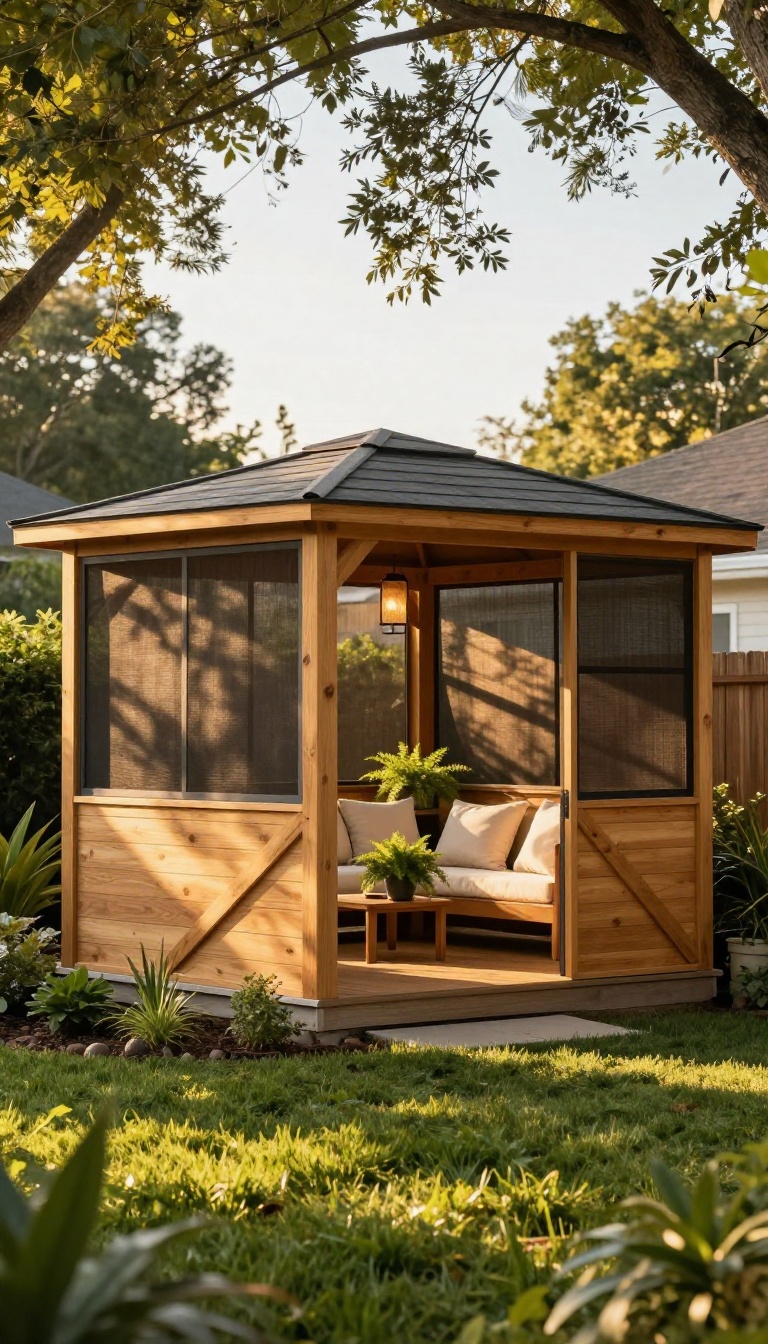
You don't have to choose between total openness and a sealed box. A hybrid setup uses solid panels on the sides that face the street or a neighbor's window, and screens everywhere else. That way you block the views you don't want without blocking the breeze you do.
The trick is figuring out which sides need real walls. Stand in your gazebo at different times of day and note where the sun hits, where the wind blows, and where prying eyes land. Usually, one or two sides carry most of the privacy burden.
Those get solid panels. The rest stay screened. This mix also solves the problem of a gazebo that feels dark and cave-like.
Solid walls on every side turn a lightweight structure into a stuffy shed. Screens on the open sides keep air moving and let in daylight, so the space still feels like part of the yard.
Picking Your Solid Sides
Start with the side that faces the road or the closest neighbor. That's your first solid panel. If your gazebo sits near a property line, the side facing that line gets a wall too.
The remaining sides can stay screened unless you have a specific reason to close them off. Think about wind as well. A solid panel blocks a cold prevailing breeze, but it also catches gusts.
If your area gets strong storms, anchor the solid sides securely and consider leaving the windward side screened so air passes through instead of pushing the whole structure.
Choosing Materials That Play Well Together
Solid panels don't have to mean heavy lumber. Tongue-and-groove cedar, composite decking boards, or even corrugated metal can work, depending on your style. The key is matching thickness and color so the mix looks intentional rather than patched together.
For the screens, go with a tight mesh if you want bug protection and a bit of visual blur. A looser weave gives you more airflow but less privacy. Many kits let you order screen panels and solid panels in the same frame profile, which makes the transition clean.
Making The Switch Easy
If you want to change the mix with the seasons, use removable panels or hinged shutters on the solid sides. In summer, you can swap a solid panel for a screen to catch a cross-breeze. In winter, put the solid panels back to block wind and hold a little warmth.
Simple hardware like sliding tracks or hook-and-eye latches keeps the swap tool-free. Label each panel so you know which side it belongs to when you store them. A few minutes of switching beats living with a setup that only works half the year.
Blending The Look
A hybrid gazebo can look choppy if the solid and screen sections don't relate to each other. Run a horizontal trim board at the same height across both types of panels. That line ties everything together and gives the eye a rest.
Paint or stain the solid panels to match your home's trim, and choose screen frames in the same finish. Add a few potted plants or a vine along the base of the solid walls to soften the transition. The goal is a space that feels deliberate, not improvised.
10. Daybed and Canopy Drape for Ultimate Relaxation
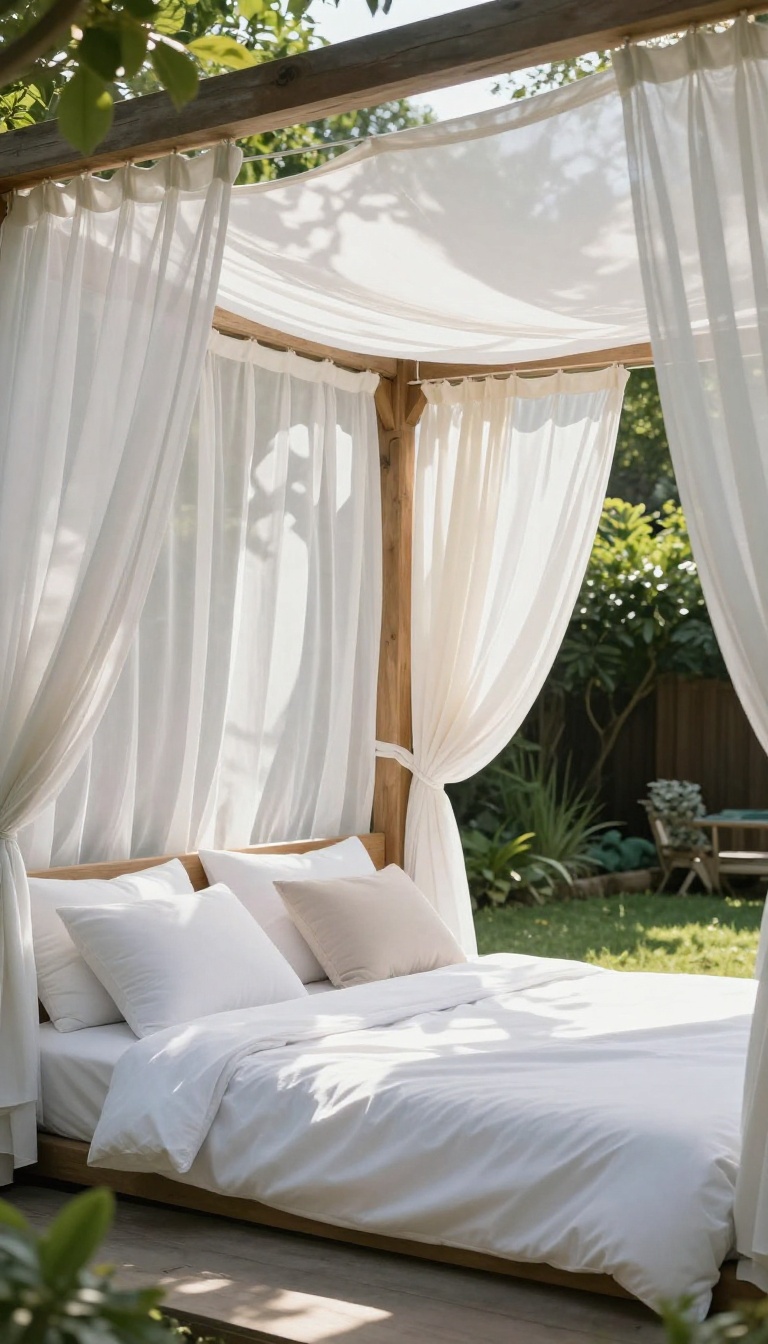
A daybed inside your gazebo turns a simple outdoor structure into a destination for serious lounging. Add sheer fabric draped from the ceiling beams, and suddenly you have a soft, private cocoon that filters sunlight and blocks curious eyes. The canopy does more than look pretty.
It diffuses harsh light, adds a layer of intimacy, and makes the space feel like a room you never want to leave. Whether you read, nap, or just stare at the leaves overhead, this setup delivers comfort without a major remodel.
The key is choosing a daybed that fits your gazebo's footprint without crowding it. You want enough room to stretch out, but you also need space to walk around and reach the sides. A twin-size daybed or a custom bench with a thick cushion often works better than a full-size bed in a standard 10×10 or 12×12 gazebo.
Once the daybed is in place, drape sheer curtains from the beams. You can hang them from a central ring, run them along the perimeter, or create a tent-like effect by gathering them at the corners. The fabric should be lightweight enough to move with the breeze but dense enough to soften the view from outside.
For the dreamiest result, layer the sheers with a few opaque panels on the sides that face the street or a neighbor's window. That way you get privacy where you need it and a light, airy feel everywhere else. The mix also helps with temperature control, since you can close the heavier panels on chilly evenings.
Choosing The Right Daybed
Measure your gazebo's interior before you shop. Leave at least 24 inches of walking space on the open sides so the daybed doesn't feel like a wall. A daybed with a back and arms gives you a cozy, sofa-like feel, while a backless bench keeps the space open and flexible.
Look for weather-resistant materials like teak, powder-coated aluminum, or synthetic wicker. Cushions should have quick-dry foam and removable, washable covers. If you live in a wet climate, consider a daybed with a slatted base so water drains instead of pooling.
You can also repurpose a porch swing or a hanging chair if a full daybed feels too bulky. The goal is a comfortable spot to lie back, not a piece that dominates the entire gazebo.
Draping Sheers For Soft Privacy
Sheer curtains are the heart of this idea. Choose a fabric like voile, chiffon, or lightweight linen in a color that complements your gazebo and garden. White and cream are classic, but soft grays, sage greens, and dusty blues add a subtle tint without making the space dark.
Hang them from a circular track mounted to the ceiling beams, or use simple hooks and a wire system. For a romantic, tented look, gather the fabric at the center and let it cascade down. For a cleaner look, run the sheers along each side like traditional curtains.
You'll want tiebacks or magnetic clips to hold the curtains open when you want a breeze. A few well-placed weights in the hem keep them from flapping wildly on windy days.
Layering Light And Texture
A daybed and canopy alone can feel a bit bare. Add a few outdoor pillows in mix-and-match patterns, a soft throw blanket for cool evenings, and a small side table for your drink and book. A battery-powered table lamp or a string of warm fairy lights tucked behind the sheers creates a gentle glow after sunset.
Texture matters here. Combine smooth sheers with a chunky knit throw, a woven rug, and maybe a hanging plant or two. The layers make the space feel intentional and inviting, not like you just threw a bed in a tent.
Keep electronics and books in a weatherproof storage box when you're not using them. That way your cozy nook stays ready for the next lazy afternoon.
11. DIY Enclosure Kit with Adjustable Panels
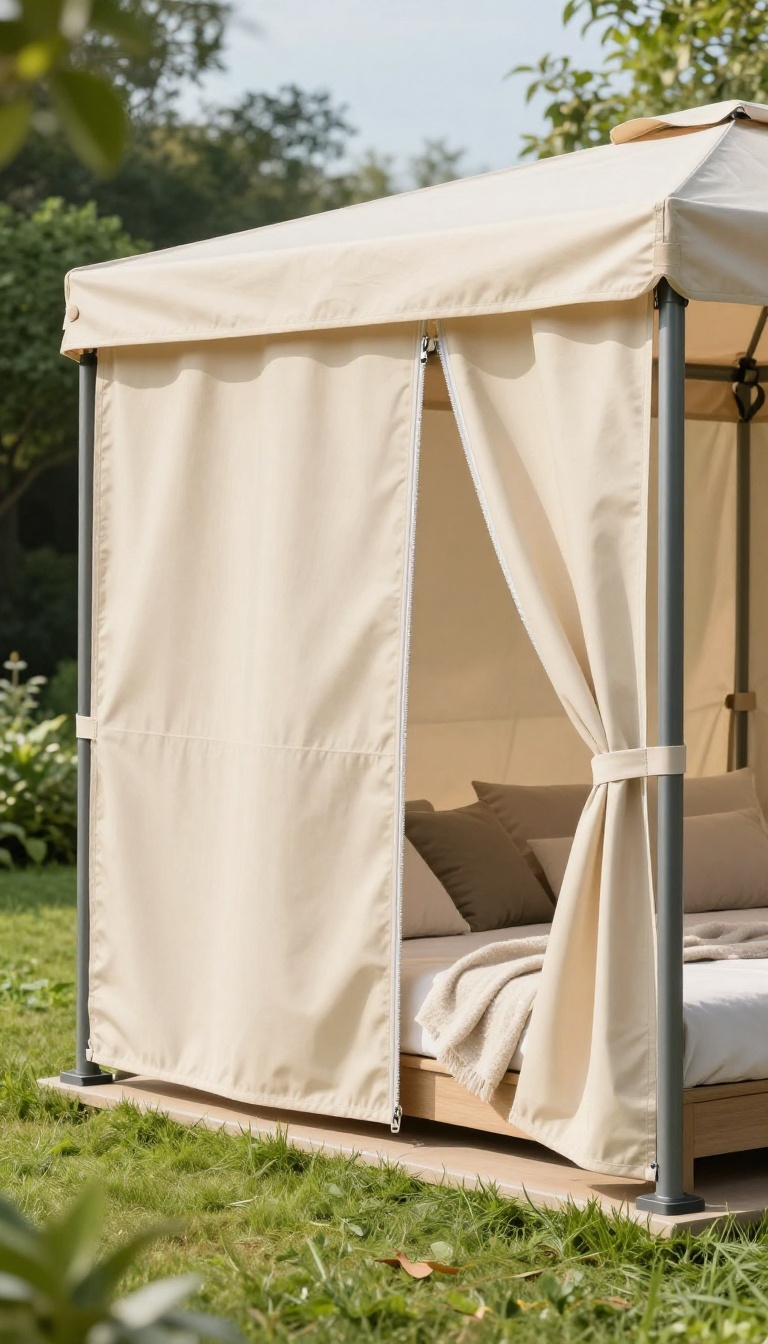
A universal enclosure kit gives you the privacy and weather protection of custom panels without the custom price tag. These kits come with zippered panels, tie-backs, and adjustable straps that fit most standard gazebo frames. You get a flexible setup you can open, close, or roll up depending on the weather and your mood.
Most kits include four to six panels made from weather-resistant fabric like polyester or canvas. They attach with hooks, Velcro, or zippers that line up with your gazebo's posts. Because the panels are adjustable, you can secure them tightly for full coverage or leave them loose for airflow.
Installation usually takes an afternoon and basic tools like a screwdriver or zip ties. The result is a cozy, private space that still feels like part of your backyard.
What To Look For In A Kit
Check the panel material first. Look for UV-resistant, water-repellent fabric that won't fade or mildew. Zippers should be heavy-duty and smooth, not flimsy plastic that jams.
Adjustable straps or buckles let you tension the panels so they don't flap in the wind. Measure your gazebo's height and width before buying, and pick a kit with a little extra fabric so you can trim or tuck as needed.
Installing Without Headaches
Start by attaching the top edge of each panel to your gazebo's frame. Work your way down, securing the sides and bottom last. If your kit uses ties, loop them around the posts and knot them snugly.
For zippered panels, zip them closed before adjusting the tension so everything lines up. A helper makes the job faster, but you can do it solo with a step stool and patience.
Adjusting For Privacy And Airflow
On hot days, roll up the panels and secure them with the included tie-backs. When you want privacy, lower them and zip the corners shut. You can also leave one side open for a cross breeze while keeping the rest closed.
This flexibility means you use your gazebo more often, whether it's a sunny afternoon or a chilly evening.
Keeping It Looking Good
Brush off dirt and pollen weekly with a soft brush or vacuum. For deeper cleaning, unzip the panels and wash them with mild soap and water, then let them air dry. Avoid harsh chemicals that can break down the fabric's coating.
Store panels rolled up, not folded, to prevent creases and cracks. With a little care, a budget kit can last several seasons.
FAQ
What is the cheapest way to enclose a gazebo for privacy?
Outdoor curtains or a basic screen kit with zip ties are the most affordable. You can also use shade cloth or lattice panels from a home improvement store.
Can I enclose a gazebo without blocking airflow?
Yes. Use fine mesh screens or a mix of screens and solid panels. Leave at least two sides open or screened to maintain cross-ventilation.
How do I keep curtains from blowing around in an enclosed gazebo?
Choose weighted hems or add curtain weights. You can also use tie-backs or magnetic strips to secure them to the frame.
Are glass panels better than screens for privacy?
Glass offers more privacy and weather protection, but it reduces airflow and costs more. Screens are better for mild climates and bug protection.
Do I need a permit to enclose my backyard gazebo?
It depends on local rules and whether the structure is permanent. Check with your city or HOA before adding solid walls or electrical components.
Conclusion
Enclosing a gazebo is really about solving one problem: you want to sit outside without feeling exposed. Pick the option that matches your climate, your budget, and how much privacy you actually need. A screened frame handles bugs, a solid wall blocks nosy neighbors, and a curtain kit does both on a dime.
Start with one upgrade and live with it for a season. You'll quickly learn whether you need more shade, better airflow, or a sturdier roof. Each small change makes the next one obvious, and before long that gazebo becomes the room you use most.