15 Christmas Pipe Cleaner Crafts to Make This Holiday
A single pack of pipe cleaners can carry a whole afternoon of holiday crafting. Twist a few stems and suddenly you have ornaments, gift toppers, and table decor that look far more expensive than they cost.
The best part is how little you need to start. Most of these crafts use supplies already sitting in a drawer, and kids can jump in without much help.
Below are 15 Christmas pipe cleaner crafts worth making this holiday. Some take five minutes, others a bit longer, but all of them earn a spot on the tree or the table.
1. Classic Candy Cane Ornaments

Candy canes show up everywhere in December, so a pipe cleaner version feels instantly familiar. You only need two stems and about a minute of twisting to get one made. It's the kind of craft you can hand to a kid mid-movie and not worry about the mess.
The shape does most of the work here. Once you've got the hook right, the rest is just a loop of string and a spot on the tree.
Grab one red stem and one white stem in the same length. Line them up side by side, then twist them together along the full length so the colors spiral around each other. Keep the twist fairly tight so the stripes stay visible instead of flattening out.
When you reach the end, bend the top into a small hook. That curve is what makes it read as a candy cane rather than a random striped stick.
Getting The Twist Right
Hold both stems together at one end and start twisting with your fingers, working your way down. A steady, even twist looks best, but a slightly messy one still reads fine on a tree. If the stems keep slipping, pinch the ends together first and twist from there.
Kids often twist too loosely at the start, so a quick squeeze at the top helps it hold.
Shaping The Hook
Bend the top inch or so into a curve, then press it gently so it keeps its shape. Make the hook small enough that the ornament hangs balanced instead of tipping sideways. You can also curve the bottom slightly for a more realistic cane look.
It's a small detail, but it makes the finished piece feel a little more polished.
Adding The Hanging Loop
Tie a short piece of string or thin ribbon around the curve of the hook. A simple knot works, though a tiny dot of glue keeps it from sliding. Trim the ends so they don't poke out, then hang it on a branch or tie it to a gift bag.
These also look great clipped along a garland or strung across a window.
2. Mini Pipe Cleaner Wreaths
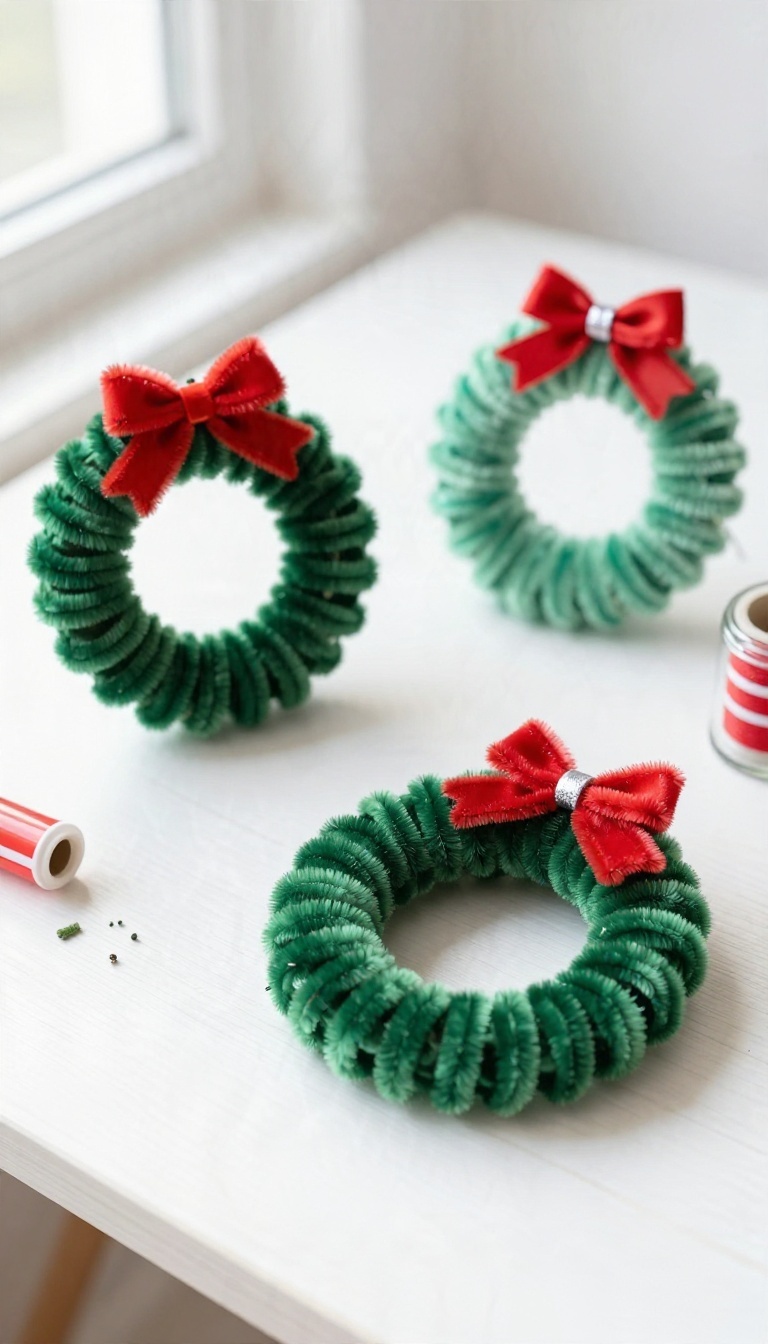
A tiny wreath takes about as long to make as it does to tie your shoes, which makes it a great warm-up craft before the bigger projects. Start with one green stem, bend it into a loop, and you have a blank canvas the size of a quarter. From there, the decorating is where the fun lives.
The finished wreath is small enough to hang almost anywhere. Loop a thread through the top and it becomes a tree ornament, or set it around a candle base, or glue it flat to a card front. Same craft, three different jobs.
Green chenille stems are the obvious pick, but don't feel locked in. A deep forest green reads classic, while a lighter mint or a silver stem gives you something a little more modern. Grab a pack of the standard 12-inch stems and you'll get several wreaths out of each one once you trim them down.
The trick is keeping the circle round. Wrap the stem around something cylindrical first, like a marker or a small jar, then twist the ends together and snip off the excess. That gives you a clean, even loop without fighting the wire by hand.
Shaping A Circle That Holds
Bend the stem around a marker or a thick pen to get a consistent ring, then twist the two ends together at the back so the join hides. Trim the leftover tail with small scissors or wire cutters. If the loop looks lopsided, just press it flat on the table and nudge it back into shape with your fingers.
For a fuller look, twist two green stems together before looping them. The doubled wire gives the wreath more body and makes it easier to tuck in decorations later.
Dressing It Up
Tiny bows are the quickest win. Cut a short piece of narrow ribbon, tie a small bow, and glue it to the bottom of the ring. Mini beads work the same way and add a bit of sparkle, especially in red or gold.
You can also wrap a contrasting stem around the green one for a candy-stripe effect, or hot glue a single tiny pinecone to one side. Keep the decorations small so the wreath doesn't get top-heavy.
Where To Put It
A loop of thread through the top turns the wreath into an ornament for the tree or a gift tag. Lay it flat around the base of a pillar candle for a quick centerpiece, or glue it to the front of a handmade card. These also make sweet package toppers.
Tape one to a wrapped gift in place of a bow and it doubles as a little keepsake the recipient can hang up later.
3. Simple Snowflake Ornaments
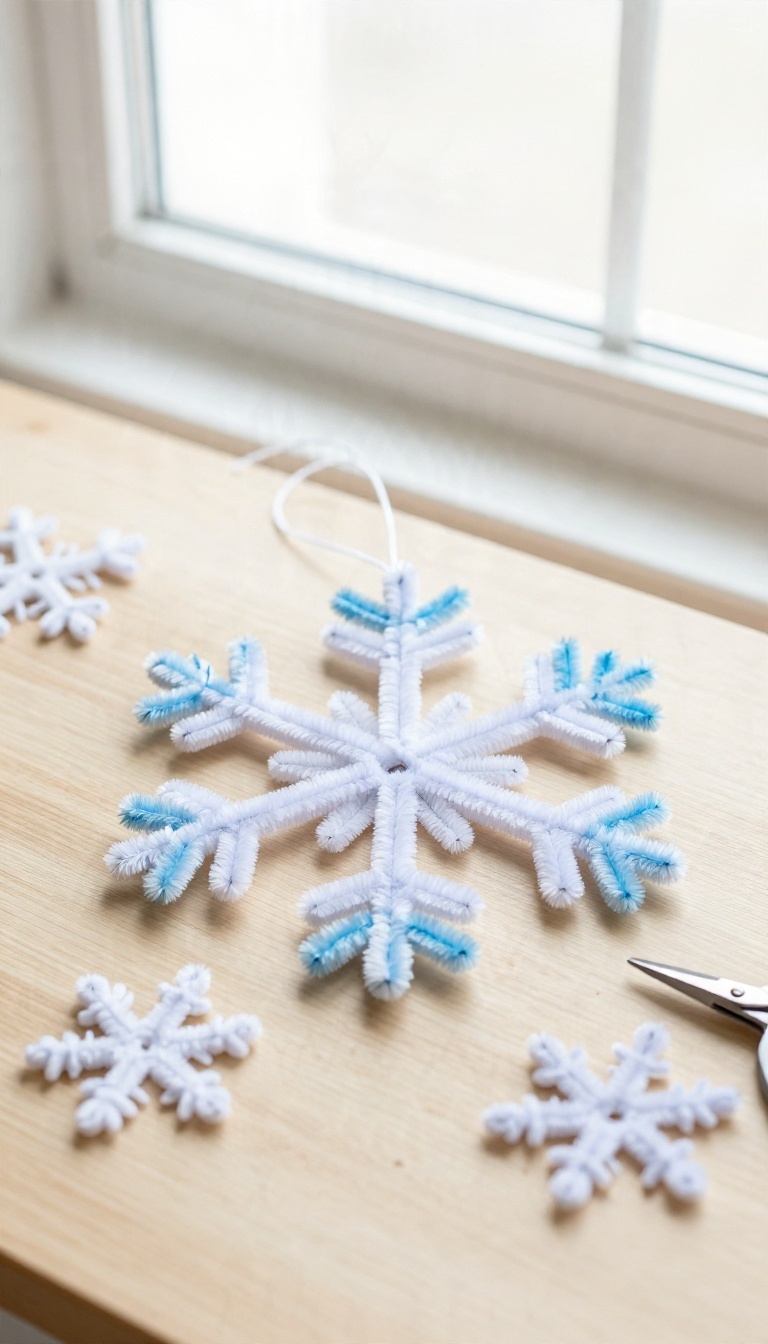
Snowflakes might look delicate, but pipe cleaner versions hold their shape and survive the season. You only need a few stems and a pair of scissors to make a batch. They're forgiving enough for kids to twist and pretty enough to hang front and center.
Start by cutting three pipe cleaners into equal lengths—about 4 inches each works well. Twist them together at the center, then fan out the ends into six points. Adjust the angles until it looks balanced, and you've got a snowflake.
White and icy blue look especially crisp, but silver or a mix of both adds a little sparkle.
Cutting And Twisting
Use sharp scissors to cut each stem in half, then in half again if you want smaller flakes. Hold all three pieces together at the middle and twist tightly a few times. Spread the arms evenly so the snowflake sits flat.
Shaping The Points
For a classic look, leave the ends straight. If you want more detail, curl the tip of each arm around a pencil or bend them into tiny loops. A mix of straight and curled points adds texture without extra work.
Hanging And Display
Tie a loop of thread or fishing line around one of the arms and hang from a tree branch or window. These snowflakes also look great strung along a garland or taped to a mirror. Make a few in different sizes for a layered effect.
4. Pipe Cleaner Christmas Trees
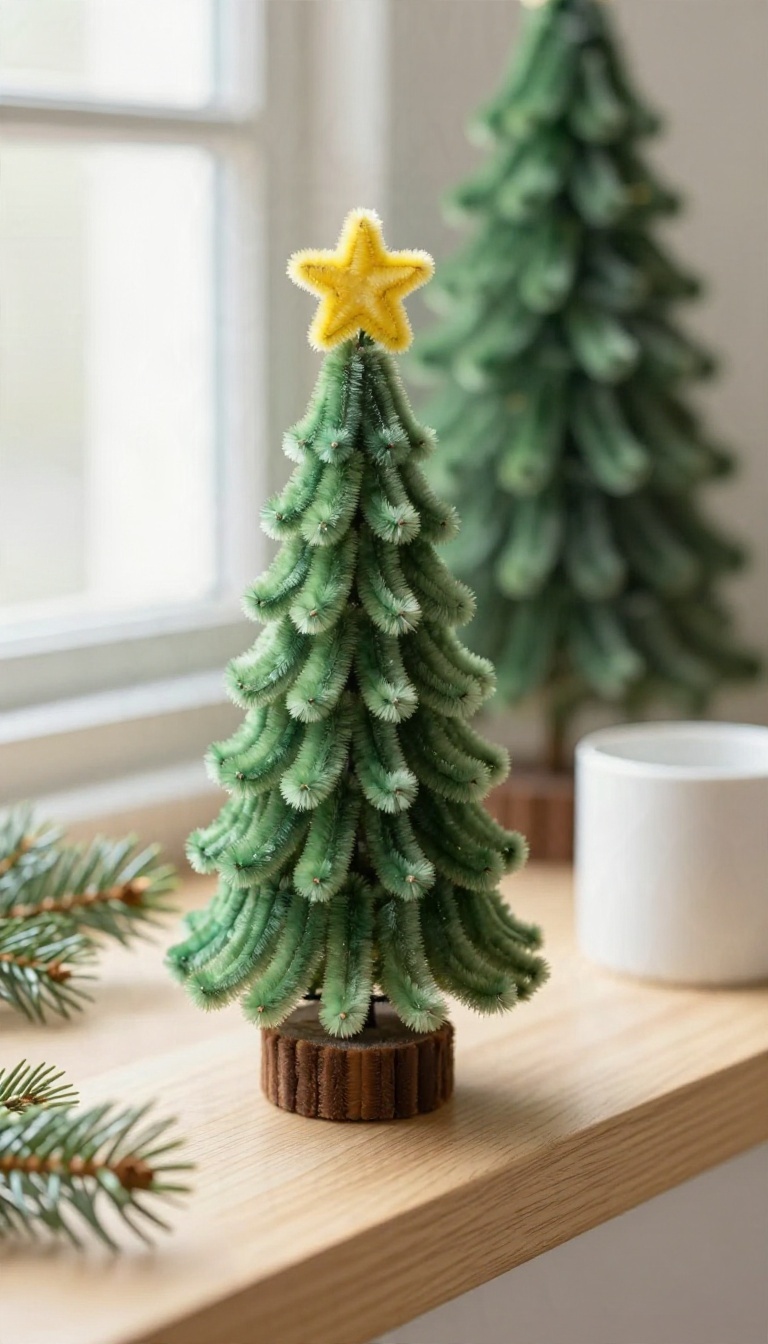
Pipe cleaner Christmas trees give you that miniature evergreen look without any watering or needle cleanup. You stack graduated green loops into a cone shape, then top it with a tiny star. The finished tree stands on a shelf or mantel and adds a handmade touch to your holiday decor.
These little trees are surprisingly sturdy for something made from fuzzy stems. The secret is in how you shape and stack the loops. Once you get the rhythm, you can make a whole forest in different sizes and shades of green.
Shaping The Loops
Start with three or four green pipe cleaners in different shades if you have them. For each loop, bend a pipe cleaner into a circle and twist the ends together to secure it. Make the bottom loop the widest, then decrease the diameter slightly for each subsequent loop.
You'll need about five to seven loops for a tree that's roughly four inches tall. Keep the twists at the back so they're hidden when you stack them.
Stacking And Securing
Slide the loops onto a central pipe cleaner stem, starting with the largest at the bottom. Push each loop down so they sit snugly against each other. Once all loops are on, twist the top of the stem to hold everything in place.
You can add a small dab of glue between loops for extra stability, but it's optional. Bend the bottom of the stem into a small circle so the tree stands upright.
Adding The Star And Finishing Touches
For the star, use a small piece of yellow or gold pipe cleaner. Bend it into a five-point star shape, or simply make a tiny loop and twist it into a star-like form. Attach it to the top of the stem with a twist or a dot of glue.
You can also add tiny ornaments by threading beads onto the loops or wrapping a bit of tinsel around the tree. These trees look great grouped together on a mantel or as place card holders at your holiday table.
5. Twisted Star Gift Toppers
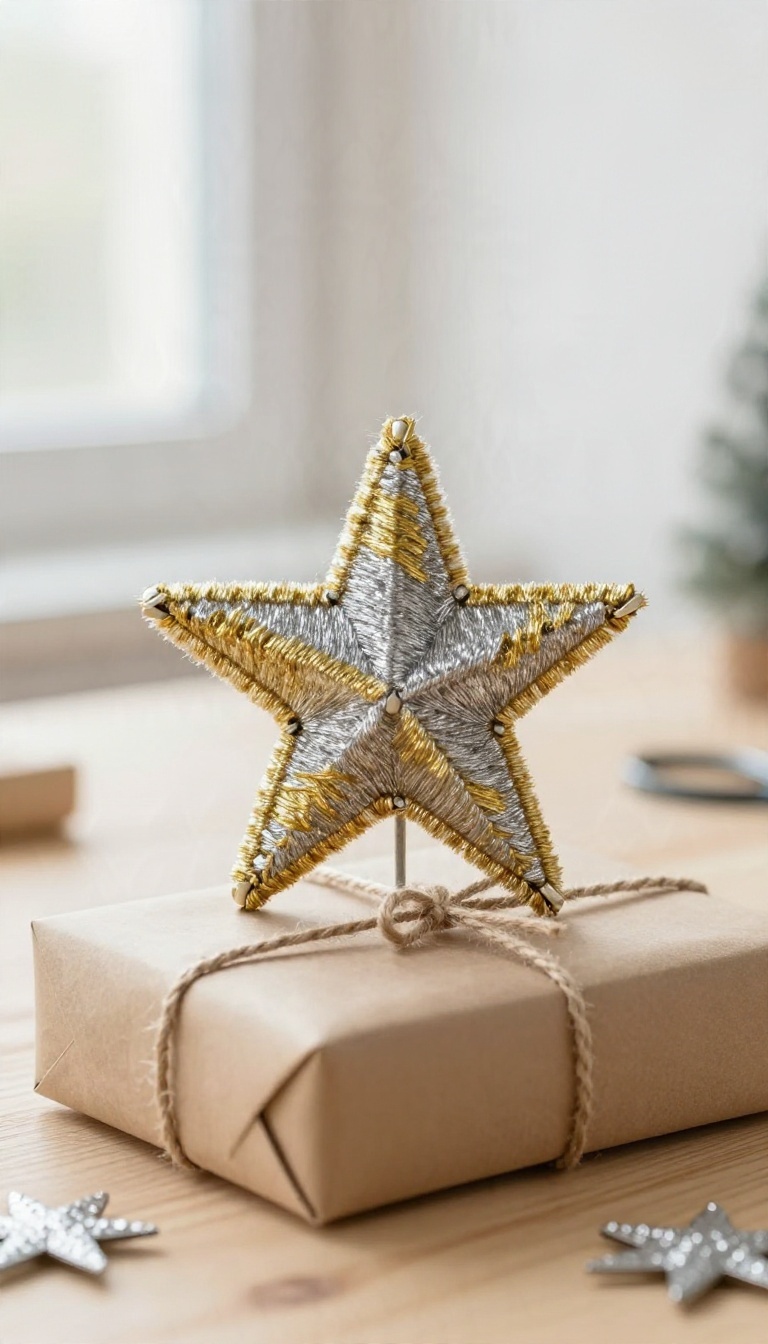
Bows are fine, but a star on top of a present feels like a small upgrade. Twist a few metallic stems into a five-point star and you get a topper that holds its shape under the tree and looks handmade in the best way. Gold and silver pipe cleaners do the heavy lifting here.
They catch the light, they stay crisp, and they cost pennies compared to a fancy ribbon. The star also pulls double duty once the wrapping paper comes off.
The trick is building the star so it stays flat and even. Work on a table, keep your points the same length, and don't rush the final twist. A lopsided star still looks charming, but a balanced one looks like you bought it.
You can make these in batches while watching a movie. Line up a row of finished stars and attach them to presents as you wrap. It's a nice way to use up scraps from the other crafts on this list.
Shaping A Clean Five-point Star
Start with one pipe cleaner and bend it into a V to form the top point. That gives you a center to build around instead of guessing where the middle is. Take a second stem and twist it around the base of that first point, then bend out two side points.
Add a third stem for the bottom two points, twisting each join tight so nothing slips. Trim any fuzzy ends with small scissors and press the star flat under a book for a minute. Even points matter more than perfect symmetry, so eyeball it and move on.
Attaching It To A Wrapped Gift
A small loop of tape on the back holds the star in place on most paper. Double-sided tape works even better because nothing shows on the front. For heavier stars, thread a short piece of ribbon through the top point and tie it around the box.
That keeps the topper secure if the gift gets moved around. Skip the bow entirely and let the star be the focal point. A plain kraft or solid-color wrap makes the metallic star pop the most.
Turning It Into A Keepsake Ornament
Add a small loop of pipe cleaner at the top point before you attach the star. Once the gift is opened, that loop lets it hang straight on the tree. Write the recipient's name and the year on a tiny tag and tuck it under the star.
It turns a throwaway topper into something people actually keep. Make a few extras in both gold and silver so you always have one ready. They store flat in a small box and come out looking fresh next December.
6. Candy Cane Napkin Rings
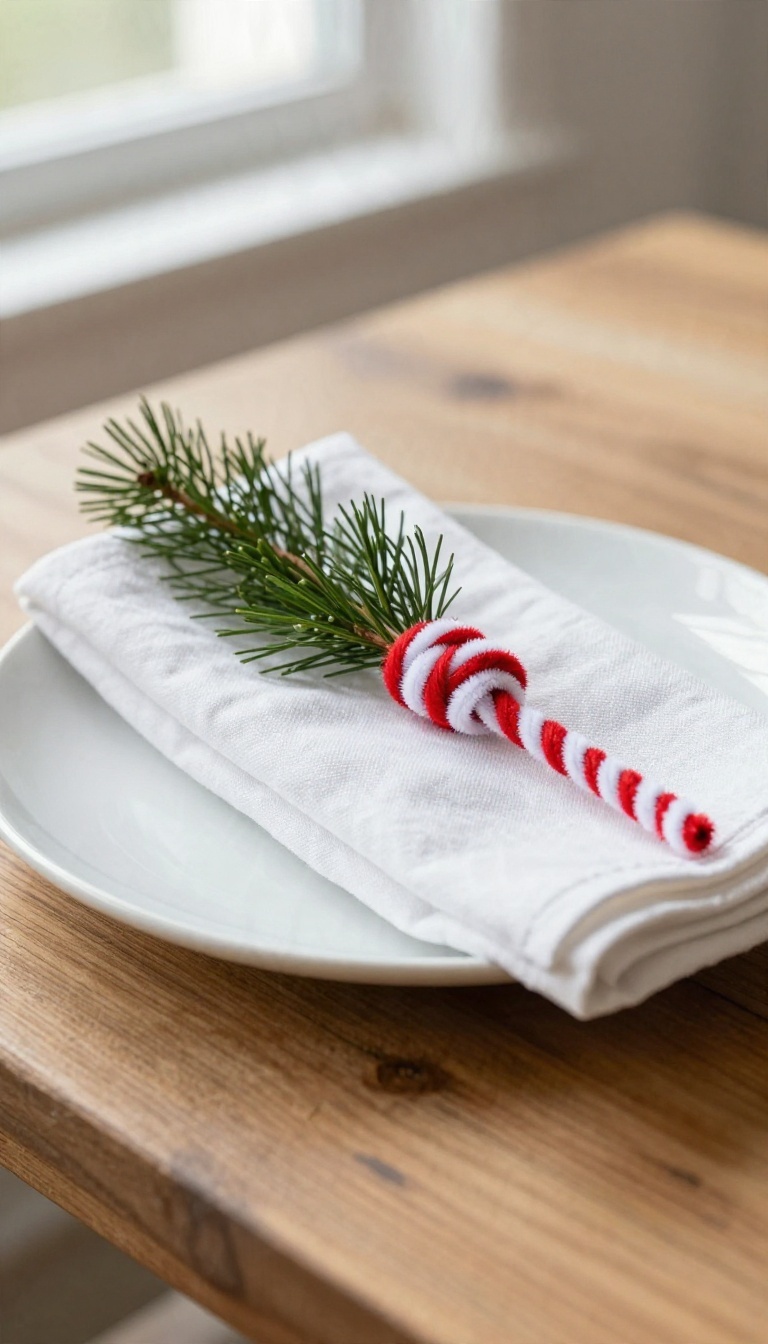
Candy cane napkin rings add a festive touch to your table setting without much effort. You just wrap pipe cleaners around a cardboard tube to form rings, then slide them onto napkins. It's a quick craft that makes holiday dinners feel a little more special.
These napkin rings come together in minutes, and you probably have everything you need. The process is simple: wrap, twist, and slide. Before you know it, your table looks like it's ready for a holiday party.
What You'll Need
Gather red and white pipe cleaners, a cardboard tube (like an empty paper towel roll), and a pair of scissors. You'll also need napkins, of course. That's it.
No glue, no mess.
How To Make The Rings
Cut the cardboard tube into rings about 1 inch wide. Take one red and one white pipe cleaner and twist them together at one end. Then wrap the twisted pair around the cardboard ring, twisting the ends together to secure.
Slide the ring off the tube, and you're done. Repeat for as many napkin rings as you need.
Tips For A Polished Look
Keep the twists tight and even for a neat candy cane stripe. If you want a more finished look, tuck the sharp ends under the wraps. You can also mix in green pipe cleaners for a peppermint vibe.
These rings fit standard napkins, but you can adjust the size by using a different tube.
7. Tiny Pipe Cleaner Reindeer
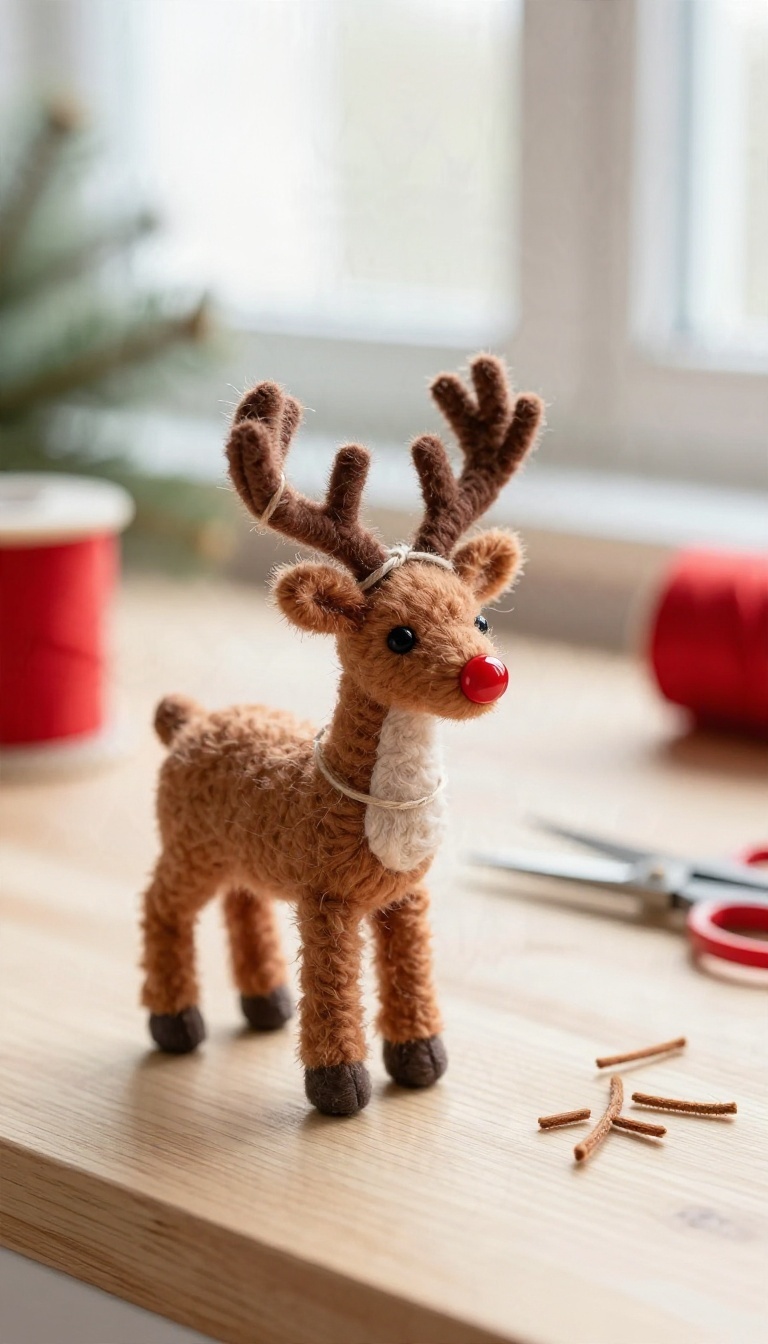
Reindeer rank right up there with snowmen and Santas when it comes to holiday icons, and a mini pipe cleaner version might be the cutest one yet. You need just a few brown stems, a red bead, and a couple of minutes to twist one together. Kids can make a whole herd in a single sitting, then hang each one on the tree or clip it to a gift bag.
The trick to a reindeer that actually stands up is getting the proportions right. Keep the body short and the legs even, and the whole thing balances without any fuss. Once you have the basic shape down, the details are where the personality comes in.
Shaping The Body And Legs
Start with one brown stem and fold it in half. Twist the folded end a couple of times to lock it, then bend the two halves outward to form the legs and body. Leave a small loop at the top for the head.
If the legs look uneven, snip the tips with scissors until they match. A reindeer that stands on its own feels like a win, especially for younger crafters.
Adding The Nose And Antlers
Thread a small red bead onto a short piece of stem and twist it into place at the front of the head for the nose. A dab of glue keeps it from sliding around. For antlers, cut two tiny brown stems and twist them onto the top of the head, bending the ends into little forks.
Keep them short so the reindeer stays balanced and doesn't tip over.
Hanging And Displaying Your Herd
Loop a piece of twine or thin ribbon through the top of the head and tie a small knot. That's your hanger, and it works on the tree, a garland, or a gift tag. Make a few in different sizes and let kids line them up along a mantel or shelf.
A tiny herd of reindeer looks surprisingly charming gathered together, and it costs almost nothing to build.
8. Pipe Cleaner Poinsettia Pins
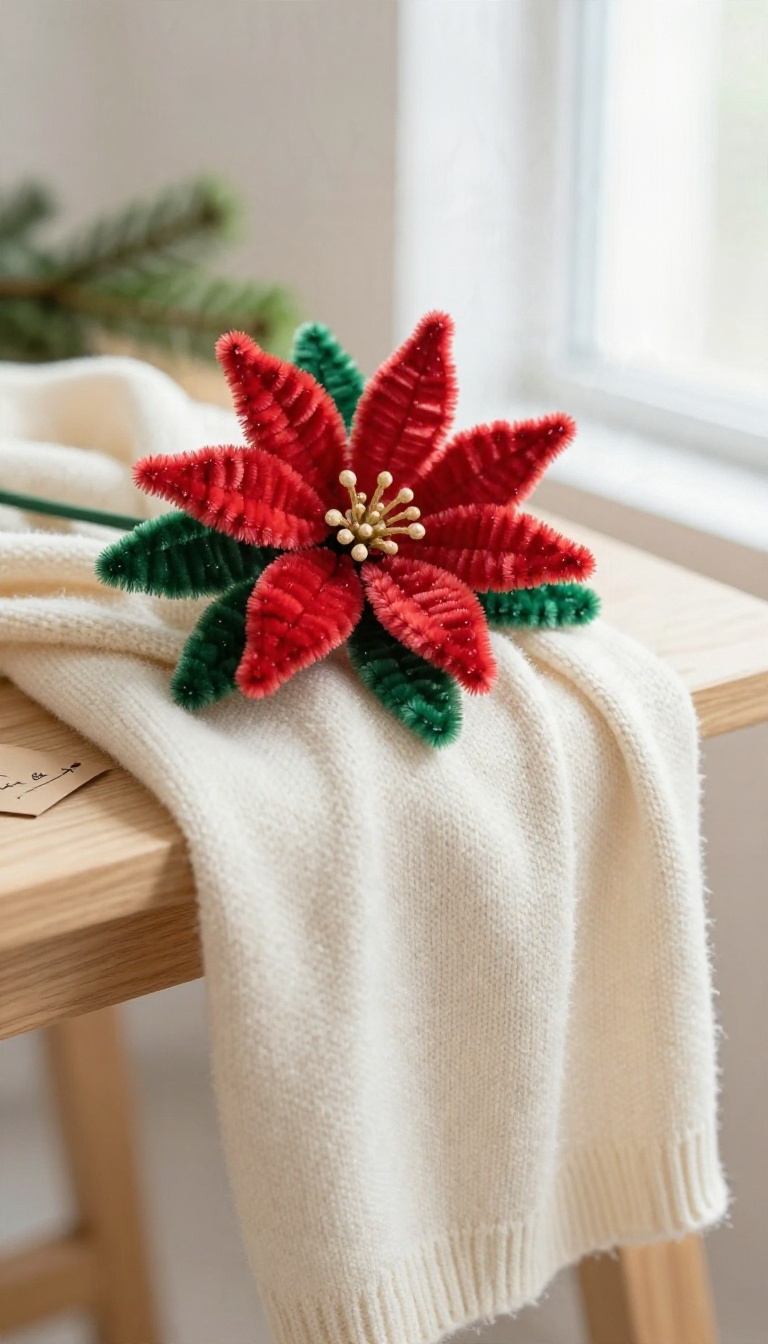
A poinsettia pin made from pipe cleaners looks like a tiny piece of jewelry, but it costs pennies and takes minutes. Layer red and green loops into a flower shape, then glue on a pin back for a brooch you can wear or gift. Teachers, neighbors, and coworkers will think you bought it at a craft fair.
These pins are a smart way to use up leftover pipe cleaners from other projects. They also make thoughtful last-minute gifts that feel personal without a big time commitment. Once you get the looping technique down, you can make a whole batch in one sitting.
Shape The Petals
Start with three red pipe cleaners. Fold each one into a loop about two inches long, twisting the ends together at the base to secure. Fan the loops out like petals, then add a second layer of three smaller loops on top.
Twist all the bases together tightly so the flower holds its shape.
Add The Leaves
Take two green pipe cleaners and form loops slightly larger than the red petals. Twist their bases around the red base, positioning them so the green points peek out between the red petals. Fluff the loops gently with your fingers to give the flower a fuller look.
Attach The Pin Back
Use a hot glue gun to attach a metal pin back to the back of the flower, right over the twisted bases. Hold it in place for a few seconds until the glue sets. If you want a cleaner finish, cover the glue with a small circle of green felt before adding the pin.
Gift And Wear
These pins look great on jackets, scarves, and tote bags. Pair one with a handwritten note for a teacher gift, or pin it to a wrapped present as an extra decoration. Make a few in different sizes to create a set for someone special.
9. Sparkly Pipe Cleaner Icicles
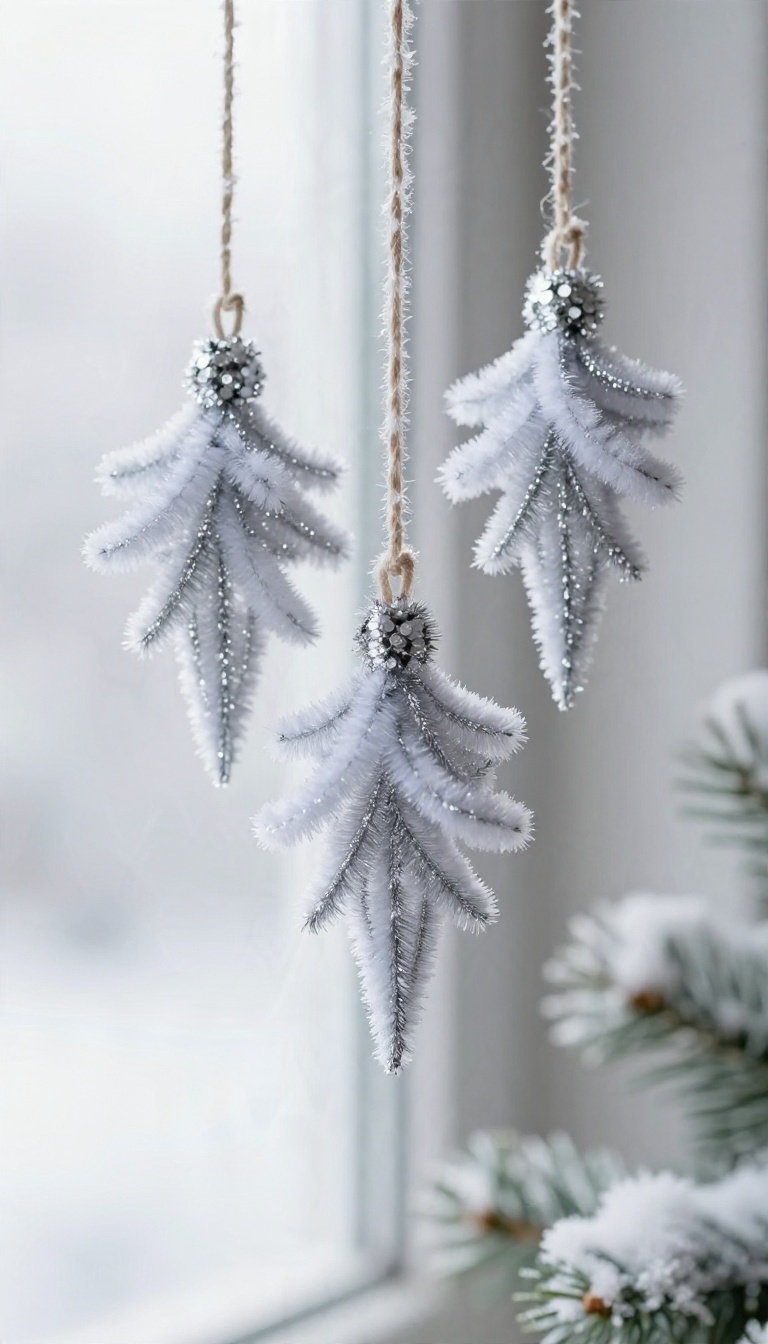
Real icicles are beautiful until they drip on your floor or snap off the gutter. Pipe cleaner versions give you the same frosty shimmer with none of the mess. Twist silver and white stems into tapered spikes, then hang them in clusters where the light can catch them.
They read as elegant from across the room, but the process is simple enough for kids to handle. A batch takes about ten minutes once you get the rhythm down, and you can scale up as many as your tree needs.
The trick to a convincing icicle is the taper. Start wide at the top and narrow toward the tip so it looks like it actually formed slowly, drop by drop. Mixing silver and white keeps it from looking flat and helps the light bounce in different directions.
Hang them in groups of three or four at slightly different lengths rather than spacing them evenly. Clusters mimic how ice really collects and create more visual interest than a single lonely spike. They work on a tree, along a window frame, or dangling from a shelf edge.
Shaping The Taper
Cut a silver stem to about six inches for a medium icicle. Fold it in half, then twist from the fold down so the top stays thick and the bottom pinches thin. For a longer version, twist two stems together at the top and let the ends trail down at different lengths.
Bend the very tip into a tiny hook so it hangs straight. Run your fingers down each one to smooth the twist and give it a gentle curve.
Mixing Silver And White
Alternate silver and white stems within a cluster so the group looks varied. A white icicle next to a silver one catches light differently, which makes the whole bunch feel more dimensional. You can also twist a white stem around a silver core for a frosted look.
Keep the white slightly looser so it reads as a coating rather than a solid color. That small detail sells the icy effect.
Hanging In Clusters
Tie a short loop of clear thread or fishing line to each icicle's hook. Clear line nearly disappears, so the icicles look like they float. Group three or four at varying lengths and hang them from one branch or hook.
On a window, use small clear suction cups and space the clusters a foot or so apart. The light does the rest.
10. Pipe Cleaner Angel Ornaments
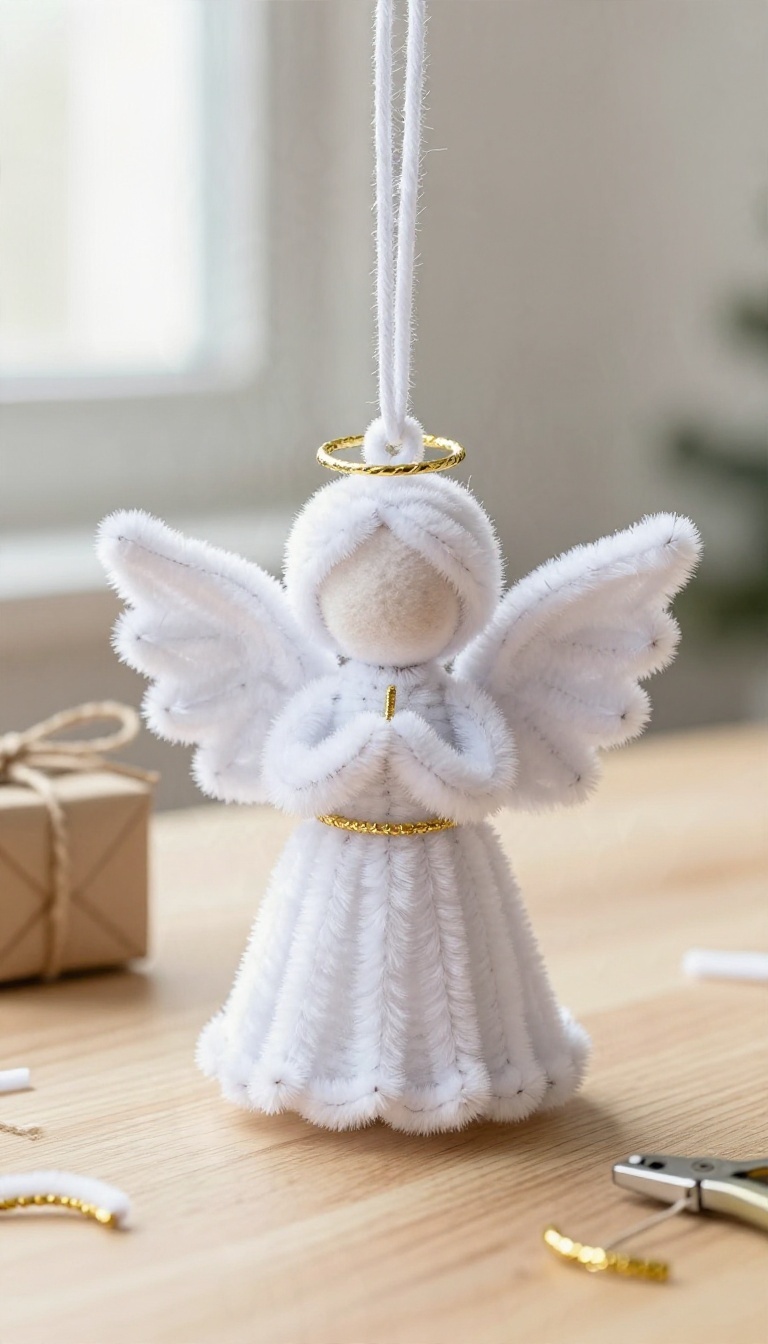
Angels show up everywhere at Christmas, and a handmade one carries a little more meaning than the store-bought kind. This version uses white stems for the body and wings, with a gold stem twisted into a halo on top. It works as a tree ornament, but it also makes a sweet gift tag on a wrapped present.
Once you get the twist down, you can make a whole choir in one sitting.
Start with two white pipe cleaners. Fold the first one in half to create a loop for the head, then twist the two ends together below it to form a neck. Bend the remaining length into a simple gown shape, flaring the bottom slightly so the angel stands or hangs upright.
For the wings, take a second white stem and bend it into a wide V. Twist the center of the V around the angel's back, just below the neck, so both sides sweep outward. Pinch the wing tips into soft points so they look feathered rather than stiff.
Shaping The Body And Wings
Keep the body loose and rounded rather than tight and wiry. A gentle twist holds the shape without making the angel look squished. If you want a fuller gown, wrap a third white stem around the base in overlapping loops.
Trim any sharp ends with small pliers or bend them inward so they don't poke through the finished ornament.
Adding The Gold Halo
Cut a short piece of gold pipe cleaner, about two inches, and bend it into a circle. Twist the ends together to close the loop, then attach it to the top of the head with a tiny twist at the back. A second small gold stem can become a belt or a tiny star in the angel's hands.
Keep the gold accents minimal so the white body stays the focus.
Hanging And Gift Tag Ideas
Thread a loop of gold thread or baker's twine through the top of the halo or the back of the neck. That loop lets the angel hang from a branch without tipping forward. For a gift tag, skip the hanging loop and tie the angel to the ribbon instead.
Write the recipient's name on a small paper tag and tuck it under the wings.
11. Candy Cane Heart Ornaments

Two candy canes crossed into a heart make one of the sweetest shapes on the tree, and pipe cleaners pull it off in about a minute. You get the peppermint look without any glass or hooks to worry about. It also happens to be a craft that keeps working after December, since the same heart reads perfectly for Valentine's Day.
The trick is bending each stem so the curve stays smooth and the two halves line up. Once you twist the ends together, the shape holds on its own. Kids can handle this one with almost no help, and adults can fuss over the details if they want a tidier result.
What You Need
Grab two pipe cleaners per ornament, ideally one red and one white so the candy cane look comes through. A small pair of scissors helps if you want to trim the twisted ends. Add a short piece of string or ribbon for hanging, and that's the whole supply list.
Shaping The Heart
Bend the first stem into a hook with a rounded curve at the top, leaving a straight tail at the bottom. Do the same with the second stem, then face the two curves toward each other so they meet in the middle. Pinch the bottom tails together and twist them a few times to lock the heart closed.
Gently squeeze the sides until both halves match.
Finishing Touches
Wrap the twisted tail with a tiny bit of washi tape or a small bow to hide the sharp ends. Thread a loop of ribbon through the top curve and tie it off. For a striped effect, twist a red and white stem together first, then bend the pair into the heart shape.
Ways To Use Them
Hang these on the tree, tie one to a gift bag, or clip a few to a garland for a pop of red and white. They also make sweet little gift toppers for teachers and neighbors. Come February, move them to a Valentine's display and nobody will guess they started as Christmas decor.
12. Pipe Cleaner Garland
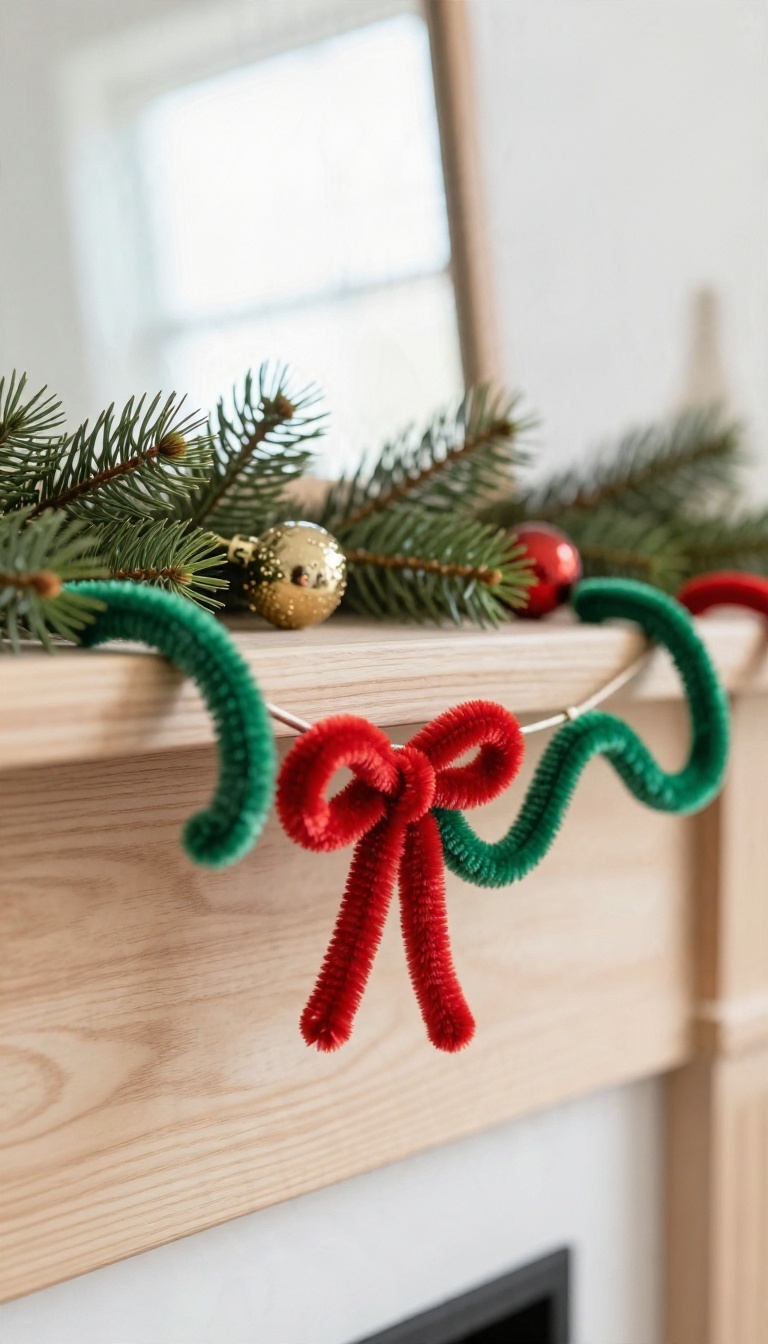
Garland fills empty space fast, and a pipe cleaner version brings color without any fragile parts. The trick is linking short stem loops into a chain, which turns a pile of fuzzy sticks into something that actually looks like a garland. Kids can handle most of the assembly, so this works well as a group project on a snowy afternoon.
Drape the finished chain across a mantel, frame a doorway, or wind it through the tree.
Start by cutting or bending pipe cleaners into short stems, then form each one into a small loop. Link the loops together before closing them, and the chain grows on its own. Mix colors as you go or keep a repeating pattern so the garland reads as intentional.
Either way, it stays light enough to hang with tape or a few hooks.
Making The Loops
Bend each pipe cleaner into a U shape, then twist the ends together to close a small loop. Leave the next loop open, slide it through the first, and twist it shut. Aim for loops about the size of a quarter so the chain stays flexible.
Tighter loops look neat, looser ones drape more softly.
Choosing A Color Pattern
Red and green is the classic combo, but silver and blue feels cooler and more modern. Alternating two colors in a simple repeat keeps the garland from looking random. Let kids pick their own scheme if they want.
A mixed rainbow chain has plenty of charm, especially in a kids' room or playroom.
Hanging It Without The Mess
Lay the chain out first to check the length before you commit to a spot. Tape small hooks along a mantel or doorway, then loop the garland over each one. For the tree, weave it between branches instead of wrapping tight.
It holds its shape and comes off easily when the season ends.
13. Miniature Pipe Cleaner Stockings

Tiny stockings might be the most useful thing on this list. They take up almost no space, weigh nothing, and slip into spots where a real ornament won't fit. Shape a few from red and white stems, and you have a batch ready for an advent calendar, a gift bag, or a small tree.
Start with a red stem and bend it into a stocking outline, leaving the top open. A second red stem twisted alongside the first gives the shape some body. Then wrap a short white stem around the top for the cuff, and bend a small loop at the back so it can hang.
Shaping The Stocking
Bend the red stem into a J shape, with a short foot at the bottom and a straight leg above it. Twist the ends together at the top to close the outline. If you want a fuller stocking, run a second stem alongside the first and twist them together as you go.
Keep the curves soft and rounded so it reads as a stocking and not a sock.
Adding The Cuff And Loop
Wrap a white stem around the top edge two or three times for the cuff. Tuck the ends in so they don't poke out. For the hanger, bend a small loop from the leftover red stem at the back and twist it tight.
Trim any sharp tips with small scissors or pinch them flat.
Where These Little Stockings Shine
These are perfect fillers for an advent calendar, and they fit into gift bags without adding bulk. Tuck a wrapped candy or a tiny note inside the open top. You can also string several onto a length of twine for a mini garland.
Make a batch in one sitting and keep them on hand for last-minute gift toppers.
14. Pipe Cleaner Candle Rings
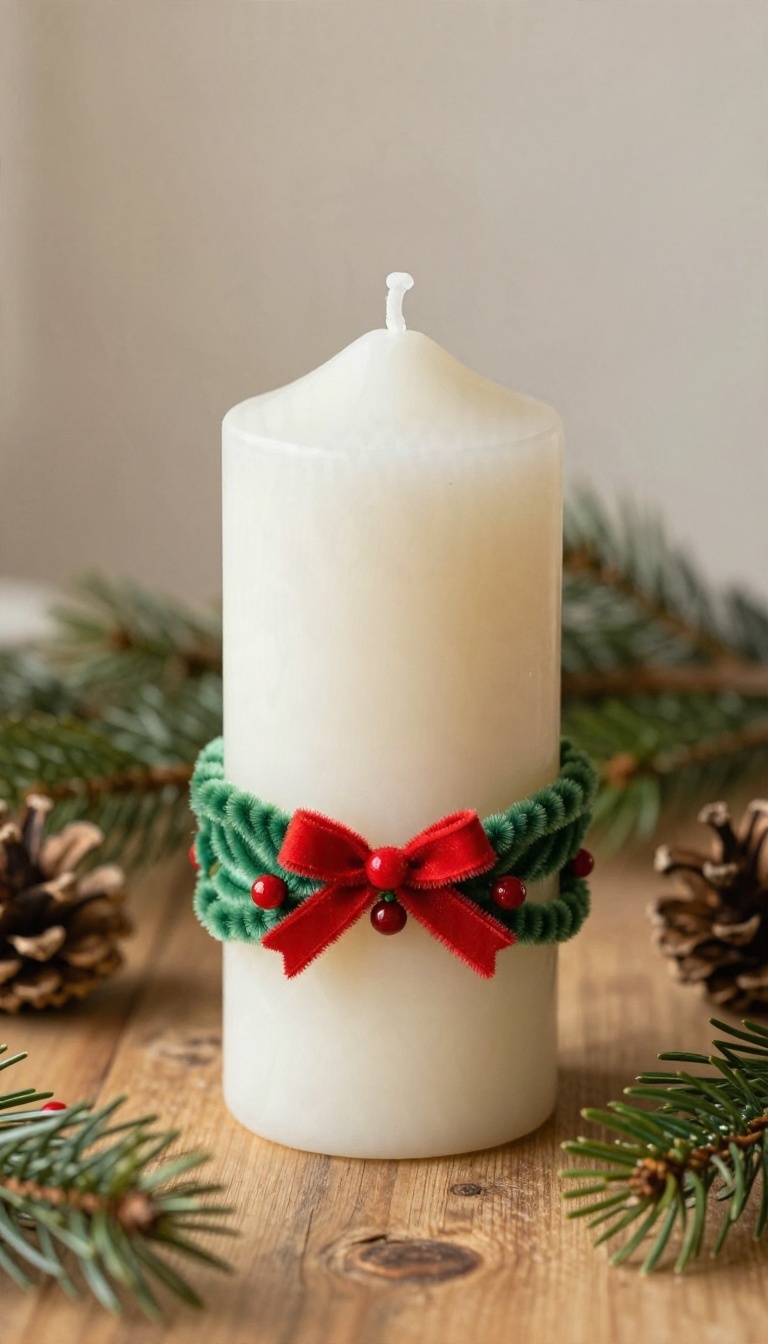
A plain pillar candle does its job, but it rarely gets a second look. Wrap a green pipe cleaner into a ring, add a few berry beads, and suddenly that candle has a little holiday outfit. It's the kind of upgrade that takes minutes but makes the whole table feel considered.
Candle rings are one of those old-fashioned touches that never really go out of style. You're basically making a tiny wreath that sits at the base of a pillar candle, and pipe cleaners are perfect for it because they hold their shape without any wire or glue. The whole thing comes together in about five minutes, and you can size it to whatever candle you already own.
Shaping The Ring
Start with two green pipe cleaners and twist their ends together to make one long stem. Wrap that stem around the base of your pillar candle to get the size right, then slide it off and twist the ends closed. If you want a fuller look, use three stems and wrap them a little looser.
Fluff the ring with your fingers so it sits flat and looks more like greenery than a fuzzy circle.
Adding Berries And Bits
Small berry beads or tiny pom-poms give the ring its pop of color. Thread a few onto a short piece of pipe cleaner, twist it around the ring, and tuck the ends underneath. You can also add a tiny bow or a single jingle bell.
Keep it simple—three to five berries is usually plenty. If you're using real berries, wrap them with floral tape first so they don't poke through.
Setting It Up
Slide the finished ring over the candle and press it down so it sits snug at the base. For a centerpiece, group two or three candles of different heights, each with its own ring. Battery-operated candles work just as well and let you place them anywhere without worrying about wax.
A set of these also makes a sweet hostess gift—just tie a ribbon around the candle and ring together.
15. Pipe Cleaner Snowman Ornaments

A snowman ornament made from pipe cleaners has a soft, friendly look that fits right in with the rest of the tree. You build it from three simple loops, so the shape comes together fast and stays sturdy once it's hung. Kids tend to take over this one, and that's fine, because there's nothing here that's easy to break.
The trick is getting the loops even enough that the snowman stands up straight instead of leaning. Once you've made one, the second and third go much quicker, and you'll probably end up with a small snowman family before the afternoon is out. These also make good gift toppers or package ties.
Clip one to a wrapped present and it doubles as a little extra decoration that won't get tossed in the trash.
Shaping The Three Loops
Take a white pipe cleaner and bend it into a loop about the size of a quarter, twisting the ends together at the bottom to lock it. That's the base. Make a slightly smaller loop for the middle and a smaller one still for the head.
Stack them so each loop sits just above the last, then twist the connecting ends tightly so the body holds its shape. Fluff the loops out a little with your fingers so they look round rather than flat.
Adding The Hat And Scarf
A tiny black pipe cleaner bent into a cylinder makes a simple top hat, and a small brim underneath keeps it from sliding off. Glue it to the top loop and let it set for a minute. For the scarf, wrap a short red or green pipe cleaner around the neck between the middle and top loops.
Twist once at the front and trim the ends so they hang like a real scarf. A dot of glue on the hat and scarf helps them survive the season.
Hanging And Finishing Touches
Bend a small loop of twine or ribbon through the top of the head loop and knot it to create a hanger. Keep it short so the snowman sits close to the branch instead of swinging. If you want a face, a fine-tip marker works better than glue-on pieces for small kids.
Two dots for eyes and a few tiny dots for a mouth take about ten seconds and won't fall off.
FAQ
What supplies do I need for these pipe cleaner crafts?
Most projects need pipe cleaners, scissors, and something to hang or attach them with, like string, tape, or a pin back. Beads, small bows, and a hot glue gun help with details but are optional for many of the simpler crafts.
Are pipe cleaner crafts safe for young kids?
Yes, with supervision. Pipe cleaners have wire inside, so check the ends for sharp points and bend them inward. Skip the hot glue and small beads for very young children and stick to twisting and looping projects.
How long does each craft take?
Simple ornaments like candy canes and snowflakes take about five minutes. Projects with more shaping, like the reindeer or angel, might take 15 to 20 minutes, which makes them good for a relaxed craft session.
Can I use these as gifts or gift toppers?
Definitely. Stars, poinsettia pins, and small wreaths make charming gift toppers, and the angel and snowman ornaments work well as handmade gifts for teachers, neighbors, or family.
Where can I buy pipe cleaners for holiday crafts?
Craft stores, dollar stores, and online retailers all carry pipe cleaners, often in holiday color packs. Look for chenille stems in red, green, white, gold, and silver to cover most of these projects.
Conclusion
Fifteen pipe cleaner crafts gives you plenty of chances to turn a handful of fuzzy sticks into something worth keeping. Start with one that matches the supplies in your drawer and the patience level of whoever's twisting alongside you. A candy cane that leans a little sideways still looks cheerful on the tree.
Grab a pack this week, bend a few into shape, and let the kids take over the rest. The crafts don't need to be perfect—they just need to happen.