17 Cleaning Microwave Tips for Splatter Free Shine
A splattered microwave isn't just unsightly—it can trap odors and make reheating feel unappealing. But restoring that like-new shine doesn't require harsh chemicals or endless scrubbing.
With a few clever techniques using everyday items, you can keep your microwave spotless with minimal effort. From steam-cleaning with lemon to tackling burnt-on messes with baking soda, these 17 tips target every nook and cranny.
No more baked-on splatters or lingering smells—just a clean, fresh appliance ready for your next meal.
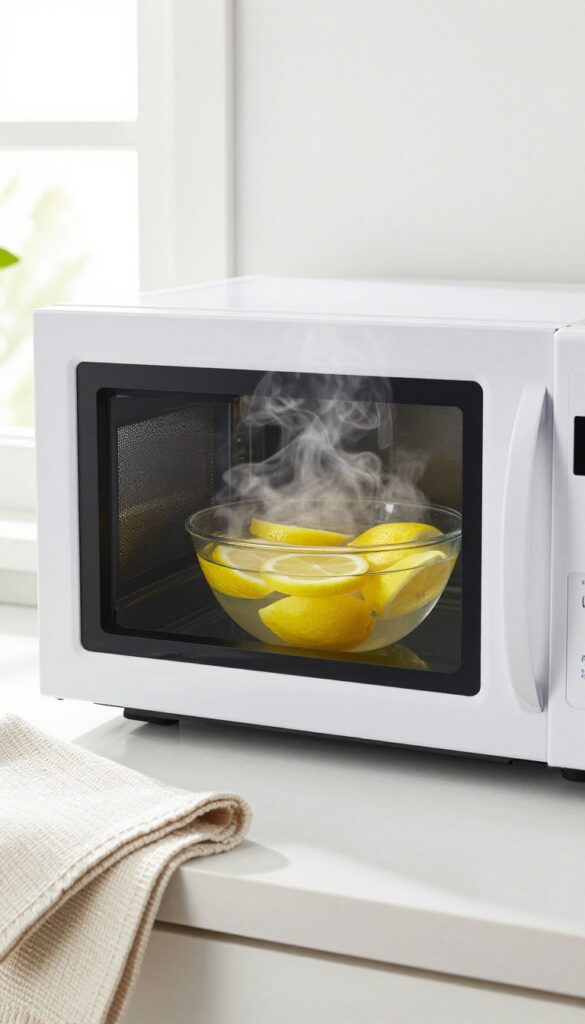
1. Steam Clean with Lemon Water
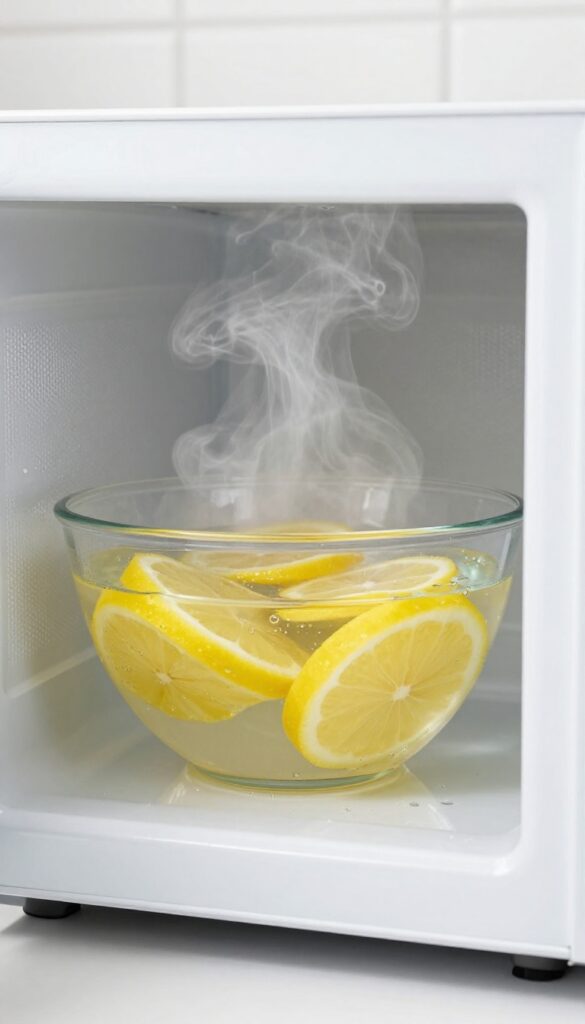
Steam is your microwave's best friend when it comes to loosening dried-on food and grease. And adding lemon takes it a step further by neutralizing odors and leaving a fresh citrus scent. This method is almost effortless—just a few minutes of heating does the heavy lifting for you.
Fill a microwave-safe bowl with 1 cup of water and add a few lemon slices or a tablespoon of lemon juice. Microwave on high for 3–5 minutes until the water boils and the window steams up. Let it sit for 2 minutes without opening the door so the steam can penetrate stubborn grime.
Then carefully remove the bowl (it's hot! ) and wipe down the interior with a damp cloth. The lemon not only cuts through grease but also leaves your microwave smelling clean.
Why Lemon Works Best
Lemon juice is naturally acidic, which helps break down grease and mineral deposits. The steam carries the acid into every crevice, softening baked-on splatters so they wipe away easily. Plus, the fresh scent lingers, masking any old food odors.
How To Avoid A Mess
Place the bowl in the center of the turntable to prevent tipping. Use a deep bowl to avoid boiling over. After steaming, let the bowl cool before handling.
For extra stubborn spots, dip your cloth in the warm lemon water for added cleaning power.
When To Repeat
This quick steam is perfect for weekly maintenance. If your microwave gets heavy use, do it every few days. It’s also a great first step before tackling tough stains with other methods.
2. Use Vinegar Steam for Tough Stains
When food splatters bake onto the microwave walls, scrubbing can feel like a workout. But there's a smarter way: let vinegar steam do the heavy lifting. The acidic vapor softens even the most stubborn, crusty residue, so you can wipe it away in seconds.
Fill a microwave-safe bowl with equal parts water and white vinegar—about half a cup each. Place it inside and run the microwave on high for 5 minutes. The steam will condense on the walls, ceiling, and turntable, loosening dried-on food.
Let it sit for 2 minutes after the cycle ends to maximize softening. Then, simply open the door and wipe everything down with a damp cloth or sponge. The vinegar smell disappears quickly once the surface dries.
Why Vinegar Works Best
White vinegar contains acetic acid, which breaks down grease and dissolves mineral deposits from hard water. Unlike plain water steam, vinegar steam actively attacks the bonds holding food particles to the surface. It's also a natural deodorizer, so it eliminates lingering smells from fish, popcorn, or tomato sauce.
How To Avoid Overpowering Odor
Some people worry about the microwave smelling like a salad. To minimize the vinegar scent, keep the microwave door open for a few minutes after wiping. You can also add a few drops of lemon juice or a cinnamon stick to the bowl for a fresher aroma.
The steam will still be effective, just with a milder fragrance.
When To Use This Method
This technique is perfect for weekly maintenance or after a major splatter incident. Use it when you see dried-on sauce, cheese, or grease that won't budge with a damp cloth. Avoid using it on a microwave that's still hot from cooking—let it cool first to prevent burns.
3. Cover Everything with a Microwave Lid
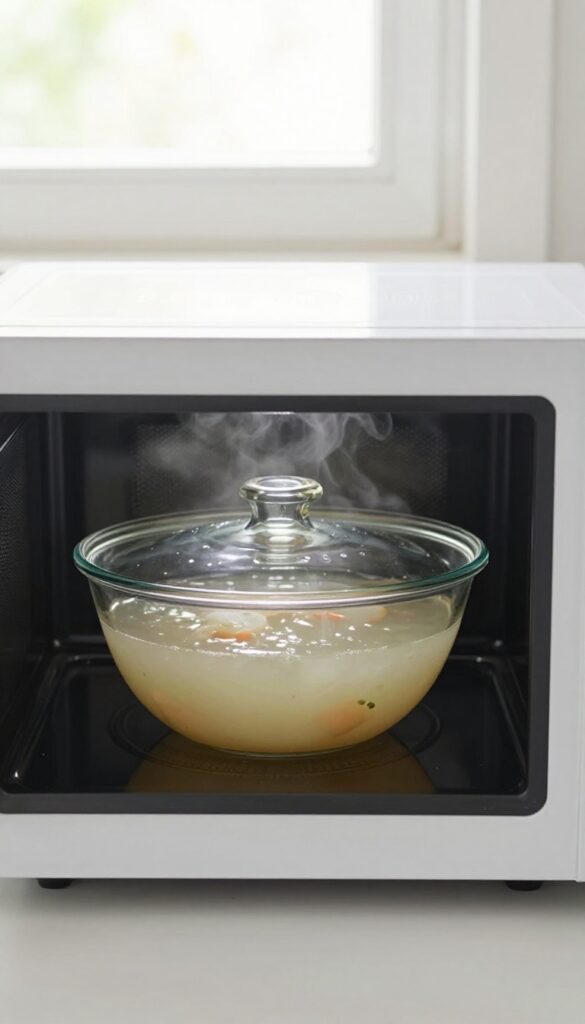
The easiest way to avoid splatters is to stop them before they start. A simple cover over your bowl or plate acts as a shield, keeping food particles from hitting the microwave walls. This one habit can cut your cleaning time in half.
Using a microwave-safe lid or a paper towel creates a barrier that traps steam and prevents mess. It's a small step that makes a big difference, especially for foods that tend to bubble or pop.
Why Covers Work So Well
When food heats up, moisture turns to steam and can carry small particles upward. A cover contains that steam, allowing food to cook evenly while keeping the interior clean. Plus, it helps retain moisture, so your food doesn't dry out.
Best Types Of Covers To Use
Look for vented microwave lids that let steam escape without splattering. You can also use a microwave-safe plate or a paper towel. Avoid tight seals that could trap too much pressure.
For soups, leave a small gap for steam to release.
When To Skip The Cover
Some foods, like crispy items or those that need browning, are better left uncovered. But for most reheating tasks—leftovers, sauces, vegetables—a cover is your best friend. If you're unsure, err on the side of covering.
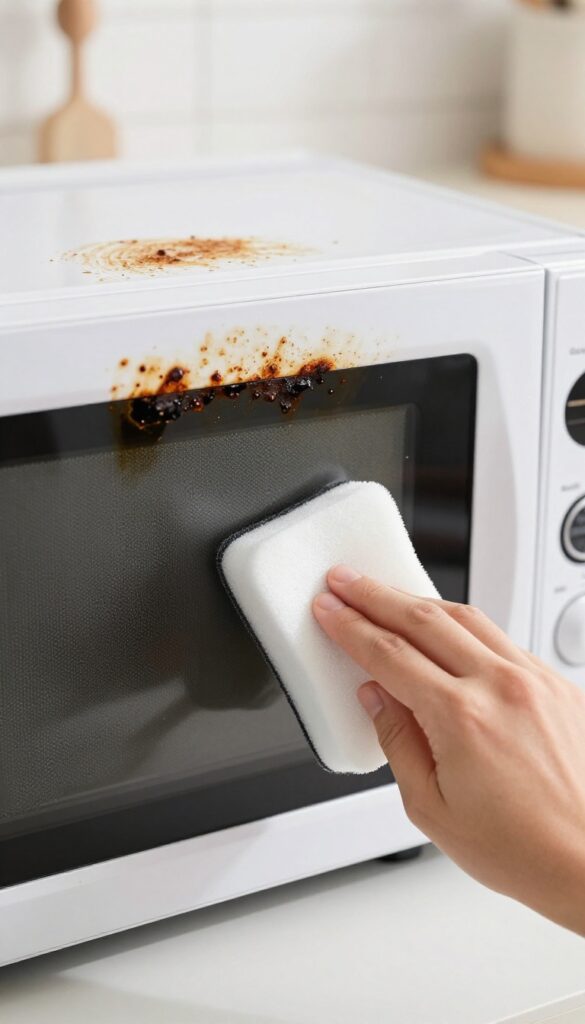
4. Wipe Spills Immediately After Heating
The secret to a spotless microwave is timing. When you hear the timer go off, don't walk away just yet. Grab a damp cloth and give the interior a quick wipe while the steam is still working its magic.
Fresh spills come off with zero effort, saving you from scrubbing later.
Fresh splatters are liquid and slide right off. Once they dry, they bond to the surface and turn into stubborn crust. A damp cloth right after heating lifts everything in seconds.
Keep a small microfiber cloth near the microwave so it's always ready. This one habit cuts cleaning time by 90 percent.
Why Fresh Spills Are Easier
Microwave steam keeps food particles moist right after cooking. That moisture is your ally. Wiping immediately uses the existing steam to dissolve residue.
Waiting even five minutes lets the mess re-solidify, making removal harder.
Best Cloth For The Job
Microfiber cloths are ideal because they trap grease and food without scratching the interior. Keep a dedicated microwave cloth dry and folded near the appliance. Dampen it slightly before use for best results.
Avoid abrasive sponges that can damage the surface.
Make It A Habit
Train yourself to wipe as soon as the microwave stops. After a few days, it becomes automatic. You'll never face a baked-on mess again.
Bonus: your microwave will always look clean, even between deep cleans.
5. Baking Soda Paste for Burnt-On Food

Burnt-on food can feel impossible to remove without scraping or harsh chemicals. But baking soda, that humble kitchen staple, is surprisingly effective at lifting charred bits without damaging the microwave's interior. A simple paste does the trick with minimal effort.
Why Baking Soda Works So Well
Baking soda is mildly abrasive, so it scrubs away stuck-on food without scratching surfaces. It also reacts with acidic burnt residues, helping to break them down. Plus, it's non-toxic and safe for food contact areas.
How To Make And Apply The Paste
Mix about 2 tablespoons of baking soda with just enough water to form a thick paste—think toothpaste consistency. Use a soft sponge or cloth to spread it over the burnt spots. Let it sit for 10 to 15 minutes to soften the char.
Then gently scrub in circular motions. Rinse with a damp cloth.
Tips For Stubborn Spots
For really tough burnt-on messes, add a few drops of white vinegar to the paste for extra fizzing action. You can also let the paste sit longer, up to 30 minutes. If needed, repeat the process.
Always test on a small hidden area first if you have a stainless steel interior.
6. Microwave a Bowl of Water Before Wiping
Sometimes the simplest solution works best. Before you reach for any cleaning agent, try microwaving a bowl of plain water. The steam alone loosens dried food and grease, making wiping effortless.
Fill a microwave-safe bowl with water and heat on high for 2 minutes. Let it sit for another minute so the steam can penetrate stubborn spots. Then carefully remove the bowl (it will be hot) and wipe down the interior with a sponge or cloth.
No lemon, no vinegar—just steam and a little elbow grease.
Why Plain Steam Works
Steam is nature's softener. It rehydrates dried food particles, turning crusty splatters into easy-to-wipe smudges. The heat also helps loosen grease, so you don't have to scrub hard.
Best Practices For Steam Cleaning
Use a deep bowl to prevent water from boiling over. Add a wooden toothpick or chopstick to encourage even boiling and prevent superheating. Always keep the microwave door closed during the heating cycle to trap steam.
When To Add A Little Extra
For tough odors or stubborn stains, add a splash of lemon juice or a teaspoon of baking soda to the water. But if you just need a quick refresh, plain water is all you need.
7. Use a Sponge or Cloth Dampened with Dish Soap
Sometimes the simplest tools are the most effective. A microfiber cloth or soft sponge with a drop of dish soap can handle daily grime without any fuss. This method is gentle on surfaces but tough on grease, making it perfect for quick cleanups.
For everyday maintenance, skip the harsh sprays and reach for a microfiber cloth. Dampen it with warm water, add a tiny drop of dish soap, and wipe down the interior. The soap cuts through grease while the microfiber traps particles.
Rinse the cloth and go over everything again to remove any soap residue—leftover suds can leave a film or affect food taste.
Why Microfiber Works Best
Microfiber cloths have tiny fibers that lift and trap grease and food particles without scratching the microwave's interior. Unlike paper towels, they don't leave lint behind, and they can be washed and reused hundreds of times. A damp microfiber with a dab of dish soap is all you need for a streak-free shine.
Avoid Soap Residue
Dish soap is great for cutting grease, but if you leave any behind, it can create a sticky film or even affect the taste of your food. After wiping with soapy water, always rinse your cloth with clean water and wipe the interior again. This extra step ensures no soapy aftertaste.
Daily Vs. Deep Clean
Use this method daily to prevent buildup. For a deeper clean, you can follow up with a steam session (lemon or vinegar) to loosen any dried-on food. But for most days, a quick soap-and-water wipe keeps your microwave looking like new.
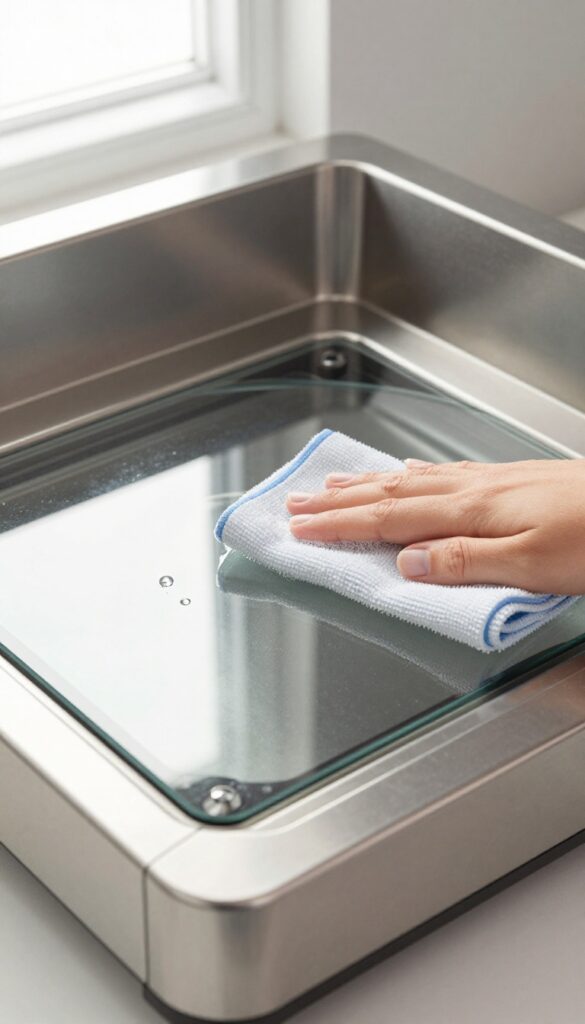
8. Clean the Turntable Separately
That glass turntable might look clean on top, but flip it over and you'll often find a sticky, grimy surprise. It's one of those spots that gets overlooked because it's not immediately visible. Giving it a separate wash makes a big difference in overall microwave freshness.
The turntable is a magnet for drips and spills that sneak underneath during cooking. Over time, these can bake on and become hard to remove. Taking it out and washing it properly prevents that buildup and keeps your microwave smelling clean.
Why It Matters
When food splatters, some always slides under the turntable. That hidden grime can cause odors and even attract pests. A quick wipe of the top isn't enough—you need to lift it out and clean both sides.
How To Do It Right
Remove the glass turntable and wash it in warm soapy water. Use a soft sponge to avoid scratches. Rinse well and dry thoroughly before putting it back.
For stuck-on bits, let it soak for a few minutes first.
Don't Forget The Roller Ring
The little plastic roller ring underneath also collects debris. Wipe it down with a damp cloth and check that the rollers spin freely. This keeps the turntable rotating smoothly and prevents uneven heating.
9. Don't Forget the Ceiling
The top of your microwave interior is a magnet for grease and steam residue, yet it's the spot most people skip. That buildup can drip down onto your food or create stubborn stains over time. A quick ceiling wipe makes a surprising difference in overall cleanliness.
Why It Gets So Dirty
Steam from heating food rises straight to the ceiling, carrying grease and food particles. Over time, that thin film turns into a sticky layer that can even start to smell. Since you don't see it at eye level, it's easy to ignore until it's caked on.
The Right Tool For The Job
A regular sponge won't cut it unless you stand on tiptoes. Use a sponge on a stick—like a dishwand with a scrubber head—or a long-handled microfiber mop head. Some people even attach a sponge to a ruler with a rubber band.
Whatever you use, make sure it's microwave-safe and won't scratch the surface.
Quick Cleaning Method
First, heat a bowl of water with lemon slices for 2 minutes to loosen grime. Then, dip your long-handled sponge in the warm lemon water and wipe the ceiling in a circular motion. Rinse the sponge frequently and finish with a dry microfiber cloth to prevent streaks.
10. Deodorize with Coffee Grounds
Lingering odors from fish, popcorn, or spicy foods can make your microwave smell less than fresh. Instead of masking smells with artificial sprays, use coffee grounds to absorb them naturally. This simple trick leaves your microwave smelling neutral and ready for the next use.
Coffee grounds are a natural deodorizer because they contain nitrogen, which helps neutralize odors in the air. Unlike scented cleaners that just cover up smells, coffee grounds actually trap and remove odor molecules. This method is especially effective after cooking strong-smelling foods like fish, broccoli, or curry.
Plus, it’s a great way to reuse grounds from your morning brew.
How To Use Coffee Grounds
Place a small bowl filled with fresh or used coffee grounds in the center of the microwave. Leave the door closed and let them sit overnight, or for at least 8 hours. The grounds will absorb any lingering odors, leaving the interior smelling clean.
For best results, use dry grounds—wet ones can create a mess and may not absorb as well.
Tips For Maximum Odor Absorption
For stubborn smells, spread the grounds on a paper towel or plate to increase surface area. You can also add a few drops of vanilla extract to the grounds for a pleasant scent boost. If you don’t have coffee, try baking soda or activated charcoal—both work similarly.
Replace the grounds every few weeks if you use this method regularly.
Why Coffee Grounds Work So Well
Coffee grounds are porous, which gives them a large surface area to trap odor particles. They also contain compounds that chemically bind to sulfur-based odors (common in fish and eggs). This makes them more effective than many commercial deodorizers.
Plus, they’re free if you already brew coffee at home.
11. Use a Magic Eraser for Stubborn Marks
Some microwave messes just won't budge with a regular sponge. Burnt-on cheese, dried sauce, or mystery splatters often laugh at soap and water. That's where a melamine sponge, better known as a Magic Eraser, comes to the rescue.
These foam blocks work like a super-fine sandpaper, gently lifting stains without scratching most surfaces. Just dampen, squeeze, and wipe—no harsh chemicals needed.
For those tough, baked-on spots that survive multiple cleaning attempts, a Magic Eraser is a game changer. It's especially effective on the interior walls and ceiling where steam residue hardens over time. The key is to keep the sponge damp (not soaking) and apply light pressure.
Let the sponge do the work. After wiping, rinse the area with a clean damp cloth to remove any residue. Always test on a small hidden area first, especially if your microwave has a painted or coated interior, to ensure it doesn't mar the finish.
How To Use A Magic Eraser Safely
Cut the sponge into smaller pieces to get more use out of each one. Wet it until it's damp, then wring out excess water. Gently rub the stained area in a circular motion.
Avoid pressing too hard, as melamine can be abrasive on glossy surfaces. Once the stain lifts, wipe the area with a damp cloth to remove any leftover sponge particles. Don't use it on the microwave's control panel or any printed surfaces, as it can rub off lettering.
When To Skip The Magic Eraser
While Magic Erasers are great for most microwave interiors, avoid using them on stainless steel or mirrored surfaces. The fine abrasives can leave micro-scratches that dull the finish. Also, skip it on the door seal or gasket, as it could damage the rubber.
Stick to a soft cloth and mild cleaner for those sensitive spots. For everything else, the eraser is a quick, low-effort solution.
12. Clean the Door Seal and Gasket
The rubber gasket around your microwave door does more than keep steam inside—it also traps food particles and grease over time. A dirty seal can lead to poor closure, energy waste, and lingering smells. Giving it regular attention is a small step that makes a big difference.
Why The Gasket Matters
The door seal is designed to create a tight barrier that prevents microwave energy from escaping. When food debris builds up, the seal can't sit flush, which reduces efficiency and may even cause the microwave to run longer. A clean gasket also prevents mold and odors from taking hold.
How To Clean It Safely
Start by unplugging the microwave. Dampen a soft cloth with warm water and a drop of mild dish soap. Gently wipe along the entire rubber gasket, paying extra attention to creases where bits of food hide.
Avoid harsh scrubbers or bleach, which can damage the rubber. Rinse with a clean damp cloth and dry thoroughly.
Preventive Maintenance Tips
After each use, quickly wipe the door seal with a dry paper towel to catch any splatters before they harden. Once a week, do a deeper clean with soap and water. If you notice the gasket is cracked or brittle, replace it promptly to maintain a proper seal.
13. Microwave a Wet Paper Towel
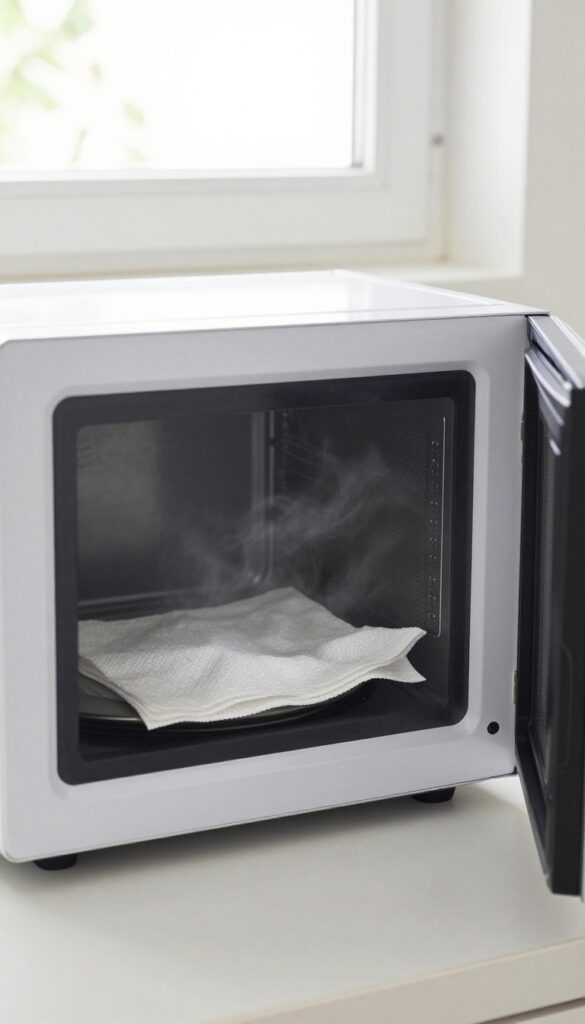
Sometimes the simplest tricks work best. If your microwave has dried-on splatters that seem impossible to wipe off, a wet paper towel is all you need. The steam loosens grime in seconds, and the towel itself becomes your cleaning tool.
This method is almost too easy. Dampen a paper towel—not dripping wet, just thoroughly moist—and place it inside the microwave. Run the microwave on high for 30 seconds.
The steam will soften any stuck-on food, making it wipe away effortlessly. Use the same warm towel to clean the interior, then toss it. No scrubbing, no extra rags.
Why 30 Seconds Is All It Takes
Microwaves work by exciting water molecules, so a damp towel turns into a mini steamer. Thirty seconds is enough to generate steam without overheating the towel or making it too hot to handle. The steam condenses on the walls and ceiling, loosening splatters that have baked on.
The Towel Does Double Duty
After the cycle ends, carefully remove the hot towel (use tongs if needed) and wipe down the interior surfaces. The towel will pick up softened residue and any lingering moisture. You might need to rinse and repeat for heavy messes, but one pass usually does the trick.
When To Use This Trick
This works best for light to medium splatters—sauce spots, cheese drips, or dried-on soup. For burnt-on messes, try a longer steam or combine with a vinegar soak. It's also great for freshening up the microwave between deep cleans.
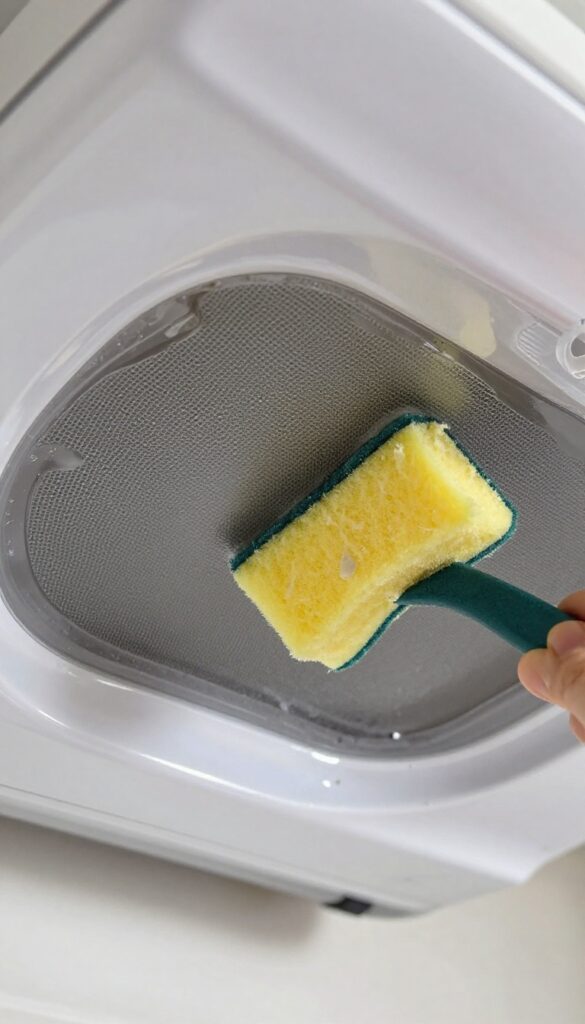
14. Use a Toothbrush for Corners and Vents
Your microwave has tight spots that sponges can't reach—corners, door edges, and vent slats. A clean toothbrush is the perfect tool to scrub these hidden areas without scratching surfaces. Dip it in vinegar or soapy water to loosen grime, then watch the gunk come loose.
A toothbrush's small head and firm bristles make it ideal for detailed cleaning. It reaches into crevices around the door seal, along the inner edges, and inside the vent openings where grease and food particles accumulate. This simple tool helps you achieve a truly thorough clean without any special equipment.
Target The Door Gasket
The rubber gasket around the door traps moisture and crumbs. Gently scrub it with a damp toothbrush dipped in mild soapy water. Avoid harsh chemicals that could degrade the seal.
Rinse with a clean damp cloth and dry thoroughly to prevent mold.
Clean The Vents
Vents on the back or sides of the microwave collect dust and grease. Use a dry toothbrush first to dislodge loose debris, then follow up with a brush dipped in vinegar solution. Wipe away residue with a microfiber cloth.
This helps your microwave run efficiently.
Reach The Ceiling Corners
The top corners inside the microwave are notorious for baked-on splatters. Angle the toothbrush to scrub these spots. A paste of baking soda and water on the brush adds gentle abrasion.
Rinse with a damp cloth afterward.
15. Line the Bottom with a Paper Towel
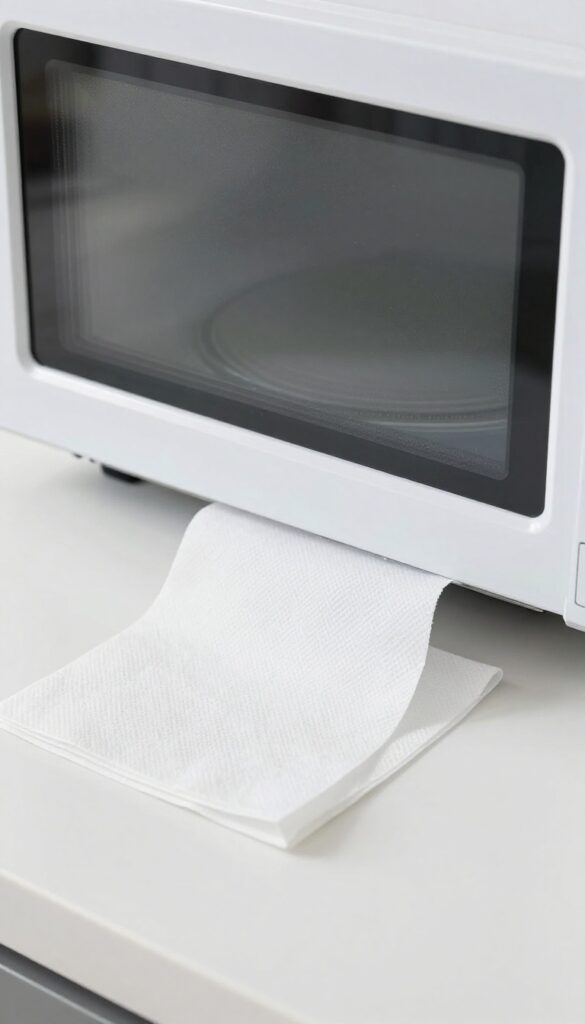
A simple paper towel can be your microwave's best friend. Placing one under the turntable catches drips and spills before they bake onto the surface. Swap it out every few days to keep things fresh and cut down on deep cleaning sessions.
This trick works because the paper towel sits in the lowest part of the microwave, right where splatters tend to pool. It absorbs moisture and food particles, preventing them from hardening. You'll notice fewer stubborn stains and less scrubbing over time.
Just remember to replace the towel regularly—if it gets too wet, it can become a fire hazard. Stick to dry paper towels and avoid using recycled or thin brands that might tear.
Why It Works So Well
The paper towel acts as a disposable liner, catching messes at their source. Since the turntable sits above it, any liquid that drips down lands on the towel instead of the microwave floor. This keeps the interior cleaner and reduces odor buildup from old food residue.
How Often To Replace It
Check the towel every few days—if it looks damp or has visible food bits, swap it out. For heavy use (like daily popcorn or soup reheating), change it every other day. A dry towel is key; never let it stay soaked, as that can create a fire risk.
Extra Tips For Best Results
Use an unbleached paper towel to avoid any chemical taste or smell. If you're heating something that might bubble over, fold the towel in half for extra absorbency. You can also place a small piece under the turntable's center to catch drips from the rotating plate itself.
16. Avoid Abrasive Scrubbers
It's tempting to grab a steel wool pad or a harsh scrubber when faced with stubborn, baked-on food. But those abrasive tools can do more harm than good, leaving fine scratches on your microwave's interior. Once scratched, the surface becomes rougher, making it easier for food to stick and harder to clean in the future.
Why Scratches Matter
Scratches aren't just cosmetic. They create tiny grooves where bacteria can hide and food particles can lodge. Over time, these scratches can also dull the finish, making your microwave look older than it is.
Plus, scratched surfaces are harder to wipe clean, defeating the purpose of a quick tidy-up.
What To Use Instead
Stick with soft sponges (the non-scratch blue or green ones), microfiber cloths, or non-abrasive pads. For tough messes, let a steam-cleaning solution (like lemon water or vinegar) loosen the grime first. Then gently wipe away with a soft cloth.
Your microwave will stay smooth and shiny.
A Quick Test For Safety
If you're unsure whether a sponge is safe, run it across an old plate or a hidden spot inside the microwave. If it leaves any visible marks, don't use it. When in doubt, choose the gentlest option—your microwave will thank you with years of easy cleaning.
17. Establish a Weekly Cleaning Routine
Consistency is the secret to a microwave that always looks and smells fresh. Instead of waiting for spills to bake on, a quick weekly habit keeps grime from ever taking hold. You'll spend less time scrubbing and more time enjoying a spotless appliance.
Pick one day—Sunday works great for many—and set a 10-minute reminder. Do a steam clean with a bowl of water and lemon or vinegar, then wipe down the interior. That's it.
Over time, this simple routine prevents buildup and keeps your microwave performing at its best.
Pick Your Day And Stick To It
Choose a day that's low-stress, like Sunday morning while coffee brews. Consistency is more important than the specific day. Attach the task to an existing habit, like after your weekend breakfast, so it becomes automatic.
What A Quick Clean Looks Like
Fill a microwave-safe bowl with 1 cup water and a slice of lemon or 2 tablespoons vinegar. Microwave on high for 3-5 minutes, then let it sit for 2 minutes. Wipe down the interior with a soft cloth or sponge—steam loosens everything.
Don't forget the turntable and door.
Bonus: Freshen Up The Exterior
While the interior steams, wipe the outside with a damp microfiber cloth. Pay attention to the handle and control panel, where fingerprints and grease collect. A quick once-over keeps the whole appliance looking like new.
FAQ
How often should I clean my microwave?
For best results, wipe down the interior after each use and do a deep steam clean once a week.
Can I use bleach to clean my microwave?
Avoid bleach. It can damage the interior and leave harmful residues. Stick to vinegar, lemon, or mild dish soap.
Why does my microwave smell bad even after cleaning?
Odors can linger in the vent or rubber seal. Clean those areas with vinegar or baking soda, and leave a bowl of coffee grounds inside overnight.
Is it safe to microwave vinegar?
Yes, but use a 1: 1 ratio with water and don't microwave for more than 5 minutes. The smell will dissipate quickly.
How do I clean the outside of my microwave?
Use a damp microfiber cloth with mild soap. For stainless steel, wipe with the grain and use a dedicated stainless steel cleaner for streaks.
Conclusion
A sparkling microwave doesn't require harsh chemicals or endless scrubbing. These 17 tips show you can tackle even the toughest splatters with items you already have in your kitchen. Pick a few that fit your routine and stick with them.
Your microwave will stay cleaner longer, and you'll spend less time on deep cleans. Try a couple of these methods this week and enjoy the difference.