17 Cleaning Supply Closet Ideas for Neater Home Storage
Your cleaning supply closet doesn't have to be a jumble of bottles and rags. With a few smart tweaks, it can become a calm, efficient hub for all your home care tools.
Think of it as a command center: everything you need to tackle spills, dust, and grime should be easy to grab and put away. A little planning goes a long way toward saving time and reducing frustration.
These 17 ideas will help you reclaim that closet space, making your daily cleaning routine smoother and your storage area genuinely pleasant to open.
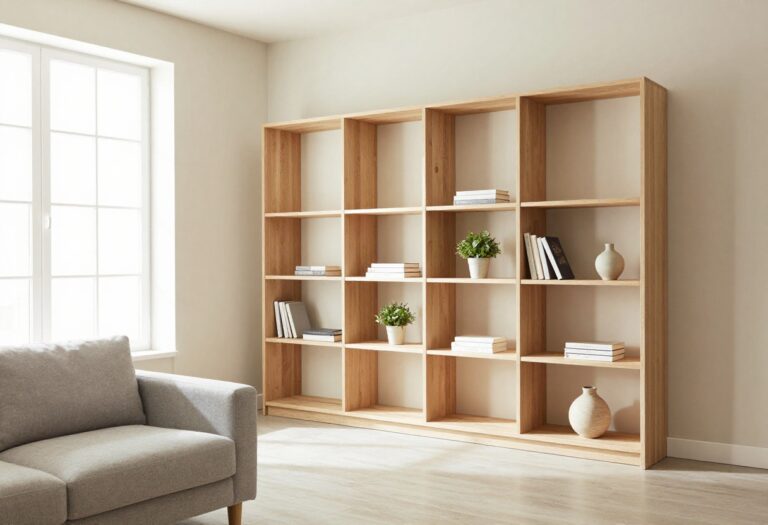
1. Install Adjustable Shelving for Flexible Space
Fixed shelves often waste vertical space or force you to cram items into awkward gaps. Adjustable shelving lets you customize the layout as your cleaning arsenal changes. A quick reconfiguration can accommodate a new tall spray bottle or a bulky steam mop without losing storage.
Standard wire or laminate shelves that clip onto vertical tracks are easy to install and move. You can shift them up or down in seconds, creating tall sections for brooms and short ones for smaller bottles. This flexibility means your closet adapts to you, not the other way around.
Measure Before You Shop
Grab a tape measure and note the closet's width, depth, and height. Check for any obstructions like light fixtures or outlets. Knowing these numbers ensures you buy shelving that fits and can be adjusted to maximize every inch.
Mix Shelf Types For Different Items
Use wire shelves for ventilated storage of damp rags or sponges. Solid laminate or wood shelves work better for heavy bottles and containers. Combining both types gives you the best of airflow and stability.
Label Shelf Heights For Quick Changes
Once you find a layout that works, mark the track positions with a pencil or small sticker. This makes future adjustments faster because you already know the ideal spots for each shelf height.
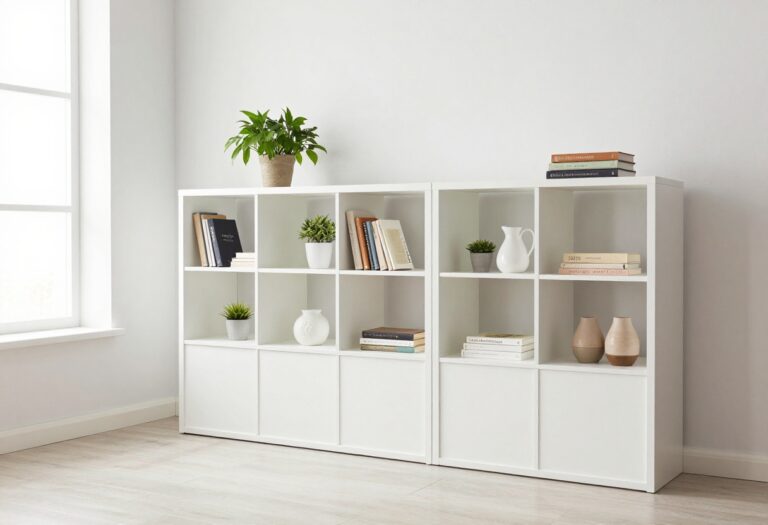
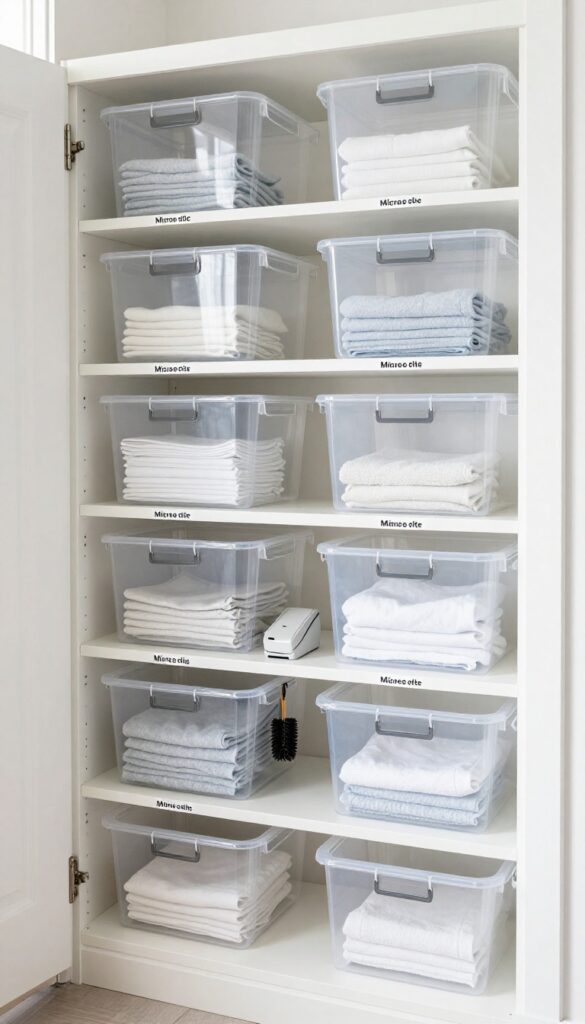
2. Use Clear Bins with Labels for Small Items
Small cleaning supplies like sponges, scrub brushes, and mini bottles have a way of turning into a chaotic pile. The fix is simple: clear bins with labels. You'll see everything at a glance and never have to dig through a dark corner again.
Group similar items together in transparent bins. Sponges and scrub brushes go in one, small bottles in another. Label each bin clearly so anyone in the household can find and return items without guesswork.
This system keeps your closet tidy and your cleaning routine efficient.
Choose The Right Bins
Opt for sturdy, clear plastic bins with smooth sides for easy cleaning. Measure your shelf depth before buying. Stackable bins save vertical space, while open-top bins work best for frequently used items.
Avoid bins with lids that are hard to remove one-handed.
Labeling That Lasts
Use a label maker or write on waterproof labels with a permanent marker. Stick labels on the front, not the lid, so you can read them even when bins are stacked. For a cleaner look, use clear labels on clear bins.
Update labels whenever you reorganize.
Maintain The System
Once a month, pull out each bin and wipe it down. Toss expired products or half-empty bottles you never use. Return everything to its labeled bin.
This habit prevents clutter from creeping back and keeps your closet feeling fresh.
3. Hang a Tension Rod for Spray Bottles
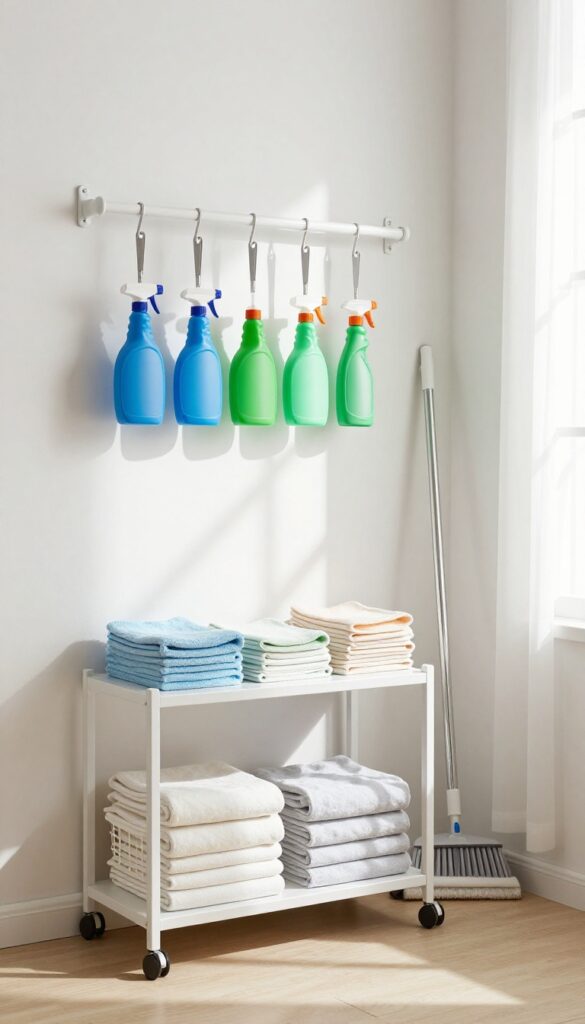
Spray bottles are bulky and tend to topple over on shelves. A simple tension rod can turn that chaos into neat, accessible storage. Mount one horizontally near the top of your closet, and you'll free up shelf space while keeping every bottle within easy reach.
This trick works because spray bottles have triggers that hook perfectly over a rod. No drilling or hardware needed—just a standard tension rod that fits your closet width. It’s a low-cost, high-impact solution that instantly declutters shelves and makes your cleaning routine faster.
Choosing The Right Rod
Look for a tension rod with a diameter of about ½ to ¾ inch. Thinner rods may not hold heavier bottles, and thicker ones might not fit through trigger loops. Measure your closet width before buying, and opt for a rod with rubber ends to grip walls without slipping.
Arranging Bottles By Frequency
Group bottles you use daily—like all-purpose cleaner and glass spray—in the center for easiest access. Place seasonal or specialty sprays (like carpet cleaner) at the ends. This keeps your most-used items front and center, saving you from shuffling bottles around.
Maximizing Vertical Space
If your closet is tall, consider installing two rods—one for full-size bottles and another lower down for smaller sprayers. You can also hang a small caddy or basket from the rod to store microfiber cloths or scrub brushes, making the most of every inch.
4. Add a Door Organizer with Pockets
The back of your closet door is prime real estate that often sits empty. An over-the-door pocket organizer turns that wasted space into a handy storage hub for small items that usually clutter your shelves. You can grab a clear plastic organizer so you see everything at a glance, or choose a fabric one with deep pockets for bulkier tools.
Either way, you'll free up shelf space and keep frequently used supplies within easy reach.
Attach an over-the-door pocket organizer to hold gloves, dusters, and small tools. It uses vertical space that often goes to waste.
What To Store In The Pockets
Think about the items you reach for most often: rubber gloves, microfiber cloths, dusting wands, scrub brushes, and small spray bottles. Assign each pocket a category so you always know where to find things. Use the bottom pockets for heavier items like all-purpose cleaner bottles and the top ones for lightweight dusters and gloves.
Choosing The Right Organizer
Look for an organizer with a mix of pocket sizes. Clear vinyl pockets let you see contents instantly, while fabric pockets with mesh fronts offer visibility with a softer look. Make sure the hooks are sturdy enough to hold the weight of your supplies without damaging the door.
If your door is hollow, use adhesive hooks instead of over-the-door hooks to avoid bending.
Installation Tips For A Secure Fit
Measure your door height before buying to ensure the organizer doesn't drag on the floor or block the door from closing. Most over-the-door organizers fit standard doors, but check the hook design—some work better with thicker doors. If the organizer wobbles, add a few command strips to the back for extra stability.
5. Mount a Magnetic Strip for Metal Tools
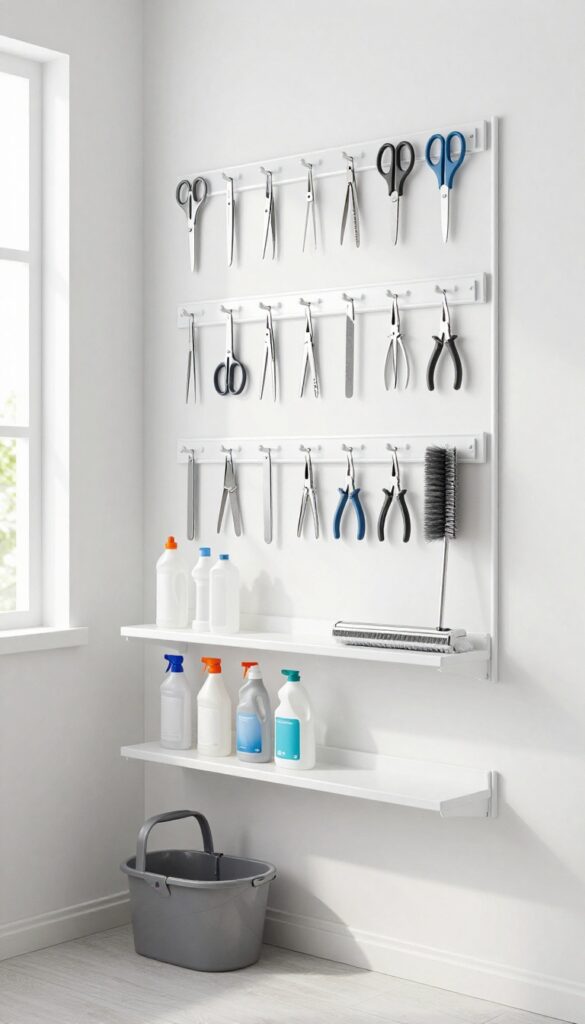
Scissors, tweezers, and small brushes often end up lost in drawers or buried under larger items. A magnetic strip turns any wall into instant storage for metal tools, keeping them visible and within reach. It’s a simple, low-cost upgrade that makes a big difference in daily convenience.
Choose The Right Strip
Look for a heavy-duty magnetic strip rated to hold at least 5 pounds. Kitchen knife strips work well, but you can also find tool-specific versions at hardware stores. Make sure the strip has a strong magnet and a clean finish that won’t scratch your tools.
Placement Tips
Mount the strip on the inside wall of the closet, at eye level or slightly above. Avoid placing it near the door hinge so tools don’t get knocked off when you open the door. If your closet has a stud finder, secure the strip into studs for extra stability.
What To Store
Metal scissors, tweezers, small pliers, metal nail files, and brush handles with metal ferrules all stick well. You can also hang metal measuring spoons or a small whisk for mixing cleaning solutions. Avoid storing anything with a plastic handle that might slip off.
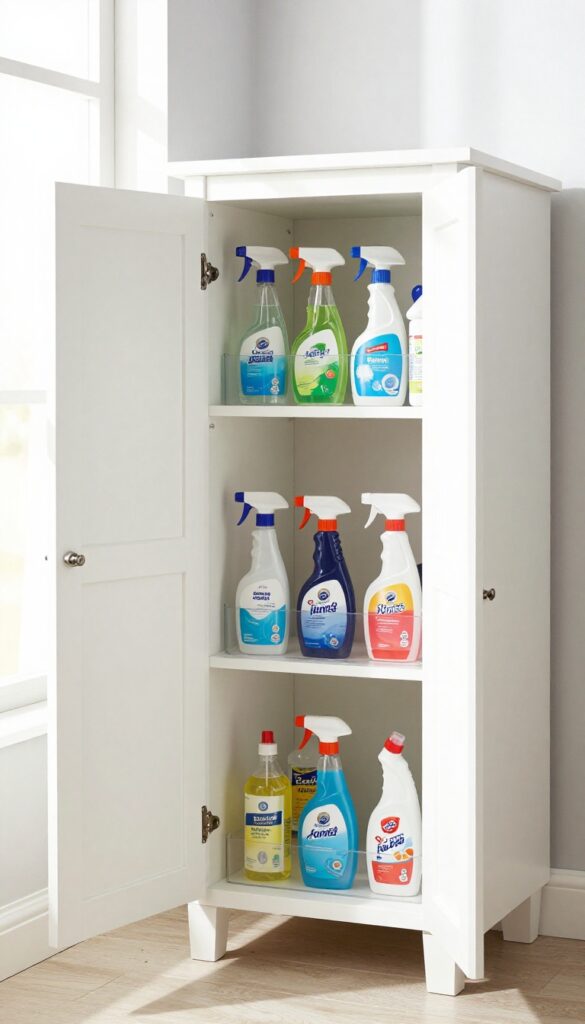
6. Use a Tiered Shelf for Cans and Bottles
Tiered shelves aren't just for pantry items. They work wonders in a cleaning closet by lifting cans and bottles so you can see every label at a glance. No more reaching behind to find the one you want.
A tiered shelf transforms a flat shelf into a small stadium. Cleaning sprays, polish cans, and trigger bottles each get their own row. The back row sits higher, the middle row lower, and the front row at the bottom.
Everything is visible and reachable. You can grab what you need without moving anything else. It also keeps bottles from hiding behind each other, which means you won't accidentally buy duplicates because you forgot you had a half-full can of glass cleaner.
Choose The Right Size
Measure your shelf depth and height before buying. A tiered shelf that's too wide will waste space, and one that's too tall might block the shelf above. Look for adjustable or expandable models that fit your exact dimensions.
Some are designed for cans, others for taller spray bottles—pick based on what you store most.
Group By Frequency Of Use
Place daily-use items like all-purpose spray and glass cleaner on the front row. Weekly-use items like bathroom cleaner or stainless steel polish go on the middle row. Seasonal or occasional products like carpet cleaner or oven spray sit on the back row.
This setup keeps your most-used products within easy reach.
Prevent Slipping And Spills
Some tiered shelves have rubberized feet or non-slip surfaces. If yours doesn't, add a thin shelf liner or a few strips of adhesive grip tape. This stops bottles from sliding forward when you open the closet door or when you pull out a can.
It also protects the shelf surface from scratches and chemical drips.
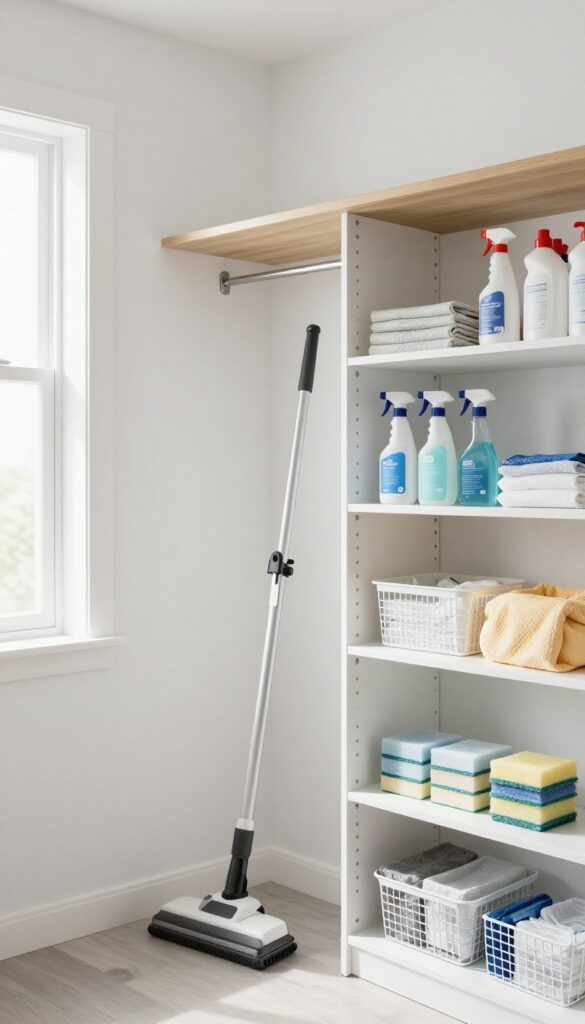
7. Install a Hook Strip for Mops and Brooms
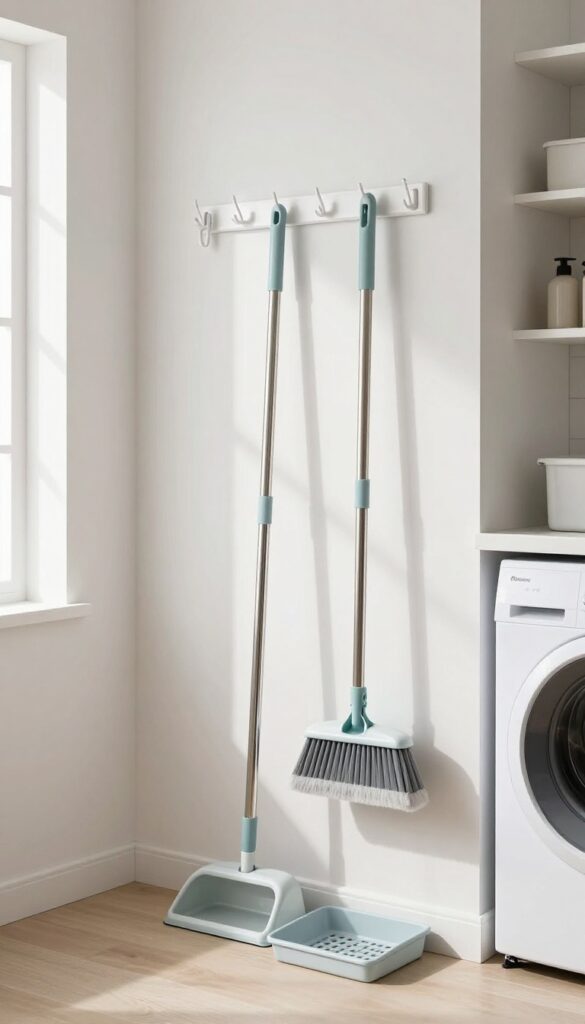
Mops and brooms are notorious for falling over or getting tangled up with each other. A simple hook strip can solve that mess in minutes. Mount a sturdy strip of hooks on an empty wall or inside a cabinet door, and suddenly those long-handled tools have a proper home.
Hooking them up keeps them off the floor, so they stay clean and dry. Plus, you can see each tool at a glance, no more digging through a leaning tower of handles. It's a low-cost, high-impact fix that works in closets, laundry rooms, or garages.
What To Look For In A Hook Strip
Choose a strip with heavy-duty hooks that can support the weight of wet mops and metal brooms. Look for rust-resistant materials like coated steel or plastic. A strip with multiple hooks spaced a few inches apart gives you room to grow.
Installation Tips
Mount the strip at a height that lets you easily lift the tool on and off. Use wall anchors if you're attaching to drywall, especially for heavier items. Position it so handles don't block access to other shelves or bins.
Bonus: Add A Drip Tray
If you hang wet mops, place a small tray or mat underneath to catch drips. That keeps your closet floor dry and prevents water damage. A simple plastic tray from the dollar store does the trick.
8. Store Vacuum Attachments in a Basket
Vacuum attachments have a way of scattering across the closet floor or getting lost in deep drawers. A simple basket can bring order to this chaos, keeping every crevice tool and brush within arm's reach.
Pick a basket or small bin that's wide enough to hold your collection of attachments. A handled caddy works well for carrying to different rooms, while a wall-mounted basket saves shelf space. Hang it on a hook inside the closet door or place it on a shelf near your vacuum.
This way, you can grab the whole basket when you need to switch tools, and everything goes back in one place.
Choose The Right Basket
Look for a basket with a sturdy base and sides that are tall enough to keep attachments from falling out. Wire baskets let dust fall through, while solid plastic bins are easier to wipe clean. A size around 12 by 8 inches typically fits most standard attachments.
Mount It For Easy Access
Use a command hook or a screw-in hook to hang the basket on the inside of the closet door. Keep it at eye level so you can see what's inside. If you prefer a shelf, place the basket right next to the vacuum so you can grab attachments without extra steps.
9. Use a Lazy Susan for Corner Access
Deep corner shelves are notorious for swallowing bottles whole. You know there's a can of furniture polish back there, but you'd rather buy a new one than excavate. A lazy Susan transforms that dead zone into a functional turntable.
A lazy Susan is a simple spinning tray that brings the back row to the front. It works especially well for tall bottles of floor cleaner, stain removers, and spray polishes that tend to hide. Just give it a spin and everything is within reach.
Pick The Right Size
Measure your shelf depth and width before buying. A lazy Susan that's too small wastes space, while one that's too large won't spin freely. Look for a model with a raised lip or non-slip surface to keep bottles from sliding off during rotation.
Group By Frequency Of Use
Place your most-used items—like all-purpose cleaner and glass spray—on the lazy Susan. Reserve the static shelf space for rarely used backups or bulk refills. This way, you spin for daily essentials and reach for the rest only when needed.
Double Up On Tall Shelves
If you have a tall cabinet with two deep shelves, put a lazy Susan on each. The lower one can hold heavy bottles of laundry detergent or bleach, while the upper one stores smaller spray bottles and dusting aids. Both shelves become accessible with a simple spin.
10. Add a Small Trash Can for Disposables
A mini trash can inside your cleaning supply closet is a small addition that makes a big difference. It catches used wipes, empty containers, and dust bags right where you work, so you don't have to carry debris across the house. This keeps your closet cleaner and your cleaning routine more efficient.
Place a small, lidded trash can on the floor or mount it on the inside of the door. Use a liner for easy removal. Empty it regularly to avoid odors and clutter.
Choose The Right Size
A 2- to 4-gallon can fits most closets without taking up too much floor space. Measure your closet's available area before buying. A slim, rectangular can works well in tight spots.
Mount It On The Door
Use adhesive hooks or a small hanging organizer to attach the can to the inside of the closet door. This frees up floor space and keeps the can accessible. Make sure it doesn't block shelves or other items.
Keep It Lined And Clean
Use small trash bags or reuse grocery bags as liners. Change the liner frequently to prevent smells. Wipe down the can occasionally with a disinfectant wipe to keep it sanitary.
11. Use a Pegboard for Custom Tool Storage
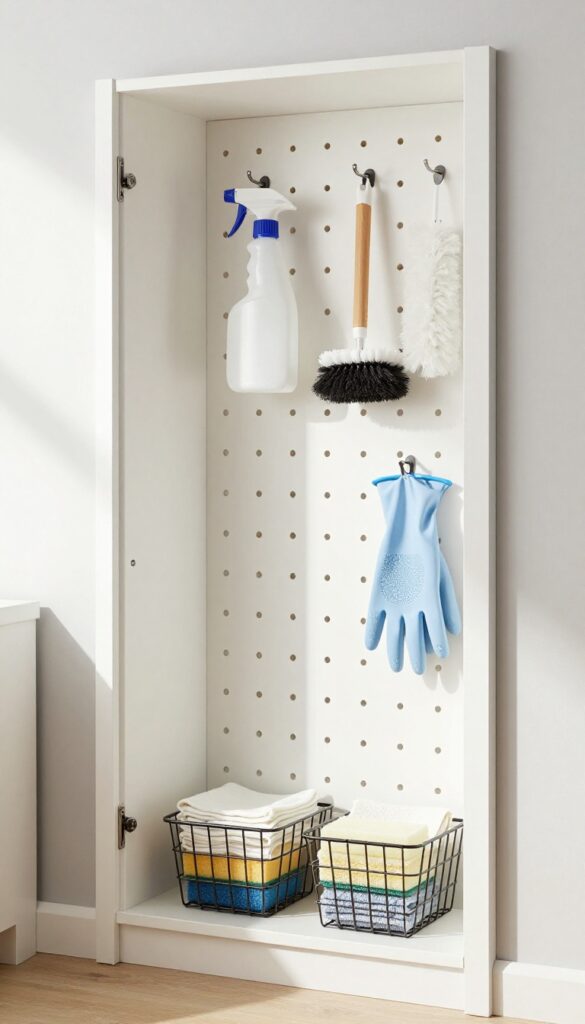
Pegboards aren't just for garages and workshops. A small pegboard mounted inside your cleaning closet can turn a blank wall into a highly flexible storage system. You can hang everything from spray bottles and scrub brushes to dusters and gloves, all within easy reach.
The beauty of a pegboard is that you can rearrange it whenever your needs change. Start with a basic layout, then tweak it as you add new tools or realize certain items are better placed elsewhere. It's a living storage solution that adapts to you.
Choose The Right Pegboard Size And Material
For most cleaning closets, a 2×4 foot pegboard is plenty. Go with tempered hardboard or metal for durability, especially if you'll be hanging heavier bottles. If your closet has a door, consider a pegboard that mounts on the inside of the door to save floor space.
Pick The Right Hooks And Accessories
Standard pegboard hooks work for most items, but add a few baskets for smaller tools like sponges, scrub pads, and dusting cloths. Cup hooks are great for hanging spray bottles by their triggers, and double hooks can hold two brooms or mops side by side. Use zip ties to secure any hooks that feel loose.
Arrange By Frequency Of Use
Place your most-used items at eye level: all-purpose cleaner, glass spray, and a microfiber cloth. Reserve the lower area for heavy bottles or tools you use less often. The top row can hold seasonal items like window squeegees or specialty brushes.
This layout keeps your daily routine fast and efficient.
12. Group Cleaning Cloths by Type
Cleaning cloths multiply fast. Before you know it, microfiber towels, old t-shirt rags, and scrubby sponges are all mixed together in one big pile. That is when you grab the nearest rag and hope it is right for the job.
A better system is to sort them by type and store each kind in its own spot.
When every cloth has a designated home, you stop wasting time digging through a heap. You also avoid using a gritty rag on a delicate surface or a microfiber cloth on a greasy mess. Grouping by type keeps your supplies organized and your surfaces safe.
Labeled Bins For Quick Picking
Use small clear bins or open baskets on a shelf. Label one bin "Microfiber" for dusting and glass, another "Rags" for spills and heavy-duty cleaning, and a third "Sponges" for dishes and counters. Clear bins let you see when you are running low, so you can grab more next time you shop.
Folding Method Matters
Fold cloths the same way every time. Microfiber towels fold neatly into thirds, then halves. Rags can be rolled.
Sponges stand upright in a small bin with holes for airflow. Uniform folding makes the bin look tidy and helps you grab one cloth without pulling out five others.
Color Coding Speeds Up Your Routine
Assign a color to each type of cloth. Blue microfiber for glass, green for general cleaning, white rags for polishing. This way you can spot the right cloth at a glance.
Color coding is especially helpful if multiple family members use the closet.
13. Keep a Caddy for Portable Cleaning
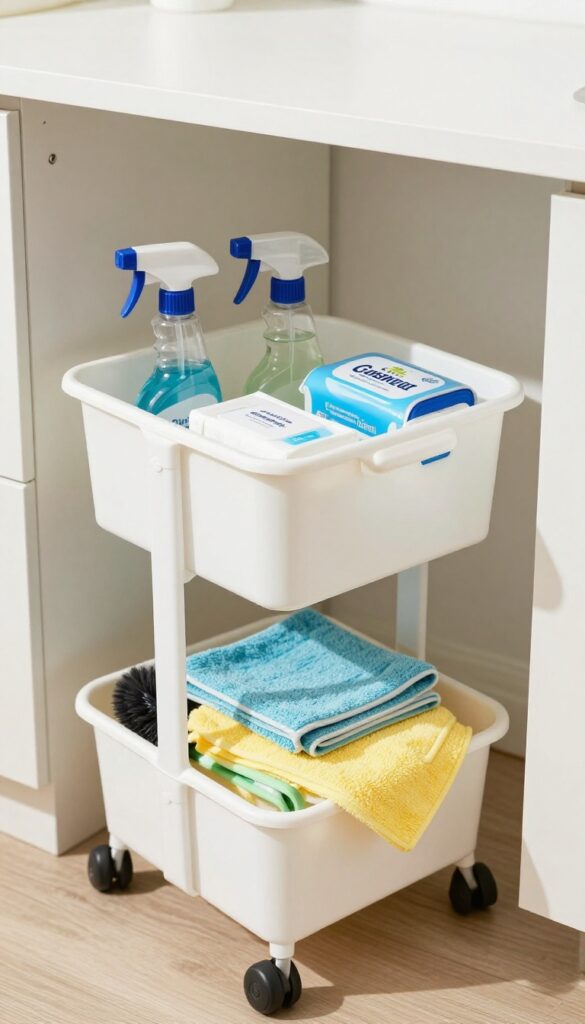
A cleaning caddy is like a grab-and-go toolkit for your home. Instead of hauling bottles and sprays from room to room, you load a caddy once and carry everything you need in one hand. This simple habit cuts down on trips back to the closet and keeps your supplies organized between uses.
Choose a sturdy caddy with a handle—plastic or metal works well. Fill it with your most-used products: all-purpose cleaner, glass spray, disinfectant wipes, a microfiber cloth, and maybe a scrub brush. Store the caddy on a low shelf or hook inside the closet so it's easy to grab.
When you finish cleaning, return the caddy to its spot and restock any empty bottles from your closet inventory.
Pick The Right Caddy
Look for a caddy with compartments or a removable tray to keep bottles upright. Avoid flimsy baskets that tip over easily. A caddy with a wide base and a comfortable handle will serve you best.
Customize By Task
Consider having multiple caddies for different purposes: one for kitchen cleaning, another for bathrooms, and a third for dusting and glass. Label each caddy so everyone in the household knows which one to grab.
Restock From Closet Stock
Keep a small bin of backup bottles in the closet. When a caddy runs low, refill it from that bin. This way your caddy is always ready to go, and you never have to hunt for supplies mid-cleaning.
14. Use a Wall-Mounted Paper Towel Holder
A wall-mounted paper towel holder is one of those small upgrades that instantly makes your cleaning closet more functional. Instead of balancing a roll on a shelf or digging for it under bottles, you can grab a sheet in one quick motion. It also frees up valuable shelf space for other essentials.
Mounting a paper towel holder inside the closet door or on an empty wall section keeps rolls accessible without cluttering shelves. Choose a sturdy model that can hold full-size rolls and allows easy tear-off. This simple change streamlines your cleaning routine and keeps the closet organized.
Where To Mount It
The inside of the closet door is prime real estate—it uses space that would otherwise go to waste. If your door is too narrow or has shelves, mount the holder on a side wall at arm height. Make sure it's within easy reach when you're holding a spray bottle or rag.
Choosing The Right Holder
Look for a holder with a horizontal bar and a built-in cutter for one-handed tearing. Stainless steel or matte black options resist rust and match most closet hardware. Avoid plastic models that can crack under the weight of a full roll.
Bonus: Store Extra Rolls Nearby
Tuck a couple of backup rolls on a high shelf or in a small bin on the floor. That way you won't have to run to the pantry when the current roll runs out. Keeping extras in the same closet maintains the convenience factor.
15. Label Everything with a Label Maker
A label maker might seem like a small luxury, but it's one of the most effective tools for keeping your cleaning supply closet organized. Clear, uniform labels eliminate guesswork and help everyone in the household know exactly where things belong. This simple step can transform a chaotic closet into a system that practically runs itself.
When every bin, shelf, and hook is labeled, putting things away becomes automatic. No more shoving a bottle of all-purpose cleaner onto the wrong shelf or wondering where the microfiber cloths go. Labels create a visual map that makes restocking and retrieving items quick and intuitive.
Choose A Consistent Label Style
Pick one font, size, and color scheme for all your labels. A uniform look not only appears polished but also makes it easier for the eye to scan. Stick with a simple sans-serif font in black on a white or light-colored background.
If you have multiple categories—like cleaners, tools, and cloths—use a subtle color coding (e. g. , blue for cleaners, green for tools) without going overboard.
Label Every Storage Zone
Go beyond just bins. Label the front of each shelf to indicate what goes there (e. g. , "Spray Cleaners" or "Scrubbing Tools"). Label hooks for aprons, gloves, or dusters.
Even label the inside of the closet door with a master list of what's where. The more specific you are, the easier it is for anyone to maintain the system.
Make Labels Durable And Easy To Update
Use a label maker that prints on waterproof, smudge-proof tape. Cleaning closets can get humid or splashed, so durability matters. If you reorganize often, consider using removable label tape or a label maker that lets you easily reprint.
Some people also use clear tape over paper labels for a budget-friendly option.
16. Add a Small Shelf for a Cleaning Caddy
A cleaning caddy is a lifesaver for quick tidy-ups, but storing it inside a packed closet can be a hassle. By installing a narrow shelf near the closet door, you give your caddy a dedicated home that's always within arm's reach. This small change eliminates the need to dig through shelves or baskets every time you want to grab your supplies.
This setup works best for daily or frequent-use items. Keep your caddy stocked with all-purpose cleaner, microfiber cloths, a scrub brush, and gloves. When you're done, simply return the caddy to its spot.
The shelf should be shallow enough to not obstruct the closet opening but deep enough to hold the caddy securely. A lip or edge on the shelf can prevent accidental bumps from knocking it off.
Choosing The Right Shelf
Look for a shelf that's at least 12 inches deep and wide enough to accommodate your caddy. Floating shelves work well because they don't take up floor space. Install it at waist height for easy access.
If your closet is narrow, consider a corner shelf or a small over-the-door rack.
Caddy Essentials
Stock your caddy with items you reach for daily. Think multi-surface cleaner, glass spray, a few rags, and a dusting tool. Avoid overfilling—keep it light enough to carry from room to room.
Rotate seasonal items as needed.
Maintaining The System
Make it a habit to restock the caddy after each use. Wipe down the shelf weekly to prevent dust buildup. If you notice the caddy is collecting items you rarely use, pare it down.
The goal is a grab-and-go system that stays clutter-free.
17. Use a Hanging Shoe Organizer for Supplies
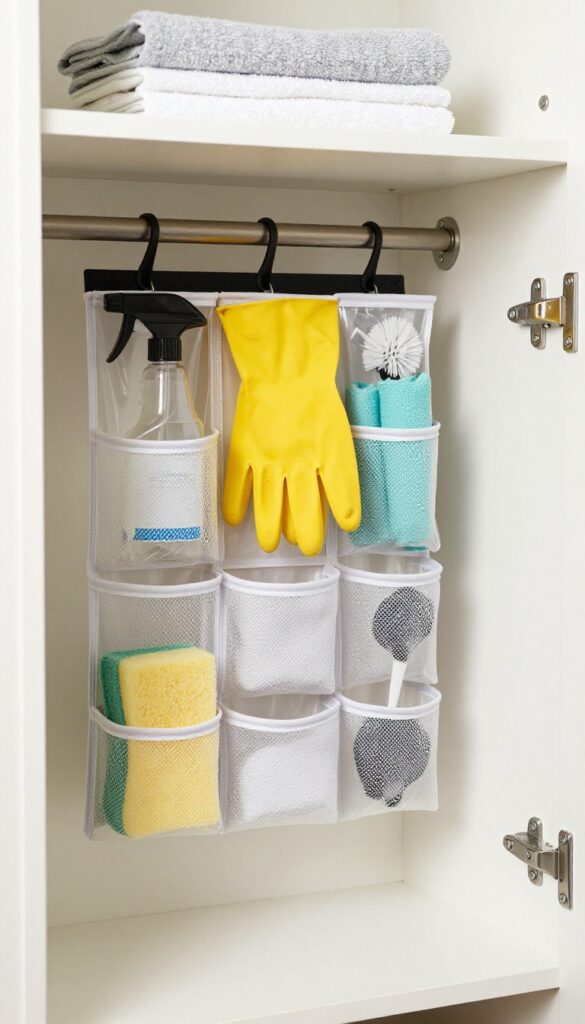
A hanging shoe organizer isn't just for shoes. It's a brilliant way to store small cleaning supplies and keep them visible and accessible. Hang it on the back of your closet door or on a wall, and each pocket becomes a dedicated spot for a different item.
Repurpose a hanging shoe organizer to store small bottles, sponges, and gloves. Each pocket holds a different item, and it hangs neatly on the back of the door. This keeps everything off shelves and makes it easy to see what you have at a glance.
Group By Frequency Of Use
Assign the top pockets to items you reach for daily, like all-purpose spray and microfiber cloths. Lower pockets can store backups or less frequently used items like specialty cleaners or scrub brushes. This way, you're not digging through everything to find what you need.
Label Each Pocket
Use a label maker or simple sticker tags to mark each pocket. Labels like "Sponges, " "Gloves, " "Glass Cleaner, " and "Dusting Spray" make it obvious where things go. This also helps family members return items to the correct spot.
Maximize Door Space
If your closet door is standard, an over-the-door shoe organizer fits perfectly without taking up floor space. For a wider door, consider a larger organizer with more pockets. Just make sure it doesn't interfere with the door closing properly.
FAQ
How do I start organizing my cleaning supply closet?
First, take everything out and sort items into categories: sprays, tools, cloths, and disposables. Then measure your space and choose storage solutions that fit your layout, like shelves, hooks, and bins.
What is the best way to store spray bottles?
Hang them by their triggers on a tension rod or use a tiered shelf to keep them upright and visible. Avoid stacking them, as that can cause leaks and make it hard to grab the one you need.
How can I maximize a small cleaning closet?
Use vertical space with door organizers, pegboards, and wall-mounted hooks. Choose clear bins to see contents, and consider a lazy Susan for deep corners. Every inch counts.
Should I keep all cleaning supplies in one closet?
It's efficient to have a central storage spot for most supplies, but you might keep a small caddy under each sink for daily use. The main closet should hold backups and less frequently used items.
How often should I declutter my cleaning supply closet?
Every three to six months. Check for expired products, empty bottles, and duplicates. Donate or toss anything you haven't used in a year to keep the space functional.
Conclusion
A well-organized cleaning supply closet doesn't just look nice—it makes your whole cleaning routine faster and less frustrating. By implementing even a few of these ideas, you'll save time and reduce clutter. Start with the changes that feel most urgent, like adding hooks for mops or labeling bins.
Over time, you can refine the system until it works perfectly for your home. Your future self will thank you every time you open that door.