15 Kitchen Cleaning Hacks for Counters Sinks and Stoves
You don't need a cabinet full of specialty cleaners to make your counters, sink, and stove sparkle. Most of these 15 kitchen cleaning hacks rely on everyday staples like baking soda, vinegar, and lemons.
Whether you're dealing with greasy stovetops, stubborn sink stains, or dull countertops, these practical methods save you time and money.
No harsh chemicals required—just smart, low-effort solutions that actually work.
1. Baking Soda Paste for Stubborn Counter Stains
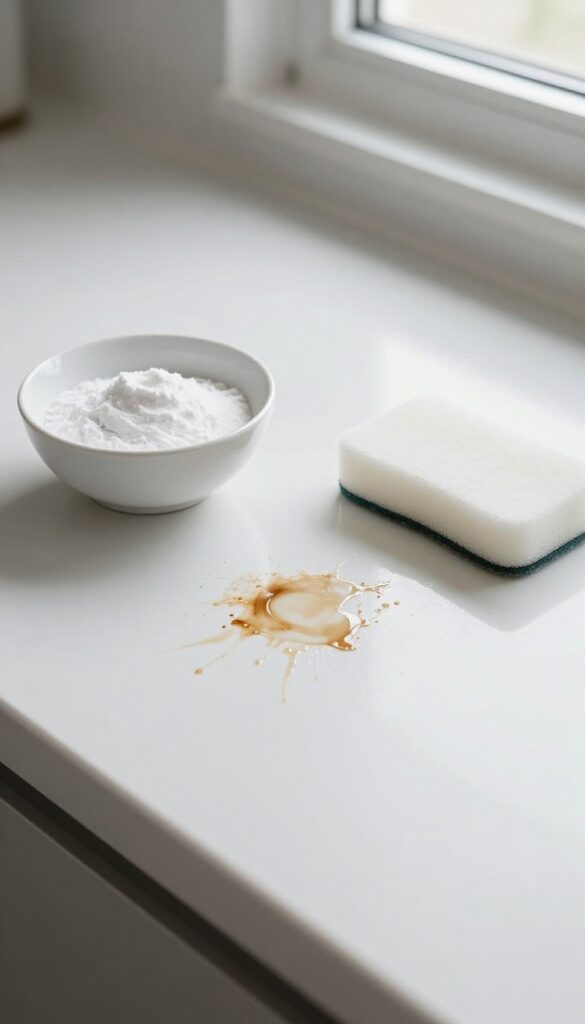
Laminate and granite counters take a beating from coffee, wine, and tomato sauce. Before you reach for harsh chemicals, try this gentle paste that lifts stains without damaging the surface. It's cheap, non-toxic, and works in minutes.
Mix three parts baking soda with one part water until it forms a spreadable paste. Apply a thick layer directly over the stain and let it sit for five minutes. Use a soft cloth or sponge to gently scrub in circular motions, then rinse with warm water and dry.
For extra stubborn marks, add a splash of white vinegar to the paste—just be ready for some fizzing action.
Why Baking Soda Works Best
Baking soda is a mild abrasive, which means it physically buffs away stains without scratching. It's also alkaline, so it neutralizes acidic stains like coffee or fruit juice. Unlike bleach or ammonia, it won't dull your counter's finish over time.
Which Countertops Can Handle It
This paste is safe for laminate, granite, quartz, and solid surface counters. Avoid it on unsealed marble or limestone—the abrasiveness can etch those softer stones. When in doubt, test on a hidden spot first.
Pro Tip For Dried-on Stains
If the stain has been sitting for hours, cover the paste with plastic wrap to keep it from drying out. Let it sit for 15 minutes instead of five. The extra moisture helps rehydrate the stain so the baking soda can lift it more easily.
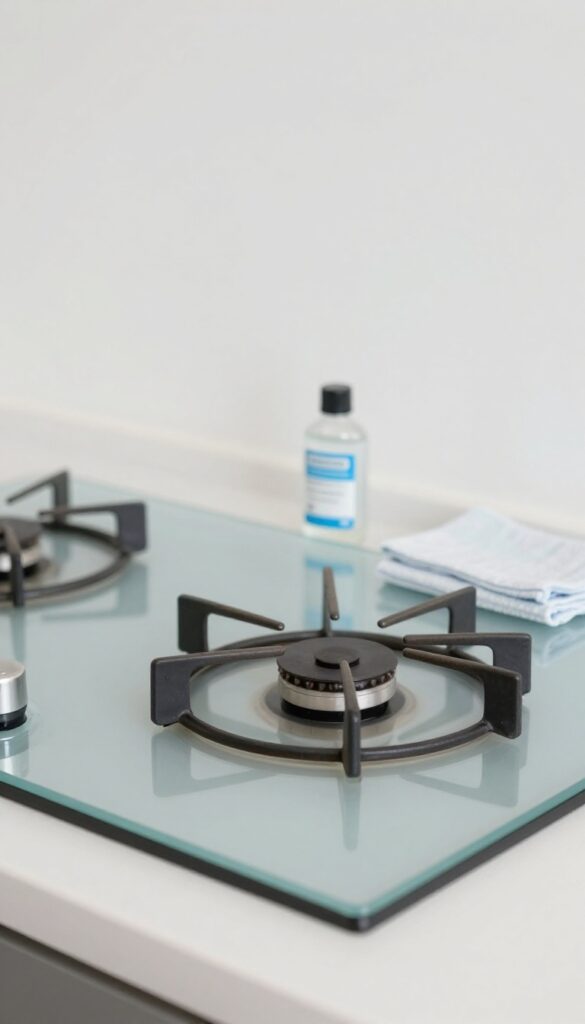
2. Vinegar and Dish Soap Spray for Greasy Stovetops
Stovetop grease can feel like a losing battle, especially after frying or sautéing. But a simple homemade spray cuts through that grime without harsh fumes or expensive products. Mix equal parts white vinegar and water, add a few drops of dish soap, and you have a degreaser that works as well as anything from the store.
The vinegar breaks down grease, while the soap lifts it away for easy wiping.
This spray is safe for most stovetops, including ceramic, glass, and stainless steel. Just avoid using it on unsealed stone or porous surfaces. Always spray onto a cool stovetop to prevent damage from thermal shock.
Let the solution sit for a minute to loosen baked-on residue, then wipe with a microfiber cloth. For stubborn spots, a soft sponge or non-abrasive scrubber can help without scratching.
Why This Combo Works So Well
Vinegar is acidic, which dissolves grease and mineral deposits. Dish soap contains surfactants that trap oil particles so they rinse away easily. Together, they create a powerful yet gentle cleaner that's safe for daily use.
How To Apply For Best Results
Fill a spray bottle with one cup of water, one cup of white vinegar, and a teaspoon of dish soap. Shake gently to combine. Spray generously over the cool stovetop, focusing on greasy areas.
Let it sit for 60 seconds, then wipe with a damp microfiber cloth. Rinse the cloth frequently to avoid spreading grease.
Tips For Extra Stubborn Grime
For burnt-on food or dried grease, spray the area and cover with a damp paper towel for 10 minutes. This softens the residue. Then scrub gently with a non-abrasive pad.
For gas stove grates, remove them and soak in hot water with a squirt of dish soap before spraying.
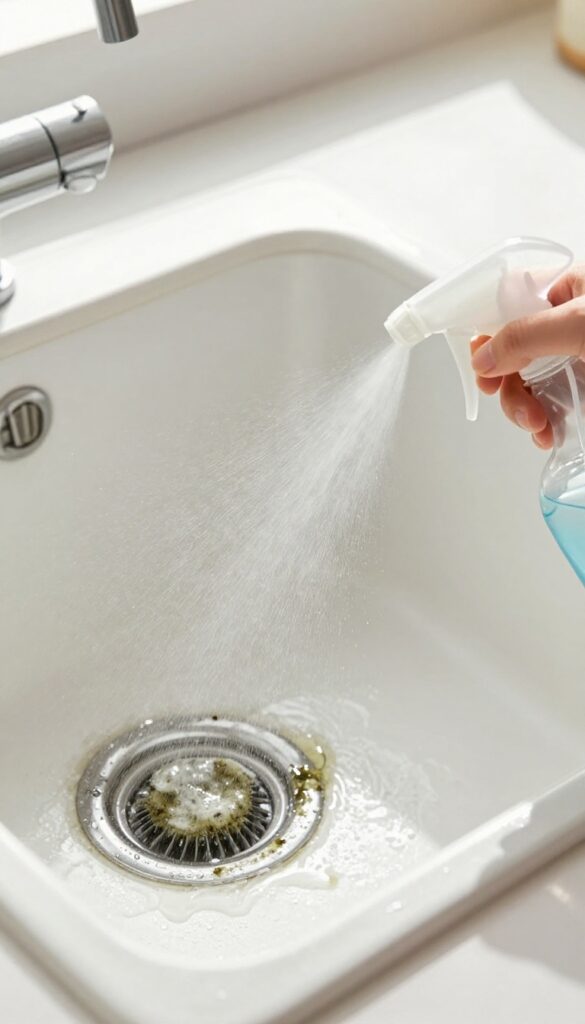
3. Lemon and Salt Scrub for Stainless Steel Sinks
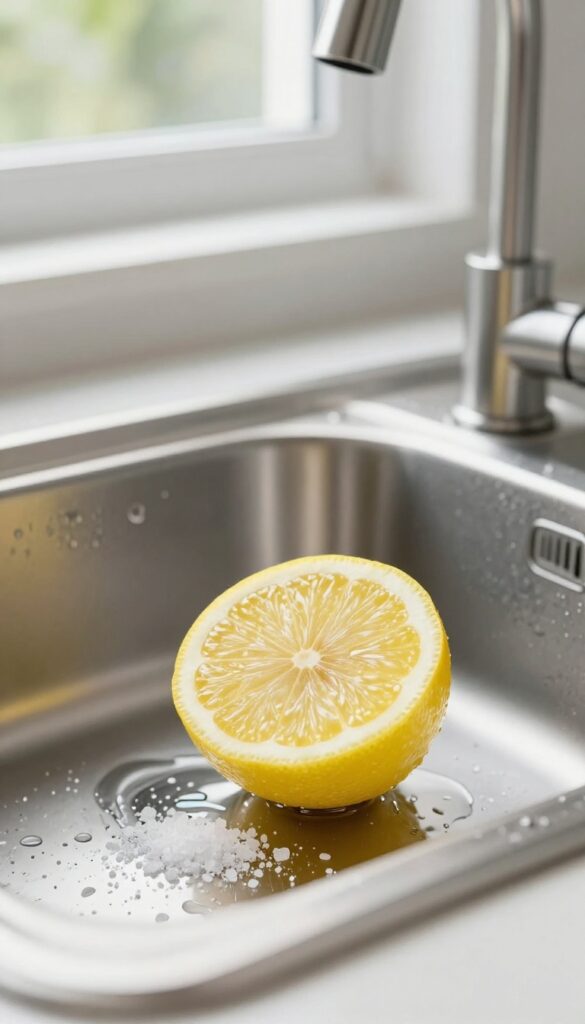
Stainless steel sinks look great when they're clean, but water spots and grime build up fast. A lemon and salt scrub is a simple, chemical-free way to restore that bright shine. The natural acidity cuts through grease and mineral deposits, while the salt provides gentle abrasion without scratching.
Why This Combo Works So Well
Lemons contain citric acid, which breaks down soap scum, hard water stains, and grease. Salt acts as a mild scrubbing agent that lifts grime without damaging the metal. Together, they create a paste that polishes the surface and leaves a fresh citrus scent.
Step-by-step: How To Scrub Your Sink
Cut a lemon in half and sprinkle a generous amount of salt onto the cut side. Scrub the sink in circular motions, focusing on stained or dull areas. Let the mixture sit for a minute, then rinse thoroughly with warm water.
Dry with a soft cloth to prevent new water spots.
Extra Tips For Best Results
Use coarse kosher or sea salt for better abrasion. For tough stains, add a splash of white vinegar to the lemon half. Avoid using this method on sinks with protective coatings or antique finishes.
Always rinse well to prevent salt residue from dulling the surface.
4. Hydrogen Peroxide and Baking Soda for Grout Lines
Grout lines between counter tiles are notorious for trapping dirt and turning dingy. Instead of scrubbing with harsh bleach, try a gentler duo: hydrogen peroxide and baking soda. This simple paste lifts stains without damaging the grout or surrounding surfaces.
Mix baking soda and hydrogen peroxide to form a thick paste. Apply it directly onto the grout lines, let it sit for about 10 minutes to break down grime, then scrub with an old toothbrush. Rinse with water and wipe dry.
For stubborn stains, let the paste sit longer or add a few drops of dish soap.
Why This Combo Works
Hydrogen peroxide is a mild bleach that whitens and disinfects, while baking soda provides gentle abrasion. Together, they create a fizzing action that loosens dirt deep within the grout pores. Unlike chlorine bleach, hydrogen peroxide won't yellow or weaken grout over time.
Application Tips For Best Results
Use a small brush or even a toothbrush to work the paste into the grout lines. Cover a small section at a time to prevent drying. After scrubbing, rinse thoroughly with water and blot excess moisture.
For extra whitening, repeat weekly until grout brightens.
When To Avoid This Method
Avoid using on unsealed or porous natural stone tiles like marble or travertine, as hydrogen peroxide can etch the surface. Test on an inconspicuous area first. If you see any reaction, switch to a baking soda and water paste instead.
5. Rubbing Alcohol for Glass Stovetop Burn Marks
Glass stovetops look sleek, but they show every burnt-on spill and crusty mark. Before you reach for harsh scrubbers that can scratch the surface, grab a bottle of rubbing alcohol. It cuts through baked-on residue without leaving streaks or damaging the glass.
Rubbing alcohol is a surprisingly effective cleaner for glass cooktops. Its fast evaporation means no smears, and it dissolves the greasy, burnt film that regular cleaners sometimes miss. Just dampen a microfiber cloth with isopropyl alcohol (70% or higher) and wipe the surface.
For tough, stubborn burn marks, let the alcohol sit on the spot for about a minute to loosen the grime, then wipe away. Repeat if needed. Unlike vinegar, alcohol won't leave a lingering smell, and it disinfects as it cleans.
Why It Works So Well
Rubbing alcohol is a solvent that breaks down the polymerized oils and sugars that create those dark, stubborn burn marks. Its low surface tension lets it seep into microscopic cracks, lifting residue that water-based cleaners can't touch. Plus, it evaporates completely, so there's no need to buff dry.
Step-by-step Application
Start with a cool stovetop. Pour a small amount of rubbing alcohol onto a clean microfiber cloth—not directly on the glass. Wipe in a circular motion over the entire cooktop.
For caked-on spots, place the alcohol-soaked cloth over the mark and let it sit for 30-60 seconds. Then wipe firmly. Finish by going over the surface with a dry section of the cloth to pick up any loosened residue.
Safety Tips
Always ensure the stovetop is completely cool before cleaning to avoid alcohol vapors igniting. Keep the area well-ventilated. Never use rubbing alcohol on a hot surface.
Also, avoid using it on painted or sealed surfaces nearby, as it can damage the finish.
6. Olive Oil and Vinegar for Wood Countertops
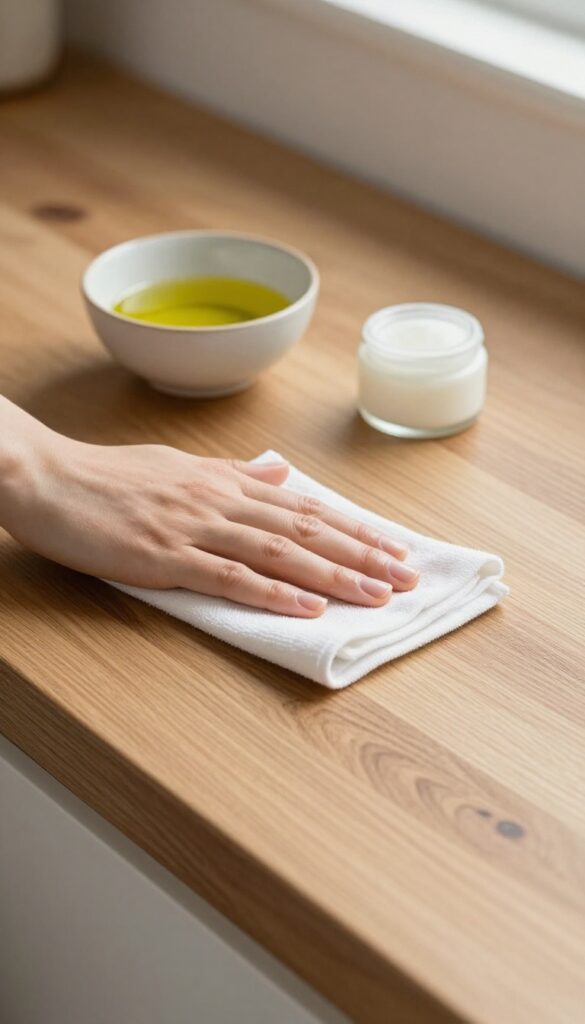
Wood countertops add warmth to a kitchen, but they need gentle care. Harsh cleaners can strip the finish and dry out the wood. A simple mix of olive oil and white vinegar conditions and cleans in one step, leaving the surface with a natural sheen.
Combine equal parts olive oil and white vinegar in a small bowl. Dip a soft cloth into the mixture, then wring it out so it's damp, not wet. Wipe the countertop following the grain, covering a small section at a time.
Let it sit for a minute, then buff with a dry cloth until the surface looks even and glossy. This treatment works best on sealed wood; avoid using it on unsealed or butcher block counters that may absorb oil unevenly.
Why This Combo Works
White vinegar cuts through grease and light grime without leaving residue. Olive oil penetrates the wood to replenish moisture and enhance the grain. Together they clean and condition, so you don't need separate products.
Application Tips
Use a microfiber or lint-free cloth to avoid streaks. Apply the mixture sparingly—too much oil can feel sticky. Buff thoroughly to remove excess; a light coat is all you need.
Repeat every few weeks or when the wood looks dry.
What To Avoid
Don't use this on unsealed or raw wood, as oil can cause dark spots. Avoid lemon juice or other acids that might dull the finish. Test on a hidden area first to make sure the wood reacts well.
7. Ketchup for Copper or Brass Sink Fixtures
If your copper or brass faucets and handles have lost their shine, you don't need a specialty metal polish. Ketchup is surprisingly effective at removing tarnish and restoring that warm glow. The acidity in the tomatoes works to dissolve oxidation, leaving your fixtures looking like new.
Squeeze a small amount of ketchup onto a soft cloth and rub it onto the tarnished areas of your faucet or handles. Let it sit for about 5 minutes—longer if the tarnish is heavy. Then rinse thoroughly with warm water and buff dry with a clean cloth.
You'll see the difference immediately.
Why Ketchup Works
Ketchup contains vinegar and tomato acids, both of which are mild enough not to damage metal but strong enough to break down tarnish. The thick texture also helps it cling to vertical surfaces like faucet necks, so you don't have to hold it in place.
Best Fixtures For This Hack
This method works best on solid copper or brass fixtures. It's also safe for brass-plated items, but test a small hidden area first. Avoid using it on lacquered brass, as the acid can damage the protective coating.
Aftercare Tips
Once your fixtures are clean, rinse them well to remove any ketchup residue. Dry with a soft towel to prevent water spots. For ongoing shine, wipe them down with a microfiber cloth after each use.
8. Dishwasher Tablet for Oven Grease
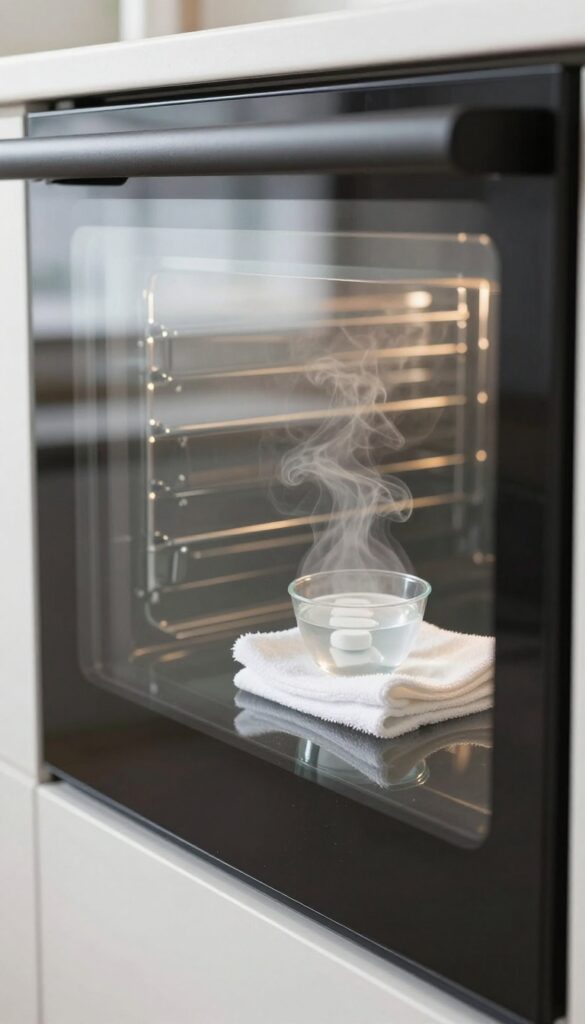
Oven grease can be stubborn, but a dishwasher tablet cuts through it like magic. Drop one tablet into a small bowl of hot water, let it dissolve, and you have a powerful degreaser ready to wipe away baked-on grime. It's a simple trick that saves you from scrubbing for hours.
Dishwasher tablets contain enzymes and surfactants designed to break down tough food residue. When dissolved in hot water, they create a solution that works wonders on oven surfaces. This hack is especially useful for glass oven doors and interior walls where grease accumulates.
How To Use
Fill a small heat-safe bowl with very hot water. Drop in one dishwasher tablet and let it dissolve completely—this takes about a minute. Dip a sponge or microfiber cloth into the solution, wring it out slightly, and wipe down greasy oven surfaces.
Avoid letting the solution sit too long on aluminum parts to prevent discoloration.
Why It Works
Dishwasher tablets are formulated to emulsify grease and lift stuck-on food. The hot water activates the cleaning agents, making them more effective. Unlike harsh oven cleaners, this solution is milder on your hands and the environment, yet still tough on grime.
Pro Tips
For extra-stubborn spots, let the solution sit on the grease for 5–10 minutes before wiping. Always rinse the surface with a damp cloth afterward to remove any residue. Test on a small hidden area first if you have a coated or specialty oven surface.
9. Cornstarch for Greasy Countertops
Greasy countertops are a constant battle, especially near the stove. You might reach for a spray cleaner, but cornstarch works just as well—and it's probably already in your pantry. This fine powder acts like a magnet for oil, lifting it off surfaces without scrubbing.
Cornstarch is a surprisingly effective degreaser that works by absorbing oil on contact. It's gentle on all countertop materials, including granite, quartz, and laminate, and leaves no scratches or residue. Best of all, it's non-toxic and safe around food.
How To Use It
Sprinkle a generous layer of cornstarch directly onto greasy spots. Let it sit for 3–5 minutes so it can soak up the oil. Then, wipe it away with a dry microfiber cloth.
Follow with a damp cloth to remove any powdery residue, and your countertops will be streak-free.
Why It Works So Well
Cornstarch is a fine, absorbent powder that clings to grease molecules. Unlike harsh degreasers that rely on chemicals to break down oil, cornstarch physically lifts it away. This makes it ideal for delicate surfaces that can't handle strong cleaners.
Pro Tips
For extra-stubborn grease, make a paste with a little water and apply it like a mask. Let it dry completely before wiping off. You can also mix cornstarch with baking soda for a gentle scrub on baked-on messes.
Always test on a small hidden area first if you're unsure about your countertop's finish.
10. Club Soda for Fresh Spills on Stone Counters
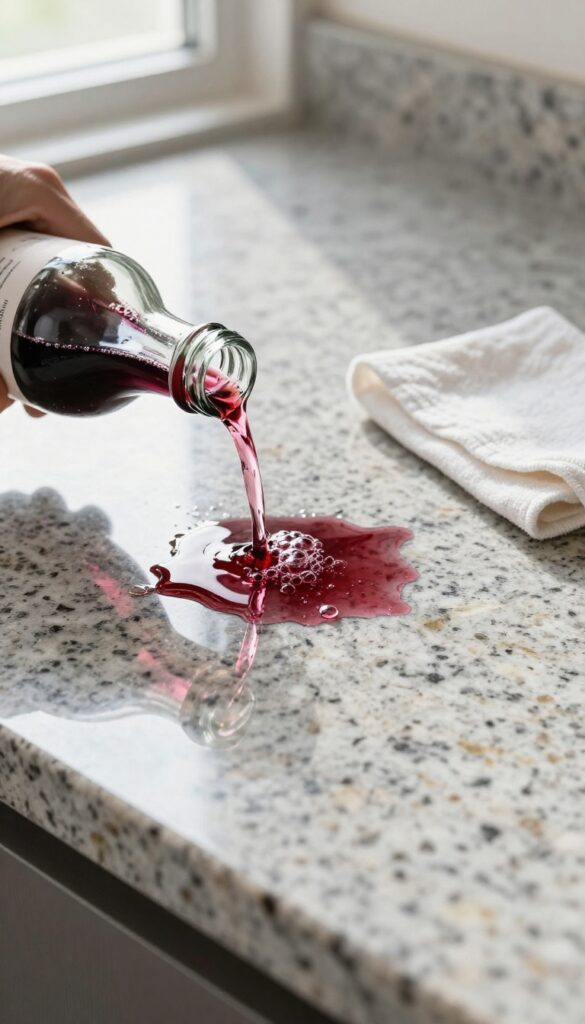
Stone countertops like granite and quartz are durable, but they can be sensitive to harsh cleaners. When you spill something acidic or sticky, reach for club soda instead of a spray bottle. The bubbles do the heavy lifting without stripping the sealant or leaving residue.
Club soda is a surprisingly effective cleaner for sealed stone surfaces. Its carbonation helps lift dirt and grime from the pores, while the mild alkaline nature neutralizes acidic spills like wine or citrus juice. Simply pour a small amount directly on the spill, let it fizz for a few seconds, then blot with a soft cloth.
No scrubbing needed. This method is safe for daily use and won't dull the finish. Just avoid using it on unsealed stone, as moisture can seep in and cause damage.
Why Club Soda Works
The carbonation in club soda creates gentle agitation that dislodges particles from the stone's surface. Unlike vinegar or lemon juice, which can etch the sealant over time, club soda is pH-neutral and won't compromise the protective layer. It's also free of dyes and fragrances that might stain porous stone.
How To Use It Right
For fresh spills, pour a small amount of club soda directly onto the spot. Let it bubble for 10–15 seconds. Blot with a soft, lint-free cloth—don't wipe, as that can spread the spill.
Repeat if needed. For dried-on messes, dampen a cloth with club soda and let it sit on the stain for a minute before blotting. No rinsing is necessary; the residue evaporates cleanly.
When To Skip This Hack
Avoid club soda on unsealed or porous stone like limestone or marble. These materials can absorb moisture and develop water spots. Also, don't use it on hot surfaces, as thermal shock can crack the stone.
Always test in an inconspicuous area first.
11. Toothpaste for Scratches on Stainless Steel Sinks
Stainless steel sinks look great when new, but scratches from pots and pans can make them look tired. Before you replace the sink, try a simple trick with toothpaste. It's a gentle abrasive that can buff out fine scratches and restore shine.
Why Toothpaste Works
Non-gel toothpaste contains mild abrasives like calcium carbonate or silica. These particles are fine enough to polish metal without causing further damage. The paste also helps lubricate the surface, reducing friction as you buff.
Step-by-step Application
Start with a clean, dry sink. Squeeze a pea-sized amount of non-gel white toothpaste onto a soft microfiber cloth. Rub the toothpaste into the scratch using circular motions for about 30 seconds.
Wipe away residue with a damp cloth, then buff dry with a clean cloth. Repeat if needed.
When To Skip This Hack
Deep gouges or scratches that catch your fingernail won't disappear with toothpaste. In those cases, you may need a stainless steel scratch repair kit or professional refinishing. Also avoid gel toothpaste or ones with whitening crystals, as they can be too harsh.
12. Cream of Tartar for Aluminum Stovetop Stains

Aluminum burner covers on gas stoves can develop stubborn, dark stains over time. Before you replace them, try a simple paste made from cream of tartar and lemon juice. This natural combination gently lifts discoloration without scratching the metal.
Why It Works
Cream of tartar is a mild acid that reacts with aluminum to break down oxidized stains. Lemon juice adds extra acidity and a fresh scent. Together, they create a gentle abrasive paste that polishes the surface without damaging it.
Step-by-step Application
Mix 1 tablespoon of cream of tartar with enough lemon juice to form a thick paste. Apply it to the stained areas of the burner covers using a soft cloth or sponge. Let it sit for 10 minutes, then scrub gently with a non-abrasive pad.
Rinse thoroughly with water and dry.
Tips For Best Results
For extra stubborn stains, let the paste sit for up to 30 minutes. Avoid using steel wool or harsh scrubbers, as they can scratch aluminum. This method works on aluminum pots and pans too.
13. Dryer Sheets for Burnt-On Food on Stove Grates

Stove grates take a beating. Burnt-on food and grease can turn them into a scrubbing nightmare. But here’s a trick that sounds almost too easy: a used dryer sheet.
The fabric softener in dryer sheets contains surfactants that help break down baked-on grime. Combined with a little water and patience, this hack cuts through stubborn residue without harsh scrubbing or chemicals.
How It Works
Place a dryer sheet directly over the burnt-on spots on your stove grates. Wet the sheet thoroughly with warm water and let it sit for 15 minutes. The softener chemicals loosen the carbonized food, making it much easier to wipe or scrub away.
Best Results
Use a fresh or used dryer sheet—both work. For extra tough grime, add a few drops of dish soap under the sheet. After soaking, scrub with a non-abrasive sponge or brush.
Rinse well and dry.
Why It’s Better
No harsh fumes, no soaking in chemical cleaners. This method is gentle on the metal finish and your hands. Plus, it repurposes something you’d normally throw away.
14. Baby Oil for Water Spots on Stainless Steel
Water spots on stainless steel can make a clean sink or faucet look dull and streaky. Hard water minerals are usually the culprit, leaving behind cloudy marks that resist regular wiping. Baby oil offers a surprisingly effective fix—it dissolves those mineral deposits and leaves a protective sheen that repels future spots.
Baby oil is mostly mineral oil, which gently breaks down water mineral deposits without scratching the surface. It also fills in microscopic pores in the metal, creating a smooth barrier that water beads up on instead of drying into spots. This hack works on sinks, faucets, and even stainless steel appliances.
How To Apply It
Start with a clean, dry stainless steel surface. Put a few drops of baby oil on a soft microfiber cloth—you only need a small amount. Rub it into the metal in the direction of the grain, covering all the water-spotted areas.
Then buff with a dry section of the cloth until the surface looks clear and shiny. No rinsing needed.
Why It Beats Commercial Polishes
Many stainless steel cleaners contain harsh chemicals or abrasives that can dull the finish over time. Baby oil is gentle, inexpensive, and already in most homes. It doesn't leave a sticky residue, and the thin layer of oil helps prevent new water spots from forming.
You'll notice your sink stays cleaner longer between wipes.
Tips For Best Results
Use a dedicated microfiber cloth to avoid transferring grease or dirt. If your sink has heavy buildup, clean it first with a mild soap and water, then dry thoroughly before applying the oil. Reapply every week or two, or whenever you see water spots returning.
Avoid using too much oil—a few drops go a long way.
15. Tea Tree Oil Spray for Moldy Sink Caulk
Moldy caulk around the sink is not only unsightly but also a health concern. Instead of harsh bleach, try tea tree oil—a natural antifungal that kills mold at the root. This simple spray is gentle on your sink and safe for your family.
To make the spray, mix 1 teaspoon of tea tree oil with 1 cup of water in a spray bottle. Shake well before each use. Spray the solution directly on the moldy caulk and let it sit for 10 minutes.
Then scrub with a stiff brush or an old toothbrush. Rinse with water and dry with a clean cloth. Repeat this process weekly to prevent mold from coming back.
Tea tree oil is potent, so a little goes a long way. Store the spray in a cool, dark place to maintain its effectiveness.
Why Tea Tree Oil Works
Tea tree oil contains terpinen-4-ol, a compound that kills mold spores and prevents regrowth. Unlike bleach, it penetrates porous caulk and doesn't produce toxic fumes. It's also safe for septic systems and won't damage sink surfaces.
Application Tips For Best Results
For stubborn mold, let the spray sit for 15-20 minutes before scrubbing. Use a brush with stiff bristles to reach into crevices. After scrubbing, wipe away residue with a damp cloth.
Always test on a small, hidden area first to ensure no discoloration.
Preventive Maintenance
To keep mold at bay, spray the caulk weekly as part of your cleaning routine. Also, ensure your sink area stays dry—wipe down caulk after washing dishes and fix any leaks promptly. Good ventilation helps too.
FAQ
Can I use these hacks on all countertop materials?
Most hacks are safe for common materials like granite, laminate, stainless steel, and sealed wood. Always test a small hidden area first, especially with acidic ingredients like vinegar or lemon on delicate stone.
How often should I clean my kitchen counters with these methods?
For daily upkeep, a quick wipe with dish soap and water works. Use these hacks weekly or as needed for deep cleaning stains, grease, or grime buildup.
Are these hacks safe for septic systems?
Yes, all ingredients like baking soda, vinegar, and lemon are septic-safe. Avoid harsh chemicals and excessive amounts of oil, which can cause issues.
What if a hack doesn't work on my stovetop?
Some stovetops have special coatings (e. g. , ceramic or induction). Check your manufacturer's guidelines. For stubborn messes, let the solution sit longer or repeat the process.
Can I mix different hacks together?
It's best to use one hack at a time. Mixing ingredients like vinegar and hydrogen peroxide can create harmful fumes. Stick to the recipe provided.
Conclusion
Keeping your kitchen counters, sink, and stove clean doesn't have to be a battle. These 15 hacks prove you can tackle grime with everyday items you already own, saving both time and money.
Pick a few that fit your routine and stick with them. Your kitchen will stay fresher longer, and you'll spend less effort on deep cleans down the road.