23 Cleaning Oven Tips for Baked Mess and Grease Spots
A baked-on mess in your oven can turn a simple cooking task into a frustrating ordeal. Grease spots and burnt food don't just look unappealing—they can also cause smoke and unpleasant odors the next time you preheat.
But scrubbing for hours isn't the only solution. These 23 cleaning oven tips tackle everything from stubborn residue to greasy glass, using ingredients you likely already have at home.
Whether you're dealing with a recent spill or months of buildup, you'll find a method that works without damaging your appliance or your sanity.
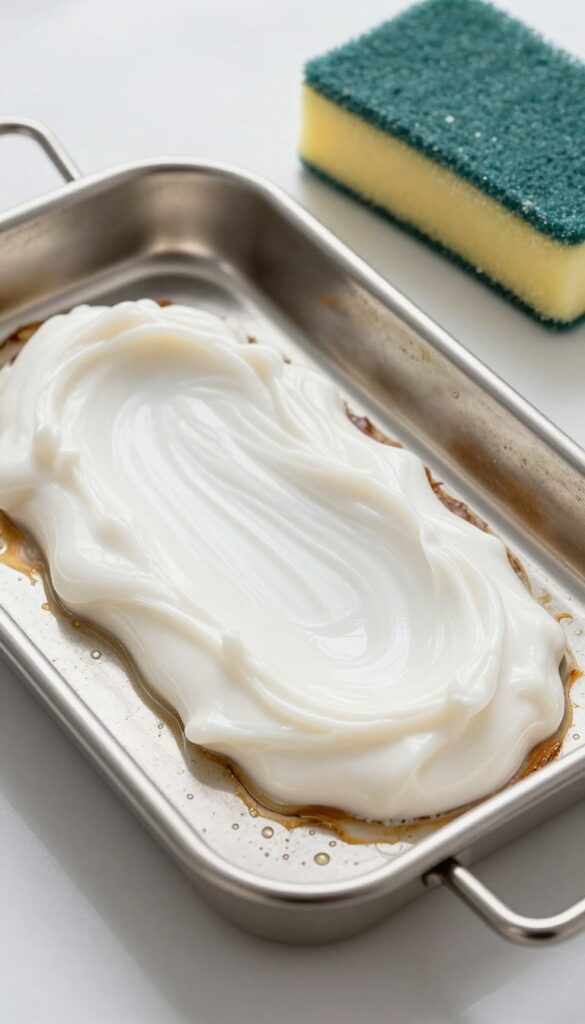
1. Use Baking Soda and Vinegar Paste
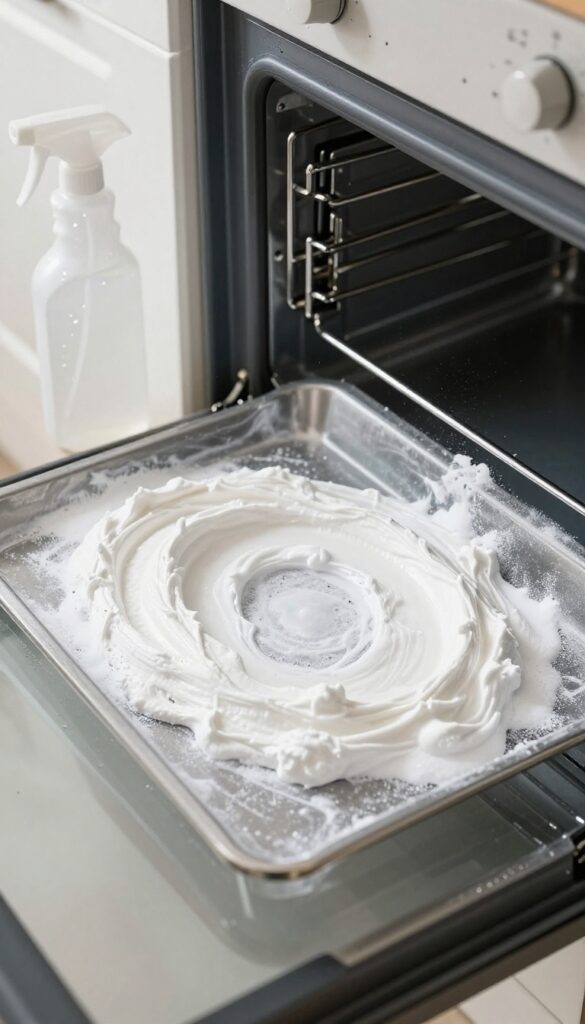
Baking soda and vinegar are a classic duo for a reason—they work. The gentle abrasiveness of baking soda lifts grime without scratching, while vinegar reacts to create foam that loosens stubborn residue. This method is cheap, non-toxic, and surprisingly effective on baked-on messes.
To start, remove oven racks and wipe away loose debris. Mix half a cup of baking soda with a few tablespoons of water until you get a spreadable paste. Apply the paste to all interior surfaces, avoiding heating elements.
Let it sit overnight or for at least 12 hours. The next day, spray white vinegar over the dried paste—it will fizz and bubble. Wipe clean with a damp cloth, rinsing frequently.
Why This Combo Works
Baking soda is mildly alkaline, which helps break down grease and food particles. Vinegar is acidic, and the reaction between the two creates carbon dioxide bubbles that physically lift grime away from surfaces. Together, they tackle both fresh spills and stubborn baked-on layers without harsh chemicals.
Pro Tips For Best Results
For extra-stubborn spots, let the paste sit longer—up to 24 hours. Use a plastic scraper or spatula to gently lift thick residue after the vinegar spray. Avoid using too much water, as excess moisture can drip into oven vents.
Always rinse thoroughly to remove any paste residue before using the oven.
Safety First
Never spray vinegar or apply paste near heating elements or the oven light. Keep the oven door open while the paste sits to allow air circulation. If you have a self-cleaning oven, check the manual—some coatings can be damaged by prolonged exposure to baking soda.
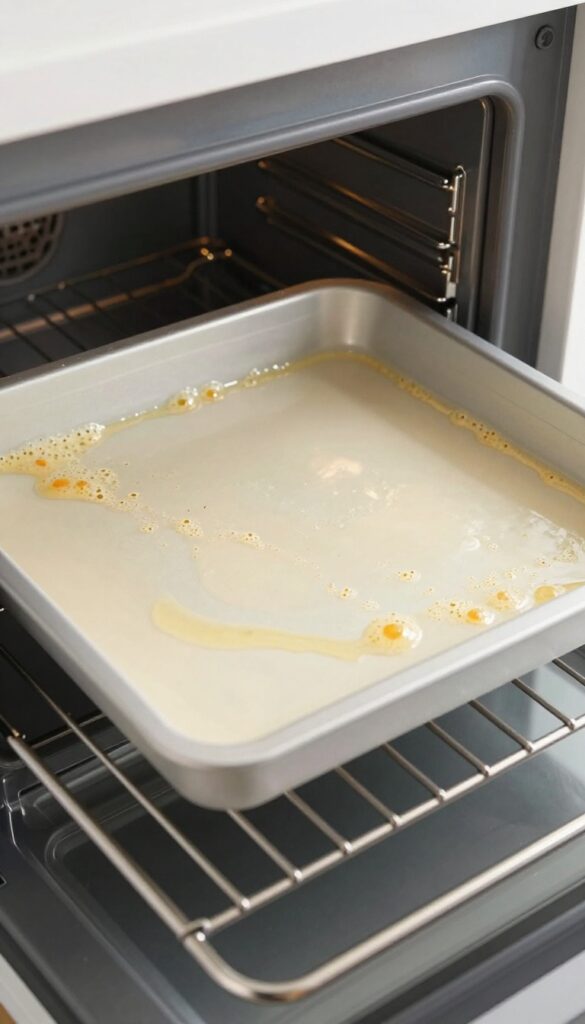
2. Steam Clean with a Bowl of Water and Lemon
Steam is a powerful, chemical-free way to loosen baked-on grease and food residue. Adding lemon not only boosts the cleaning action but also leaves your oven smelling fresh. This method works best for light to moderate buildup and is especially useful when you want to avoid harsh fumes.
This gentle yet effective technique uses steam to soften grime, making it easy to wipe away. It's perfect for a quick refresh between deep cleans or when you need to remove fresh spills before they bake on further.
How It Works
The combination of heat and steam softens dried food and grease, while the lemon's natural acidity helps break down stubborn spots. As the water evaporates, it creates a moist environment that loosens debris without scrubbing.
Step-by-step Instructions
Fill an oven-safe bowl with about 2 cups of water. Add a few lemon slices or a tablespoon of lemon juice. Place the bowl on the middle rack and heat the oven to 250°F.
Let it run for 30 minutes, then turn off the oven and let it cool slightly. Open the door and wipe down the interior with a damp cloth or sponge. For extra stubborn spots, use a non-abrasive scrubber.
When To Use This Method
This steam cleaning is ideal for routine maintenance after cooking greasy dishes or roasting. It's also a great first step before applying a baking soda paste for deeper cleaning. Avoid it if your oven has a self-cleaning feature that you plan to use soon, as the moisture can interfere.
3. Scrape with a Plastic Razor Blade
Sometimes a little elbow grease isn't enough—you need a tool that can physically lift burnt-on gunk without damaging your oven. That's where a plastic razor blade comes in. Unlike metal scrapers, plastic won't scratch glass doors or enamel surfaces, making it perfect for stubborn spots that won't budge with cleaners alone.
A plastic razor blade is a game-changer for removing baked-on food and grease. It's safe for glass, ceramic, and most oven interiors. Use it gently at a low angle to avoid gouging.
For best results, soften the residue first with a steam or baking soda paste, then scrape.
Why Plastic Over Metal?
Metal blades can leave permanent scratches on glass oven doors and enamel surfaces. Plastic is firm enough to lift crusted food but soft enough to avoid damage. It's also safer to handle and less likely to cause injury if you slip.
How To Use A Plastic Scraper Safely
Always hold the scraper at a 30- to 45-degree angle and push away from your body. Work on cooled surfaces only. If you're scraping a glass door, spray a little cleaner or water first to lubricate—this reduces friction and helps the blade glide.
Where To Find Plastic Razor Blades
You can buy packs of plastic razor blades online or at hardware stores. They're often sold as paint scrapers or stovetop cleaning tools. Some come with a handle, or you can use a standard razor holder.
Keep a few on hand for quick cleanups.
4. Try a Commercial Oven Cleaner Spray
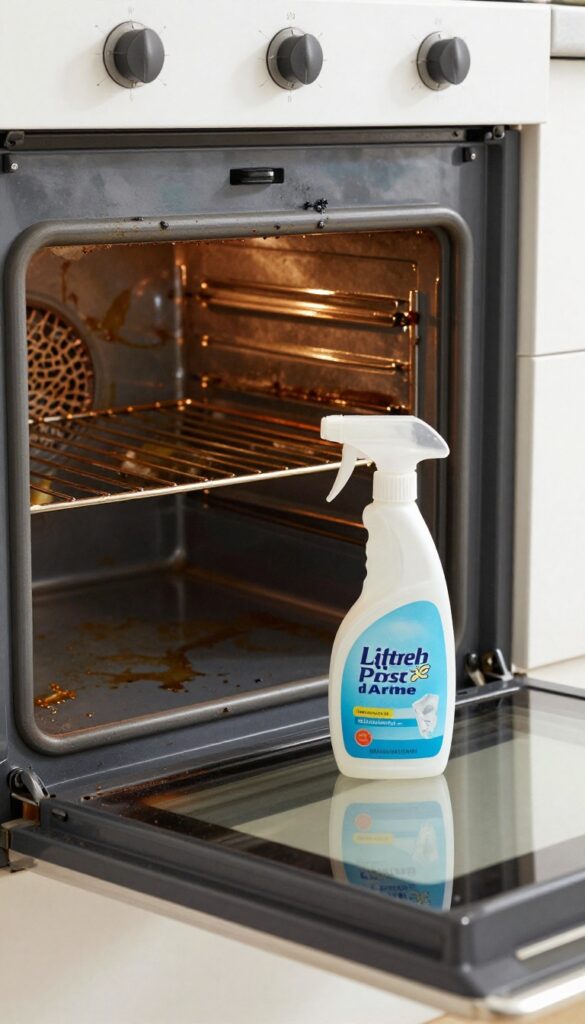
When natural methods fall short, a commercial oven cleaner spray can be your best friend. These heavy-duty formulas are designed to cut through the toughest baked-on grease and carbonized food without requiring hours of scrubbing. Just spray, wait, and wipe—it's that simple.
Not all oven messes can be solved with baking soda and vinegar. For those stubborn, burnt-on stains that have been building up for months, a commercial cleaner like Easy-Off is a reliable solution. The key is to follow the instructions carefully: apply the spray evenly, let it sit for the recommended time (usually 15-20 minutes for standard cleaning, or longer for heavy buildup), and then wipe away the grime with a damp cloth or sponge.
Always wear gloves and ensure good ventilation, as these products contain strong chemicals. For best results, use a non-abrasive scrubber to gently lift any remaining residue. This method saves time and effort, leaving your oven looking nearly new.
Choosing The Right Cleaner
Look for a spray that specifically targets baked-on grease and carbon. Easy-Off Fume Free Oven Cleaner is a popular choice for indoor use because it has a milder smell. For extra-stubborn spots, the original formula works faster but requires more ventilation.
Check the label to ensure it's safe for your oven type—self-cleaning or standard.
Application Tips For Best Results
Before spraying, remove oven racks and any loose debris. Spray the cleaner generously on the soiled areas, avoiding heating elements and the oven door seal. Let it sit for the maximum recommended time to soften the grime.
Then, use a damp sponge or microfiber cloth to wipe away the loosened mess. Rinse the surface with water to remove any chemical residue.
Safety Precautions
Always wear rubber gloves and work in a well-ventilated area. Open a window or turn on the kitchen exhaust fan. Keep the cleaner away from your eyes and skin.
If you have a gas oven, avoid spraying the gas ports or pilot light. After cleaning, run the oven at a low temperature for a few minutes to burn off any remaining fumes before cooking.
5. Clean the Oven Door Glass with a Paste
Oven door glass often gets overlooked, but it's one of the first places grease and grime show up. A simple paste can cut through that cloudy film without scratching the surface. This method uses everyday ingredients and takes just 15 minutes of wait time.
Baking soda and dish soap form a gentle but effective cleaning paste. The baking soda provides mild abrasion to lift baked-on grease, while the dish soap breaks down oils. Together, they tackle the stubborn residue that makes your oven door look dirty even after wiping.
Making The Paste
Mix equal parts baking soda and dish soap in a small bowl until it forms a spreadable paste. You want it thick enough to stay on the glass without dripping. A ratio of about 3 tablespoons each should cover a standard oven door.
Applying And Waiting
Spread the paste evenly over the glass using a spatula or your fingers (wear gloves if you prefer). Let it sit for 15 minutes. During this time, the paste works on loosening the grease.
For extra-stubborn spots, you can let it sit up to 30 minutes.
Scrubbing And Rinsing
After the wait, scrub the glass with a non-abrasive pad or sponge. Use circular motions to lift the grime. Rinse the pad frequently in warm water.
Once the glass looks clean, wipe away any residue with a damp cloth. Dry with a microfiber towel for a streak-free shine.
6. Remove Oven Racks and Soak in Dish Soap
Oven racks are notorious for collecting baked-on grease and food residue that's tough to wipe away in place. Instead of scrubbing them inside the oven, take them out and give them a proper bath. This method saves time and effort, letting the soap do the heavy lifting.
Removing the racks is the first step to a thorough clean. Fill your bathtub or a large plastic bin with enough hot water to fully submerge the racks. Add a generous squirt of dish soap—about a quarter cup—and stir to dissolve.
Place the racks in the water and let them soak for at least four hours, or overnight for heavily soiled racks. The hot water and soap loosen the grease and burnt-on food, making scrubbing much easier. After soaking, use a non-abrasive scrub brush or sponge to remove any remaining residue.
Rinse thoroughly with clean water and dry before putting them back in the oven.
Why Soaking Works So Well
Hot water and dish soap break down grease molecules, lifting them away from the metal. The long soak allows the solution to penetrate layers of baked-on grime, so you don't have to scrub aggressively. This method is gentle on the racks' finish and prevents scratching.
Best Practices For A Mess-free Soak
Protect your bathtub by placing an old towel or a plastic liner at the bottom to prevent scratches. If you're using a bin, make sure it's large enough and stable. For extra tough spots, add a cup of white vinegar to the soak—it helps dissolve mineral deposits and stubborn residue.
What To Avoid When Soaking
Never use bleach or harsh chemicals that can damage the rack's coating. Avoid abrasive scrubbers like steel wool, which can leave scratches and rust. Also, don't soak racks with non-stick coatings for more than a few hours, as prolonged soaking might degrade the coating.
7. Use a Self-Cleaning Cycle Wisely
Self-cleaning ovens are a modern convenience, but they're not magic. That high-heat cycle can burn off food residue, but it also stresses your oven's components and creates a lot of smoke and heat. Use it sparingly and strategically to avoid damaging your appliance or filling your kitchen with acrid fumes.
The self-cleaning cycle is best reserved for major messes, not routine maintenance. Before you start, remove all racks and large debris, then wipe up any loose crumbs. Run the cycle when you can open windows and leave the house for a few hours—the smell is intense.
Once it's done and the oven cools, you'll find a layer of ash. Simply wipe it away with a damp cloth. Avoid using the cycle more than a few times a year; overuse can damage heating elements and door seals.
When To Hit The Self-clean Button
Only use the self-cleaning cycle when you have stubborn, baked-on spills that scrubbing won't touch. For light messes, a quick wipe with a damp sponge is enough. The cycle runs at extremely high temperatures (800°F or more), which can warp oven components over time.
Reserve it for deep cleans every few months or after a major spill.
Prepping Your Oven For The Cycle
Before you start, remove all oven racks, pans, and aluminum foil. These items can discolor or warp under extreme heat. Wipe out any loose food particles to reduce smoke.
Make sure the oven door is securely closed—most models lock automatically during the cycle. Keep pets and kids out of the kitchen, and open a window for ventilation.
Post-cycle Ash Cleanup
Once the cycle finishes and the oven cools down (this can take an hour or more), open the door and wipe the interior with a damp cloth or sponge. The ash is mostly carbon and wipes away easily. Avoid using harsh cleaners or abrasive pads—they can scratch the enamel.
If any residue remains, a gentle scrub with a soft brush and warm water will do the trick.
Why Less Is More With Self-cleaning
Running the self-cleaning cycle too often can cause premature wear on your oven's heating elements, thermostat, and door gasket. The high heat can also damage the oven's interior finish. Stick to a schedule of two to three times per year at most.
For regular maintenance, use steam cleaning or a baking soda paste instead.
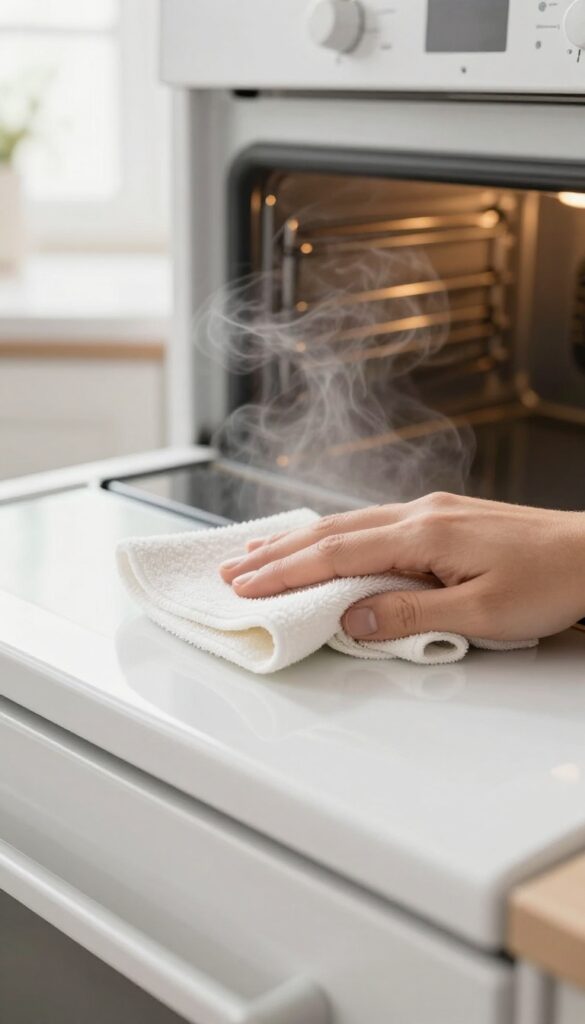
8. Wipe Up Spills Immediately After Cooking
The easiest mess to clean is the one that never gets baked on. Waiting until the oven is cold might be safer, but by then that spill has already turned into a stubborn crust. A quick wipe while the oven is still warm can save you serious scrubbing later.
Once you've finished cooking, let the oven cool for about 15 to 20 minutes—just enough so it's warm but not hot to the touch. Then grab a damp microfiber cloth or sponge and gently wipe away any spills or splatters. The warmth helps loosen the residue, so it comes off without effort.
For greasy spots, add a drop of dish soap to your cloth. This habit takes less than a minute and keeps your oven looking clean after every use.
Why Warm Cleaning Works
Heat softens food particles and grease, making them easier to lift. If you let spills cool and harden, they bond to the oven surface and require harsh scrubbing or chemicals. A warm wipe prevents that bond from forming.
What To Use For The Wipe
A soft microfiber cloth is best—it's absorbent and won't scratch. Avoid abrasive sponges or steel wool, which can damage the enamel. If the spill is sugary or sticky, plain warm water usually does the trick.
For grease, a tiny bit of mild dish soap helps cut through it.
Safety First: Don't Rush
Never wipe a hot oven—you risk burns and the cloth might steam or scorch. Wait until the oven is warm but comfortable to touch. Also, avoid using cold water on a hot surface, as thermal shock can crack the oven lining.
9. Line the Bottom with a Protective Mat
Imagine never having to scrub baked-on drips from the oven floor again. A simple silicone or non-stick oven liner placed on the bottom rack catches spills before they become permanent fixtures. These mats are heat-resistant up to 500°F and can be wiped clean or tossed in the dishwasher.
It's a small investment that saves hours of elbow grease.
Oven liners are a game-changer for anyone who bakes frequently. They sit on the lowest rack, not directly on the oven floor, to allow proper air circulation. When a pie bubbles over or a casserole drips, the liner catches it all.
After cooling, just lift it out, wash it, and you're done. No scraping, no harsh chemicals. Just make sure to choose a liner that fits your oven and trim it if needed—never block the heating elements or vents.
Why Silicone Works Best
Silicone oven liners are flexible, non-stick, and reusable. They don't warp or melt under normal oven temperatures. Unlike foil, they don't tear or leave sharp edges.
Plus, they're dishwasher safe, making cleanup almost effortless. Look for FDA-approved food-grade silicone to ensure safety at high heat.
Installation Tips
Place the liner on the bottommost rack position, not directly on the oven floor. This keeps airflow consistent and prevents overheating. If your liner is too large, trim it with scissors—but never cover the heating elements or the oven's bottom vent.
Check your oven manual to confirm clearance.
When To Replace
Even the best liners wear out. Replace yours if you notice cracks, deep stains, or a lingering burnt smell. Most silicone liners last about a year with regular use.
If you see any melting or bubbling, remove it immediately—that's a sign it's not heat-safe or has been placed incorrectly.
10. Use a Pumice Stone on Stubborn Spots
Burnt-on spots on the oven floor can feel impossible to remove without harsh chemicals or aggressive scrubbing. A pumice stone offers a surprisingly gentle yet effective solution. When wet, the stone's abrasive surface erodes the grime without scratching the enamel.
This method is ideal for those tough, carbonized patches that won't budge with baking soda or vinegar. It works best on the oven floor, not on glass or delicate surfaces. Just a few light strokes can transform a crusty mess into a clean surface.
How To Use A Pumice Stone Safely
Start by soaking the pumice stone in water for a few minutes—never use it dry. Gently rub the wet stone over the burnt spot using light pressure. The stone will slowly wear down the grime.
Rinse the stone frequently to remove residue and keep it effective.
Why It Works Without Scratching
Pumice is softer than oven enamel but harder than burnt food. When wet, it creates a fine abrasive paste that lifts carbonized deposits. The key is to keep both the stone and the surface wet.
If you feel resistance, stop and rewet—scratching only happens when the stone is dry.
When To Avoid This Method
Do not use a pumice stone on oven glass, ceramic cooktops, or any coated surface. It's strictly for the bare enamel floor. Also, avoid it if your oven has a non-stick coating—check the manufacturer's guidelines first.
11. Make a Lemon and Salt Scrub
When you need a gentle but effective scrub for greasy oven surfaces, look no further than your fruit bowl. A lemon and salt scrub harnesses natural acidity and abrasion to cut through baked-on grease without harsh chemicals. This method works especially well on oven doors, interior walls, and any spot where grime has built up but isn't burnt to a crisp.
Cut a lemon in half, dip the cut side into coarse salt, and scrub the greasy area in circular motions. The citric acid breaks down grease while the salt provides just enough grit to lift residue without scratching most oven surfaces. For extra stubborn spots, let the lemon juice sit for a few minutes before scrubbing.
Rinse with a damp cloth and dry. This method is quick, smells fresh, and uses ingredients you already have.
Why This Combo Works So Well
Lemon juice is a natural degreaser thanks to its acidity, which helps dissolve the bonds in baked-on grease. Salt acts as a mild abrasive that physically lifts grime without scratching glass or enamel. Together, they create a paste-like scrub that's both effective and safe for most oven interiors.
Best Surfaces For Lemon And Salt Scrubbing
This scrub is ideal for oven doors, side walls, and the area around the heating element (as long as it's cool). Avoid using it on aluminum or soft metals, as salt can cause pitting. Stick to ceramic, glass, and enamel surfaces for best results.
A Few Tips For Maximum Effect
Use coarse salt like kosher or sea salt for better abrasion. If the lemon dries out while scrubbing, squeeze a little extra juice onto the salt. Rinse thoroughly after scrubbing to remove any salt residue, which could otherwise leave white streaks.
For a final polish, wipe with a clean, damp microfiber cloth.
12. Clean the Oven Door Gasket Carefully
The rubber gasket around your oven door creates a tight seal that keeps heat inside. If it gets damaged, your oven won't heat properly and energy bills can creep up. Many people overlook this part during cleaning or attack it with harsh tools, which is a mistake.
Why The Gasket Matters
That soft, flexible strip isn't just there for show. It prevents heat loss and helps your oven maintain consistent temperature. A torn or compressed gasket leads to hot spots, longer cooking times, and wasted energy.
Treating it gently during cleaning extends its life and keeps your oven performing well.
What To Use And What To Avoid
Stick with a soft, damp microfiber cloth and a tiny bit of mild dish soap. Avoid soaking the gasket—water can seep into the fibers and ruin the seal. Never use abrasive scrubbers, bleach, or oven cleaner sprays on the gasket, as they can dry out the rubber and cause cracks.
Step-by-step Cleaning
First, make sure the oven is completely cool. Dip your cloth in warm soapy water and wring it out well—damp, not dripping. Gently wipe along the gasket, following its contour.
For stuck-on bits, let the damp cloth sit for a minute to soften them, then wipe again. Finish with a dry cloth to remove any moisture.
When To Replace The Gasket
If you notice tears, brittleness, or if the door doesn't close snugly, it's time for a new gasket. Replacement kits are inexpensive and easy to install. A damaged gasket undermines all your cleaning efforts because the oven has to work harder and can't maintain even heat.
13. Use a Steam Cleaner for Deep Grease
When scrubbing and soaking aren't cutting it, steam can be your best friend. A handheld steam cleaner uses hot vapor to soften baked-on grease and grime without any chemicals. It's especially handy for those stubborn spots that have been there for months.
How It Works
A steam cleaner heats water to produce high-temperature steam. When directed at greasy areas, the steam penetrates the residue, loosening it from the surface. After a few seconds, you can wipe the grease away with a cloth—no elbow grease required.
Best Areas To Steam
Focus on the oven floor, walls, and the glass door. These are the spots where grease tends to bake on the hardest. The steam also helps clean the racks if you place them on a towel and steam them directly.
Safety Tips
Always let the oven cool before using a steam cleaner. Avoid directing steam at electrical components, heating elements, or the oven light. Use distilled water to prevent mineral buildup in the steamer.
14. Try a Dishwasher Tablet Trick
Dishwasher tablets aren't just for your dishwasher. They can also tackle tough oven grease with surprising ease. The combination of enzymes and surfactants breaks down baked-on residue without harsh scrubbing.
This method is perfect for spot-treating stubborn grease splatters on the oven walls or door. It's gentler than commercial oven cleaners but still powerful enough to cut through months of buildup.
How To Use A Dishwasher Tablet On Your Oven
Fill a small bowl with warm water and drop in one dishwasher tablet. Let it dissolve completely—this usually takes a minute or two. Dip a non-abrasive sponge into the solution and apply it directly to the greasy spots.
Let it sit for 10–15 minutes so the enzymes can work. Then scrub gently; the grime should lift off easily. Wipe clean with a damp cloth.
Why This Trick Works So Well
Dishwasher tablets contain surfactants, enzymes, and alkaline agents that target protein-based stains and fats. These ingredients are specifically designed to break down food residue, making them ideal for oven grease. The warm water activates the tablet, creating a powerful cleaning solution that's safe for most oven surfaces.
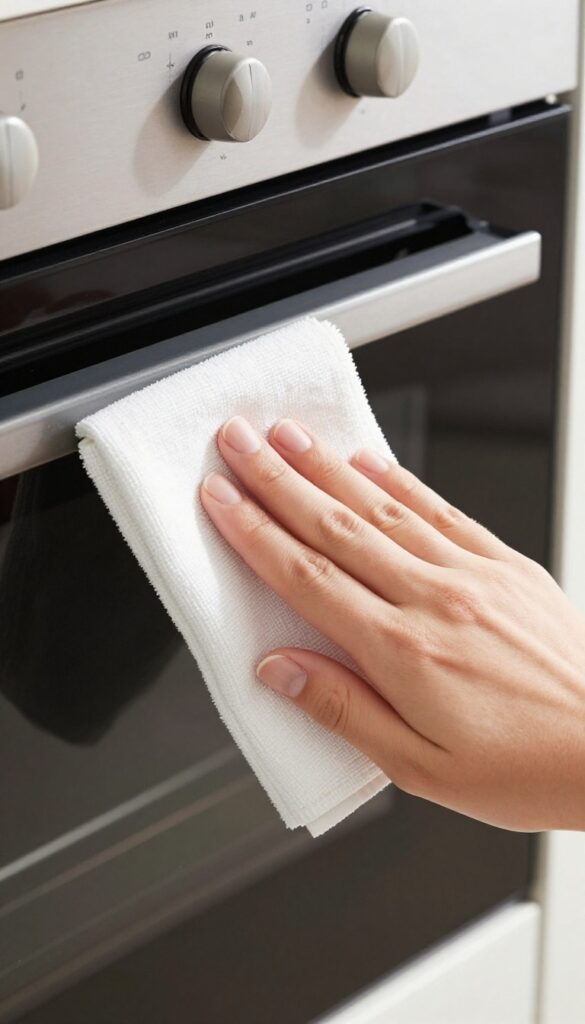
15. Clean the Exterior with Degreasing Dish Soap
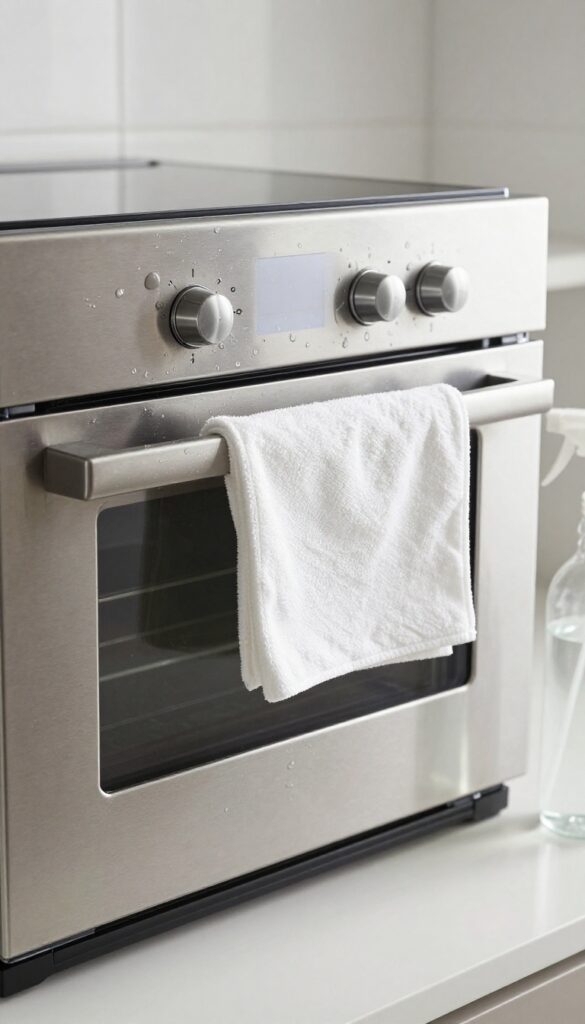
The oven door, handle, and control panel get just as grimy as the inside, but they often get ignored. Grease and fingerprints build up fast, especially around the handle where hands grab it repeatedly. A simple degreasing dish soap solution can cut through that residue without damaging the surface.
Mix a few drops of dish soap with warm water in a spray bottle or bowl. Use a soft microfiber cloth to wipe down the exterior, paying extra attention to the handle and control panel. For stubborn spots, let the solution sit for a minute before wiping.
Avoid abrasive sponges or harsh cleaners that could scratch the finish.
Why Dish Soap Works
Dish soap is designed to break down grease on plates, so it works just as well on oven surfaces. It's gentle enough for stainless steel, glass, and plastic control panels, but tough on oily fingerprints. The warm water helps loosen dried-on grime without extra scrubbing.
How To Wipe Without Streaks
Use a damp cloth with the soap solution, then follow up with a dry microfiber cloth to buff away any residue. For glass oven doors, wipe in a circular motion to avoid streaks. If your oven has a digital display, wring the cloth well so no excess moisture seeps into the electronics.
When To Avoid This Method
Check your oven's manual before cleaning. Some coated or painted surfaces may react to even mild soap. If your oven has a special finish, test the solution on a small hidden area first.
Never spray liquid directly onto control panels—always apply to the cloth instead.
16. Use a Magic Eraser on Stubborn Marks
Sometimes, even the best degreasers and scrubbing pastes leave behind faint, ghostly stains on oven glass or interior walls. That's when a melamine sponge—commonly known as a Magic Eraser—comes to the rescue. These sponges work like a super-fine sandpaper, gently lifting baked-on residue without harsh chemicals.
Before you start, make sure your oven is completely cool and unplugged for safety. Dampen the melamine sponge with water—no soap needed—and wring out excess liquid. Gently rub the stubborn marks in a circular motion.
The sponge will gradually wear down as it abrades the residue. For extra-tough spots, apply a little pressure, but avoid scrubbing too hard on painted or coated surfaces, as it can remove the finish. Rinse the area with a damp cloth afterward to remove any sponge residue.
This method works wonders on oven windows, ceramic cooktops, and even the inside of the door.
Why Melamine Sponges Work So Well
Melamine foam has a unique open-cell structure that acts like a microscopic abrasive. When dampened, it creates a mild scrubbing action that lifts dirt and grime without scratching most surfaces. It's especially effective on baked-on grease and carbonized food particles that resist traditional cleaners.
Surfaces To Avoid
While versatile, melamine sponges can damage delicate finishes. Avoid using them on non-stick coatings, stainless steel with a brushed finish, glossy enamel, or any surface that scratches easily. Always test on a small, hidden area first.
Stick to glass, ceramic, and smooth metal surfaces for best results.
Pro Tips For Best Results
Use a fresh sponge for each cleaning session—once it starts crumbling, it loses effectiveness. Keep the sponge damp but not soaking wet to prevent dripping into oven vents. For extra stubborn spots, let the sponge sit on the mark for a minute before scrubbing.
And always follow up with a clean, damp cloth to remove any foam particles.
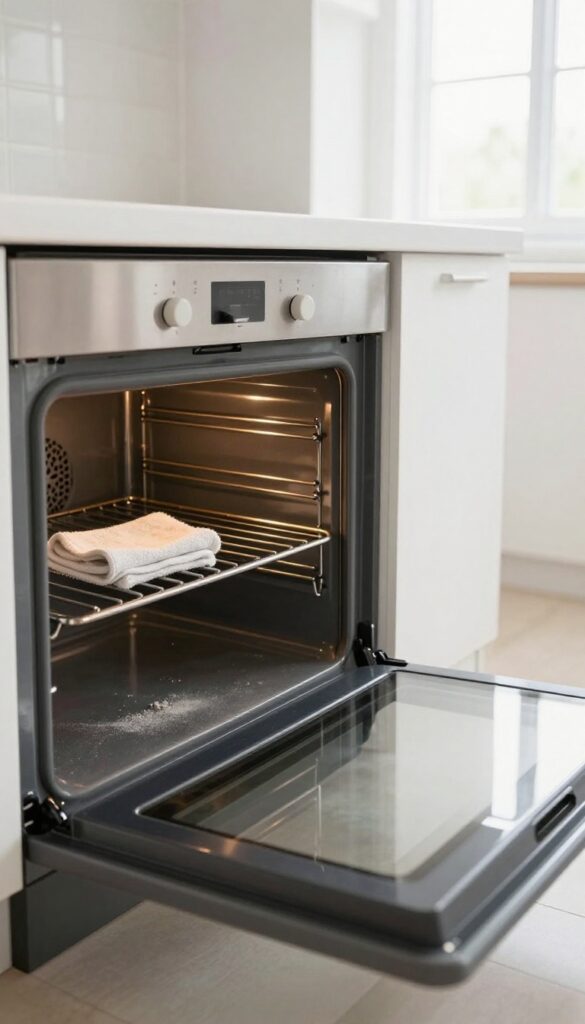
17. Soak Burned-On Food with a Wet Towel
Some spills are so stubborn that even the strongest cleaners seem to bounce right off. When you're facing a patch of burned-on food that refuses to budge, a simple wet towel can work wonders. The idea is to rehydrate the crusty grime, making it soft enough to wipe away without endless scrubbing.
This method is especially useful for dried-on spills on the oven floor or walls. It's gentle, chemical-free, and requires almost no elbow grease—just a little patience.
How It Works
Heat and time turn food into a hard, carbonized layer. By covering it with a wet towel, you trap moisture against the surface. The water slowly penetrates the burnt crust, softening it until it loosens its grip on the enamel.
Step-by-step Instructions
First, make sure the oven is completely cool. Soak a clean dish towel or microfiber cloth in hot water, then wring it out so it's damp but not dripping. Lay it directly over the burned-on spots.
Let it sit for 30 minutes—if the towel dries out, re-wet it. After the wait, remove the towel and scrub the area with a non-abrasive sponge or plastic scraper. The grime should come off easily.
When To Use This Trick
This works best on fresh-ish spills that have been baked on once or twice. For months-old buildup, you may need to repeat the process or combine it with a baking soda paste. Avoid using this on self-cleaning oven liners or surfaces that shouldn't get wet—check your manual first.
18. Clean the Oven Fan and Vents
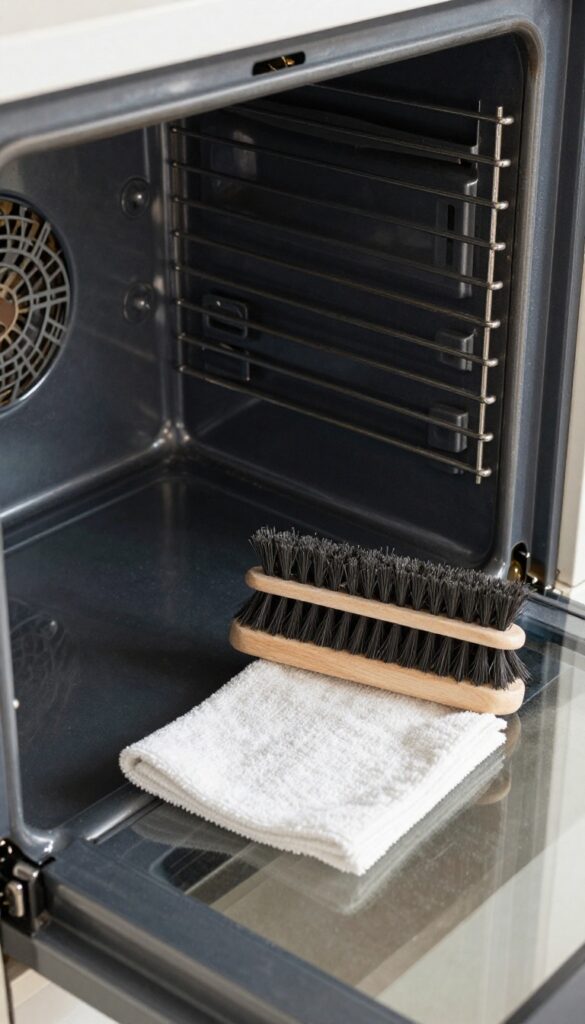
The oven fan and vents work hard to circulate heat and keep temperatures even, but they also collect dust, grease, and food particles over time. When they get clogged, airflow drops, cooking becomes uneven, and you might notice strange smells or smoke. Cleaning these parts is straightforward and can make a real difference in how your oven performs.
Most people never think about cleaning the fan or vents, but a quick maintenance session can prevent bigger issues. Start by making sure the oven is completely cool and unplugged or the circuit breaker is off. Locate the fan cover—usually a metal grille on the back wall inside the oven—and the vents, which are often along the edges or bottom.
Use a soft brush or a vacuum with a crevice tool to gently remove loose debris. For stubborn grease, a damp microfiber cloth with a little mild dish soap works well. Avoid getting water into the fan motor or electrical parts.
Once clean, let everything dry fully before using the oven again.
Why It Matters
A dirty fan has to work harder, which can shorten its lifespan and increase energy use. Clogged vents can trap heat, leading to hot spots or uneven baking. Regular cleaning helps your oven run efficiently and keeps the air inside fresh.
What You'll Need
Grab a soft-bristled brush (like a paintbrush or pastry brush), a vacuum with a narrow nozzle, a microfiber cloth, and a mild degreaser or dish soap. Avoid abrasive tools that could scratch the metal.
Step-by-step Cleaning
First, remove any loose dust with the brush or vacuum. Then, lightly dampen your cloth with soapy water and wipe the fan blades and vent openings. For tight spots, use a cotton swab or an old toothbrush.
Rinse with a barely damp cloth and let air-dry completely before closing the door.
19. Use a Vinegar and Water Rinse After Cleaning
You've scrubbed, scraped, and degreased your oven until it shines. But even after all that effort, a faint chemical smell or sticky residue can linger. That's where a simple vinegar and water rinse comes in.
It's the final step that makes everything feel truly clean.
A 50/50 mix of white vinegar and water cuts through leftover cleaning agents and neutralizes odors. It's safe for all oven surfaces, including glass and enamel. Just spray it on, wipe with a clean cloth, and you're done.
Why It Works
Vinegar is acidic enough to break down alkaline residues from many commercial cleaners and baking soda pastes. It also kills some bacteria and mold spores that can cause musty smells. The water dilutes it so it won't damage your oven's interior.
How To Apply
Mix equal parts white vinegar and water in a spray bottle. After your main cleaning, spray the solution over all interior surfaces, including the door and racks. Let it sit for a minute, then wipe with a damp microfiber cloth.
For stubborn spots, use a soft sponge.
When To Skip It
If your oven has a self-cleaning coating or a special non-stick finish, check the manual first. Vinegar can sometimes dull these surfaces. In that case, just use plain water for the final rinse.
20. Try a Baking Soda and Hydrogen Peroxide Paste
For those tough, baked-on stains that laugh at regular cleaners, it's time to bring out a stronger paste. Mixing baking soda with hydrogen peroxide creates a powerful, fizzing reaction that helps lift stubborn grease and burnt food without harsh chemicals. This combination is especially effective on oven racks and the interior walls where grease has had time to set.
This paste works because hydrogen peroxide acts as a mild bleach and oxidizer, breaking down organic stains while baking soda provides gentle abrasion. Together, they tackle spots that vinegar or lemon juice alone can't handle. Apply it to the affected areas, let it sit for 15–20 minutes, then scrub with a non-abrasive sponge.
Rinse thoroughly with water to remove any residue.
Why Hydrogen Peroxide Makes A Difference
Hydrogen peroxide is a natural disinfectant and stain remover. When mixed with baking soda, it creates a paste that bubbles up, helping to loosen grime from surfaces. It's particularly good for yellowed or discolored spots on oven interiors and glass doors.
How To Apply The Paste Effectively
Mix three parts baking soda with one part hydrogen peroxide to form a thick paste. Spread it evenly over the stained areas, avoiding heating elements. Let it sit for 15–20 minutes—longer for extra stubborn spots.
Scrub gently with a damp sponge or soft brush, then wipe clean with a wet cloth.
Safety Tips And Precautions
Always wear gloves to protect your skin from hydrogen peroxide, which can cause irritation. Test the paste on a small, hidden area first to ensure it doesn't damage the finish. Avoid using on aluminum surfaces, as hydrogen peroxide can cause discoloration.
21. Use a Razor Blade on Glass Doors (Carefully)
Glass oven doors take a beating. Grease splatters, cheese drips, and sauce bubbles up, then bakes into a stubborn crust. While chemical cleaners help, sometimes you need a little mechanical persuasion.
A razor blade can be your best friend here—if you use it right. One wrong move and you'll scratch the glass, so technique matters.
Hold the blade at a 45-degree angle to the glass. This lets the edge lift the gunk without digging in. Keep the glass wet with a soapy spray or glass cleaner—the moisture acts as a lubricant and reduces friction.
Work in small sections, scraping gently in one direction. Rinse the blade often to avoid dragging debris across the surface. This method works wonders on burnt-on cheese or caramelized sugar.
Just never use a dry blade or press too hard. For safety, consider a razor scraper with a handle, which gives you better control and a safer grip.
Why Wet Glass Matters
Scraping dry glass creates micro-scratches that turn into permanent fog. A wet surface lets the blade glide smoothly, lifting residue instead of grinding it in. Plus, the moisture softens the burnt layer, so you need less pressure.
Always re-spray if the glass starts to dry.
Safety First: Protect Yourself And The Glass
Never use a dull or rusty blade—it can skip and scratch. Wear a glove on your scraping hand if you're nervous. Avoid scraping over the oven seal or gasket, as the blade can cut the rubber.
And never use a razor on textured or tinted glass; it's only for smooth, clear surfaces.
When To Skip The Blade
If the glass is coated with a reflective or anti-smudge layer, a razor will ruin it. Check your oven manual first. Also, skip the blade if you see chips or cracks—scraping can worsen them.
In those cases, stick to a baking soda paste or a non-abrasive cleaner.
22. Clean Under the Oven with a Long Brush
You might think your oven is clean once the interior sparkles, but crumbs and grease often hide underneath. Pulling the oven out slightly reveals a dusty, greasy zone that can attract pests and even cause odors when the oven heats up. A long-handled brush makes this job quick and satisfying.
Why Under The Oven Matters
Food particles that fall through gaps don't just sit there—they can burn and smoke the next time you bake. Grease buildup under the oven can also become a fire hazard over time. Cleaning this hidden area once a month keeps your kitchen safer and your oven running efficiently.
Choose The Right Brush
A brush with stiff bristles and a long handle lets you reach deep without bending over. Look for one specifically designed for oven cleaning or a heavy-duty dusting brush. Avoid wire brushes that might scratch the floor or the oven's exterior.
How To Clean Under The Oven
First, unplug the oven or turn off the circuit breaker if you have a gas model. Slide the oven forward carefully—watch the gas line if applicable. Sweep crumbs toward you and use a vacuum with a crevice tool to pick up the debris.
For greasy spots, wipe with a degreasing cleaner and a microfiber cloth.
23. Maintain a Weekly Quick Wipe Routine
A little prevention goes a long way when it comes to oven cleaning. Instead of waiting for spills to bake into stubborn crusts, a quick weekly wipe keeps your oven looking fresh and reduces the need for deep scrubs. This habit takes just a few minutes but saves you hours of elbow grease later.
The key is to wipe while the oven is still warm but not hot—around 150°F is ideal. Heat loosens grease and food particles, making them easier to remove. Use a soft, damp microfiber cloth or sponge, and avoid abrasive scrubbers that can damage the enamel.
For stuck-on spots, a little baking soda paste works wonders.
Choose The Right Tools
A microfiber cloth is your best friend for quick wipes. It traps grease and dirt without scratching. Keep a dedicated cloth near the oven for easy access.
Avoid paper towels, which can leave lint, and never use steel wool or harsh scouring pads.
Focus On High-impact Areas
Pay extra attention to the oven door, bottom, and racks. Grease splatters accumulate quickly on the door glass. A quick wipe after each use prevents cloudy buildup.
For the bottom, gently sweep crumbs into a dustpan before they burn.
Make It A Habit
Set a reminder on your phone or tie it to another routine, like wiping down the stovetop after cooking. Consistency is key—after a few weeks, it becomes second nature. Your future self will thank you when deep-cleaning day is a breeze.
FAQ
How often should I deep clean my oven?
Deep clean your oven every 3 to 6 months, depending on usage. If you cook greasy foods often, clean more frequently to prevent buildup.
Can I use oven cleaner on a self-cleaning oven?
It's best to avoid harsh chemical cleaners on self-cleaning ovens as they can damage the coating. Stick to the self-clean cycle or mild natural methods.
Is it safe to use baking soda and vinegar together?
Yes, they are safe and non-toxic. The reaction helps lift grime, but rinse thoroughly afterward to avoid residue.
How do I clean the oven door between the glass panels?
If your oven door has removable inner glass, take it off and clean between panels. Otherwise, use a long flexible brush or a vent cleaning tool to reach inside.
What should I do if my oven smokes when preheating?
Smoking often means there's leftover grease or food debris. Clean the interior thoroughly, especially the bottom and heating elements, and wipe away any residue.
Conclusion
Cleaning your oven doesn't have to be a dreaded chore. With these 23 tips, you can tackle everything from light splatters to caked-on grease using methods that fit your style. Whether you prefer natural ingredients or commercial products, consistency is key.
A quick wipe after each use and a deeper clean every few months will keep your oven looking and performing its best. Pick a few tips that work for you and make them part of your routine—your future self will thank you.