20 Cleaning Your Room Steps for a Fast Bedroom Reset
You walk into your bedroom and feel instantly overwhelmed. Clothes on the chair, dust on the nightstand, and that mysterious pile in the corner. A full deep clean sounds exhausting, but you don't need hours to make a difference.
These 20 steps are designed for a fast reset.
They focus on high-impact actions that transform the look and feel of your room without burning you out. No complicated systems, just straightforward moves. Pick a starting point and work through the list.
By the end, your bedroom will feel like a sanctuary again. Ready? Let's go.
1. Strip the bed and start the laundry
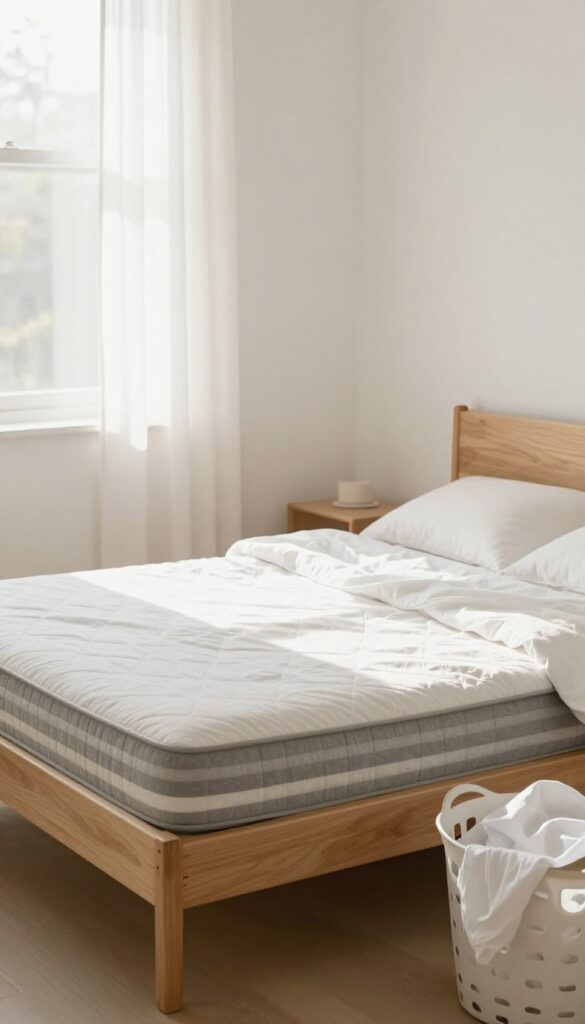
Your bed is the biggest visual anchor in the room. When it's messy, the whole space feels chaotic. Pulling off all the sheets, pillowcases, and blankets takes thirty seconds, but the effect is instant.
Suddenly the room looks lighter and more manageable.
Once the bed is bare, toss everything into the washing machine. Set a timer so you remember to switch loads later. While the laundry runs, you've already eliminated one major source of clutter.
Plus, making the bed later with fresh linens will feel like a reward.
Why Start Here
This single step removes the largest soft surface in the room from the equation. No more staring at wrinkled sheets or a lumpy comforter. It also forces you to deal with any items hiding under the covers, like remote controls or socks.
What To Wash
Grab everything: fitted sheet, flat sheet, pillowcases, and any decorative pillow covers that can go in the wash. If you have a duvet cover, take it off too. Use cold water to save energy and protect fabrics.
Add a scoop of oxygen bleach if you want to freshen whites.
While It Runs
Use the free time to tackle other steps. The sound of the washing machine is a nice background cue that progress is happening. When the cycle ends, toss everything in the dryer or hang it up.
By the time you finish the rest of the reset, your bed will be ready to remake.
2. Clear every surface completely
Surfaces collect clutter faster than any other spot in your bedroom. A nightstand piled with books, a dresser covered in random receipts, a desk buried under old papers—it all adds visual noise. Clearing every flat surface gives you a blank slate and instantly makes the room feel bigger and calmer.
Start with your nightstand, then move to your dresser, desk, and any shelves. Take everything off—every single item. Don't sort yet, just relocate it all to a temporary holding spot like your bed or a laundry basket.
Once every surface is bare, grab a microfiber cloth or disinfecting wipe and clean each one thoroughly. Dust, crumbs, and sticky spots disappear, leaving behind a fresh foundation. Now you can put back only what belongs there, which naturally reduces clutter.
Why Bare Surfaces Matter
When every inch of your nightstand or dresser is covered, your brain registers chaos. Clearing surfaces removes that mental load. It also makes dusting way easier since you're not moving items around obstacles.
A clean, empty surface reflects light and opens up the room visually.
The Wipe-down Step You Shouldn't Skip
Even if a surface looks clean, it probably isn't. Dust settles invisibly, and oils from your hands leave residue. A quick wipe with a damp cloth or all-purpose cleaner lifts that grime.
Pay extra attention to corners and edges where dust bunnies hide.
What Goes Back And What Doesn't
Before returning items, ask yourself: Do I use this daily? Does it belong here? If not, find it a new home or toss it.
Limit surfaces to a few essentials—a lamp, a phone charger, a small tray for jewelry. Less is more when it comes to keeping a reset feel.
3. Trash the obvious junk
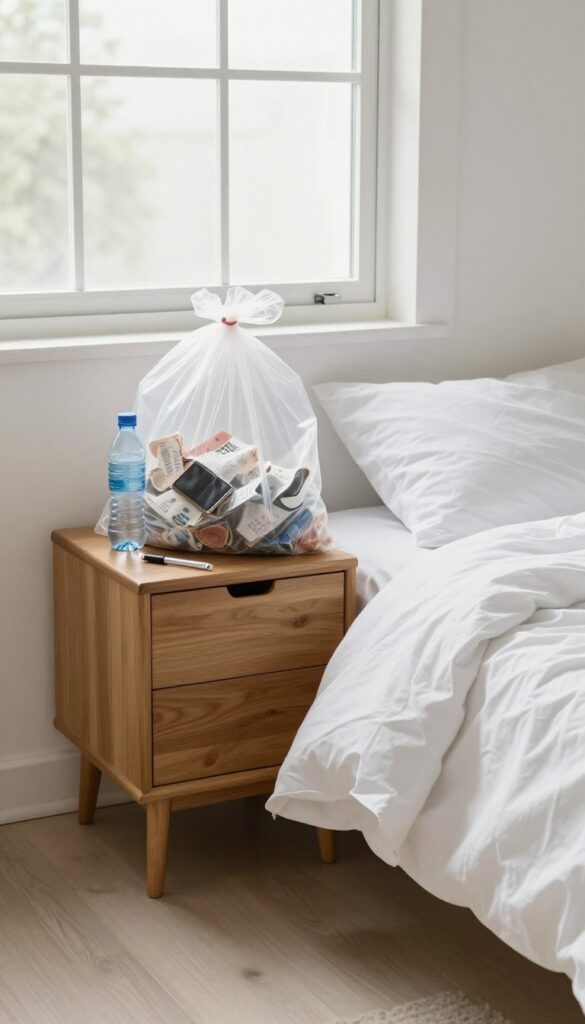
Before you do anything else, grab a trash bag and scan the room for things that have no business being there. Empty water bottles, old receipts, broken phone chargers, dried-out pens—stuff that's clearly garbage but somehow migrated to your nightstand or floor. This step takes two minutes and instantly clears visual noise.
Start With Surfaces
Hit your dresser, nightstand, desk, and any shelf. Toss anything that's obviously trash: crumpled tissues, takeout napkins, expired coupons. Don't overthink it—if you wouldn't pick it up in a store, it goes.
Don't Forget The Floor
Check under the bed, beside the dresser, and in corners. You might find bottle caps, twist ties, or random wrappers. A quick sweep with your hand or a dustpan gets rid of these before they become part of the scenery.
Broken Items Go Too
That cracked phone case? The earring with a missing back? A pen that won't write?
They're not repairable in this moment, and they're just taking up space. Drop them in the bag. You can deal with sentimental stuff later.
4. Gather all stray clothes
Clothes scattered around the room are the biggest visual clutter. They make even a tidy space feel messy. By collecting every stray item in one go, you instantly reduce chaos and see real progress.
Start With The Floor
Walk around your room and pick up every piece of clothing on the floor. Don't stop to fold or sort yet—just toss everything into a pile on your bed or a clear spot on the floor. This quick sweep removes the biggest eyesore first.
Clear The Furniture
Next, grab clothes draped over chairs, the footboard, or your dresser. These items often become permanent decor without you realizing it. Add them to your pile so surfaces look clean and intentional again.
Sort Into Three Piles
Now that everything is in one place, separate items into laundry, donate, and put away. Laundry goes straight to the hamper or washer. Donate items go into a bag by the door.
The rest should be hung or folded right now—don't let them sit.
5. Make a donate pile
Not everything in your room deserves to stay. That shirt you haven't worn in two years? Those books gathering dust?
They're just taking up space. Setting aside a donate pile is a quick way to declutter without the guilt of throwing things away. Keep the pile hidden until you can drop it off, and enjoy the extra breathing room.
A donate pile is your shortcut to a cleaner room without the emotional baggage of tossing items. It's a simple, guilt-free way to let go of things you no longer need. By keeping the pile out of sight, you avoid second-guessing your decisions later.
What Goes In The Pile
Focus on items you haven't used in the past year: clothes that don't fit, books you won't reread, decor that no longer sparks joy. If it's in good condition but unused, it's a candidate. Be honest with yourself.
Where To Keep The Pile
Stash the pile in a closet corner, under your bed, or in a spare bag. Out of sight means out of mind until donation day. This prevents you from pulling items back into your room.
Make Donation Easy
Set a deadline to drop off the pile within a week. Schedule a trip to a local charity or use a pickup service. The faster it leaves your home, the less likely you are to second-guess.
6. Dust from top to bottom
Dust settles everywhere, but if you start at the floor, you'll just kick it up onto already-cleaned surfaces. That's why working top-down is the only way to go. Grab a microfiber cloth—it traps dust instead of spreading it around—and start high.
Begin with ceiling fans and light fixtures, then move to shelves, furniture tops, and finally baseboards. This method ensures you're not re-dusting anything. A quick pass with a microfiber cloth is usually enough for weekly maintenance.
For stubborn grime, dampen the cloth slightly.
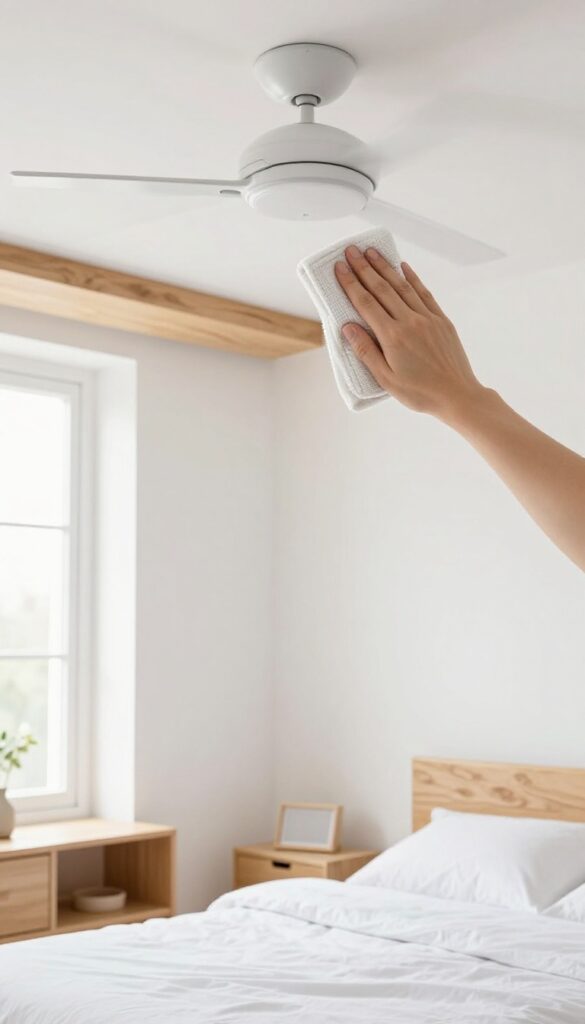
Ceiling Fans And Lights
Ceiling fan blades collect a surprising amount of dust. Use a long-handled duster or a microfiber cloth on a pole to reach them without climbing. For light fixtures, wipe the shades and bulbs carefully.
This step alone makes the room feel fresher.
Shelves And Furniture
Work your way down to shelves, dressers, and nightstands. Remove items, dust the surface, and wipe down any decorative objects before placing them back. Don't forget picture frames and electronics—they're dust magnets.
Baseboards And Corners
Finish with baseboards, window sills, and floor corners. A microfiber cloth wrapped around a butter knife works great for tight spots. This final pass catches any dust that fell during the earlier steps.
7. Wipe down all hard surfaces
Hard surfaces are dust and germ magnets. A quick once-over with a cleaner makes the whole room feel fresher. Focus on the spots you touch and see most often.
Start With The Nightstand
Your nightstand is prime real estate for dust and clutter. Move everything off, spray with an all-purpose cleaner, and wipe dry. Don't forget the sides and any drawers you've left open.
Hit Dressers And Windowsills
Dresser tops collect random items and dust bunnies. Clear them off, then wipe the surface. Windowsills often get neglected but show grime easily.
A damp cloth does the trick.
Don't Skip The Mirror
A smudged mirror makes the whole room look messy. Spray glass cleaner or a vinegar solution on a microfiber cloth (not directly on the mirror) and wipe in circles until streak-free.
Quick Wipe For Handles And Switches
Door handles and light switches are high-touch but often forgotten. A disinfecting wipe or spray on a cloth kills germs and removes fingerprints. It takes seconds but makes a difference.
8. Vacuum or sweep the floor
The floor is the largest surface in your room, and it sets the tone for how clean everything feels. Even if the rest of the room is tidy, a dusty or hairy floor drags the whole space down. This step is about making that surface look fresh and feel good underfoot.
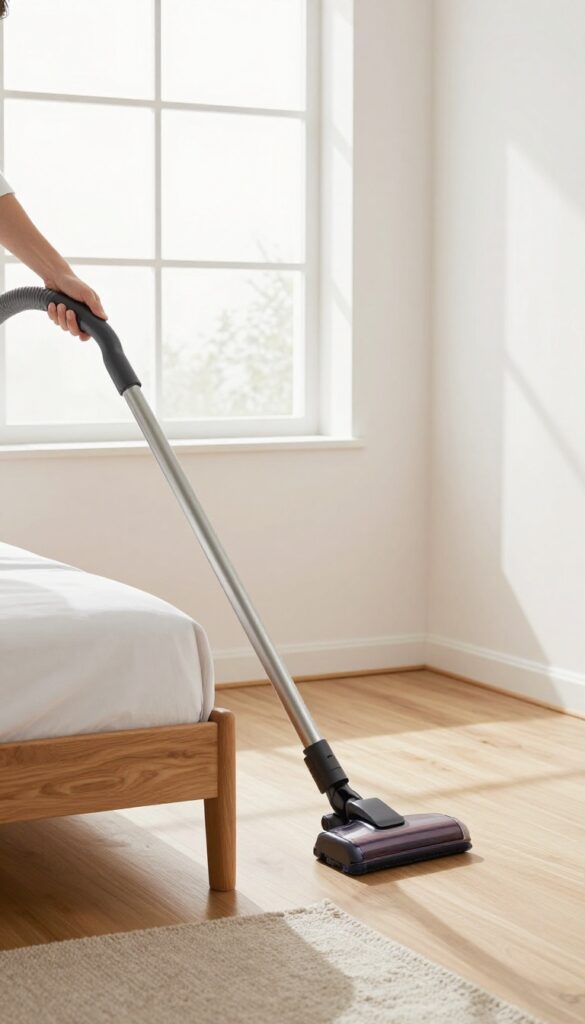
Grab your vacuum or broom and start in the farthest corner, working your way toward the door. This way you aren't walking over just-cleaned areas. For carpets, go slowly and use overlapping passes to pick up embedded dirt.
On hard floors, sweep debris into a dustpan or use a vacuum with a hard floor setting to avoid scattering dust.
Don't Skip The Edges
Baseboards and corners collect dust bunnies and hairballs that a standard pass misses. Use a crevice tool on your vacuum or a small brush to sweep along the edges. Pay extra attention behind doors and near furniture legs.
Under The Bed Counts
That dark zone under your bed is a magnet for lost socks, dust, and random clutter. If you can't slide the bed out, use a flat mop or a vacuum wand with a brush attachment to reach underneath. Doing this even every few weeks makes a big difference.
Finish With A Quick Spot Check
Once you've covered the main area, do a once-over for any stubborn spots or crumbs. Pick up larger debris by hand if needed. Then step back and admire how much cleaner the whole room looks.
9. Spot clean walls and doors
Walls and doors collect fingerprints, smudges, and mysterious marks over time. They're easy to overlook, but cleaning them instantly makes the whole room feel fresher. You don't need to wash every surface—just target the obvious spots.
Grab a damp microfiber cloth or a magic eraser and scan your walls and doors at eye level. Focus on areas around light switches, doorknobs, and corners where hands or furniture have left marks. For stubborn spots, a gentle scrub with a magic eraser works wonders without damaging paint.
Wipe dry with a clean cloth to avoid streaks. This quick pass takes under five minutes but makes a surprisingly big difference.
Check High-traffic Zones
Look near light switches, door handles, and the base of the door where shoes might have scuffed. These areas get touched daily and show dirt first. A quick wipe here removes the most visible grime.
Use The Right Tool
A damp microfiber cloth works for most smudges. For tougher marks like crayon or scuff marks, a magic eraser is your best friend. Test on an inconspicuous spot first to ensure it won't remove paint.
Don't Forget The Door Itself
Doors collect dust and fingerprints on both sides. Wipe down the entire surface, including the edges and top edge where dust settles. This small detail makes the door look freshly cleaned.
10. Organize your nightstand
Your nightstand is the last thing you see before sleep and the first thing you see in the morning. When it's cluttered, it can make your whole room feel messy. Streamlining this small surface creates a calm focal point and sets a peaceful tone for the entire bedroom.
Start by removing everything from the nightstand. Wipe down the surface, then place only the items you use nightly. A lamp, a book you're reading, and a glass of water are plenty.
Use a small tray to corral loose items like the remote, phone charger, or glasses. This keeps them accessible but contained, so the surface stays tidy with minimal effort.
Declutter First
Take everything off and sort into three piles: keep, relocate, toss. Be honest about what you actually use. Old magazines, empty water bottles, and random receipts don't belong here.
Relocate items like tissues or hand lotion to a drawer if you need them nearby but not on display.
Use A Tray Or Dish
A small tray, dish, or shallow bowl catches the daily essentials. Drop your phone, watch, or earbuds in it at night. This prevents them from scattering across the surface and makes it easy to grab them in the morning.
Choose a tray that matches your decor for a polished look.
Limit To Three Items
As a rule of thumb, keep no more than three decorative or functional items on top. For example, a lamp, a book, and a small plant or photo. This prevents visual clutter and makes dusting quick.
If you need more storage, use the drawer or a small basket underneath.
Maintain Daily
Each morning, take a few seconds to reset the nightstand. Put the book back, place the glass in the sink, and straighten the tray. This habit takes less than a minute and ensures your nightstand stays organized without a weekly overhaul.
11. Tidy your dresser top
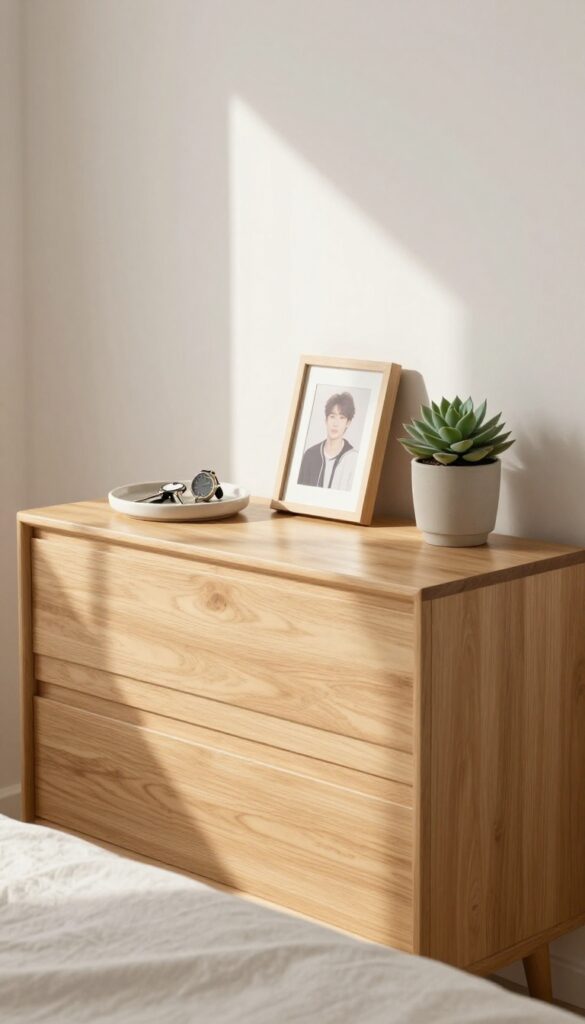
Your dresser top is prime real estate, but it easily turns into a dumping ground for random items. A cluttered surface makes the whole room feel messy, even if everything else is clean. The fix is simple: keep only what you actually use or love.
Start by removing everything from the dresser top. Wipe it down, then be intentional about what goes back. Limit yourself to a few meaningful decor pieces—maybe a small plant, a framed photo, or a catch-all tray for daily accessories.
Store jewelry, watches, or sunglasses in a dedicated dish or organizer so they don't scatter. This keeps the surface functional and visually calm.
Choose A Catch-all Tray
A small tray or dish corrals loose items like keys, coins, or earbuds. It prevents them from rolling off or creating visual noise. Pick one that matches your room's style—ceramic, wood, or woven—and make it the designated spot for pocket dump at the end of the day.
Limit Decor To Three Pieces
Too many knick-knacks make the dresser look busy. Stick to three items max: something functional (like a lamp or jewelry box), something personal (a photo or souvenir), and something alive (a small plant or fresh flowers). This rule instantly elevates the space.
Use Vertical Storage For Accessories
If you have multiple necklaces, watches, or bracelets, a small standing organizer or a wall-mounted rack keeps them tangle-free and easy to grab. It also frees up surface area. Just make sure it doesn't crowd the dresser—less is more.
12. Refresh your closet entrance
The area right in front of your closet often becomes a catch-all for shoes, bags, and clothes you tried on but didn't put away. It's also the first thing you see when you walk into the room, so tidying it up gives an instant sense of order. A quick reset here makes getting dressed feel less chaotic and more intentional.
Clear The Floor
Start by picking up anything sitting on the floor in front of the closet. Shoes, laundry, boxes, or random items that don't belong. Give the floor a quick sweep or vacuum while it's clear.
A bare floor makes the whole room look cleaner.
Corral Loose Items
If you have a basket or bin near the closet, use it to hold items that need to go elsewhere—like a jacket that belongs in the hall closet or a book that should return to the shelf. This prevents the pile from reforming. If you don't have a basket, grab a tote bag as a temporary holding spot.
Straighten Visible Accessories
Take a moment to line up shoes neatly, hang up any bags or scarves that are draped over the door or handles, and remove empty hangers. This small touch makes the entrance feel organized and intentional. It takes less than a minute but makes a big visual difference.
13. Fluff and arrange pillows

Pillows are the easiest shortcut to a polished bed. After you've smoothed the sheets and blanket, take a moment to fluff each pillow and set them in place. This tiny step makes the entire bed look intentional and inviting, even if the rest of the room is still a work in progress.
Start by giving each pillow a good squeeze and shake to redistribute the filling. For decorative pillows, pat them into shape and arrange them leaning against the headboard or stacked in a casual but tidy way. If you have shams, make sure the openings face inward or downward for a cleaner look.
The goal is a relaxed, hotel-like appearance that signals comfort.
Fluffing Technique Matters
Don't just punch the pillow once and call it done. Use both hands to knead and fluff from the center outward. For down or down-alternative pillows, give them a few good shakes to aerate the fill.
This restores loft and makes the pillow look plump and fresh.
Arranging For Visual Balance
Place larger pillows in the back and smaller ones in front. If you have an odd number of decorative pillows, center the middle one slightly higher. For a symmetrical look, mirror the arrangement on both sides.
A little thought goes a long way toward making the bed feel styled.
Don't Forget The Sleeping Pillows
Your sleep pillows deserve attention too. Fluff them and set them upright against the headboard or lay them flat under the decorative pillows. Smooth out any wrinkles in the pillowcases for a crisp, clean finish.
This small detail makes the bed look cared for.
14. Make the bed with fresh linens
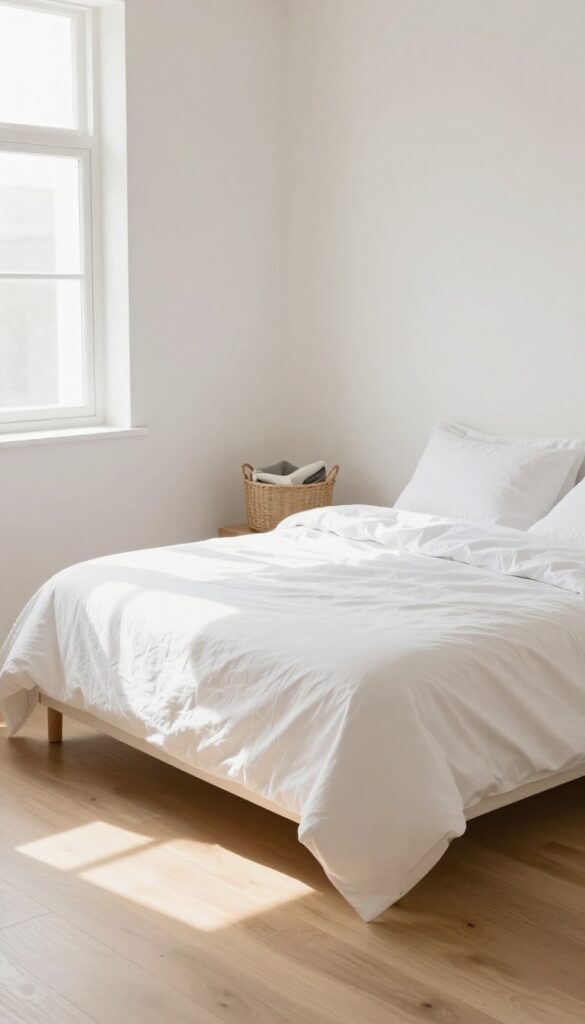
Once your laundry is sorted and folded, it's time to tackle the bed. A made bed instantly changes the whole feel of the room. Fresh sheets, a smooth duvet, and fluffed pillows make the space look tidy and inviting.
Start by putting on clean fitted and flat sheets. Smooth out any wrinkles with your hands—it doesn't have to be perfect, but a few passes make a difference. Then add your duvet or comforter, shaking it out so it's evenly distributed.
Fold it neatly at the foot of the bed or spread it flat, depending on your style. Finally, arrange pillows. Fluff them and set them upright or angled for a relaxed look.
This one step alone can make your room feel 10 times cleaner.
Choose The Right Sheets
Crisp, clean sheets feel amazing. If you have multiple sets, pick one that matches your current mood or season. Cotton percale is great for summer, flannel for winter.
Make sure the fitted sheet is snug on the mattress corners so it stays put.
Layer For Comfort
Add a lightweight blanket or quilt between the sheet and duvet for extra coziness. This also makes the bed look more inviting. Fold the top sheet down a few inches to show off a patterned blanket or a contrasting duvet cover.
Don't Forget The Pillows
Fluff each pillow by punching the center and shaking it out. Arrange sleeping pillows flat, then add decorative pillows or shams if you have them. Even just two pillows placed neatly can elevate the whole look.
15. Clear the floor of clutter
Floors are one of the first things your eyes land on when you walk into a bedroom. When they're covered with bags, shoes, boxes, and random cords, the whole room feels chaotic. Clearing the floor instantly opens up the space and makes it look cleaner, even if you haven't touched anything else.
Start by picking up everything that doesn't belong on the floor. Shoes go in the closet or on a rack. Bags get hung up or placed on a shelf.
Boxes and packages should be broken down and recycled. Cords can be bundled and tucked away behind furniture. Once the floor is bare, give it a quick sweep or vacuum to remove dust and debris.
You'll be surprised how much bigger and calmer your room feels.
Why Floor Clutter Matters
Floor clutter doesn't just look messy—it also collects dust and makes cleaning harder. When items are scattered around, you can't easily mop or vacuum, and dust bunnies accumulate underneath. Keeping the floor clear also reduces visual noise, which helps your brain relax.
It's one of the simplest ways to make a room feel instantly tidier.
Quick Sorting System
Grab a laundry basket or a box and walk around your room, tossing in anything that's on the floor. Then sort the contents: put away clothes, return items to their proper spots, and trash anything that's garbage. This method takes less than 10 minutes and prevents you from getting sidetracked.
Maintain The Habit
To keep your floor clear, make it a rule that nothing sits on the floor overnight. Have designated spots for shoes, bags, and cords. A small shoe rack or a basket by the door can work wonders.
Once you get used to a clear floor, you'll never want to go back.
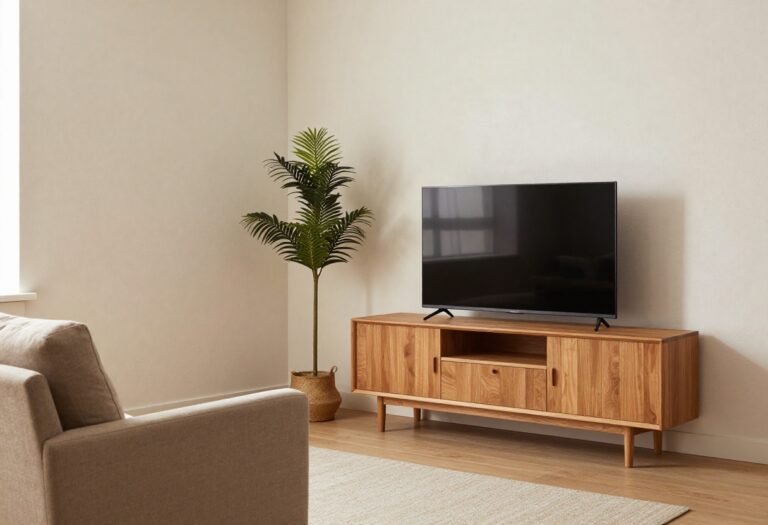
16. Wipe down electronics
Electronics are dust magnets, and they often get overlooked during a quick tidy. But a dusty screen or grimy keyboard makes the whole room feel messier than it is. A fast wipe-down takes under a minute per device and instantly freshens up your space.
Grab a dry microfiber cloth—no sprays or paper towels, which can damage screens. Start with your TV or monitor, using gentle circular motions. Then move to your computer, speakers, and any charging stations.
Don't forget the back of devices and cords where dust bunnies hide. This small step makes your tech look brand new and reduces allergens in your bedroom.
Choose The Right Cloth
Microfiber is key. It traps dust without scratching surfaces. Avoid using household cleaners or water on screens unless specified by the manufacturer.
A dry cloth works for most dust, but for stubborn spots, slightly dampen the cloth with distilled water.
Target High-touch Areas
Focus on things you use daily: phone charger area, laptop keyboard, mouse, and remote controls. These collect oils and dust fast. A quick once-over removes grime and makes your space feel cleaner instantly.
Don't Forget Cords And Vents
Cords and power strips gather dust too. Wipe them down with the same microfiber cloth. For vents on electronics, use a soft brush or a can of compressed air to clear out dust buildup, which helps devices run cooler and quieter.
17. Clean the windows and mirrors
Natural light can completely change how your bedroom feels, but it won't help if your windows and mirrors are smudged and dusty. A quick clean makes the room look brighter and more spacious without any effort. You'll be surprised at the difference a streak-free surface makes.
Gather The Right Tools
You don't need fancy products. A good glass cleaner and a lint-free microfiber cloth work best. Avoid paper towels—they leave lint and streaks.
If you prefer a DIY solution, mix equal parts white vinegar and water in a spray bottle. It's cheap and effective.
Work From Top To Bottom
Start at the top of the window or mirror and work your way down. This prevents drips from ruining already-cleaned areas. Spray the cleaner onto the cloth, not directly onto the surface, to avoid overspray on walls or frames.
Use horizontal strokes on one side and vertical on the other to spot streaks easily.
Don't Forget The Sills And Frames
Dust and grime collect on window sills and mirror frames. Wipe them down with a damp cloth before cleaning the glass. This keeps dirt from transferring back onto the clean surface.
A quick vacuum with a brush attachment works too.
18. Empty the trash can
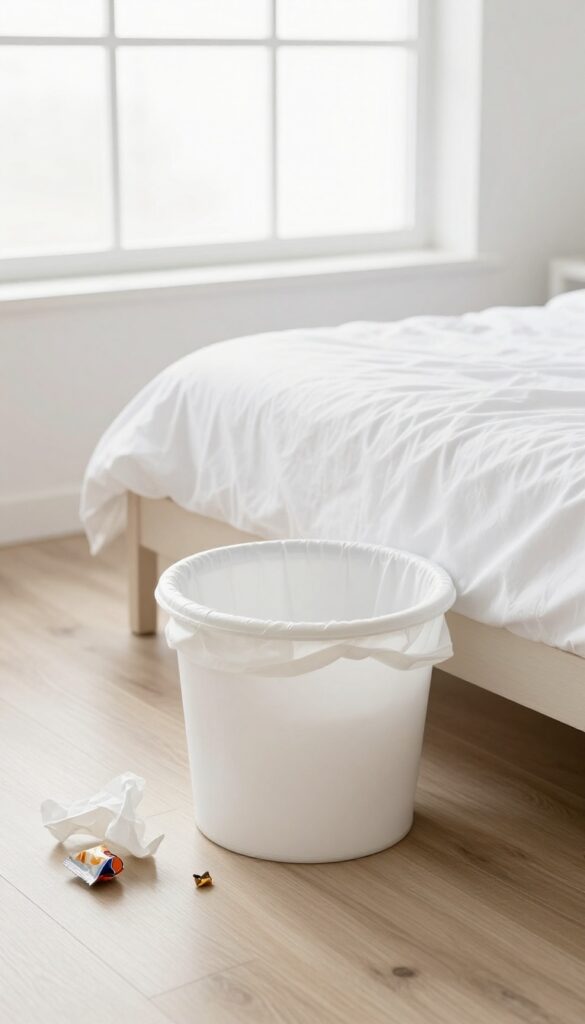
A trash can overflowing with crumpled tissues, snack wrappers, and random receipts doesn't just look messy—it can make the whole room feel stale. Taking out the bedroom trash is one of those small tasks with an outsized impact. It takes less than a minute, but the fresh, clean result lasts for days.
Why It Matters
Trash cans are easy to overlook, especially when you're focused on bigger surfaces like the bed or dresser. But an overstuffed bin sends a signal that the room isn't fully clean. Worse, it can start to smell if food wrappers or damp items sit too long.
Emptying the trash is a quick win that instantly lifts the room's freshness.
How To Do It Right
First, gather any stray trash that missed the bin—receipts on the nightstand, empty water bottles by the desk, or used tissues on the floor. Then tie up the bag and take it straight to the main trash or outside. Don't just set it by the door.
Finally, put in a fresh liner. A new bag makes the bin look clean and ready to use.
Bonus Tip: Wipe The Can
If you have a minute, give the inside and outside of the trash can a quick wipe with a disinfectant wipe or damp cloth. Dust and sticky residue build up over time. This extra step keeps the can itself from becoming a source of odors or grime.
19. Add a finishing touch
You've scrubbed, sorted, and organized. The room looks clean, but something still feels missing. That last layer—the finishing touch—is what transforms a tidy room into a welcoming space.
It's the difference between a hotel room and a home.
Light A Candle
A warm, subtle scent can instantly shift the mood. Choose a candle with a calming fragrance like lavender, vanilla, or sandalwood. Light it for just a few minutes while you finish up, or let it burn while you relax.
The soft glow and gentle aroma signal that the cleaning is done and it's time to unwind.
Spritz A Linen Spray
If you're not into candles, a linen spray is a quick alternative. A couple of spritzes on your pillows and duvet can make the bed feel fresh and inviting. Look for sprays with essential oils—something light and natural, not overpowering.
It's a small step that adds a spa-like touch.
Place Fresh Flowers Or Greenery
Nothing says 'finished' like a small vase of fresh flowers or a potted plant. You don't need a big bouquet—a single stem in a bud vase on your nightstand is enough. If fresh flowers aren't practical, a small succulent or a sprig of eucalyptus works too.
It brings life and color to the room.
20. Do a final walkthrough
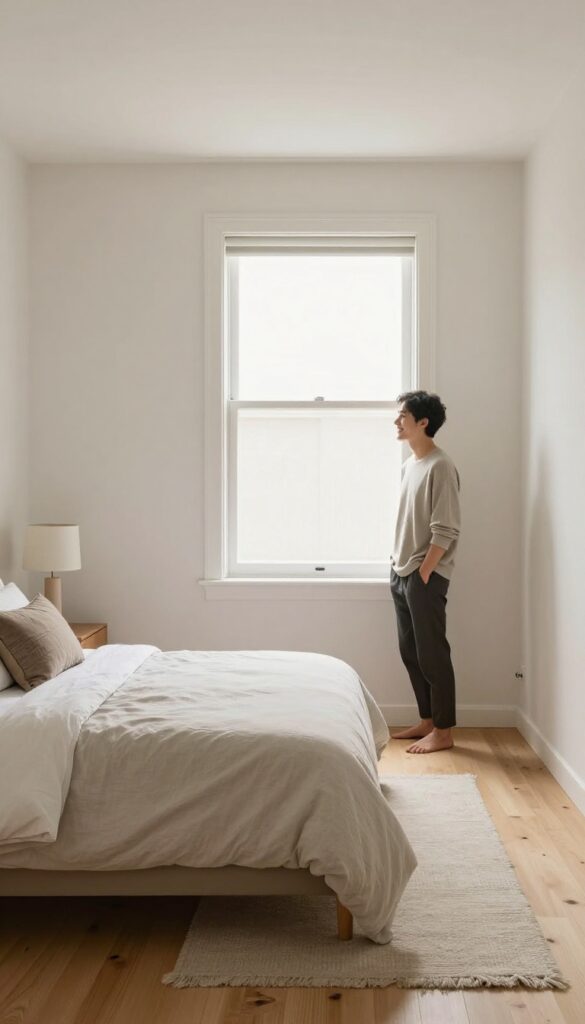
Stand at the doorway and scan the room. Adjust anything that looks out of place. Enjoy your reset space.
Scan From The Entry
Position yourself at the doorway and slowly pan your gaze across the entire room. Notice if any items are out of place—a stray sock, a tilted picture frame, or a lamp that’s slightly crooked. This bird’s-eye view helps you catch small details you might miss when you’re in the thick of cleaning.
Tweak And Perfect
Walk in and adjust anything that catches your eye. Fluff a pillow, straighten a rug, or fold a throw blanket that’s hanging unevenly. These micro-adjustments take seconds but make the room feel intentional and polished.
Celebrate The Result
Take a moment to appreciate your work. Breathe in the fresh scent, notice the clear surfaces, and enjoy the calm energy. This final walkthrough isn’t just about fixing flaws—it’s about acknowledging that you’ve transformed your space into a sanctuary.
FAQ
How long does a bedroom reset take?
A fast reset using these steps typically takes 30 to 60 minutes, depending on the size of your room and how much clutter has accumulated.
Do I need to follow the steps in order?
The steps are ordered for efficiency, but you can skip around. Just make sure to finish each step before moving on to avoid backtracking.
What if I don't have time for all 20 steps?
Focus on the high-impact steps: make the bed, clear surfaces, and remove trash. Even 5 steps can make a noticeable difference.
How often should I do a bedroom reset?
A quick reset once a week helps maintain order. A deeper clean can be done monthly or as needed.
What cleaning supplies do I need?
Basic supplies: all-purpose cleaner, microfiber cloths, glass cleaner, vacuum or broom, trash bags, and laundry detergent.
Conclusion
A clean bedroom isn't just about appearances—it directly affects how well you sleep and how productive you feel the next day. By following these 20 steps, you've turned a chaotic space into a calm sanctuary without spending hours. The key is consistency: spend just 10 minutes each morning making your bed and putting away stray items.
That small habit keeps the reset from becoming necessary again anytime soon. Enjoy your fresh start.