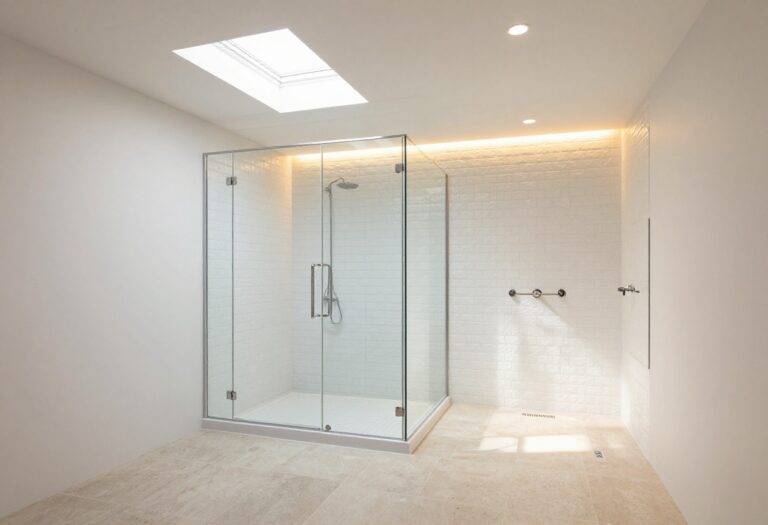
15 Shower Stall Ideas That Make Compact Bathrooms Shine
Small bathrooms often get the short end of the design stick, especially when it comes to the shower. A cramped stall can feel more like a penalty box than a place to unwind.
But with the right layout, materials, and a few clever tricks, you can turn that tight corner into the most refreshing spot in your home. The secret is to think vertically, use transparent elements, and choose fixtures that pull double duty.
Whether you're planning a full renovation or just want to refresh the look, these 15 shower stall ideas will help you make every inch count. From sleek glass panels to built-in benches, each idea is practical, stylish, and tailored for small spaces.
1. Go Frameless with Glass Panels
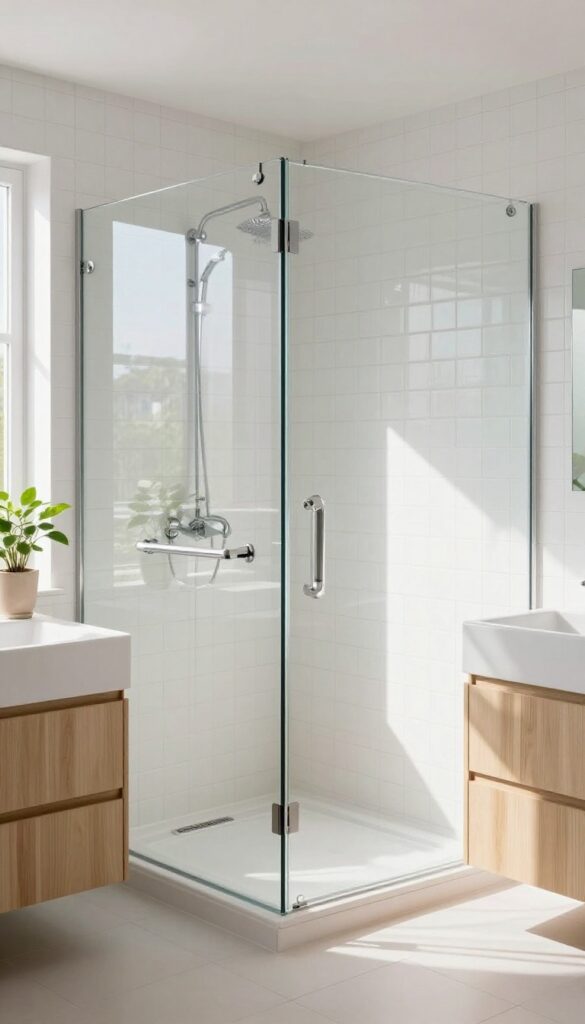
A frameless glass panel is the closest thing to an invisibility cloak for your shower. It opens up the space visually, letting light flow through and making the bathroom feel larger. Without bulky frames, the eye travels uninterrupted from tile to tile, creating a seamless, airy look that's perfect for tight quarters.
Frameless glass panels are a game-changer for compact bathrooms. They eliminate the visual clutter of aluminum or chrome frames, which can make a small space feel boxed in. The clear glass allows natural light to bounce around, making the entire room appear brighter and more spacious.
Plus, the sleek, modern aesthetic adds a touch of luxury without taking up extra square footage.
Why Frameless Works In Small Spaces
In a small bathroom, every visual trick counts. Frameless glass panels create an unobstructed view, so the eye isn't stopped by thick frames. This makes the shower blend into the room, tricking the brain into seeing more space.
The lack of hardware also means fewer places for soap scum to hide, making cleaning a breeze.
Choosing The Right Glass Thickness
For safety and durability, opt for tempered glass that's at least 3/8-inch thick. Thicker glass feels more substantial and reduces vibration, but it can be heavier and more expensive. In a small stall, a 3/8-inch panel strikes the perfect balance between sturdiness and visual lightness.
Clear glass is best for openness, but frosted or textured glass offers more privacy if that's a concern.
Installation Tips For A Seamless Look
Frameless panels require precise measurements and sturdy hinges. Hire a professional if you're not confident in your DIY skills—a poorly installed panel can leak or wobble. Use a continuous bottom track or a minimal floor guide to keep the door stable without adding visual bulk.
Also, consider a slight tilt inward at the top to prevent water from splashing out.
2. Use a Curved Shower Rod for Extra Elbow Room
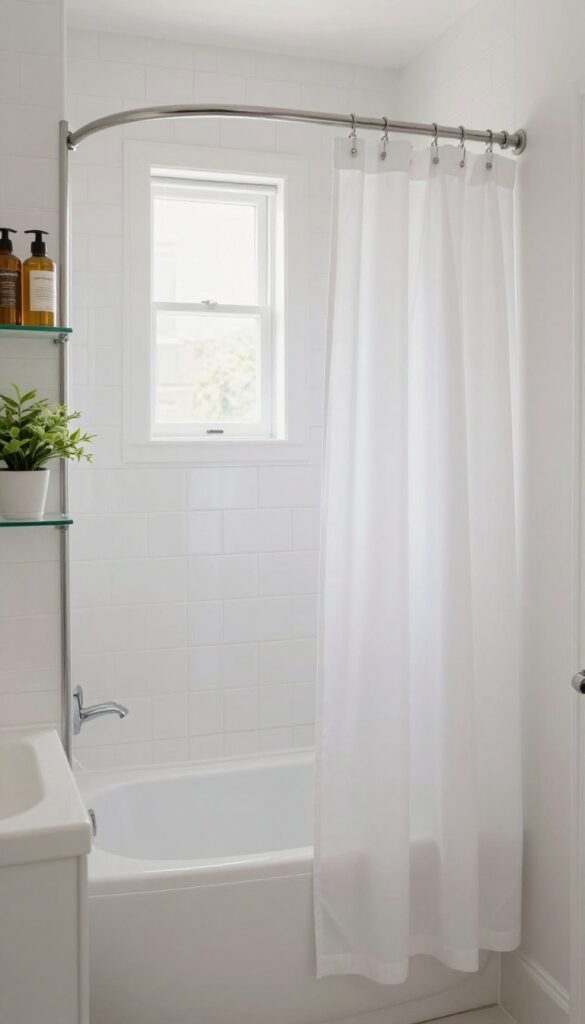
A curved shower rod might not sound like a game-changer, but it can make a standard tub-shower combo feel surprisingly roomier. The rod bows outward, giving you a few extra inches of shoulder space where you need it most. It's a simple, affordable swap that takes about ten minutes to install.
The magic of a curved rod lies in the subtle arc that pushes the curtain away from your body. That extra space means your elbows won't brush against the wet curtain every time you move. You'll notice the difference immediately, especially if you're used to the claustrophobic feel of a straight rod.
How Much Space Does It Really Add?
Most curved rods add about 3 to 4 inches of interior space at the center. That might not sound like much, but in a cramped shower, those inches make a big difference. You can move freely, wash your hair without hitting the curtain, and even shave your legs without feeling like you're in a straitjacket.
Choosing The Right Curved Rod
Look for a rod that's made of stainless steel or aluminum to avoid rust. The curve should be gradual, not too sharp, so the curtain glides smoothly. You'll also want to check the mounting hardware—some rods use tension springs, while others need screws.
Tension rods are easier, but screw-in models are sturdier for daily use.
Installation Tips And Tricks
Measure your tub width first, then pick a rod that extends a bit beyond that. If you're using a tension rod, make sure it's tight enough to stay put. For a more permanent fix, use the screw-in brackets and a level to keep everything straight.
Add a curved rod with a matching curtain and you're done—no contractor needed.
3. Install a Corner Shower Caddy for Vertical Storage
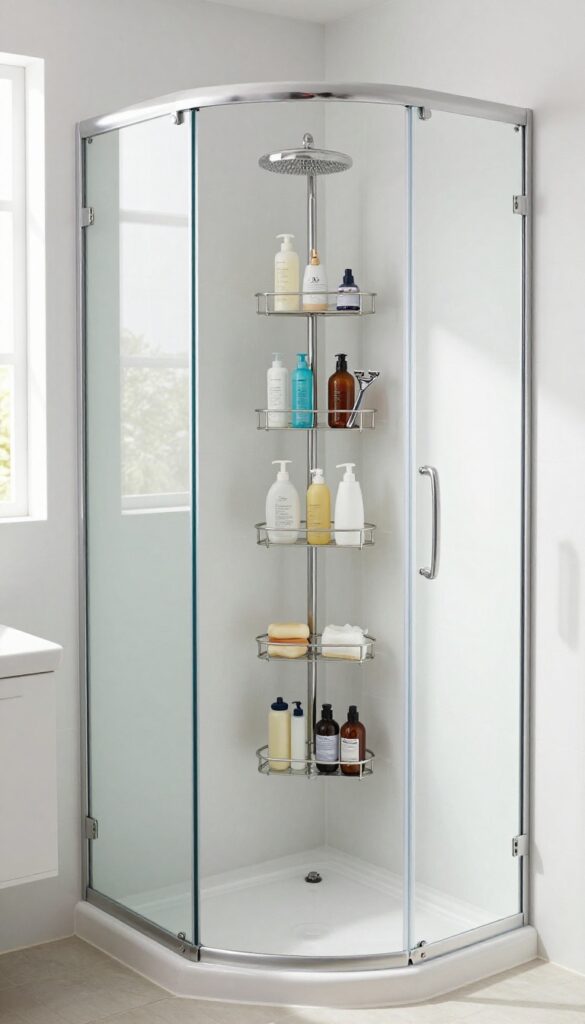
When floor space is tight, the only way to go is up. A corner shower caddy takes advantage of the often-unused vertical corner area, keeping your bottles and soaps within easy reach without cluttering the floor or the shower seat. Tall, multi-tiered caddies are especially handy because they let you organize everything from shampoo to razors in one compact spot.
Choose a rust-resistant model, and it will stay looking sharp even with constant moisture.
A corner caddy is a simple upgrade that delivers big results in a small shower. By stacking your essentials vertically, you free up the floor and make the space feel more open. Plus, having everything organized at eye level means no more bending down or fumbling for a bottle.
Look for a caddy that fits snugly into the corner, ideally with adjustable shelves or baskets to accommodate different bottle heights. Many models mount to the wall or use tension poles, so they don't take up any floor space at all. Go for materials like stainless steel or coated aluminum to avoid rust and keep maintenance low.
Why Vertical Storage Matters
In a compact shower, every inch counts. Vertical storage uses the height of the stall, which is often underutilized. A tall caddy can hold a surprising amount of products without making the space feel crowded.
It also keeps the floor clear, which makes cleaning easier and reduces trip hazards.
Choosing The Right Material
Rust is the enemy of any shower accessory. Stainless steel, aluminum with a protective coating, or plastic with a metal core are all good choices. Avoid cheap chrome finishes that can peel or rust over time.
A caddy with a matte or textured finish also hides water spots better.
Placement And Installation Tips
Install the caddy near the showerhead or the side wall where you usually reach for products. Make sure it's within arm's reach but not in the direct stream of water if possible. For tension pole caddies, ensure they are snug and secure to avoid wobbling.
Wall-mounted options require a solid anchor, especially if you're using tile or fiberglass.
4. Choose a Sliding Barn Door for a Rustic Touch
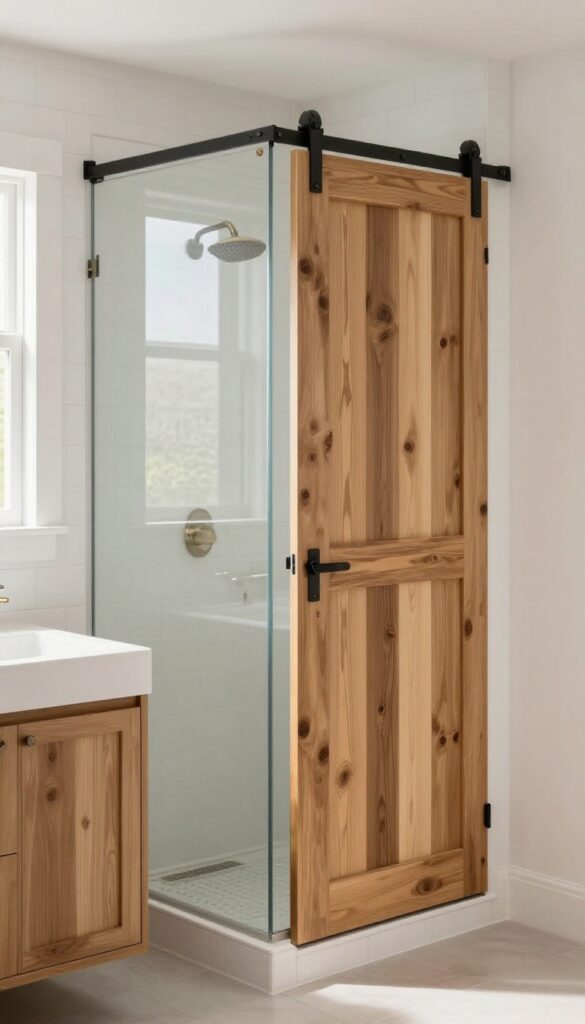
If your bathroom is so tight that the shower door swings into the toilet or vanity, a sliding barn door is a smart, stylish fix. It glides along a track mounted above the opening, so it takes up zero floor space. Beyond the space savings, it brings a cozy, rustic vibe that pairs beautifully with farmhouse-style bathrooms.
A sliding barn door isn't just for the main bathroom entrance—it works wonders for the shower stall itself. By replacing a traditional hinged door, you free up the area right in front of the shower, making the room feel larger and easier to move around in. Plus, the hardware adds a touch of industrial charm that can warm up an otherwise plain space.
Space-saving Benefits
The biggest win is the clearance. With a sliding door, you don't need to worry about the swing arc hitting a nearby sink, toilet, or towel rack. That means you can position the shower closer to other fixtures without feeling cramped.
It's a practical solution for narrow layouts where every inch counts.
Style Options And Materials
Barn doors come in a range of materials—reclaimed wood, frosted glass, or even metal. For a rustic touch, go with a solid wood door in a warm stain. If you want more light to pass through, choose a door with a glass panel or a frosted insert.
The hardware finish (matte black, bronze, or brushed nickel) can tie into your existing fixtures.
Installation And Water Protection
Installing a sliding barn door requires a sturdy track mounted above the opening. Make sure the wall can support the weight. To keep water inside the shower, use a slight slope on the floor and a bottom seal or a small curb.
A well-sealed door prevents splashes and keeps the bathroom floor dry.
Maintenance And Durability
Wood doors need periodic sealing to resist moisture and warping. Opt for a water-resistant finish or a composite material that mimics wood. The track and rollers should be stainless steel or coated to prevent rust.
With regular care, a barn door shower can last for years and become a standout feature in your bathroom.
5. Add a Built-In Niche for Shower Essentials
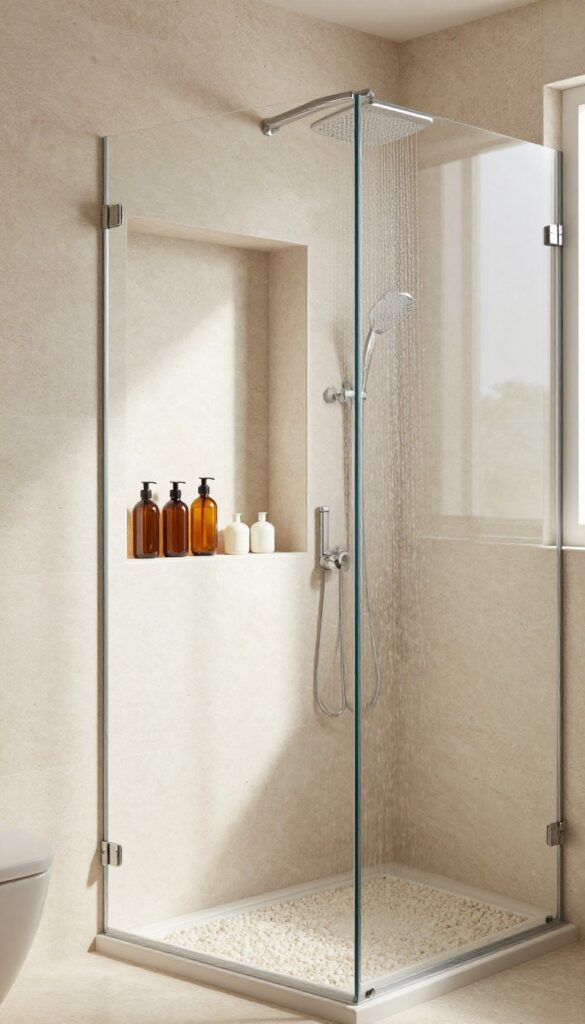
A built-in niche is one of those upgrades that feels obvious once you have it. Instead of juggling bottles on the floor or a hanging caddy, you get a sleek, recessed shelf that disappears into the wall. It keeps everything within reach without stealing any precious floor space.
For small showers, every inch counts. A niche carves out storage from the wall itself, so it doesn't push into the walking area. You can place it at the perfect height for shampoo and soap, and it looks like part of the design rather than an afterthought.
Pick The Right Spot
The best location is usually on a side wall, around chest height, so you can grab bottles without bending or stretching. If you have a corner shower, a niche on the back wall works well. Avoid placing it directly under the showerhead to keep water from pooling on the shelf.
Size And Depth Matter
A standard niche is about 12 inches wide and 6 inches deep, but you can adjust it to fit your bottles. Make sure it's deep enough to hold full-size shampoo bottles without them sticking out. If you're tiling, consider a slightly larger niche to add a decorative touch, like a contrasting tile back.
Tiling Options And Waterproofing
For a seamless look, use the same tile as the shower walls. If you want a focal point, try a different color or a mosaic. The niche must be properly waterproofed with a membrane behind the tile to prevent moisture damage.
A slight slope on the shelf helps water drain off.
Retrofit Or Build-in?
If you're renovating, building a niche into the framing is straightforward. For existing showers, you can install a surface-mounted niche that sticks out slightly, but it takes up a little space. Either way, you'll gain storage without cluttering the floor.
6. Opt for a Rainfall Showerhead with a Handheld Combo
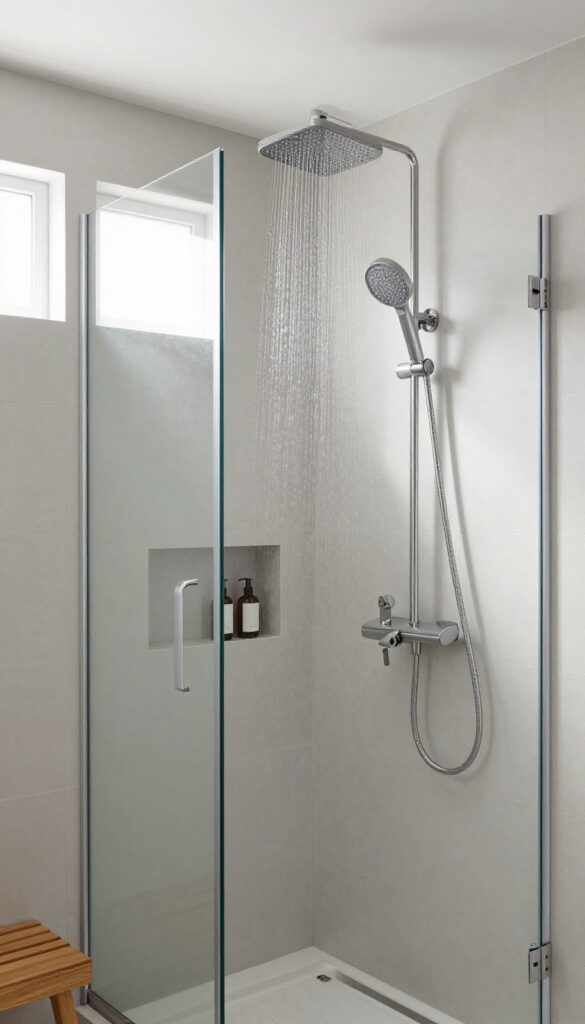
Rainfall showerheads are often associated with big, spa-like bathrooms, but they can work beautifully in compact stalls too. The key is pairing one with a handheld attachment, which gives you the best of both worlds: a drenching overhead spray and a flexible wand for targeted rinsing. This combo doesn't just feel indulgent—it also makes everyday tasks like cleaning the stall or washing kids much easier.
A rainfall showerhead mounted overhead creates a luxurious feel, while a handheld attachment offers flexibility for rinsing and cleaning. This combo is both indulgent and practical.
Why This Combo Works In Small Spaces
In a compact shower, every fixture needs to earn its place. A rainfall head delivers a wide, gentle spray that covers your whole body, so you don't need to move around much. The handheld adds versatility without taking up extra wall space, making it perfect for rinsing hard-to-reach spots or guiding water exactly where you need it.
Choosing The Right Setup
Look for a model with a diverter valve that lets you switch between the rainfall head and the handheld, or use both at once if you want. A handheld with a sliding bar is a smart choice because it lets you adjust the height easily, especially if you share the shower with kids or tall partners. Opt for a brushed nickel or matte black finish to hide water spots and keep the look sleek.
Installation Tips For Tight Stalls
If you're replacing an existing showerhead, the installation is usually straightforward. For a rainfall head, make sure your water pressure is sufficient—some models need a minimum flow rate to work properly. If you're mounting the handheld on a wall, place it at a height that's easy to reach but doesn't interfere with the rainfall spray.
A flexible hose with a kink-resistant design will make maneuvering easier in tight corners.
7. Use Large-Format Tiles to Minimize Grout Lines
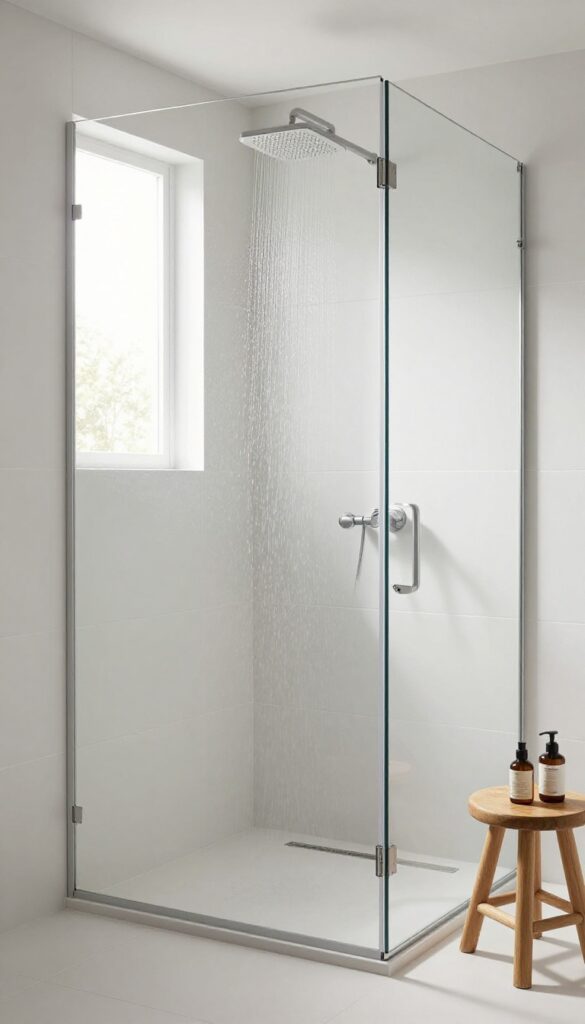
Grout lines might not be the first thing you notice in a shower, but they play a huge role in how open and clean the space feels. In a compact stall, every line adds visual noise, making the walls look busier and smaller. Large-format tiles solve this by cutting down on the number of grout joints, creating a smoother, more seamless surface that tricks the eye into seeing more space.
Plus, fewer grout lines mean less scrubbing and less chance of mold or mildew taking hold in those hard-to-reach crevices.
Large-format tiles are a smart choice for small showers not just for looks, but for practicality. With fewer grout lines, there’s less surface area for soap scum and grime to accumulate, making cleaning a breeze. The larger panels also mean fewer interruptions in the visual flow, which helps the walls appear taller and wider.
And because you’re using fewer tiles, installation can be quicker, though you’ll want a professional to handle the heavy slabs to ensure proper leveling and waterproofing.
Why Fewer Grout Lines Matter
Grout lines are like tiny highways for dirt and moisture. In a small shower, every extra line adds to the visual clutter and gives mold a place to hide. Large tiles reduce these lines dramatically, so you get a cleaner look and a more hygienic surface.
Plus, the smooth expanse of tile reflects light better, making the stall feel brighter and more open.
Picking The Right Size And Finish
When choosing large-format tiles, aim for sizes like 12×24 inches or even 24×48 inches. The bigger the tile, the fewer grout lines you’ll see. Go for a matte or subtle textured finish to avoid a slippery floor, and consider using the same tile on the walls and floor to create a seamless, continuous look.
Lighter colors and subtle veining can also enhance the sense of space.
Installation Tips For Small Spaces
Large tiles can be tricky to install in a tight shower because they’re heavy and require precise cutting. Make sure your walls are perfectly flat before tiling, or you’ll end up with lippage—where one tile edge sticks up higher than the next. Use a leveling system to keep everything flush, and have a pro handle the cuts around fixtures and corners.
Also, opt for a grout color that blends with the tile to make the lines even less noticeable.
8. Incorporate a Teak Bench for a Spa-Like Feel
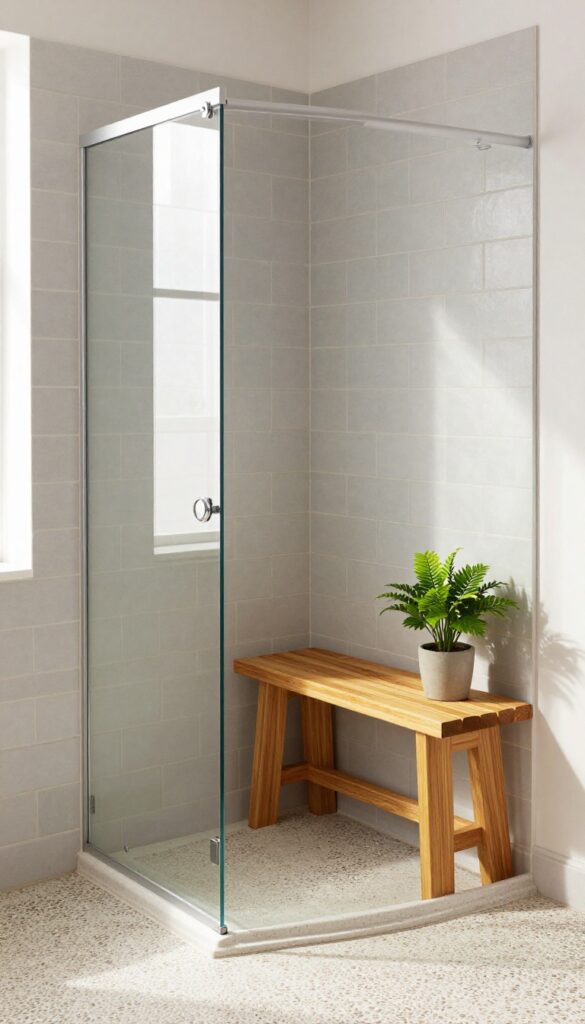
A shower bench often feels like a luxury reserved for oversized bathrooms, but a compact teak bench can slip into even the tightest stall. It adds a natural, warm element that instantly makes the space feel more like a spa and less like a utility closet. Plus, it's genuinely practical—giving you a place to sit while shaving your legs or simply to rest a foot while you scrub.
Teak is the perfect material for this job because it's naturally water-resistant and can handle the constant humidity of a shower without warping or rotting. Unlike plastic or metal benches that can look clinical, teak brings an organic texture that pairs beautifully with tile, stone, or even basic white subway tile. And because it's lightweight, you can move it out when you need extra floor space or want to clean the stall thoroughly.
Why Teak Works In Small Showers
Teak's natural oils make it incredibly durable in wet environments, so it won't swell, crack, or grow mold like other woods might. It also has a warm, golden tone that adds a touch of nature to an otherwise sterile space. In a small shower, a teak bench can serve as a visual anchor, drawing the eye and making the area feel intentional rather than cramped.
Choosing The Right Size And Style
When space is limited, you don't want a bulky bench that eats up the entire floor. Look for a compact teak bench that's around 16 to 18 inches deep and 20 to 24 inches wide—enough to sit comfortably but small enough to leave room for movement. Some benches come with folding legs, which are perfect for tucking away when not in use.
A simple, slatted design allows water to drain through and keeps the bench from becoming a puddle trap.
Placement And Maintenance Tips
Place the bench against the wall opposite the showerhead to keep it out of the direct spray, which also gives you a convenient footrest while you rinse. To keep it looking fresh, rinse it after each use and let it air dry. A quick wipe with a damp cloth every few weeks will prevent soap scum from building up.
If you notice the wood starting to look dry, a light coat of teak oil can restore its rich color.
9. Install a Shower Curtain with a Tension Rod for Rental-Friendly Flexibility
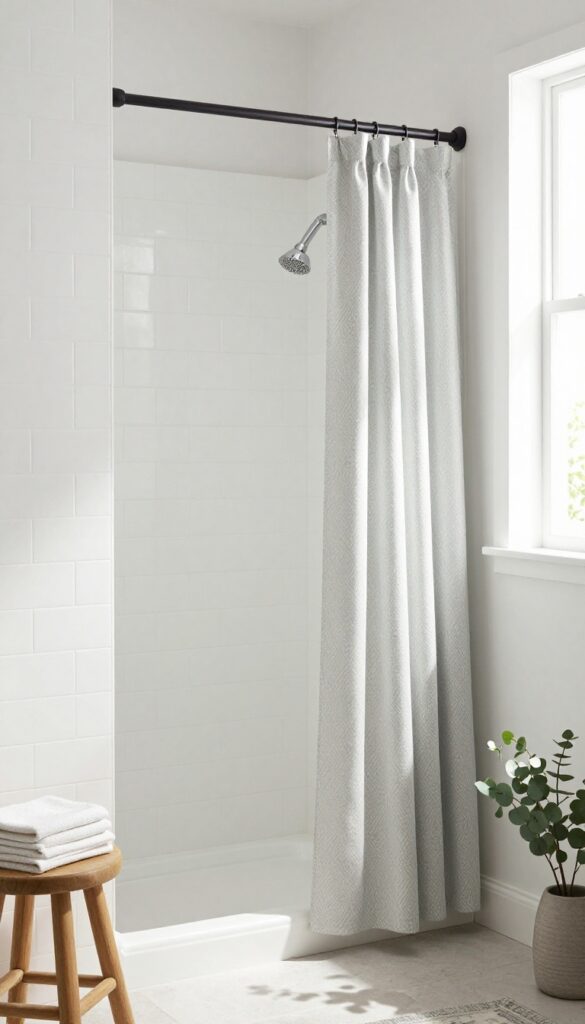
Renting often means living with a shower that's not yours to change. But a tension rod and a fresh shower curtain can transform the space without a single drill hole. This simple swap is quick, reversible, and perfect for adding style on a budget.
Plus, you can take it with you when you move.
A tension rod fits snugly between two walls, so no tools or permanent hardware are needed. Pair it with a high-quality shower curtain and liner, and you've got an instant refresh. Choose a light-colored curtain to bounce light around and make the stall feel bigger.
Patterns can add personality, but keep them subtle to avoid overwhelming a small space.
Why Tension Rods Work In Small Bathrooms
Tension rods are adjustable, so they fit most standard shower openings. They're also sturdy enough for everyday use when installed correctly. Because they don't require drilling, they're ideal for renters or anyone who wants to avoid permanent changes.
And if you ever need to replace the rod, it's a five-minute job.
Choosing The Right Curtain
Look for a curtain that's machine washable and water-repellent. A fabric curtain with a PEVA liner gives a more upscale feel than a plastic one. For small spaces, avoid dark, heavy fabrics.
Instead, go for light neutrals, soft pastels, or simple geometric prints that add interest without closing in the room.
Styling Tips For A Polished Look
Hang the curtain rod higher than the shower opening to create the illusion of height. Use extra-long curtains and trim them to fit, or let them puddle slightly for a relaxed vibe. Add a curved tension rod to gain extra elbow room inside the shower.
It's a small change that makes a big difference in comfort.
10. Add a Corner Seat for Comfort and Safety
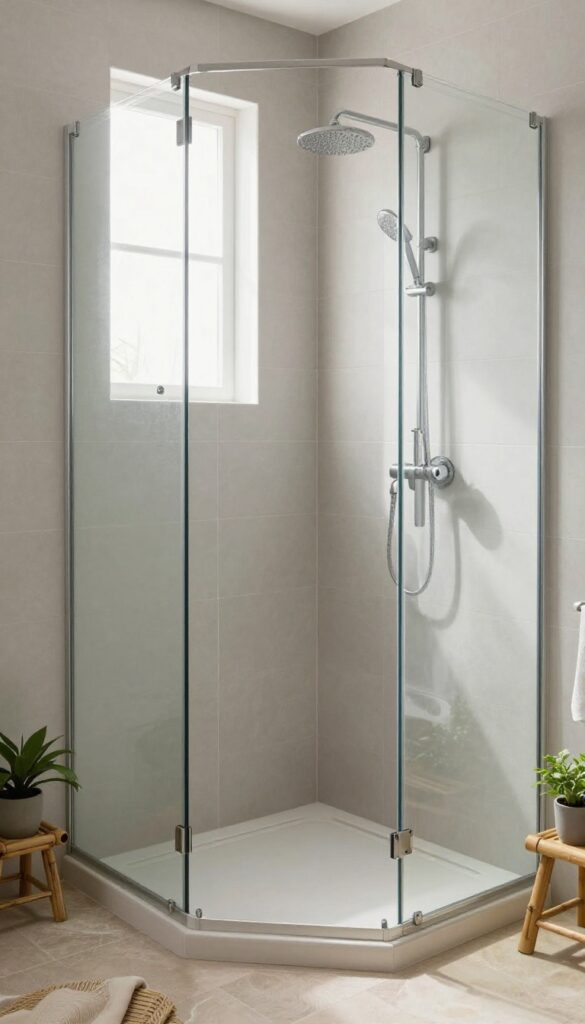
A built-in corner seat is more than just a nice place to sit. It's a practical addition that adds comfort and safety to a compact shower, especially for anyone who values stability or just wants to enjoy a longer, more relaxed rinse. When tucked into the corner, it uses space that might otherwise go unused, and it can be tiled to match the walls for a seamless, integrated look.
A corner seat doesn't have to eat up precious floor space. By fitting snugly into the corner, it leaves the rest of the shower open and easy to move around in. It's perfect for sitting while shaving your legs, resting a foot for balance, or simply taking a moment to enjoy the steam.
Plus, it's a thoughtful feature for older adults or anyone with mobility concerns, offering a secure spot to sit without needing a separate stool that can slide around.
Designing For Seamless Looks
To keep the seat from breaking up the visual flow, match its tile to the surrounding walls. Use the same large-format tiles or a complementary mosaic to create a continuous surface that makes the shower feel larger. If you want a subtle contrast, choose a slightly different shade or a wood-look tile for a warm accent, but keep the overall palette cohesive.
Size And Placement Tips
Aim for a seat depth of about 15 to 18 inches and a height that feels comfortable when you sit down—typically 17 to 19 inches. Place it in the corner opposite the showerhead so it stays dry when you're using the water, and make sure it doesn't block the door swing or the flow of traffic. A triangular or rectangular seat both work well; just measure your space to find the best fit.
Safety And Comfort Enhancements
Add a subtle non-slip surface on the seat, either through the tile texture or a mat, to prevent slipping when wet. You can also install a grab bar nearby for extra support, which is a smart addition for households with kids or older adults. The seat itself becomes a natural resting spot, making the shower feel more like a personal spa.
11. Use a Glass Block Window for Privacy and Light
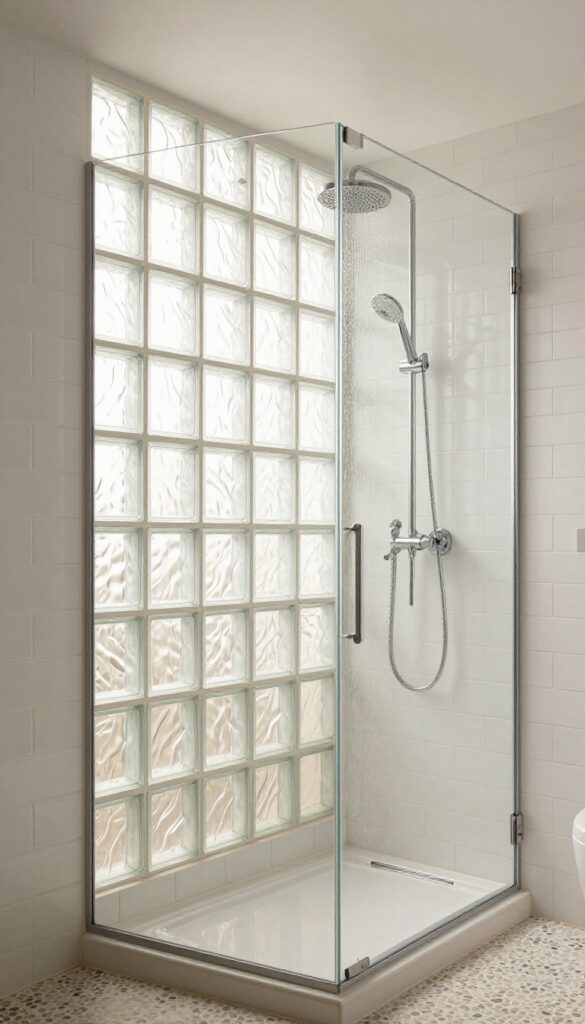
If your shower sits against an exterior wall, a glass block window can be a game-changer. It lets in soft, natural light without sacrificing privacy, and it adds a touch of architectural charm that plain drywall never could. Plus, it's a timeless look that works with both modern and traditional bathrooms.
Glass block windows are a classic solution for bringing brightness into a shower stall without turning it into a fishbowl. The textured glass diffuses light beautifully, creating a warm, spa-like glow even on cloudy days. They're also energy-efficient and low-maintenance, making them a smart choice for busy homeowners.
Why Glass Blocks Work In Small Showers
Small bathrooms often feel dark and closed in, especially when the shower is tucked into a corner. A glass block window punches through that heaviness by letting daylight bounce around the tile. The blocks scatter light, so you get plenty of illumination without any glare or direct sightlines from outside.
It's a simple upgrade that makes the whole room feel bigger and airier.
Privacy Without The Curtain
One of the biggest fears with a shower window is privacy. Glass blocks solve that with their frosted, wavy texture that blurs everything behind it. You can see shapes and movement, but no details, which means you don't need a curtain or blinds.
That's one less thing to clean and one more way to keep the stall feeling open and uncluttered.
Installation And Maintenance Tips
Installing a glass block window is a job best left to a pro, especially if you're cutting into an exterior wall. But once it's in, maintenance is a breeze. The blocks are sealed and waterproof, so they won't mold or mildew like grout lines.
Just wipe them down with a squeegee or glass cleaner now and then, and they'll stay crystal clear for years.
12. Install a Handheld Showerhead with a Slide Bar
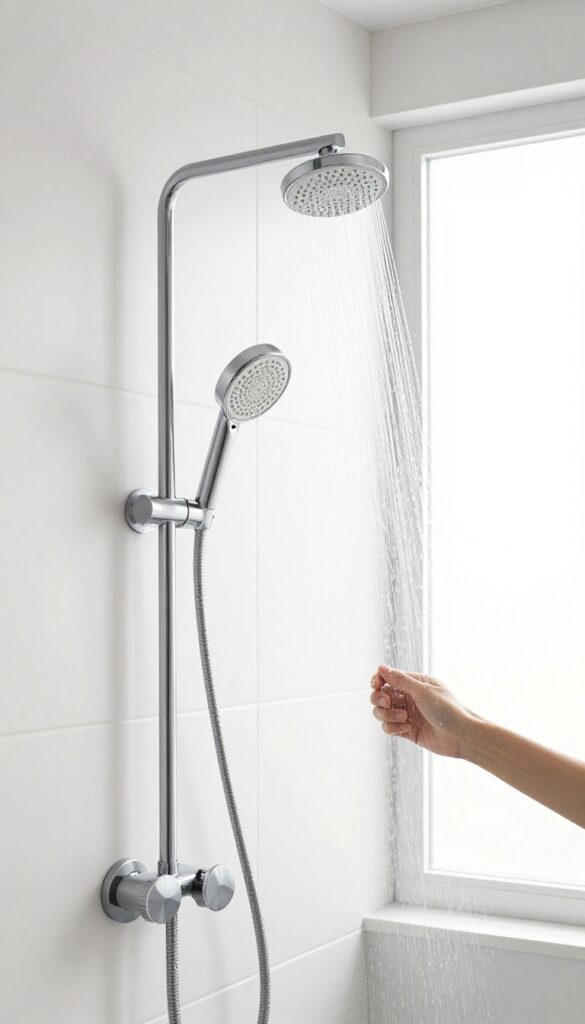
A fixed showerhead can be a real pain when you're trying to rinse off after a long day or wash the dog in a tight stall. A handheld model with a slide bar solves that by letting you adjust the height and angle to suit whoever is using it. It's a simple upgrade that adds a surprising amount of flexibility without taking up any extra space.
The beauty of a slide bar is that it puts the spray exactly where you need it. Kids can lower it to their level, tall folks can raise it high, and you can even detach the head for spot cleaning the walls or floor. It's a small change that makes the whole shower feel more adaptable and less cramped.
Height Adjustment For Everyone
One of the biggest annoyances with a fixed showerhead is that it's set at one height, which never seems right for everyone. A slide bar lets you move the head up or down in seconds, so each person can set it to their comfort. That means no more ducking or stretching, just a comfortable rinse every time.
Perfect For Pet Baths And Cleaning
If you've ever tried to bathe a wiggly dog under a fixed showerhead, you know the struggle. With a handheld, you can bring the water to the pet, not the other way around. It also makes cleaning the stall easier—just spray down the walls, corners, and floor without getting soaked yourself.
Easy Diy Upgrade
Swapping out a standard showerhead for a handheld with a slide bar is a weekend project most homeowners can handle. You'll need a few basic tools and a bit of plumber's tape, but it's straightforward. Look for a model with a sturdy metal bar and a hose that won't kink, and you're set.
13. Choose a Shower Base with a Low Threshold for Easy Access
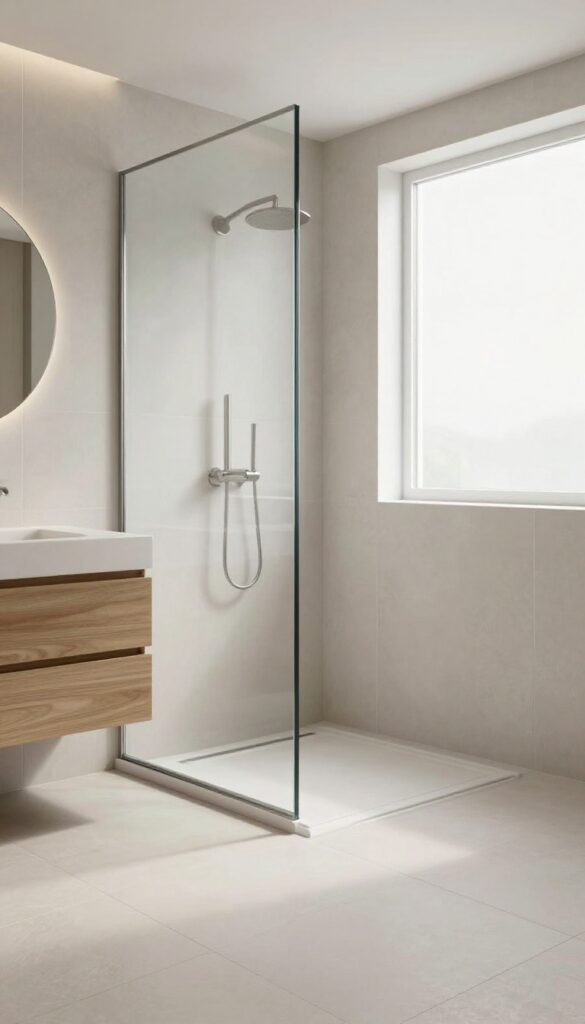
Stepping into a shower shouldn't feel like climbing over a hurdle, especially when you're short on space. A low-threshold or curbless shower base eliminates that step, creating a seamless transition from the bathroom floor. This not only makes the space feel larger but also adds a sleek, modern touch that's both practical and stylish.
A low-threshold base is a smart choice for small bathrooms because it visually opens up the floor, making the room appear more spacious. It also improves accessibility for everyone, from kids to older adults, and makes cleaning a breeze—no more scrubbing around a raised curb. Plus, it's a design statement that screams contemporary elegance.
Why Low Thresholds Work In Small Bathrooms
In a compact bathroom, every visual barrier counts. A traditional shower curb breaks the sightline, making the floor look choppy and the space feel tighter. A low or curbless base lets the tile flow continuously from the bathroom floor right into the shower, creating an uninterrupted expanse that tricks the eye into seeing more square footage.
It's a simple trick that architects love for small spaces.
Installation Tips And Considerations
Going curbless isn't just about picking a different base—it requires some planning. You'll need to slope the floor slightly toward the drain, which might mean adjusting the subfloor or using a linear drain system. If you're on a concrete slab, you may need to build up the surrounding floor.
But don't let that scare you; many prefabricated low-threshold bases are designed to make this easier. Just make sure your contractor knows you want a true curbless look, not just a shorter curb.
Pairing With Glass And Tile
To maximize the open feel, pair your low-threshold base with a frameless glass shower door or even a single glass panel. Skip the door entirely if you want a fully open concept—just ensure the slope is enough to keep water from escaping. For the floor, use large-format tiles or a continuous material like polished concrete to enhance the seamless look.
This combo turns your shower into a spa-like retreat that feels anything but cramped.
14. Add a Heated Towel Rack Near the Shower
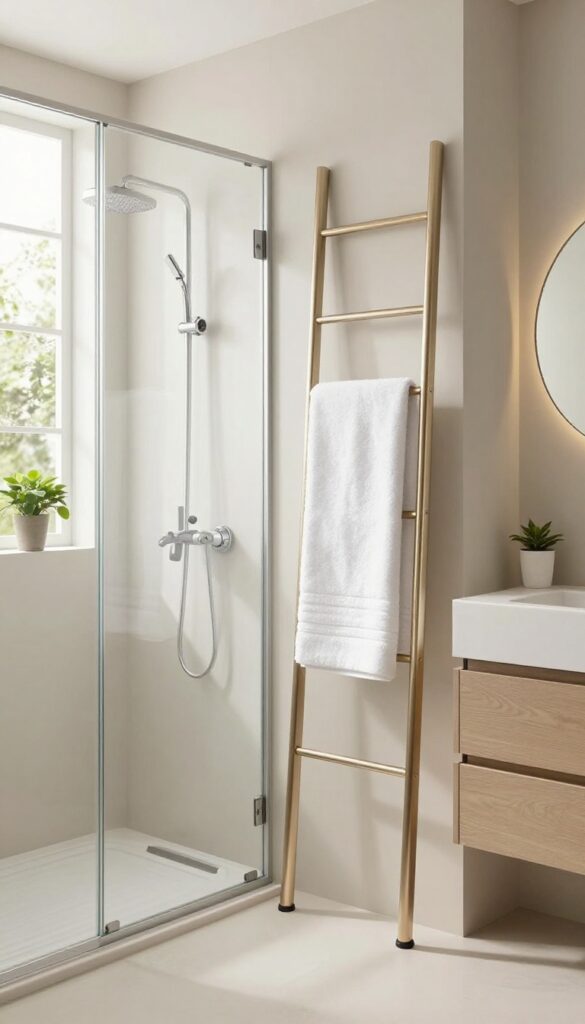
There's a small but mighty upgrade that can make your compact bathroom feel like a spa: a heated towel rack. It's not just about warm towels, though that's a huge perk. In a small space, it also helps dry towels faster, cuts down on that damp, musty smell, and frees up valuable wall space that a bulky towel bar might otherwise hog.
A heated towel rack is a smart addition to any small bathroom, especially when placed right outside the shower. It keeps towels toasty and dry, so you're not stepping out to a cold, damp towel. Plus, it reduces the humidity that can lead to mold and mildew, which is a common issue in tight, poorly ventilated bathrooms.
And since it mounts on the wall, it doesn't take up any floor space, making it a perfect fit for compact layouts.
Why It Works In A Small Bathroom
In a compact bathroom, every square inch counts. A heated towel rack does double duty: it warms your towels and acts as a drying rack, so you're not draping wet towels over doors or hooks. This helps keep the space feeling fresh and organized.
Plus, many models are slim and sleek, so they don't visually clutter the room. You can even find ones that double as a towel warmer and a small shelf, giving you extra storage without taking up more room.
Choosing The Right Style And Size
When picking a heated towel rack, think about the size of your bathroom and where you'll mount it. A ladder-style rack is great for holding multiple towels, while a slim horizontal bar works well in tight spots. Look for one with a low wattage to save energy, and consider a plug-in or hardwired version depending on your setup.
Stainless steel or chrome finishes blend easily with most fixtures, and you can find models with timers or thermostats for added convenience.
Placement Tips For Maximum Convenience
The best spot is close to the shower or tub, within arm's reach when you step out. If you have a small wall next to the shower, that's ideal. You can also mount it on the back of the bathroom door if space is tight, but make sure it doesn't interfere with the door swing.
Keep it away from direct water spray to avoid electrical hazards, and always follow the manufacturer's installation instructions. A little planning goes a long way in making your bathroom feel more luxurious and functional.
15. Use a Shower Curtain with a Liner to Add Color and Pattern
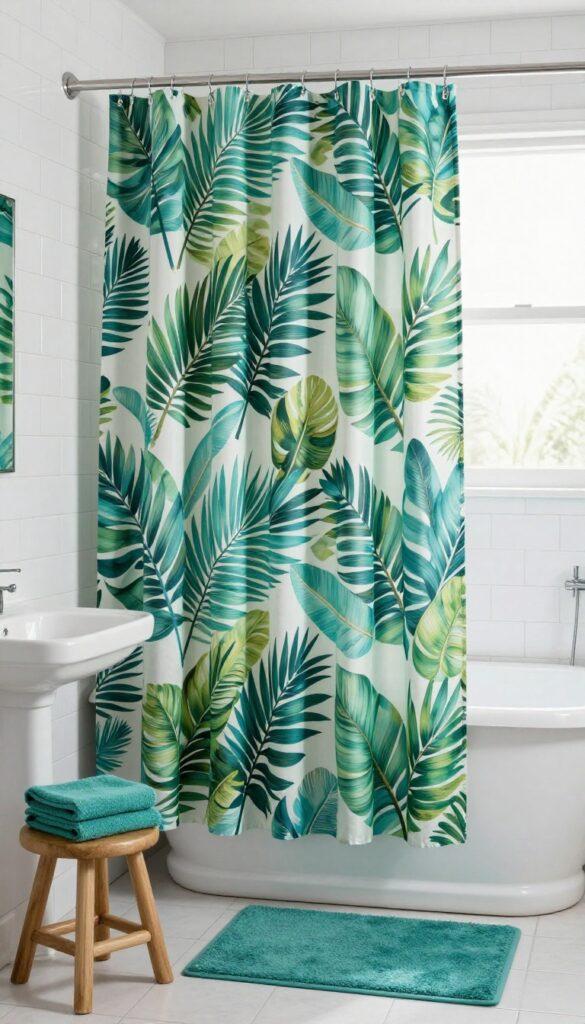
A shower curtain is often the first thing you notice in a small bathroom, so why not make it work for you? A patterned curtain can add a burst of personality and color without taking up any extra space. Pair it with a clear liner to keep water inside while letting the design shine through.
Pick A Pattern That Pops
When space is tight, a bold pattern can draw the eye and make the room feel more dynamic. Geometric prints, tropical leaves, or playful stripes can add visual interest without overwhelming the space. Just keep the rest of the bathroom neutral so the curtain becomes the focal point.
Layer With A Clear Liner
A clear vinyl liner is a practical choice because it keeps water from splashing out while showing off the curtain's design. Unlike opaque liners, it doesn't block the pattern or make the shower feel closed in. Plus, it's easy to wipe down and replace when needed.
Mix And Match With Accessories
Use the curtain as a starting point for your bathroom's color scheme. Pick up one of the accent colors from the pattern and repeat it in towels, a bath mat, or a small stool. This creates a cohesive look that feels intentional and polished, even in a compact space.
FAQ
What is the best shower door for a small bathroom?
Frameless glass doors are ideal for small bathrooms because they create an open, airy feel and allow light to pass through. Sliding or barn-style doors also save space by not swinging outward.
How can I make my shower stall look bigger?
Use large-format tiles to reduce grout lines, choose a clear glass enclosure, and keep the color palette light. Adding a built-in niche and a corner caddy reduces visual clutter and frees up floor space.
What is the best material for a shower base in a small bathroom?
Acrylic and fiberglass are lightweight, easy to clean, and come in many shapes. Stone resin is also durable and looks high-end, but it can be heavier and more expensive.
Can I install a shower in a small bathroom without a bathtub?
Yes, replacing a tub with a walk-in shower can free up space and make the bathroom feel larger. A curbless or low-threshold shower base enhances the sense of openness.
How do I add storage to a small shower stall?
Install a recessed niche in the wall, use a corner caddy, or add a hanging organizer over the showerhead. These options keep essentials off the floor and within easy reach.
Conclusion
Transforming a compact shower stall into a standout feature doesn't require a huge budget or a major remodel. Sometimes it's as simple as swapping a door, adding a niche, or choosing the right tile. Each of these ideas is designed to maximize space, light, and functionality.
Pick the ones that resonate with your style and practical needs. With a little creativity, your small bathroom can become a place you genuinely enjoy stepping into every day.