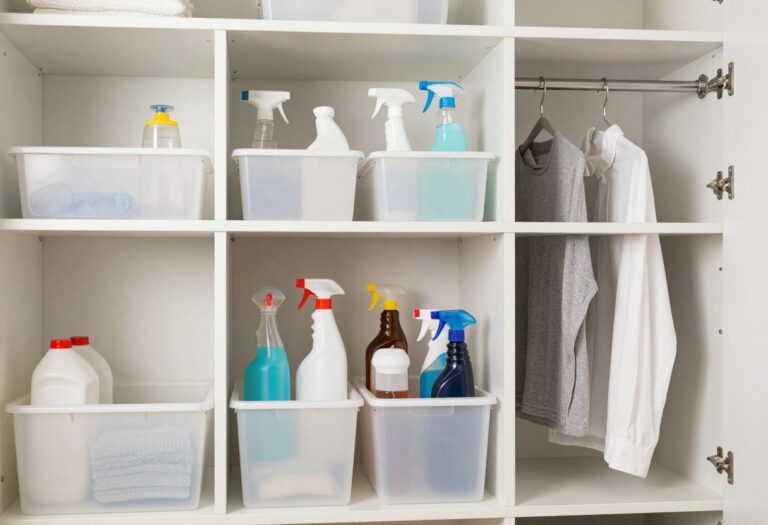
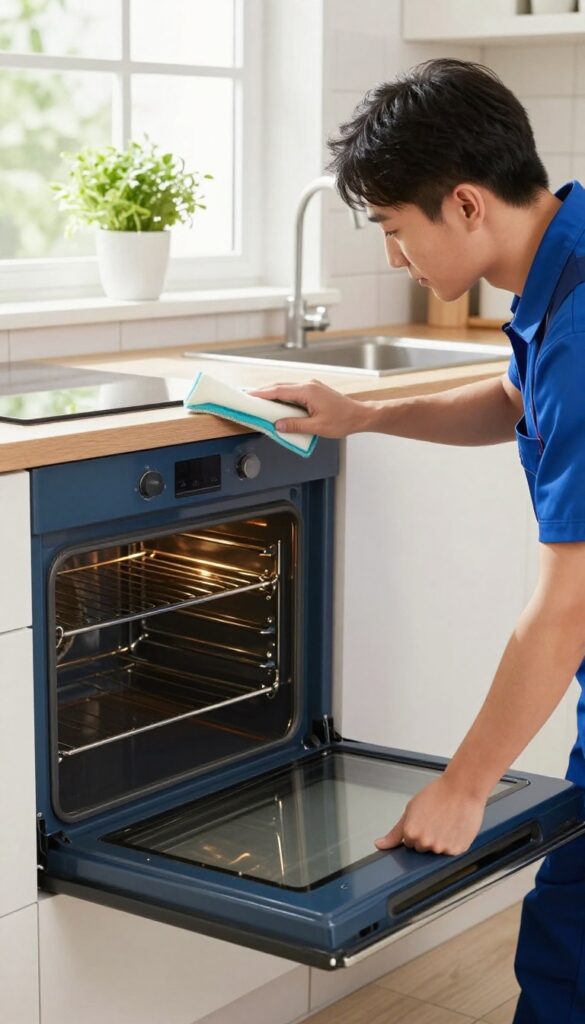
25 Oven Cleaning Ideas for a Fresh No Fuss Kitchen
A sparkling oven doesn't have to mean hours of scrubbing or harsh chemical fumes. Whether you're tackling a recent spill or months of baked-on grime, these 25 oven cleaning ideas deliver real results with minimal fuss.
From pantry staples like baking soda to clever shortcuts with dishwasher tablets, each method targets stubborn grease and residue without damaging your appliance.
Get ready to reclaim your oven's shine with practical, low-effort solutions that actually work.
1. Baking Soda and Vinegar Paste
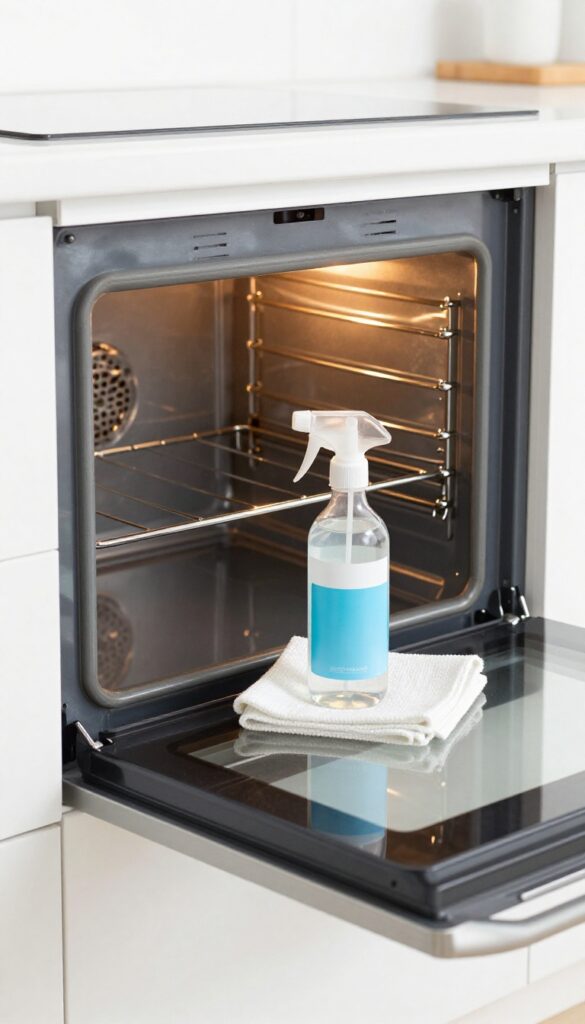
This classic combo is a powerhouse for cutting through baked-on grease without harsh scrubbing. The paste clings to vertical surfaces and crevices, giving it time to break down grime while you relax. A final spritz of vinegar creates a gentle foaming action that lifts residue away.
Start by mixing half a cup of baking soda with a few tablespoons of water until you get a spreadable paste. Remove the oven racks and wipe out loose debris, then coat the interior (avoid heating elements) with the paste. Let it sit overnight or for at least 12 hours.
The next day, spray vinegar over the dried paste—it will fizz and soften. Wipe clean with a damp cloth, rinsing frequently. For stubborn spots, scrub gently with a non-abrasive sponge.
Why It Works So Well
Baking soda is a mild alkali that reacts with acidic grease and food residues, breaking them down chemically. Vinegar's acetic acid neutralizes the baking soda, creating carbon dioxide bubbles that help lift grime. This two-step process is gentle on enamel and glass but tough on dirt.
Tips For Best Results
For extra-stubborn buildup, let the paste sit for a full 24 hours. If the paste is too runny, add more baking soda; if too thick, add a drop of water. Use a plastic spatula to scrape off thick residue before wiping.
Avoid using metal tools that could scratch the surface.
2. Lemon Steam Clean
Harness the power of citrus and steam to loosen stubborn grime without harsh scrubbing. This method uses natural acidity to break down grease while the steam softens baked-on residue, making cleanup almost effortless. Perfect for routine maintenance or tackling moderate buildup before a deep clean.
How It Works
Fill an oven-safe dish with water and add sliced lemons (or lemon juice). Place it on the middle rack and heat the oven to 250°F for 30 minutes. The steam and lemon vapors work together to soften grease and food particles, while the citric acid helps dissolve stubborn spots.
After the cycle, let the oven cool slightly, then wipe down surfaces with a damp cloth.
Best Uses
This method is ideal for light to moderate grime, especially on glass doors and interior walls. It’s also great for neutralizing odors—lemon leaves a fresh, clean scent. Use it after cooking strong-smelling foods like fish or curry to refresh the oven without chemicals.
Pro Tips
For extra cleaning power, add a splash of white vinegar to the water. Avoid opening the oven door during steaming to keep the heat and moisture trapped. If residue remains, follow up with a baking soda paste for spot treatment.
Always wipe while the oven is still warm (but not hot) for easiest removal.
3. Dishwasher Tablet Hack
You know those dishwasher tablets sitting under your sink? They are not just for dishes. Drop one into a bowl of warm water, let it fizz and dissolve, then dip a sponge into the solution.
The enzymes and surfactants cut through oven grease like magic—no elbow grease required. This hack works wonders on the glass door and interior walls, leaving them streak-free and shiny.
The dishwasher tablet hack is a game-changer for anyone who hates scrubbing. The tablet's powerful cleaning agents break down baked-on food and grease quickly. Simply dissolve one tablet in a quart of warm water, then use a sponge or microfiber cloth to wipe down the oven surfaces.
Rinse with a damp cloth afterward to remove any residue. This method is especially effective on oven doors and racks.
How It Works
Dishwasher tablets contain enzymes, surfactants, and alkaline salts that target grease and protein stains. When dissolved in warm water, these ingredients create a potent cleaning solution that loosens grime without harsh scrubbing. The fizzing action helps lift stubborn residue, making it easy to wipe away.
Best Uses
This hack shines on oven glass doors, interior walls, and removable racks. Avoid using it on self-cleaning oven liners or aluminum surfaces, as the alkaline solution can cause discoloration. For heavily soiled areas, let the solution sit for 5–10 minutes before wiping.
Pro Tips
Use one tablet per quart of warm water—hot water activates the enzymes better. Wear gloves to protect your skin, and always rinse surfaces thoroughly after cleaning. For extra stubborn spots, scrub gently with a non-abrasive pad.
4. Self-Cleaning Cycle Boost
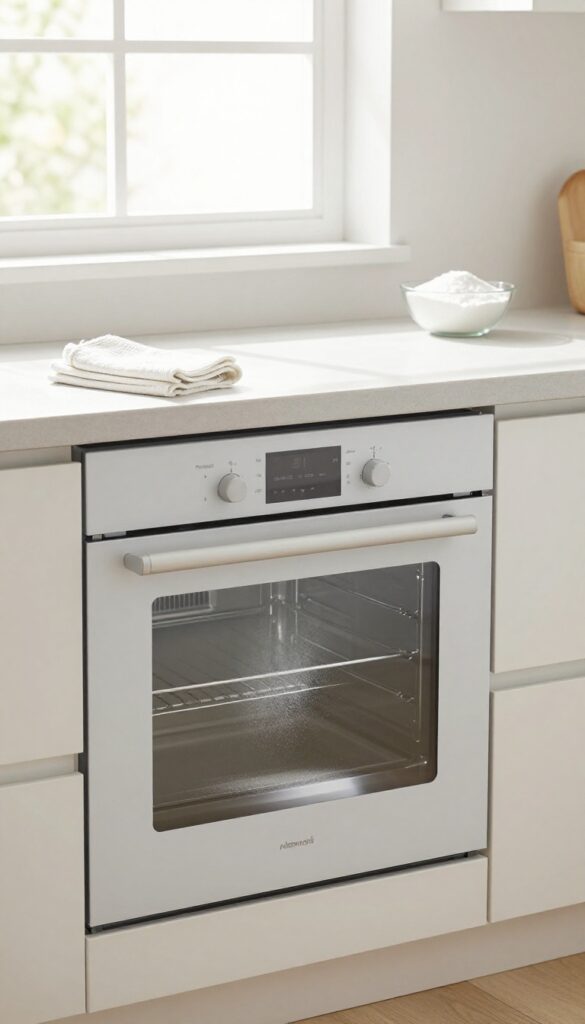
Your oven's self-cleaning cycle is a powerful tool, but it works even better with a little prep. Instead of letting it handle everything alone, give it a head start by wiping out loose debris first. This simple step prevents smoke and odors while helping the cycle focus on stubborn grime.
After the cycle finishes, you'll be left with a layer of ash. Let the oven cool completely, then wipe the interior with a damp cloth. For any stubborn spots, a gentle scrub with a non-abrasive sponge will finish the job.
This method cuts down on manual scrubbing and leaves your oven looking like new.
Prep Work Matters
Before starting the self-cleaning cycle, remove large food particles and loose crumbs with a dry cloth or vacuum. This prevents burning smells and reduces smoke. Also, take out oven racks if they're not self-cleaning safe—check your manual.
A quick wipe of the door seal ensures a tight closure for maximum heat efficiency.
After The Cycle: Ash Removal
Once the oven cools, open the door and vacuum or wipe out the ash with a damp microfiber cloth. Avoid using harsh chemicals, as the ash is alkaline and can react. For residual stains, a paste of baking soda and water applied gently will lift them without scratching the enamel.
When To Skip Self-clean
If your oven has heavy grease buildup or a lot of spilled sugar, skip the self-cleaning cycle. High heat can caramelize sugar and cause permanent stains or smoke. Instead, use a manual method like a baking soda paste.
Also, never use the cycle if your oven has a damaged door seal or faulty lock mechanism.
5. Cream of Tartar Scrub
Cream of tartar isn't just for stabilizing egg whites or making fluffy cakes. This fine white powder is also a gentle yet effective abrasive that tackles stubborn oven stains without scratching the surface. When mixed with a bit of water, it forms a paste that can lift baked-on grime with minimal elbow grease.
It's a great option for those who prefer natural, non-toxic cleaning methods.
To make the scrub, combine two tablespoons of cream of tartar with just enough water to form a thick paste. Apply the paste directly to problem areas like the oven door glass, the bottom where spills have carbonized, or around the heating elements. Let it sit for about 15 minutes so the acidity can work on breaking down the residue.
Then scrub gently with a damp sponge or soft brush. Rinse thoroughly with a clean wet cloth to remove all traces of the powder. For extra tough spots, you can add a few drops of white vinegar to boost the cleaning power.
Why Cream Of Tartar Works
Cream of tartar is acidic, which helps dissolve alkaline deposits like burnt food and grease. Its fine grit provides gentle abrasion, so you can scrub without worrying about scratches on enamel or glass surfaces. Unlike harsh chemical cleaners, it's non-toxic and safe to use around food.
Best Uses For This Scrub
This paste is perfect for spot-cleaning the oven door window, removing baked-on spills from the oven floor, and brightening the interior walls. It's also great for cleaning the stovetop and removing hard water stains from glass cooktops. Avoid using it on self-cleaning oven liners or continuous-cleaning surfaces, as it may interfere with their coatings.
Tips For Best Results
Always test the paste on a small, inconspicuous area first. For maximum effectiveness, ensure the oven is cool before applying. If the paste dries out during the sitting time, spritz a little water to reactivate it.
Rinse thoroughly to avoid any residue that could burn off during the next use.
6. Steam Clean with Vinegar
Vinegar is a powerhouse in the kitchen, and it works wonders on oven grime without any harsh chemicals. This method uses steam to loosen baked-on residue, making cleanup almost effortless. All you need is a bowl, some vinegar, and a little patience.
Fill an oven-safe bowl with equal parts vinegar and water, then place it on the middle rack. Heat the oven to 300°F and let it run for 20 minutes. The steam will soften the gunk, and once it cools, you can wipe away the mess with a damp cloth.
It's a simple, chemical-free solution that leaves your oven fresh and clean.
Why It Works So Well
Vinegar's acidity breaks down grease and mineral deposits, while the steam helps lift stubborn stains. The combination creates a powerful cleaning action without scrubbing. Plus, it neutralizes odors, so your kitchen smells clean too.
Tips For Best Results
Use a deep bowl to prevent spillover, and avoid opening the oven during the process to keep the steam trapped. After steaming, let the oven cool slightly before wiping. For extra tough spots, sprinkle some baking soda on a damp sponge and scrub gently.
Safety And Precautions
Make sure the bowl is oven-safe and not cracked. Don't use this method if your oven has a self-cleaning cycle lock engaged. Always let the oven cool completely before cleaning to avoid burns.
7. Bar Keepers Friend for Glass
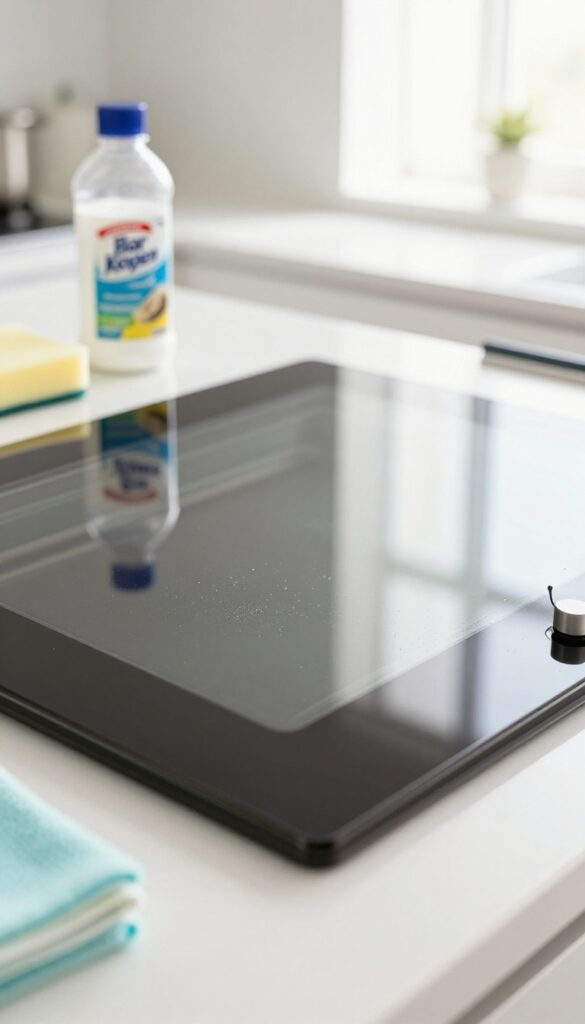
Bar Keepers Friend is a classic cleaner that does more than just polish stainless steel. Its gentle abrasive action works wonders on baked-on grime without scratching glass surfaces. For oven doors, it’s a game-changer—especially when you need to cut through that stubborn haze without resorting to harsh chemicals.
To use Bar Keepers Friend on your oven door glass, start by wetting a soft sponge or microfiber cloth. Sprinkle a small amount of the powder directly onto the damp sponge—just enough to create a thin paste. Gently scrub the glass in circular motions, focusing on areas with baked-on residue or grease.
The mild oxalic acid in the cleaner helps dissolve tough stains without damaging the glass. Once you’ve covered the entire surface, rinse the sponge and wipe away any remaining paste. Finally, buff the glass dry with a clean, lint-free cloth for a streak-free shine.
Why It Works So Well
Bar Keepers Friend contains oxalic acid, which breaks down mineral deposits and carbonized food particles. Its fine powder texture provides just enough abrasion to lift grime without scratching glass. Unlike some commercial oven cleaners, it doesn’t rely on harsh fumes or caustic ingredients, making it safer for indoor use.
Best Practices For Best Results
Always test on a small, inconspicuous area first, especially if your oven door has a tinted coating. Avoid using too much water—damp, not soaking wet, is key. For extra-stubborn spots, let the paste sit for a minute before scrubbing.
Rinse thoroughly to prevent any residue from baking on during the next use.
What To Avoid
Don’t use Bar Keepers Friend on painted or decaled surfaces, as it may remove the finish. Also, steer clear of abrasive scrub pads like steel wool, which can scratch glass. Stick to soft sponges or microfiber cloths for safe, effective cleaning.
8. Essential Oil Deodorizer
Even after a deep clean, ovens can hold onto lingering smells from past meals. Essential oils offer a natural way to freshen things up without artificial fragrances. A few drops mixed into your cleaning paste can transform the scent of your entire kitchen.
Lemon and orange essential oils are top choices because their citrus notes cut through grease and leave a clean, bright aroma. Simply add 5–10 drops to your baking soda and water paste before applying it to oven surfaces. The oil won't affect the cleaning power, but it will make the process much more pleasant.
For an extra boost, wipe down the interior with a damp cloth after cleaning, then place a bowl of water with a few drops of oil in a warm oven (turned off) to let the scent diffuse.
Why Citrus Oils Work Best
Citrus oils like lemon, orange, and grapefruit contain d-limonene, a natural solvent that helps break down grease. They also have antibacterial properties, which is a bonus for kitchen hygiene. The fresh scent lingers longer than synthetic sprays, and you control the intensity.
How To Use Them Safely
Always dilute essential oils in a carrier like water, vinegar, or baking soda paste before applying to oven surfaces. Avoid direct contact with heating elements, and never apply oil to a hot oven. After cleaning, leave the oven door open for an hour to let the scent settle naturally.
Scent Pairings To Try
Lemon and rosemary make a clean, herbal blend. Orange and clove create a warm, cozy aroma. For a spa-like feel, try grapefruit and peppermint.
Mix a few drops into a spray bottle with water and spritz the oven interior after cleaning for a quick refresh.
9. Pumice Stone for Baked-On Spills
A pumice stone isn't just for rough feet—it's a secret weapon for the toughest oven messes. When you've got a black, crusty spill that laughs at regular cleaners, this volcanic rock can save the day. It works by gently abrading the burnt-on residue without scratching the enamel, as long as you use it correctly.
The trick is to wet both the stone and the oven surface thoroughly before you start. Then, with light pressure, rub the pumice stone over the spill in small circles. You'll see the gunk lift away almost like magic, leaving a smooth, clean floor behind.
Rinse the stone frequently to keep it effective, and wipe away the residue with a damp cloth. This method is ideal for the oven floor but avoid using it on glass or delicate parts.
Why It Works So Well
Pumice is a porous, abrasive stone that's softer than oven enamel but harder than burnt-on food. When wet, it creates a fine grit that scrubs away carbonized spills without scratching. It's a physical, non-chemical solution that's especially good for thick, baked-on layers that have been there for months.
Step-by-step Tips For Best Results
Start by soaking the pumice stone in water for a few minutes. Wet the oven floor with a spray bottle or damp sponge. Rub gently in circular motions—let the stone do the work, not your elbow grease.
Rinse the stone often to clear the pores. After the spill is gone, wipe the area with a clean, damp cloth to remove any grit.
What To Avoid
Never use a dry pumice stone—it can scratch the enamel. Avoid using it on the oven door glass, heating elements, or any non-stick surfaces. Stick to the oven floor and walls only.
If you have a self-cleaning oven, use this method only on cool surfaces and after the self-clean cycle has finished.
10. Hydrogen Peroxide Spray
Hydrogen peroxide isn't just for first aid kits. It's a mild bleach that breaks down grease and grime without leaving toxic residue. When sprayed on warm oven surfaces, it fizzes and lifts stuck-on food, making wipe-up almost effortless.
For best results, use 3% hydrogen peroxide straight from the bottle. Spray it generously on greasy spots, let it bubble for ten minutes, then wipe with a damp microfiber cloth. Repeat if needed.
Avoid using on aluminum surfaces as it can cause discoloration.
Why It Works So Well
Hydrogen peroxide releases oxygen bubbles that physically push dirt away from the surface. It's also a natural disinfectant, so your oven gets both clean and sanitized. Unlike bleach, it breaks down into water and oxygen, so you don't have to worry about rinsing off harsh chemicals.
Best Uses In The Oven
This method is perfect for the oven door glass, racks, and interior walls. It's especially effective on fresh spills and light to moderate grease buildup. For tough, baked-on crud, pair it with a baking soda paste—apply the paste first, then spray peroxide on top for extra fizzing power.
Safety Tips
Always wear gloves to protect your skin. Test on a small hidden area first. Don't mix hydrogen peroxide with vinegar or other cleaners—it can create harmful gases.
Keep the oven door open while it works to allow ventilation.
11. Salt and Baking Soda Scrub
When you need a little extra abrasion without damaging your oven's surface, salt and baking soda make a brilliant team. The salt adds grit to lift stubborn baked-on bits, while baking soda gently deodorizes and cuts through grease. This scrub is especially handy for spot-treating the oven floor or the glass door before a full clean.
Mix equal parts salt and baking soda with just enough water to form a thick, gritty paste. Apply it directly to tough spots—think dried-on cheese drips or caramelized spills—and let it sit for 5–10 minutes. Scrub with a non-abrasive sponge or a soft brush in circular motions, then rinse with a damp cloth.
For extra stubborn areas, add a splash of white vinegar to the paste for fizzing action that helps lift grime.
Why Salt + Baking Soda Works So Well
Baking soda is mildly alkaline, which helps break down acidic grease and food residues. Salt is a natural abrasive that won't scratch most oven surfaces (avoid on enamel if it's chipped). Together, they create a scrub that's tough on grime but gentle on your appliance.
Best Uses For This Scrub
This paste is perfect for the oven floor, the glass door interior, and the racks. It's also great for cleaning the stovetop if you have a spillover. Avoid using it on self-cleaning oven liners or any surface with a non-stick coating, as the abrasion could cause damage.
Pro Tip For Stubborn Spots
For burnt-on messes that won't budge, let the paste sit for 15–20 minutes. If it dries out, spritz with a little water to reactivate. You can also add a few drops of dish soap to boost degreasing power.
Rinse thoroughly afterward to avoid any salty residue.
12. Commercial Oven Cleaner (Fume-Free)
Not all commercial oven cleaners are created equal. If the harsh chemical smell of traditional sprays makes you cough or gives you a headache, a fume-free formula is a game-changer. These cleaners are just as effective at cutting through baked-on grease but without the overpowering odor that lingers for days.
Fume-free oven cleaners work by using milder solvents or natural-based ingredients that break down grime without releasing strong vapors. You apply them exactly like regular oven cleaner: spray on cold surfaces, let it sit for the recommended time (usually 10–30 minutes), then wipe away. The result is a spotless oven without the need to open windows or wear a respirator.
How To Use It Right
For best results, remove racks and loose debris first. Spray the cleaner evenly on all interior surfaces, avoiding heating elements. Let it sit without scrubbing—the chemicals do the work.
After the dwell time, wipe with a damp cloth or sponge. Rinse thoroughly to remove any residue before heating the oven.
What To Look For
Check the label for phrases like “no fumes, ” “low odor, ” or “fume-free. ” Brands like Easy-Off Fume Free or Carbona Oven Cleaner are popular options. Avoid any product that still contains sodium hydroxide or strong alkaline ingredients if you're sensitive to smells.
When To Choose This Method
This is ideal for apartments, homes with kids or pets, or anyone who wants a deep clean without the chemical smell. It’s also great for quick touch-ups between heavy-duty cleans. Just remember that fume-free doesn't mean chemical-free—always wear gloves and keep the area ventilated.
13. Magic Eraser for Racks
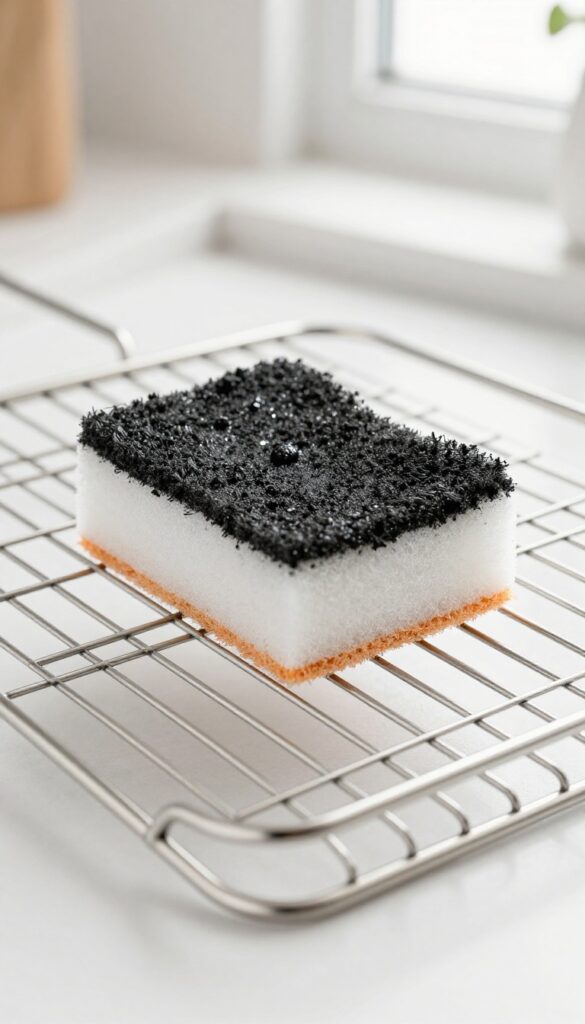
Oven racks are notorious for collecting baked-on carbon that regular scrubbing won't touch. A melamine sponge—often sold as a magic eraser—is surprisingly effective at lifting that stubborn grime without harsh chemicals. Just a little water and some elbow grease can make your racks look almost new again.
Dampen a melamine sponge and gently scrub the oven racks in circular motions. The micro-abrasive foam breaks down carbon deposits without scratching the metal. Rinse thoroughly with water and dry before sliding them back into the oven.
For heavily soiled racks, you may need to repeat the process or let the sponge sit on tough spots for a minute.
Why It Works
Melamine foam acts like ultra-fine sandpaper, physically lifting burnt-on residue. It's non-toxic and requires no additional cleaning agents, making it a safe choice for food-contact surfaces.
Pro Tips
Always wet the sponge first—dry melamine can be too abrasive. Work in a well-ventilated area and wear gloves if you have sensitive skin. After scrubbing, rinse racks immediately to prevent any foam residue from drying on.
When To Avoid
Don't use melamine sponges on non-stick or coated racks, as they can strip the finish. Stick to stainless steel or chrome racks for best results.
14. Ammonia Overnight Soak
Ammonia is a powerful degreaser that works while you sleep. The key is using it in a warm, sealed oven so the fumes can break down stubborn grime without any scrubbing on your part. Just be sure to ventilate your kitchen well when you open the oven door in the morning.
This method is ideal for heavily soiled ovens where baked-on grease has formed a hard, dark layer. The ammonia fumes soften the carbonized residue, making it easy to wipe away with a damp cloth. It's a set-it-and-forget-it approach that saves elbow grease, but it requires careful handling due to the strong odor.
How To Set Up The Soak
Start by heating your oven to 150°F (65°C) for about 10 minutes, then turn it off. Place a small heat-safe bowl containing ½ cup of ammonia on the top rack. Close the oven door and leave it overnight (at least 8 hours).
Make sure the kitchen is well-ventilated before you open the oven.
Wiping Down After The Soak
In the morning, open all windows and turn on the exhaust fan. Remove the ammonia bowl carefully. Wipe down the interior with a mixture of warm water and a few drops of dish soap.
You'll find the grease lifts off easily. For stubborn spots, use a non-abrasive sponge. Rinse with a clean damp cloth.
Safety Precautions
Never mix ammonia with bleach or other cleaners—it produces toxic fumes. Wear rubber gloves and avoid breathing in the fumes. Keep the kitchen ventilated for at least 30 minutes after opening the oven.
Keep children and pets away during the process.
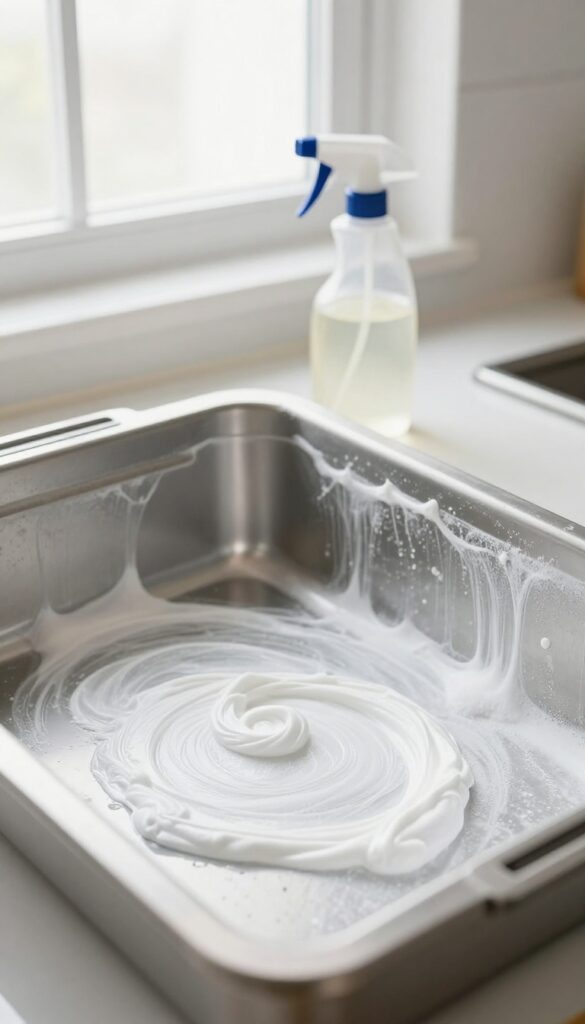
15. Dish Soap and Baking Soda Foam
Sometimes the simplest combos work best. Dish soap cuts grease, baking soda provides gentle abrasion, and together they create a foam that lifts grime without harsh scrubbing. This method is perfect for everyday messes and light baked-on residue.
How To Make The Foam
Start by wetting the oven interior with a spray bottle or damp sponge. Sprinkle a generous layer of baking soda over the greasy areas, then squirt a few pumps of dish soap directly on top. Use a wet sponge to work the mixture into a foam, spreading it evenly.
Let it sit for 10–15 minutes to break down grease.
Scrubbing And Rinsing
Scrub the foam in circular motions with a non-abrasive sponge. The baking soda provides enough grit to lift stuck-on food without scratching enamel or glass. Rinse thoroughly with a damp cloth, wiping away all residue.
Repeat on stubborn spots if needed.
Why It Works So Well
Dish soap contains surfactants that surround and lift grease molecules, while baking soda’s mild alkalinity helps dissolve acidic burnt bits. The foam action increases contact time, letting the cleaners work deeper into grime. Plus, it’s non-toxic and safe for most oven surfaces.
16. Steam Cleaner Machine
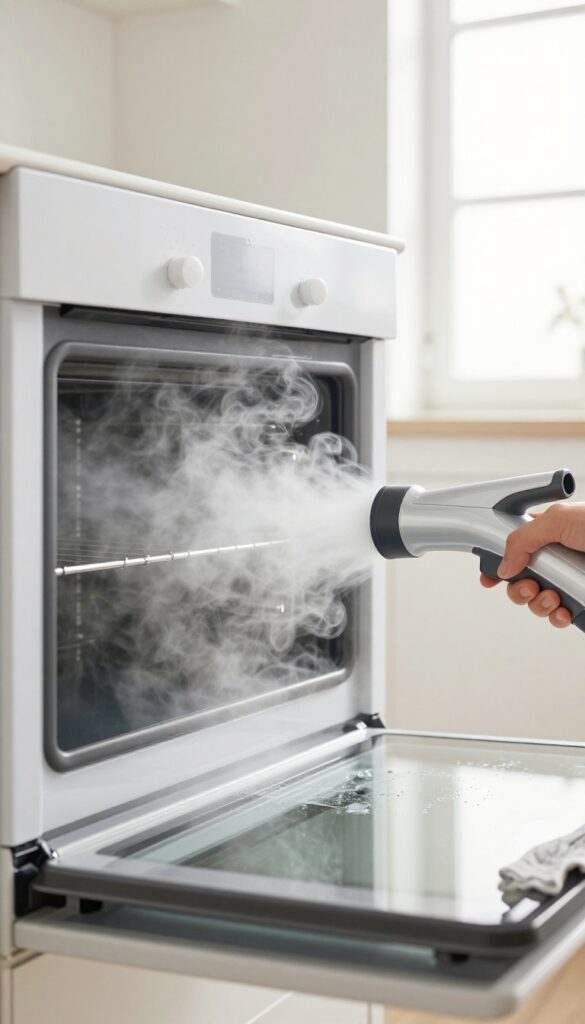
If you prefer a chemical-free approach to oven cleaning, a handheld steam cleaner is a game-changer. These devices use superheated water vapor to loosen grease and grime on contact, making them ideal for quick touch-ups or tackling stubborn spots without harsh fumes. They're especially handy for glass doors, control panels, and tight corners where baked-on residue hides.
Steam cleaning works by heating water to around 200–300°F, producing a pressurized vapor that penetrates and dissolves grease. The high temperature kills bacteria and deodorizes naturally, so you can skip the scrubbing with abrasive pads. For best results, use a steam cleaner with a nozzle attachment to direct the steam precisely.
Wipe away loosened grime with a microfiber cloth immediately after steaming. This method is safe for most oven surfaces, but avoid prolonged steam on electrical components or rubber seals.
Why Steam Works So Well
Steam's heat and moisture break down carbonized grease faster than scrubbing alone. The vapor lifts debris from crevices and baked-on stains, reducing elbow grease. Plus, it's eco-friendly—no chemicals means no rinsing residue or worrying about fumes in your kitchen.
Best Spots For Steam Cleaning
Focus on the oven door glass, interior walls, and the area around the heating elements (when cool). Steam is excellent for cleaning the oven's gasket gently and for removing sticky spills from the bottom. It also works wonders on control knobs and the stovetop, if applicable.
Quick Tips For Success
Always read your steam cleaner's manual first. Use distilled water to prevent mineral buildup. Work in sections, steaming a small area then wiping immediately.
For extra tough spots, let the steam sit for 30 seconds before wiping. Never use steam on self-cleaning oven locks or electronic displays.
17. Toothbrush for Crevices
An old toothbrush dipped in baking soda paste reaches corners, hinges, and seals where sponges can't. It's the perfect tool for detail work after you've cleaned the main surfaces.
This method is ideal for stubborn grime in tight spots. The bristles agitate without scratching, and the paste clings long enough to break down grease.
Make The Paste
Mix baking soda with a little water to form a thick paste. Add a drop of dish soap for extra degreasing power.
Scrub The Crevices
Dip the toothbrush into the paste and scrub along door seals, hinge gaps, and corners. Let it sit for 10 minutes before wiping with a damp cloth.
Rinse And Dry
Wipe away residue with a clean damp cloth. Use a dry cloth to soak up any moisture left in crevices to prevent rust.
18. Oven Liner Replacement
Worn-out oven liners do more than just look tired—they stop doing their job. Once the non-stick coating starts peeling or the liner develops cracks, spills start seeping through and burning onto the oven floor. Replacing them with fresh, high-quality non-stick sheets is a quick fix that pays off every time you cook.
Why Fresh Liners Matter
A good oven liner acts as a sacrificial barrier. It catches drips, cheese melts, and bubbling sauces before they hit the oven surface. Over time, liners lose their non-stick properties, making cleanup harder and allowing stains to set.
A new liner restores that effortless wipe-clean performance.
Choosing The Right Liner
Not all liners are created equal. Look for heavy-duty, PTFE-free non-stick sheets that are cut to fit your oven precisely. Some are reusable and dishwasher-safe, while disposable foil liners are a no-fuss alternative.
Measure your oven floor and buy a liner that covers it fully without blocking vents.
Installation And Care Tips
Place the liner flat on the lowest rack or directly on the oven floor, depending on your model. Avoid overlapping or bunching, which can cause uneven heating. To extend its life, wipe it down after each use and replace it as soon as the non-stick coating shows signs of wear.
19. Vinegar and Cornstarch Polish
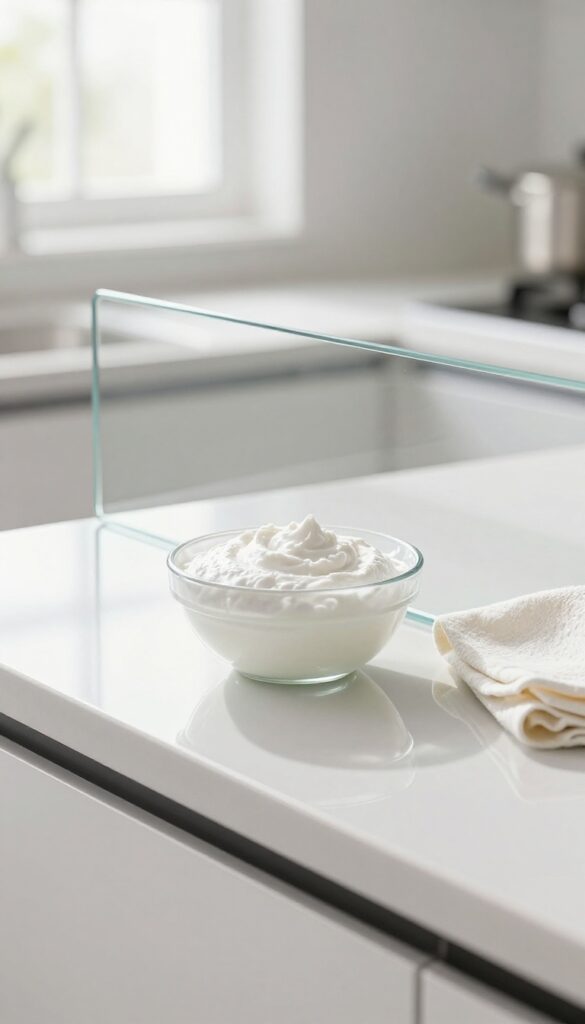
Glass oven doors are notorious for showing every fingerprint, grease splatter, and baked-on drip. Commercial glass cleaners often leave streaks or require multiple passes. A simple mixture of vinegar and cornstarch creates a paste that cuts through grime and dries to a crystal-clear finish with minimal effort.
This two-ingredient polish is surprisingly effective. The vinegar breaks down grease and residue, while the cornstarch acts as a gentle abrasive that buffs away stubborn spots without scratching the glass. Once dry, a quick wipe reveals a streak-free shine that looks like new.
How To Make The Paste
Combine equal parts white vinegar and cornstarch in a small bowl. Stir until you get a smooth, spreadable paste—similar to toothpaste consistency. If it's too thick, add a few drops of vinegar; if too runny, add more cornstarch.
Use immediately for best results.
Application And Drying
Apply the paste to the cool oven glass using a soft cloth or sponge. Spread it evenly, focusing on greasy or cloudy areas. Let it sit for 10–15 minutes until the paste dries completely.
You'll see it turn opaque as it dries.
Buffing To A Shine
Once dry, take a clean, dry microfiber cloth and buff the glass in circular motions. The dried paste will flake off, lifting residue with it. Wipe away any remaining powder, and enjoy a clear, streak-free door that reflects light beautifully.
20. Citrus Peels in Steam
Don't toss those orange or lemon rinds just yet. When you run a steam cleaning cycle in your oven, adding citrus peels to the water infuses the steam with natural oils that help cut through grease. The result is a fresher-smelling oven with less scrubbing effort.
The acidity in citrus peels works as a gentle degreaser when heated. As the steam circulates, the oils loosen baked-on residue and neutralize odors. This method is especially effective for light to moderate grime and leaves your kitchen smelling like a fresh citrus grove.
How To Do It
Fill an oven-safe dish with about two cups of water. Add the peels from one or two oranges or lemons—the more surface area, the better. Place the dish on the bottom rack and run your oven's steam cleaning cycle (or set it to 250°F for 20–30 minutes if you don't have a steam function).
After the cycle, let the oven cool slightly, then wipe down the interior with a damp cloth.
Why It Works
Citrus peels contain d-limonene, a natural solvent that breaks down grease. When combined with steam, the heat releases these oils and helps them penetrate stubborn spots. Plus, the steam softens dried-on food, making it easier to wipe away without harsh chemicals.
Pro Tip For Stubborn Spots
For extra cleaning power, rub a fresh peel directly over greasy areas before starting the steam cycle. The friction helps release the oils, and the steam does the rest. Just be careful not to get juice on heating elements.
21. Rack Soak in Hot Dish Soap
Oven racks often get the worst of the mess, but they're also the easiest part to clean if you let them soak. Instead of scrubbing every single bar by hand, submerge the racks in a bathtub of hot water and a generous squirt of dish soap. After an hour, the grease and grime will loosen up, and a quick scrub with a brush will leave them looking brand new.
It's a simple, no-fuss method that requires almost no elbow grease.
This method works because hot water and dish soap break down grease without harsh chemicals. Just make sure your bathtub is clean first, or use a large plastic bin if you prefer. For extra stubborn buildup, add half a cup of baking soda or a dishwasher tablet to the water.
After soaking, rinse the racks thoroughly and dry them before putting them back in the oven.
Why Hot Water Works Best
Hot water helps dissolve grease faster than cold or warm water. The heat activates the surfactants in dish soap, making it easier to lift baked-on food. Aim for water as hot as your tap can handle—just be careful not to burn yourself when handling the racks.
How To Protect Your Bathtub
To avoid scratches or residue in your tub, place a towel or an old sheet at the bottom before adding the racks. You can also use a large plastic storage bin or a utility sink if you have one. This keeps the mess contained and makes cleanup easier.
Scrubbing Tips For Stubborn Spots
After the soak, use a non-abrasive scrub brush or a crumpled ball of aluminum foil to scrub away remaining grime. For tight corners, an old toothbrush works well. If some spots still cling, let the racks soak for another 30 minutes before scrubbing again.
22. Dryer Sheet for Burnt Spots
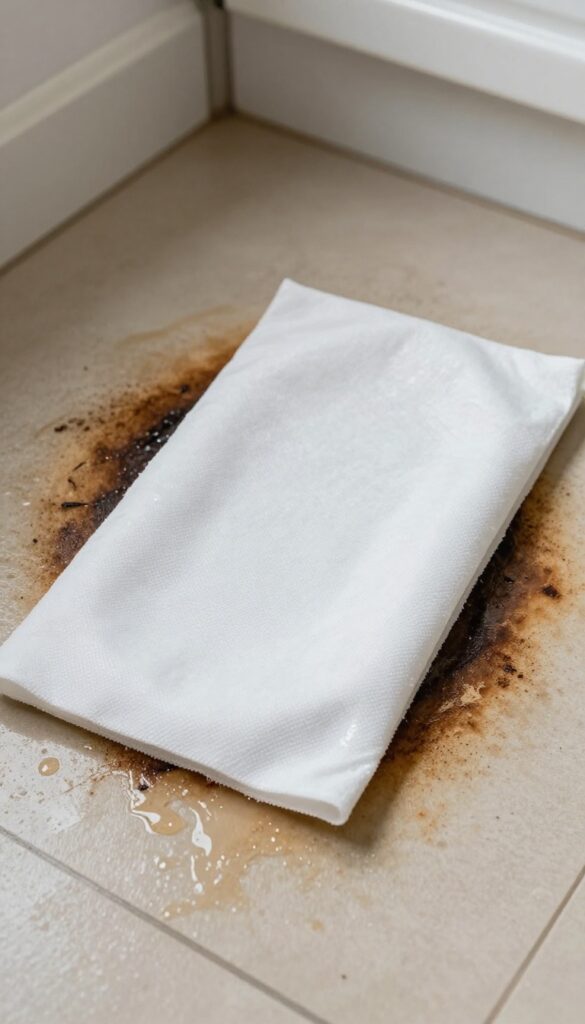
Burnt-on spots on your oven floor or walls can feel impossible to shift, but a humble dryer sheet might be your secret weapon. The fabric softener in the sheet contains surfactants that help loosen baked-on residue without harsh scrubbing. It's a low-effort trick that works especially well on fresh spills or moderately burnt areas.
Wet a standard dryer sheet and lay it directly over the burnt spot. Let it sit for about 20 minutes—the moisture and softening agents will start breaking down the grime. After the wait, wipe the area with a damp cloth; the residue should come off easily.
For stubborn spots, gently scrub with a non-abrasive sponge. This method is safe for enamel and stainless steel interiors, but avoid using on self-cleaning oven seals or heating elements.
Why Dryer Sheets Work
Dryer sheets are coated with fabric softeners, which contain cationic surfactants. These compounds reduce surface tension and help lift grease and burnt food particles. The water in the wet sheet also rehydrates dried-on spills, making them easier to wipe away.
Best Practices For Best Results
Use a fresh, unused dryer sheet for each spot. Let it soak for the full 20 minutes—don't rush. If the sheet dries out, rewet it.
After removing the sheet, rinse the area with clean water to avoid any residue from the softener. This trick works best on light to moderate burns; for heavy, carbonized layers, you may need a stronger cleaner.
A Note On Safety
Always ensure your oven is cool before using this method. Never place dryer sheets near heating elements or gas burners, as they can be flammable. Avoid using scented sheets if you're sensitive to fragrances—unscented versions work just as well.
23. Microfiber Cloth Final Wipe
You've scrubbed, soaked, and wiped, but that last step can make or break your oven's shine. A microfiber cloth final wipe is the unsung hero of a streak-free finish. It picks up the tiniest particles of cleaner residue and grease that a regular sponge leaves behind, giving your oven a truly polished look without extra elbow grease.
Once you've completed your main cleaning routine, grab a clean, damp microfiber cloth. Wring it out so it's just barely moist—too much water can leave streaks or pool in corners. Wipe down all interior surfaces: walls, floor, ceiling, and the inside of the door.
Pay extra attention to crevices around the heating elements and the seal. The microfiber's static charge attracts dust and residue like a magnet, trapping them in the cloth rather than smearing them around. Finish by buffing with a dry microfiber cloth for a mirror-like gleam.
This simple step ensures no cleaner residue bakes onto surfaces during your next preheat, keeping your oven fresh and ready to use.
Why Microfiber Works Best
Microfiber is made of split fibers that create a large surface area with tiny hooks. These hooks grab and hold onto dirt, grease, and residue particles instead of pushing them around. Unlike cotton cloths or paper towels, microfiber doesn't leave lint or scratches, making it ideal for glass doors and enamel surfaces.
It also absorbs up to eight times its weight in water, so a single cloth can handle a whole oven interior without needing constant rinsing.
The Two-cloth Technique
For best results, use two microfiber cloths: one damp for the initial residue wipe, and one dry for buffing. The damp cloth loosens and lifts any leftover cleaner, while the dry cloth removes moisture and polishes to a streak-free shine. This method is especially effective on glass oven doors, where water spots and smears are most visible.
Wash your microfiber cloths separately from lint-producing fabrics to keep them effective.
When To Replace Your Cloth
Microfiber cloths lose their grip over time. If you notice streaking or the cloth feels smooth rather than slightly tacky, it's time for a new one. Typically, a high-quality microfiber cloth can withstand about 50 washes before it needs replacing.
Avoid using fabric softener or bleach when washing, as these damage the fibers and reduce cleaning power.
24. Regular Wipe-Down Habit
The easiest way to avoid a tough oven cleaning session is to never let the grime build up in the first place. A quick wipe-down after each use takes just seconds but saves you from hours of scrubbing later. This simple habit keeps your oven looking fresh and cuts down on smoke and smells during cooking.
What You Need
Keep a microfiber cloth or a soft sponge handy near the oven. A spray bottle filled with a 50/50 mix of water and white vinegar works perfectly as a daily cleaner. If you prefer, a mild dish soap solution also does the trick without leaving residue.
How To Do It
Wait until the oven is cool enough to touch but still warm—this helps loosen any fresh spills. Spray the interior lightly, then wipe with a damp cloth. Pay extra attention to the door seal and corners where crumbs tend to hide.
Dry with a clean towel to prevent streaks.
Why It Works
Baked-on grease is much harder to remove once it has been heated and cooled repeatedly. A daily wipe prevents that cycle, keeping surfaces smooth and easy to clean. Over time, you'll notice less smoke, fewer odors, and a noticeably brighter oven.
25. Professional Deep Clean
Sometimes the best oven cleaning idea is to hand the job to someone else. A professional deep clean once a year removes years of baked-on grease without harsh chemicals, leaving your oven looking like new and running more efficiently. It's an investment that pays off in saved time and extended appliance life.
What To Expect From A Pro Service
Professional oven cleaners use steam or eco-friendly solutions to dissolve grime without damaging enamel or heating elements. They'll remove racks, doors, and even the back panel for a thorough clean. Most services take 1-2 hours and include a final polish that makes the oven gleam.
When To Book A Deep Clean
Schedule a professional clean before the holidays or after a major cooking session like a Thanksgiving feast. If you notice smoke or odd smells when preheating, it's a sign that built-up residue needs expert attention. Annual cleaning keeps your oven running efficiently and reduces fire risk.
Cost Vs. Value
Prices range from $50 to $150 depending on oven type and condition. Compare that to the cost of replacing a neglected oven or buying harsh cleaning products. A professional clean also saves you hours of scrubbing and eliminates chemical fumes, making it a worthwhile splurge for a fresh kitchen.
FAQ
How often should I clean my oven?
For light use, a deep clean every 3-6 months is enough. Wipe up spills after each use to keep buildup minimal.
Can I use baking soda and vinegar on a self-cleaning oven?
Yes, it's safe. Avoid using harsh chemicals on self-cleaning ovens, but natural pastes are fine for manual cleaning.
What's the best way to clean oven glass without streaks?
Use a paste of vinegar and cornstarch, let it dry, then buff with a microfiber cloth for a streak-free shine.
Is it safe to use ammonia in the oven?
Yes, but ventilate the area well. Place a bowl of ammonia in a warm oven overnight, then wipe clean in the morning.
How do I clean burnt-on food from the oven floor?
Try a pumice stone (wet) or a baking soda paste left overnight. For tough spots, use a steam cleaner or commercial oven cleaner.
Conclusion
A clean oven doesn't require harsh chemicals or hours of scrubbing. With these 25 ideas, you can pick the method that fits your schedule and cleaning style. Whether you prefer natural solutions like lemon steam or quick fixes like a dishwasher tablet, each tip helps you maintain a fresh kitchen with less effort.
Try a few and see which ones become your go-to. Your oven—and your future self—will thank you.