20 Cleaning Rusty Cast Iron Tips for Skillets and Pans
Rust on cast iron can feel like a death sentence for your favorite skillet, but it doesn't have to be. With the right techniques, you can bring that pitted, orange mess back to a smooth, non-stick surface without breaking the bank.
These 20 tips range from quick fixes with pantry staples to more involved restoration methods, so you can choose what fits your time and patience level. Whether you're rescuing a flea market find or reviving a family heirloom, each method is practical and tested.
Let's walk through the steps that actually strip rust without wrecking the metal.
1. Start with a Dry Scrub
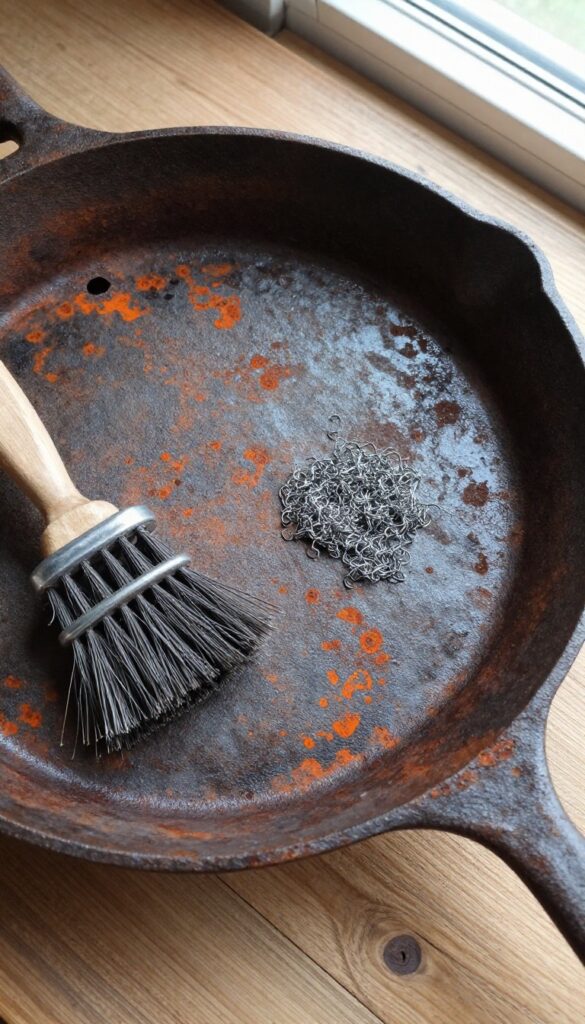
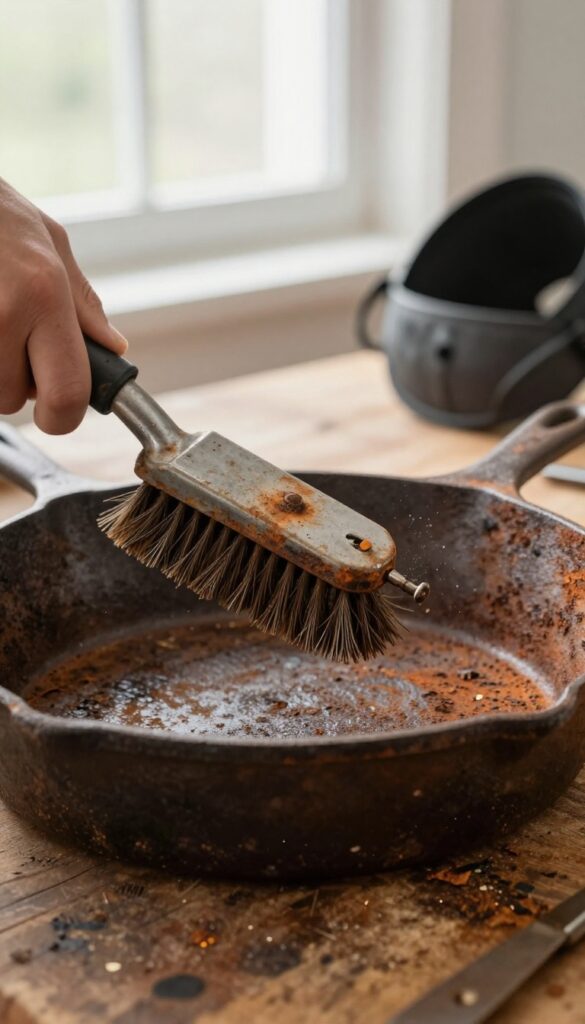
Before you reach for vinegar, baking soda, or any other liquid, grab a stiff brush or some steel wool and go at the rust dry. This first step is all about removing loose, flaky rust that hasn't bonded tightly to the metal. It's quick, it's simple, and it saves you a ton of elbow grease later.
A dry scrub is the fastest way to remove surface rust without introducing moisture that could cause more rust. Use a stainless steel brush or coarse steel wool (#00 or #0 grade) and work in a well-ventilated area or over a trash can. Focus on the rusty spots, scrubbing in the direction of the grain if possible.
Once you've brushed off the loose rust, wipe the skillet with a dry cloth to remove dust. This step is ideal for light rust or as a prep before a deeper cleaning.
Why Dry Scrubbing Works First
Rust forms in layers. The top layer is usually loose and powdery, while deeper rust is more stubborn. By scrubbing dry, you remove that top layer without pushing moisture into the pores of the metal.
This makes subsequent wet methods more effective and less messy. Plus, you can see exactly how much rust is left and where it's concentrated.
Tools That Work Best
A stiff-bristle nylon brush is good for very light rust, but for anything more, go with steel wool or a stainless steel brush. Avoid brass brushes because they're softer and can leave residue. If you're worried about scratching the seasoning, use fine steel wool (#0000) and a light touch.
For heavy rust, a wire brush attachment on a drill can save time, but be careful not to gouge the metal.
When To Skip This Step
If the rust is deep and pitted, a dry scrub alone won't cut it. You'll need to move on to soaking or electrolysis. Also, if the skillet has a thick layer of old seasoning over the rust, dry scrubbing might not reach the rust underneath.
In those cases, strip the seasoning first with oven cleaner or a lye bath, then dry scrub.
2. Use Coarse Salt as an Abrasive
Coarse salt isn't just for seasoning—it's a surprisingly effective rust remover. When you rub salt against rusty cast iron, the crystals act like tiny scrubbers that lift rust without scratching the seasoning or the metal underneath. This method is especially handy for light surface rust or spot rust that hasn't pitted deeply.
You probably already have salt in your kitchen, so there's no special trip to the store. Plus, it's non-toxic and safe to use on cookware you'll eat from. The trick is pairing it with the right scrubbing tool to get the most out of the abrasion.
Coarse salt is a gentle yet effective abrasive for removing light rust from cast iron. It works by physically scrubbing away rust particles without damaging the metal's surface. This method is best for skillets and pans with surface rust that hasn't caused pitting.
To use, sprinkle a generous layer of coarse salt (like kosher or sea salt) onto the rusty area. Then, cut a raw potato in half, dip the cut side in salt, and scrub the rusted surface in circular motions. The potato's moisture helps the salt stick and provides a mild acidic boost.
Alternatively, you can use a folded paper towel or a damp cloth to scrub the salt. Rinse thoroughly and dry immediately to prevent new rust. This technique is quick, cheap, and leaves your pan ready for re-seasoning.
Why Coarse Salt Works So Well
Coarse salt crystals are hard enough to scrape off rust but soft enough to avoid gouging the iron. Unlike steel wool or sandpaper, salt won't remove the underlying metal or create scratches that trap future rust. The irregular shape of the crystals provides a scrubbing action that dislodges rust particles without harsh chemicals.
Plus, salt is hygroscopic, meaning it draws out moisture from the rust, which helps break it down further.
Best Tools To Pair With Salt
A cut potato is the classic companion because it adds moisture and a bit of oxalic acid (from the potato) that helps dissolve rust. If you don't have a potato, a damp paper towel or a soft scrub brush works too. Avoid using metal scrubbers with salt, as they can be too aggressive and damage the surface.
For stubborn spots, let the salt sit on the rust for a few minutes before scrubbing.
When To Use This Method
This technique is ideal for light, surface rust that hasn't eaten into the metal. If your pan has deep pitting or flaking rust, you'll need a more aggressive method like electrolysis or vinegar soaking. But for everyday maintenance or reviving a pan with minor orange patches, salt scrubbing is a gentle first step that often does the trick.
3. Try a Baking Soda Paste
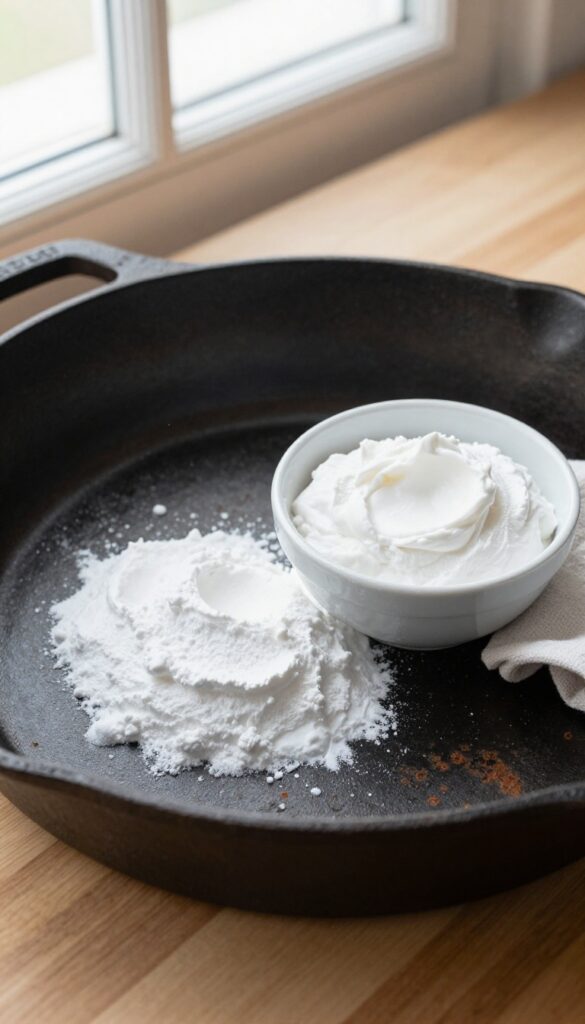
Baking soda is one of those kitchen staples that pulls double duty in the rust removal department. It's gentle enough not to scratch your pan's surface but abrasive enough to lift light rust. Mixing it into a paste gives you better control than sprinkling it dry, so the paste stays exactly where you need it.
For light rust spots that haven't pitted the metal, a baking soda paste is a safe first step. It won't damage the seasoning underneath if you're gentle, and it rinses away easily. This method works best on surface rust that hasn't had time to dig in deep.
How To Make The Paste
Combine three parts baking soda with one part water in a small bowl. Stir until it forms a thick, spreadable paste. Adjust the ratio if needed—you want it to cling to the pan, not drip off.
Let it sit for a minute so the baking soda fully hydrates.
Application And Scrubbing
Use a soft cloth or a non-scratch scrub pad to apply the paste to the rusted areas. Work in circular motions with light pressure. Let the paste sit on stubborn spots for 15 minutes, then scrub again.
Rinse with warm water and dry immediately.
When To Use This Method
This is best for pans with light, patchy rust that hasn't caused pitting. If you see deep orange craters or flaking, you'll need a stronger method like vinegar or electrolysis. Baking soda is also a good maintenance step between deep cleans.
4. Soak in Vinegar (But Not Too Long)
Vinegar is a go-to for rust removal because the acetic acid dissolves iron oxide fast. But that speed is exactly why you need to watch the clock. A vinegar soak can strip rust in an hour, but leave it too long and it starts eating into the good metal, leaving a dull, etched surface that's harder to season.
Mix equal parts white vinegar and water in a container large enough to submerge your pan. Place the rusty skillet in the solution, making sure it's fully covered. Check on it every 15 to 20 minutes—you'll see the rust loosening and the liquid turning murky.
After about an hour, pull it out and scrub with a stiff brush or steel wool. Rinse thoroughly with water and dry immediately with a towel, then place on a warm stove to evaporate any remaining moisture. Don't skip the drying step; flash rust can form within minutes if water sits on the bare iron.
Why Vinegar Works So Fast
White vinegar is a mild acid that reacts with rust (iron oxide) to form water-soluble iron acetate. This reaction happens quickly, which is great for removing surface rust but risky for the iron itself. The acid doesn't discriminate—it will attack both rust and the underlying metal if given enough time.
How To Avoid Over-soaking
Set a timer for 45 minutes and check the pan. If rust is still stubborn, you can go a bit longer, but never exceed 2 hours total. For heavily pitted pans, multiple short soaks are safer than one long soak.
Between soaks, scrub off loose rust and re-submerge in fresh vinegar solution.
What To Do After The Soak
Once the rust is gone, neutralize any remaining acid by rinsing with a baking soda and water paste (1 tablespoon baking soda to 1 cup water). Then wash with mild dish soap, rinse thoroughly, and dry immediately. Apply a thin layer of oil and season the pan right away to protect the bare metal.
5. Use a Potato and Dish Soap
If you've got a potato sitting in your pantry, you're already holding a rust-fighting tool. The oxalic acid naturally present in potatoes reacts with rust to loosen it, while the dish soap helps lift grime. This method is gentle enough for light to moderate rust and won't damage the seasoning underneath.
This trick works best on skillets with surface rust, not deep pitting. It's also a great option if you want to avoid harsh chemicals or strong smells. The potato acts as both a scrubber and a chemical agent, making it a two-in-one solution.
How It Works
Oxalic acid is a common ingredient in commercial rust removers, but potatoes contain it naturally. When you cut a potato in half and dip it in dish soap, the acid reacts with iron oxide (rust) to form a soluble compound that rinses away. The soap adds lubrication and helps break down any oily residue.
Step-by-step
Start by cutting a raw potato in half crosswise. Squirt a small amount of dish soap onto the cut surface. Scrub the rusty areas of your cast iron in a circular motion, applying moderate pressure.
As the potato gets coated with rust, rinse it off and reapply soap as needed. Continue until the rust is gone, then wash the pan thoroughly with warm water and dry it immediately.
When To Use This Method
This technique is ideal for skillets with light rust spots or after you've removed most of the rust with a more aggressive method. It's also a good choice for vintage pans with delicate markings that you don't want to abrade. Avoid using it on heavily pitted or flaking rust—you'll need something stronger first.
6. Scrub with a Chainmail Scrubber
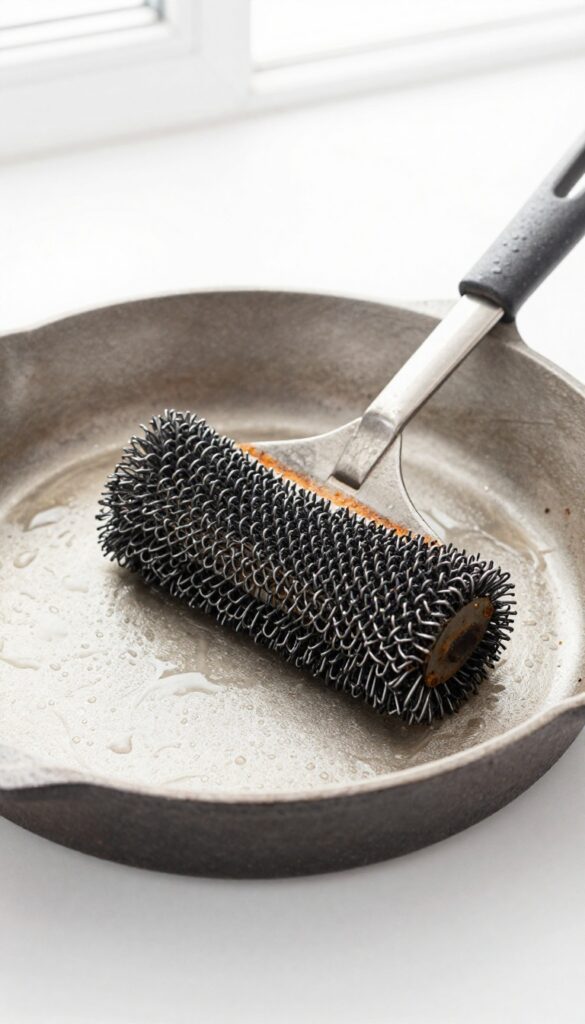
A chainmail scrubber might look medieval, but it's one of the best tools for tackling rust on cast iron. The interlocking metal rings are tough enough to dislodge rust flakes yet gentle enough to leave your seasoning intact. This makes it a favorite among cast iron enthusiasts who want to remove rust without starting from scratch.
Why Chainmail Works
The secret is in the design. Each ring acts like a tiny scraper, lifting rust particles without gouging the metal. Unlike steel wool, which can shed fibers and leave behind metallic dust, chainmail is seamless and reusable.
It also rinses clean easily, so you won't transfer grit back onto the pan.
How To Use It
Run the pan under hot water to loosen the rust. Then scrub in a circular motion with the chainmail, applying moderate pressure. Focus on the rusty spots, but don't bear down too hard—let the scrubber do the work.
Rinse frequently to check your progress and avoid spreading rust residue.
When To Avoid Chainmail
If your pan has a thick layer of seasoning that's flaking, chainmail might be too aggressive. It's best for surface rust or light pitting, not deep corrosion. For heavily rusted pans, start with a vinegar soak or electrolysis, then finish with chainmail for a smooth surface.
7. Apply a Rust Remover Gel
When scrubbing and soaking aren't enough, a rust remover gel can be a game-changer. These gels are designed to cling to vertical surfaces and stubborn rust spots, making them ideal for intricate areas like handle crevices or deep pitting. They work chemically to dissolve rust without damaging the underlying metal, and they're surprisingly easy to use.
Commercial rust remover gels, such as Evapo-Rust or Rust Kutter, are formulated to be safe for cast iron. They typically require no scrubbing—just apply, let it sit, and rinse off. This method is especially useful for heavily rusted pieces where abrasion might be too aggressive or time-consuming.
Always follow the product instructions for dwell time, usually between 30 minutes and a few hours. After rinsing, dry the pan immediately and apply a thin layer of oil to prevent flash rusting.
Choosing The Right Gel
Look for a gel that's non-toxic and biodegradable, especially if you plan to cook with the pan afterward. Evapo-Rust is a popular choice because it's water-based and won't etch the metal. Avoid acidic gels that can eat into the iron if left on too long.
Check the label to ensure it's safe for cast iron—most are, but it's worth confirming.
Application Tips For Best Results
Apply the gel generously with a brush or sponge, making sure to cover all rusted areas. For deep pits, use a toothbrush to work the gel into the crevices. Place the pan in a plastic bag or wrap it in plastic wrap to keep the gel from drying out.
Check periodically—if the gel turns dark or brown, it's working. Rinse with water and dry thoroughly.
Aftercare And Seasoning
Once the rust is gone, the pan will be bare iron and highly susceptible to new rust. Immediately dry it over low heat on the stove, then apply a thin layer of oil (vegetable, flaxseed, or grapeseed). Wipe off the excess and heat until the oil smokes.
This initial seasoning will protect the surface until you're ready to do a full seasoning in the oven.
8. Use an Electrolysis Tank
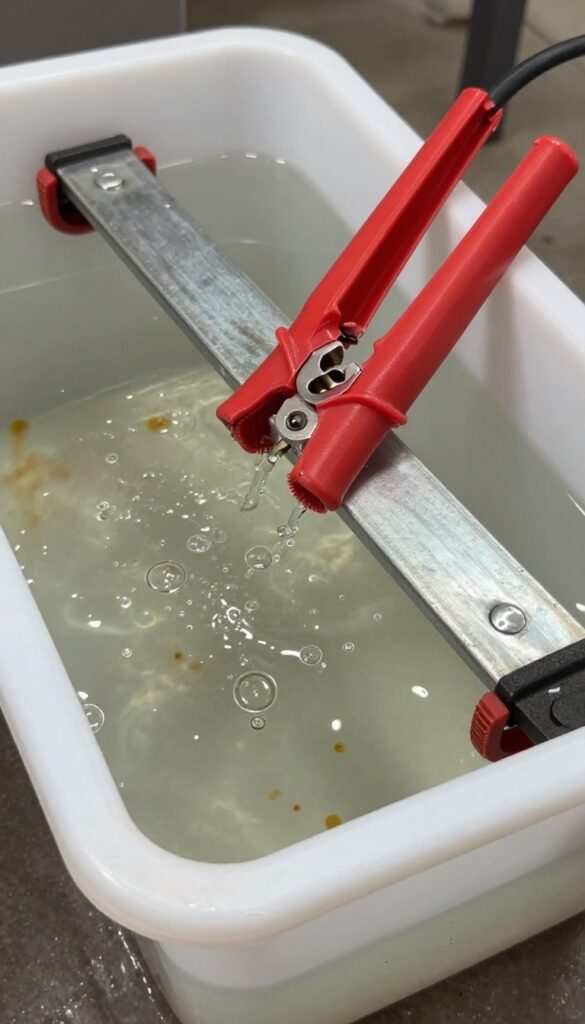
When rust has taken a deep hold, scrubbing and soaking just won't cut it. Electrolysis uses a low-voltage electrical current to lift rust off the metal without any abrasive action, leaving the original surface intact. It sounds like science class, but it's surprisingly simple to set up at home with a few basic supplies.
Electrolysis is the most thorough rust removal method for heavily pitted cast iron. The process uses a battery charger, a plastic tub, water, and washing soda to create a chemical reaction that transfers rust from the pan to a sacrificial piece of metal. No scrubbing, no chemicals, and no damage to the iron.
What You'll Need
Gather a plastic or rubber container large enough to submerge your skillet, a manual battery charger (not an automatic one), a box of washing soda (sodium carbonate), and a piece of scrap steel like a flat bar or an old sheet pan. You'll also need a copper wire or an old coat hanger to suspend the pan in the solution.
Setting It Up Safely
Fill the tub with water and add one tablespoon of washing soda per gallon, stirring until dissolved. Place the scrap steel in the tub and connect the positive (red) clamp to it. Suspend the cast iron in the water without touching the steel, then connect the negative (black) clamp to the pan.
Plug in the charger—you'll see bubbles and the water will turn rusty. Let it run for 12 to 24 hours.
Finishing Up
After electrolysis, the rust will be gone, but the pan will have a gray, porous surface. Rinse it thoroughly, dry it immediately, and scrub off any loose residue with a stiff brush. Then season the pan right away to prevent flash rusting.
The result is bare, clean iron ready for a fresh layer of seasoning.
9. Try a Lye Bath for Old Seasoning
Sometimes rust isn't the only enemy. Old, flaking seasoning can trap moisture and hide corrosion underneath. A lye bath strips everything down to bare metal, giving you a clean slate.
It's a slower process but incredibly thorough.
What You'll Need
Get 100% lye (sodium hydroxide) from a hardware store or online. You'll also need a plastic container with a lid, rubber gloves, and eye protection. Never use metal or aluminum containers — lye reacts with them.
Mixing The Bath
Fill the container with water, then slowly add lye (always add lye to water, never the reverse). Use about 1 tablespoon per gallon of water. Stir gently until dissolved.
Submerge the pan completely and weigh it down if needed.
Soaking And Safety
Let the pan soak for 2–7 days. Check every day or two. The lye will turn the water dark and greasy as seasoning dissolves.
Wear gloves when handling the pan. Rinse thoroughly with water and scrub with a stainless steel scrubber before reseasoning.
10. Sand Off Stubborn Rust
When rust has dug in deep, sometimes you need to go old school and sand it away. It sounds aggressive, but with the right grit and a light touch, sanding can remove rust without damaging the underlying metal. This method works especially well on flat cooking surfaces and the sides of skillets where you can get good leverage.
Sanding is a straightforward way to remove rust that won't budge with scrubbing or soaking. The key is choosing the right grit and applying even pressure. Start with 120-grit sandpaper to knock down the rust, then switch to 220-grit to smooth the surface.
Always sand in a consistent direction—circular motions can leave swirl marks. After sanding, wash the pan with warm, soapy water and dry it immediately to prevent flash rust. Then apply a thin layer of oil before storing or reseasoning.
Choose The Right Grit
For heavy rust, start with 120-grit sandpaper. It's coarse enough to remove rust quickly but won't gouge the iron if you're careful. Once the rust is gone, switch to 220-grit to smooth out the scratches left by the coarser paper.
Using a sanding block or sponge can help you apply even pressure and avoid digging into the metal.
Work In A Well-ventilated Area
Sanding creates fine metal dust that you don't want to breathe in. Set up your workspace outside or in a garage with the door open. Wear a dust mask and safety glasses to protect yourself.
Lay down newspaper or a drop cloth to catch the dust for easy cleanup.
Finish With A Thorough Wash
After sanding, wash the pan with hot, soapy water and a stiff brush to remove all metal particles. Rinse well and dry immediately with a lint-free towel or by placing it on a warm stove. Any moisture left behind can cause flash rust, so be thorough.
Once dry, apply a thin coat of vegetable oil or flaxseed oil to protect the surface until you're ready to reseason.
11. Use a Drill with a Wire Brush
When you're dealing with a large skillet covered in rust, hand scrubbing can take forever. That's where power tools come in. Attaching a wire brush to a drill turns a tedious chore into a fast, effective rust removal process.
Choose The Right Brush
Not all wire brushes are the same. For cast iron, a crimped wire brush is gentle enough to avoid gouging the metal, while a knotted wire brush is more aggressive for heavy rust. Use a cup brush for flat surfaces and a wheel brush for curved areas like the sides of a skillet.
Safety First
A spinning wire brush can fling rust particles and wire bristles everywhere. Always wear safety goggles and a dust mask. Work in a well-ventilated area or outdoors.
Gloves are a good idea too, because the metal can get warm from friction.
Technique Matters
Hold the drill steady and let the brush do the work. Apply light pressure and move in consistent patterns, following the grain of the metal if possible. Avoid staying in one spot too long to prevent creating grooves.
For stubborn rust, you can use a wire brush attachment on an angle grinder, but that's more aggressive and requires even more care.
12. Dry Immediately After Cleaning
Water is cast iron's worst enemy once the seasoning is compromised. Even a few droplets left behind can trigger flash rusting within minutes, undoing all your hard work. That's why drying isn't just a final step—it's a critical part of rust prevention.
After washing, grab a clean, lint-free towel and dry every surface thoroughly, including the handle and bottom. Then place the pan on a stove burner over low heat for a few minutes until it's completely dry to the touch. This evaporates any moisture hiding in microscopic pores.
Once cool enough to handle, apply a thin layer of oil to protect the bare metal until you can reseason.
Why Towel Drying Isn't Enough
A towel can't reach moisture trapped in the iron's porous surface. That's why stovetop heating is essential. The gentle heat drives out hidden water and prevents orange rust spots from forming overnight.
The Stovetop Drying Method
Set your burner to low or medium-low and place the pan upside down for even heating. Let it warm for 2–3 minutes, then check with your hand—it should feel hot but not scorching. Turn off the heat and let the pan cool naturally.
What To Do If You See Flash Rust
If orange specks appear during drying, don't panic. Wipe them off with a dry cloth, then reheat the pan and apply a tiny drop of oil. Rub it in with a paper towel, then buff off the excess.
This light oil coating will stop further rusting.
13. Apply a Thin Layer of Oil
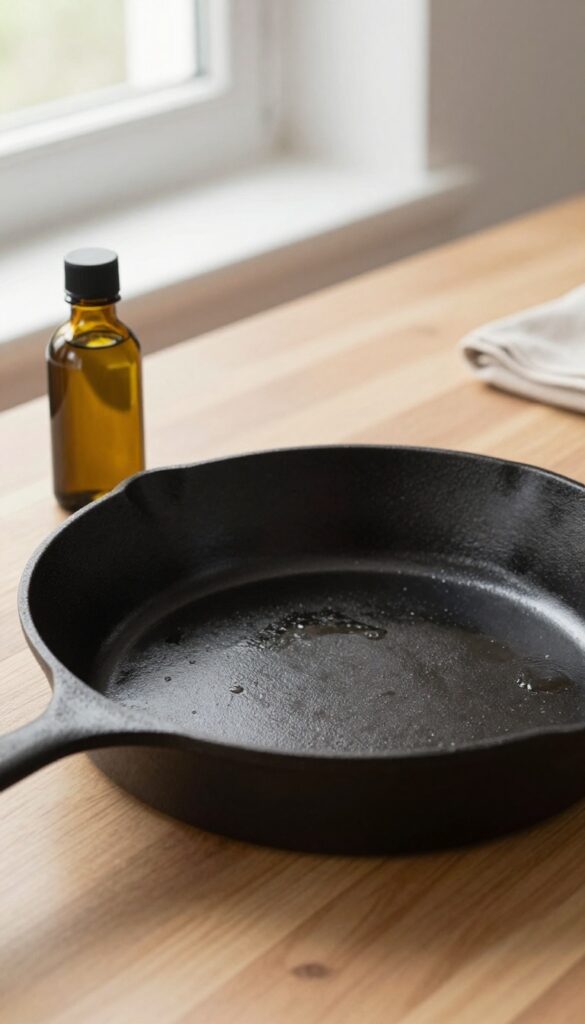
Once your skillet is clean and bone-dry, the next step is critical. If you leave bare metal exposed to air for more than a few minutes, flash rust can form—a thin, orange layer that ruins all your hard work. A quick coat of oil stops that and primes the surface for seasoning.
After drying, rub a thin coat of vegetable oil or flaxseed oil over the entire pan. This prevents flash rust and preps for seasoning. Use a lint-free cloth or paper towel to apply a very thin layer—too much oil will become sticky and tacky.
The goal is to create a microscopic barrier that seeps into the pores of the iron.
Why Oil Matters
Cast iron is porous, and bare metal reacts with oxygen and moisture almost instantly. A thin oil layer fills those pores and seals the surface. This isn't seasoning yet—it's a temporary shield that buys you time to heat the pan and build a proper layer.
Best Oils For The Job
Vegetable oil, canola oil, or flaxseed oil are top choices because they have high smoke points and polymerize well. Avoid olive oil or butter—they burn too quickly and leave a gummy residue. Flaxseed oil is a favorite among enthusiasts because it creates a hard, durable seasoning.
How To Apply It Right
Pour a small drop onto the pan and spread it with a clean cloth. Wipe it all over—inside, outside, handle, and edges. Then, with a dry part of the cloth, wipe off as much as you can.
You want the surface to look almost dry, with just a faint sheen. Less is definitely more.
14. Season in the Oven
After you've stripped the rust and dried the pan completely, it's time to build a new protective layer. Oven seasoning is the gold standard for creating a tough, non-stick surface that also prevents future rust. This method uses heat to polymerize the oil into a hard, durable coating that bonds with the iron.
Preheat your oven to 400°F. Apply a very thin layer of oil—flaxseed, grapeseed, or vegetable oil work well—to the entire pan, inside and out. Then wipe it off as if you made a mistake; the goal is a microscopically thin film.
Place the pan upside down on the middle rack with a baking sheet on the lower rack to catch drips. Bake for 1 hour, then turn off the oven and let the pan cool inside. Repeat this process 2-3 times for a deep, dark seasoning that feels smooth and slick.
Why Upside Down?
Placing the pan upside down prevents oil from pooling in the cooking surface, which would create sticky spots instead of a smooth finish. The baking sheet catches any drips, keeping your oven clean.
Choosing The Right Oil
Flaxseed oil creates a hard, glass-like seasoning but can flake if not applied thinly. Grapeseed and vegetable oils are more forgiving and produce a durable, flexible layer. Avoid butter or olive oil—they burn at high temperatures.
Cooling Slowly Matters
Letting the pan cool inside the oven allows the seasoning to set without thermal shock. Rapid cooling can cause the seasoning to crack or peel, so patience here pays off.
15. Use the Stovetop for Quick Seasoning
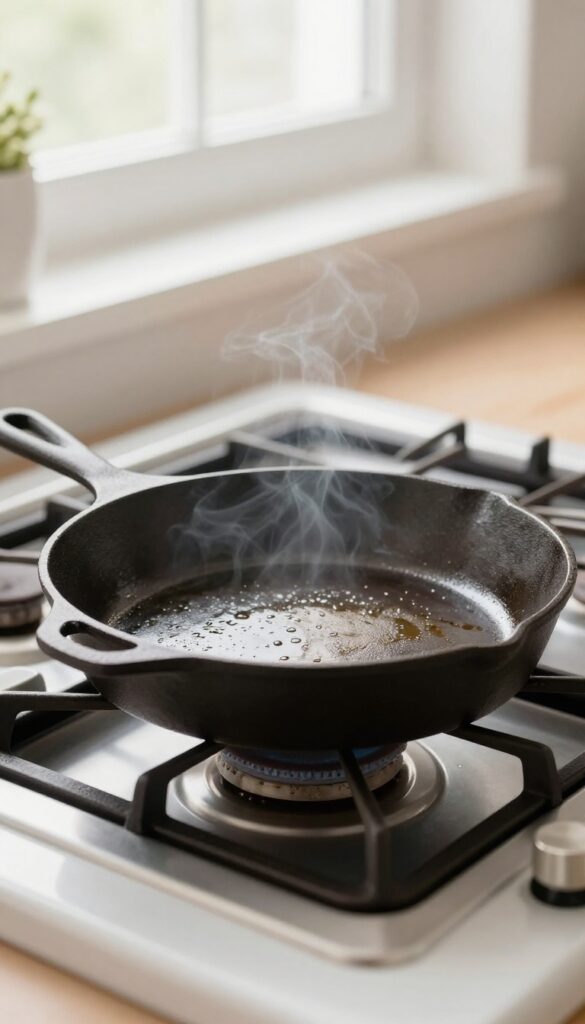
Not everyone wants to heat up the kitchen with a long oven cycle. The stovetop method is faster and works just as well for a single pan. You can go from oiled to seasoned in under ten minutes.
Stovetop seasoning is perfect for quick touch-ups or when you only have one pan to do. It gives you direct control over the heat and lets you see the oil polymerize in real time. The key is to use a high smoke point oil and work in a well-ventilated area.
Choose The Right Oil
Use an oil with a high smoke point like grapeseed, avocado, or canola. Avoid butter or olive oil—they burn too quickly and leave a sticky residue. A teaspoon is plenty for a 10-inch skillet.
Heat And Wipe Technique
Place the dry pan on a burner over medium heat. Once hot, add a drop of oil and wipe it all over the interior with a paper towel or lint-free cloth. The goal is a very thin, even layer—almost invisible.
Then wipe again with a clean cloth to remove excess.
Let It Smoke
Continue heating the pan until the oil just starts to smoke. That’s the polymerization point. Let it smoke for 2–3 minutes, then turn off the heat.
Let the pan cool completely before storing. You’ll see a dark, matte finish form.
16. Cook Fatty Foods First
Your freshly seasoned cast iron is ready for action, but the first few cooks matter more than you might think. Fatty foods are your skillet's best friend during this break-in period because they deposit a thin layer of oil that bonds to the metal, reinforcing the seasoning with every sizzle.
Starting with bacon, fried chicken, or oil-sautéed vegetables gives the pan a head start. The rendered fat fills microscopic pores in the iron, creating a smoother surface that's less likely to rust. Plus, these foods naturally release from the pan, so you won't risk pulling off your new seasoning.
Why Fat Works
When you cook fatty foods, the heat causes the fat to polymerize—a fancy way of saying it bonds to the iron and forms a hard, non-stick layer. This is exactly what seasoning is, so each fatty meal adds to the protective coating.
Best First Meals
Bacon is the classic choice because it renders plenty of fat and cooks at a moderate temperature. Fried chicken, pan-seared steaks with oil, and stir-fried vegetables in a generous amount of oil are also excellent. Avoid acidic foods like tomatoes or vinegar-based dishes until the seasoning is well-established.
What To Avoid
Skip watery foods like boiled vegetables or wet brines early on. They can cause steam to lift the seasoning. Also avoid high-heat searing of lean meats without added oil—the pan needs that fat to stay protected.
17. Avoid Soap for the First Few Uses
You've stripped the rust, seasoned the pan, and now you're ready to cook. But before you reach for the dish soap, hold up. That fresh seasoning is still fragile, and soap can strip it before it has a chance to set.
For the first 5 to 10 cooks, skip the soap entirely. Hot water and a stiff brush are all you need to remove food residue. This gives the oil layers time to polymerize fully, creating a durable non-stick surface that will last for years.
Why Soap Is Risky Early On
Modern dish soaps are milder than the lye-based ones our grandparents used, but they can still weaken a new seasoning. The first few layers of oil haven't bonded completely, so even gentle detergents can lift them. Patience here pays off.
How To Clean Without Soap
While the pan is still warm, run it under hot water and scrub with a stiff nylon brush or chainmail scrubber. For stuck bits, boil a little water in the pan for a minute, then scrape with a wooden spatula. Dry immediately over low heat.
When It's Safe To Use Soap
After about a dozen cooks, the seasoning will be dark, slick, and resilient. At that point, a little soap won't hurt. But many cast iron enthusiasts still prefer soap-free cleaning for life, relying on heat and abrasion instead.
18. Store with a Paper Towel Inside
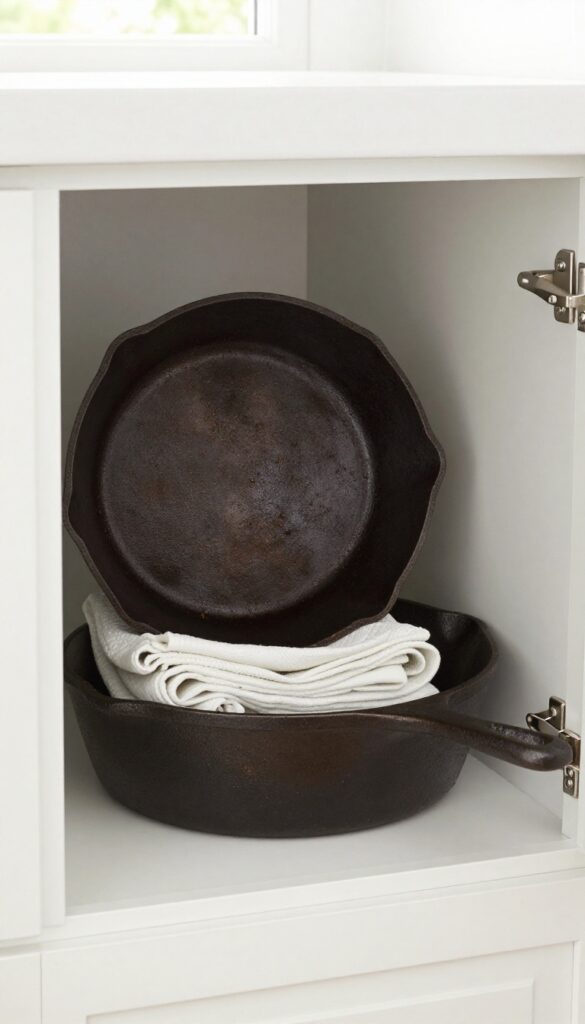
Even after you've seasoned your cast iron perfectly, storage can undo all that work. Humidity is the enemy, and a closed cabinet or pantry can trap moisture that leads to rust spots. A simple paper towel inside the pan acts as a moisture sponge, keeping the surface dry between uses.
This trick is almost too easy, but it makes a real difference, especially if you live in a damp climate or store your pans in a basement. The paper towel absorbs any condensation that forms inside the pan, preventing rust from taking hold. Just remember to swap it out every few weeks or after each use if you cook frequently.
Why It Works
Cast iron is porous and can hold microscopic moisture even when it feels dry. A paper towel creates a wicking effect, pulling that moisture away from the metal surface. Without that layer of water, the iron can't oxidize, so rust simply doesn't form.
Best Practices
Use a plain, unbleached paper towel to avoid any chemical residues. Fold it into a square that fits snugly inside the pan, but not so tight that it compresses the seasoning. Replace it whenever it feels damp or after you've washed the pan.
If you stack multiple pans, place a towel between each one to prevent scratching and absorb moisture.
When To Skip This Tip
If you use your cast iron daily, a paper towel isn't necessary since the pan gets heated and dried regularly. Also, avoid leaving a paper towel in a pan that's stored in a very hot or humid space for months at a time—it can become a breeding ground for mold. In those cases, opt for a silica gel packet instead.
19. Re-season Annually
Even a well-loved cast iron pan that's never seen rust can benefit from a yearly re-season. Over twelve months of cooking, the seasoning layer naturally thins from heat, acidic foods, and scrubbing. A fresh coat every year keeps the surface strong and rust-resistant, so you never have to panic over a spot of orange.
An annual re-season is preventive maintenance, not a full restoration. You don't need to strip the pan unless the current seasoning is flaking or uneven. If it's still smooth, just scrub it clean, dry thoroughly, and apply a thin layer of oil before baking it upside down in the oven.
This reinforces the barrier that keeps moisture and oxygen away from the iron.
When To Strip Vs. Just Refresh
If your seasoning looks patchy, sticky, or has built-up carbon, strip it first using oven cleaner or the vinegar soak method. Then start fresh with a full seasoning cycle. If the pan looks good but feels a little dry, simply wash, dry, oil, and bake at 400°F for an hour.
That light refresh is enough to seal the surface for another year.
The Annual Routine Step By Step
Pick a day when you can leave the pan in the oven for a couple of hours. Scrub it with hot water and a stiff brush, then dry it on the stove over low heat. Rub a very thin layer of vegetable oil or flaxseed oil all over—inside and out—and wipe off the excess with a clean cloth.
Place the pan upside down on the middle rack with a baking sheet on the lower rack to catch drips. Bake at 400°F for one hour, then let it cool in the oven. That's it.
Why Yearly Matters Even For Perfect Pans
Seasoning isn't permanent. Every time you cook, especially with sauces or acidic ingredients, microscopic gaps form in the polymerized oil. Over a year, those gaps add up.
An annual re-season fills them in before rust can take hold. It's like giving your pan a yearly oil change—simple, cheap, and it prevents bigger problems down the road.
20. Know When to Let Go
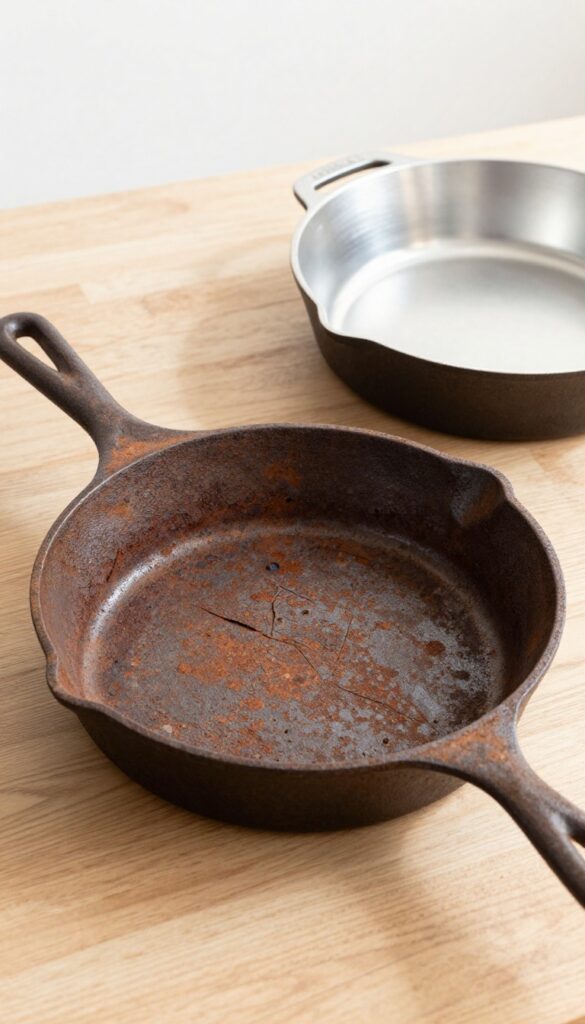
Not every rusty cast iron pan can be saved, and that's okay. Deep pitting, cracks, or warping mean the pan's structure is compromised. Cooking on damaged cast iron isn't just frustrating—it can be unsafe, especially if flakes of rust or metal end up in your food.
Sometimes the best restoration tip is knowing when to recycle and start fresh.
Assess the damage honestly before investing time in restoration. Run your fingers over the surface—if you feel sharp edges or deep craters, the metal is too thin or pitted. Hold the pan up to light and look for hairline cracks, especially around the handle rivets.
A cracked pan can fail under high heat, causing burns or spills. Warping is another dealbreaker: place the pan on a flat surface and check for rocking. A warped pan won't heat evenly, making cooking a nightmare.
If the pan is structurally sound but has deep rust pits, consider whether you're okay with a rough cooking surface. Some pits can be sanded smooth, but if they're too deep, they'll always trap food and oil. In that case, relegate the pan to outdoor use or repurpose it as a decorative piece.
But for daily cooking, a heavily pitted pan isn't worth the hassle. Safety first: if the pan is from an unknown source, test for lead or heavy metals if you suspect it was used for melting lead or as a paint pot. Old pans can harbor toxins.
When in doubt, don't cook with it. Your health is more important than sentimental value. Finally, consider the cost of restoration.
Buying a new pre-seasoned cast iron pan is often cheaper than buying supplies and spending hours restoring a badly damaged one. Sometimes letting go is the smartest, most practical choice.
Spotting Irreparable Damage
Look for cracks, deep pitting, and warping. Run your fingers over the surface—sharp edges or craters mean the metal is compromised. Check for hairline cracks around handles and rivets.
A cracked pan can fail under heat. Warping causes uneven cooking and is hard to fix.
When Pitting Is Too Deep
Light pitting can be sanded out, but deep pits will always collect food and oil. If you can't smooth the surface without thinning the metal too much, the pan will never perform well. Consider repurposing or recycling it.
Safety Concerns With Old Pans
Unknown-origin pans may contain lead or other toxins if used for non-cooking purposes. Never cook in a pan that might have been used for melting lead or as a paint pot. When in doubt, test or discard.
Cost Vs. Value Of Restoration
Add up the cost of supplies (steel wool, vinegar, seasoning oil) and your time. A new pre-seasoned pan is often $20–$40. If restoration costs more than that, or if the pan won't perform well afterward, it's better to buy new.
FAQ
Can I use soap on cast iron?
Yes, modern dish soaps are mild and won't damage seasoning. Avoid harsh detergents or soaking for long periods.
How long does it take to remove rust from cast iron?
Light rust can be removed in 15-30 minutes with scrubbing. Heavy rust may require overnight soaking or electrolysis.
Is it safe to cook in a rusty cast iron pan?
Small amounts of rust are not toxic, but it's best to remove it. Rust can affect taste and texture of food.
What oil is best for seasoning cast iron?
Flaxseed oil creates a hard, durable seasoning. Vegetable oil, canola oil, and grapeseed oil are also good choices.
Can I use vinegar on cast iron?
Yes, but only for short soaks (1 hour max) to remove rust. Prolonged exposure can damage the iron.
Conclusion
Rusty cast iron doesn't have to be the end of the road. With a few simple techniques and a bit of patience, you can restore your skillet to its former glory. The key is to start with the gentlest method and work your way up as needed.
Remember, each pan is different, so don't be afraid to experiment. Once you've got it clean, a little regular maintenance will keep it rust-free for years.