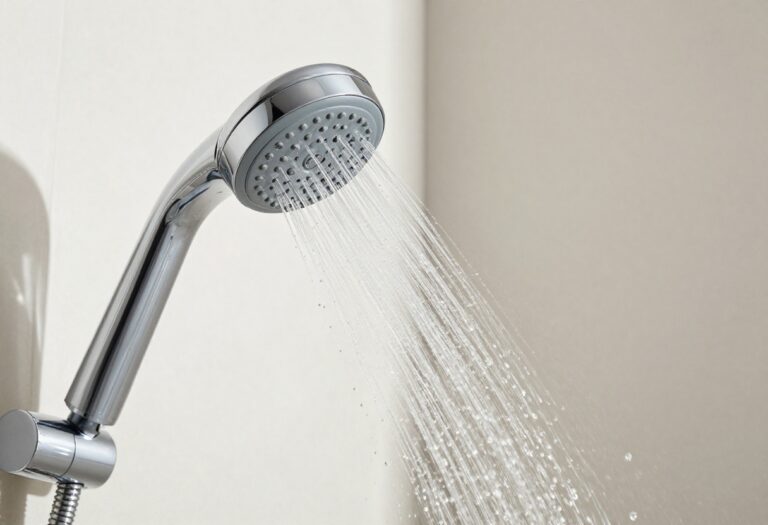
How to Clean Shower Grout in 15 Mold Fighting Tips
Moldy shower grout is stubborn, but fighting it doesn't have to be. These 15 tips break down the process into simple, effective steps—from a baking soda paste to a daily spray that prevents regrowth.
Each method targets a specific type of grime, so you can pick the right weapon for your worst spots. Ready to make your grout look new again without spending hours scrubbing?
Let's get started.
1. Start with a Baking Soda Paste
Baking soda is a gentle abrasive that lifts mold without damaging grout. When mixed with water, it forms a paste that clings to vertical surfaces, giving it time to break down grime. This method works best on light to moderate mold and is safe for all grout types.
Mix three parts baking soda with one part water to create a thick, spreadable paste. Apply it generously over the moldy grout lines using an old toothbrush or a grout brush. Let the paste sit for 10 minutes—this gives the baking soda time to loosen the mold spores.
Then scrub in a circular motion, focusing on the darkest spots. Rinse with warm water and wipe dry with a microfiber cloth. For stubborn areas, add a splash of white vinegar to the paste, but test on a hidden spot first since vinegar can etch some grout.
Why Baking Soda Works
Baking soda is alkaline, which helps neutralize acidic mold residues. Its fine crystals provide gentle scrubbing power that won't scratch tiles or erode grout. Plus, it's non-toxic, so you don't have to worry about harsh fumes in a small bathroom.
How To Apply For Best Results
Apply the paste with a stiff-bristled brush, working it into the grout lines. Let it sit undisturbed for the full 10 minutes. If the paste dries out, spritz it lightly with water to keep it active.
Scrub firmly but not aggressively—let the baking soda do the work.
Rinsing And Drying Tips
Rinse thoroughly with warm water to remove all paste residue. Leftover baking soda can leave a white film. Use a clean, damp sponge and change the water frequently.
Dry the grout with a towel or let it air dry with the fan on to prevent new mold from forming.
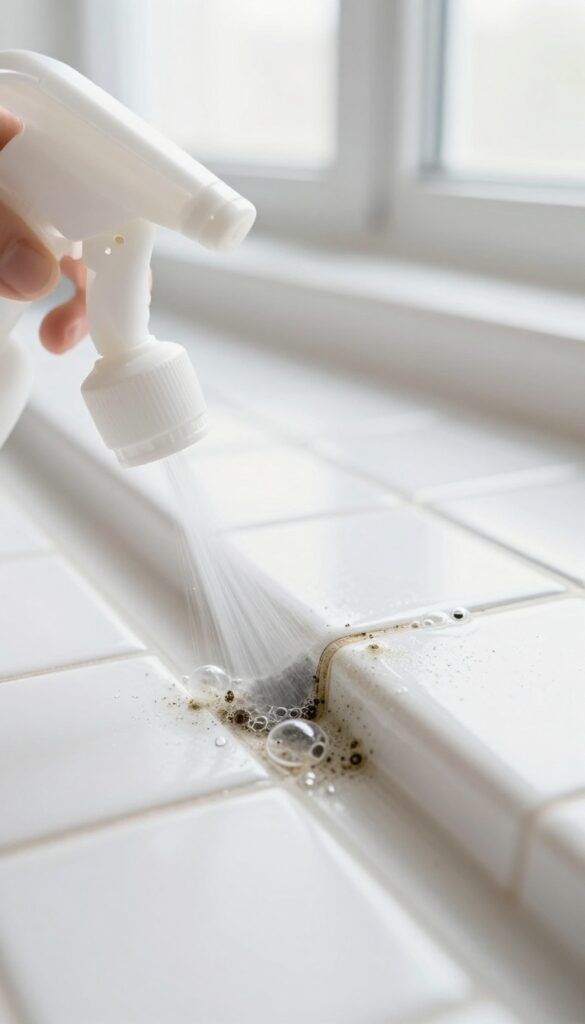
2. Use White Vinegar for Stubborn Spots
White vinegar is a powerhouse cleaner that cuts through mold and grime without harsh chemicals. Its acidity breaks down mineral deposits and kills most mold spores on contact. For those dark, stubborn spots that won't budge, vinegar is your go-to.
Spray undiluted white vinegar directly onto the moldy grout, making sure it's fully saturated. Let it fizz and work for 15 minutes — you might see some bubbling as it reacts with the grime. Then scrub with a stiff brush, rinse with warm water, and dry with a clean cloth.
For extra tough spots, repeat or let it sit longer.
Why Vinegar Works So Well
Vinegar is acidic enough to dissolve alkaline buildup like soap scum and hard water stains, which often trap mold. It also penetrates porous grout better than many commercial cleaners, reaching deep into the cracks where mold hides.
Safety And Precautions
Never mix vinegar with bleach or hydrogen peroxide — it creates toxic fumes. Test on a small hidden area first, especially on natural stone or unsealed grout, as vinegar can etch some surfaces. Wear gloves to protect your hands from prolonged contact.
When To Use Vinegar Vs. Other Methods
Vinegar is best for light to moderate mold and everyday grime. For heavy, black mold or deeply embedded stains, you might need a stronger method like hydrogen peroxide or a commercial mold remover. But for most routine cleaning, vinegar is effective and eco-friendly.
3. Try Hydrogen Peroxide for Deep Stains
When baking soda and vinegar aren't cutting it, hydrogen peroxide steps up. This mild antiseptic bubbles away deep mold stains without the harsh smell of bleach. It's especially good for older grout that's absorbed years of grime.
For darker mold stains, apply 3% hydrogen peroxide directly to the grout. Let it sit for 30 minutes, then scrub. It whitens and disinfects without bleach fumes.
How It Works
Hydrogen peroxide releases oxygen bubbles that lift organic stains like mold and mildew. It also kills bacteria and fungi on contact, making it a powerful disinfectant. The 3% solution is safe for most grout types, but always test a small area first.
Application Tips
Pour peroxide into a spray bottle or apply directly with a sponge. Let it foam for 30 minutes—don't let it dry out. Scrub with a stiff brush, then rinse with water.
For extra stubborn spots, mix with baking soda into a paste.
Safety Notes
Hydrogen peroxide can bleach fabrics and some surfaces, so protect your shower curtain and clothes. It's non-toxic once it breaks down into water and oxygen, making it safer than bleach for households with kids or pets.
4. Make a Bleach Solution for Tough Mold
Sometimes mold is so embedded that gentler methods just won't cut it. That's when a bleach solution becomes your best bet. It's a powerful disinfectant that kills mold at the root, but you need to handle it with care to avoid damaging your grout or your lungs.
Mixing The Right Ratio
The sweet spot is one part bleach to three parts water. Any stronger and you risk eating away at the grout; any weaker and it might not kill the mold. Use a small bowl or spray bottle, but if you go with a sprayer, make sure it's labeled for bleach to avoid corrosion.
Application And Dwell Time
Dip a stiff-bristled brush into the solution and work it into the grout lines. Let it sit for 10 minutes—this gives the bleach time to penetrate and kill the mold. Don't let it dry out; if it does, reapply.
After 10 minutes, scrub gently to lift any remaining stains.
Rinse And Ventilate
Rinse the area thoroughly with warm water. Leftover bleach can damage grout over time, so make sure you get it all off. Open a window or turn on the exhaust fan—bleach fumes are strong and can irritate your lungs.
Wear gloves and old clothes too.
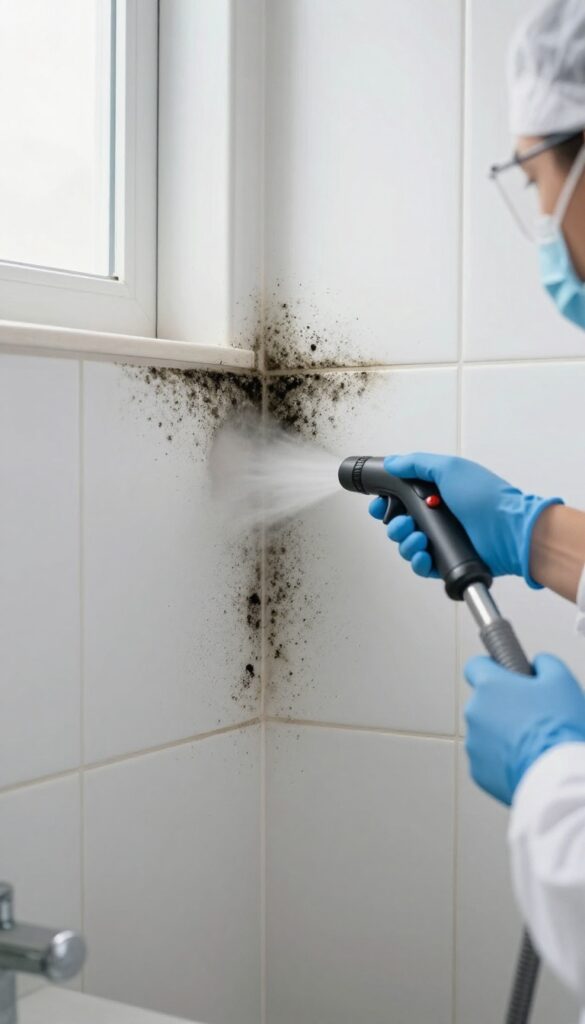
5. Use a Steam Cleaner for Deep Cleaning
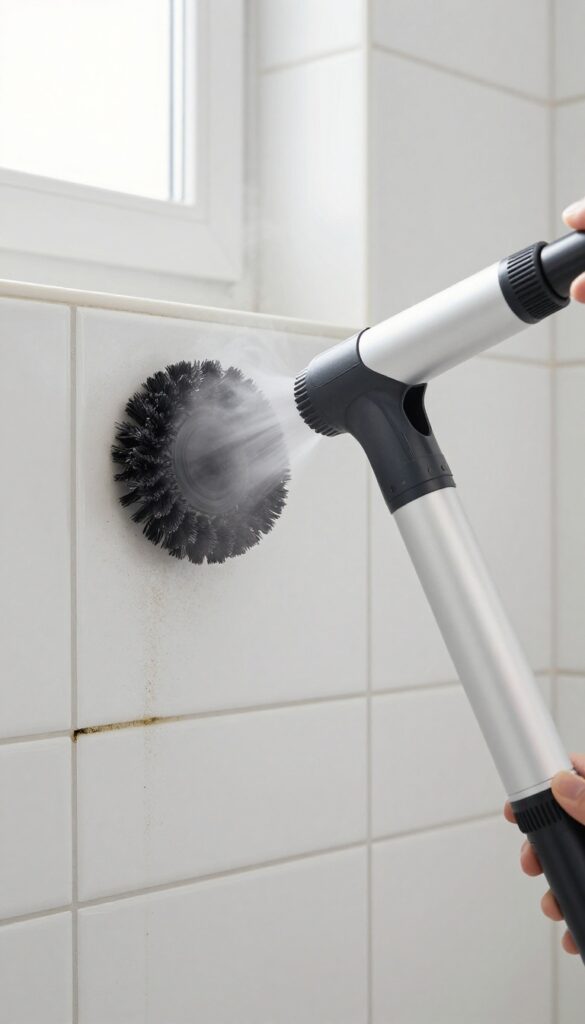
When scrubbing by hand feels like a losing battle, a steam cleaner can be your secret weapon. It delivers hot, pressurized steam that penetrates deep into grout pores, killing mold spores and loosening years of grime. Best of all, it's chemical-free—just water and heat.
This method is especially effective for large tiled areas or stubborn stains that resist gentler cleaners.
A handheld steam cleaner is a worthwhile investment if you deal with moldy grout regularly. The high-temperature steam (often above 200°F) kills mold on contact and softens dirt so it wipes away easily. It's also safe for most tile types, including ceramic, porcelain, and natural stone (check your manufacturer's guidelines).
For best results, use a brush attachment to agitate the grout while steaming. Work in small sections, and follow up with a dry cloth to remove loosened debris. Regular steam cleaning once a month can prevent mold from establishing a foothold.
Choose The Right Steam Cleaner
Not all steam cleaners are created equal. For shower grout, a handheld model with a brush attachment is ideal. Look for one that heats up quickly and has continuous steam output.
Avoid steam mops—they're designed for floors and won't provide the focused pressure you need for vertical grout lines.
Prepare The Area
Before steaming, remove any loose debris with a dry brush. Open a window or turn on the exhaust fan to ventilate the bathroom. If you're using a steam cleaner for the first time, test it on an inconspicuous area to ensure your tile can handle the heat.
Steam In Sections
Work from top to bottom to prevent dirty water from dripping onto clean grout. Hold the steam nozzle about an inch from the grout and move slowly along each line. Let the steam sit for a few seconds before wiping with a microfiber cloth.
For heavy mold, you may need to repeat the process.
Dry And Seal
After steaming, dry the grout thoroughly with a clean towel. Moisture left behind can encourage new mold growth. Once dry, consider applying a grout sealer to protect against future stains and make cleaning easier.
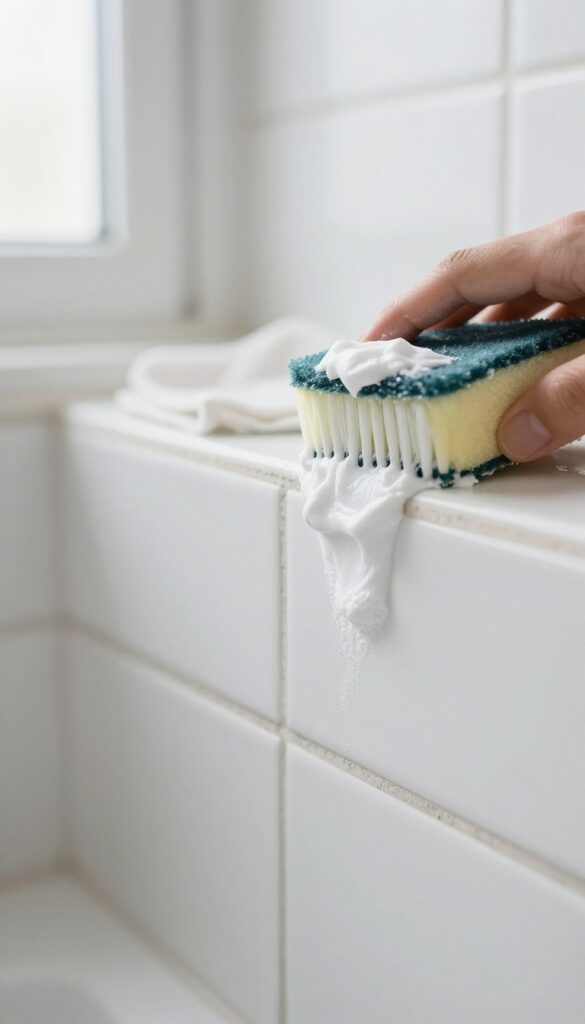
6. Scrub with a Grout Brush or Old Toothbrush
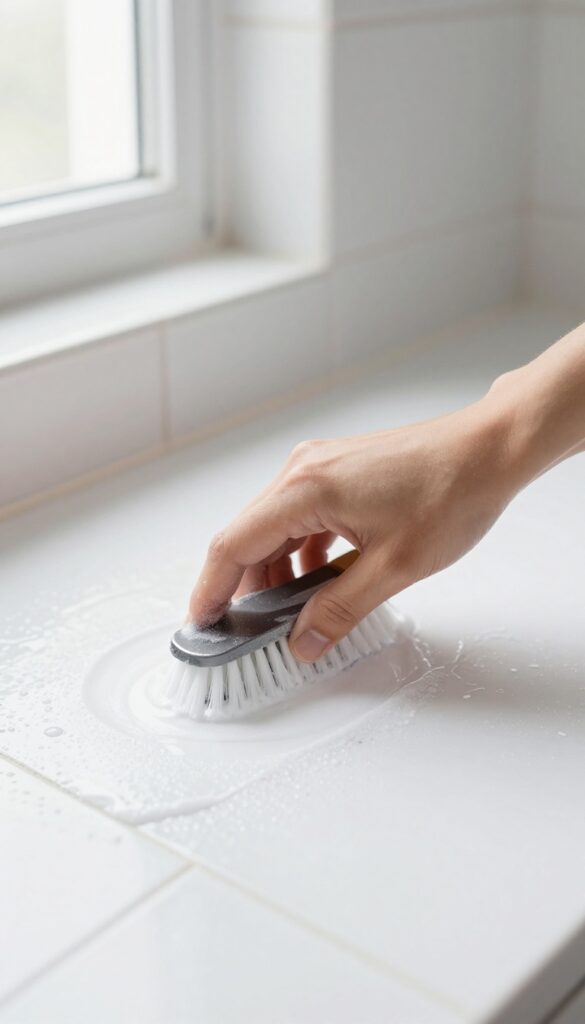
A stiff-bristled grout brush is the tool you need to really get into those narrow lines. An old toothbrush works just as well for tight spots. The key is to scrub in circular motions to dislodge mold without damaging the grout.
Using the right tool makes all the difference. Grout brushes have angled bristles that reach deep into crevices. An old toothbrush is perfect for corners and edges.
Apply your cleaner, then scrub firmly but gently. Rinse with water and wipe away residue.
Why A Grout Brush Beats A Sponge
Sponges are too soft to get into grout lines. A grout brush's stiff bristles scrape away mold without scratching tiles. It's also reusable and easy to clean.
How To Scrub Effectively
Dip the brush in your cleaning solution, then scrub in small circles. Focus on the darkest spots first. Rinse the brush often to avoid spreading grime.
When To Replace Your Brush
Once bristles are frayed or bent, the brush loses effectiveness. Replace it every few months or after heavy mold removal. A fresh brush works much better.
7. Apply a DIY Oxygen Bleach Mix
If you're dealing with stubborn mold stains but want to avoid the harsh fumes of chlorine bleach, oxygen bleach is your answer. It's gentler on you and the environment, yet surprisingly effective at lifting deep-set grime from grout lines. This method relies on a simple chemical reaction: oxygen bubbles that penetrate porous grout and break down organic stains without damaging the surface.
Oxygen bleach powder is widely available in laundry aisles or online. Unlike chlorine bleach, it won't yellow your grout or release toxic fumes, making it a safer choice for bathrooms with limited ventilation. The key is to mix it with warm water—hot water activates the oxygen too quickly, while cold water won't dissolve the powder properly.
Let the mixture sit on the grout for a full 15 minutes to give the bubbles time to work their magic, then scrub with a stiff brush. Rinse thoroughly with water afterward to remove any residue.
Why Oxygen Bleach Works
Oxygen bleach (sodium percarbonate) releases hydrogen peroxide when mixed with water. This creates a fizzing action that lifts mold, mildew, and dirt from the grout's pores. It's especially effective on light-colored grout where stains are most visible.
Because it's non-toxic once diluted, it's safe to use around kids and pets—just avoid direct contact with eyes and skin.
Step-by-step Application
Start by sweeping or vacuuming loose debris from the grout. Mix the oxygen bleach powder with warm water according to the package directions—usually about 1/4 cup powder per gallon of water. Apply the solution generously to the grout lines using a spray bottle or sponge.
Let it sit for 15 minutes; you'll see bubbles forming as it works. Scrub with a grout brush or old toothbrush, focusing on stained areas. Rinse with clean water and wipe dry.
For extra-stubborn spots, repeat the process or let the solution sit longer.
Safety And Precautions
Always wear gloves and eye protection when handling any cleaning chemical, including oxygen bleach. Test the solution on an inconspicuous area first to ensure it doesn't discolor your grout. Avoid using on natural stone tiles like marble or travertine, as the bubbling action can etch the surface.
Keep windows open or use a fan to improve airflow during cleaning.
8. Use a Magic Eraser for Light Stains
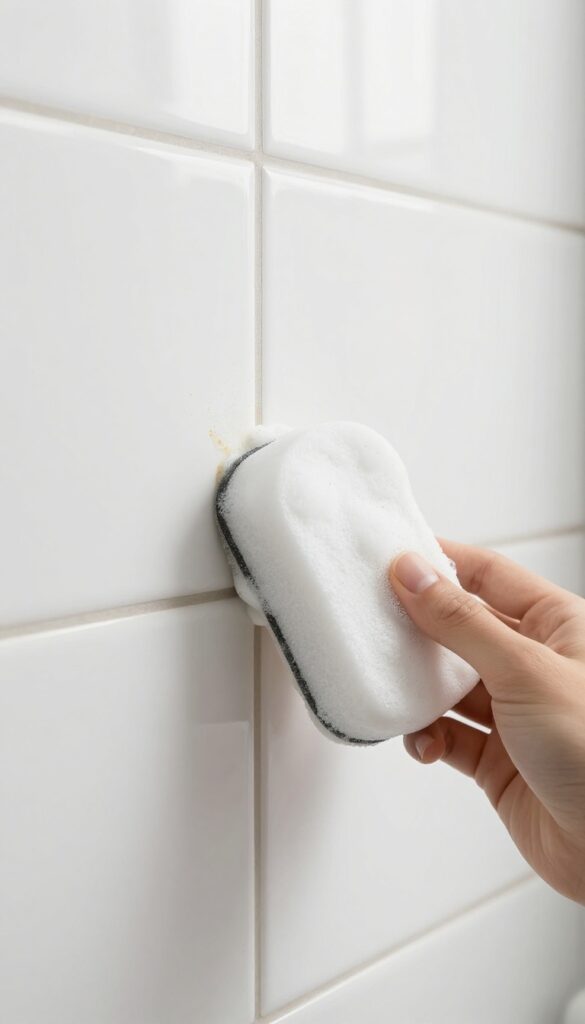
Not every mold stain needs a heavy-duty chemical assault. For surface-level grime that's more cosmetic than structural, a simple melamine sponge—better known as a Magic Eraser—can work wonders. It's a quick, low-effort fix that fits right into your regular cleaning routine.
A Magic Eraser is essentially a super-fine abrasive sponge that lifts dirt and mild mold without the need for bleach or harsh scrubbing. It's perfect for those light gray or brownish spots that appear on grout between cleanings. Just dampen the sponge, wring it out so it's not dripping, and gently rub over the stained areas.
You'll see the discoloration lift away almost instantly. No waiting, no mixing, no fumes.
How To Use It Right
Start with a clean, damp sponge—don't soak it. Press lightly and move in short strokes along the grout lines. The sponge will start to wear down as it works, which is normal.
Rinse the sponge frequently to avoid redepositing grime. For best results, test on a small hidden area first, especially if your grout is old or porous. The abrasive action can sometimes dull glossy tiles if you scrub too hard.
When To Skip This Method
Magic Erasers are great for light, surface-level stains, but they won't penetrate deep mold or mildew that has taken root inside the grout. If you see black, fuzzy growth or the stain returns quickly after cleaning, you need a stronger approach. Also, avoid using them on unsealed natural stone tiles—the abrasion can cause etching.
9. Seal Grout After Cleaning
You've scrubbed, rinsed, and dried your grout until it looks almost new. Now comes the step that makes all that effort last: sealing. A good sealer locks in your hard work and turns your grout into a moisture-repelling surface that mold finds much harder to cling to.
Sealing is the finishing move that transforms clean grout into low-maintenance grout. Without a sealer, grout remains porous and soaks up water, soap scum, and dirt—creating the perfect breeding ground for mold. A penetrating sealer soaks into the pores and forms an invisible shield.
Once applied, water beads up on the surface instead of sinking in. This simple barrier can extend the time between deep cleans from weeks to months. And when you do need to clean, the grime stays on top, so a quick wipe is often enough.
Choose The Right Sealer
Not all sealers are the same. For shower grout, a penetrating sealer is your best bet. It goes into the grout rather than sitting on top, so it won't peel or flake.
Avoid film-forming sealers, which can trap moisture and actually encourage mold growth underneath. Look for a sealer labeled "penetrating" or "impregnating" and check that it's suitable for your specific grout type—sanded or unsanded.
Apply It The Right Way
Start with completely dry grout—wait at least 24 hours after cleaning. Use a small brush or a foam applicator to work the sealer into the grout lines. Don't let it pool on the tile surface; wipe off any excess immediately with a clean cloth.
Let it cure for the time specified on the bottle, usually 24 to 48 hours, before getting the shower wet. Proper application ensures an even barrier that lasts.
Reapply As Needed
Sealer isn't permanent. Over time, it wears away from scrubbing and water exposure. Plan to reseal your shower grout once a year, or more often if you notice water no longer beading up.
A simple water test—sprinkle a few drops on the grout—tells you when it's time. If the water soaks in quickly, grab your sealer and give it another coat.
10. Improve Bathroom Ventilation

You can scrub all you want, but if your bathroom stays damp, mold will keep coming back. Good ventilation is your first line of defense. It removes moisture from the air, drying out grout before mold has a chance to settle in.
Run the exhaust fan during and after showers for at least 20 minutes. Good airflow dries out moisture that mold needs to grow. If you don't have a fan, crack a window or use a portable dehumidifier.
Even a small fan aimed at the shower area helps. Make it a habit to air out the bathroom after every shower—your grout will stay cleaner longer.
Why Ventilation Matters
Mold thrives in damp, stagnant air. Without proper airflow, moisture lingers on grout lines for hours, giving mold spores a perfect environment to grow. A well-ventilated bathroom cuts down drying time significantly.
How Long To Run The Fan
Run the exhaust fan during your shower and for at least 20 minutes afterward. Many fans are on a timer, so set it for 30 minutes to be safe. If your fan is weak, consider upgrading to a more powerful model.
Simple Alternatives
No fan? Open a window and prop the bathroom door open. A small box fan placed near the shower can also help.
For extra moisture control, use a squeegee on tiles after showering and wipe down wet surfaces.
11. Squeegee Walls After Every Shower
You can scrub all you want, but if your bathroom stays damp, mold will keep coming back. The simplest way to prevent grout mold is to remove standing water after every shower. A squeegee does this job in seconds and keeps moisture from soaking into the grout lines.
Grab a small squeegee and keep it hanging inside your shower. After you turn off the water, run the squeegee over the tiles from top to bottom. Focus on the grout lines—those are where water likes to hide.
This one habit cuts down drying time and makes mold much less likely to grow.
Why It Works So Well
Mold needs moisture to survive. When you squeegee, you remove the thin layer of water that sits on the surface. Grout is porous, so it absorbs that water quickly.
By taking it off, you keep the grout drier and less inviting to mold spores.
How To Make It A Habit
Hang the squeegee on a hook inside the shower so it's always within reach. Make it part of your routine—right after you rinse off, before you step out. It only takes 30 seconds.
If you forget, try setting a phone reminder for a week. Soon it'll feel automatic.
Extra Tip: Dry The Squeegee Too
After using the squeegee, give it a quick shake or wipe it with a towel. Leaving it wet on the hook can let mold grow on the rubber blade. A dry squeegee works better and lasts longer.
12. Use a Daily Shower Spray
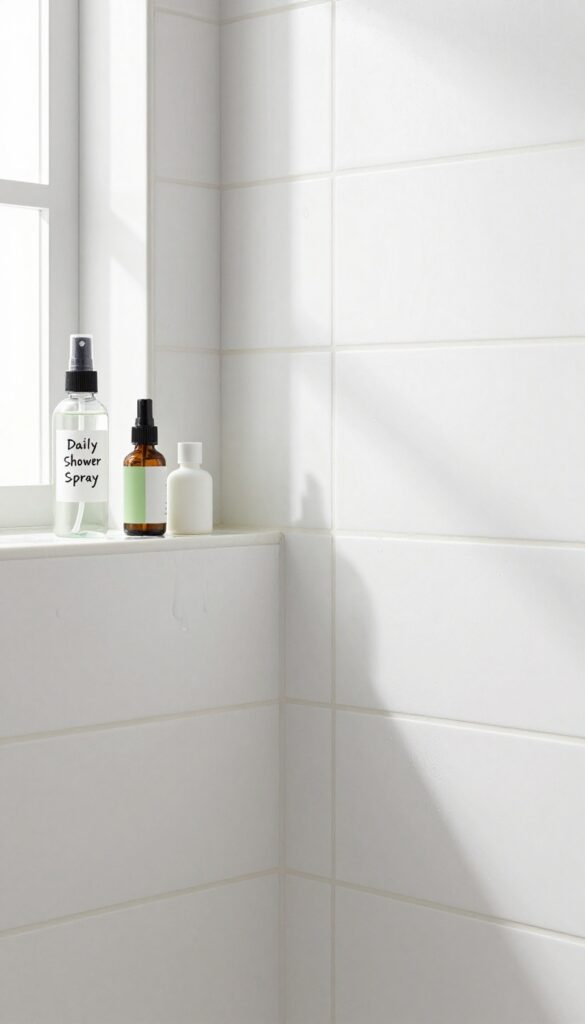
Stopping mold before it starts is way easier than scrubbing it off later. A quick spritz after every shower keeps grout dry and inhospitable to spores. This habit takes 10 seconds but saves you hours of deep cleaning.
Mix one cup of water with 10–15 drops of tea tree oil or a tablespoon of white vinegar in a spray bottle. After your final rinse, mist the shower walls and grout lines lightly. No need to rinse again—just let it air dry.
Tea tree oil is a natural antifungal, while vinegar creates an acidic environment mold hates. Avoid using vinegar if you have natural stone grout, as it can etch the surface. Stick to tea tree oil for delicate materials.
Why It Works
Mold needs moisture to grow. By drying the surface quickly and applying a mild antimicrobial, you break the cycle before spores take hold. The spray also helps remove soap scum residue that mold feeds on.
Diy Spray Recipes
For a basic spray: 1 cup water + 1 tablespoon white vinegar. For a stronger version: 1 cup water + 10–15 drops tea tree oil + 1 tablespoon rubbing alcohol. Store in a dark bottle to preserve essential oils.
Label it clearly and keep it in the shower.
When To Use It
Mist after every shower, especially if your bathroom lacks ventilation. Focus on grout lines, corners, and the bottom of the shower where water pools. If you skip a day, don't worry—just resume the habit.
Consistency matters more than perfection.
13. Replace Worn-Out Caulk
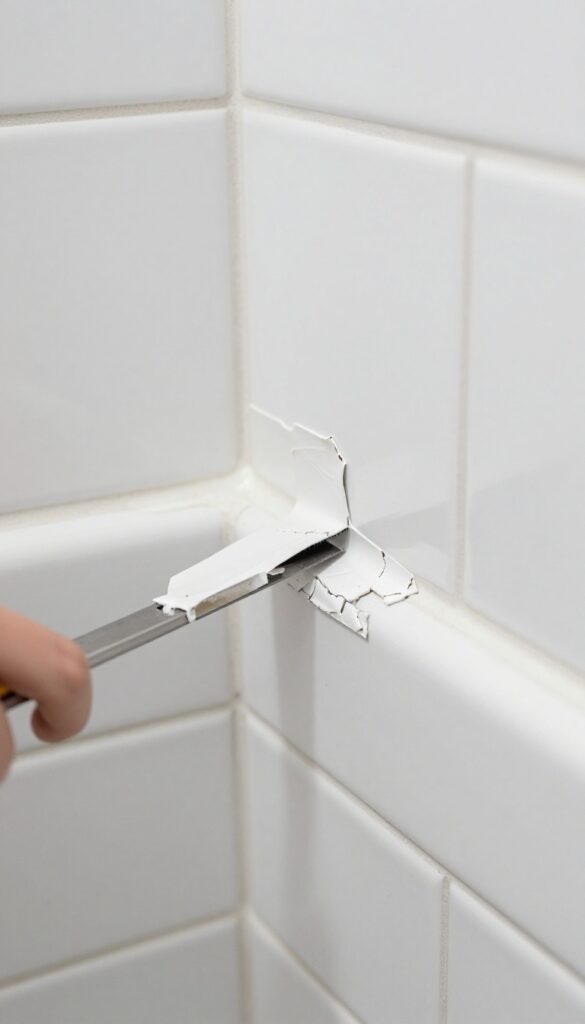
Caulk might not be the first thing you think of when cleaning grout, but it plays a huge role in keeping mold at bay. Over time, caulk around the edges of your shower can crack, peel, or shrink, creating the perfect hiding spot for moisture and mold. Even if your grout is spotless, old caulk can undo all your hard work by letting water seep behind tiles.
Replacing worn-out caulk is a straightforward DIY task that gives your shower a fresh start. Start by removing the old caulk with a utility knife or a caulk removal tool—take your time to get it all out. Clean the area thoroughly with a mildew cleaner or rubbing alcohol, and let it dry completely for at least 24 hours.
Then, apply a new bead of mold-resistant silicone caulk, smoothing it with a wet finger or a caulk tool. Let it cure according to the package instructions before using the shower again. This simple swap not only improves appearance but also seals out moisture, making your grout cleaning efforts last longer.
Why Caulk Matters For Mold Prevention
Caulk acts as a waterproof barrier at joints where tiles meet the tub, shower pan, or walls. When it fails, water gets behind tiles and into the substrate, creating a damp environment where mold thrives. Replacing caulk every year or two is a proactive step that keeps your grout cleaner and reduces the need for deep scrubbing.
How To Choose The Right Caulk
For showers, always pick a 100% silicone caulk labeled as mold- and mildew-resistant. Avoid acrylic or latex caulks, which are less durable and more porous. Look for a caulk that matches your grout color or is clear for a seamless look.
Some brands offer antimicrobial additives for extra protection.
Step-by-step Removal And Application
Use a sharp utility knife to cut through the old caulk, then pull it away in strips. Scrub any residue with a stiff brush and cleaner. After drying, apply painter's tape along the edges for a clean line.
Cut the caulk tube nozzle at a 45-degree angle, apply a steady bead, and smooth it immediately. Remove the tape before the caulk skins over.
When To Call A Pro
If you notice water damage behind the caulk or extensive mold growth in the seams, it might indicate a bigger issue like a leaky shower pan or failed waterproofing. In that case, replacing caulk alone won't solve the problem—consider hiring a contractor to inspect and repair the underlying structure.
14. Try a Commercial Grout Cleaner
Sometimes the toughest mold just won't budge with homemade solutions. That's when a dedicated commercial grout cleaner can save the day. These products are formulated with powerful mold-killing ingredients that penetrate deep into porous grout, tackling stains that vinegar and baking soda can't touch.
When you've exhausted DIY methods, a commercial grout cleaner is your next best bet. Look for products specifically labeled for grout and mold removal, often containing bleach or hydrogen peroxide. Always follow the instructions carefully—some require a dwell time of several minutes, while others need scrubbing.
And never skip the patch test: apply a small amount to an inconspicuous area to ensure it won't discolor your grout or tiles.
Choosing The Right Product
Not all grout cleaners are created equal. For heavy mold, opt for a gel or spray that clings to vertical surfaces. Check the label for active ingredients like sodium hypochlorite (bleach) or hydrogen peroxide.
Avoid acidic cleaners on natural stone tiles, as they can etch the surface.
Application Tips For Best Results
Apply the cleaner generously to the grout lines, then let it sit for the recommended time—usually 5 to 15 minutes. Use a stiff-bristled brush to work it in, then rinse thoroughly with water. Ventilate the bathroom well, and wear gloves and eye protection.
Repeat if necessary, but avoid over-saturating to prevent damage.
When To Call It Quits
If commercial cleaners don't fully remove the mold after two attempts, the grout may be too porous or damaged. At that point, consider professional cleaning or regrouting. Persistent mold could also indicate a moisture problem that needs fixing first.
15. Call a Professional for Severe Mold
Sometimes mold wins. If you've tried every DIY method and the black spots keep spreading or return within days, it's time to bring in the pros. Professional cleaners have industrial-grade treatments that penetrate deep into porous grout, and they can spot hidden moisture issues that fuel regrowth.
When To Wave The White Flag
Call a pro if mold covers more than a few square feet, keeps coming back despite your best efforts, or if anyone in your home has respiratory issues. Also, if you notice a musty smell that won't go away, that's a sign of moisture trapped behind tiles.
What Professionals Do Differently
They use high-pressure steam cleaners, antimicrobial sealants, and sometimes even commercial-grade fungicides that are not available to consumers. They also inspect for leaks, poor ventilation, or failed grout that needs replacement.
Cost Vs. Benefit
A professional cleaning typically runs $200–$500 depending on the area, but it can save you from costly mold remediation later. Plus, they often guarantee their work—so if mold returns within a certain period, they'll retreat it for free.
FAQ
How often should I clean shower grout?
For maintenance, clean grout every 2-4 weeks. Deep clean with a paste or steam every 1-2 months to prevent mold buildup.
Can I use bleach on colored grout?
Bleach can discolor colored grout. Test on a hidden spot first, or use oxygen bleach or vinegar instead.
What kills mold in grout permanently?
No method kills mold permanently, but sealing grout after cleaning and reducing moisture can prevent regrowth for months.
Is vinegar or bleach better for grout mold?
Vinegar is safer and effective for surface mold. Bleach works faster on deep stains but can damage grout and release fumes.
How do I prevent mold from coming back?
Keep the shower dry with ventilation and squeegeeing, seal grout, and use a daily anti-mold spray.
Conclusion
Moldy grout doesn't have to be a permanent problem. With these 15 tips, you can tackle existing stains and set up habits that keep mold away. Start with the method that fits your situation—whether it's a quick vinegar spray or a deep steam clean.
Consistency is the real secret. A few minutes of daily care can save you hours of scrubbing later. Your shower will look better, and you'll breathe easier knowing mold isn't taking over.