20 Cleaning Stove Burners Tips for Grease and Spills
You know that moment when you turn on a burner and smell burnt grease instead of food? That's your stove telling you it's time for a deep clean. Grease and spills don't just look bad—they can affect performance and even become a fire hazard.
But scrubbing those burner caps and grates doesn't have to be a dreaded chore. With the right techniques, you can cut through grime quickly and keep your stove looking like new.
These 20 tips cover everything from everyday wipe-downs to heavy-duty degreasing. Whether you have gas, electric, or induction burners, there's a solution here for you.
1. Wipe Down Burners After Every Use
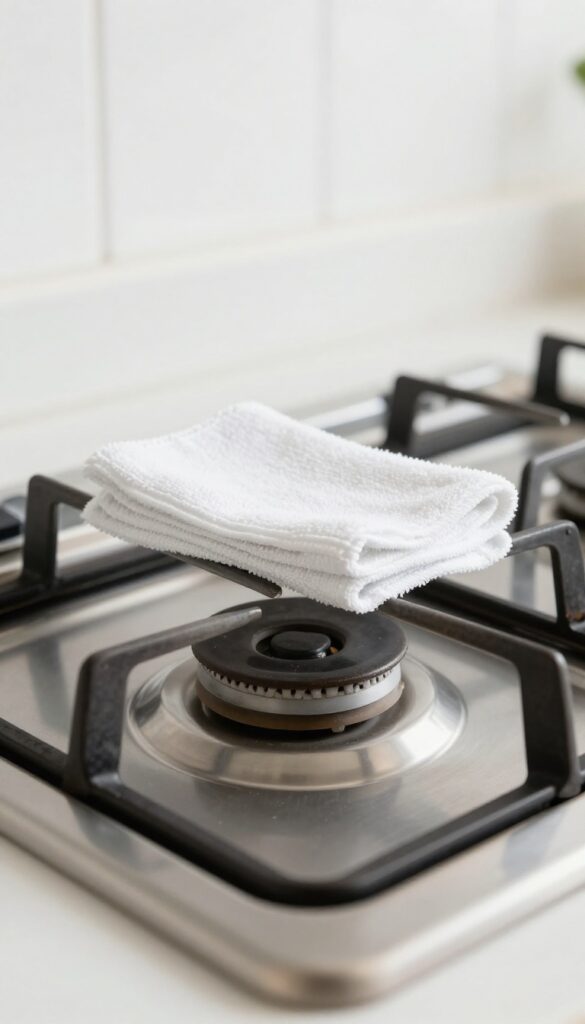
A quick wipe with a damp cloth after cooking prevents grease from hardening. Make it a habit to save hours of scrubbing later.
Getting into the routine of wiping your burners after each use is the single most effective way to keep grease from building up. It takes just 30 seconds but can cut your deep-cleaning time in half. Here's how to make it work for different burner types.
Gas Burners: Quick Wipe For Caps And Grates
After the burner has cooled, remove the cap and grate. Wipe them with a damp microfiber cloth. For stubborn spots, a drop of dish soap helps.
Dry thoroughly before replacing to prevent rust.
Electric Coil Burners: Cool And Wipe Carefully
Wait until coils are completely cool. Use a damp cloth to wipe the drip pans and the coils themselves. Avoid getting water into the electrical connections.
A paper towel works too.
Induction Or Ceramic Glass: Gentle Cleaning Only
Use a soft cloth and a cleaner designed for glass cooktops. A vinegar-water solution works well. Wipe in one direction to avoid streaks.
Never use abrasive pads.
2. Use Baking Soda Paste for Stubborn Grease
Sometimes a simple soapy scrub just doesn't cut it—especially when grease has baked on over time. That's where baking soda comes in. This pantry staple is a gentle abrasive that lifts grime without scratching metal or enamel surfaces.
Mixed into a paste, it clings to vertical surfaces and seeps into crevices, making it perfect for burner rings, caps, and drip pans.
Baking soda paste is one of the most effective and affordable ways to tackle stubborn grease. It's non-toxic, so you don't have to worry about harsh chemical fumes around food. The paste works by creating a mild alkaline reaction that breaks down fatty acids in grease, loosening them for easy removal.
Plus, it's safe for all burner types—gas, electric, and induction—as long as you avoid soaking electrical components.
How To Make The Paste
Combine three parts baking soda with one part water in a small bowl. Stir until it forms a thick, spreadable paste. If it's too runny, add more baking soda; too dry, add a few drops of water.
The consistency should be similar to toothpaste—firm enough to stay put but soft enough to spread easily.
Application And Dwell Time
Using a sponge or your fingers (wear gloves if you prefer), apply the paste generously to the greasy areas. Focus on burnt-on spots and crevices. Let it sit for 15 minutes—this gives the baking soda time to break down the grease.
For extra-stubborn buildup, let it sit for up to 30 minutes, but don't let it dry completely, or it may harden and be harder to wipe off.
Scrubbing And Rinsing
After the dwell time, scrub gently with a non-abrasive sponge or a soft-bristled brush. You'll see the grease lift away easily. Rinse thoroughly with warm water and dry with a clean cloth.
If any residue remains, repeat the process or use a vinegar spray (1 part vinegar to 3 parts water) to neutralize and remove any baking soda film.
3. Soak Burner Grates in Hot, Soapy Water
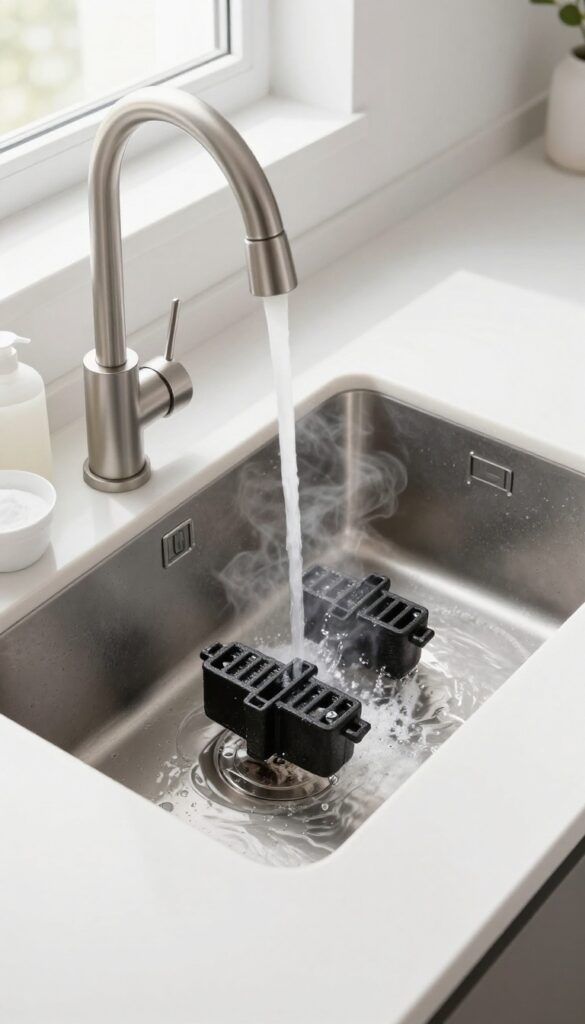
If you've been scrubbing grates by hand, you're making things harder than they need to be. A hot, soapy soak does most of the work for you—dissolving grease and softening burnt-on bits so they rinse right off. This method is perfect for cast iron or enameled grates that can handle heat and moisture.
What You'll Need
Grab your sink or a large basin, hot water, and a grease-cutting dish soap. Add a quarter cup of baking soda for extra oomph if the grime is stubborn. Avoid using bleach or harsh chemicals that can damage the finish.
How Long To Soak
Let the grates sit for at least 30 minutes, but an hour is even better. For really baked-on messes, let them soak overnight. Check periodically—if the water cools, replace it with fresh hot water to keep the grease loosening.
After The Soak
Remove the grates and scrub gently with a non-abrasive sponge or a soft brush. Most of the gunk will slide right off. Rinse thoroughly with clean water and dry completely before putting them back on the stove to prevent rust.
4. Try Vinegar and Baking Soda Combo
If you prefer natural cleaning methods, vinegar and baking soda are a powerful duo for cutting through grease. The chemical reaction between the two creates a fizzing action that helps lift stuck-on grime without harsh chemicals. This method works especially well on burner grates and drip pans that have seen better days.
Baking soda is a mild abrasive that helps scrub away grease, while vinegar's acidity breaks down stubborn residue. Together, they create a reaction that loosens dirt so you can wipe it away easily. This combo is safe for most stove surfaces, but avoid using it on aluminum or unsealed cast iron to prevent damage.
Always rinse thoroughly after cleaning to remove any residue.
How To Apply The Combo
Start by sprinkling a generous layer of baking soda over the burner surfaces you want to clean. Make sure the grates or drip pans are cool. Then, pour or spray white vinegar over the baking soda until it starts to fizz.
Let the mixture sit for about 10 minutes to allow the reaction to work through the grease. You'll see the grime start to loosen.
Wiping And Rinsing
After 10 minutes, use a damp sponge or cloth to wipe away the baking soda and vinegar paste. You may need to scrub lightly with a soft brush on stubborn spots. Rinse the burner parts with water to remove any leftover baking soda, which can leave a white residue if not fully cleaned.
Dry everything thoroughly before reassembling.
When To Use This Method
This technique is ideal for moderate grease buildup that hasn't been baked on for weeks. It's also a great option if you're sensitive to strong chemical cleaners. For heavy, caked-on grease, you might need to repeat the process or follow up with a degreaser.
Always test on a small hidden area first if you're unsure about your stove's finish.
5. Use a Degreasing Dish Soap
Not all dish soaps are created equal when it comes to fighting stubborn grease. Standard formulas work fine for everyday dishes, but they often fall short on baked-on stove grime. That's where a dedicated degreasing dish soap shines—it's designed to break down oils and fats more aggressively, saving you time and elbow grease.
Reach for a brand like Dawn or any soap labeled "degreasing" or "grease-cutting. " These contain surfactants that lift grease from surfaces so it rinses away easily. For best results, apply a few drops directly to a damp sponge or scrub brush, work into a lather, and focus on the greasiest areas.
Let the soap sit for a minute or two before rinsing to give it time to work.
Why Degreasing Soap Works Better
Regular dish soap is formulated for light food residue, not heavy grease. Degreasing soaps have higher concentrations of active ingredients that break the bond between oil and metal or ceramic. This means less scrubbing and fewer passes to get burners sparkling clean.
How To Use It On Burner Grates And Caps
Remove the grates and caps and soak them in hot water with a squirt of degreasing soap for 15–20 minutes. This softens the grease so you can wipe it off with a non-abrasive sponge. For stubborn spots, scrub gently with a soft brush.
Rinse thoroughly and dry before putting them back.
A Tip For Electric Coil Burners
Never submerge electric coil burners. Instead, dampen a cloth with a few drops of degreasing soap and wipe the coils after they've cooled completely. Use a second damp cloth to remove any soap residue, then let them dry fully before turning on the stove.
6. Clean Burner Caps with Ammonia (Ventilated Area)
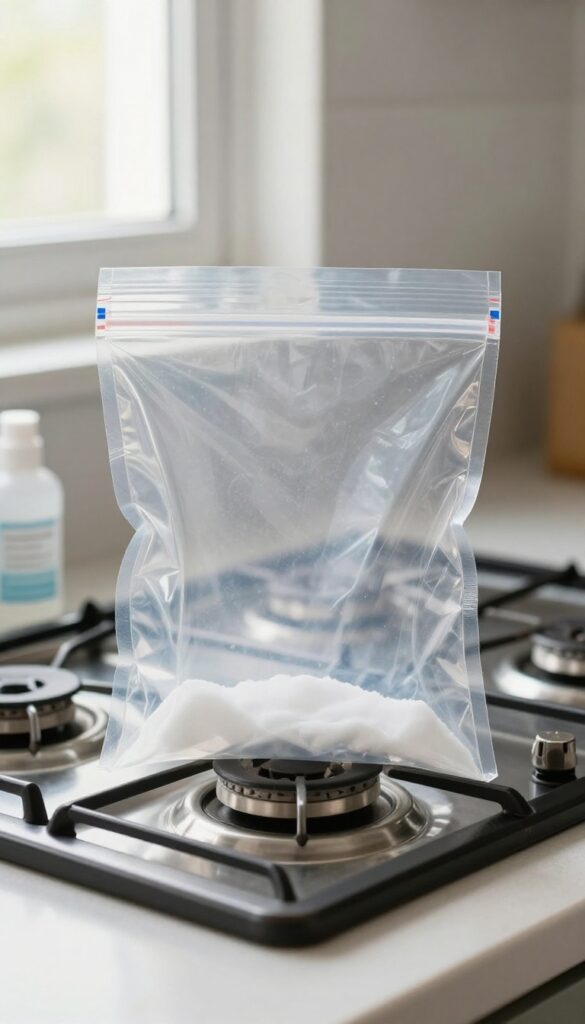
Ammonia is a powerhouse for breaking down baked-on grease without scrubbing. The fumes do the heavy lifting, so you barely have to lift a finger. Just make sure you're working in a well-ventilated space and keep the bag sealed tight.
This method works best for metal burner caps that can handle a strong chemical. The ammonia vapor penetrates the grease, softening it so you can rinse it away. It's a set-it-and-forget-it approach that saves elbow grease.
What You'll Need
Grab a gallon-size resealable plastic bag, a tablespoon of household ammonia, and your burner caps. That's it. No special tools required.
Step-by-step Instructions
Place the burner caps inside the bag. Add the ammonia without letting it touch the caps directly—just pour it into the bag. Seal the bag and gently shake to spread the ammonia.
Let it sit overnight in a well-ventilated area (like a garage or near an open window). In the morning, remove the caps and rinse thoroughly with warm water. Dry completely before putting them back on the stove.
Safety First
Ammonia fumes are strong and can irritate your eyes and lungs. Always work in a ventilated area, and avoid mixing ammonia with bleach or other cleaners. Wear gloves if you're sensitive to chemicals.
7. Scrub with a Non-Abrasive Sponge
Not all scrubbers are safe for your stove burners. Using steel wool or harsh scouring pads can scratch the surface, especially on coated or enameled burners. Those scratches not only look bad but also create tiny crevices where grease and food can hide, making future cleanups harder.
The fix is simple: switch to a non-abrasive sponge or a nylon brush.
A soft sponge or nylon brush is gentle enough to protect the finish but tough enough to lift grease. For extra scrubbing power without damage, look for sponges labeled "non-scratch" or those with a melamine foam core (like magic erasers). Always test a small hidden area first if you're unsure about the material.
Why Steel Wool Is A No-go
Steel wool might seem like a quick fix, but it leaves microscopic scratches on coated burners. Over time, these scratches dull the finish and make the surface more porous. For gas burner caps or electric coil pans, stick to plastic or silicone scrub brushes.
Best Tools For The Job
A cellulose sponge with a soft scrub pad on one side works well for most burner types. Nylon brushes with stiff but flexible bristles are great for getting into crevices. For induction cooktops, use a microfiber cloth or a dedicated ceramic cooktop scraper with a plastic blade.
Technique Tips
Wet the sponge and apply a small amount of dish soap or a gentle cleaner. Scrub in circular motions with light to medium pressure. Rinse frequently to remove loosened grease, and replace the sponge if it starts to feel gritty.
8. Use a Toothbrush for Tight Spots
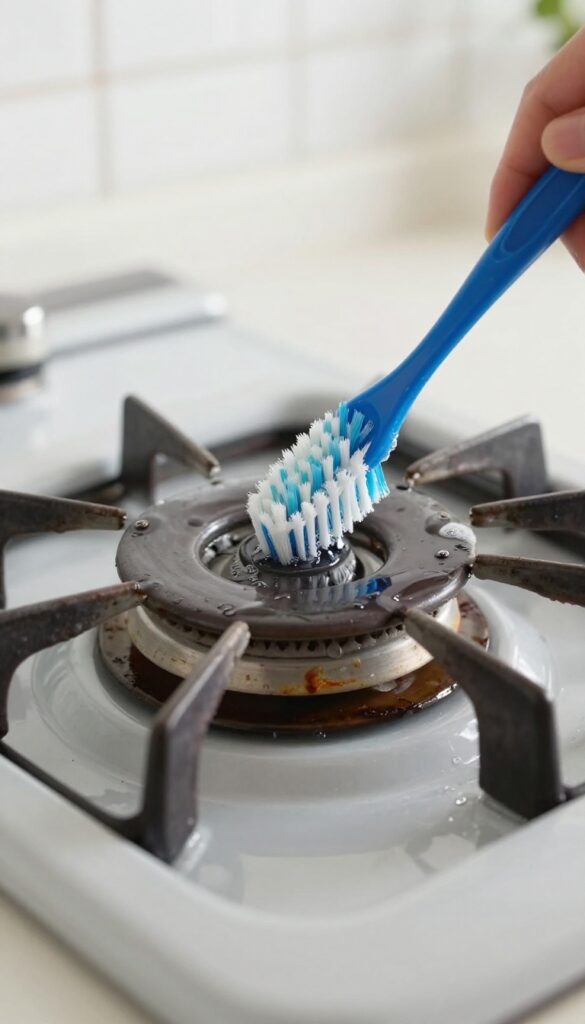
An old toothbrush reaches crevices around burner ports and knobs. Dip it in vinegar or soapy water for detailed cleaning.
A toothbrush is perfect for scrubbing the nooks and crannies that sponges can't reach. Its small head and firm bristles dig into grease buildup around burner ports, control knobs, and the edges of burner caps. You don't need a fancy tool—just grab an old toothbrush you'd otherwise toss.
Why A Toothbrush Works Best
The bristles are stiff enough to loosen baked-on grease but soft enough not to scratch surfaces. The narrow head lets you get between tight spaces, like the gaps around gas burner rings or the crevices under electric coil burners. Plus, the handle gives you good control for precise scrubbing.
How To Use It Effectively
Dip the toothbrush in a solution of equal parts white vinegar and warm water, or use a few drops of dish soap mixed with water. Scrub the burner ports, the base of the knobs, and any seams where grease hides. For extra stubborn spots, sprinkle baking soda on the brush first.
Rinse with a damp cloth afterward.
Pro Tip: Keep A Dedicated Brush
Designate one toothbrush just for stove cleaning. Store it in a small container near your cleaning supplies so it's always ready. Replace it every few months or when the bristles start to fray.
9. Remove Clogged Burner Ports with a Pin
Gas burners rely on tiny ports to distribute flame evenly. When those ports get clogged with grease or food debris, you'll notice uneven flames or weak spots. The fix is simpler than you think.
After you've soaked and dried your burner caps, grab a straight pin or a paperclip. Gently poke each port to dislodge any blockages. This quick step restores proper gas flow and helps your burners perform like new.
Clogged burner ports are a common issue with gas stoves, especially after spills or heavy use. Before you start, make sure the burner caps are completely dry to avoid any gas flow issues. Then, use a pin or a thin wire to clear each port.
Work carefully to avoid widening the holes. This simple maintenance step can save you from uneven cooking and wasted gas.
Why Ports Get Clogged
Grease splatters and food bits can bake onto burner ports over time. Even after a thorough cleaning, residue can remain inside the tiny openings. That's why soaking alone isn't always enough—physical removal is often needed.
How To Do It Safely
Always ensure the burner is cool and turned off. Use a straight pin, sewing needle, or a opened paperclip. Gently insert and twist to break up the clog.
Avoid using anything too thick that could damage the port. Repeat for each port until the flame pattern improves.
When To Call For Help
If clearing ports doesn't fix uneven flames, the issue might be deeper—like a clogged gas line or a faulty regulator. In that case, contact a professional. But for most routine clogs, a pin is all you need.
10. Steam Clean with a Bowl of Water
When grease and spills have hardened around your burners, steam can be your best friend. This method uses gentle heat and moisture to loosen baked-on grime without harsh chemicals. It's especially handy for electric coil burners or gas burner caps that can't be submerged.
Fill a heatproof bowl with water and add a few lemon slices for a fresh scent. Place it directly on the burner you want to clean and bring the water to a boil. Let it boil for about 5 minutes—the steam will rise and soften grease on the burner surface and surrounding areas.
After steaming, let everything cool, then wipe away the loosened grime with a damp cloth. For stubborn spots, a gentle scrub with a sponge may be needed.
Why It Works
Steam penetrates dried grease and makes it pliable again. The heat helps melt away oils, while the moisture prevents them from re-sticking. Lemon adds a natural degreasing boost and leaves a clean scent.
Best For Electric And Sealed Burners
This method is ideal for electric coil burners and sealed gas burners where you can't soak the entire burner. Avoid using it on open gas flames—the steam could extinguish them. For gas, steam clean the grates separately.
Safety First
Never leave boiling water unattended. Use a bowl that's microwave-safe or oven-safe to avoid cracking. Keep the bowl centered on the burner to prevent tipping.
After steaming, unplug the burner or turn off the gas before wiping.
11. Use a Magic Eraser for Stubborn Marks
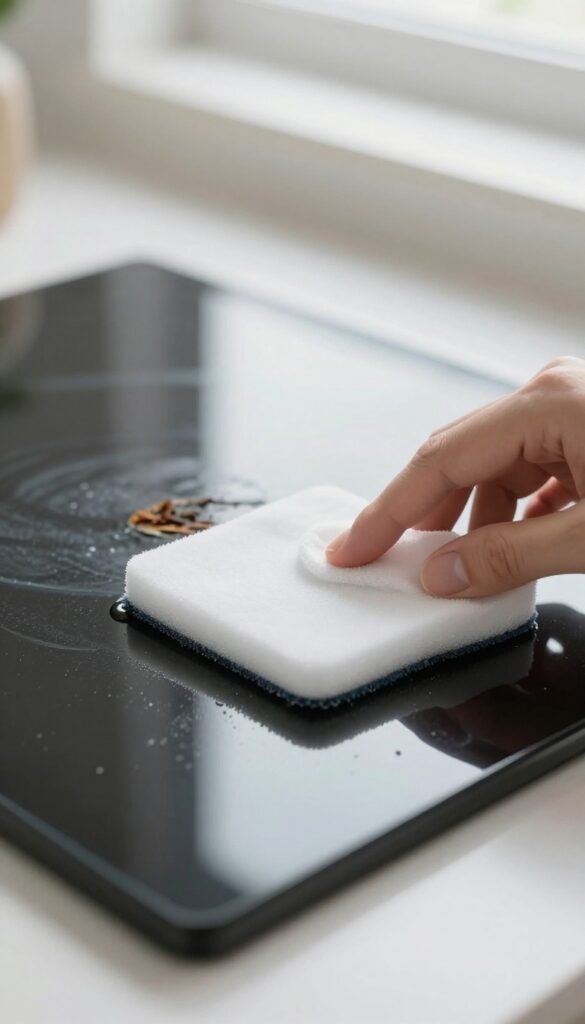
Sometimes, even after a good scrub, those dark, burnt-on spots just won't budge. That's where a melamine sponge—often sold as a Magic Eraser—comes in. It's a gentle abrasive that can lift stubborn marks without scratching most surfaces, especially ceramic and glass cooktops.
Just dampen it, wring out excess water, and rub gently over the stain. You'll be surprised how easily those burnt-on spills disappear.
For ceramic or glass cooktops, a Magic Eraser is a game-changer. It's softer than steel wool but tough enough to tackle baked-on residue. Always test on an inconspicuous area first, and avoid using it on painted or coated surfaces where it might dull the finish.
For best results, keep the sponge damp and apply light pressure—let the sponge do the work.
How To Use It Safely
Start by wetting the Magic Eraser and squeezing out the extra water. Gently rub the burnt area in small circles. Rinse the sponge frequently to avoid spreading grime.
Once the mark is gone, wipe the surface with a clean, damp cloth to remove any residue. Never use a dry eraser—it can scratch.
When To Avoid It
Skip the Magic Eraser on gas burner caps, stainless steel, or any surface with a glossy finish. It can be too abrasive for those materials. Stick to ceramic, glass, and enameled cooktops where it's safe.
If you're unsure, test on a hidden spot first.
12. Try a Commercial Cooktop Cleaner
When everyday cleaners just aren't cutting it, it's time to bring out the big guns. Commercial cooktop cleaners are specially formulated to tackle the tough, baked-on grease that builds up on glass and ceramic stovetops. Products like Weiman Glass Cook Top Cleaner or Cerama Bryte are designed to dissolve residue without scratching the surface.
They leave behind a streak-free shine that makes your stove look brand new.
Using a commercial cleaner is straightforward: apply a small amount to a cool cooktop, spread it with a soft cloth or the included applicator, and buff it dry. Always follow the manufacturer's instructions for best results. These cleaners are powerful, so a little goes a long way.
For extra-stubborn spots, let the cleaner sit for a minute before buffing. Avoid using them on hot surfaces or on gas burner grates unless specified.
Choosing The Right Cleaner
Not all commercial cleaners are the same. Weiman is a popular choice for glass cooktops, while Cerama Bryte is known for its gentle abrasive action. Check your stove's manual to ensure compatibility.
Some cleaners come with a conditioning agent that helps prevent future buildup. If you have a ceramic or induction cooktop, look for a cleaner that's safe for those surfaces.
Application Tips For Best Results
Always start with a cool stove. Squirt a small amount of cleaner onto the burner area, then use a clean, dry microfiber cloth to spread it in circular motions. Let it dry to a haze, then buff with a fresh cloth.
For burnt-on spills, repeat the process or let the cleaner sit for a few minutes before buffing. Avoid using abrasive sponges or scrub pads—they can scratch the glass.
Maintaining The Shine Between Deep Cleans
After a deep clean with a commercial product, you can maintain the shine with daily wipe-downs using a damp cloth and a mild dish soap. Keep a dedicated microfiber cloth near the stove for quick touch-ups. If you notice dullness returning, a weekly application of the commercial cleaner will keep your cooktop looking like new.
13. Clean Underneath Burner Caps
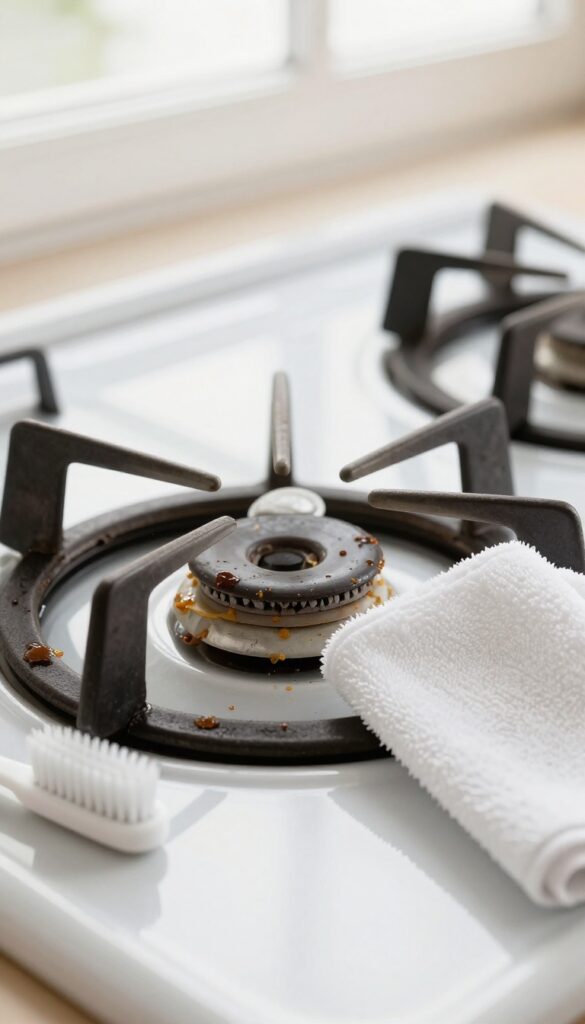
Most people scrub the top of burner caps and call it done, but grease loves to sneak underneath. That hidden buildup can cause uneven flames, flare-ups, or that burnt smell every time you cook. Lifting the caps and cleaning the area below is a quick step that makes a big difference.
Lift each burner cap carefully—they usually pop right off. You'll likely find a ring of greasy residue or even crusty spills underneath. A paper towel or a small brush (like a clean paintbrush or a toothbrush) works perfectly to sweep away the grime.
Wipe the rim of the burner base too, then replace the cap. Do this every few weeks to prevent stubborn buildup.
What You’ll Find Under There
Under the cap, expect a mix of cooking oil, food particles, and sometimes rust if moisture gets trapped. On gas stoves, the burner ports can get clogged, leading to yellow flames or weak heat. On electric coils, residue can burn onto the drip pan.
Knowing what’s lurking helps you choose the right cleaning method.
Best Tools For The Job
A paper towel is fine for light dust, but for sticky grease, use a microfiber cloth or a soft scrub brush. An old toothbrush is great for getting into small crevices around the burner base. Avoid metal scrubbers—they can scratch the surface or damage the cap’s finish.
How Often To Do This
Make it part of your weekly stove wipe-down. If you cook greasy foods often, check under the caps every time you clean the stovetop. For occasional cooks, once a month is enough.
Regular attention prevents the grease from hardening into a crust that’s much harder to remove.
14. Use Rubbing Alcohol for Sticky Residue
Sticky, tacky residue left behind by cooking sprays or sugary spills can be frustrating. Regular soap and water might not cut it, but rubbing alcohol works like a charm. It breaks down the sticky compounds quickly and evaporates fast, leaving your burners clean and residue-free.
Rubbing alcohol is a powerful degreaser that dissolves sticky buildup without harsh scrubbing. It's safe on stainless steel and ceramic glass cooktops, but avoid using it on painted or plastic parts. Apply it with a soft cloth or cotton ball, then wipe dry.
For stubborn spots, let it sit for a minute before wiping.
Why Alcohol Works So Well
Isopropyl alcohol is a solvent that breaks down the chemical bonds in sticky residues like dried sugar or grease. It evaporates quickly, so it won't leave streaks or moisture behind. Plus, it's inexpensive and readily available at any drugstore.
How To Apply It Safely
Dampen a clean microfiber cloth with rubbing alcohol—don't soak it. Wipe the affected area gently. For tight spots around burner knobs or crevices, use a cotton swab.
Always test on a small hidden area first, especially on colored or coated surfaces.
When To Skip This Method
Avoid rubbing alcohol on painted or enameled surfaces, as it can strip the finish. Also, never use it near open flames or hot burners—make sure the stove is completely cool and turned off. For gas burners, remove the grates and caps before cleaning.
15. Dry Burners Thoroughly Before Reassembling
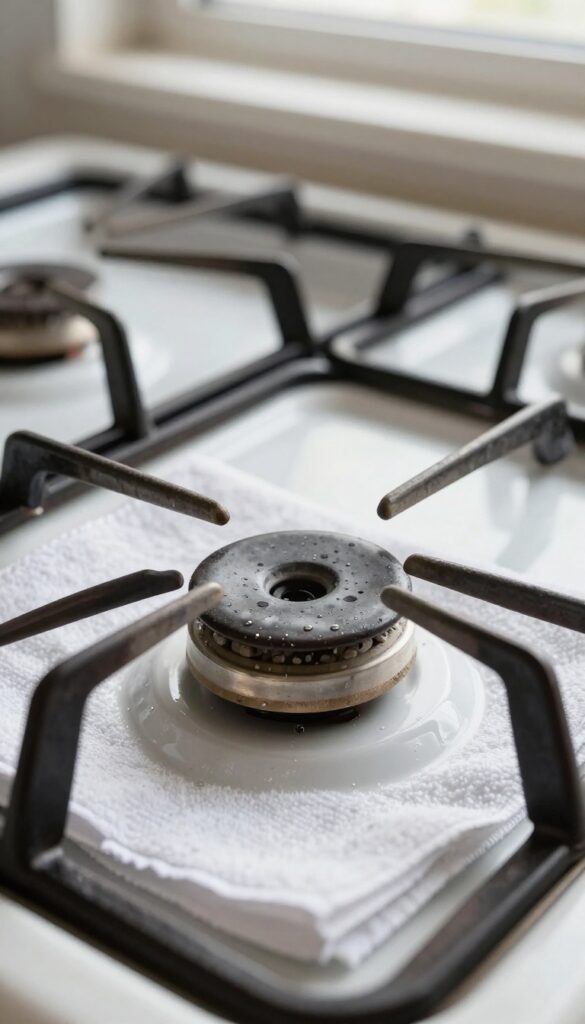
You might be tempted to slap those burner caps and grates back on while they're still damp, but that's a fast track to rust and ignition problems. A little extra patience here saves you from bigger headaches later. Moisture trapped in gas burner ports can block the flow of gas, leading to weak or uneven flames.
On electric coils, water can cause short circuits or corrosion. Drying completely is non-negotiable.
Once you've scrubbed and rinsed every burner part, drying them fully is the final step that seals the deal. Don't rush it—even a few drops of water can cause issues. Air-drying is the safest method, but if you're short on time, a clean microfiber towel works well.
For gas burners, pay special attention to the small holes where gas comes out; any water there can cause sputtering or delayed ignition.
Air-dry Overnight
The easiest way to ensure thorough drying is to leave burner parts on a dish rack or a clean towel overnight. This allows air to reach every crevice, including the tiny gas ports. If you're in a hurry, you can speed things up by placing them near a warm (not hot) oven or in a sunny spot.
Towel-dry For Speed
When you need the stove back in action fast, use a lint-free microfiber towel to dry each piece individually. Wipe inside burner caps, around the electrode (the spark igniter), and along the burner ring. For electric coil burners, make sure the drip pans are bone-dry before sliding them back in.
Check The Ignition Area
On gas stoves, the electrode that sparks to light the burner is especially sensitive to moisture. If it's wet, the burner may click but not ignite. Use a cotton swab or a corner of a towel to gently dry around the electrode.
Wait a few extra minutes to be sure.
16. Line Burner Drip Pans with Foil
If you have electric coil burners, you already know those metal drip pans underneath are grease magnets. They catch everything that bubbles over, and over time they get crusty and discolored. But there's a simple trick that keeps them looking clean for weeks: line them with aluminum foil.
Using foil as a disposable liner means you can swap it out whenever it gets dirty, instead of scrubbing the pans themselves. It takes seconds to replace, and your drip pans stay pristine underneath. Just make sure the foil doesn't touch the burner coil or block airflow, and replace it regularly to avoid grease buildup.
How To Fit The Foil Correctly
Cut a piece of heavy-duty aluminum foil slightly larger than the drip pan. Press it gently around the pan's edges to mold it into shape, then trim any excess with scissors. Leave the center open so the burner coil fits through without touching the foil.
When To Replace The Foil
Swap the foil every week or two, or sooner if you see heavy grease or spills. Don't let it sit too long—old foil can become a fire hazard if grease builds up. A quick visual check after each use helps you stay on top of it.
A Note On Safety
Never let the foil extend up the sides of the burner or touch the coil. Foil that's too close to the heat source can melt or cause arcing. Also, avoid using foil on gas burners—it can block gas flow and create a dangerous situation.
17. Use a Steam Cleaner for Deep Cleaning
If you've got a handheld steam cleaner sitting in your closet, now's the time to put it to work. Steam blasts away baked-on grease without any chemicals, making it perfect for gas burner grates and electric coils. Plus, it reaches those tiny crevices that sponges always miss.
A steam cleaner is a game-changer for deep cleaning stove burners. The high-temperature steam loosens grease and food residue instantly, so you can wipe it away with a cloth. No scrubbing, no harsh fumes—just heat and water.
It's especially effective on gas grates where grease gets trapped in the crossbars.
Why Steam Works So Well
Steam penetrates porous surfaces and dissolves grease at a molecular level. Unlike chemical degreasers, it leaves no residue behind. This means your burner grates come out clean and ready to use immediately, without any lingering chemical smell.
Best Practices For Steam Cleaning Burners
Always let the burners cool completely before steaming. Use a brush attachment to agitate stubborn spots. Work in sections, steaming and wiping as you go.
For electric coils, avoid direct steam on electrical connections—focus on the drip pans and coil surfaces only.
What To Avoid
Don't steam ceramic or glass cooktops—the rapid temperature change can crack them. Also avoid steaming any burner components that are still hot. Always check your stove manual to ensure steam cleaning is safe for your specific model.
18. Clean Electric Coil Burners Carefully
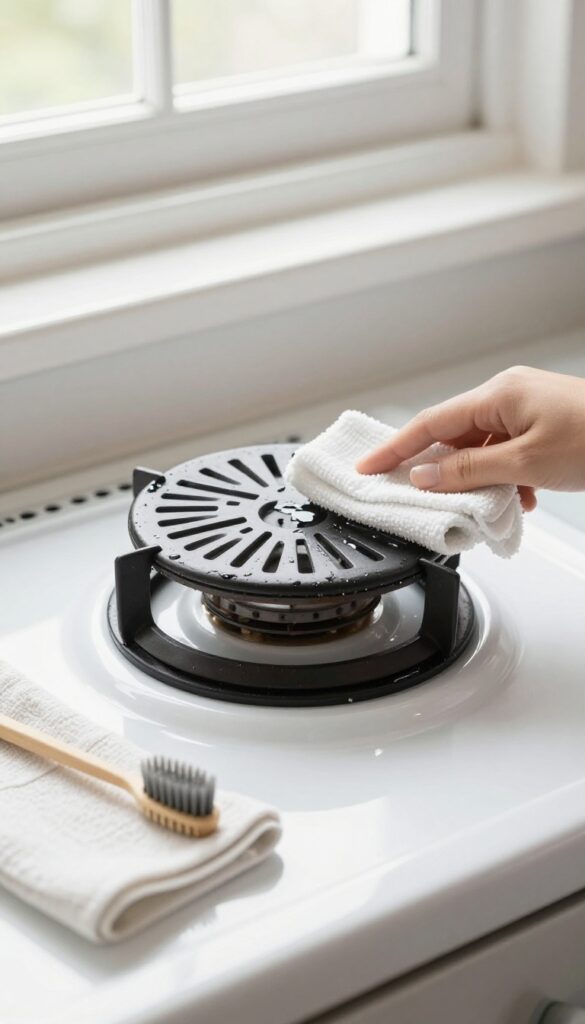
Electric coil burners need a gentle touch. Unlike gas grates or sealed burners, these coils can't handle being submerged or soaked. Water inside the heating element can cause shorts or even shocks.
The key is to clean them while they're still warm—but not hot—and to keep moisture to a minimum.
Start by making sure the burner is completely cool to the touch, then unplug it from the socket. Wipe the coil surface with a damp cloth—just a little moisture is enough to loosen grease. For crevices where gunk builds up, use a soft brush like an old toothbrush to gently scrub without damaging the coil.
Never use steel wool or abrasive pads; they can scratch the metal and create hot spots. Once clean, dry the coil thoroughly with a towel before plugging it back in. This prevents rust and ensures safe operation.
Why Submerging Is A No-go
Electric coils are hollow and contain a heating wire inside. If water gets in, it can cause the burner to short out or even trip your circuit breaker. That's why you should never dunk them in water or run them through the dishwasher.
A damp cloth is all you need.
The Right Tools For Crevices
Grease often collects in the tiny gaps between the coil loops and around the connection prongs. A soft-bristled brush, like a clean paintbrush or a toothbrush, works perfectly. For stubborn spots, dip the brush in a little vinegar or degreaser, then wipe with a damp cloth.
Drying Is Non-negotiable
After wiping, let the coil air-dry for at least 15 minutes, or pat it dry with a lint-free cloth. Plugging in a wet coil can cause arcing or damage the socket. A dry coil also prevents rust on the drip pan underneath.
19. Polish Stainless Steel Burner Rings
Stainless steel burner rings look sleek when clean, but they show every fingerprint and smudge. A quick polish not only removes grease residue but also restores that factory shine. It's a small step that makes your whole stovetop look brand new.
Why Polish Matters
Over time, burner rings accumulate a thin film of baked-on oil and fingerprints. Polishing lifts that film and adds a protective layer that repels future smudges. It also helps prevent rust on stainless steel surfaces.
What You'll Need
Grab a microfiber cloth and either a commercial stainless steel cleaner or a small amount of olive oil. Avoid abrasive pads or harsh chemicals that can scratch the finish. A soft cloth is key.
Step-by-step Polish
First, make sure the burner rings are cool and dry. Spray or dab a little cleaner onto the cloth—never directly onto the ring. Wipe in the direction of the grain (usually circular or linear).
Buff gently until the shine returns, then flip to a dry section to remove any excess.
Quick Maintenance Tip
Keep a microfiber cloth handy near the stove. After cooking, a quick wipe while the rings are still warm (but not hot) prevents buildup. A weekly polish keeps them looking great with minimal effort.
20. Prevent Future Buildup with a Splatter Guard
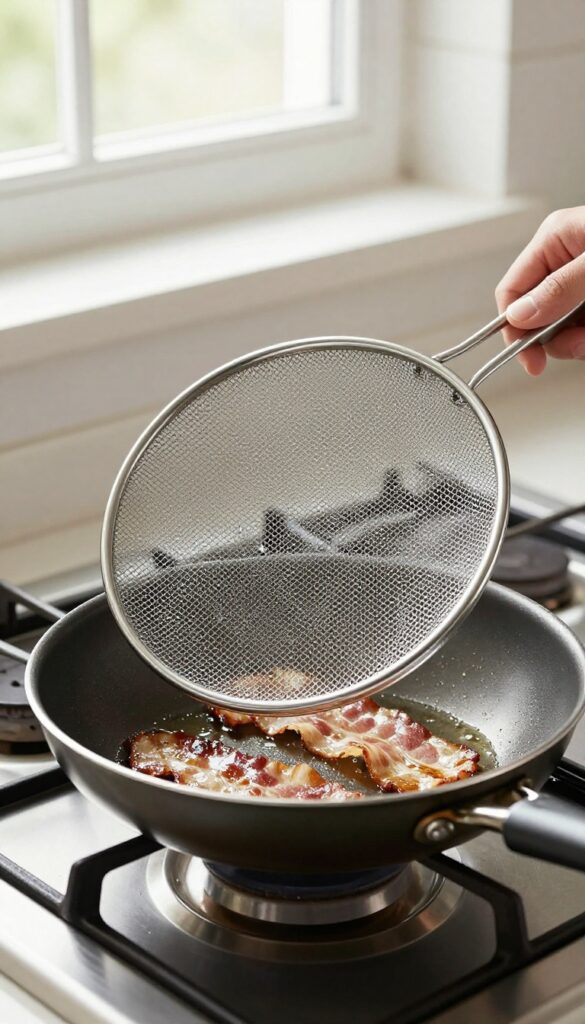
Frying bacon or chicken on the stove often sends grease flying everywhere. That mess lands on your burners, grates, and surrounding surfaces, making cleanup a hassle. A simple mesh splatter guard can stop most of that grease before it ever hits your stove.
These guards sit right over your pan and catch oil droplets while letting steam escape. They're cheap, easy to clean, and save you from scrubbing baked-on grease later. Once you start using one, you'll wonder why you didn't grab it sooner.
Using a splatter guard is one of the easiest ways to keep your burners cleaner for longer. It's a small investment that pays off every time you cook something greasy. Pair it with a quick post-cooking wipe, and your stove stays spotless with minimal effort.
Choose The Right Splatter Guard
Look for a splatter guard made of fine stainless steel mesh. It should fit snugly over your largest pan without wobbling. Some guards come with a handle or fold flat for storage.
Avoid plastic ones—they can melt or warp near high heat.
Use It Every Time You Fry
Make it a habit to place the splatter guard on the pan as soon as you start frying. It works for shallow frying, sautéing, and even simmering sauces that tend to pop. The guard catches splatters but still lets you see and stir your food.
Clean The Guard Right After Cooking
Don't let grease harden on the mesh. Rinse the splatter guard with hot water and a drop of dish soap immediately after use. A soft brush helps remove stubborn bits.
Dry it completely before storing to prevent rust.
FAQ
Can I put gas burner grates in the dishwasher?
Check your stove's manual. Some grates are dishwasher-safe, but others may discolor or lose their finish. Hand washing is often safer.
How often should I deep clean my stove burners?
A deep clean every 1-3 months is ideal, depending on usage. Wipe down after each use to extend time between deep cleans.
Is it safe to use bleach on stove burners?
Bleach can damage metal finishes and is not recommended. Stick to mild detergents, baking soda, or vinegar.
Why does my gas burner have a yellow flame?
A yellow flame indicates incomplete combustion, often due to clogged burner ports. Clean the ports with a pin and ensure proper airflow.
Can I use a razor blade on a glass cooktop?
Yes, but only with a scraper designed for glass cooktops. Hold the blade at a 45-degree angle to avoid scratches.
Conclusion
You don't need harsh chemicals to get your stove burners looking like new. These 20 tips prove that everyday items like baking soda, vinegar, and dish soap can tackle even the toughest grease and spills. Pick a few methods that fit your cleaning style and stick with them.
A quick wipe after each use and a deeper clean every few weeks will keep buildup from taking over. Your burners will stay spotless with minimal effort.