23 Toilet Cleaning Hacks for Stains, Odor, and Shine
Toilet cleaning doesn't have to be a dreaded chore. With the right hacks, you can tackle stubborn stains, banish odors, and restore shine in less time.
From overnight denture tablet soaks to pumice stones that erase hard water rings, these 23 tips use everyday items you already have.
No harsh chemicals needed—just smart, practical solutions that make your toilet look and smell fresh.
1. Drop a Denture Tablet for an Overnight Soak
You might think denture tablets are only for false teeth, but they’re actually a toilet’s best friend. Those fizzy tablets contain mild bleach and cleaning agents that break down stains and kill bacteria. The best part?
You just drop them in and walk away. No scrubbing, no harsh fumes—just a clean bowl by morning.
This hack is perfect for tackling those stubborn rings around the waterline and under the rim. The effervescent action helps reach spots your brush might miss. It’s a set-it-and-forget-it solution that works while you sleep.
How To Do It
Drop two effervescent denture tablets into the toilet bowl before you go to bed. Let them fizz and soak overnight. In the morning, simply flush.
The combination of mild bleach and foaming action lifts stains and deodorizes without scrubbing.
Why It Works So Well
Denture tablets are designed to dissolve tough deposits and whiten surfaces, making them ideal for porcelain. The fizzing action creates micro-bubbles that penetrate crevices, while the bleach sanitizes and brightens. Plus, they’re gentle enough for regular use.
When To Use This Hack
Use it weekly for maintenance or as a deep clean when stains build up. It’s especially effective on hard water rings and yellowing. Avoid using it if you have a septic system with bleach-sensitive bacteria—check your system’s guidelines first.
2. Use a Pumice Stone on Hard Water Rings
Hard water rings can make even a clean toilet look dingy. If your usual scrubbing isn't cutting it, a pumice stone is a game-changer. It's a simple, cheap tool that removes mineral deposits without damaging the porcelain.
Wet a pumice stone and gently rub it against hard water rings and mineral deposits. The abrasive texture scrubs away buildup without scratching porcelain. Works best on stubborn rings that resist regular cleaners.
Why Pumice Works
Pumice is a volcanic rock with a rough, porous surface. When wet, it acts like fine sandpaper, grinding down calcium and lime deposits. Unlike chemical cleaners, it doesn't rely on harsh acids or bleach, making it safer for your toilet and the environment.
How To Use It Safely
Always wet the stone and the toilet surface before scrubbing. Rub gently in a circular motion—don't press hard. The stone will gradually wear down, conforming to the curve of the bowl.
Rinse and check your progress often to avoid over-scrubbing.
When To Skip This Hack
Avoid using a pumice stone on toilet bowls with a glossy finish or colored porcelain, as it may dull the surface. Stick to white, standard porcelain toilets. If you're unsure, test on a small hidden area first.
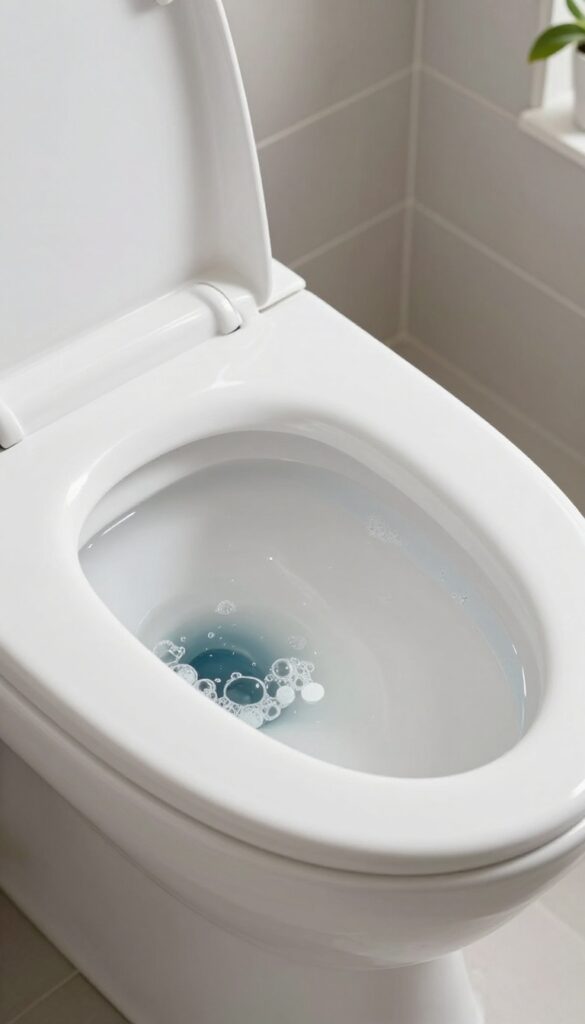
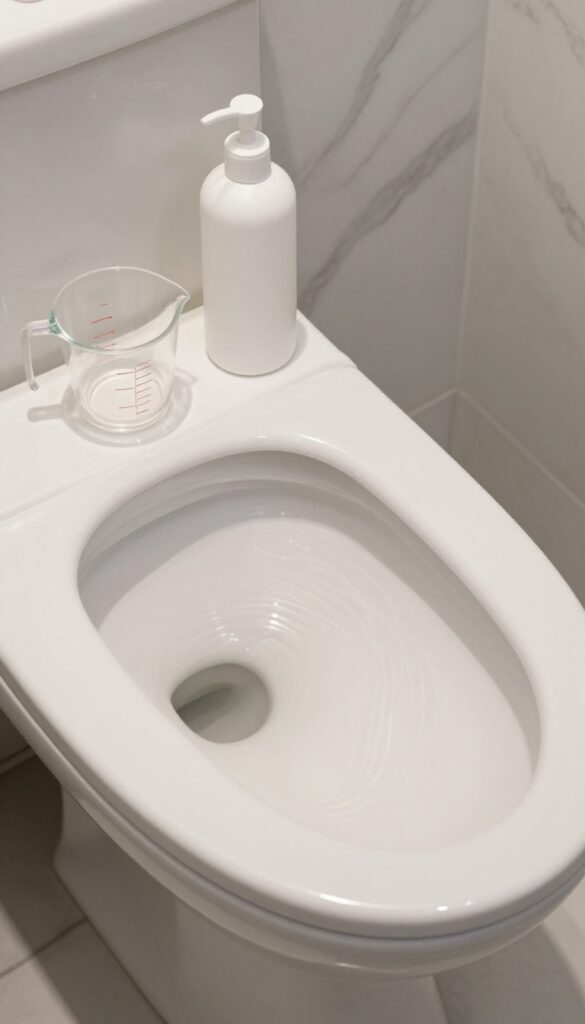
3. Make a DIY Vinegar and Baking Soda Bomb
If you want a fizzy, chemical-free way to blast away stains and smells, this classic combo is your go-to. Baking soda and vinegar react to create a bubbling action that lifts grime without scrubbing hard. It’s cheap, non-toxic, and surprisingly satisfying to watch.
Start by sprinkling a generous amount of baking soda all around the inside of the toilet bowl, focusing on any stained areas or under the rim. Then pour about one cup of white vinegar directly over the baking soda. The mixture will fizz and foam up, working its way into crevices and mineral deposits.
Let it sit for 10 minutes—longer if the stains are stubborn. After the fizzing subsides, scrub with a toilet brush and flush. The reaction breaks down alkaline and acidic residues, while the vinegar neutralizes odors.
For extra cleaning power, add a few drops of essential oil like tea tree or lemon before the vinegar.
Why This Combo Works
Baking soda is a mild abrasive that physically scrubs stains, while vinegar’s acidity dissolves mineral deposits like limescale and hard water rings. When mixed, they create carbon dioxide gas that helps lift dirt from surfaces. The fizzing action reaches spots your brush might miss, like under the rim and in the trap.
When To Use This Method
This hack is perfect for regular maintenance or for tackling moderate stains and odors. It’s gentle enough for daily use but strong enough for weekly deep cleans. Avoid using it right after using bleach-based cleaners, as mixing can create harmful fumes.
Stick to this method alone for best results.
Pro Tips For Better Results
For tough rings, let the fizz sit for 20 minutes or overnight for extra stubborn stains. Use a pumice stone gently after the soak if needed. To boost odor control, add 10 drops of tea tree or eucalyptus oil to the vinegar before pouring.
Always flush after to clear the bowl.
4. Clean Under the Rim with a Toilet Brush and Vinegar
That hidden area under the toilet rim collects grime, urine residue, and mineral deposits over time. It’s a prime spot for odors and stains that your regular brush might miss. A simple vinegar-soaked brush can reach those crevices and break down buildup without harsh scrubbing.
Start by pouring white vinegar into a cup or small bowl. Dip your toilet brush into the vinegar, letting it soak for a few seconds. Scrub vigorously under the rim, angling the brush to hit all sides.
For a deeper clean, wrap a microfiber cloth around the brush head and secure it with a rubber band—this gives you extra scrubbing surface and helps trap grime. Let the vinegar sit for 10 minutes before flushing. Repeat weekly to prevent stubborn buildup and keep the area smelling fresh.
Why Vinegar Works
White vinegar is acidic enough to dissolve mineral deposits and alkaline residues without damaging porcelain. It also neutralizes odors naturally, leaving a clean scent without chemical fumes.
Brush Upgrade Tips
If your toilet brush is old or worn, replace it. A stiff, angled brush reaches under the rim better. For extra reach, bend an old wire hanger into a hook and wrap a cloth around it to scrub hard-to-reach spots.
Preventive Routine
Add a weekly vinegar scrub to your cleaning schedule. After scrubbing, flush and rinse the brush in the bowl. This simple habit stops grime from building up and keeps your toilet looking newer longer.
5. Remove Urine Smell with a Baking Soda Paste
Urine odors can linger even after scrubbing, especially around the rim or in hard-to-reach spots. Baking soda is a natural deodorizer that neutralizes smells without covering them up. Mixed into a paste, it clings to surfaces and breaks down odor-causing residues.
Baking soda is a gentle abrasive that lifts stains while absorbing odors. Unlike bleach, it won't produce harsh fumes or damage porcelain. This method works well for regular maintenance or between deep cleans.
How To Make And Apply The Paste
In a small bowl, mix three tablespoons of baking soda with just enough water to form a thick paste—think toothpaste consistency. Use a toilet brush or an old sponge to apply the paste directly to the bowl, focusing on the waterline, under the rim, and any stained areas. Let it sit for 15 minutes so it can absorb odors and loosen grime.
Scrubbing And Rinsing Tips
After the wait, scrub the bowl with a toilet brush, paying extra attention to stubborn spots. The paste will feel slightly gritty, which helps dislodge residue. Flush to rinse, then inspect.
For persistent smells, repeat the process or let the paste sit longer—up to 30 minutes.
Why It Works Without Harsh Chemicals
Baking soda is alkaline, which helps neutralize acidic urine compounds. Its fine particles provide gentle abrasion that won't scratch porcelain. Plus, it's safe for septic systems and won't irritate your lungs or skin.
This makes it a great option for households with kids, pets, or anyone sensitive to strong cleaners.
6. Use a Magic Eraser on Scuff Marks
Scuff marks and shoe prints on the toilet’s exterior can make a clean bathroom look messy. A magic eraser is a quick fix that doesn’t require extra chemicals or elbow grease. Just dampen it slightly and wipe away the marks in seconds.
Magic erasers work like a gentle abrasive sponge, lifting scuff marks, dirt, and grime from surfaces without scratching. They’re safe for the toilet’s porcelain and plastic parts, including the lid, seat, and base. After wiping, rinse the area with a damp cloth to remove any residue.
This hack is especially handy for busy households where shoes or cleaning tools leave marks near the base.
Where Scuff Marks Hide
Scuff marks often appear on the front of the toilet base from shoes or cleaning caddies, and on the lid from dropped items. Check around the hinges and behind the seat too—those spots collect grime from daily use.
How To Use A Magic Eraser Safely
Always dampen the eraser first—never use it dry, as it can be too abrasive. Gently rub the mark in a circular motion. Test on a small hidden area first, especially on glossy finishes, to ensure it won’t dull the surface.
Rinse thoroughly after use.
7. Pour Coca-Cola for Rust Stains
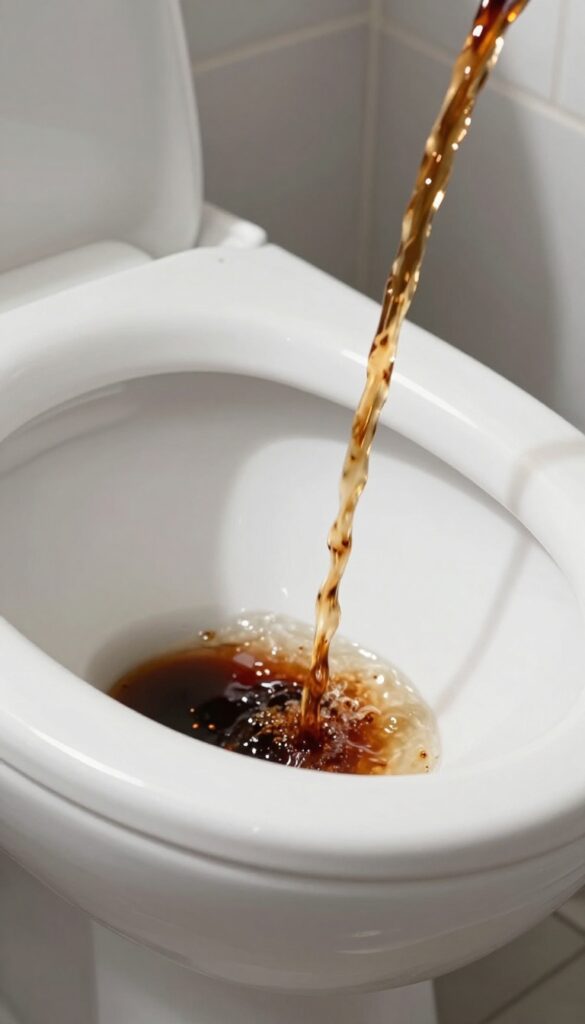
Rust stains in the toilet bowl are stubborn, but you don’t need a harsh chemical cleaner to remove them. A can of Coca-Cola works surprisingly well thanks to its phosphoric acid content, which breaks down rust and mineral deposits. It’s a cheap, non-toxic hack that uses something you probably already have in the fridge.
Pour a full can of Coca-Cola around the toilet bowl, making sure to coat the stained areas. Let it sit for at least an hour—overnight for heavy stains. The acid gently dissolves the rust without scrubbing.
After soaking, flush the toilet and give the bowl a quick scrub with your toilet brush. Most stains will lift away easily. For stubborn spots, repeat the process or follow up with a pumice stone.
Why It Works
Coca-Cola contains phosphoric acid, which is a mild acid that reacts with iron oxide (rust) and calcium deposits. This reaction loosens the stain so it can be flushed away. It’s much gentler than bleach or hydrochloric acid, making it safe for porcelain and septic systems.
Tips For Best Results
Use regular Coca-Cola, not diet or zero sugar—the sugar content helps the acid cling to the bowl. If the water level is high, scoop some out first so the cola concentrates on the stains. For vertical rust streaks, soak a paper towel in cola and press it against the stain for an hour.
When To Skip This Hack
If your toilet has a colored porcelain bowl (like pastel pink or blue), test the cola on a small hidden area first—the acid could etch or dull the finish. Also, this hack works best on surface rust, not deep-set stains that have been there for years. For those, you may need a pumice stone or a commercial rust remover.
8. Clean the Flush Valve with a Toothbrush
Mineral deposits love to build up inside the flush valve and rim holes, quietly sabotaging your toilet’s performance. A weak flush often means those tiny passages are clogged. The fix is simpler than you think: grab an old toothbrush and some vinegar.
Dip the toothbrush in white vinegar and scrub the flush valve inside the tank and the rim holes around the bowl. The vinegar dissolves calcium and lime scale while the bristles dislodge stubborn deposits. Do this every few months to keep water flowing freely and prevent stains from forming.
Why The Flush Valve Matters
The flush valve controls water release from the tank into the bowl. When mineral deposits coat it, the valve may not seal properly, causing running water or weak flushes. Cleaning it regularly extends the life of your toilet and saves water.
How To Reach The Rim Holes
The rim holes are the small openings under the toilet rim where water jets out. Use the toothbrush to gently scrub each hole, working the bristles inside. For deeper clogs, use a bent paper clip to loosen debris before brushing.
Prevent Future Buildup
After cleaning, pour a cup of vinegar into the overflow tube once a month to keep mineral deposits at bay. This simple habit prevents clogs and maintains a strong flush without harsh chemicals.
9. Use a Toilet Tank Tablet for Continuous Cleaning
Dropping a tablet into your toilet tank is one of the easiest ways to keep stains and odors at bay between deep scrubs. With every flush, the tablet releases cleaning agents that help prevent mineral buildup and discoloration. Just make sure you choose a bleach-free formula to avoid damaging rubber seals and internal parts.
How Tank Tablets Work
These tablets dissolve slowly in the tank, releasing a controlled dose of cleaner into the bowl each time you flush. They target common issues like limescale, rust, and bacteria growth, keeping the water clear and the bowl fresh. Most tablets last about 30 days, making them a low-maintenance solution.
Choosing The Right Tablet
Not all tablets are created equal. Bleach-based ones can corrode the flapper, fill valve, and gaskets, leading to leaks or costly repairs. Look for enzyme or oxygen-based formulas that are safe for all toilet components.
Brands like Scrubbing Bubbles and Clorox offer bleach-free options.
Installation Tips
Simply drop the tablet into the tank away from the fill valve and flapper. Avoid placing it near the outlet where it might dissolve too quickly. Always follow the package instructions, and never use more than one tablet at a time.
Check the tank after a week to ensure the tablet isn't causing excessive foam or residue.
When To Skip The Tablet
If you have a newer toilet with sensitive parts, or if you notice any discoloration or leaks after using tablets, it might be better to stick with manual cleaning. Some plumbers advise against tablets for older toilets with rubber seals that are more prone to damage. In that case, a weekly vinegar flush is a safer alternative.
10. Deodorize with a Few Drops of Essential Oil
Essential oils aren't just for aromatherapy—they're a secret weapon for a fresh-smelling toilet. A few drops of tea tree or lemon oil in the bowl can transform your cleaning routine. The oils leave behind a natural, pleasant scent while also helping to kill bacteria.
It's a simple trick that makes a big difference.
Instead of relying on harsh chemical sprays or artificial air fresheners, try this natural deodorizing method. Add 5–10 drops of tea tree or lemon essential oil directly into the toilet bowl before you start scrubbing. The oil will disperse as you clean, leaving a clean, uplifting fragrance.
Plus, tea tree oil has natural antibacterial properties, so you're tackling odors at the source.
Why Tea Tree And Lemon Work Best
Tea tree oil is known for its antimicrobial and antifungal properties, making it great for killing odor-causing bacteria. Lemon oil is a natural degreaser and leaves a bright, citrusy scent that cuts through bathroom smells. Both oils are safe for your toilet when used in small amounts, and they won't damage the porcelain or plumbing.
How To Apply For Maximum Effect
For best results, add the drops after you've applied your cleaner but before you scrub. Let the oil sit for a minute to start working. Then scrub as usual with your toilet brush.
The motion helps spread the oil around the bowl and under the rim. After flushing, you'll notice a lasting fresh scent that lingers for hours.
A Quick Boost Between Cleanings
You can also use essential oils for a quick freshen-up between deep cleans. Just add a few drops to the toilet bowl and let them sit for a few minutes before flushing. This is especially handy after guests have used the bathroom or when you need a fast odor fix.
Keep a small bottle of oil near the toilet for easy access.
11. Tackle Black Mold with Bleach Gel
Black mold around the toilet rim or base is not only unsightly but can also release musty odors. The key to removing it effectively is using a thick bleach gel that clings to vertical surfaces instead of running off. This method targets the mold directly and breaks it down without excessive scrubbing.
Apply a bleach-based gel cleaner to black mold spots under the rim or around the base. Let it sit for 10 minutes, then scrub with a brush. Wear gloves and ensure ventilation.
Why Bleach Gel Works Best
Unlike liquid bleach that drips away, gel stays put on moldy areas. This gives the bleach more contact time to kill mold spores and bleach away stains. Look for a gel with at least 5% sodium hypochlorite for maximum effectiveness.
Step-by-step Application
Squeeze a thick line of gel directly onto the black mold. For under-rim spots, use a toilet brush to spread it evenly. Let it sit for 10 minutes—don’t rush this step.
Then scrub firmly with the brush and flush. Repeat if necessary.
Safety Precautions
Always wear rubber gloves to protect your skin from bleach. Open a window or turn on the exhaust fan to avoid breathing in fumes. Never mix bleach with ammonia or other cleaners, as this creates toxic gas.
12. Use a Toilet Bowl Cleaner with Hydrochloric Acid
When you’re dealing with stubborn mineral deposits that won’t budge with regular cleaners, it’s time to bring out the big guns. Cleaners containing hydrochloric acid are highly effective at dissolving lime scale, rust, and hard water rings that have built up over time. These products are available at most hardware stores or online, but they require careful handling.
Hydrochloric acid cleaners work fast, but you need to follow safety guidelines. Always wear rubber gloves and eye protection, and ensure the bathroom is well-ventilated. Apply the cleaner directly to the stains inside the bowl, using the bottle’s nozzle to target problem areas.
Let it sit for about 5 minutes—don’t leave it longer than recommended, as it can damage porcelain. Scrub with a toilet brush, then flush thoroughly. Never mix hydrochloric acid with bleach or other cleaners, as toxic fumes can result.
Use this method sparingly, only for extreme deposits, and rinse the bowl well afterward to protect your plumbing.
Safety First
Before using any acid-based cleaner, read the label carefully. Hydrochloric acid can cause burns and respiratory irritation. Wear gloves, goggles, and long sleeves.
Keep the bathroom door open and turn on the exhaust fan. If you have children or pets, keep them out of the bathroom until the area is fully rinsed and dry.
Application Tips
For best results, apply the cleaner to a dry toilet bowl. Use a toilet brush to spread it evenly over the stains. Focus on the waterline and under the rim where deposits hide.
Let it sit for the time specified on the product—usually 5 to 10 minutes. Don’t let it dry out; if needed, reapply to keep the surface wet. Scrub vigorously, then flush twice to remove all residue.
When To Use This Hack
Reserve hydrochloric acid cleaners for tough, crusty mineral rings that won't come off with vinegar or baking soda. If your toilet has a persistent brown or white ring that scrubbing can't remove, this is your solution. Avoid using it on toilets with colored porcelain or antique fixtures, as it may cause discoloration.
For regular maintenance, stick to gentler methods.
13. Clean the Seat Hinges with Q-Tips
Those tiny crevices around your toilet seat hinges are a magnet for grime and urine. Over time, buildup can cause odors and make the hinges stiff or squeaky. A simple Q-tip dipped in vinegar or rubbing alcohol reaches exactly where sponges can't.
Regularly cleaning the hinges prevents stubborn buildup and keeps the seat moving smoothly. It's a quick task that makes a big difference in overall toilet hygiene.
What You'll Need
Grab a cotton swab (Q-tip), white vinegar or rubbing alcohol, and a small bowl. That's it. No special tools required.
Step-by-step
Dip the Q-tip in vinegar or alcohol. Swipe it along the hinge crevices, both top and bottom. Use a dry Q-tip to absorb any excess liquid.
Repeat until the Q-tip comes out clean.
How Often To Do It
A quick wipe every two weeks keeps buildup at bay. If you notice grime or squeaking, do it more often. It only takes a minute.
14. Prevent Rings with a Weekly Vinegar Flush
Mineral rings inside the toilet bowl are a pain to scrub off. But you can stop them from forming in the first place with a simple weekly habit. White vinegar works as a mild acid that dissolves minerals before they get a chance to build up.
Pour one cup of white vinegar into the toilet tank once a week. Let it sit for about 30 minutes, then flush. The vinegar mixes with the flush water and helps prevent calcium and lime deposits from sticking to the bowl.
It also keeps the tank cleaner and reduces odors. This hack takes almost no effort and saves you from heavy scrubbing later.
Why It Works
Hard water contains minerals that cling to porcelain and form rings. Vinegar's acidity neutralizes these minerals, making them less likely to deposit. Regular use keeps the bowl surface slicker, so stains slide off instead of sticking.
How To Do It Right
Use plain white vinegar—no need for fancy or colored kinds. Pour it directly into the overflow tube or the tank water. Avoid mixing with bleach or other cleaners, as that can create harmful fumes.
Flush after 30 minutes for best results.
Pro Tips For Best Results
For extra stubborn water, heat the vinegar slightly before adding it. If you have a newer toilet with rubber parts, check the manufacturer's advice—vinegar is generally safe, but prolonged exposure might degrade some seals. Still, once a week is gentle enough for most toilets.
15. Use a Toilet Brush with Built-in Cleaner
If you're tired of juggling a brush and a bottle of cleaner, a toilet brush with a built-in dispenser is a game changer. These clever tools release gel or liquid directly from the handle as you scrub, so you don't have to pour or spray separately. It's one less step and a lot less mess.
These brushes work by holding a refillable cartridge or reservoir in the handle. When you press a button or squeeze, cleaner flows through the brush head onto the bowl. You can find them at most home stores, and refills are widely available.
Some models even use concentrated tablets that dissolve as you scrub.
How It Saves Time
You don't need to pre-treat stains or wait for cleaner to sit. The brush applies fresh cleaner exactly where you're scrubbing, so you can tackle rings and grime in one go. It's especially handy for quick touch-ups between deep cleans.
Refilling And Maintenance
Most brushes use screw-in or snap-in refill cartridges. When the cleaner runs out, simply replace the cartridge. Some brands also offer eco-friendly refill options.
Rinse the brush head after each use and replace it every few months to keep it hygienic.
What To Look For
Choose a brush with a sturdy handle and a head that reaches under the rim. Look for models with a locking mechanism to prevent accidental dispensing. A caddy or holder keeps the brush neat and allows it to dry between uses.
16. Remove Limescale with Lemon Juice
Limescale buildup in your toilet bowl can be stubborn and unsightly. Instead of reaching for harsh chemicals, try a natural solution that’s probably already in your kitchen. Fresh lemon juice contains citric acid, which breaks down calcium deposits effectively.
Squeeze fresh lemon juice directly onto the limescale stains, making sure to cover the affected areas. Let it sit for about 30 minutes to allow the acid to work. Then, scrub lightly with a toilet brush and flush.
The result is a clean bowl with a fresh citrus scent, no harsh fumes.
Why Lemon Juice Works
The citric acid in lemons is a natural chelating agent that binds to calcium and other minerals in limescale, helping to dissolve them. This makes it an effective, eco-friendly alternative to commercial descalers.
How To Apply For Best Results
For heavy buildup, you can soak a cloth in lemon juice and press it against the stains. Alternatively, use a lemon half as a scrubber. After applying, let it sit longer if needed, up to an hour, before scrubbing and flushing.
Safety And Precautions
Lemon juice is gentle on most toilet surfaces, but avoid using it on natural stone or unsealed surfaces as the acid may cause etching. Always rinse thoroughly after treatment.
17. Clean the Exterior with a Microfiber Cloth
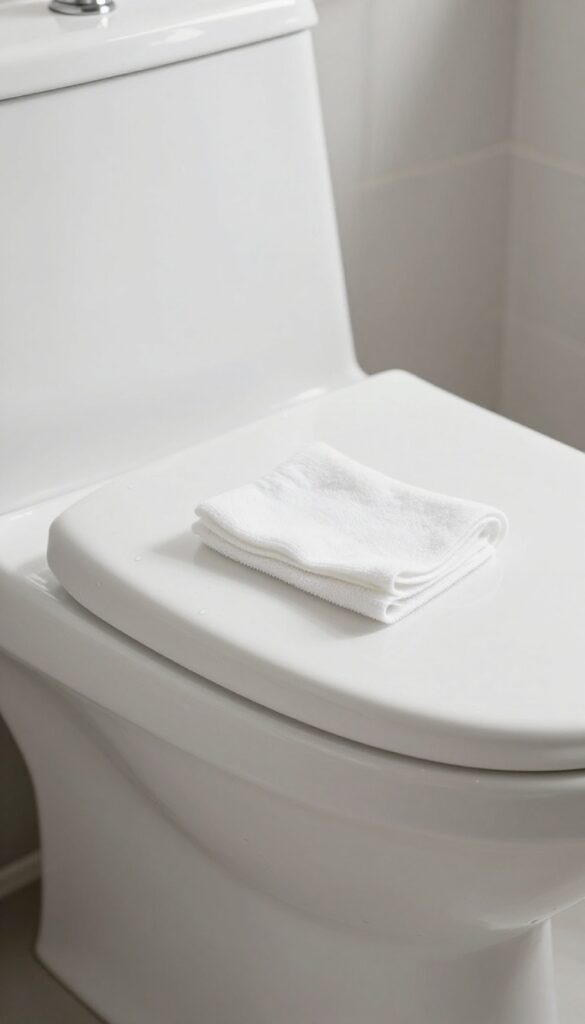
The outside of your toilet collects dust, fingerprints, and grime just as much as the inside. A quick wipe with a microfiber cloth makes all the difference. Microfiber traps particles without scratching surfaces or leaving lint behind.
For a streak-free shine, dampen the cloth with a little water and a drop of dish soap.
Why Microfiber Works Best
Microfiber cloths have tiny fibers that grab dust and dirt instead of pushing them around. They absorb moisture well and dry quickly, reducing bacteria growth. Unlike paper towels, they don't leave fuzz or streaks on porcelain and chrome.
Simple Soap Solution For Shine
Mix a few drops of dish soap with warm water in a spray bottle. Lightly mist the cloth (not the toilet) to avoid overspray. Wipe the tank, lid, seat base, and pedestal.
The soap cuts through grease and leaves a clean scent.
Don't Forget The Small Areas
Use the edge of the cloth to clean around the seat hinges, flush button, and base of the toilet. These spots collect hidden grime. A dry microfiber cloth can buff away water spots for a polished finish.
18. Use a Toilet Wand for Disposable Cleaning
If you're tired of dealing with a germy toilet brush that sits in a holder between uses, a toilet wand with disposable scrub pads is a game changer. These wands have a long handle that keeps you at a distance, and the pads are pre-loaded with cleaner. After a quick scrub, you just press a button to release the pad and flush it away.
No more storing a wet, smelly brush.
A toilet wand is perfect for quick touch-ups and daily maintenance. The disposable pads are designed to be flushable and break down in water, so you can clean and dispose in one step. Many brands offer scented pads that leave a fresh smell.
It's a convenient option for households where multiple people use the toilet and you want a quick clean without pulling out the heavy-duty supplies.
Why It Works So Well
The main advantage is hygiene. Traditional brushes can harbor bacteria and odors even after rinsing. With a wand, each pad is fresh and single-use.
The angled head helps reach under the rim and around the bowl, making it easier to get a thorough clean. Plus, the handle is usually longer than a standard brush, so you don't have to lean in as close.
Best Uses And Limitations
This tool excels at light to moderate cleaning—ideal for daily upkeep or between deep cleans. However, for tough stains like hard water rings or rust, you may still need a pumice stone or a stronger cleaner. The pads are pre-loaded with cleaner, but if you want extra scrubbing power, you can add a bit of your own toilet cleaner to the pad.
Tips For Getting The Most Out Of It
Store the wand handle in a dry place, like a cabinet or over-the-door hook, to prevent moisture buildup. Keep a refill pack nearby so you always have pads on hand. If the pad feels dry, dampen it slightly under the faucet before scrubbing.
And remember to flush the pad right away—don't let it sit in the bowl, as it may start to break down prematurely.
19. Deep Clean the Wax Ring Area
Odors near the base of the toilet often point to a compromised wax ring. This hidden seal sits between the toilet and the floor flange, blocking sewer gases. Over time, it can crack or shift, letting smells escape.
Catching it early prevents bigger plumbing issues.
Start by wiping around the base with a bleach wipe or a cloth dipped in diluted bleach. This kills surface bacteria and removes grime. Look for any moisture, dark stains, or gaps between the toilet and floor.
If you see signs of a leak, the wax ring likely needs replacing. That job involves removing the toilet, scraping off the old ring, and installing a new one. It’s a straightforward DIY fix that seals odors and prevents floor damage.
Spotting A Bad Wax Ring
Check for these clues: a persistent musty smell near the base, dampness on the floor, or a wobbling toilet. Sometimes you’ll see black mold or water stains around the seal. If the toilet rocks even slightly, the wax ring can break its seal.
Address these signs quickly to avoid subfloor rot.
Cleaning Without Removing The Toilet
For surface odors only, use a bleach solution or a commercial toilet base cleaner. Spray it around the base and let it sit for five minutes, then wipe with a clean cloth. Avoid pouring bleach directly into the flange gap—it can damage the wax.
This routine keeps the area fresh if the ring is intact.
When To Call A Pro
If you’re not comfortable removing the toilet, or if the floor feels soft or spongy, call a plumber. Soft flooring suggests water damage beyond the wax ring. A professional can replace the ring and inspect the flange for cracks.
It’s worth the cost to prevent costly repairs later.
20. Use a Steam Cleaner for Sanitizing

A handheld steam cleaner blasts hot steam to sanitize the toilet bowl and exterior. Steam kills bacteria and loosens grime without chemicals. Ideal for a deep, chemical-free clean.
Steam cleaning is a powerful, eco-friendly way to tackle toilet grime. The high-temperature steam penetrates porous surfaces, dissolving mineral deposits and killing germs on contact. It's especially effective for hard-to-reach areas like under the rim and around the base.
How Steam Cleaning Works On Toilets
Handheld steam cleaners heat water to over 200°F, producing pressurized steam. When directed at the toilet bowl, the steam loosens stubborn stains and biofilm. The heat also sanitizes without bleach or harsh chemicals, making it safe for septic systems.
Best Practices For Steam Cleaning
Start by flushing to lower the water level, then aim the steam nozzle at stains and under the rim. Wipe away loosened grime with a microfiber cloth. For the exterior, use a steam mop or handheld attachment on the tank, lid, and seat.
Let surfaces dry completely before use.
When To Use A Steam Cleaner
Use steam cleaning for a monthly deep clean or after illness to sanitize. It's also great for removing limescale rings and old stains that resist scrubbing. Avoid steam on wax seals or plastic parts that may warp.
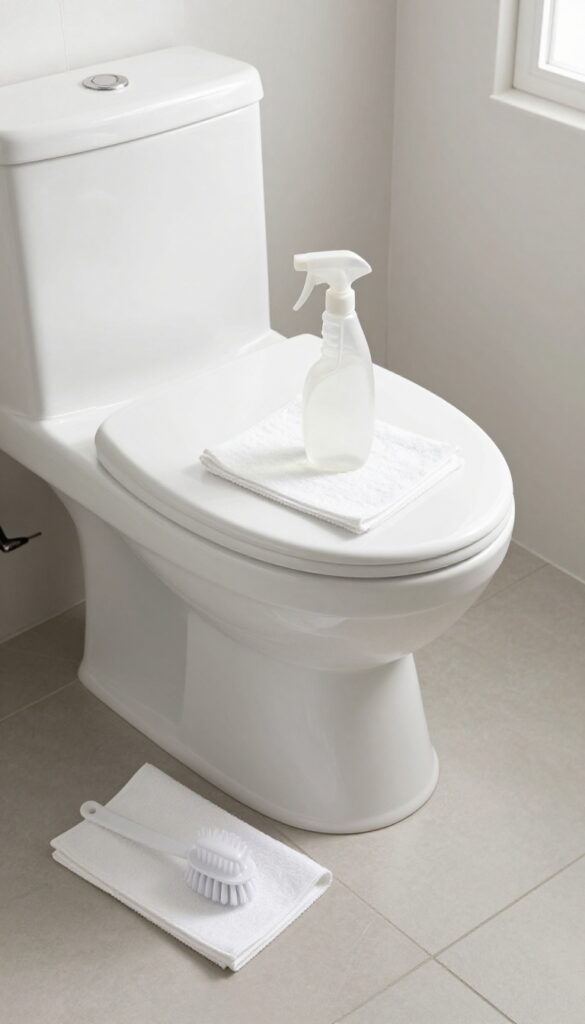
21. Keep a Spray Bottle of Vinegar and Water Handy
A simple spray bottle filled with vinegar and water can be your best friend for daily toilet maintenance. This hack is all about preventing stains and odors before they start, making deep cleans easier and less frequent. Just a quick spritz each day keeps the bowl and seat fresh without any harsh chemicals.
Mixing equal parts white vinegar and water in a spray bottle creates a gentle but effective cleaning solution. The mild acidity of vinegar breaks down mineral deposits and kills bacteria, while the water dilutes it enough to be safe for daily use. Spray the inside of the bowl, the rim, and the seat, then let it sit for a minute before wiping or flushing.
This routine keeps surfaces fresh and reduces the need for heavy scrubbing.
How To Make The Spray
Use a clean spray bottle and fill it halfway with white vinegar, then top off with water. No need to shake—just swirl gently. Label the bottle so you remember what's inside.
For extra scent, add a few drops of lemon essential oil, but avoid mixing vinegar with bleach or other cleaners.
Daily Spritzing Routine
After each use, give the bowl a quick spritz and let it sit until the next flush. This prevents stains from forming and keeps odors at bay. For the seat and lid, spray and wipe with a cloth or paper towel.
It takes less than a minute and makes a big difference.
When To Use It
Use this spray every day as a maintenance step. It's especially helpful in hard water areas where mineral buildup happens fast. If you notice stains starting, increase the vinegar ratio or let the spray sit longer before flushing.
22. Use a Toilet Seat Cover for Quick Freshening
Sometimes the fastest way to make a toilet look cleaner is to swap out the seat cover. An old, stained, or faded cover can make the whole bathroom feel dingy. Replacing it with a fresh one instantly upgrades the look and feel.
Choose a cover made from easy-care fabric that you can toss in the wash. Look for options with elastic edges or adjustable straps so they stay put. This simple swap hides stubborn stains on the seat itself and adds a clean, soft touch.
Pick A Washable Material
Cotton or microfiber covers are best because they hold up to frequent washing. Avoid cheap polyester that pills or fades quickly. A machine-washable cover means you can keep it fresh without extra effort.
Match Your Bathroom Decor
A seat cover is a small detail that can tie the room together. Choose a color or pattern that complements your towels or shower curtain. Neutral tones like white, beige, or gray are versatile and hide minor stains better than dark colors.
Replace Every Few Months
Even with regular washing, seat covers wear out. Replace them every three to six months to keep the bathroom looking crisp. It's an inexpensive way to maintain a clean appearance without deep cleaning the seat itself.
23. Schedule a Monthly Deep Clean
A quick weekly wipe-down keeps things fresh, but a monthly deep clean is what really protects your toilet from long-term buildup. Setting aside 30 minutes once a month prevents stains from setting in and odors from becoming permanent. Think of it as a reset button for your bathroom.
A monthly deep clean doesn't have to be a huge ordeal. Break it into simple steps: start by flushing with a cup of vinegar or a commercial cleaner, let it sit, then scrub the bowl thoroughly. Next, wipe down the exterior—including the base, tank, and handle—with a disinfectant.
Finally, check for leaks around the base and supply line. Catching small issues early saves you from bigger problems down the road.
What To Include In Your Deep Clean
Don't just focus on the bowl. Monthly attention should cover the entire toilet: lift the lid and wipe the inner rim, scrub under the seat hinges, and clean the floor around the base. Use a toothbrush or small scrub brush for tight spots.
A deep clean also means checking the wax ring and bolts for any signs of moisture or rust.
How To Remember And Stay Consistent
Set a recurring reminder on your phone for the first Saturday of each month. Pair it with another monthly task like changing your toothbrush or washing bath mats. Consistency is key—regular deep cleaning means you'll rarely face tough stains or lingering odors.
Tools That Make Deep Cleaning Easier
Invest in a good toilet brush with a storage caddy, a microfiber cloth for the exterior, and a small spray bottle with a bleach-free cleaner. A pumice stone is great for stubborn mineral rings. Having these tools ready cuts down on prep time and makes the whole process faster.
FAQ
Can I use bleach and vinegar together to clean the toilet?
No, never mix bleach and vinegar. The combination produces toxic chlorine gas. Use them separately and rinse thoroughly between applications.
How often should I clean my toilet to prevent stains?
For best results, clean the toilet bowl at least once a week and do a deeper clean monthly. Daily quick wipes can help maintain freshness.
What is the best natural cleaner for hard water stains?
White vinegar is highly effective for hard water stains. Let it sit for 10-15 minutes before scrubbing. For stubborn stains, use a pumice stone or citric acid.
Why does my toilet smell even after cleaning?
Odors can come from hidden grime under the rim, a worn wax ring, or mineral buildup in the bowl. Check these areas and clean thoroughly. If the smell persists, inspect for leaks.
Are toilet tank tablets safe for all toilets?
Most tank tablets are safe, but avoid those with bleach if you have a newer toilet with rubber seals. Bleach can degrade seals over time. Look for enzyme-based or non-bleach tablets.
Conclusion
A sparkling toilet doesn't require a cabinet full of specialty cleaners. Just a few of these hacks—like a vinegar soak or a pumice stone—can tackle stubborn stains and odors without extra effort. Pick the ones that fit your routine and stick with them.
Consistency is what keeps your toilet fresh between deep cleans. Start with two or three tips this week, and you'll see how small changes add up to a noticeably cleaner bathroom.